Post pics of your mods for camping
 03-19-2008, 11:57 AM
#81
Registered User
Join Date: Jul 2007
Location: Thunder bay Ontairooo
Posts: 429
Likes: 0
Received 0 Likes
on
0 Posts
yeah very good thread, now im thinking bout doing that thing with the topper, build up a base halfway and put a topper on :thumbup:
edit, this

edit, this
Last edited by Albert.G; 03-19-2008 at 11:58 AM.
 12-14-2009, 12:24 PM
#82
Registered User
Join Date: Dec 2009
Location: VT
Posts: 2
Likes: 0
Received 0 Likes
on
0 Posts
Hi Everyone, New to the site but not to Toyota, on my 5th now. I have a '00 4Runner now. I'm getting ready to install a custom sleeping platform on the back and stumbled across this thread. I wanted to thank everyone that posted pictures and diagrams here, they really helped give me some great ideas. I start the build this coming weekend and I will share some pictures of the finished product........
These two were definatly helpful....http://www.scottiac.com/4runner/sleepdeck.htm and https://www.yotatech.com/forums/f129...4runner-76673/
Thanks from Vermont.
These two were definatly helpful....http://www.scottiac.com/4runner/sleepdeck.htm and https://www.yotatech.com/forums/f129...4runner-76673/
Thanks from Vermont.
Last edited by Vermont Yota; 12-14-2009 at 12:29 PM.
12-15-2009, 02:25 PM
#83
Registered User
Join Date: Jul 2004
Location: King George,VA
Posts: 137
Likes: 0
Received 0 Likes
on
0 Posts
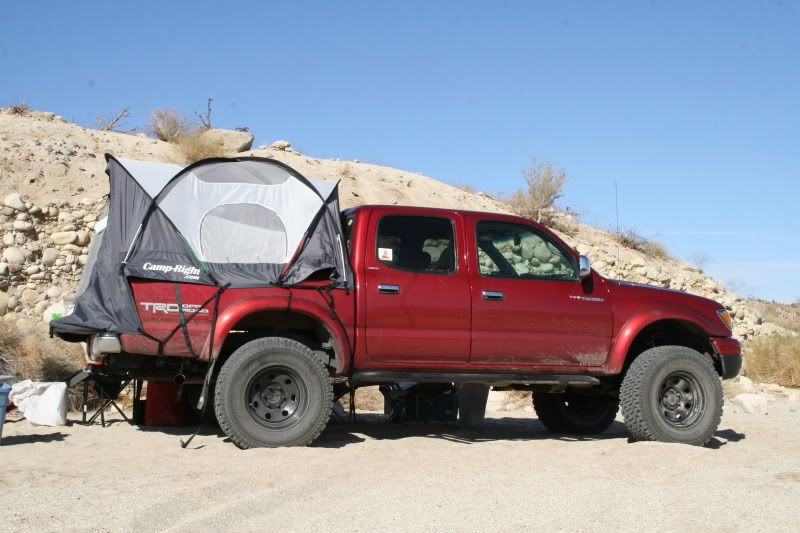
Camping kit for four....bed full of gear, bed rack full of gear. 4 Cots, 2 tents, full kitchen, rollup tables, EZ-Up awning, hot shower, 21 gallon water tank, etc...the basic idea looks like this:
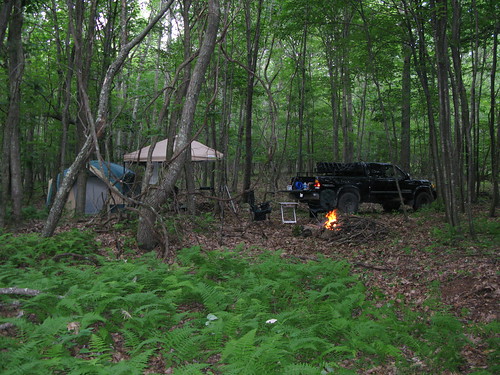
although this set for just two, no kids that weekend!
although this set for just two, no kids that weekend!
Last edited by jim65wagon; 12-15-2009 at 05:54 PM.
12-20-2009, 07:11 PM
#84
Registered User
iTrader: (1)

Join Date: Jan 2005
Location: Spokane, WA
Posts: 199
Likes: 0
Received 0 Likes
on
0 Posts
My new sleep platform
I have been in search of the ideal camping set-up for the 4Runner. My fianc�e and I do a lot of travel for bicycle racing around Washington, Oregon, and Idaho. During the spring and summer we're sometimes gone every weekend of the month. Hotels get expensive and staying with "host housing" get's old. So we've been looking for a way to "camp" using the 4Runner. Travel trailers, pop-ups, tear drops, and RV's all have their advantages, but also have associated hassle and expense. So for now we've decided to make the 4Runner as "self contained" as possible.
A sleep platform seems like a good way to go. I made a simple sleep platform last summer which consisted of a piece of 74"x48" 3/4 inch plywood supported by a few 2x4's. It was okay, but it wasn't that sturdy it was hard to keep stuff organized underneath. So last week I cut the board in half and made a drawer system: There are plenty of great threads on Yotatech, IH8Mud, and Expedition Portal Forums. I didn't copy any one design, but kind of took the best of what I saw. Well, I should say, I did the best that I could with the tools and skills I have, which aren't much

I decided to use very simple sliding drawers. Heavy duty slide outs would have been nice, but are expensive and take drawer space anyway. So I just used bee's wax on the contact points and they slide fine:

I used glue-on speaker box carpet to give a softer sleeping surface. The aluminum angle stock gave it a more finished look:

I'm going to keep the back half the platform tied down full time. It takes just a few minutes to fold down the seats, remove the seat bottoms, and put in the front half of the platform.

The drawers are about 39" long x 17" wide x 9" high. I've got plenty of room for tool kits, camping gear, first aid kits, and winter driving gear:

edit: okay here are some more pictures
This is how the front half the the platform attaches to the back half. The front part rests on the lip of the plywood and is secured by latches:

This is the front half of the platform. Note the fold up legs that will rest on the floor mats (where the passengers normally puts their legs).

The platform in sleep configuration:

The platform provides about 75 inches (6'3") of headroom from tail gate to front seat back. I'm 6'2" and I found myself wanting more room. So I slid the front seat forward for give me all the room I needed to stretch out.

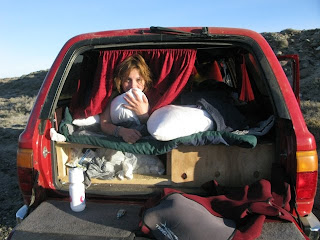
Here are some pics of the inaugural camp out with the platform. My fianc�e, the dog Stevie, and I went winter camping near the Puget Sound on Christmas weekend. Stevie basically now considers the 4Runner to be the dog house she never had. There's probably more room than you'd think from this picture. We had 5 layers of blankets and padding, which took up about 4 inches of vertical space. Of course it compressed when we were in it:


Anyway, the platform and drawers weigh 100 lbs empty. Not bad at all when you compare that to carrying a person in the back seat. The total cost of the materials was around $110. The lumber store did most of the cutting, so I didn't need to use any fancy saws. I used a drill, circular saw, chop saw, sand paper, screw driver, measuring tape, 90 degree square, level, wood glue, carpet adhesive, three wood clamps, and two saw horses.
So this is yet another platform to add to the many good designs already highlighted on this forum. ~ Mike

A sleep platform seems like a good way to go. I made a simple sleep platform last summer which consisted of a piece of 74"x48" 3/4 inch plywood supported by a few 2x4's. It was okay, but it wasn't that sturdy it was hard to keep stuff organized underneath. So last week I cut the board in half and made a drawer system: There are plenty of great threads on Yotatech, IH8Mud, and Expedition Portal Forums. I didn't copy any one design, but kind of took the best of what I saw. Well, I should say, I did the best that I could with the tools and skills I have, which aren't much
I decided to use very simple sliding drawers. Heavy duty slide outs would have been nice, but are expensive and take drawer space anyway. So I just used bee's wax on the contact points and they slide fine:
I used glue-on speaker box carpet to give a softer sleeping surface. The aluminum angle stock gave it a more finished look:
I'm going to keep the back half the platform tied down full time. It takes just a few minutes to fold down the seats, remove the seat bottoms, and put in the front half of the platform.
The drawers are about 39" long x 17" wide x 9" high. I've got plenty of room for tool kits, camping gear, first aid kits, and winter driving gear:
edit: okay here are some more pictures
This is how the front half the the platform attaches to the back half. The front part rests on the lip of the plywood and is secured by latches:
This is the front half of the platform. Note the fold up legs that will rest on the floor mats (where the passengers normally puts their legs).
The platform in sleep configuration:
The platform provides about 75 inches (6'3") of headroom from tail gate to front seat back. I'm 6'2" and I found myself wanting more room. So I slid the front seat forward for give me all the room I needed to stretch out.
Here are some pics of the inaugural camp out with the platform. My fianc�e, the dog Stevie, and I went winter camping near the Puget Sound on Christmas weekend. Stevie basically now considers the 4Runner to be the dog house she never had. There's probably more room than you'd think from this picture. We had 5 layers of blankets and padding, which took up about 4 inches of vertical space. Of course it compressed when we were in it:
Anyway, the platform and drawers weigh 100 lbs empty. Not bad at all when you compare that to carrying a person in the back seat. The total cost of the materials was around $110. The lumber store did most of the cutting, so I didn't need to use any fancy saws. I used a drill, circular saw, chop saw, sand paper, screw driver, measuring tape, 90 degree square, level, wood glue, carpet adhesive, three wood clamps, and two saw horses.
So this is yet another platform to add to the many good designs already highlighted on this forum. ~ Mike
Last edited by Mtn Mike; 12-27-2009 at 07:19 PM.
12-30-2009, 07:31 PM
#86
Registered User
iTrader: (1)
Join Date: Jan 2005
Location: Spokane, WA
Posts: 199
Likes: 0
Received 0 Likes
on
0 Posts
Anyway, I still like the way it came out; it's very solid during sleeping and at 100 lbs I'm not that worried about the weight.
Last edited by Mtn Mike; 12-30-2009 at 07:39 PM.
02-03-2010, 06:58 PM
#87
Registered User
My turn although I've posted this before.
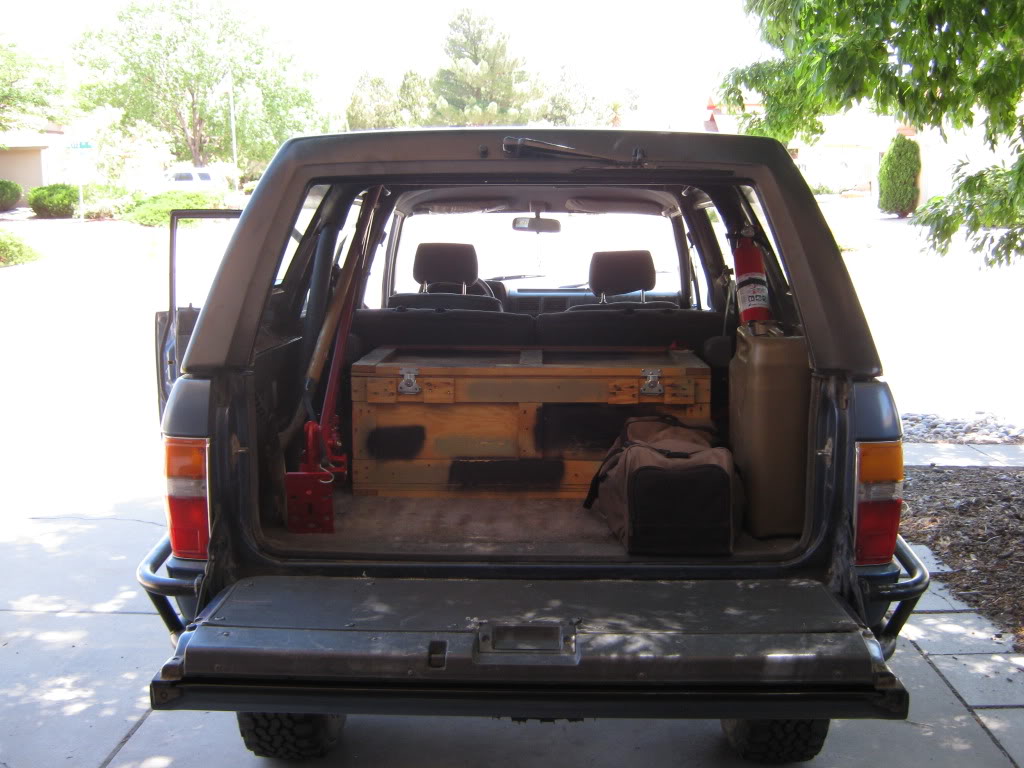
Open box neatly packed with foam to prevent things from bouncing around.
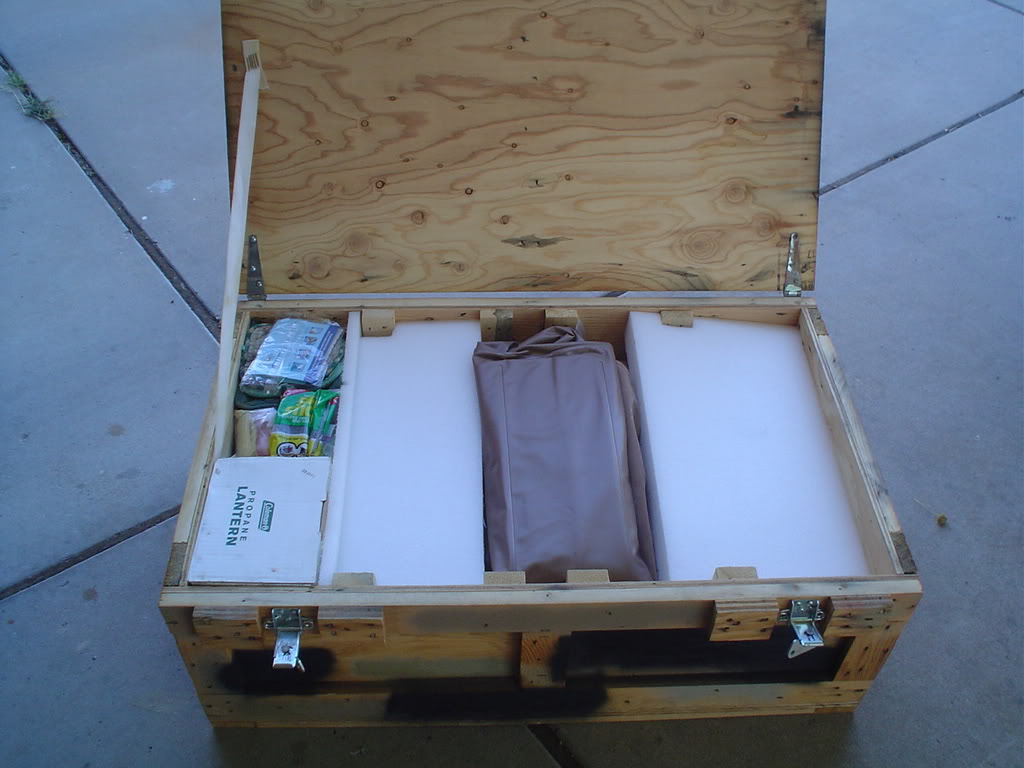
Don't have this truck anymore but you get the idea on the camping box and what it holds. I've also upgraded my stove.
Lets see..... we have a lantern with fuel, forks and such for eating, knives for cutting, spoons for stirring etc..... We also have some plates, pots and pans (I'm planning on some larger pans soon and I have some cast iron that just doesn't fit in the box), foil, trash bags (if you pack it in then you damn sure pack it out) and cleaning supplies. There is coffee, tea, sugar, salt/pepper/spices, napkins, TP, a first aid kit my free coleman stove with fuel and the seat of honor goes to the coffee pot. To the right of that is the recovery bag with a 30' tow strap, gloves, D ring, fire extinguisher, chain and the footing to my hi-lift.
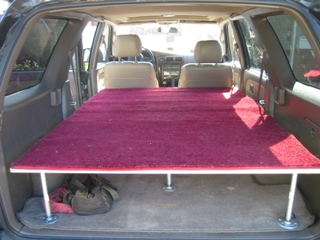
Notice the inflated bed mat with the pump sitting in front of it? Nice and comfy.
[IMG]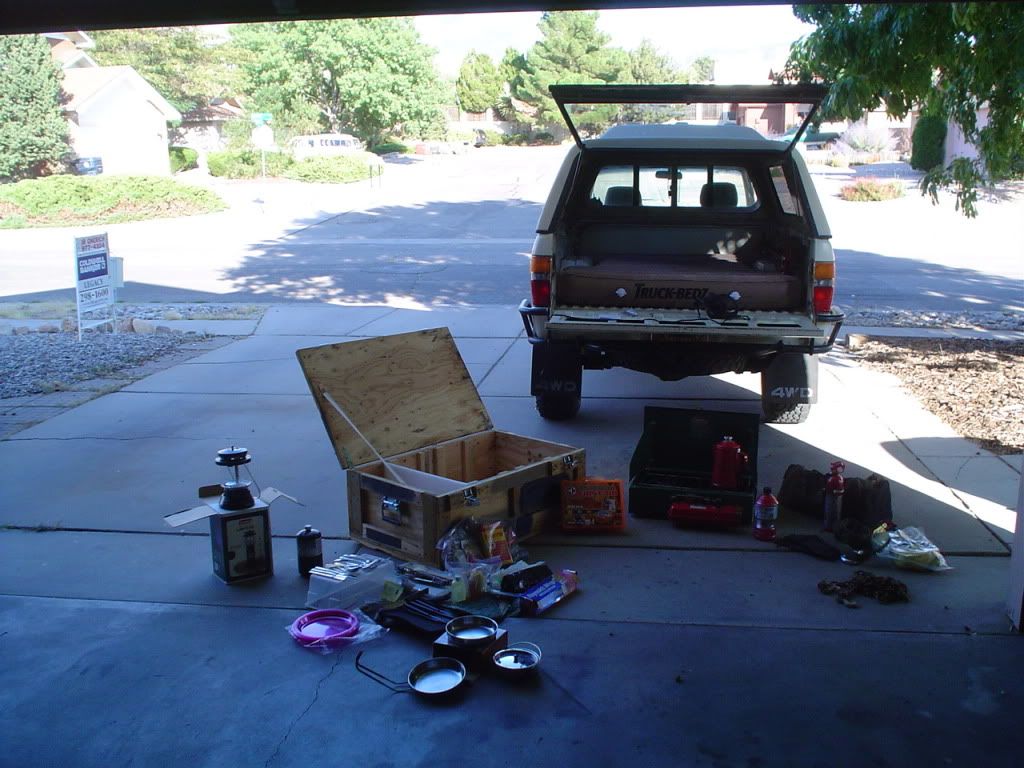 [/IMG]
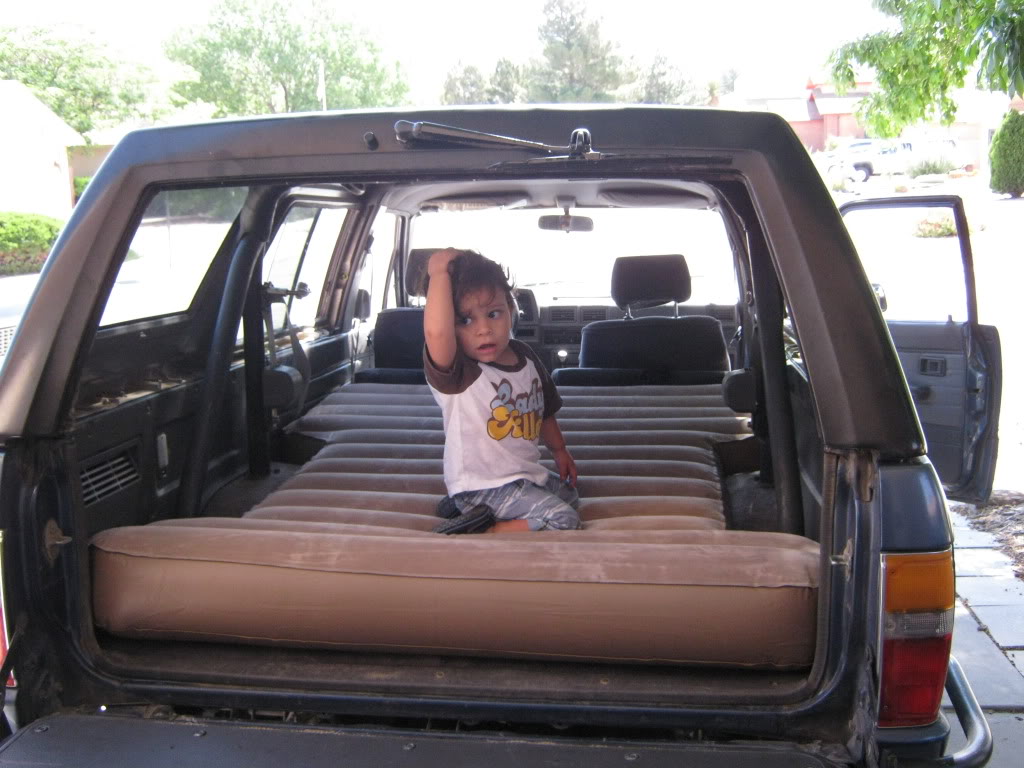
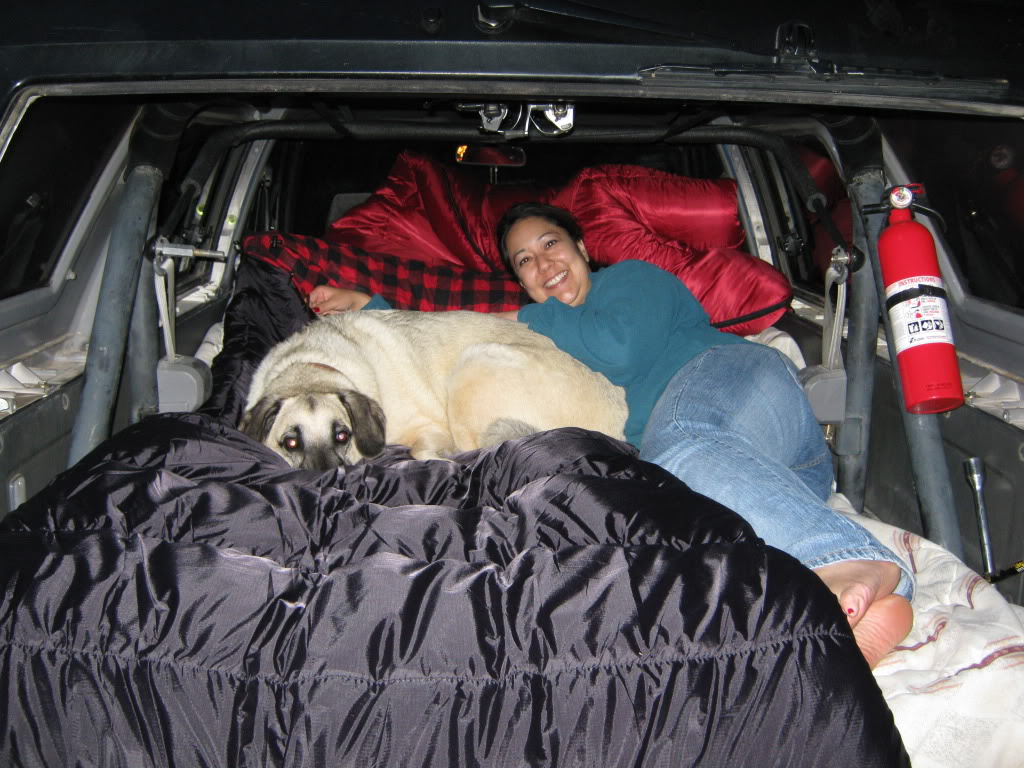
How the same mattress fits in the 4runner. (no that is not my kid)
Camping box in there.
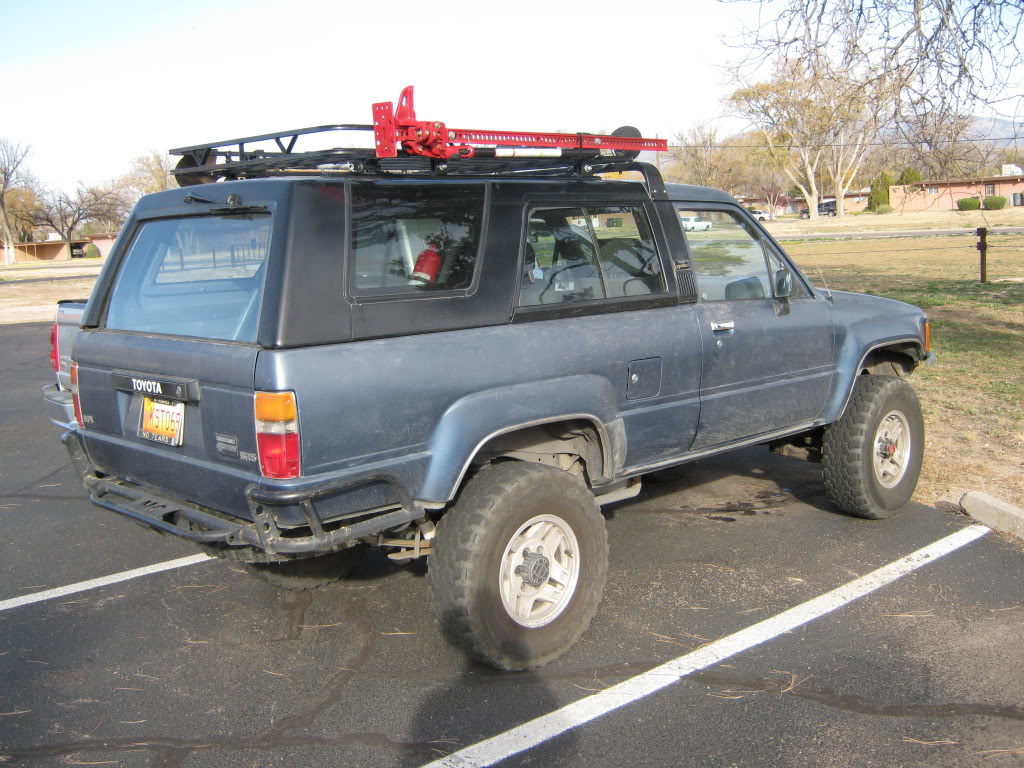
The roof rack that now holds the hi-lift and shovel that used to be in the cargo area along with an axe, a fuel can, water can, soon to be the spare tire and probably the ice chest.
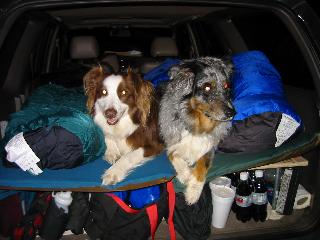
The ex wife and my boy. Believe it or not we all slept in there for two nights and had plenty of room. The puppy kept it nice and warm in there.
Open box neatly packed with foam to prevent things from bouncing around.
Don't have this truck anymore but you get the idea on the camping box and what it holds. I've also upgraded my stove.
Lets see..... we have a lantern with fuel, forks and such for eating, knives for cutting, spoons for stirring etc..... We also have some plates, pots and pans (I'm planning on some larger pans soon and I have some cast iron that just doesn't fit in the box), foil, trash bags (if you pack it in then you damn sure pack it out) and cleaning supplies. There is coffee, tea, sugar, salt/pepper/spices, napkins, TP, a first aid kit my free coleman stove with fuel and the seat of honor goes to the coffee pot. To the right of that is the recovery bag with a 30' tow strap, gloves, D ring, fire extinguisher, chain and the footing to my hi-lift.
Notice the inflated bed mat with the pump sitting in front of it? Nice and comfy.
[IMG]
[/IMG]How the same mattress fits in the 4runner. (no that is not my kid)
Camping box in there.
The roof rack that now holds the hi-lift and shovel that used to be in the cargo area along with an axe, a fuel can, water can, soon to be the spare tire and probably the ice chest.
The ex wife and my boy. Believe it or not we all slept in there for two nights and had plenty of room. The puppy kept it nice and warm in there.
Last edited by Junkers88; 02-03-2010 at 07:01 PM.
03-28-2010, 06:43 PM
#88
Contributing Member
Join Date: Jun 2002
Posts: 1,031
Likes: 0
Received 0 Likes
on
0 Posts
Darren has a nice, simple set up for his 4Runner and you can see on his web page he spends a good bit of time camping in it. He also has info on window shades and ventilation -

Last edited by Darren; 06-07-2010 at 08:14 PM.

 04-03-2010, 08:26 AM
#91
Registered User
 04-05-2010, 10:33 AM
#93
Registered User
Join Date: Sep 2009
Location: Kona Hawaii
Posts: 47
Likes: 0
Received 0 Likes
on
0 Posts
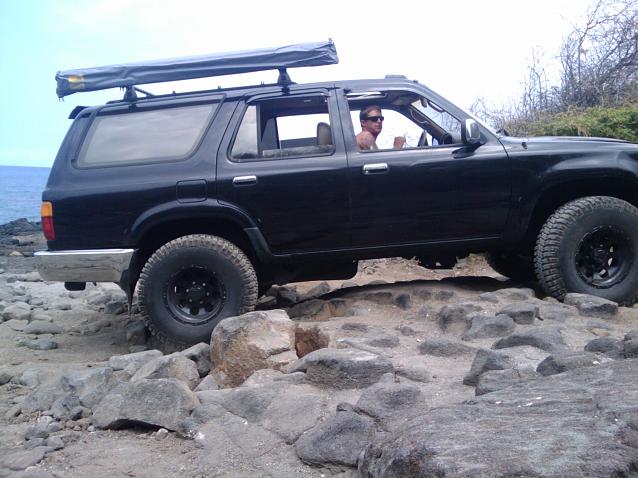
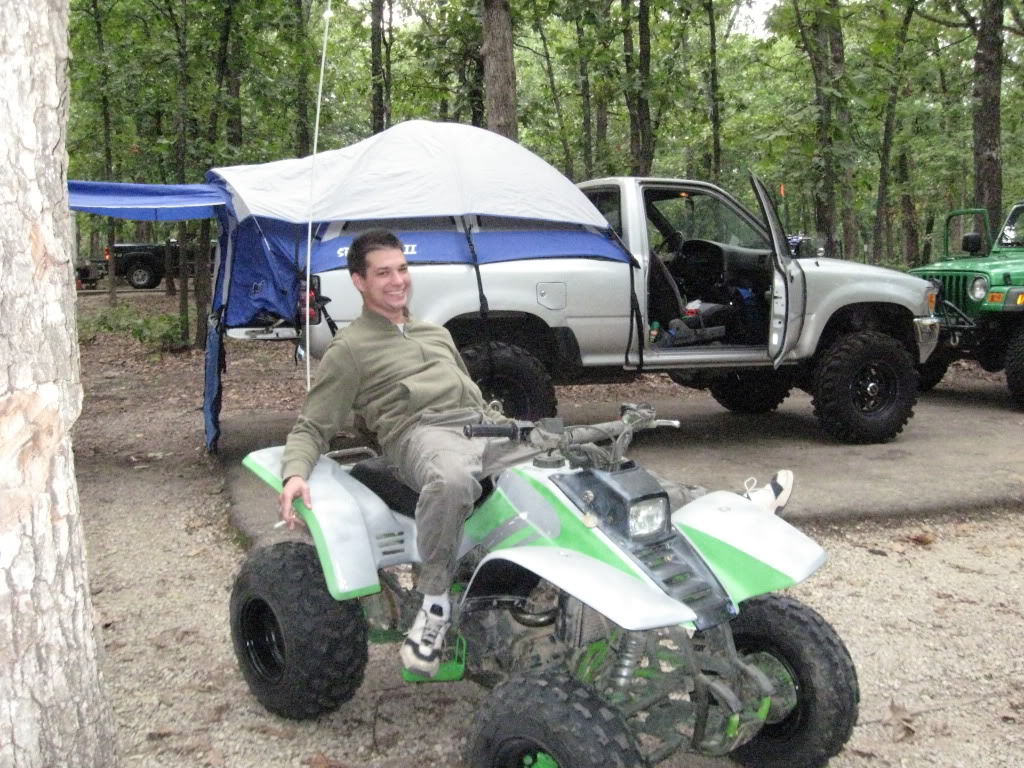
Well i am a slacker and with moving and everything i still have not built my drawers. But here is some shots of the tent and Awning from Camping Lab!
But mod ever done we just spent a night in 30mph winds and pouring rain but i was nice and comfy.
But mod ever done we just spent a night in 30mph winds and pouring rain but i was nice and comfy.
05-25-2010, 09:45 AM
#94
Registered User
Join Date: Mar 2007
Location: Denver, CO
Posts: 103
Likes: 0
Received 0 Likes
on
0 Posts
I used scottiacs directions for my 1995 4runner, I used all the improvements he said he would have done and it worked out great. I will have to take some proper pictures when i have time. heres what i do have.

My setup is very low tech, but it has worked out pretty darn well, and it's pretty flexible.
http://www.scottiac.com/4runner/sleepdeck.htm
http://www.scottiac.com/4runner/sleepdeck.htm
 02-25-2011, 07:32 PM
#97
Registered User

Join Date: Feb 2011
Posts: 3
Likes: 0
Received 0 Likes
on
0 Posts
man, I just found this part of the forum and I love seeing this stuff, I'll try to get some pics of my van, but I build a bed for two, storage underneath, storage beside the bed, and a little table for the stove with a drawer (having the drawer is crucial for all that little stuff!). and yeah I cook in the van but I've got the sliding door open, and there's a sliding window right behind the stove which is open full).
03-06-2011, 06:13 PM
#98
Registered User

Join Date: Mar 2007
Location: Monterey Bay Area
Posts: 68
Likes: 0
Received 0 Likes
on
0 Posts
Sleeping Platform 1994 pickup.
Thanks to everyone who has posted all their builds on this site--this is what its all about! I hope that this post might help someone find direction for their own project.
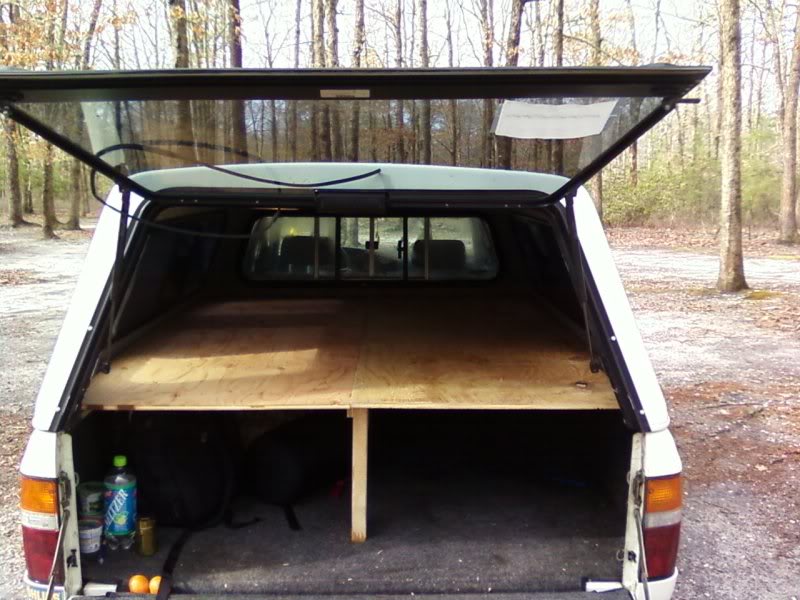
After quite a bit of looking at everyone's trial and error, critiques and reviews, I decided on this simple design (rather, stole it from someone here who I can't remember!!):
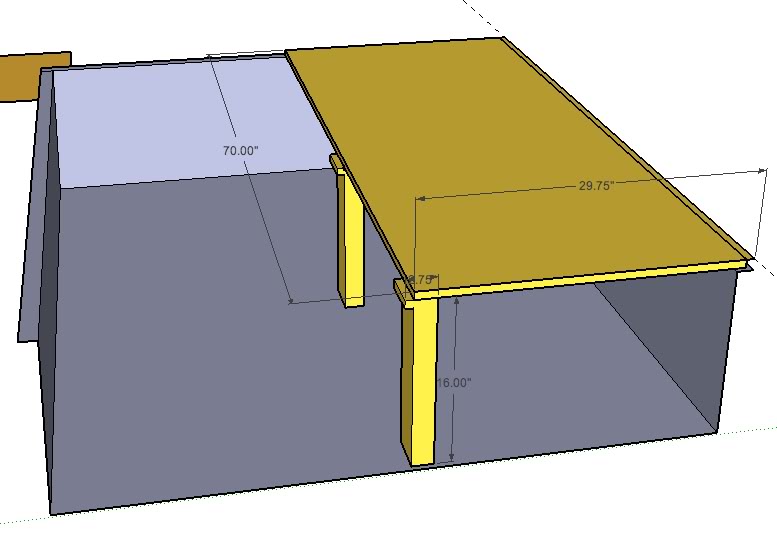
I just installed it today and haven't slept in it or taken any pics. I like the design because unlike a lot of the full boxes with drawers, etc., it is extremely lightweight (I pay close attention to my mileage!), is easily removable, allows plenty of vertical storage for bicycles, etc and is tall enough to fit good amounts of gear underneath or beside it and still have a place to sleep. My only concern is that I may feel a little claustrophobic as it is pretty near to the ceiling--we'll see!
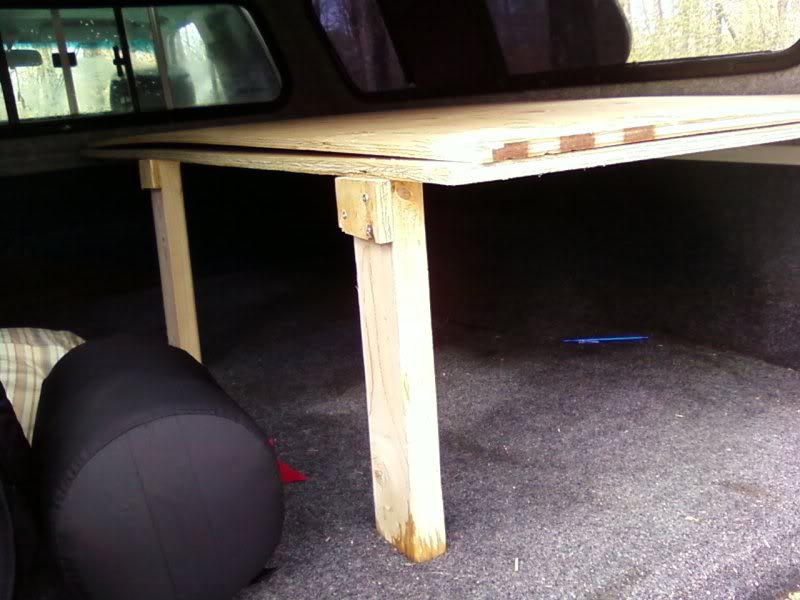
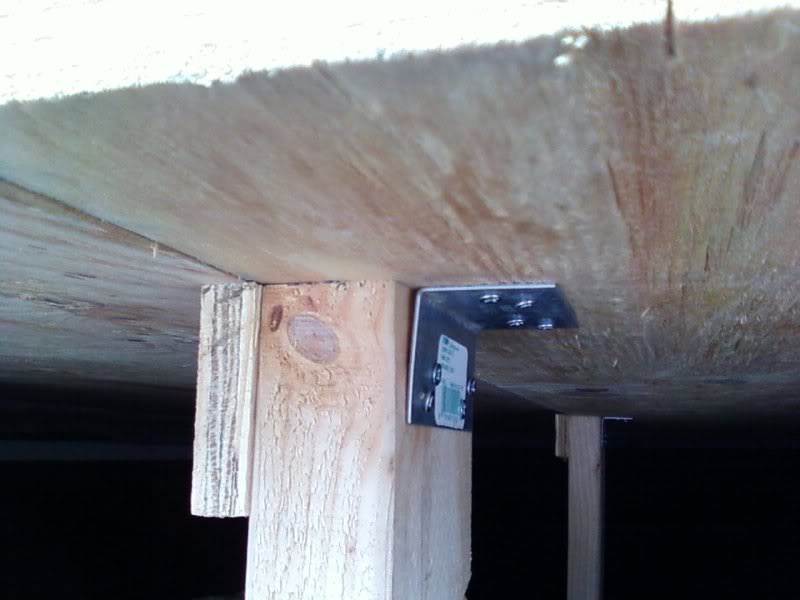
It rests on the lip of the camper-shell (topper) so it only needs two supports. Another sheet of plywood is removable, can rest on top of the one here when not in use, or it can be set beside this sheet for a full sized bed for two. For solo missions, there is plenty of room for all my crap inside with space left for me to sleep.
I'm excited to try it out this Spring and I'll post some pics soon!
After quite a bit of looking at everyone's trial and error, critiques and reviews, I decided on this simple design (rather, stole it from someone here who I can't remember!!):
I just installed it today and haven't slept in it or taken any pics. I like the design because unlike a lot of the full boxes with drawers, etc., it is extremely lightweight (I pay close attention to my mileage!), is easily removable, allows plenty of vertical storage for bicycles, etc and is tall enough to fit good amounts of gear underneath or beside it and still have a place to sleep. My only concern is that I may feel a little claustrophobic as it is pretty near to the ceiling--we'll see!
It rests on the lip of the camper-shell (topper) so it only needs two supports. Another sheet of plywood is removable, can rest on top of the one here when not in use, or it can be set beside this sheet for a full sized bed for two. For solo missions, there is plenty of room for all my crap inside with space left for me to sleep.
I'm excited to try it out this Spring and I'll post some pics soon!
Last edited by SC2WD; 04-01-2011 at 07:45 AM.
03-08-2011, 07:53 AM
#99
Registered User
Thanks to everyone who has posted all their builds on this site--this is what its all about! I hope that this post might help someone find direction for their own project.
After quite a bit of looking at everyone's trial and error, critiques and reviews, I decided on this simple design (rather, stole it from someone here who I can't remember!!):

I just installed it today and haven't slept in it or taken any pics. I like the design because unlike a lot of the full boxes with drawers, etc., it is extremely lightweight (I pay close attention to my mileage!), is easily removable, allows plenty of vertical storage for bicycles, etc and is tall enough to fit good amounts of gear underneath or beside it and still have a place to sleep. My only concern is that I may feel a little claustrophobic as it is pretty near to the ceiling--we'll see!
It rests on the lip of the camper-shell (topper) so it only needs two supports. Another sheet of plywood is removable, can rest on top of the one here when not in use, or it can be set beside this sheet for a full sized bed for two. For solo missions, there is plenty of room for all my crap inside with space left for me to sleep.
I'm excited to try it out this Spring and I'll post some pics soon!
After quite a bit of looking at everyone's trial and error, critiques and reviews, I decided on this simple design (rather, stole it from someone here who I can't remember!!):
I just installed it today and haven't slept in it or taken any pics. I like the design because unlike a lot of the full boxes with drawers, etc., it is extremely lightweight (I pay close attention to my mileage!), is easily removable, allows plenty of vertical storage for bicycles, etc and is tall enough to fit good amounts of gear underneath or beside it and still have a place to sleep. My only concern is that I may feel a little claustrophobic as it is pretty near to the ceiling--we'll see!
It rests on the lip of the camper-shell (topper) so it only needs two supports. Another sheet of plywood is removable, can rest on top of the one here when not in use, or it can be set beside this sheet for a full sized bed for two. For solo missions, there is plenty of room for all my crap inside with space left for me to sleep.
I'm excited to try it out this Spring and I'll post some pics soon!
Pics soon I hope.
03-30-2011, 11:52 AM
#100
Registered User
Join Date: Mar 2007
Location: Monterey Bay Area
Posts: 68
Likes: 0
Received 0 Likes
on
0 Posts
Trial Run with Pics!

So after posting my drawing of what I wanted in the pickup, I installed and road-tested it on a little overnight trip down near Cape May/Pine Barrens, New Jersey. I'd never been out here before and though I looked everywhere, I didn't find the Jersey Devil--and he didn't find me. It rained hard almost the whole time so I got to see how "livable" my little project is and well...it is minimally livable in severe weather. Quite cramped but doable. And I found out my shell leaks. If it had continued to rain the next morning, I would have been in a pretty bad mood but I woke up to crisp, clear skies and was stoked I was there.
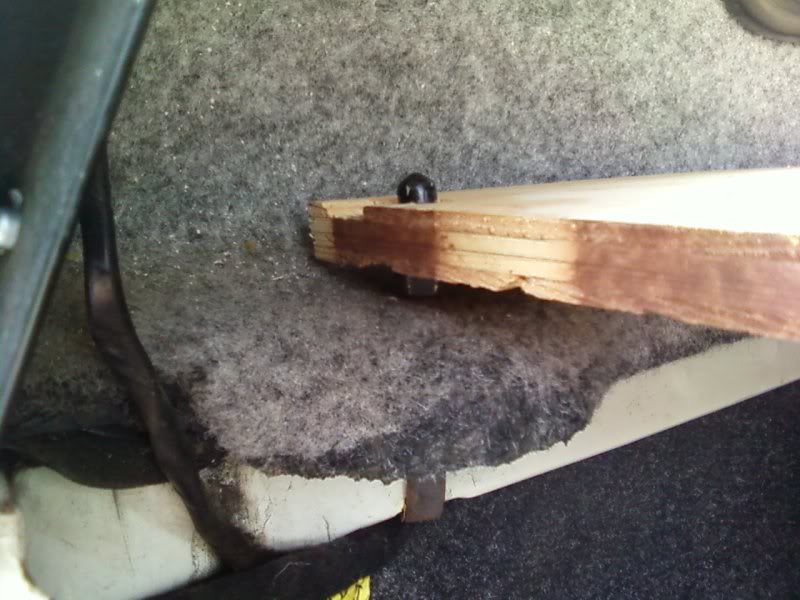
I drilled holes in the corners of the plywood so they press-fit onto the lugs of the camper-shell brackets. That worked out well to hold the wood in place while I'm impersonating baja 1000 drivers, making zoom zoom noises...
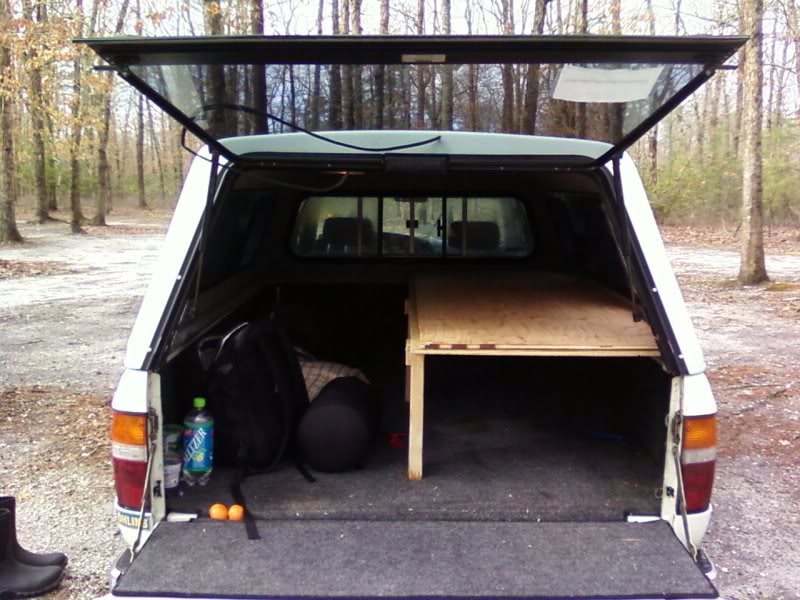
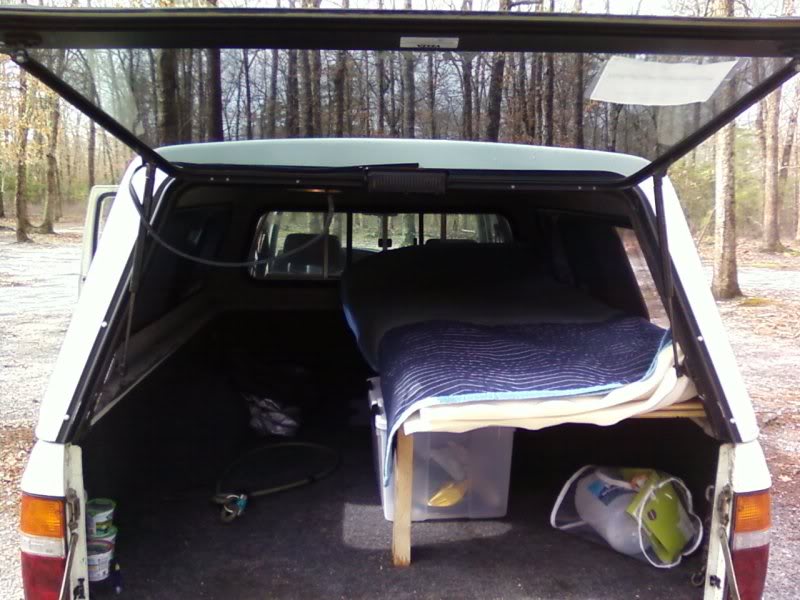
With both halves down, it was way too cramped to be in there for hours before I went to sleep. With the half bed setup, I could sit, lie down, hang out a little more comfortably while it pissed down rain outside. In good weather, the full sized bed for the girlfriend and me will be a "get in and go to sleep right away" kind of situation. If there is bad weather when traveling with girlfriend, well...I might have to make some tough decisions.....!
Last edited by SC2WD; 03-30-2011 at 11:55 AM.


