Hidden CB for 2nd Gen Tacoma
 12-12-2012, 11:13 AM
#1
Registered User
Thread Starter
Join Date: Nov 2012
Location: Olympia, WA
Posts: 42
Likes: 0
Received 0 Likes
on
0 Posts
Here's my CB install on my 2nd Gen Taco. I wanted it to be discreet and out of the way, but still functional.
----------------------------------------------------------------------
*I am not an expert or professional so I claim no responsibility for any damage or injury from anyone attempting this install. Please PM me with questions or feel free to leave civil feedback or comments.
*I am not an expert or professional so I claim no responsibility for any damage or injury from anyone attempting this install. Please PM me with questions or feel free to leave civil feedback or comments.
Parts Used:
Cheap Old Cobra 19DX (or equivalent model/size)*
Relentless Antenna Hood Mount
Firestik II 4' Antenna: FS4-B
Firestik 9' Coax w/ FireRing: K8-R9
Firestik Stud Mount: K-4
Firestik Heavy-Duty Spring: SS-3H (en route)
Cobra External Speaker: HG-S300
PL259 Right Angle Adapter
10" 4-Pin Mic. Extension
14 AWG Wire - approx. 30 ft. (2 colors)
(2) 1/2" Ring Terminals
Inline Fuse Holder
Tool Used:
Wire Cutters / Crimpers
Ratchet and sockets
Crescent wrench(s)
Screwdrivers (long ones and stubby ones)
Soldering Iron (or butt connectors)
Drill with 1/2" bits and smaller
Dremel with assorted bits
Needle nose pliers
Heat Shrink Tubing
Zip-Ties
Plastic conduit
Electrical Tape
Sandpaper / Files
6-Pack of your favorite beer
LIGHT!!!
*My used Cobra 19DX from the '80s crapped out on me during the last trip. I replaced it with a new Cobra 19 DX IV. The only downside is I can't see the little back-lit LCD when it's mounted in the original location. I have to tilt it forward to see the screen....oh well. Just a heads up to anyone with that (or equivalent) CB.
----------------------------------------------------------------------
Step 1:
Disconnect the battery!!!
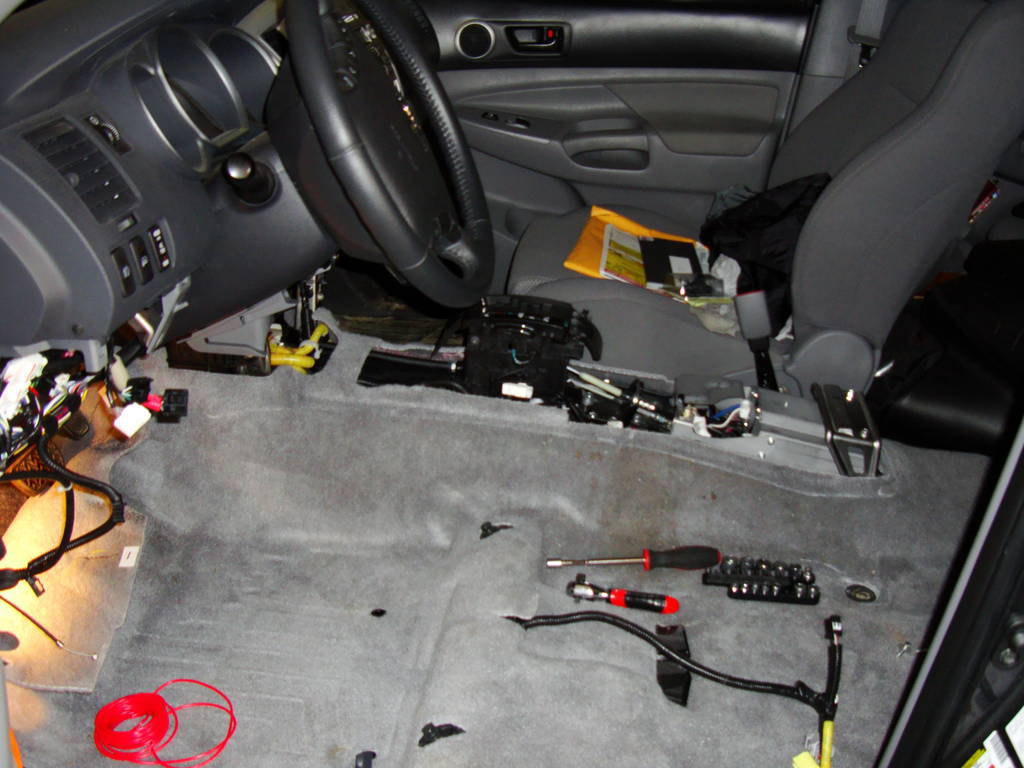
Tear your interior apart: seat, lower dash, center console....everything. I don't care how you do it, just get it done.
Honestly, it's not that difficult.
Remove the seat and unplug the harness underneath.
Center Console:
Pull up on the cup-holder basin to remove it.
Unscrew the shift knob and unclip the center gearbox cover and remove the (4) black screws.
Lift the carpet-thing inside the storage box and unscrew the (2) bolts.
The whole center console assembly should separate and pull apart with a little finesse.
Lower Dash
Pull out the little storage bucket ( ) to the right of the steering wheel.
Flip down that little panel to reveal a hidden bolt (+10 INT).
Pull the scuff-plate trim up.
Remove the foot-rest thing right by the Parking Brake.
Unscrew the rubber cap-screw and remove the lower kick-panel.
Remove the (2) bolts and "gently" pull out to unclip the lower dash assembly.
Unplug any connectors.
Don't forget about the TPMS plug and hoot-latch cable.
You have successfully gutted the driver's seat area. Drink a beer
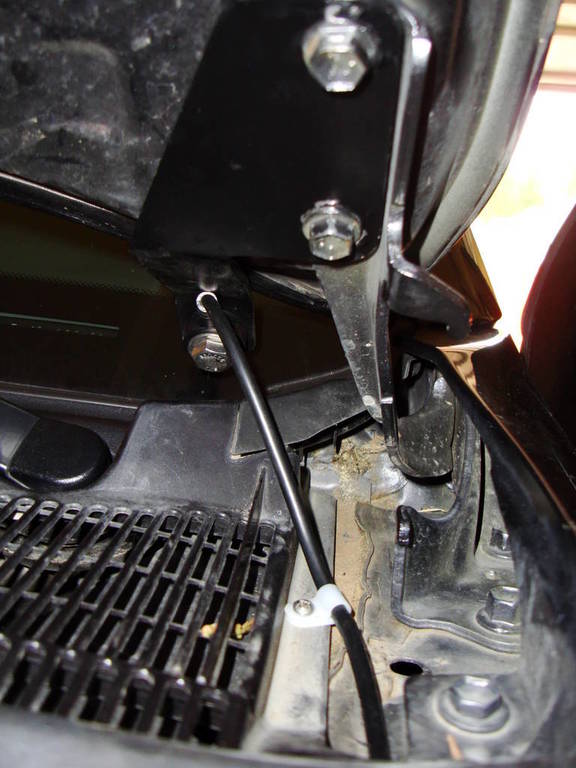
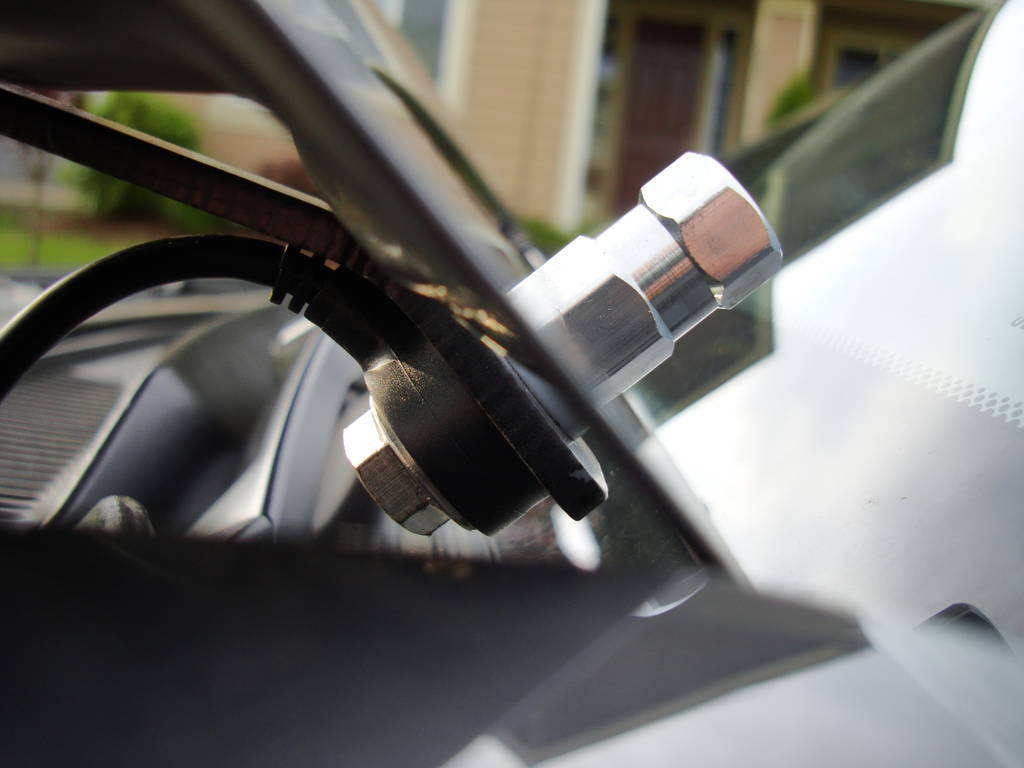
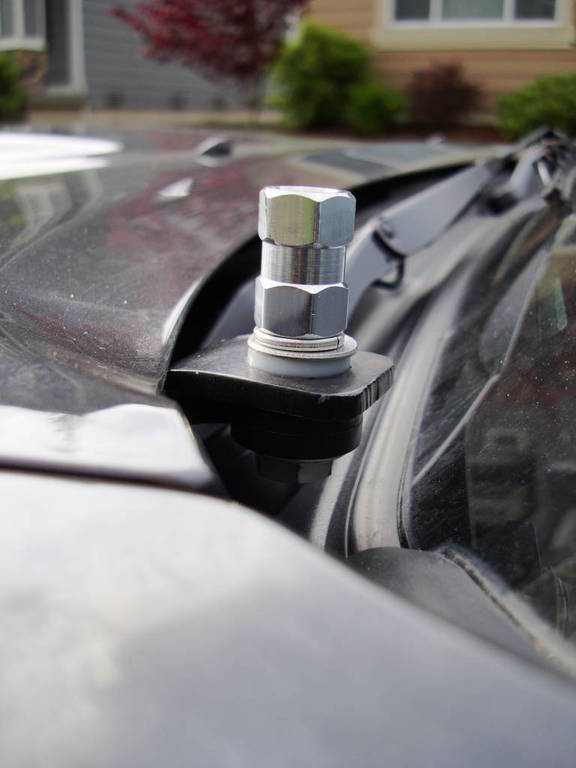
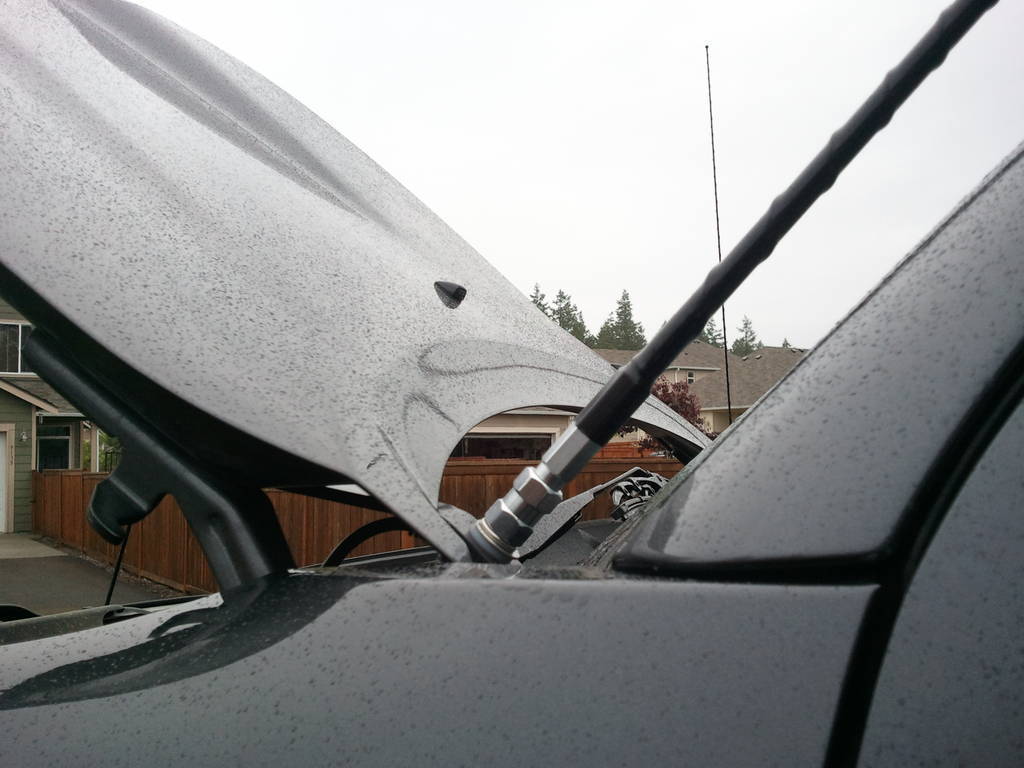
Install the Relentless CB Antenna Mount. Don't undo both the hood bolts. I removed the top hood-hinge bolt first, and bolted up the antenna mount, then followed with the lower bolt. That way your hood won't shift.
Install the Firestik Stud Mount using the longer 1.25" bolt that was included with the Coax. Follow the order printed on the instructions:
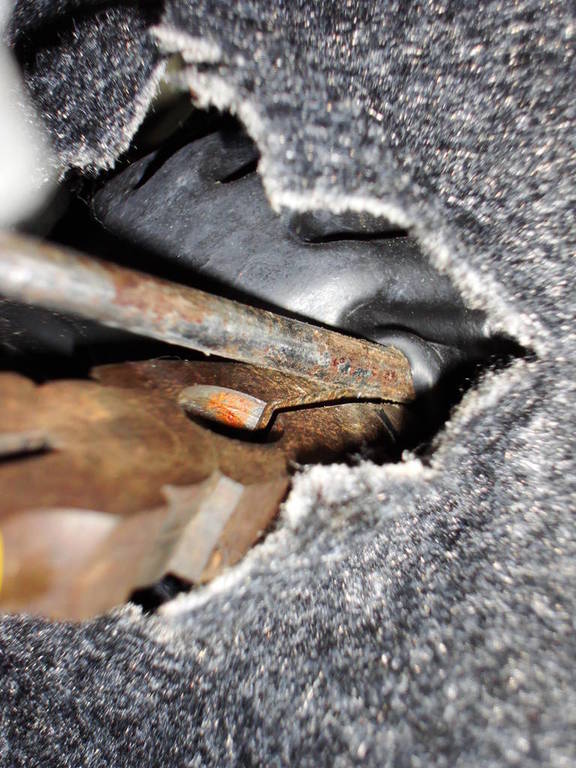
I ran the coax under the plastic cowl, and secured it with zip-ties and electrical tap to insure it wouldn't kink or rub on any edges.
*NOTE: There are a few sharp edges in this area so be wise where you
secure the coax.
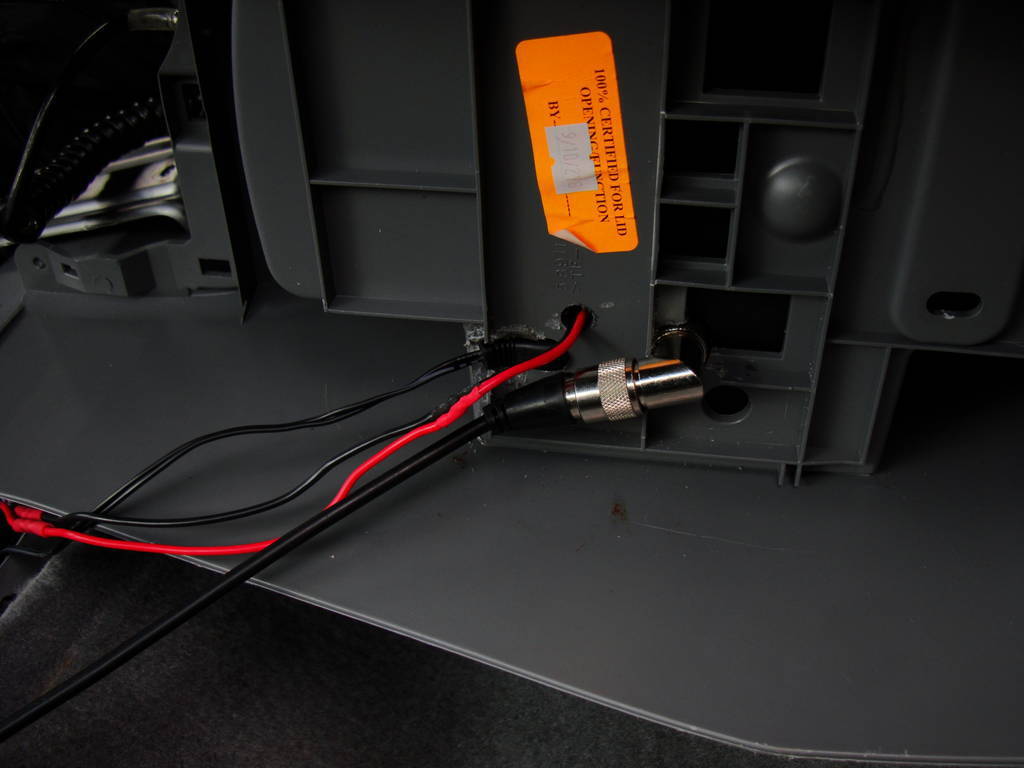
I then poked a hole in the firewall grommet to run the coax and wires through. I found it was pretty easy to use a long screwdriver to poke through it, then widen the hole with some needle-nose pliers. I then wrapped all the (2) pos/neg leads in conduit, and taped them to the coax and gripped them with the needle-nose to pull them through.
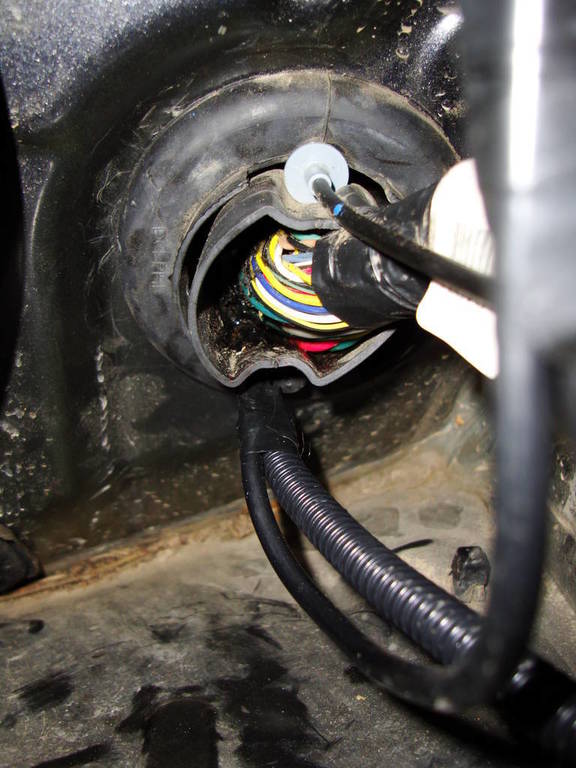
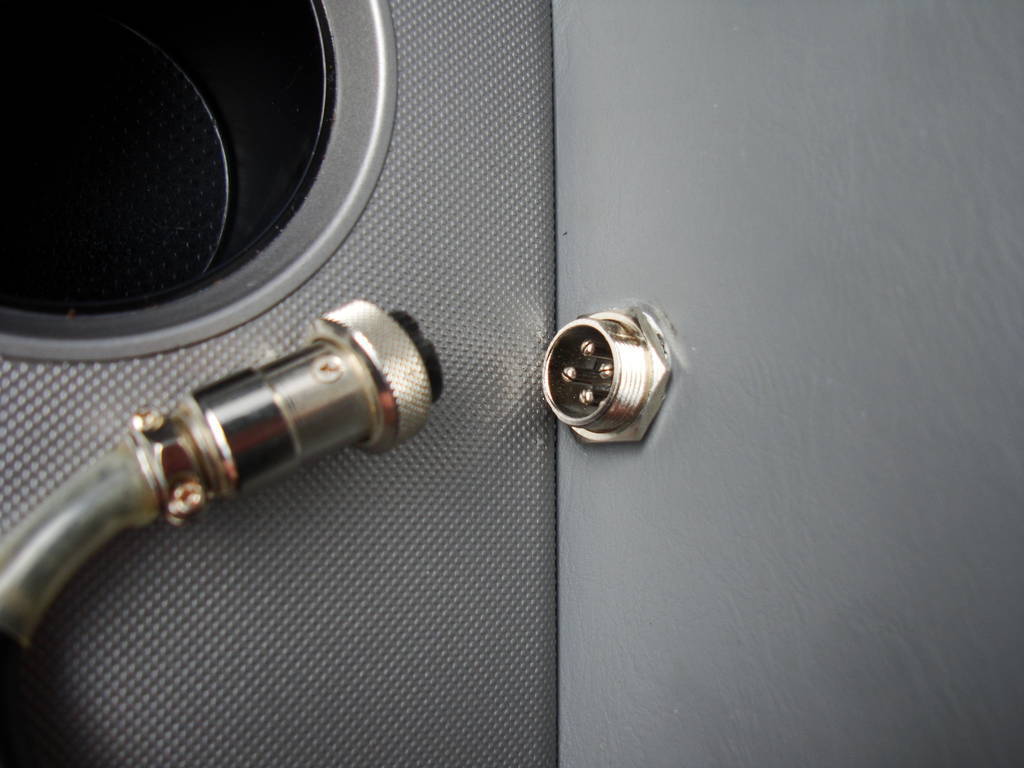
Crimp and heat-shrink a ring terminal to your NEGATIVE wire lead and connect it here:
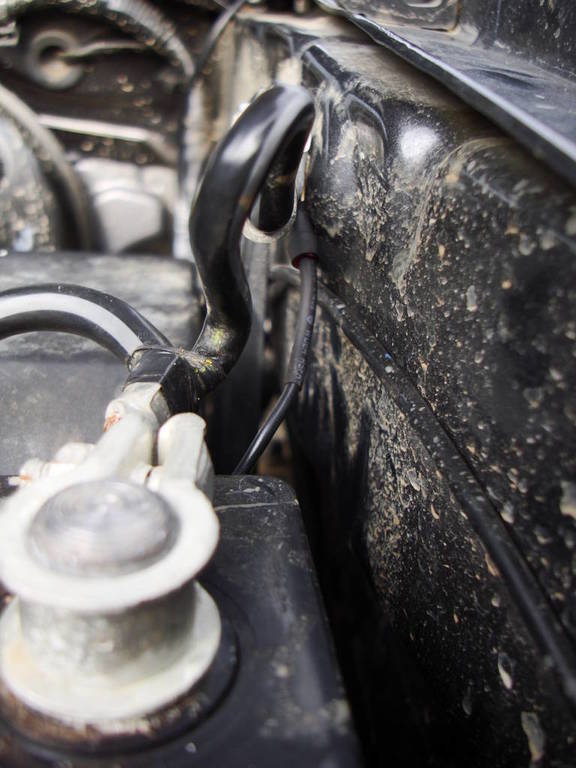
Solder -or- butt connect the inline fuse holder to your POSITIVEand attach the other ring terminal to that as well and connect it here:
*I chose to run my POSITIVE directly to the battery with a fuse in order to have CB operation even when the vehicle is OFF. This is optional, and you could always add a relay or tap into a switched power source.
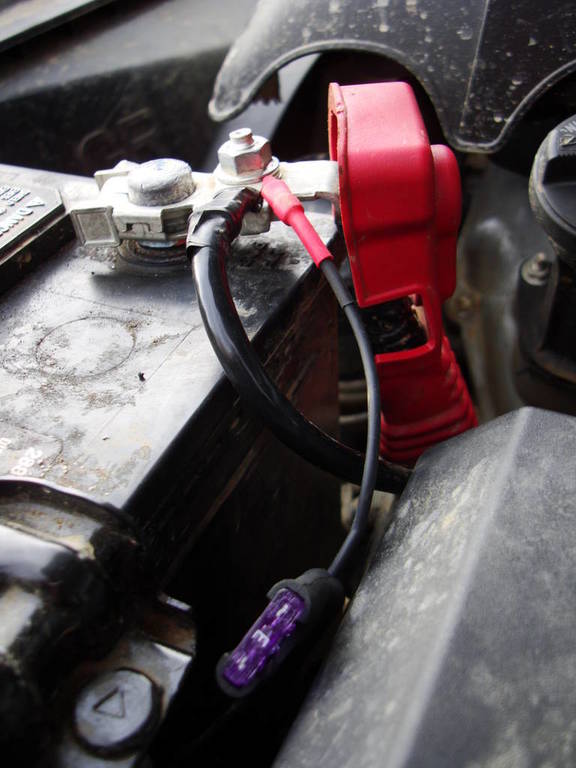
I used a 3-AMP fuse in mine, and wouldn't recommend anything higher to avoid burning out your CB.
You should be done in the engine compartment....Drink a beer!!!
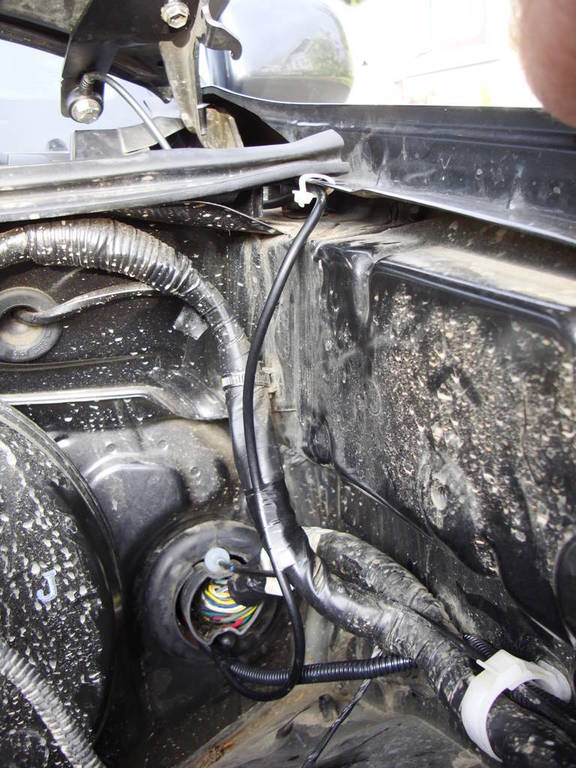
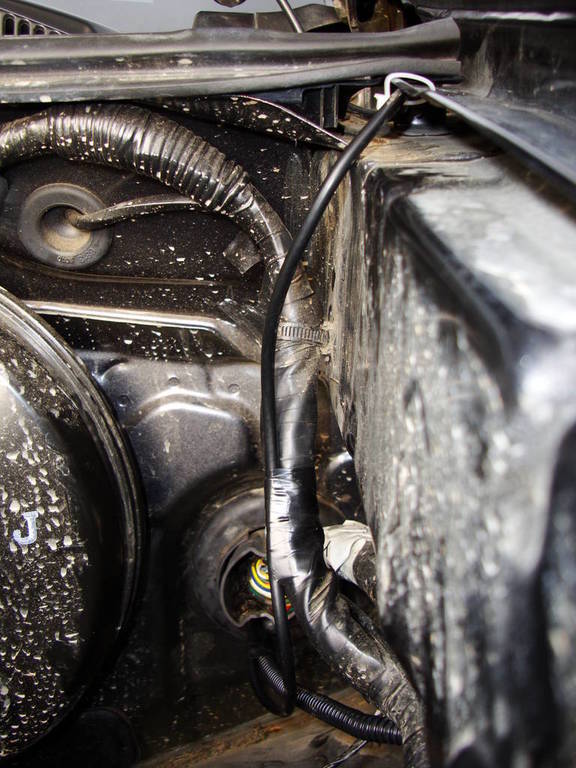
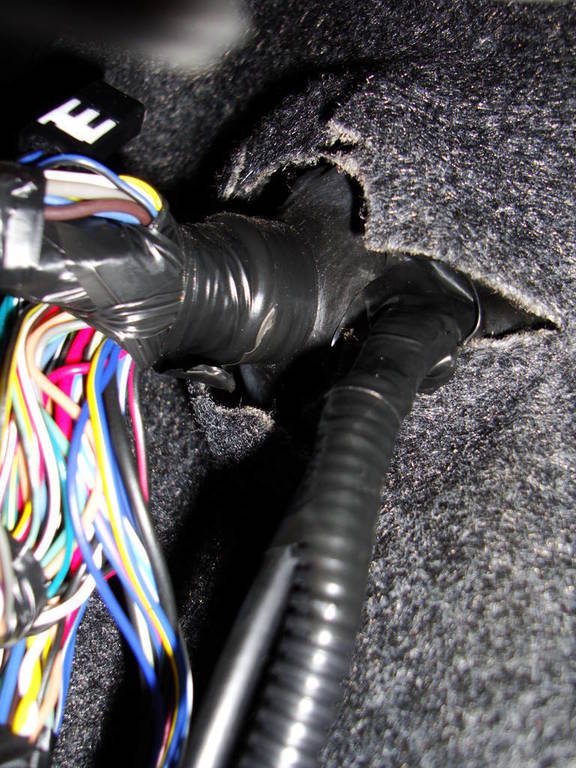
Moving back to the interior again. I tried to wrap the rubber fire-wall grommet in electrical tape to seal it up well. After measuring the length of wire I needed, I finished wrapping the wires with plastic conduit and taped the hell out of 'em.
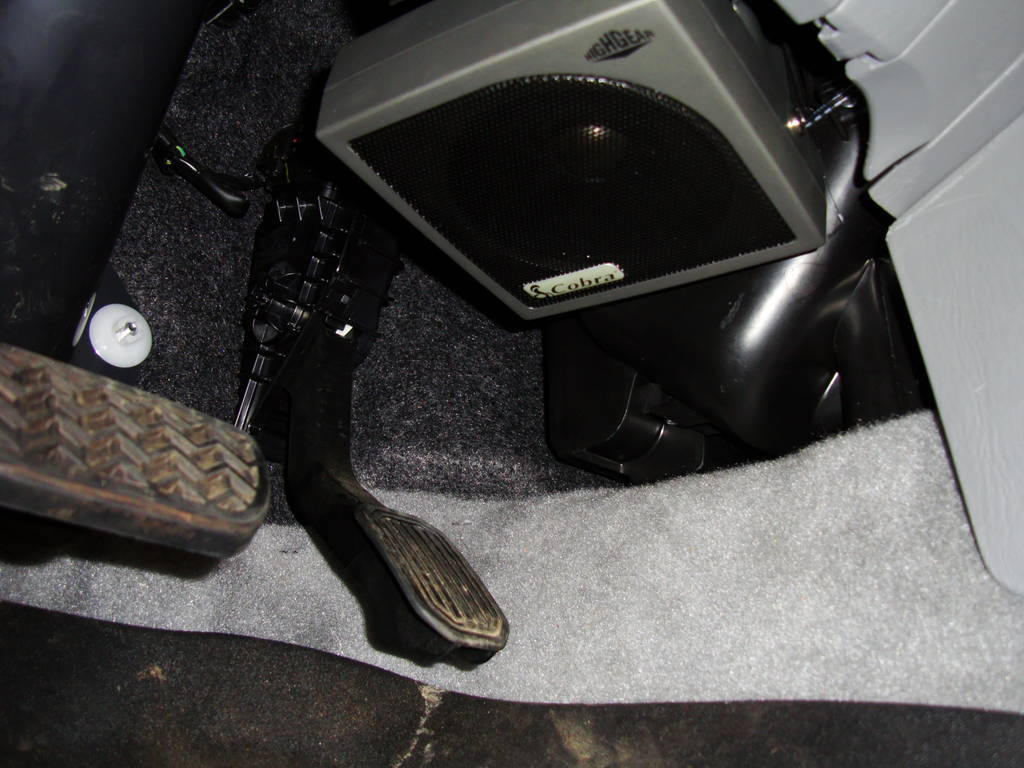
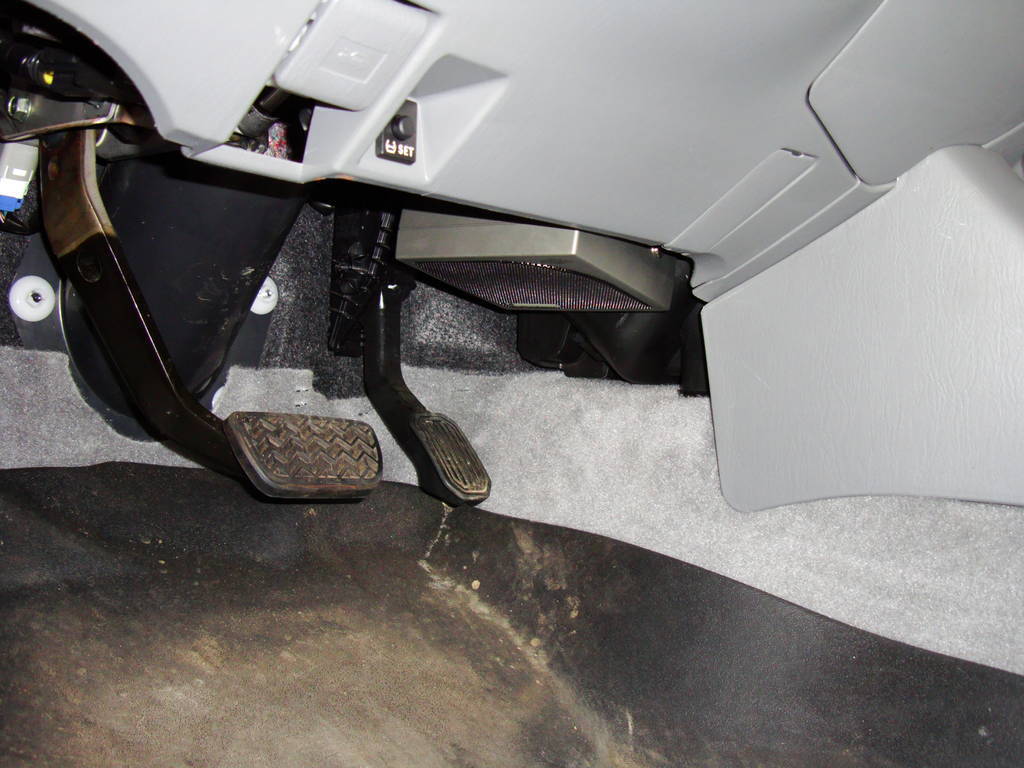
Next, I mounted the external speaker. There were not a lot of options, so I mounted it above the gas pedal, attached the the plastic shroud panel covering the water lines. My foot clears it, but not by much.
I pulled up the carpet to run the wires/coax underneath, and stuffed the speaker cable into the plastic conduit as well.
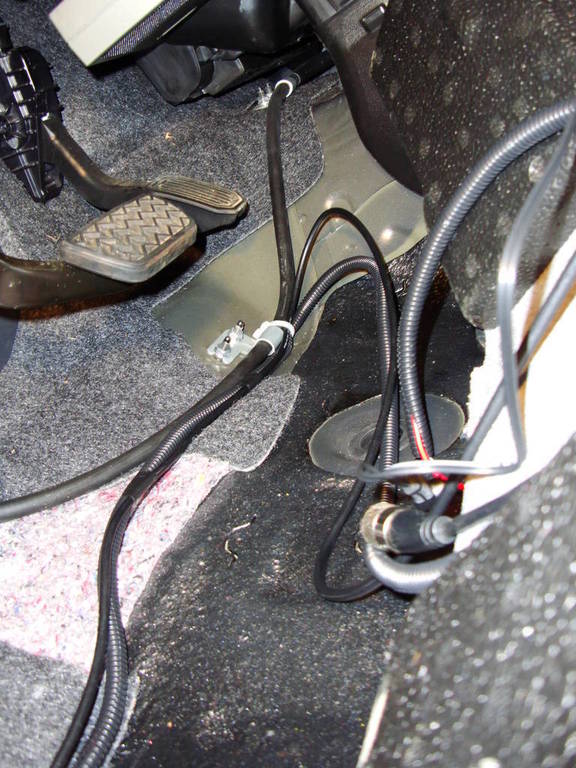
I tucked it all along the inner-console area and everything was just the right length to reach it's destination.
Now it's time to move on to drilling holes into the console box...Drink a beer
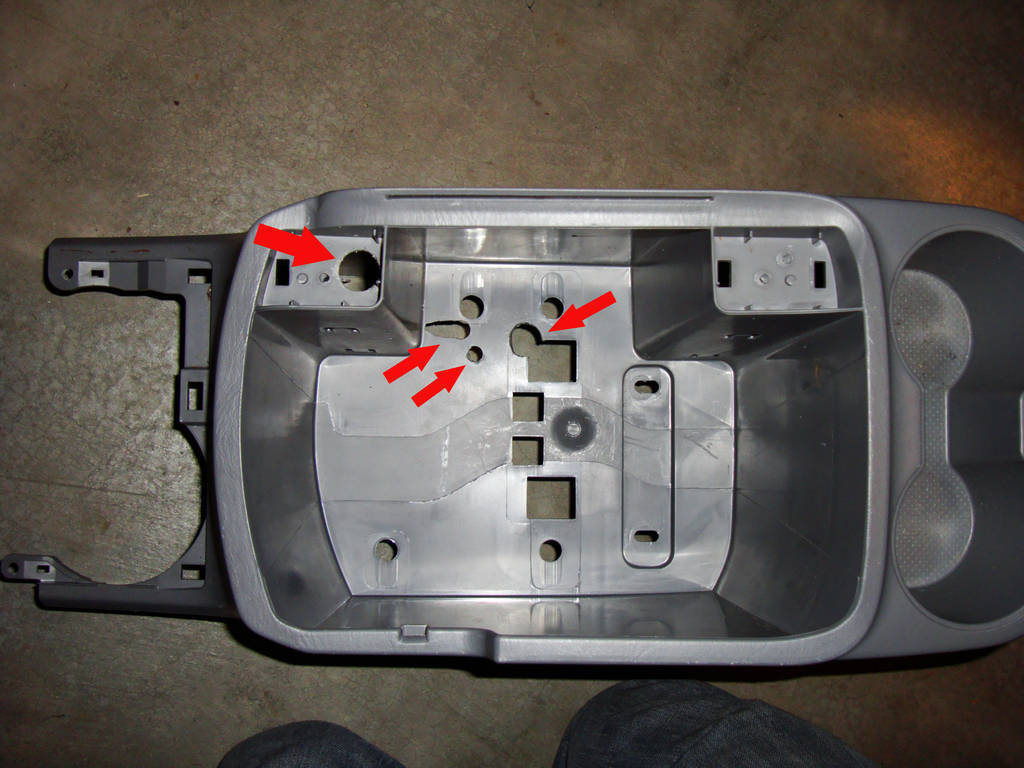
Disassemble your storage box. Remove the lid, spring hinge assembly, the plastic corner pieces and pull out that carpet piece.
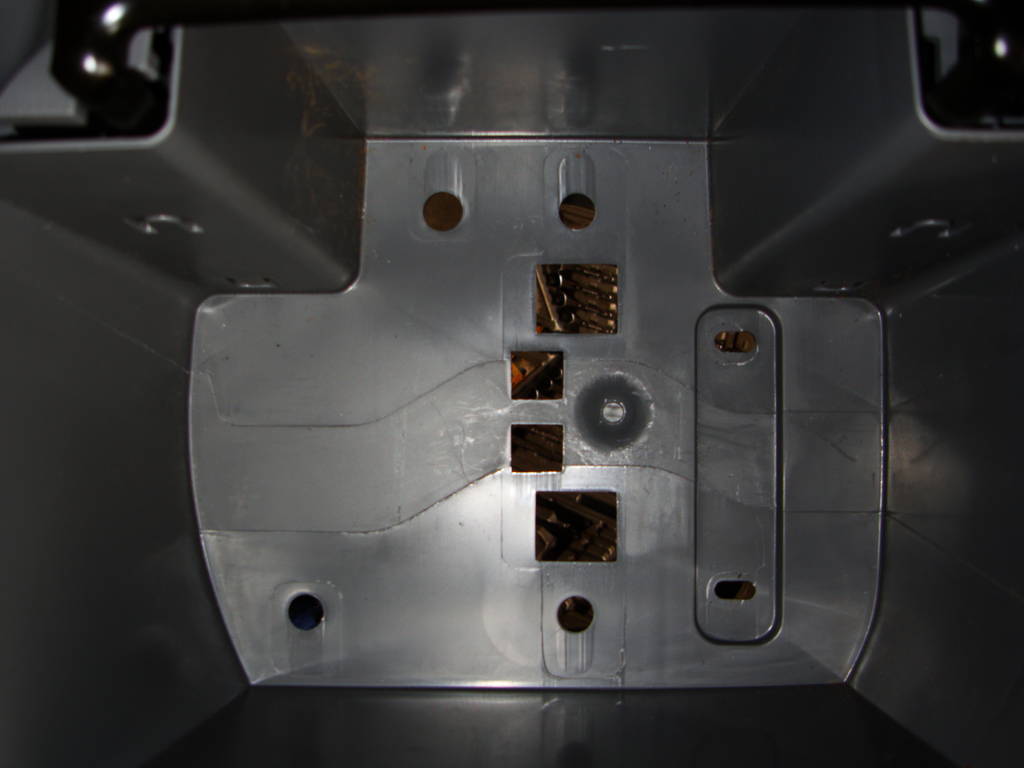
I apologize, I didn't document any measurements for where to drill the holes, it was on-the-fly trial and error. But there are some things I would've done differently, and will note them as needed.
I used the carpet piece my template, and noted where to drill. I needed holes for the UHF Antenna connector, power leads and the ext. speaker port.
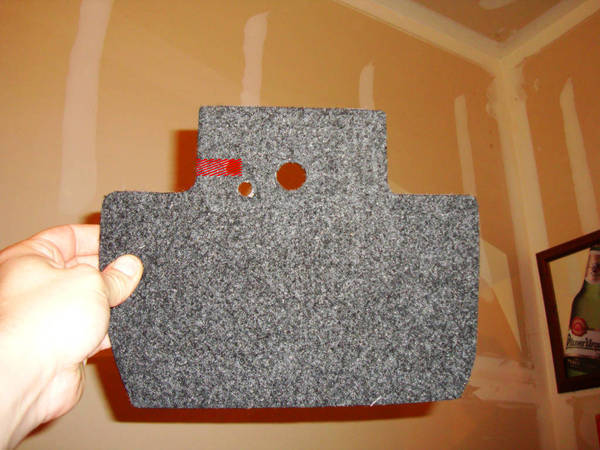
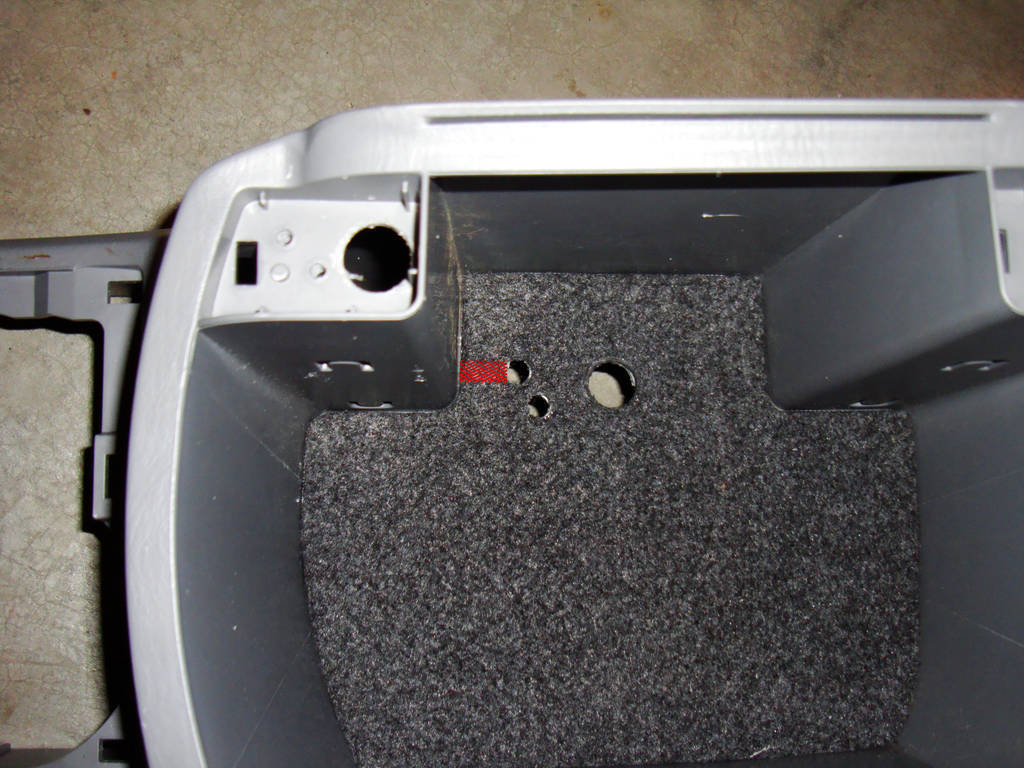
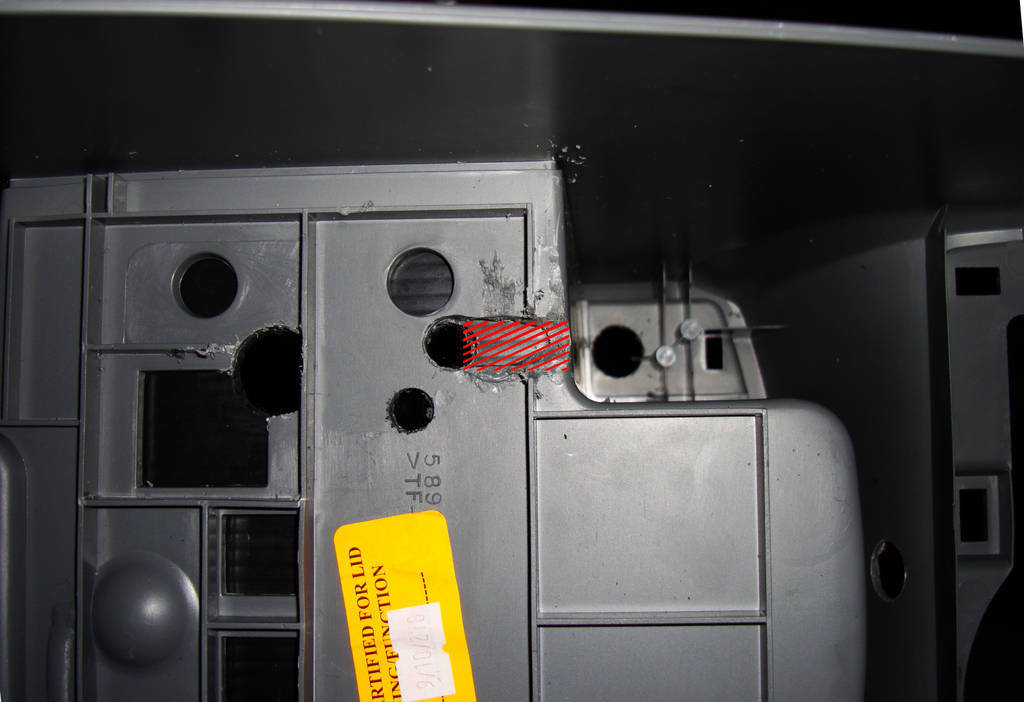
*NOTE: Cut out the areas in RED on the carpeted piece to make sure the speaker plug fits securely.
I also had to drill out the top (right by the left hinge) to fit the microphone extension through. Here are my holes:
Next, I drilled a hole for the microphone extension plug.
*NOTE: Once again, lesson learned. The microphone plugs barely cleared the textured plastic when everything was reassembled. I would've drilled this hole 1/4" higher if I were to do it again. I lucked out that it still fits well, but it leaves little room for error.
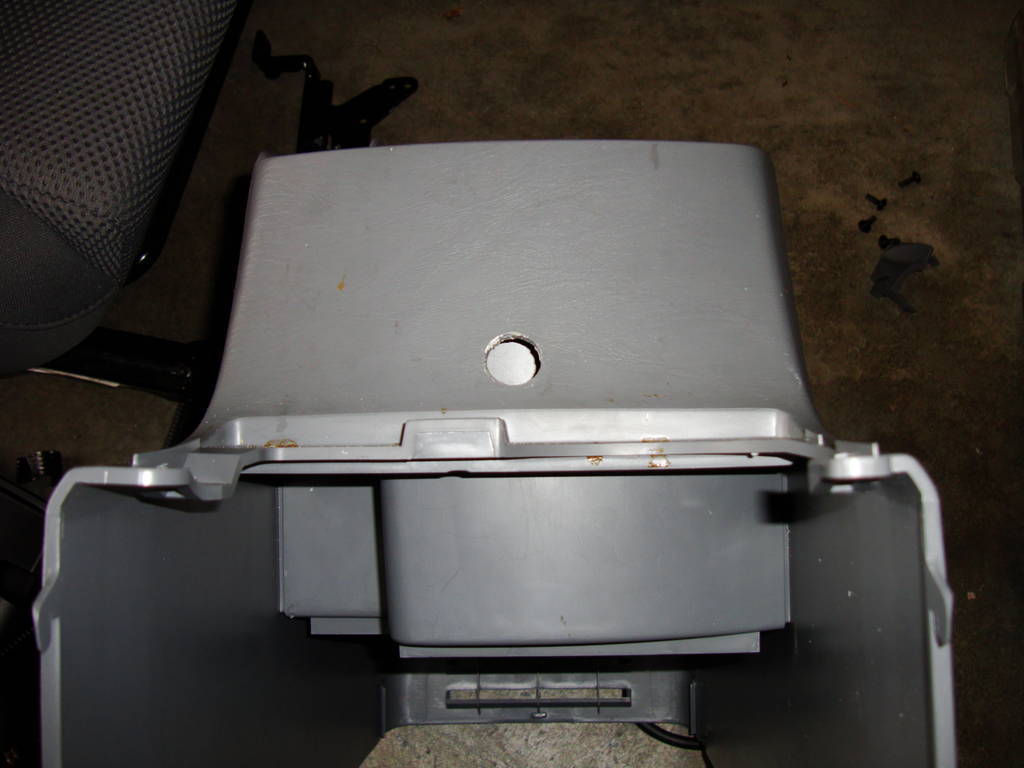
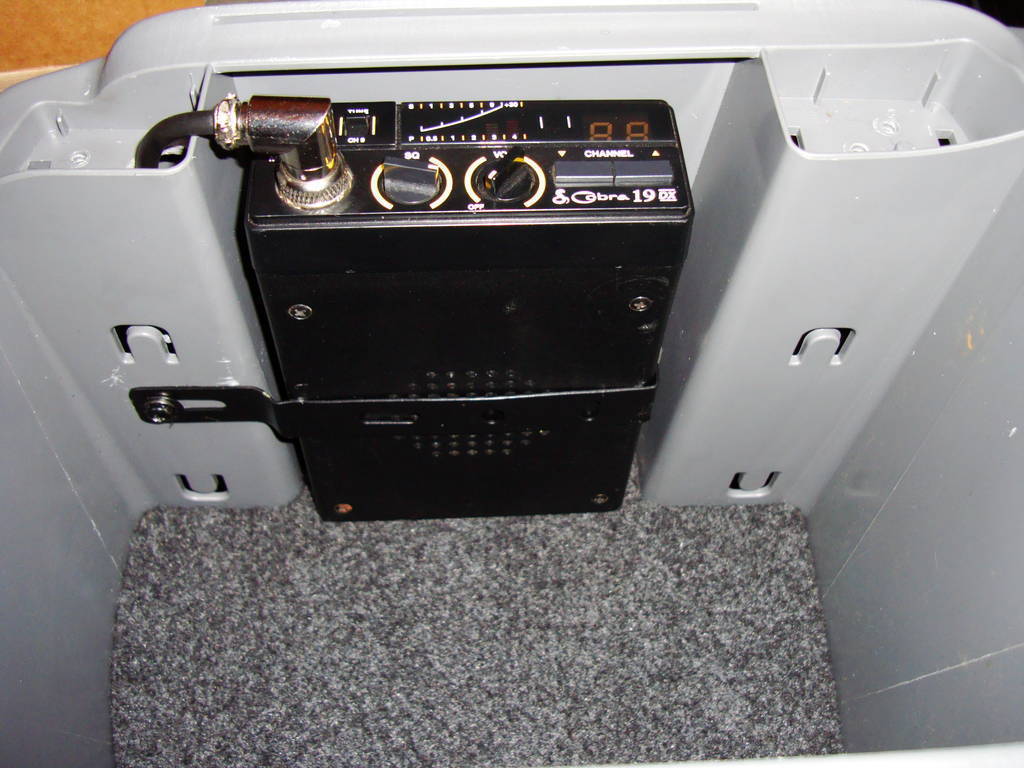
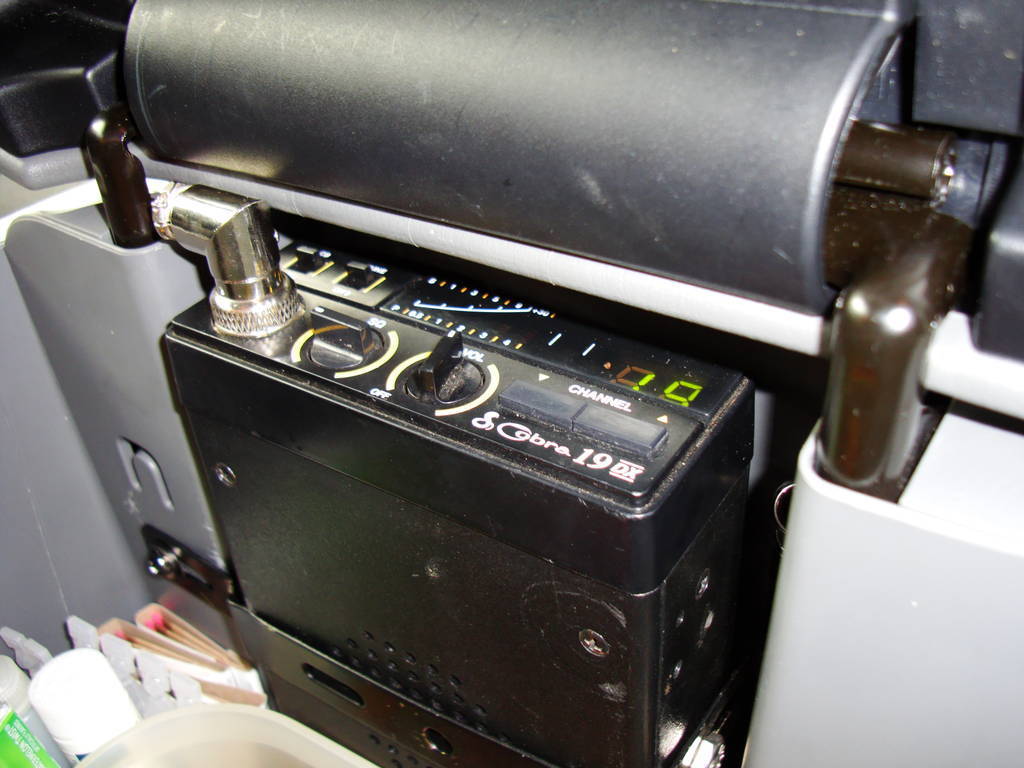
Next I had to test fist the CB and everything lined up beautifully. I screwed the right-side of the metal mounting bracket into the CB, and bent the other side out. I drilled a small hole in the storage box, and used a small machine screw with nuts and lock washers to secure it in place.
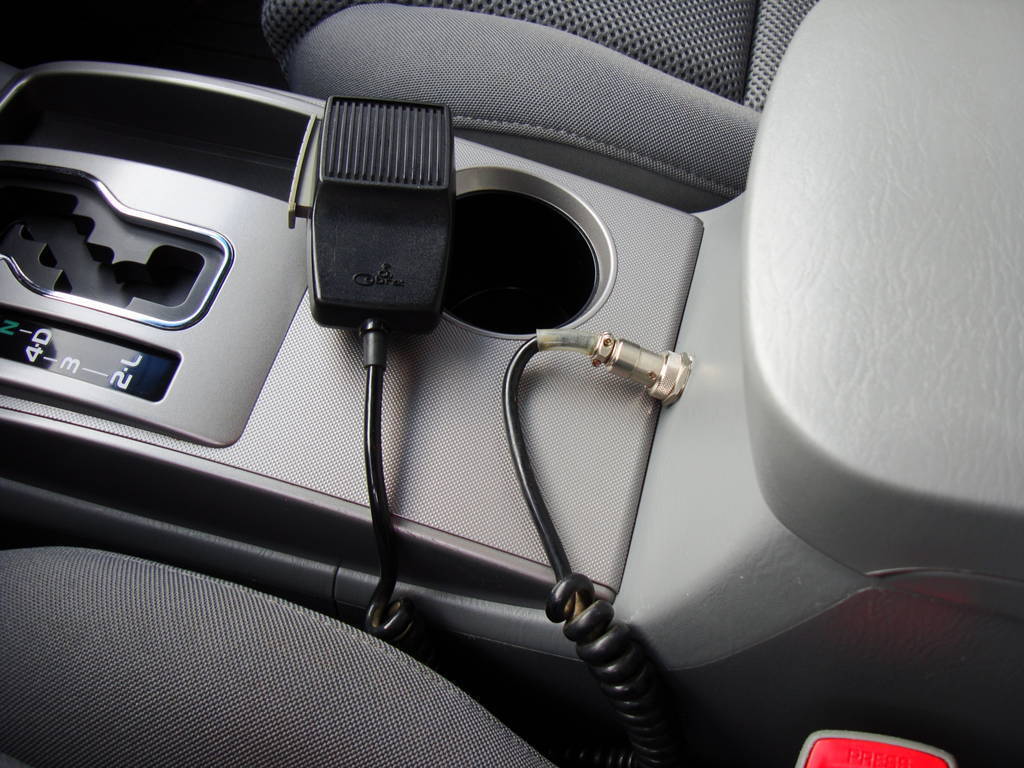
Once the bracket was secured, I ran my microphone extension cable, and threaded it through the hole.
Then, I threaded the Right-Angle PL259 adapter to the bottom of the CB
I was now ready to connect the antenna coax, POS/NEG wires, and plug in the ext. speaker (*again, I had to trim the carpet piece some more to fit the speaker plug all the way in).
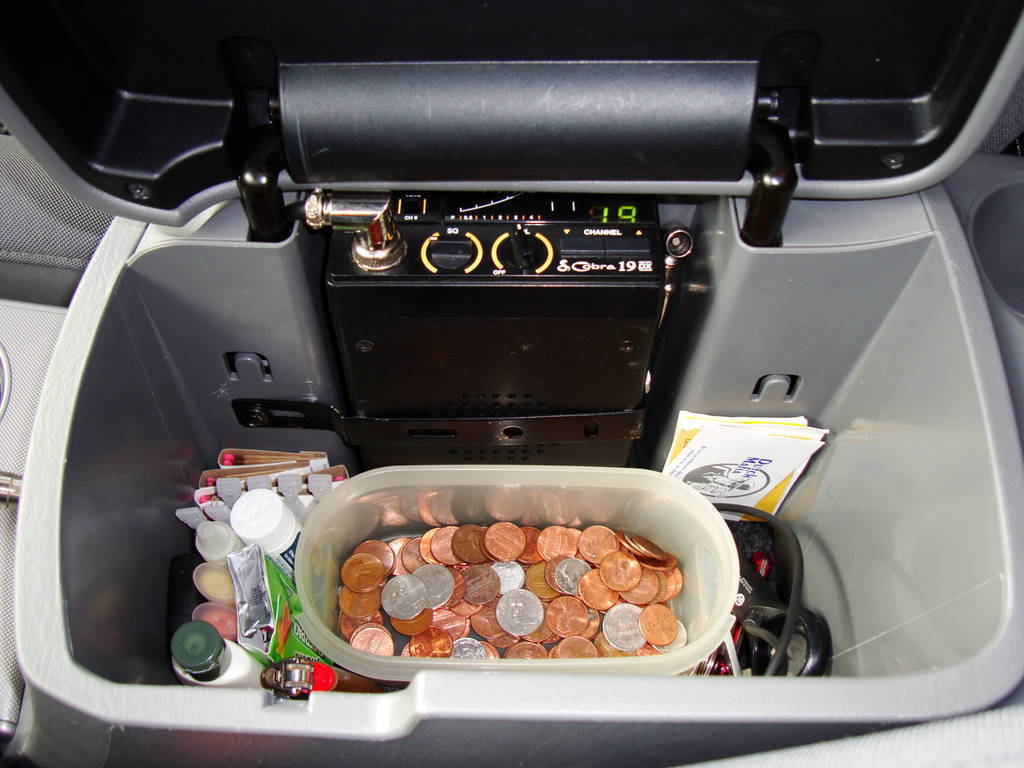
After tidying up, and making sure everything was secure, I plugged in the microphone, twisted on the antenna, and reconnected the battery. Turned it on and basked in the sweet aroma of sweat and success.....Drink 2 beers!
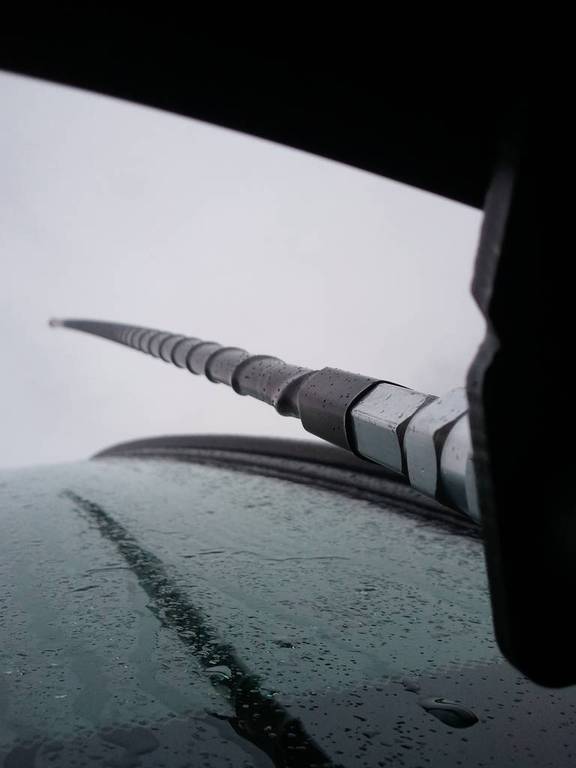
Don't re-assemble everything just yet! You still have to tune your new antenna.
Make sure the Antenna Coax and CB Input are still easily accessible. Buy/Rent/Borrow an SWR Meter to properly tune your Antenna to a range of 1.5:1 across all channels. My buddy came over with his and taught me the basics.
We started on Ch.19 to tune it, and then jumped from Ch.40 to Ch.1 trying to get the sweet spot from 1.1:1 - 1.5:1. The Firestik has a threaded screw on top to easily make minor adjustments. We ended up with a nominal reading of 1.2:1 - 1.5:1 across the board.
Now you can put your interior back together and bolt everything back up.
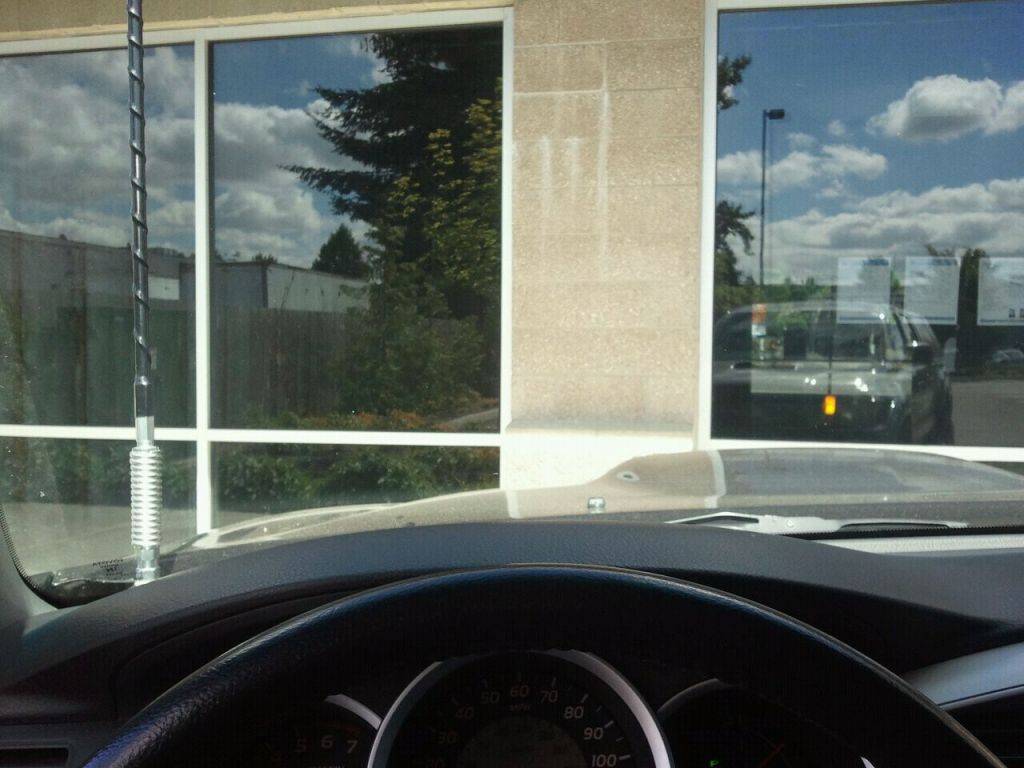
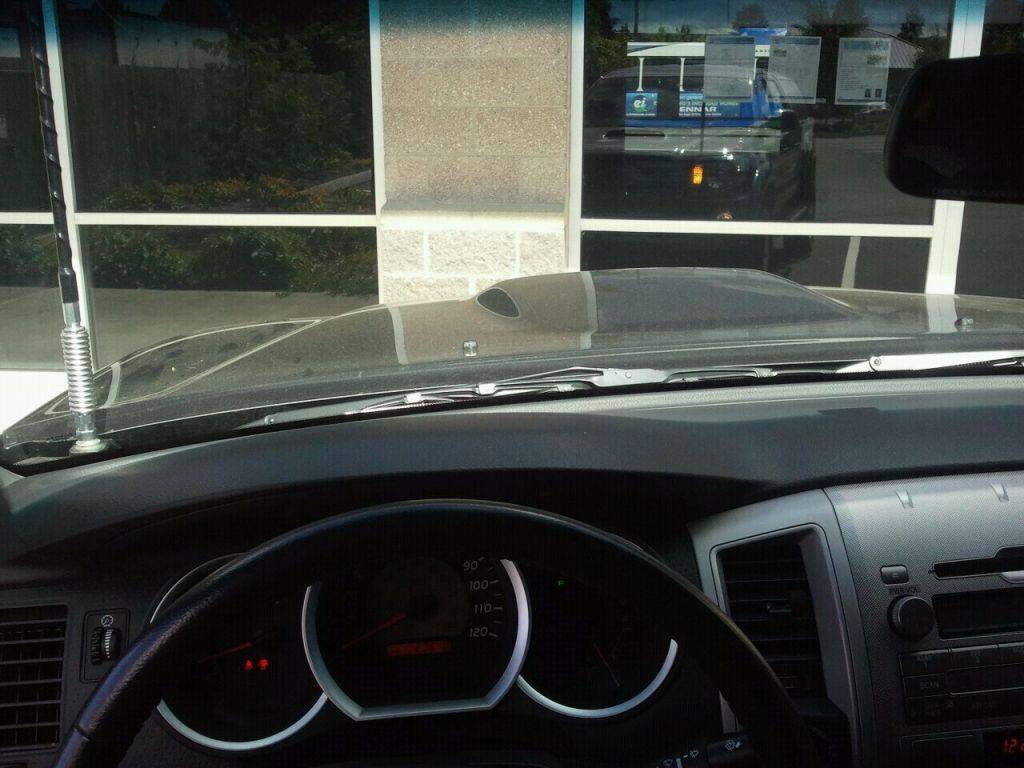
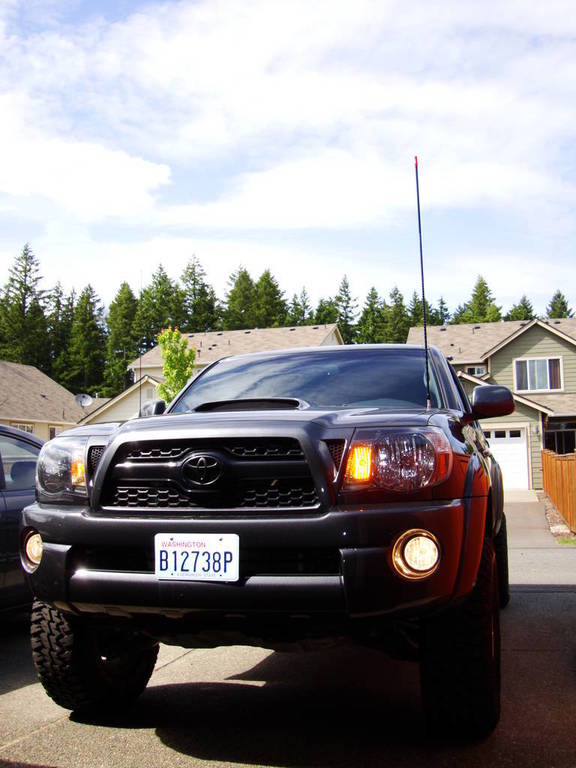
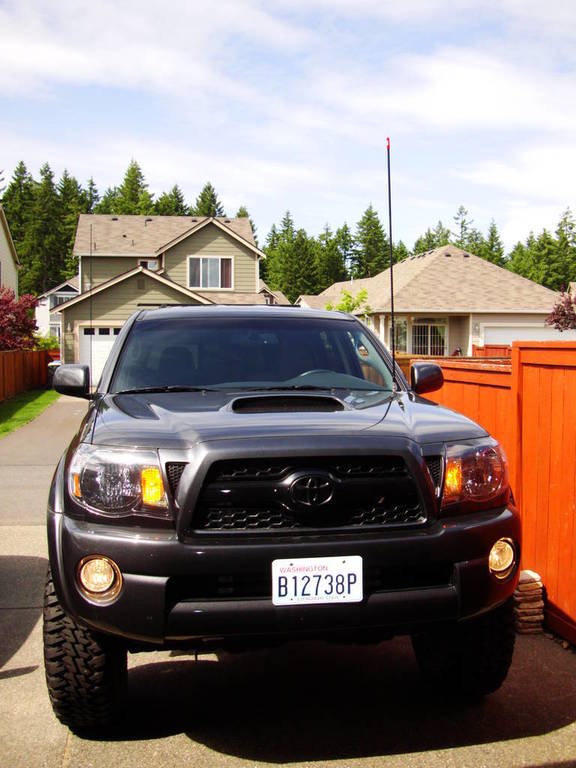
THE FINISHED PRODUCT:
----------------------------------------------------------------------
Step 1:
Disconnect the battery!!!
Tear your interior apart: seat, lower dash, center console....everything. I don't care how you do it, just get it done.
Honestly, it's not that difficult.
Remove the seat and unplug the harness underneath.
Center Console:
Pull up on the cup-holder basin to remove it.
Unscrew the shift knob and unclip the center gearbox cover and remove the (4) black screws.
Lift the carpet-thing inside the storage box and unscrew the (2) bolts.
The whole center console assembly should separate and pull apart with a little finesse.
Lower Dash
Pull out the little storage bucket (
) to the right of the steering wheel. Flip down that little panel to reveal a hidden bolt (+10 INT).
Pull the scuff-plate trim up.
Remove the foot-rest thing right by the Parking Brake.
Unscrew the rubber cap-screw and remove the lower kick-panel.
Remove the (2) bolts and "gently" pull out to unclip the lower dash assembly.
Unplug any connectors.
Don't forget about the TPMS plug and hoot-latch cable.
You have successfully gutted the driver's seat area. Drink a beer
----------------------------------------------------------------------
Step 2:
Step 2:
Install the Relentless CB Antenna Mount. Don't undo both the hood bolts. I removed the top hood-hinge bolt first, and bolted up the antenna mount, then followed with the lower bolt. That way your hood won't shift.
Install the Firestik Stud Mount using the longer 1.25" bolt that was included with the Coax. Follow the order printed on the instructions:
I ran the coax under the plastic cowl, and secured it with zip-ties and electrical tap to insure it wouldn't kink or rub on any edges.
*NOTE: There are a few sharp edges in this area so be wise where you
secure the coax.
I then poked a hole in the firewall grommet to run the coax and wires through. I found it was pretty easy to use a long screwdriver to poke through it, then widen the hole with some needle-nose pliers. I then wrapped all the (2) pos/neg leads in conduit, and taped them to the coax and gripped them with the needle-nose to pull them through.
Crimp and heat-shrink a ring terminal to your NEGATIVE wire lead and connect it here:
Solder -or- butt connect the inline fuse holder to your POSITIVEand attach the other ring terminal to that as well and connect it here:
*I chose to run my POSITIVE directly to the battery with a fuse in order to have CB operation even when the vehicle is OFF. This is optional, and you could always add a relay or tap into a switched power source.
I used a 3-AMP fuse in mine, and wouldn't recommend anything higher to avoid burning out your CB.
You should be done in the engine compartment....Drink a beer!!!
----------------------------------------------------------------------
Step 3:
Step 3:
Moving back to the interior again. I tried to wrap the rubber fire-wall grommet in electrical tape to seal it up well. After measuring the length of wire I needed, I finished wrapping the wires with plastic conduit and taped the hell out of 'em.
Next, I mounted the external speaker. There were not a lot of options, so I mounted it above the gas pedal, attached the the plastic shroud panel covering the water lines. My foot clears it, but not by much.
I pulled up the carpet to run the wires/coax underneath, and stuffed the speaker cable into the plastic conduit as well.
I tucked it all along the inner-console area and everything was just the right length to reach it's destination.
Now it's time to move on to drilling holes into the console box...Drink a beer
----------------------------------------------------------------------
Step 4:
Step 4:
Disassemble your storage box. Remove the lid, spring hinge assembly, the plastic corner pieces and pull out that carpet piece.
I apologize, I didn't document any measurements for where to drill the holes, it was on-the-fly trial and error. But there are some things I would've done differently, and will note them as needed.
I used the carpet piece my template, and noted where to drill. I needed holes for the UHF Antenna connector, power leads and the ext. speaker port.
*NOTE: Cut out the areas in RED on the carpeted piece to make sure the speaker plug fits securely.
I also had to drill out the top (right by the left hinge) to fit the microphone extension through. Here are my holes:
Next, I drilled a hole for the microphone extension plug.
*NOTE: Once again, lesson learned. The microphone plugs barely cleared the textured plastic when everything was reassembled. I would've drilled this hole 1/4" higher if I were to do it again. I lucked out that it still fits well, but it leaves little room for error.
Next I had to test fist the CB and everything lined up beautifully. I screwed the right-side of the metal mounting bracket into the CB, and bent the other side out. I drilled a small hole in the storage box, and used a small machine screw with nuts and lock washers to secure it in place.
Once the bracket was secured, I ran my microphone extension cable, and threaded it through the hole.
Then, I threaded the Right-Angle PL259 adapter to the bottom of the CB
I was now ready to connect the antenna coax, POS/NEG wires, and plug in the ext. speaker (*again, I had to trim the carpet piece some more to fit the speaker plug all the way in).
After tidying up, and making sure everything was secure, I plugged in the microphone, twisted on the antenna, and reconnected the battery. Turned it on and basked in the sweet aroma of sweat and success.....Drink 2 beers!
You're not finished yet!!!
----------------------------------------------------------------------
Step 5:
----------------------------------------------------------------------
Step 5:
Don't re-assemble everything just yet! You still have to tune your new antenna.
Make sure the Antenna Coax and CB Input are still easily accessible. Buy/Rent/Borrow an SWR Meter to properly tune your Antenna to a range of 1.5:1 across all channels. My buddy came over with his and taught me the basics.
We started on Ch.19 to tune it, and then jumped from Ch.40 to Ch.1 trying to get the sweet spot from 1.1:1 - 1.5:1. The Firestik has a threaded screw on top to easily make minor adjustments. We ended up with a nominal reading of 1.2:1 - 1.5:1 across the board.
Now you can put your interior back together and bolt everything back up.
THE FINISHED PRODUCT:
Last edited by Benson X; 12-12-2012 at 12:55 PM.


Thread
Thread Starter
Forum
Replies
Last Post
foampile
03+ 4Runner/GX470, & 05+ Tacomas
1
12-18-2022 01:29 PM
FS[PacSouthWest]: Husky floor liners '90-95 4runner
rocket
Misc Stuff (Vehicle Related)
3
01-21-2016 05:03 PM
landrunner
86-95 Trucks & 4Runners
17
08-05-2015 09:18 PM
vanion2
99+ Tundra, 00+ Sequoia, 98+ Land Cruiser/LX470
2
07-29-2015 06:17 PM
Steezy96yota
86-95 Trucks & 4Runners (Build-Up Section)
1
07-06-2015 10:00 AM


