89' Yota TBI350/4L60E/VF1A
 10-31-2014, 10:59 AM
#61
Registered User
Thread Starter

Join Date: Jan 2011
Location: Minneapolis, MN
Posts: 88
Likes: 0
Received 0 Likes
on
0 Posts
There is an update.
Long story short, Saab radiator won't keep this thing cool, turns out my dad had an extra original Harrison radiator for his 62' Corvette, the story behind it was my brother crashed it about 5 years ago, put a hole in the overflow on the top of radiator core, so when the shop repaired the vehicle, the shop owner being a Vette owner himself, ordered a DeWitts radiator and eFan to replace the original Harrison and mechanical fan. The radiator just sat and collected dust, until I started searching for radiators to cool this beast. Every shop I talked to was scared to touch the radiator, but found a guy to repair the aluminum, and we are off and running with a 52-year-old aluminum radiator.
1962 Harrison radiator
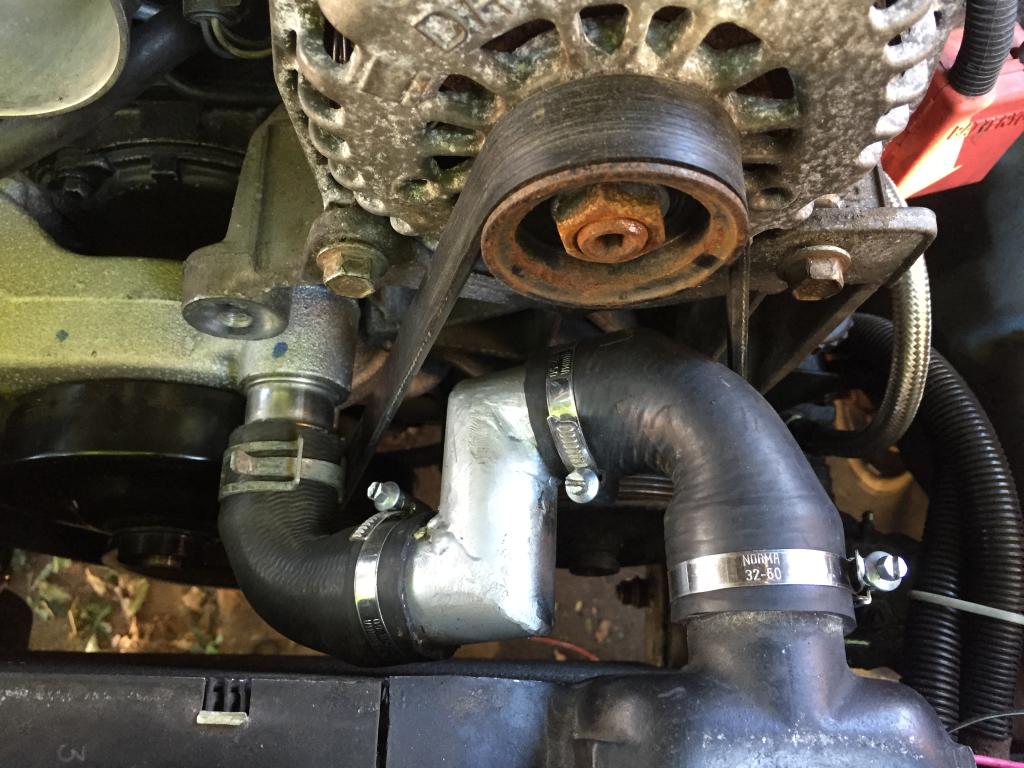
Not spacious by any means, but I should be able to get a slim puller fan in there, the distance between the lower hose and the York pulley is also fairly tight.
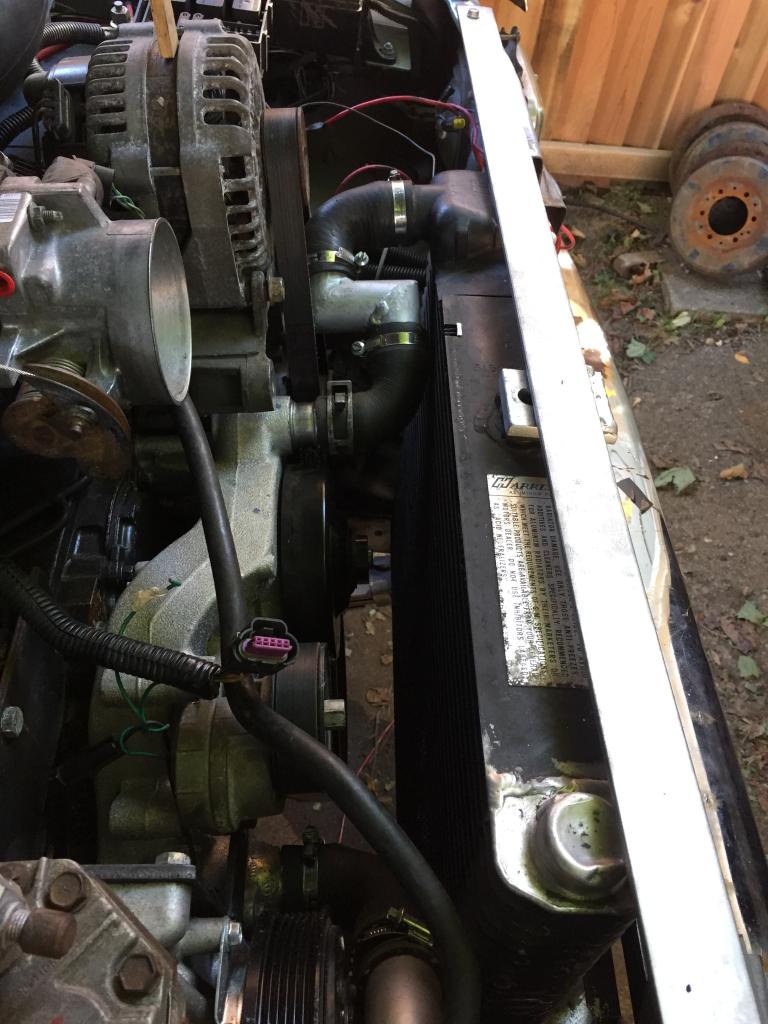
It looks tighter than it is, but it's roughly 1/2" of clearance between the upper hose and the belt.
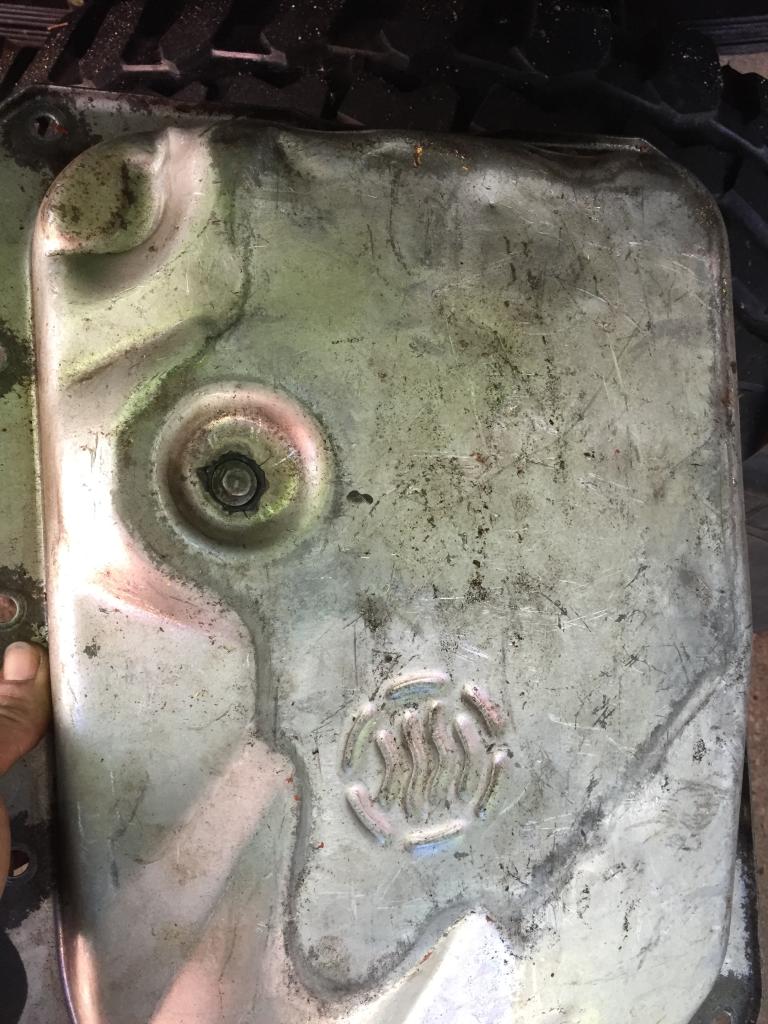
Welded a drain plug on the 4L80E pan on a raised boss to avoid premature failure.
A view from underneath, GM mount and both driveshafts in.

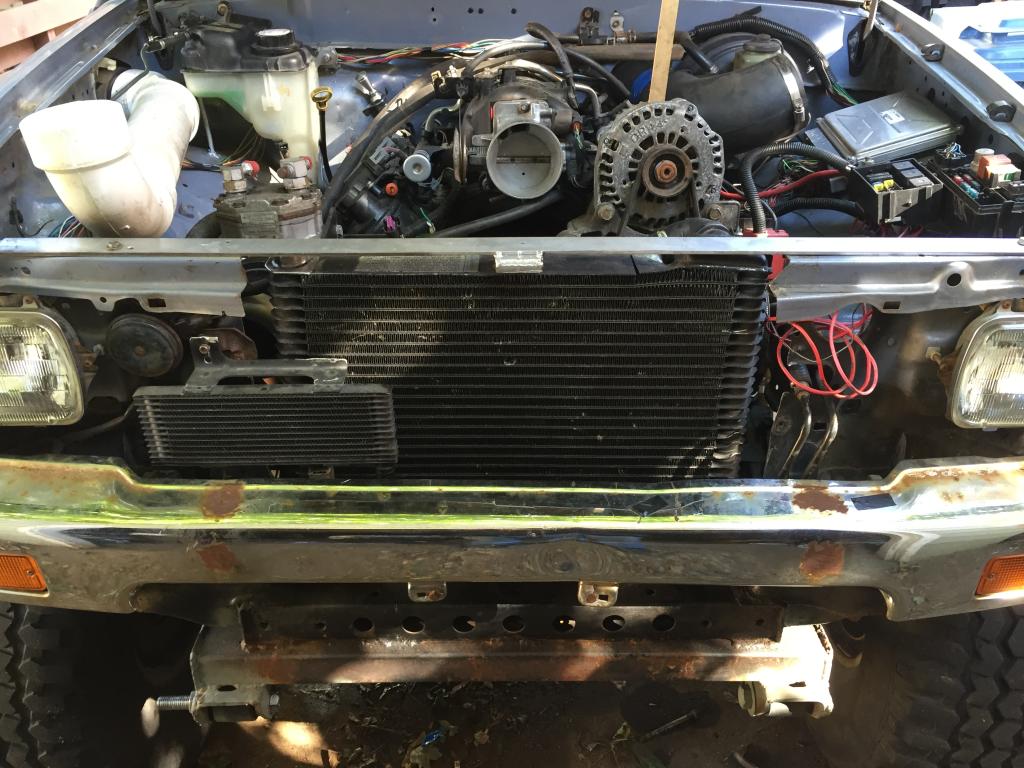
Under the hood, before the radiator swap, but essentially how it looks now.

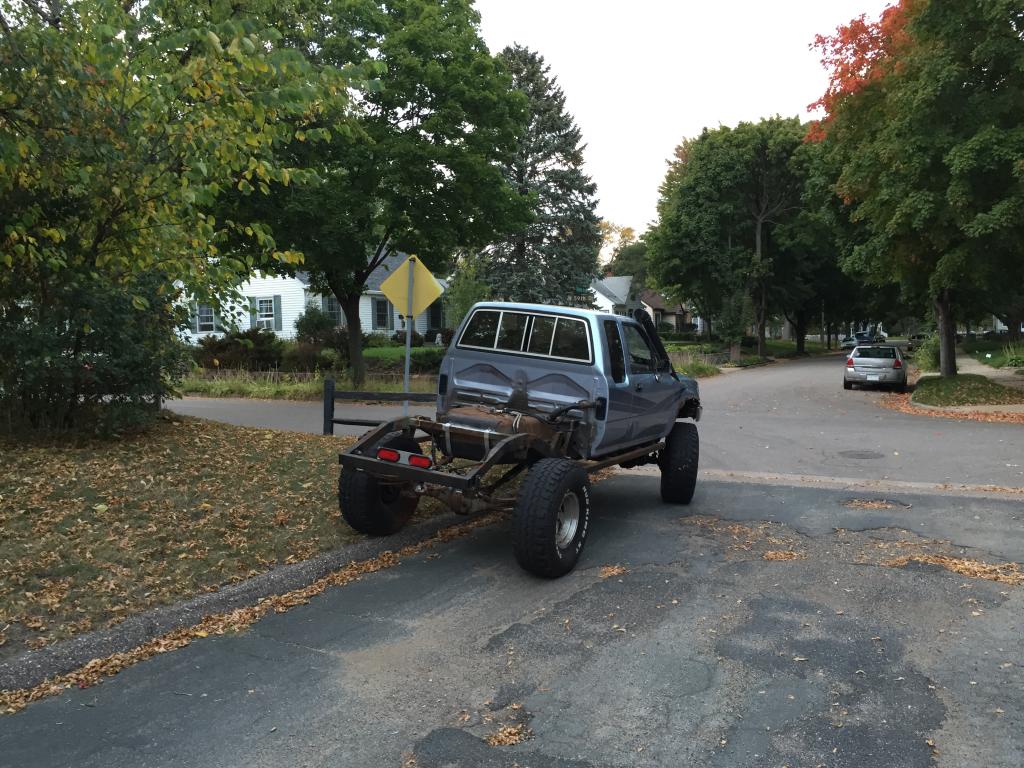
Ready for a cruise.
Flexin'

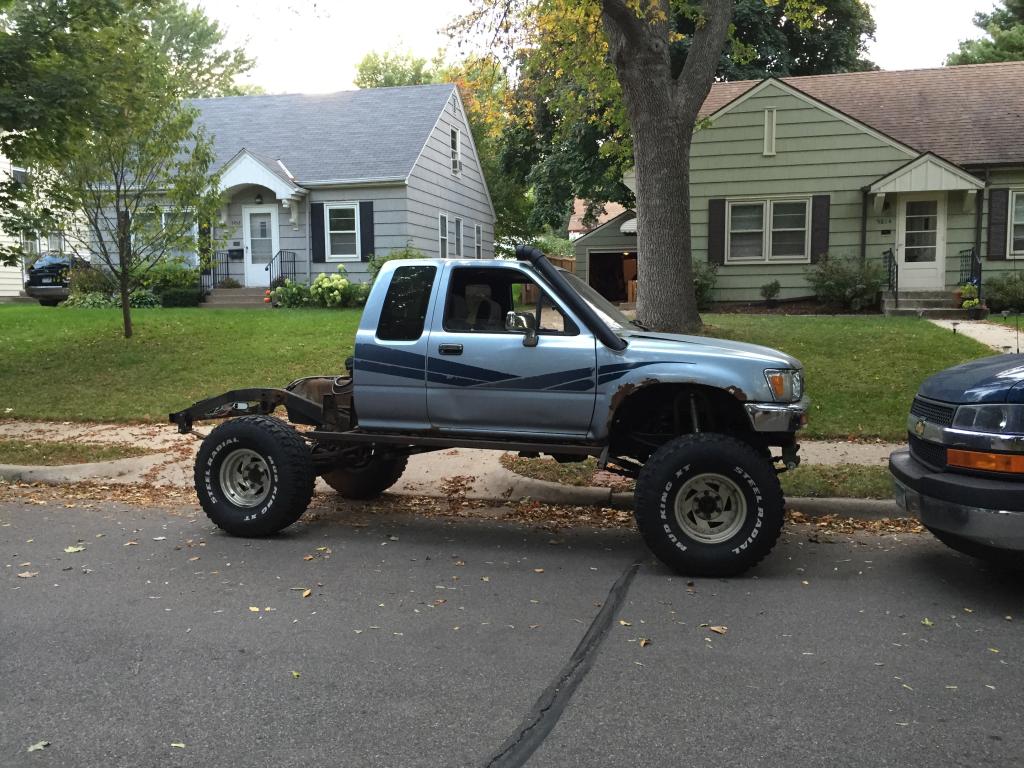
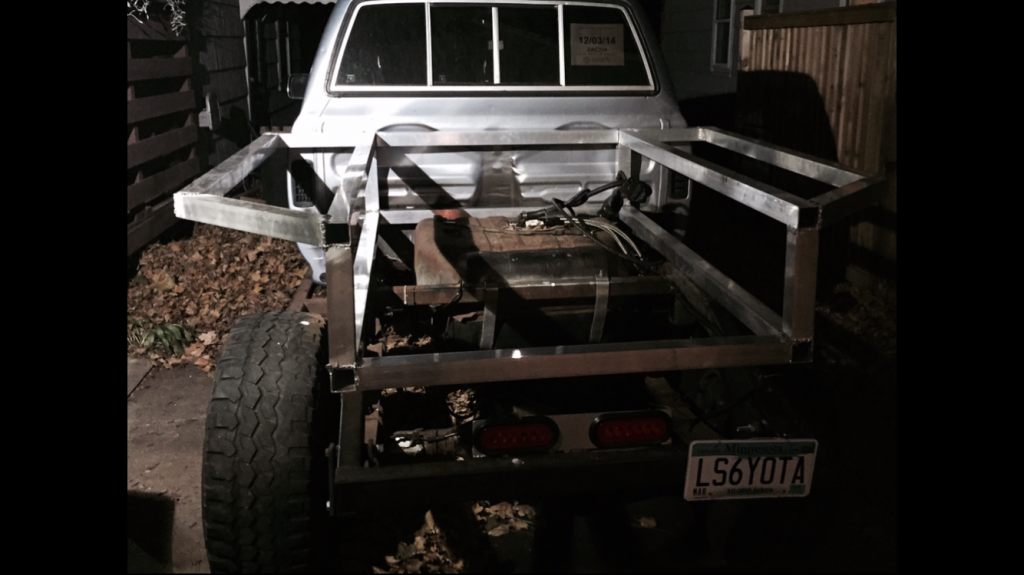
A view from behind, currently working on the flat/utility bed.
1962 Harrison radiator
Not spacious by any means, but I should be able to get a slim puller fan in there, the distance between the lower hose and the York pulley is also fairly tight.
It looks tighter than it is, but it's roughly 1/2" of clearance between the upper hose and the belt.
Welded a drain plug on the 4L80E pan on a raised boss to avoid premature failure.
A view from underneath, GM mount and both driveshafts in.
Under the hood, before the radiator swap, but essentially how it looks now.
Ready for a cruise.
Flexin'
A view from behind, currently working on the flat/utility bed.
Last edited by 3uzfte; 10-31-2014 at 11:02 AM.
 01-18-2015, 06:44 AM
#62
Registered User
Thread Starter
Join Date: Jan 2011
Location: Minneapolis, MN
Posts: 88
Likes: 0
Received 0 Likes
on
0 Posts
Update.
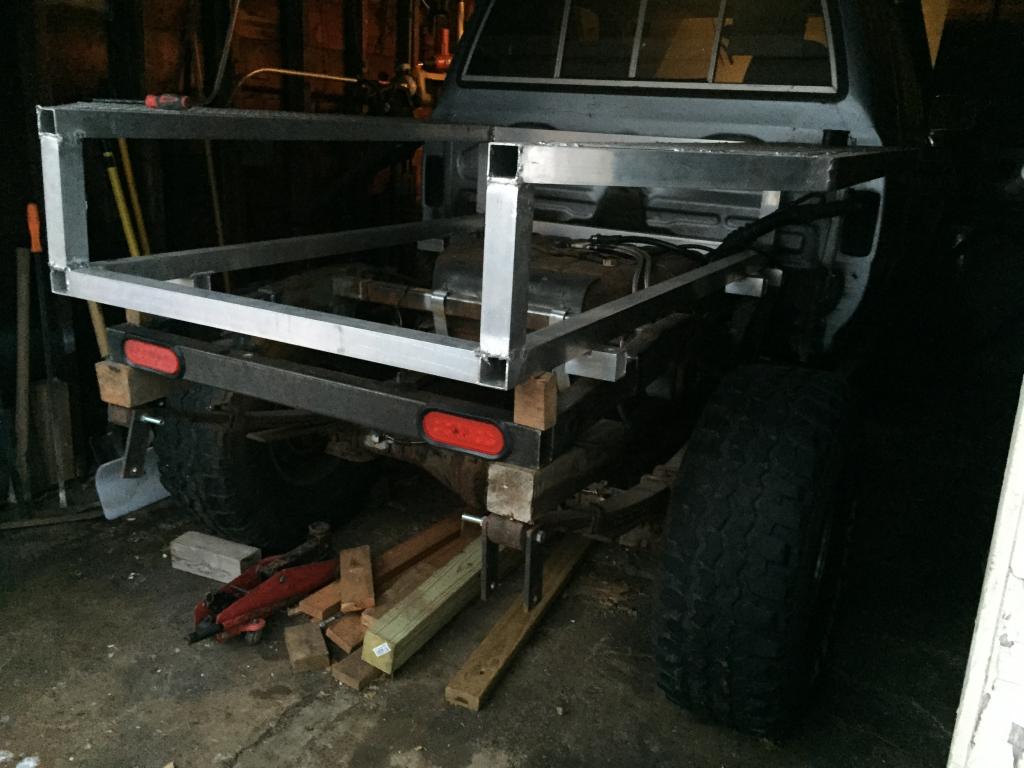
In order to be road legal in Minnesota, you have to have fenders that cover the tire except roughly .5", so I started making a utility bed out of aluminum. Started like this...
I's learnt real kwik..
Ended up with this for now...
Ever since I made the rear drop frame, I have regretted it. I decided to chop off the old design and build a new setup to keep the rear end from dragging a$$ on everything.

Moved tail/brake lights into the rear bumper, burned in the new rear frame setup, and will either fabricate or buy rear hangers.
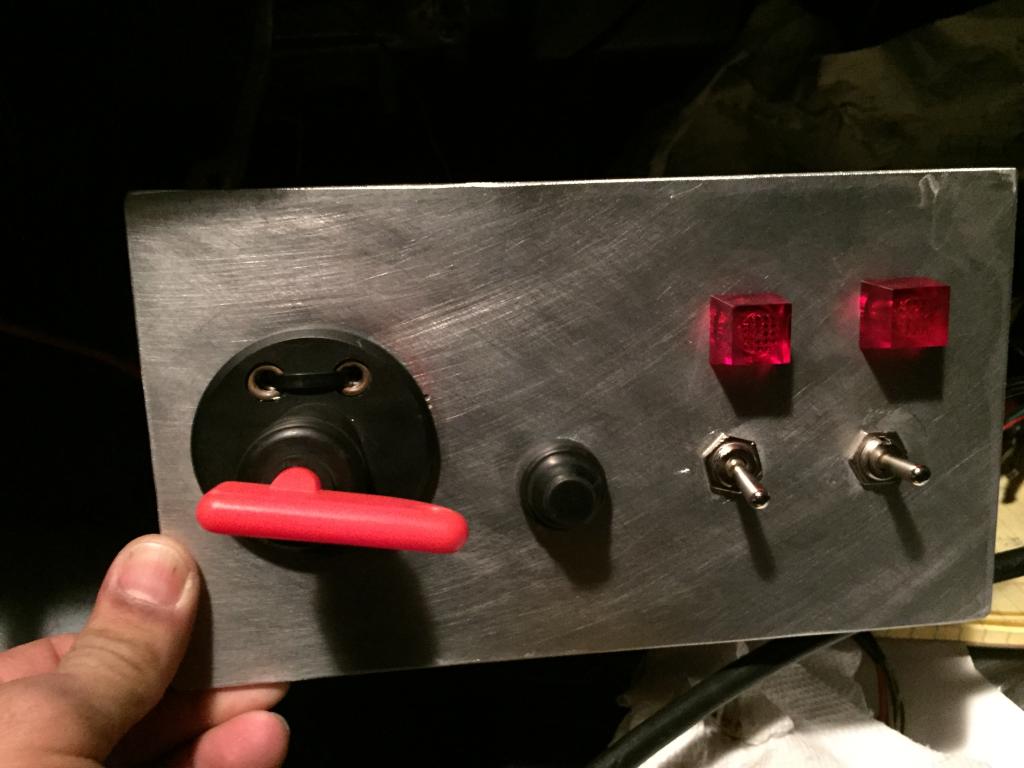
Homebrew switch panel, marine on-off switch, push button ignition, front and rear eLockers w/ LEDs.
In order to be road legal in Minnesota, you have to have fenders that cover the tire except roughly .5", so I started making a utility bed out of aluminum. Started like this...
I's learnt real kwik..
Ended up with this for now...
Ever since I made the rear drop frame, I have regretted it. I decided to chop off the old design and build a new setup to keep the rear end from dragging a$$ on everything.
Moved tail/brake lights into the rear bumper, burned in the new rear frame setup, and will either fabricate or buy rear hangers.
Homebrew switch panel, marine on-off switch, push button ignition, front and rear eLockers w/ LEDs.
Last edited by 3uzfte; 01-18-2015 at 06:54 AM.
05-23-2015, 06:54 PM
#63
Registered User

Join Date: Jan 2011
Posts: 10
Likes: 0
Received 0 Likes
on
0 Posts
do you have any more pics of this its been about a year
my 91 i have got all my funds together my big decision is to leave the stock manual trans or put in a chevy th 400 automatic it seems this might be easier and cheaper
than using the kit from north west offroad which would cost me about $ 850 delivered
my 91 i have got all my funds together my big decision is to leave the stock manual trans or put in a chevy th 400 automatic it seems this might be easier and cheaper
than using the kit from north west offroad which would cost me about $ 850 delivered
05-26-2015, 11:54 AM
#64
Registered User
Thread Starter
Join Date: Jan 2011
Location: Minneapolis, MN
Posts: 88
Likes: 0
Received 0 Likes
on
0 Posts
do you have any more pics of this its been about a year
my 91 i have got all my funds together my big decision is to leave the stock manual trans or put in a chevy th 400 automatic it seems this might be easier and cheaper
than using the kit from north west offroad which would cost me about $ 850 delivered
my 91 i have got all my funds together my big decision is to leave the stock manual trans or put in a chevy th 400 automatic it seems this might be easier and cheaper
than using the kit from north west offroad which would cost me about $ 850 delivered
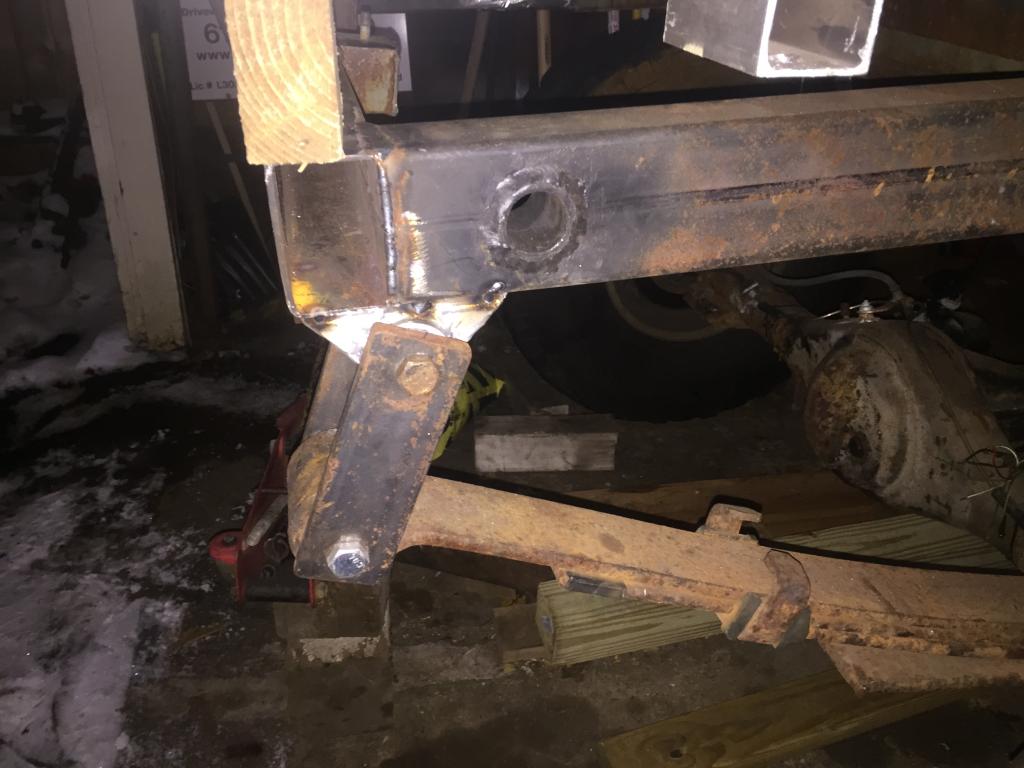
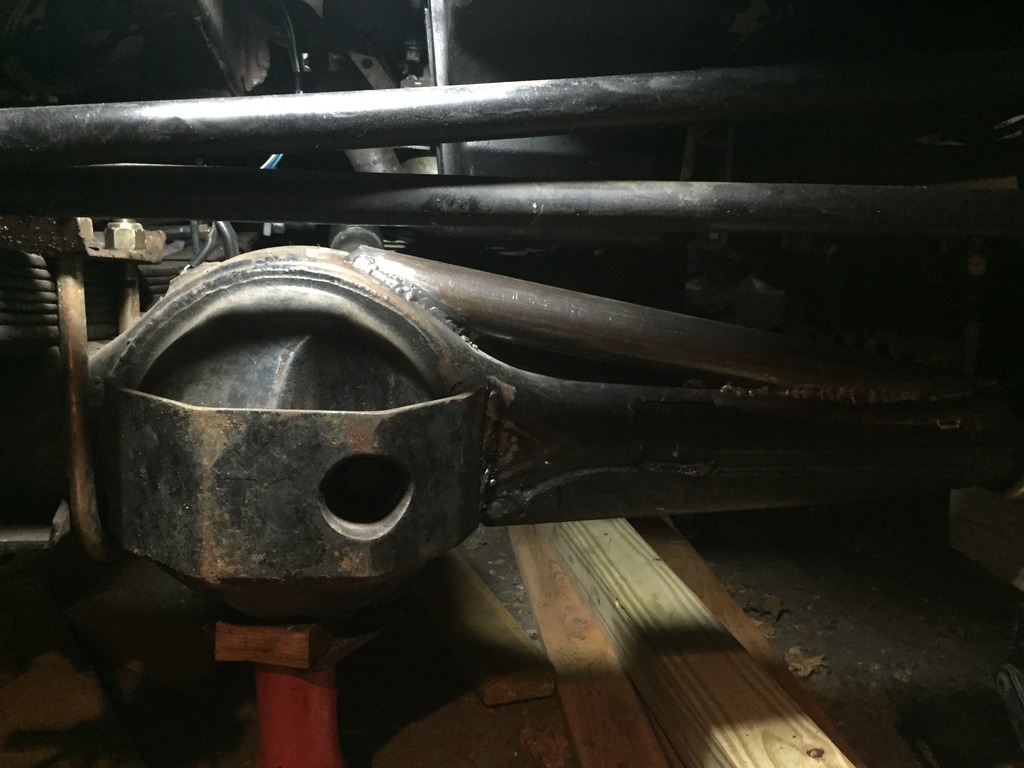
Corrected the rear frame drop, moved taillights into rear bumper and skinned the wings of the utility bed with diamond plate.

Took DOM tubing, one slightly larger than the other, sliced the larger tube the long way...
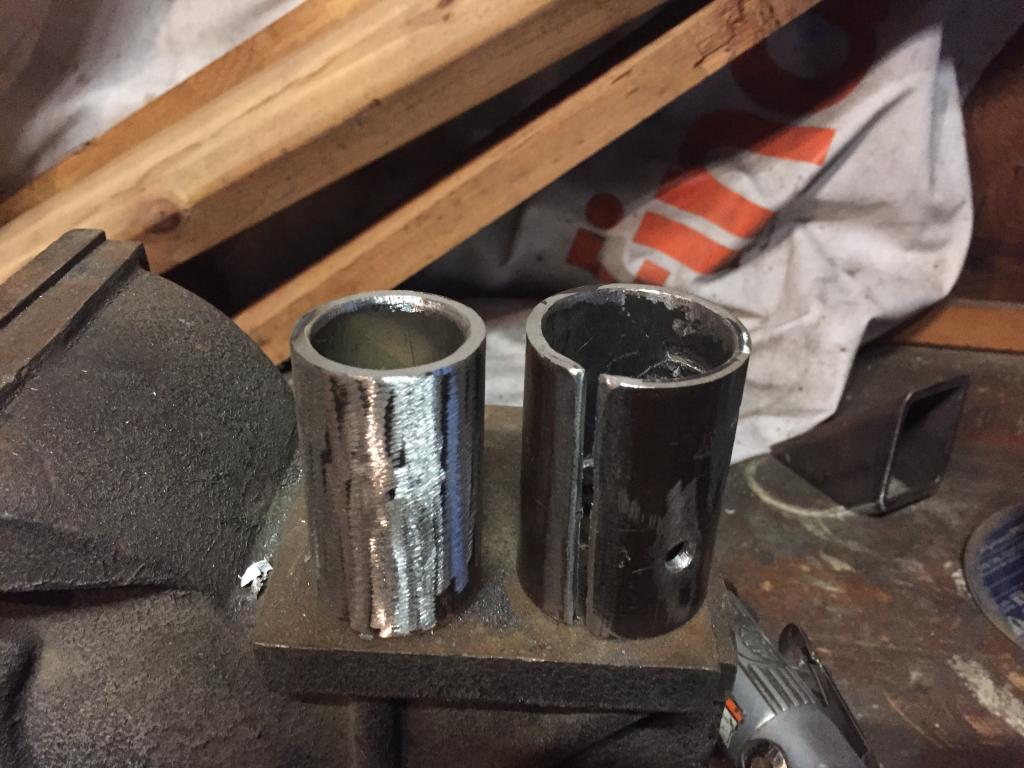
Inserted the inner sleeve into the outer.
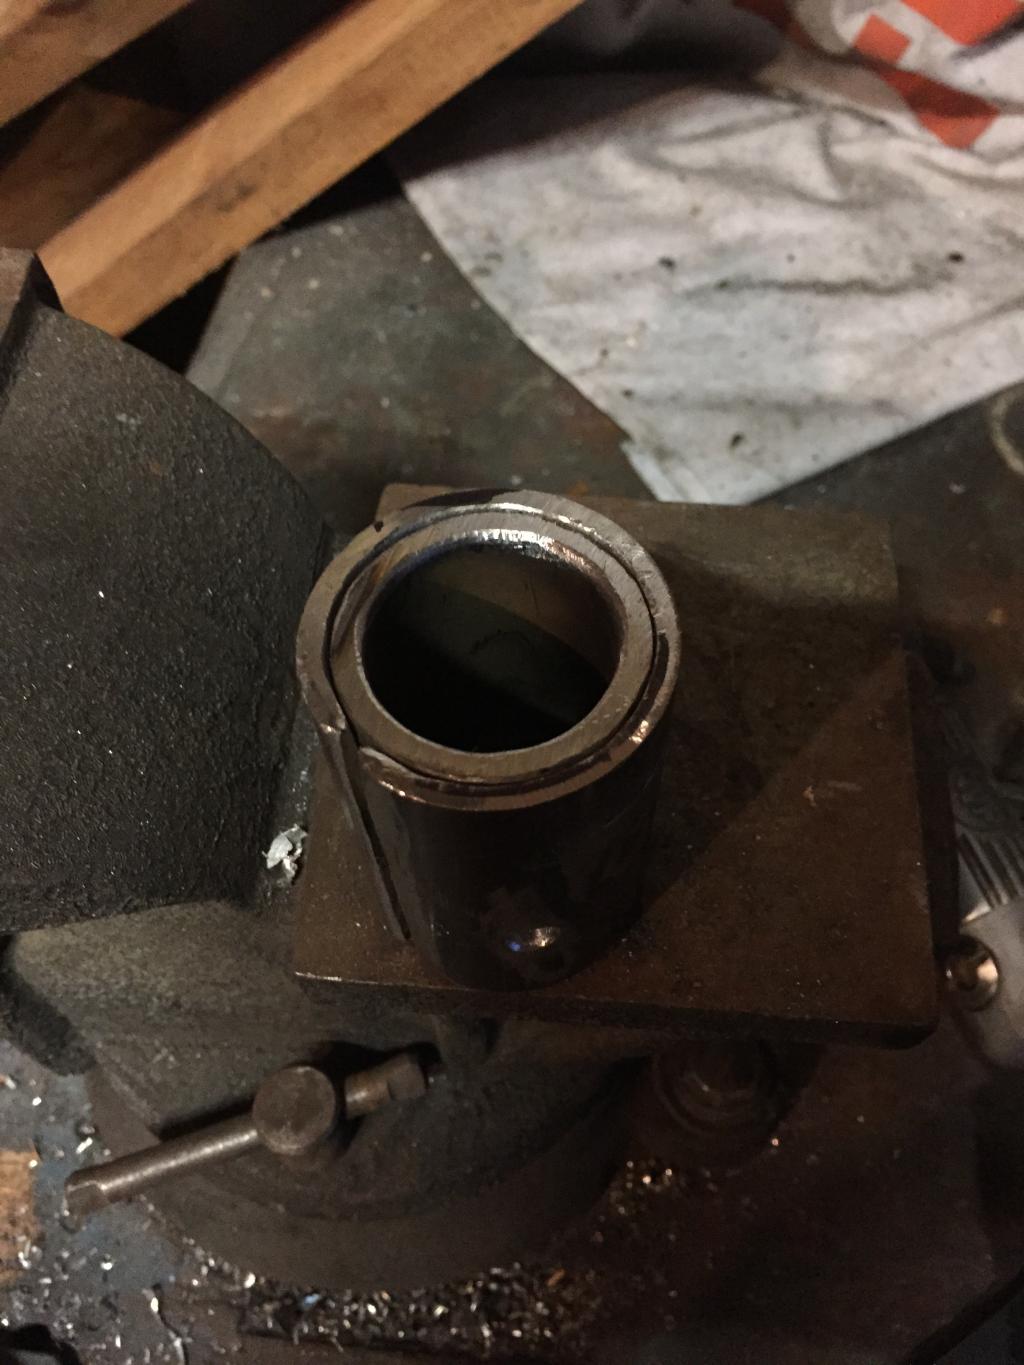
Drilled holes to stop the inner sleeve from walking or rotating.
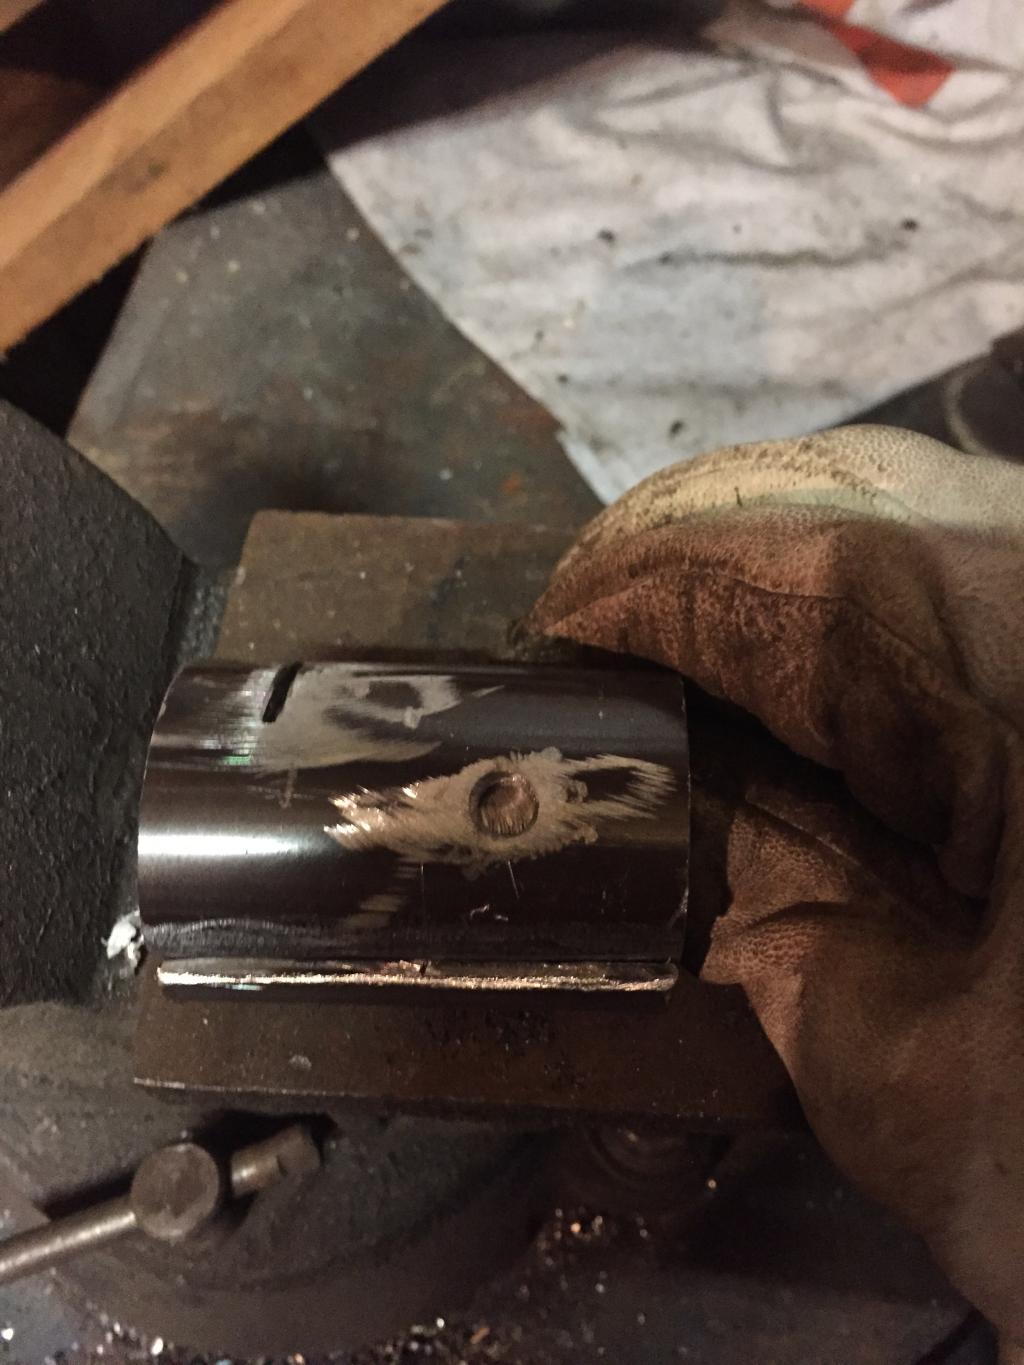
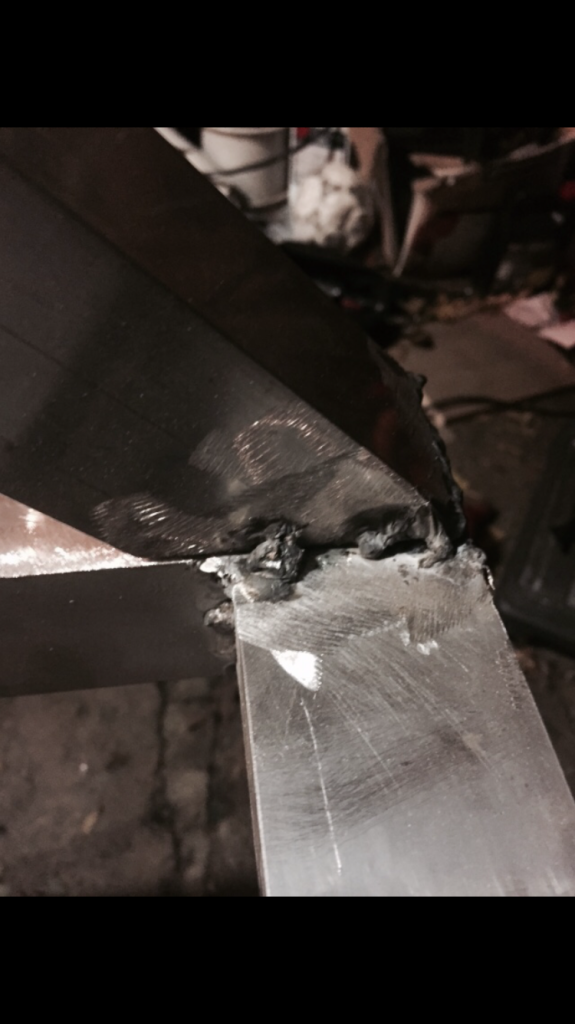
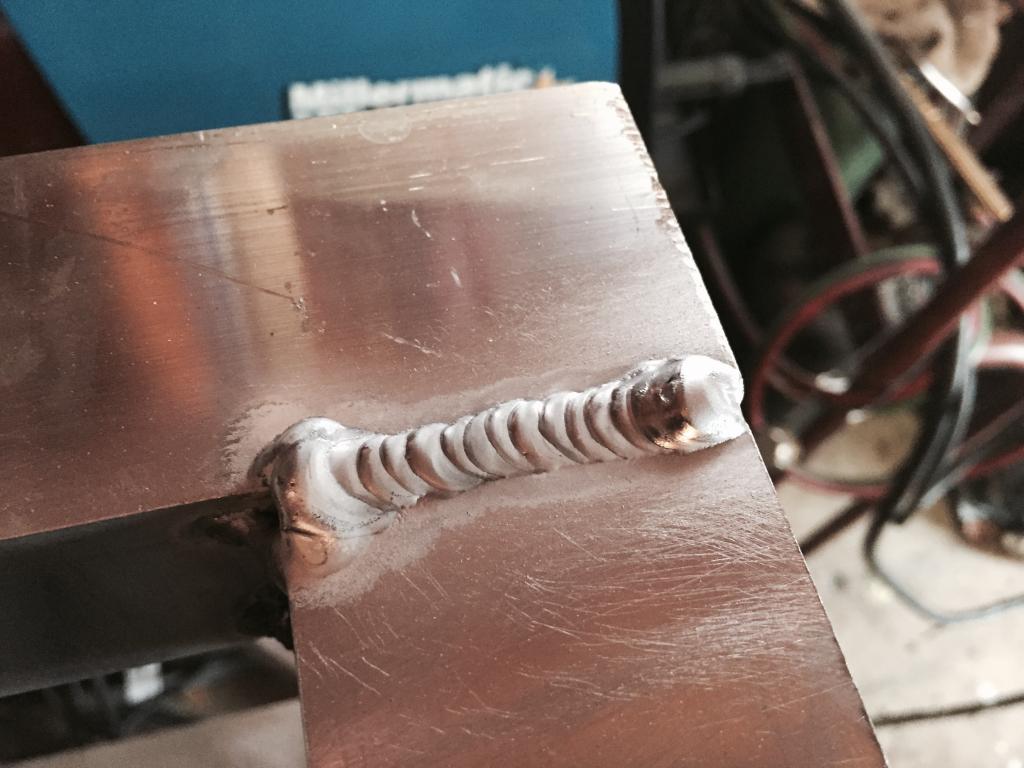
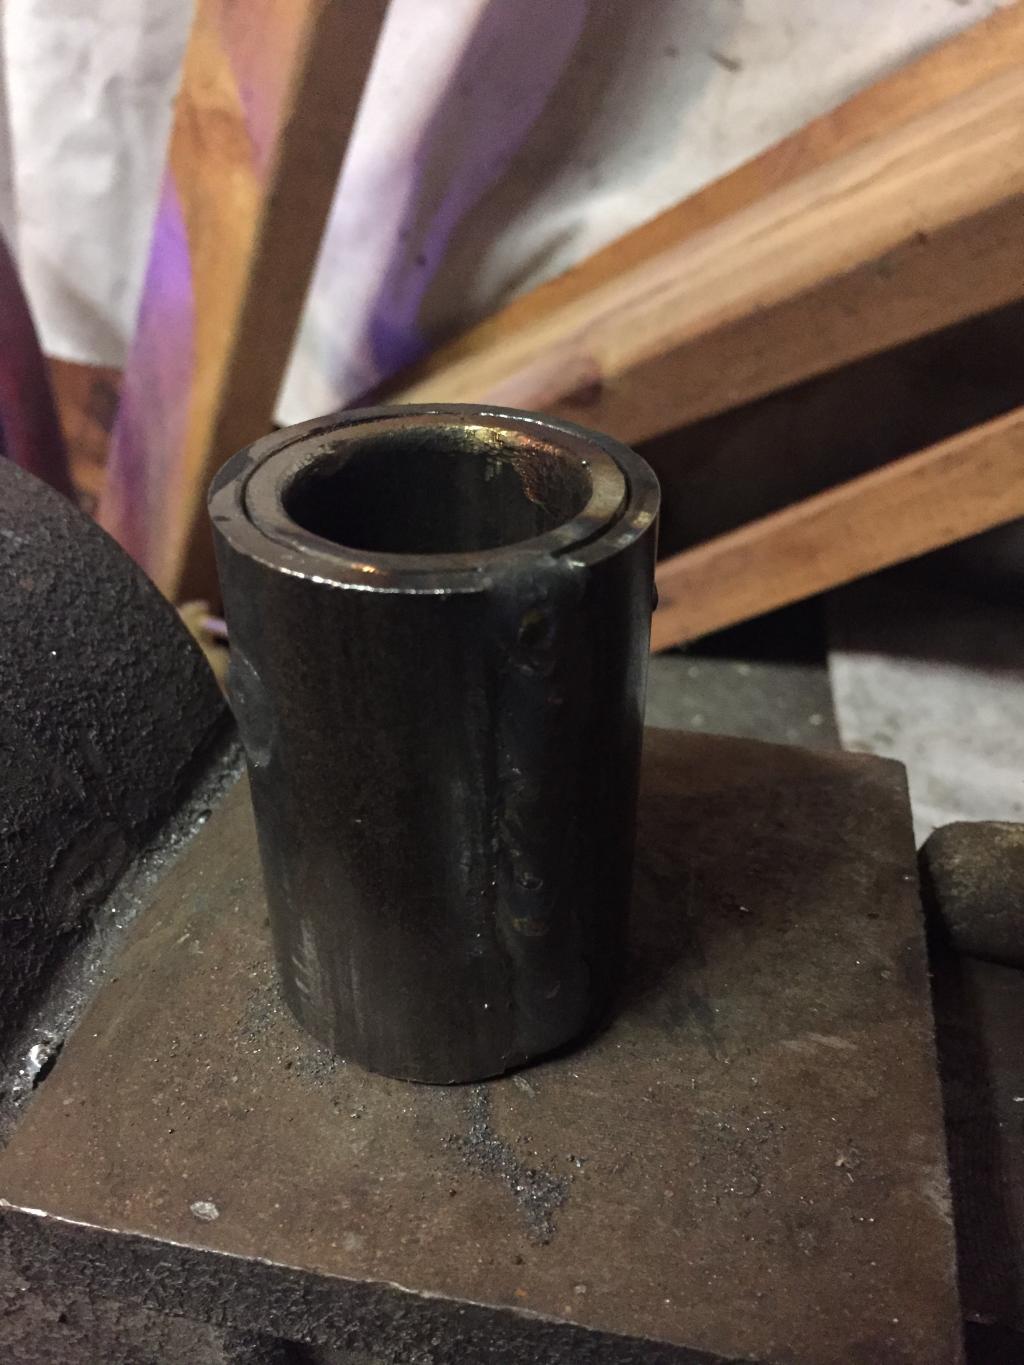
Welder up.
Notched 2x2" square tube to make mounts to weld to the frame.

Inserted OE Toyota bushings and painted them with whatever spray paint I had, silver.
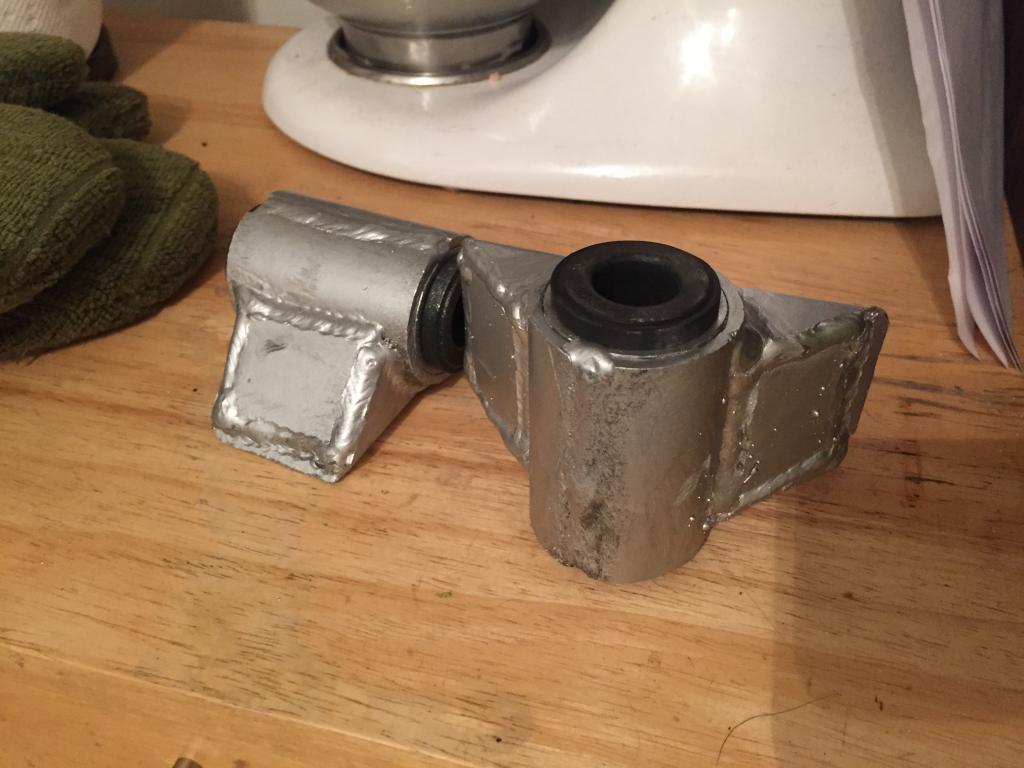
Hangers, hung.
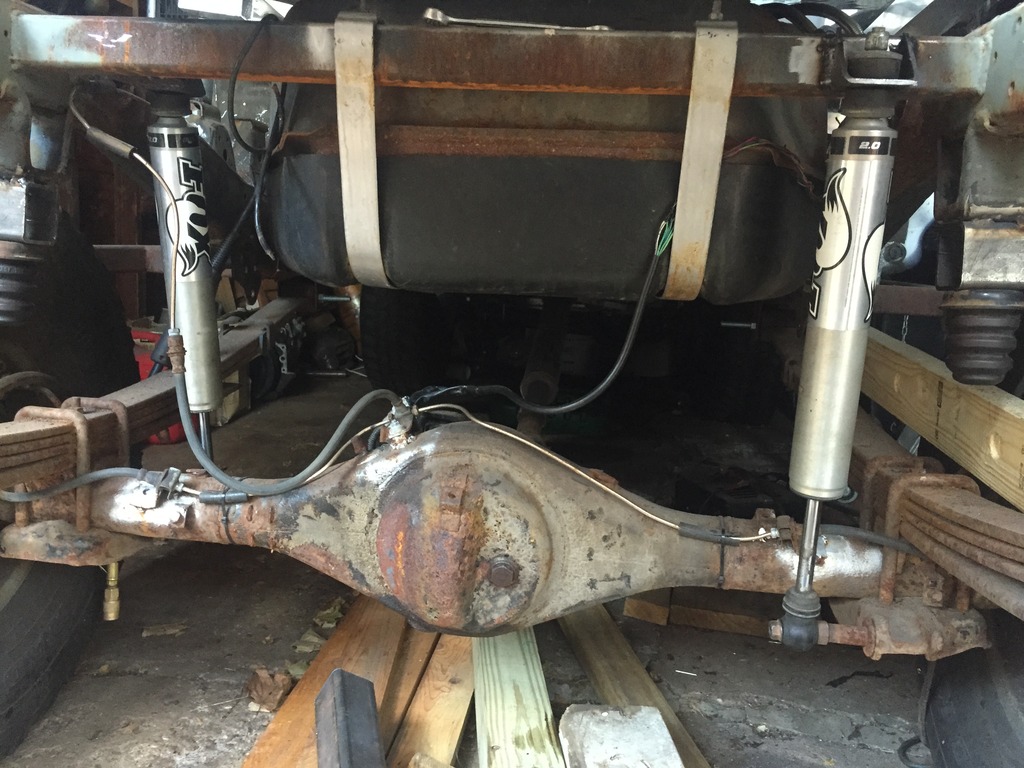
Picked up used Fox 2.0 shocks from a local JK owner, used bump stops from 00' Trailblazer mounted to 2.5" square tubing.
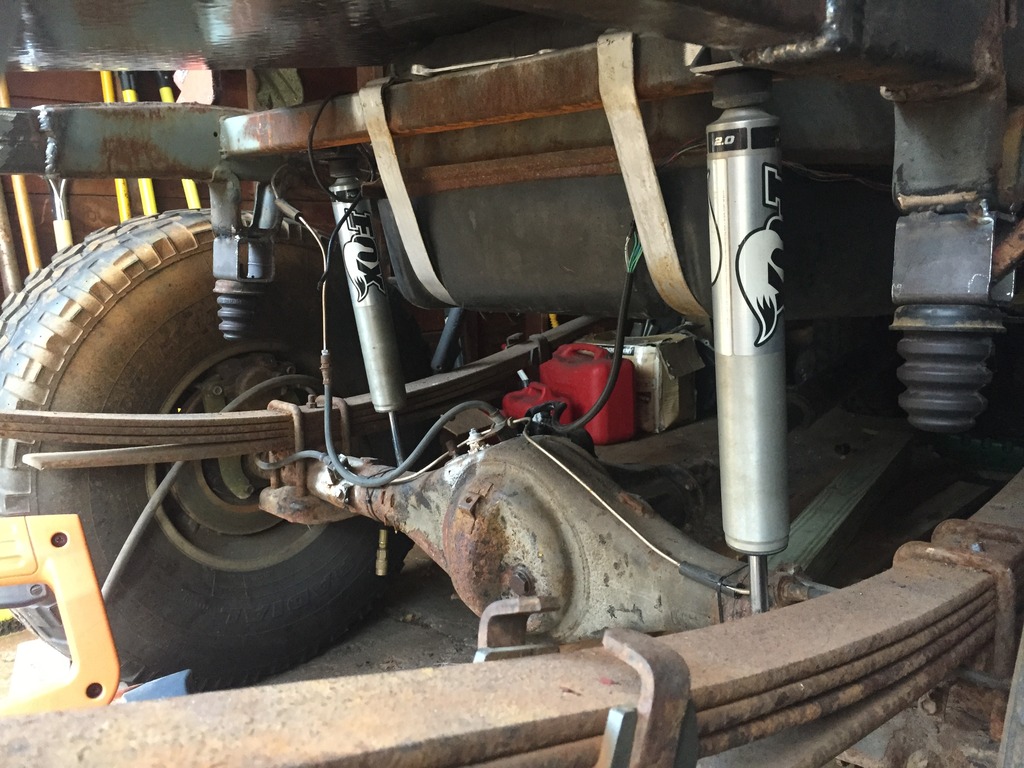
I am going to run U-bolt flip plates, but this will work for now.
 05-26-2015, 11:55 AM
#65
Registered User
Thread Starter
Join Date: Jan 2011
Location: Minneapolis, MN
Posts: 88
Likes: 0
Received 0 Likes
on
0 Posts
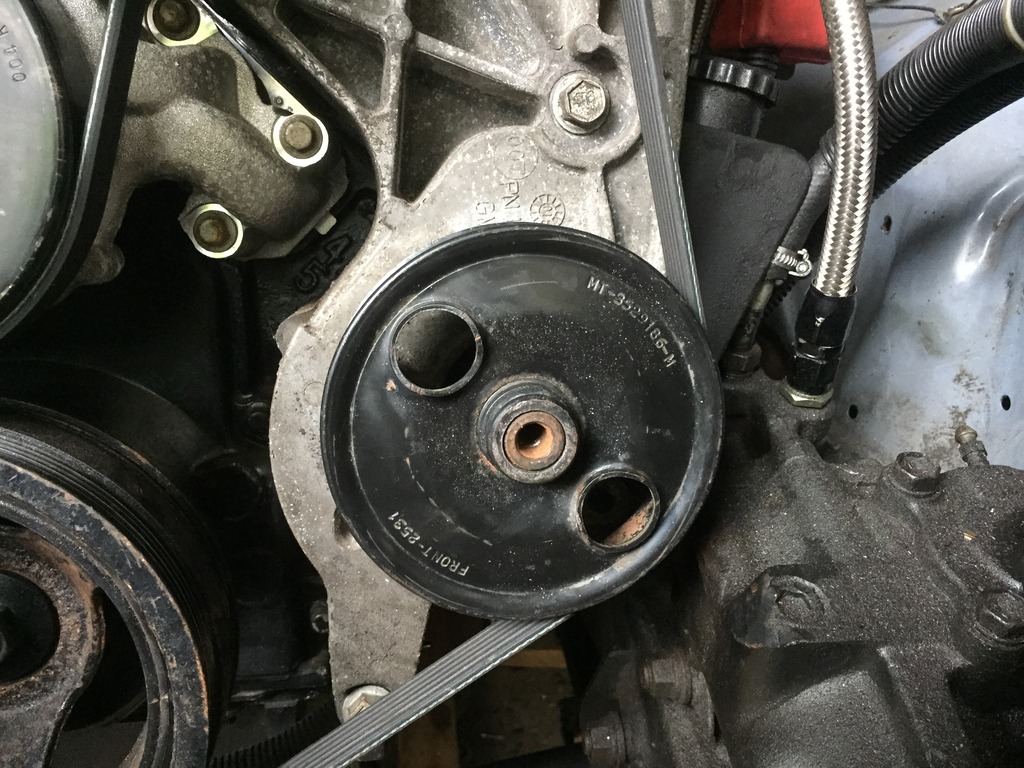
Power steering pulley was ever so slightly touching the Toyota steering gear, I could've moved the gear or find a smaller diameter PS pulley, I choose the later. Wondered through the local junkyard and found a late 80's-early 90's Cadillac Deville w/ a 4.9 V8. The diameter of the Caddy pulley was roughly 1" smaller than the LS truck accessory pulley, so I yanked it. LS truck on left, Caddy on right.
Caddy PS pulley installed. In order to make pulley fit, I had to drill out the hub for 3/4" in order to push the pulley further onto the shaft to get the pulley offset correct in order to get the belt to line up. Result, plenty of clearance.
In a rush to get to the gym, my girlfriend locked me out of the house while I was measuring the radiator for an eFan, so I figured I had no choice but to get busy. Keeping with the theme of the build, my dad recently swapped from a C4 to an AOD transmission in his Ford Falcon, he also swapped the Lokar shifter to a B&M, so I re-purposed the Lokar shifter for my 4L80E.
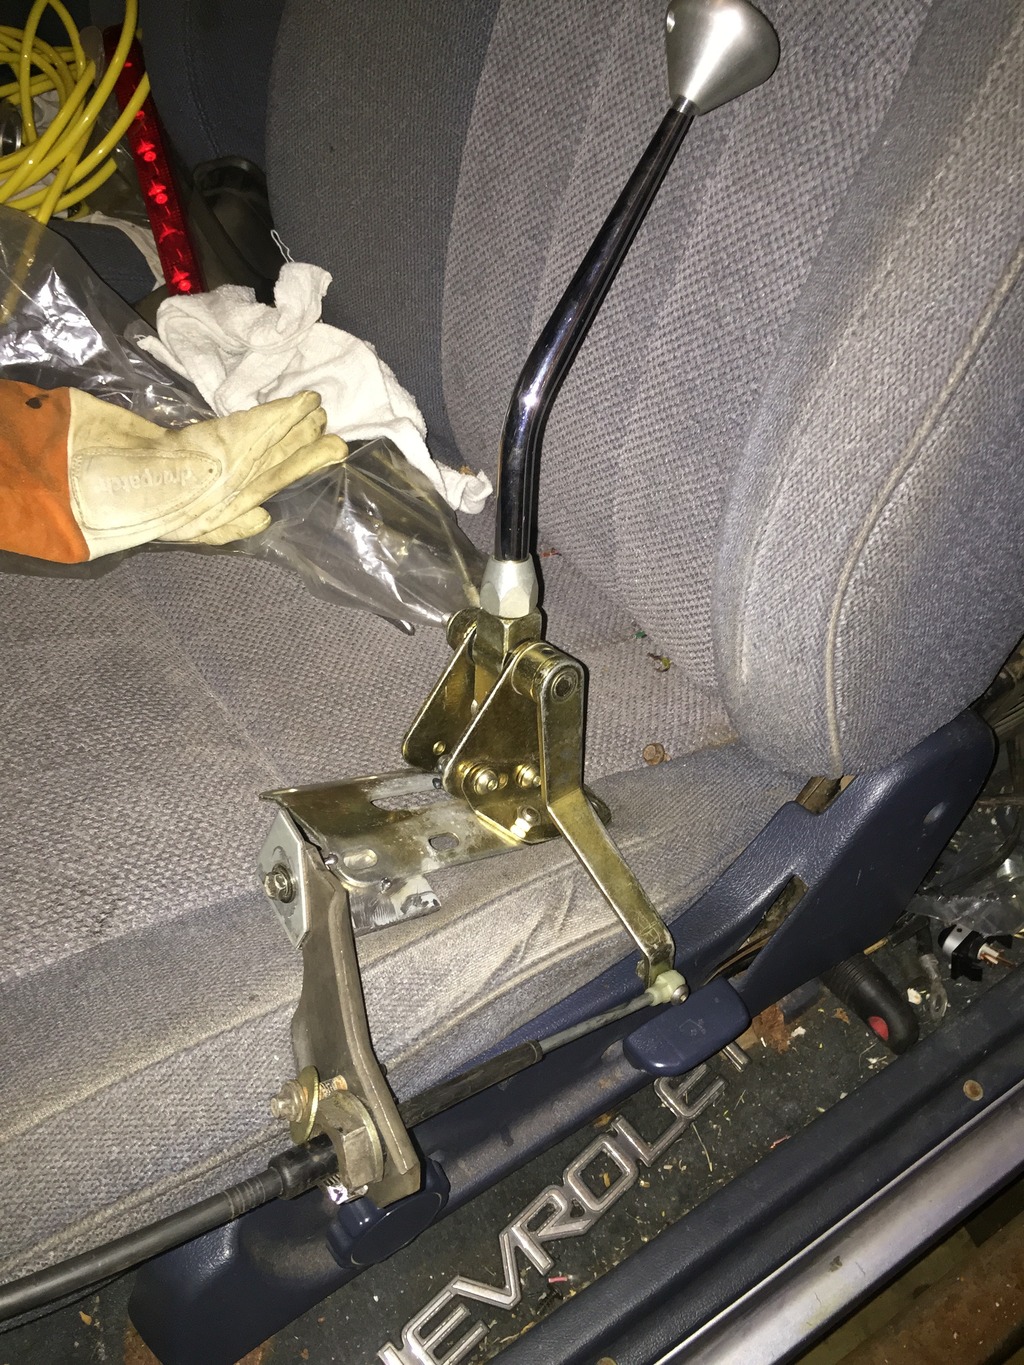
The shifter consist of a factory GM cable, but that's about it. I took a shift lever for a New Process transfer case and drilled the larger end out to fit the shift cable. In order to keep the cable secure, I drilled and tapped the shift lever for a M8 bolt in order to keep the shift cable from backing out or coming loose, cut a slice out of a large nut to use as a hold down mechanism for the bolt that threads into the shift arm, this will keep the cable from backing out under pressure, also drilled through the plastic linkage to run a nut and bolt for a fool-proof connection. Next I used a piece of scrap to extend the shifter base to allow the shift lever to bolt on to the shifter to have some adjustability and ease of removal.
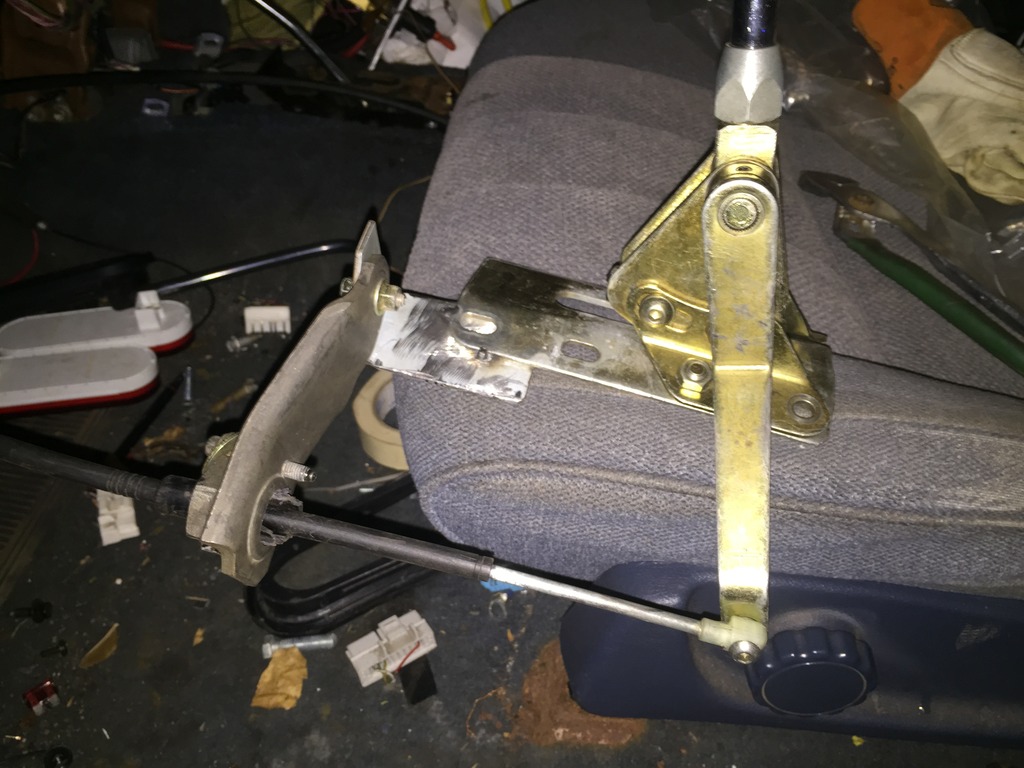
Everything roughed in, both shifters work well and hit all gears, and I got the switch panel mounted.
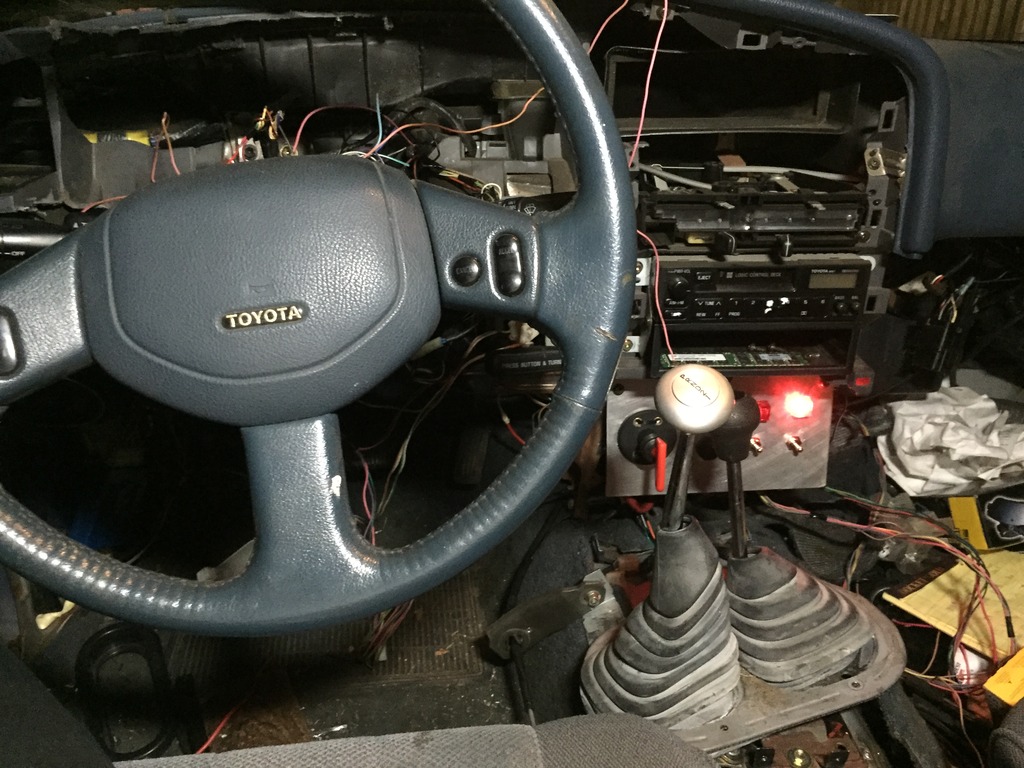
Also added a DOM truss on front axle.
Thanks for checking it out, I'm always around to help, let me know if you have any questions.
Caddy PS pulley installed. In order to make pulley fit, I had to drill out the hub for 3/4" in order to push the pulley further onto the shaft to get the pulley offset correct in order to get the belt to line up. Result, plenty of clearance.
In a rush to get to the gym, my girlfriend locked me out of the house while I was measuring the radiator for an eFan, so I figured I had no choice but to get busy. Keeping with the theme of the build, my dad recently swapped from a C4 to an AOD transmission in his Ford Falcon, he also swapped the Lokar shifter to a B&M, so I re-purposed the Lokar shifter for my 4L80E.
The shifter consist of a factory GM cable, but that's about it. I took a shift lever for a New Process transfer case and drilled the larger end out to fit the shift cable. In order to keep the cable secure, I drilled and tapped the shift lever for a M8 bolt in order to keep the shift cable from backing out or coming loose, cut a slice out of a large nut to use as a hold down mechanism for the bolt that threads into the shift arm, this will keep the cable from backing out under pressure, also drilled through the plastic linkage to run a nut and bolt for a fool-proof connection. Next I used a piece of scrap to extend the shifter base to allow the shift lever to bolt on to the shifter to have some adjustability and ease of removal.
Everything roughed in, both shifters work well and hit all gears, and I got the switch panel mounted.
Also added a DOM truss on front axle.
Thanks for checking it out, I'm always around to help, let me know if you have any questions.
Last edited by 3uzfte; 05-26-2015 at 07:07 PM.
05-26-2015, 07:11 PM
#67
Registered User
Thread Starter
Join Date: Jan 2011
Location: Minneapolis, MN
Posts: 88
Likes: 0
Received 0 Likes
on
0 Posts
05-26-2015, 07:15 PM
#68
Registered User
Join Date: Jan 2011
Posts: 10
Likes: 0
Received 0 Likes
on
0 Posts
thanks for the pics i need direction im pretty capable of doing the work as long as i have a strong idea and a plan. I have my own mig & tig welders gas cutting and a good miller plasma cutter. Northwest offroad were also very helpful and have many brackets , header kits and radiator kits for a smooth drop in they recommended a th 350 with an adaptor transfer kit and a minimum of a 4" lift lit on front and back so yup i do have a lot of work cut out for me . i like your flat bed design .The original Toyota v6 was a bad design I.M.O.O. Everything else about it is perfect size weight etc.
might also sign up over at Pirate, might look hillbilly but if it works and licks butt that is all i care !
might also sign up over at Pirate, might look hillbilly but if it works and licks butt that is all i care !
05-27-2015, 06:39 PM
#69
Registered User
Join Date: Jan 2011
Posts: 10
Likes: 0
Received 0 Likes
on
0 Posts
are you using a 110 or 220 mig welder? ill guess... a 110V as i have a lincoln sp125 110v looks similar to my welds the 220 gives a hotter larger bead
, i think im going to have a whoop ass truck when done Summitt has a nice ATK 350 roller cam 290 HP crate motor complete less carb , the purpose of this truck is long trips on the highways a bit of rock trails able to go to home depot able to handle stop and go traffic and be dependable going throught the angeles national forest ( no cell phone service or anything for about 2 hours) im pretty sure im going to use a tci th 350 trans and just need to figure out the right converter to get and also how to post pics on here of my weekly progress,
, i think im going to have a whoop ass truck when done Summitt has a nice ATK 350 roller cam 290 HP crate motor complete less carb , the purpose of this truck is long trips on the highways a bit of rock trails able to go to home depot able to handle stop and go traffic and be dependable going throught the angeles national forest ( no cell phone service or anything for about 2 hours) im pretty sure im going to use a tci th 350 trans and just need to figure out the right converter to get and also how to post pics on here of my weekly progress,

Thread
Thread Starter
Forum
Replies
Last Post
LittleUgly
86-95 Trucks & 4Runners (Build-Up Section)
15
01-02-2020 01:30 PM
primordialbeast117
86-95 Trucks & 4Runners
11
12-19-2015 12:23 PM


