89' Yota TBI350/4L60E/VF1A
 04-27-2011, 04:01 PM
#21
Registered User
Thread Starter

Join Date: Jan 2011
Location: Minneapolis, MN
Posts: 88
Likes: 0
Received 0 Likes
on
0 Posts
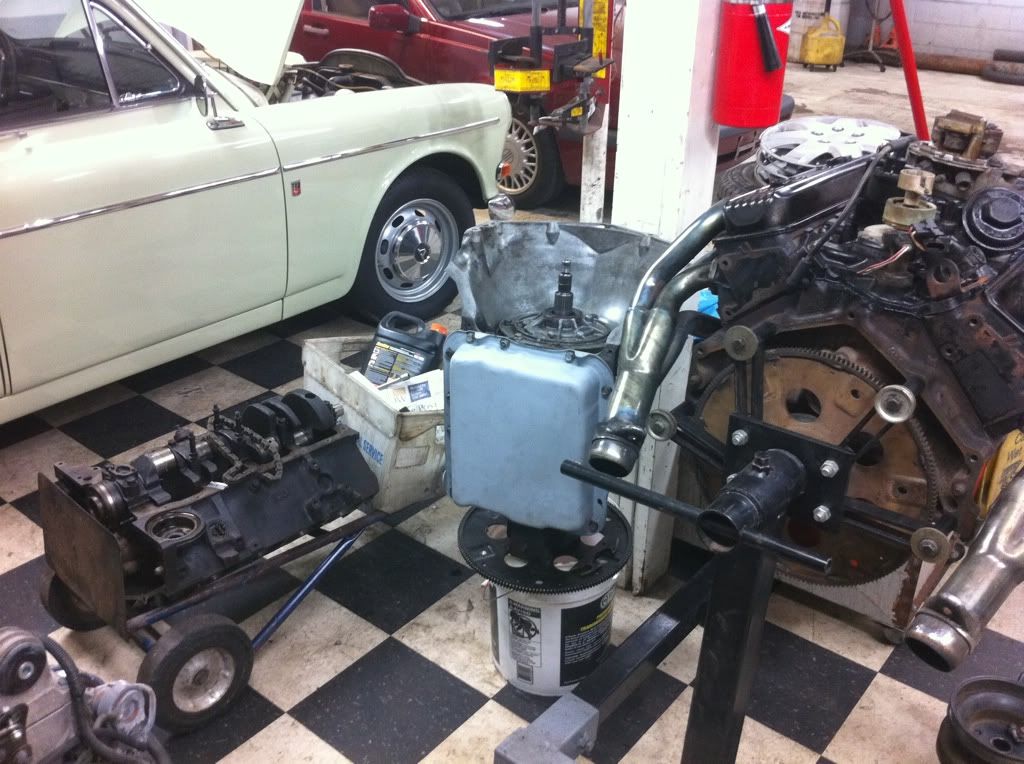
Finally took the time to get the gaskets for the 4L60E. I called Kennedy Transmission right down the street from my work. My friend John Kennedy (not related) must be looking down on me because they gave um to me for free. I know their gaskets, but they took 15 mins out of their day to chase some gaskets down, and then give them to me for nothing. I'm going to buy them pizza tomorrow, for sure. It was funny because I told him it was for a Toyota, his face was pretty funny.
Last edited by 3uzfte; 04-27-2011 at 04:03 PM.
 05-18-2011, 06:50 PM
#22
Registered User
Thread Starter
Join Date: Jan 2011
Location: Minneapolis, MN
Posts: 88
Likes: 0
Received 0 Likes
on
0 Posts
Got the 4L60E buttoned back up with fresh gaskets, I have 2 weeks until it's gotta be ready, so I don't have much time...
Last edited by 3uzfte; 03-02-2014 at 07:26 AM.
05-26-2011, 07:50 PM
#24
Registered User
Thread Starter
Join Date: Jan 2011
Location: Minneapolis, MN
Posts: 88
Likes: 0
Received 0 Likes
on
0 Posts
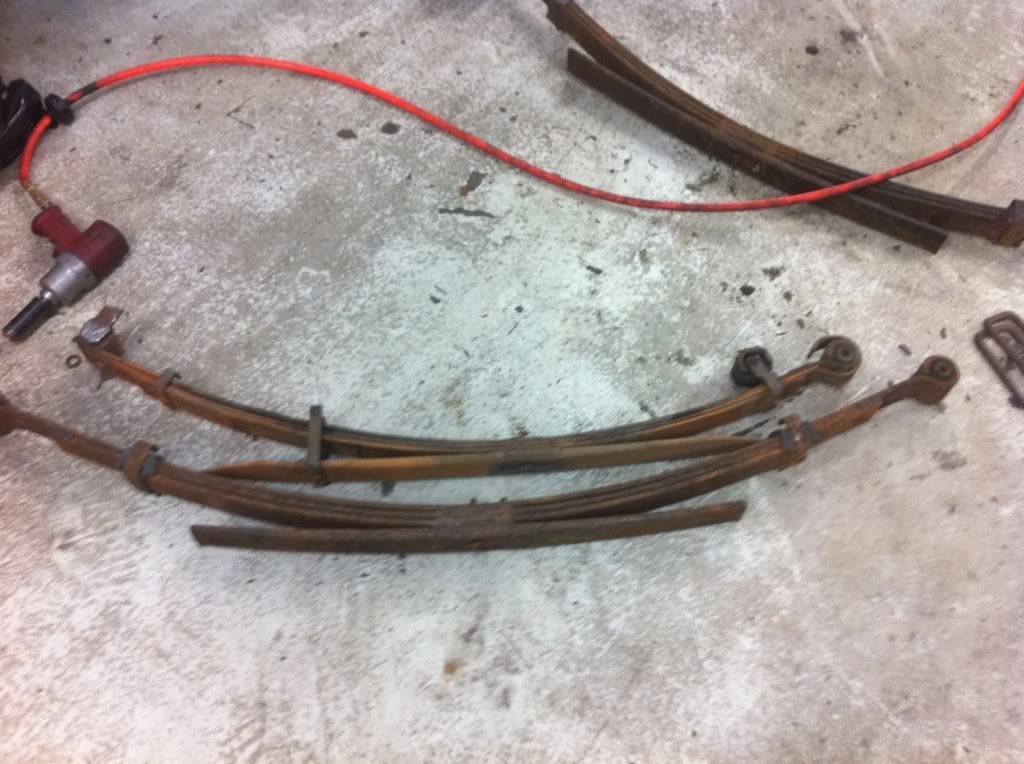
Hello all, sorry for the delay. I tried to do an update from my iPhone, but it lost my whole post, so I just waited until I had time. I don't think I will be able to have it running for this weekend as I still have laundry list of things to do. I spent last weekend putting the Chevy 63's, building my own hangers and shackles. I'm, not entirely sure what I was thinking, but I only made 4" shackles, I should've made 6". I temporarily tacked the hangers, I need to burn them in. I am looking for a spare set of leafs to build a hybrid set for my SAS. Here's the leaf comparison.
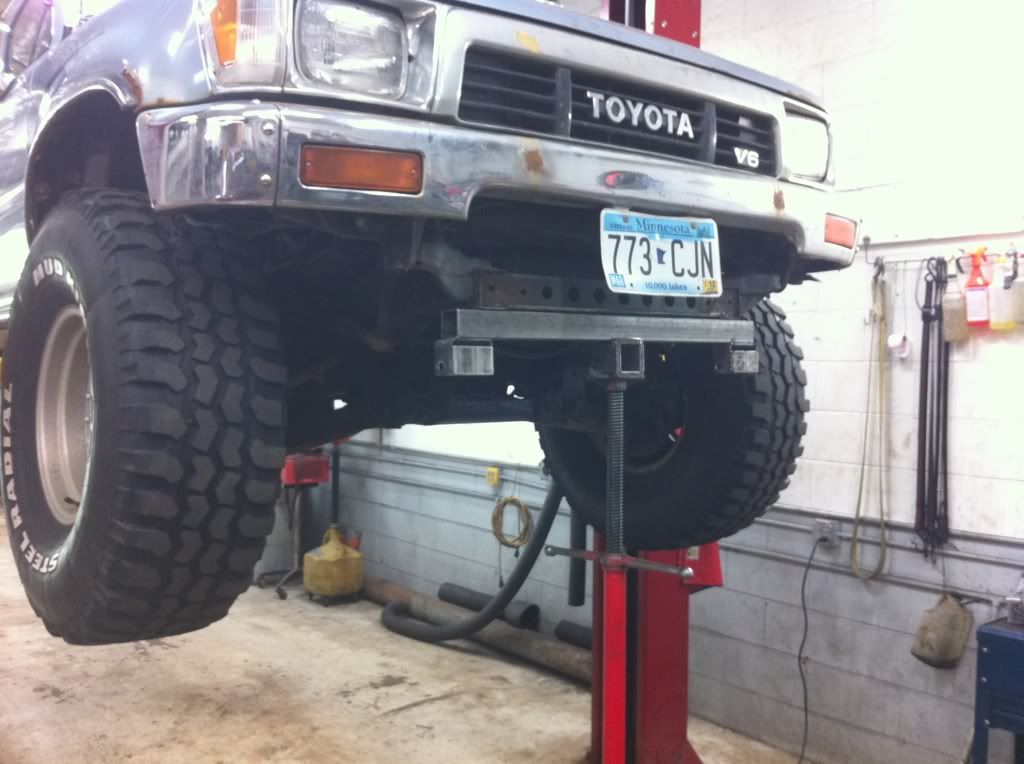
Here is my truck sprung on 63's on those busted up 31"s...
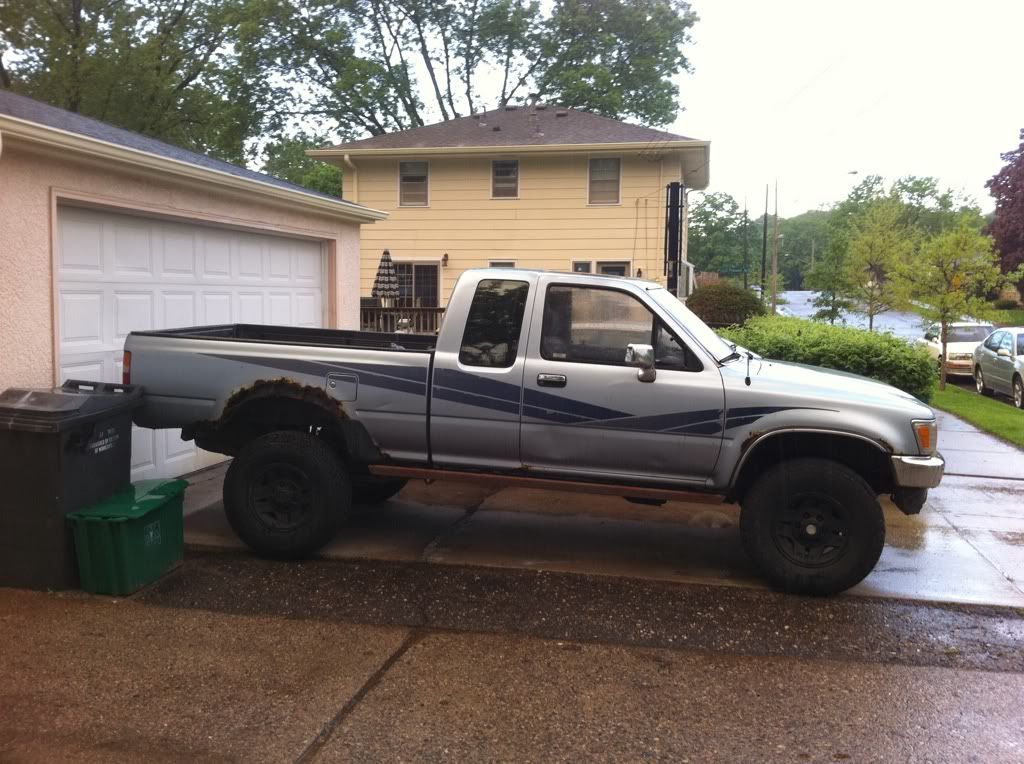
I ended up finding a deal on craigslist from a fellow YT member on a decent set of 35" tires with some 15" rims. I ended up picking them up as a set for $300, and couldn't wait to put them on. I decided that I could manage 35"s instead of 33's because I could find a better deal on these, plus I'm running a small block, so grunt/gearing shouldn't be an issue with 4.10s and 35"s.
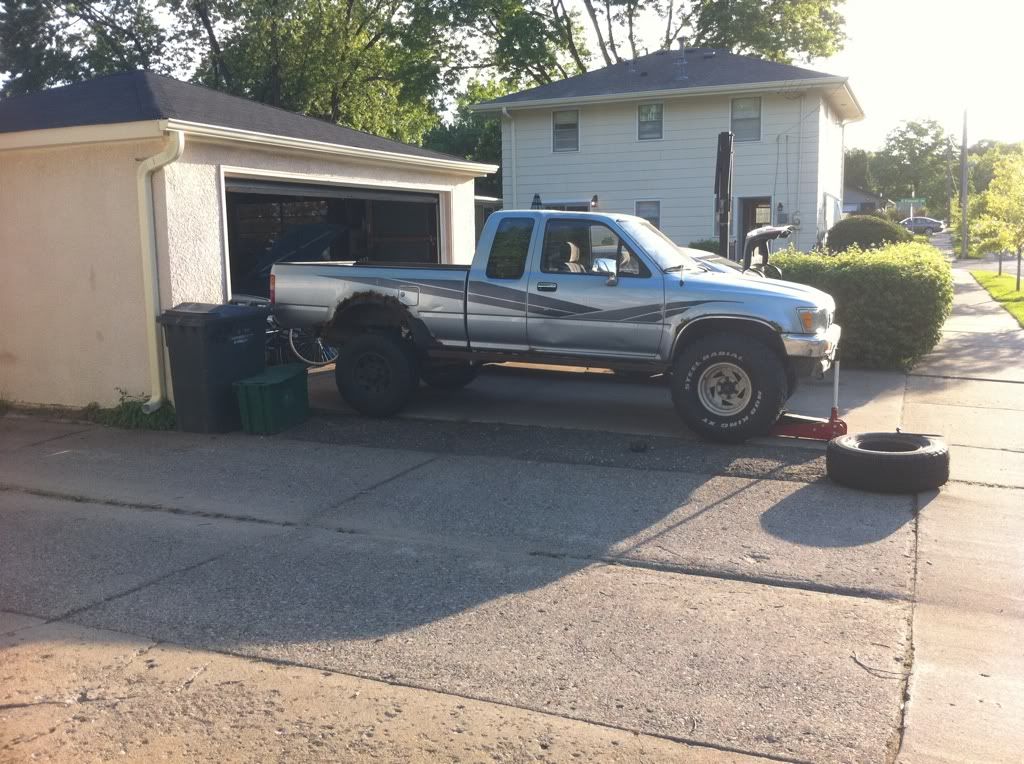
Here's a shot of the difference in tires. I like it.
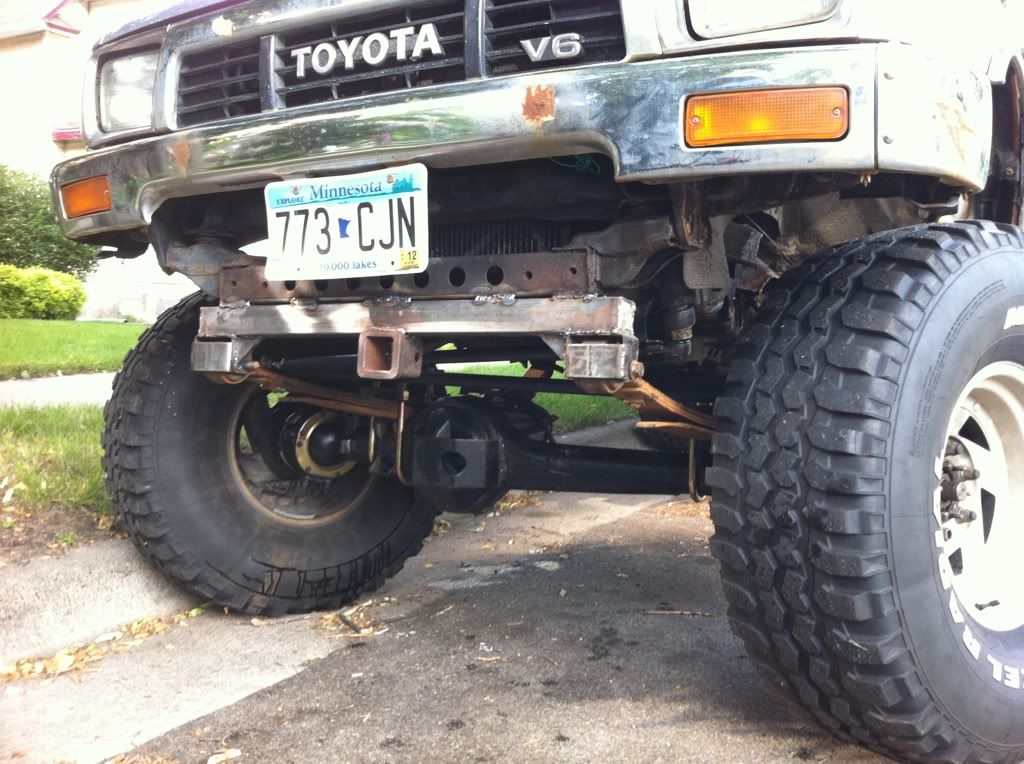
I am also in the process of putting the axle back together. As of now, the housing's been ground down the hi-pinion 3rd, the birfs have been MarTacked, and packed with grease, now I need to assemble the knuckle/hubs. I plan on using my existing IFS hubs and calipers, and using FJ rotors to widen the stance and use my wheels.
Obviously, more to come. This weekend, I am going to make my front hanger and shackles to hang my front springs. I also need shocks, front and rear, I plan on using the F250 shock mounts, and I need a solid axle u-bolt kit. Thanks for stopping by.
Here is my truck sprung on 63's on those busted up 31"s...
I ended up finding a deal on craigslist from a fellow YT member on a decent set of 35" tires with some 15" rims. I ended up picking them up as a set for $300, and couldn't wait to put them on. I decided that I could manage 35"s instead of 33's because I could find a better deal on these, plus I'm running a small block, so grunt/gearing shouldn't be an issue with 4.10s and 35"s.
Here's a shot of the difference in tires. I like it.
I am also in the process of putting the axle back together. As of now, the housing's been ground down the hi-pinion 3rd, the birfs have been MarTacked, and packed with grease, now I need to assemble the knuckle/hubs. I plan on using my existing IFS hubs and calipers, and using FJ rotors to widen the stance and use my wheels.
Obviously, more to come. This weekend, I am going to make my front hanger and shackles to hang my front springs. I also need shocks, front and rear, I plan on using the F250 shock mounts, and I need a solid axle u-bolt kit. Thanks for stopping by.
Last edited by 3uzfte; 03-02-2014 at 07:26 AM.
05-28-2011, 01:30 PM
#25
Registered User
Thread Starter
Join Date: Jan 2011
Location: Minneapolis, MN
Posts: 88
Likes: 0
Received 0 Likes
on
0 Posts
Built my own spring hanger, nothing special, made out of stuff I had already. I am only waiting on SAS u-bolts.
Last edited by 3uzfte; 03-02-2014 at 07:26 AM.
09-01-2011, 05:14 AM
#27
Registered User
Thread Starter
Join Date: Jan 2011
Location: Minneapolis, MN
Posts: 88
Likes: 0
Received 0 Likes
on
0 Posts
Sorry for the lack of updates, I've also got a turbocharged Lexus LS400 that I've built that I'm finally getting around to bring to shows and working the kinks out. The Toyota is next, plus I need my winter beater back. This project has taking such a long time, it's hard to push myself to stay after a long day's work and build my stuff, I'm going to try to get it done before snow falls when the Lexi (GS430 and LS400t) go bye bye. Anyways here's where I'm at...
I've SAS'd er with all the junkyard goodies I could get my hands on, IFS hubs, V6 calipers, and FJ rotors.
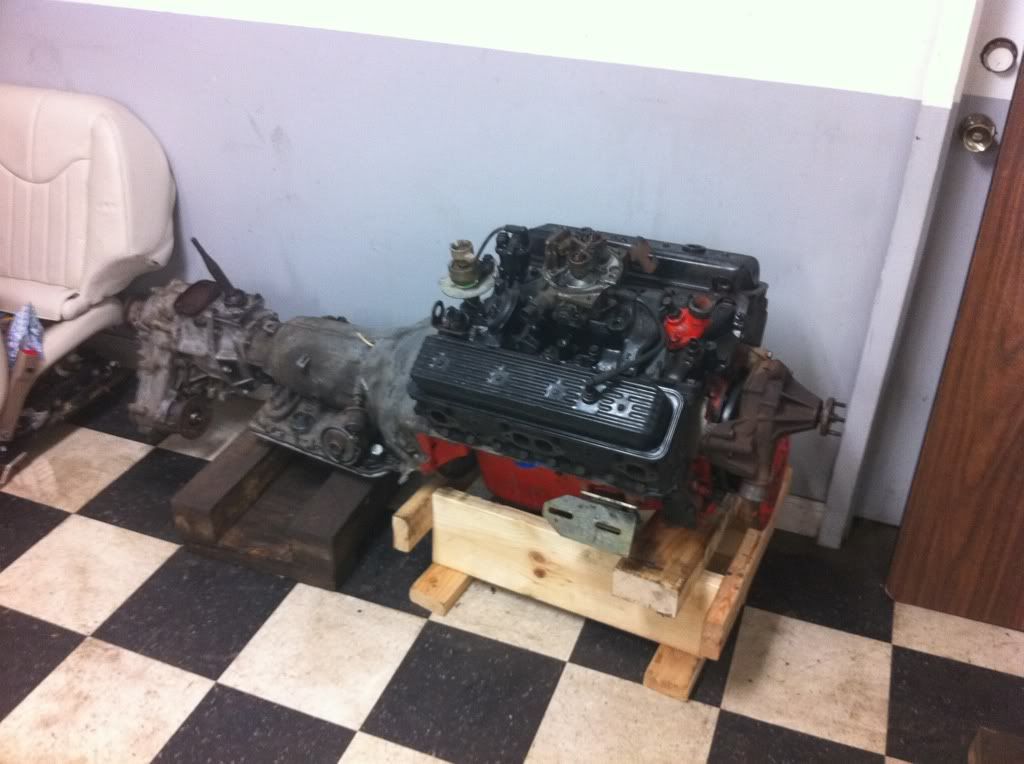
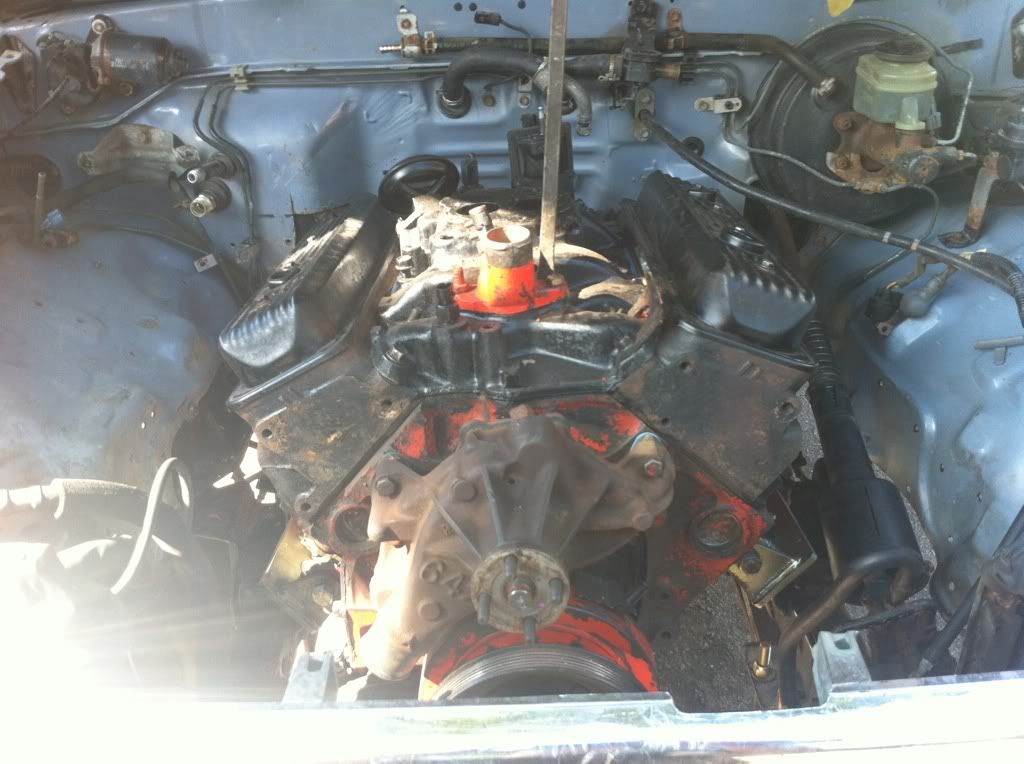
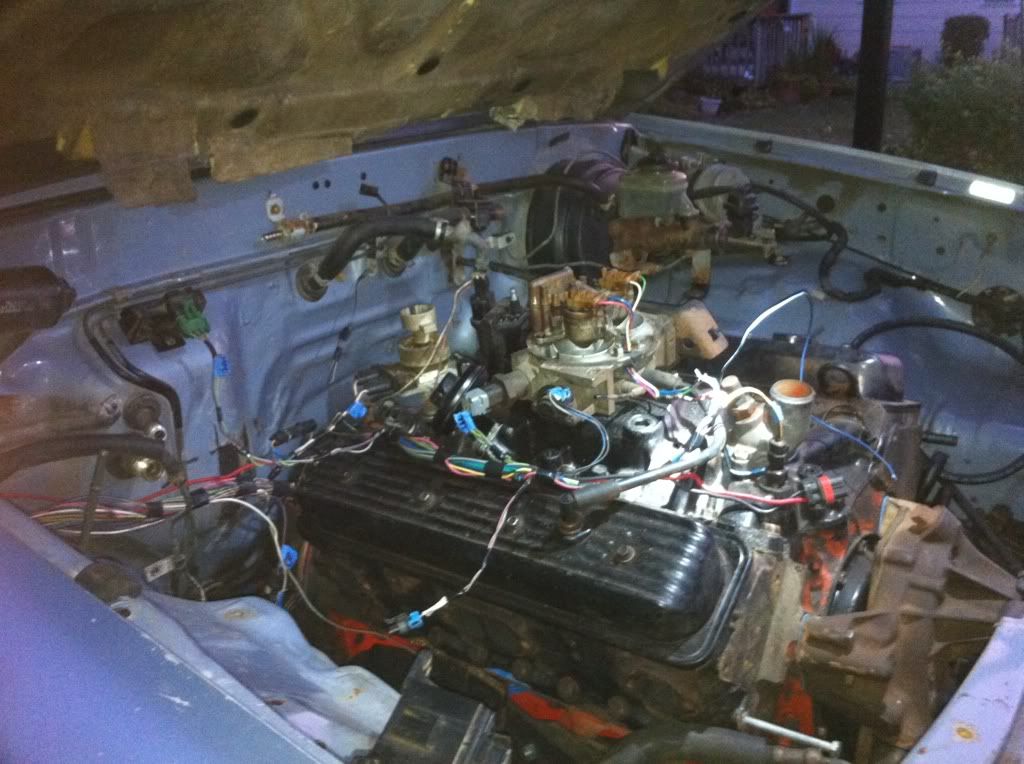
Here's where I'm at as of today. 78' 350 Block, 93' TBI heads & intake, 93' 4L60E 4x4, AA TH350-Toy TC adapter, Forward Shift RF1A...
I'm going to try to do the swap this weekend, and try to make it to the Minnesota state fair.
I've SAS'd er with all the junkyard goodies I could get my hands on, IFS hubs, V6 calipers, and FJ rotors.
Here's where I'm at as of today. 78' 350 Block, 93' TBI heads & intake, 93' 4L60E 4x4, AA TH350-Toy TC adapter, Forward Shift RF1A...
I'm going to try to do the swap this weekend, and try to make it to the Minnesota state fair.
Last edited by 3uzfte; 03-02-2014 at 07:39 AM.
09-04-2011, 10:57 AM
#28
Registered User
Thread Starter
Join Date: Jan 2011
Location: Minneapolis, MN
Posts: 88
Likes: 0
Received 0 Likes
on
0 Posts
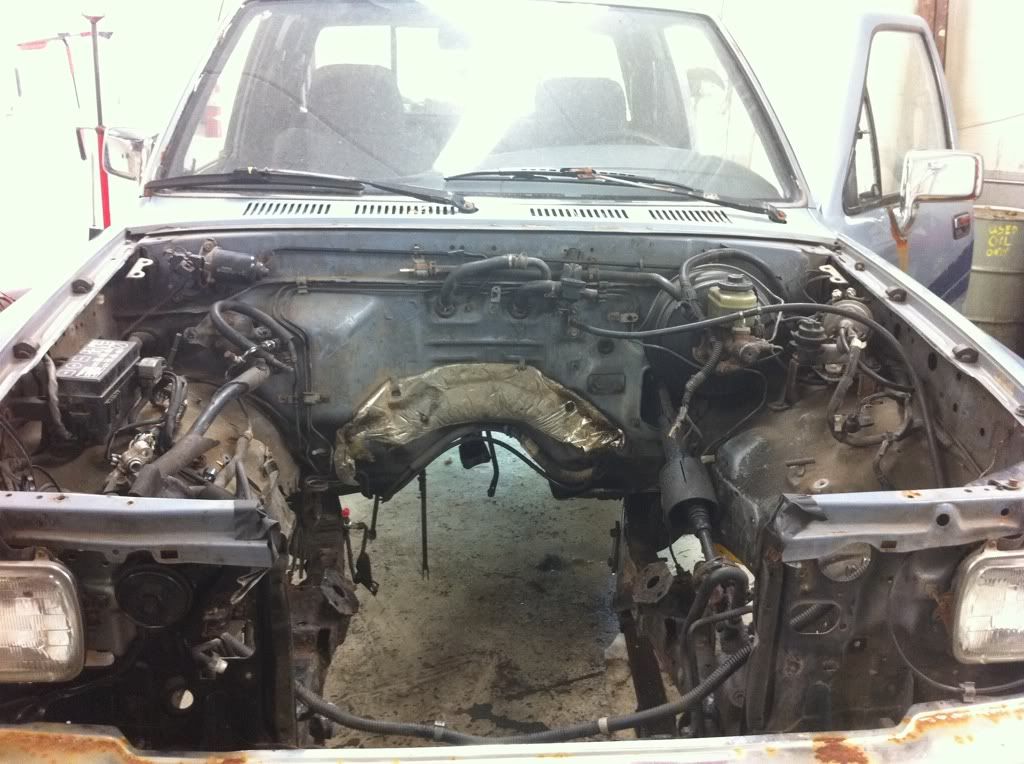
Decided I would get what I could done over the weekend with my dad's help. Here's how we started.
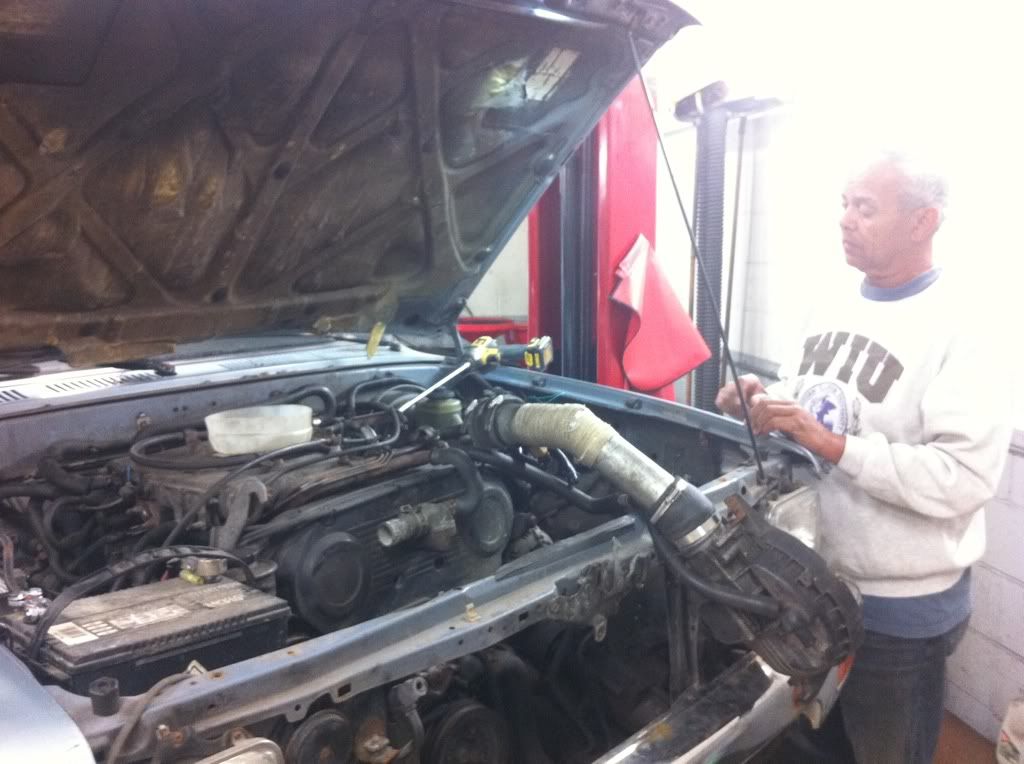
Getting it out wasn't bad at all.
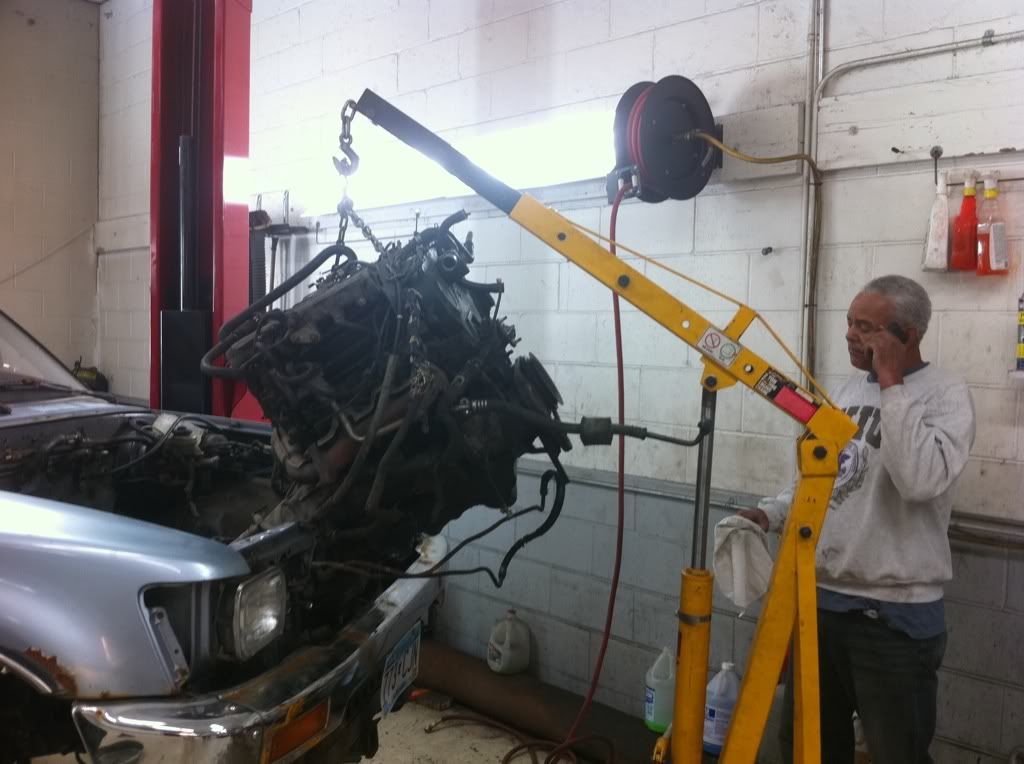
Here's how we ended up.
Getting it out wasn't bad at all.
Here's how we ended up.
Last edited by 3uzfte; 03-02-2014 at 07:39 AM.
09-05-2011, 03:46 PM
#29
Registered User
Thread Starter
Join Date: Jan 2011
Location: Minneapolis, MN
Posts: 88
Likes: 0
Received 0 Likes
on
0 Posts
Ok, so I miss spoke when I did the title and but I think I found out I really have an RF1A, not a VF1A as the title states.
He did most of the work...
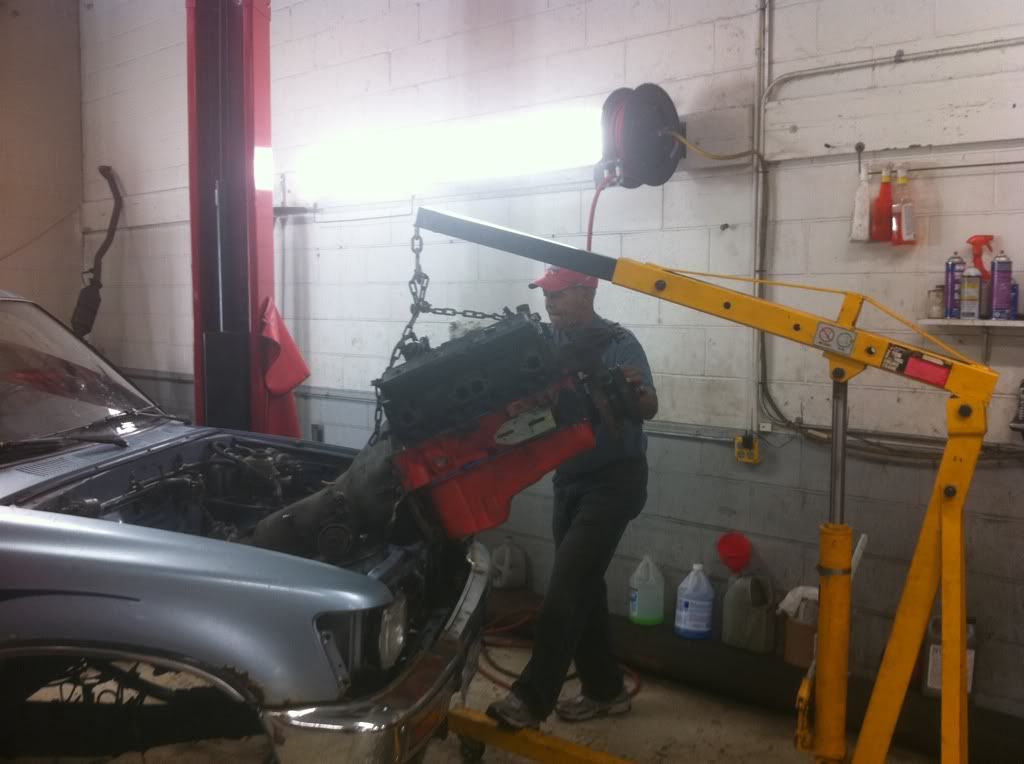
It's kind of hard to tell, but it's sitting really far forward for now because as to my understanding the mounts I bought we supposed to bolt up to my V6 mounts, but came no where close. So, we improvised and came up with temp mounts just to hold it in place. I'll fab something up when I have some time.
Although there's a hole in the firewall, it was cut prematurely and the engine sits well clear of the firewall, which is more than can be said about the bellhousing/firewall clearance. Since I making everything from scratch, I'm trying to get the powertrain up as high as possible, obviously for ground clearance, but without too much body work I decided I had to move the setup a little forward which should help.

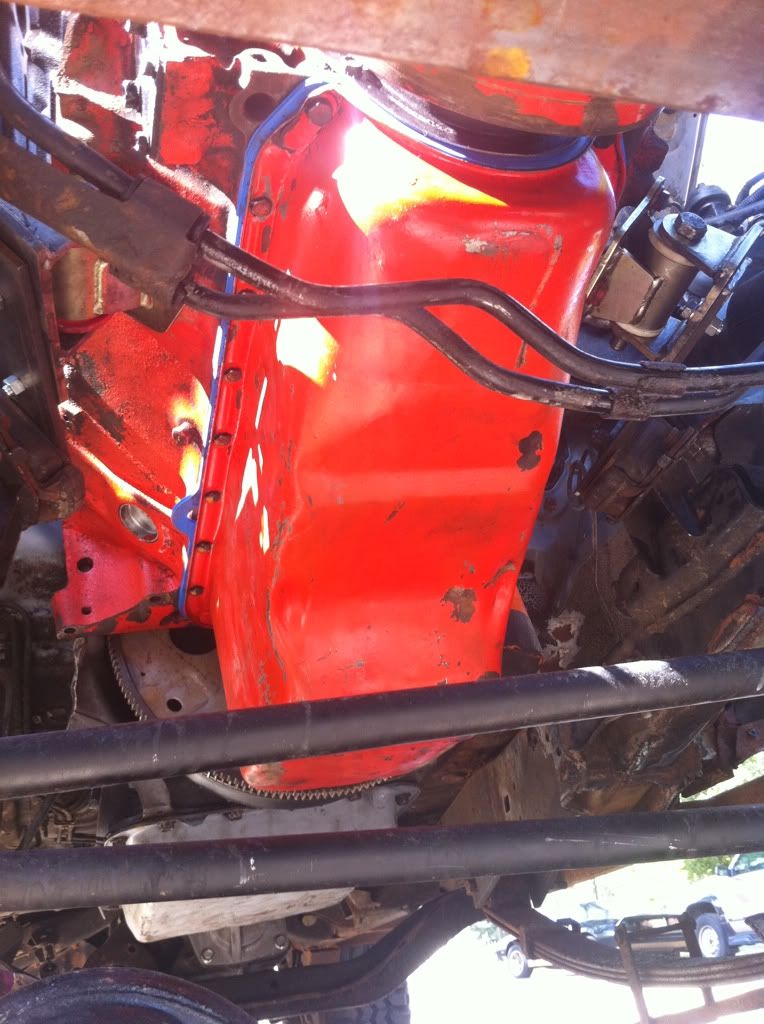
Here's an underneath shot, you can see the extension that was made to mount the existing V6 mounts to the custom mounts. Tons of clearance for the SBC, unfortunately it's sitting so far forward that I won't be able to run a radiator up front, unless I run a custom driveshaft (which I want to do) because the 350/4L60E/AA adapter/RF1A is about 4-6" longer than the 3VZE/A340H combo. I also didn't account for the difference in trans/TC mounts, the A340H uses a different mount setup than the RF1A. You can see there is no mount underneath the TC, I think it's pointless for me to fab a mount setup, rather just fab up a flat crossmember.
Hunk o' junk.
Things I didn't account for, but wasn't surprised about...
1) My motor mounts not bolting up to the stock mounts, reason being that the 4L60E is ~3" longer than the th350, and I didnt want to fabricate new crossmember.
2) The RF1A and the A340H mount bolt patterns being different.
3) I'll probably have to run a rear mounted radiator due the the very little clearance I have from the engine being pushed forward, I don't think think there is even 2" from the front crossmember.
Why do people not use this shock mount? Is it because it would limit the wheel travel from being too short?
He did most of the work...
It's kind of hard to tell, but it's sitting really far forward for now because as to my understanding the mounts I bought we supposed to bolt up to my V6 mounts, but came no where close. So, we improvised and came up with temp mounts just to hold it in place. I'll fab something up when I have some time.
Although there's a hole in the firewall, it was cut prematurely and the engine sits well clear of the firewall, which is more than can be said about the bellhousing/firewall clearance. Since I making everything from scratch, I'm trying to get the powertrain up as high as possible, obviously for ground clearance, but without too much body work I decided I had to move the setup a little forward which should help.
Here's an underneath shot, you can see the extension that was made to mount the existing V6 mounts to the custom mounts. Tons of clearance for the SBC, unfortunately it's sitting so far forward that I won't be able to run a radiator up front, unless I run a custom driveshaft (which I want to do) because the 350/4L60E/AA adapter/RF1A is about 4-6" longer than the 3VZE/A340H combo. I also didn't account for the difference in trans/TC mounts, the A340H uses a different mount setup than the RF1A. You can see there is no mount underneath the TC, I think it's pointless for me to fab a mount setup, rather just fab up a flat crossmember.
Hunk o' junk.
Things I didn't account for, but wasn't surprised about...
1) My motor mounts not bolting up to the stock mounts, reason being that the 4L60E is ~3" longer than the th350, and I didnt want to fabricate new crossmember.
2) The RF1A and the A340H mount bolt patterns being different.
3) I'll probably have to run a rear mounted radiator due the the very little clearance I have from the engine being pushed forward, I don't think think there is even 2" from the front crossmember.
Why do people not use this shock mount? Is it because it would limit the wheel travel from being too short?
Last edited by 3uzfte; 03-02-2014 at 07:42 AM.
 11-03-2011, 10:37 AM
#31
Registered User
Thread Starter
Join Date: Jan 2011
Location: Minneapolis, MN
Posts: 88
Likes: 0
Received 0 Likes
on
0 Posts
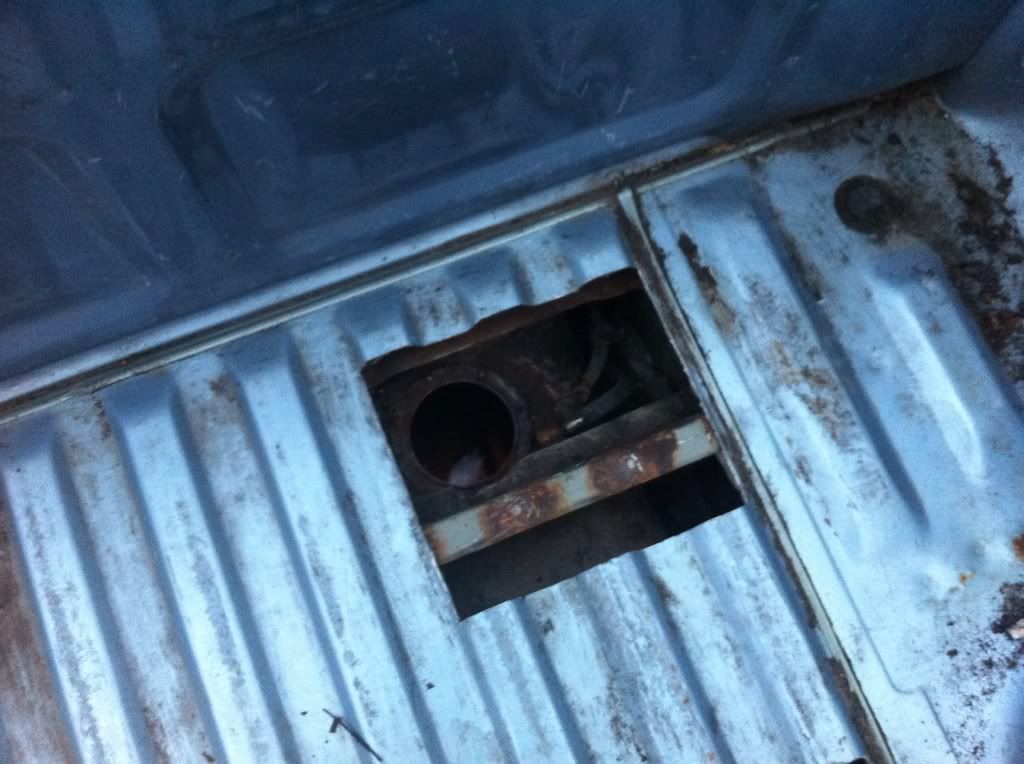
Swapping fuel pumps from the hi-psi Yota pump to the lo-psi GM pump so I cut a hole in the bed to save some time.
New GM pump on the left, Yota pump of the right.
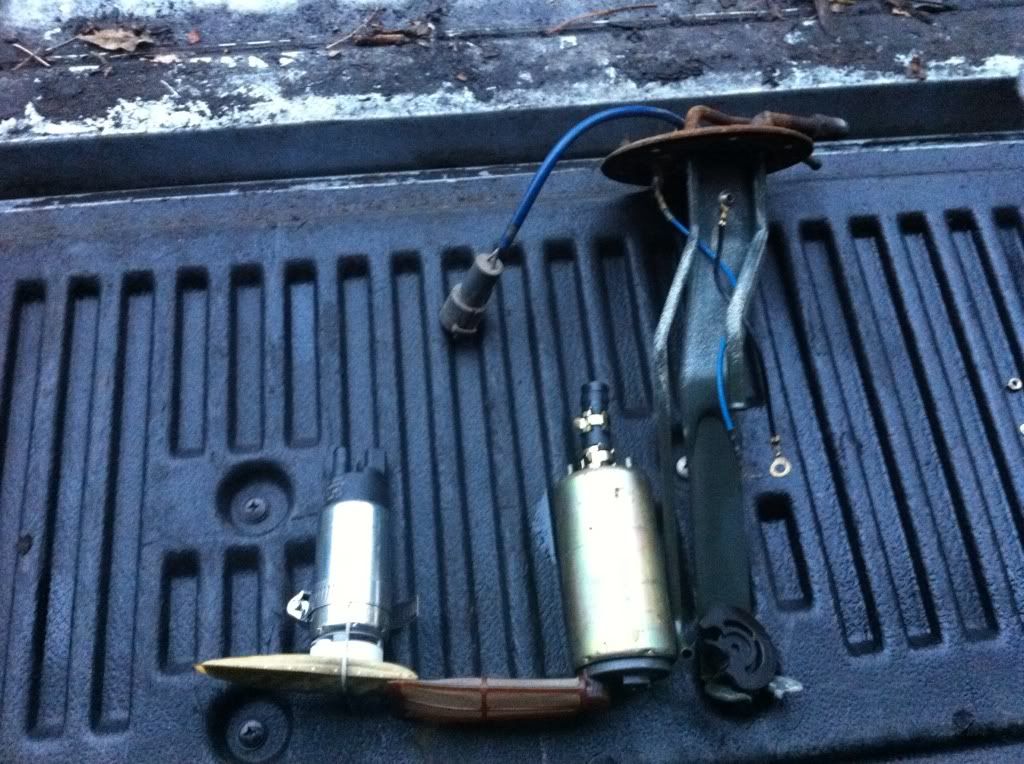
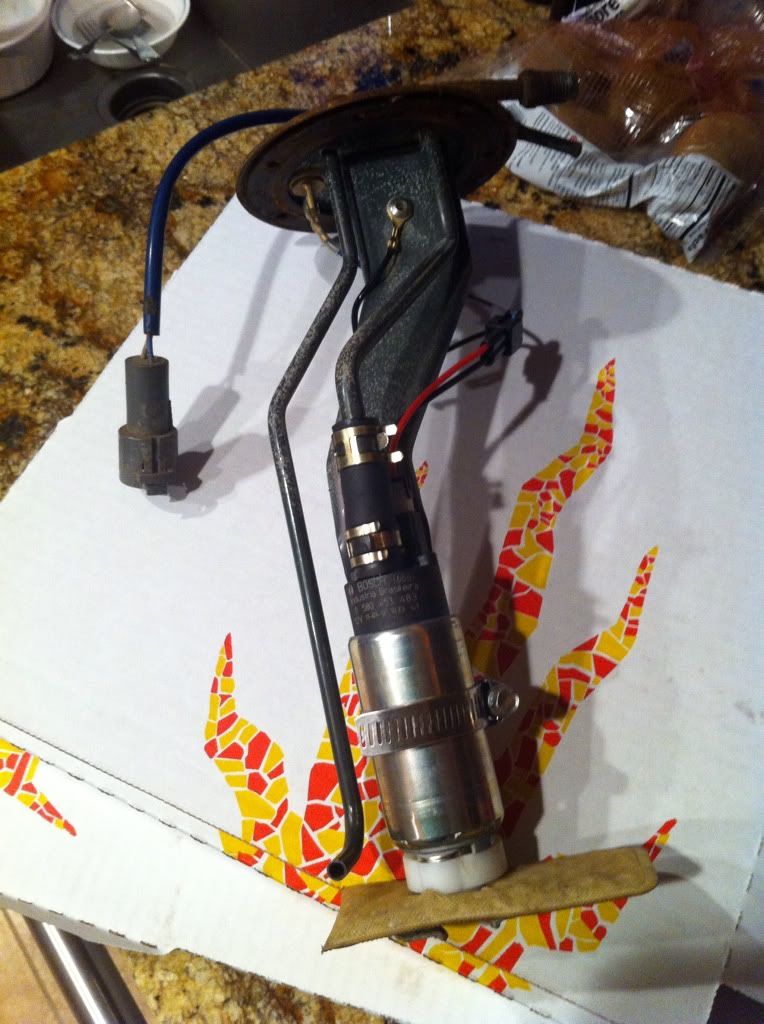
Yota pump plumbed and wired up.
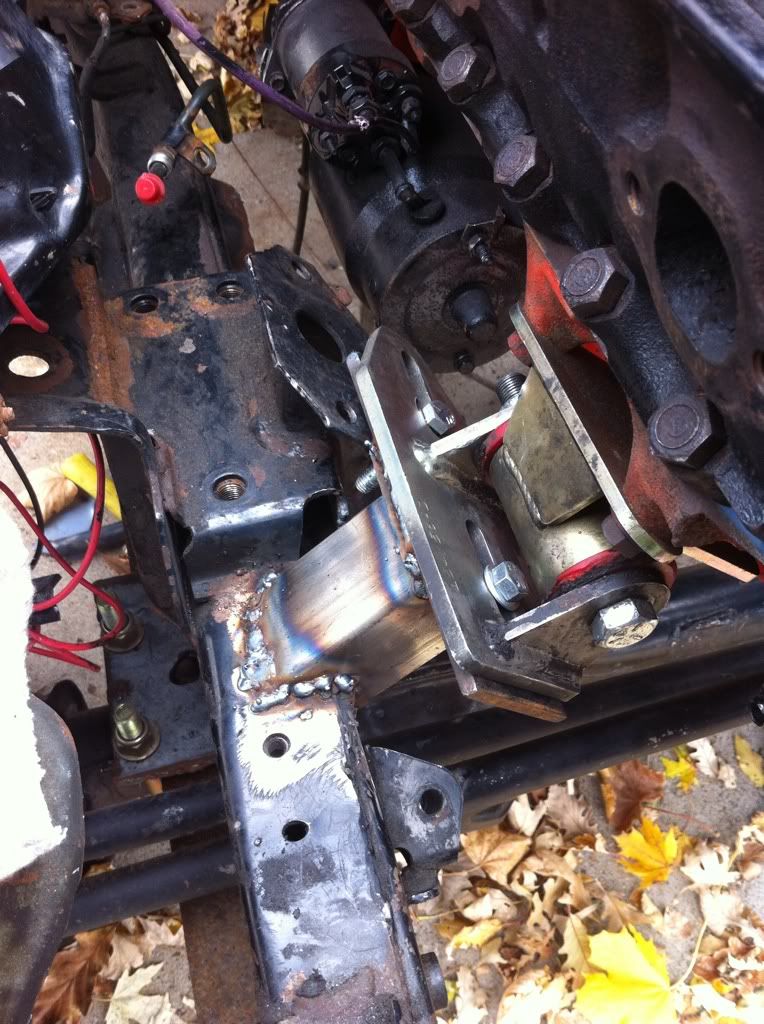
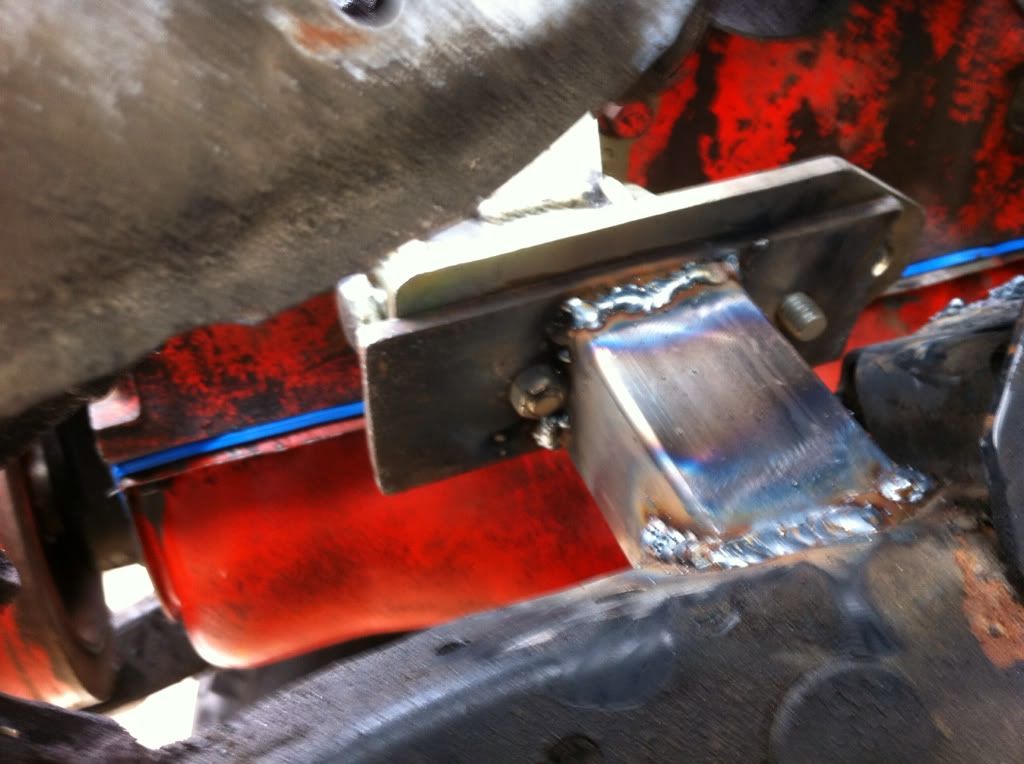
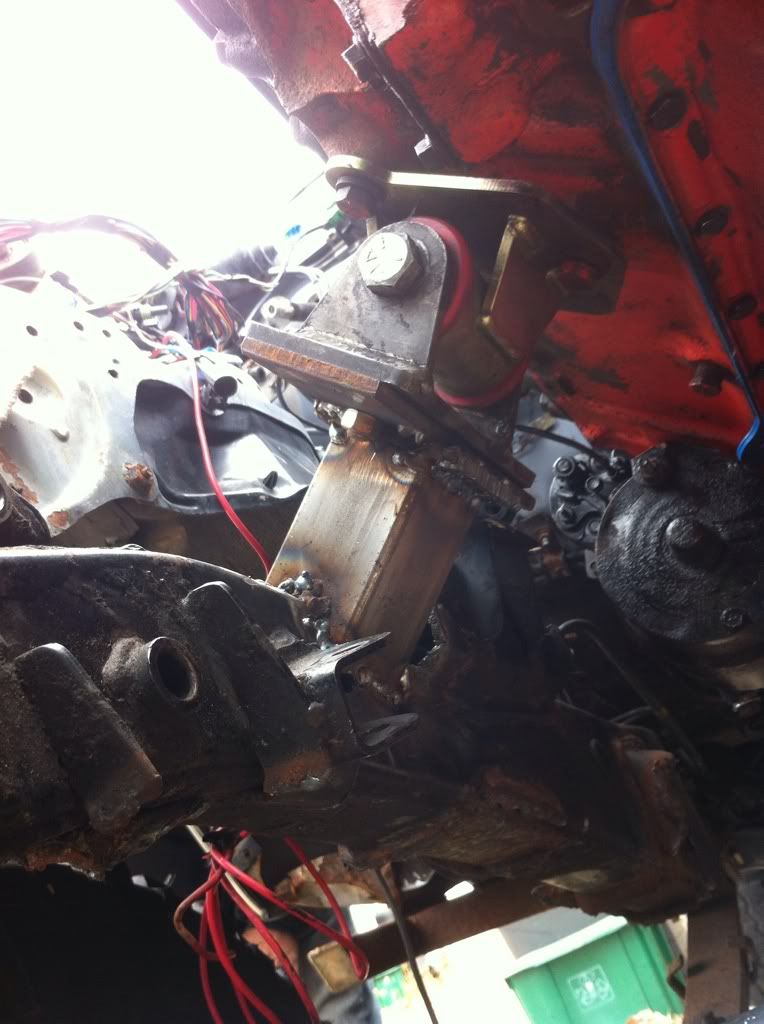
Since I used the 4L60E, instead of the TH350, the TC mount was moved back roughly 2". And when it was mocked up in the vehicle, the mount butted up against the x-member. This made me not want to make a new x-member, but rather modify a mount setup to work with the existing one. Here's what I came up with using 3/8" steel.
New GM pump on the left, Yota pump of the right.
Yota pump plumbed and wired up.
Since I used the 4L60E, instead of the TH350, the TC mount was moved back roughly 2". And when it was mocked up in the vehicle, the mount butted up against the x-member. This made me not want to make a new x-member, but rather modify a mount setup to work with the existing one. Here's what I came up with using 3/8" steel.
Last edited by 3uzfte; 03-02-2014 at 07:43 AM.
11-06-2011, 11:19 AM
#32
Registered User
Thread Starter
Join Date: Jan 2011
Location: Minneapolis, MN
Posts: 88
Likes: 0
Received 0 Likes
on
0 Posts
Update.
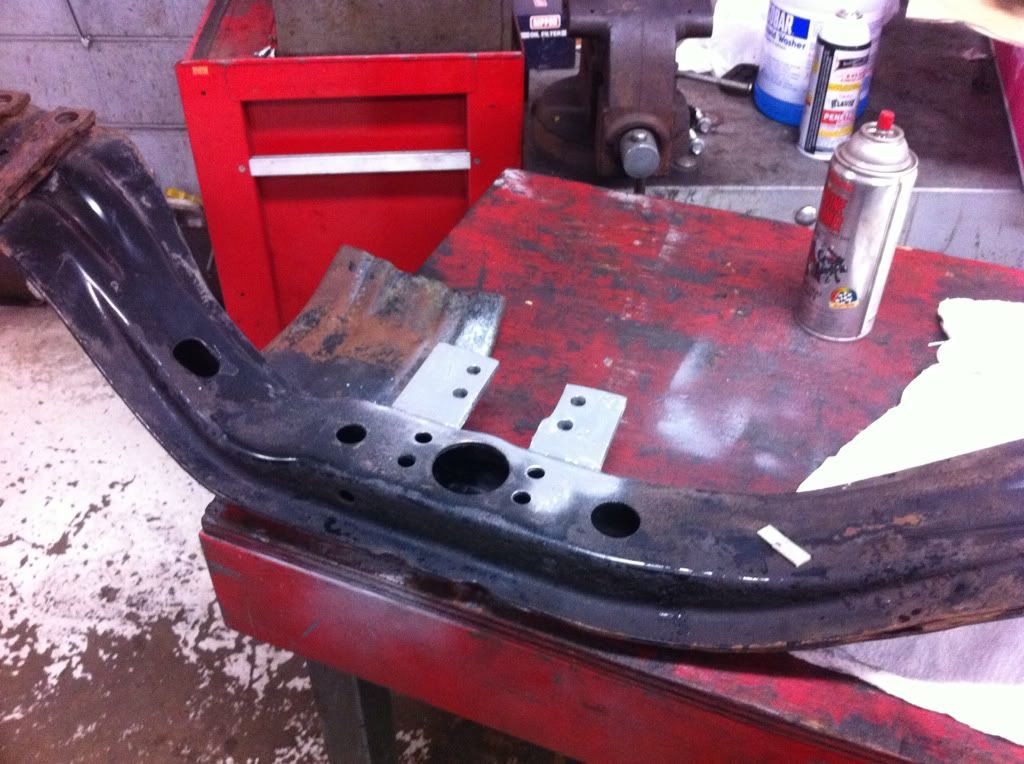
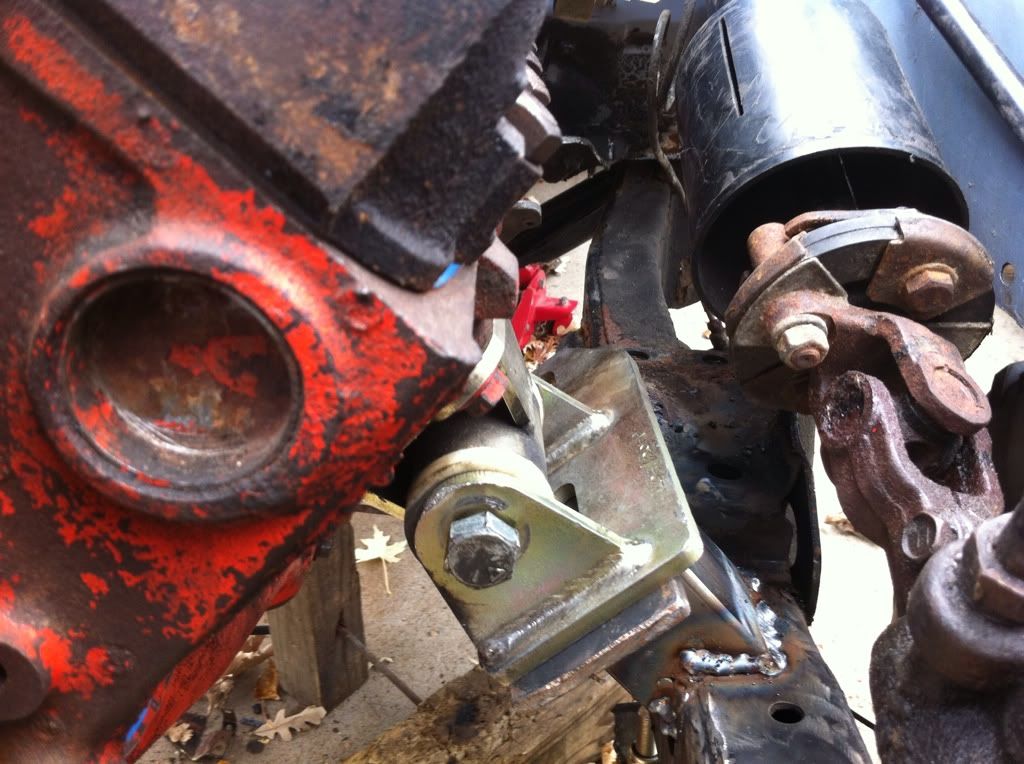
It's getting colder, and we're lucky not to have snow by now. Since I had the crossmember off, I decided to trim it down. I cut about 1" off, and instead of plating the bottom, I decided to use 1x1 square tube to strengthen it, and painted it up.
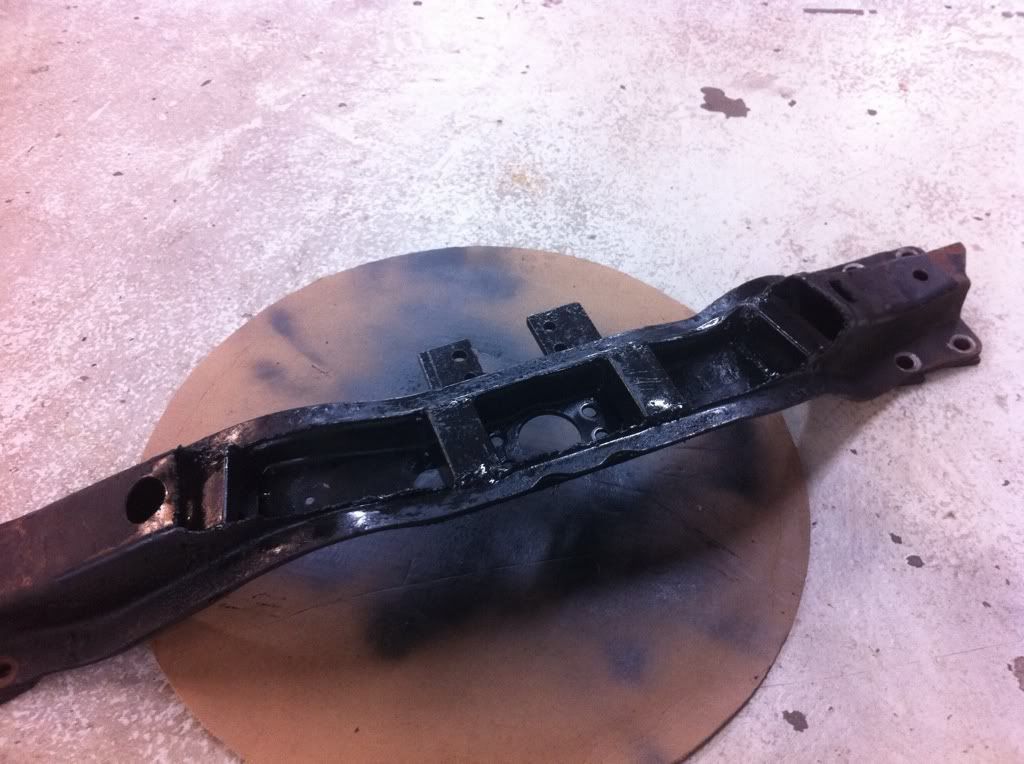
Gained about 1", and I don't really think I lost any structural support, not bad for the OE x-member.

I couldn't figure out the engine mounts to save my life, so I went back to square one and eventually came up with these.
It's getting colder, and we're lucky not to have snow by now. Since I had the crossmember off, I decided to trim it down. I cut about 1" off, and instead of plating the bottom, I decided to use 1x1 square tube to strengthen it, and painted it up.
Gained about 1", and I don't really think I lost any structural support, not bad for the OE x-member.
I couldn't figure out the engine mounts to save my life, so I went back to square one and eventually came up with these.
Last edited by 3uzfte; 03-02-2014 at 07:44 AM.
11-21-2011, 03:44 AM
#33
Registered User
Thread Starter
Join Date: Jan 2011
Location: Minneapolis, MN
Posts: 88
Likes: 0
Received 0 Likes
on
0 Posts
Since the drivetrain got pushed back in the truck, I needed to shorten the drive shaft.
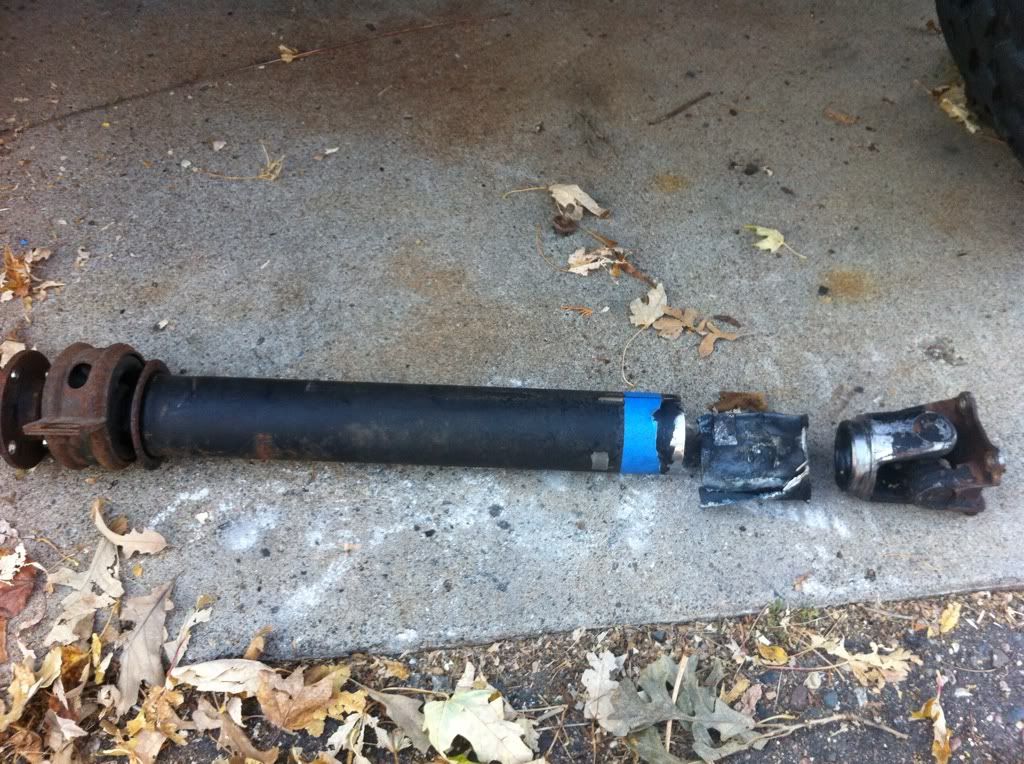
Tacked.

Welded up and stripped of any material.
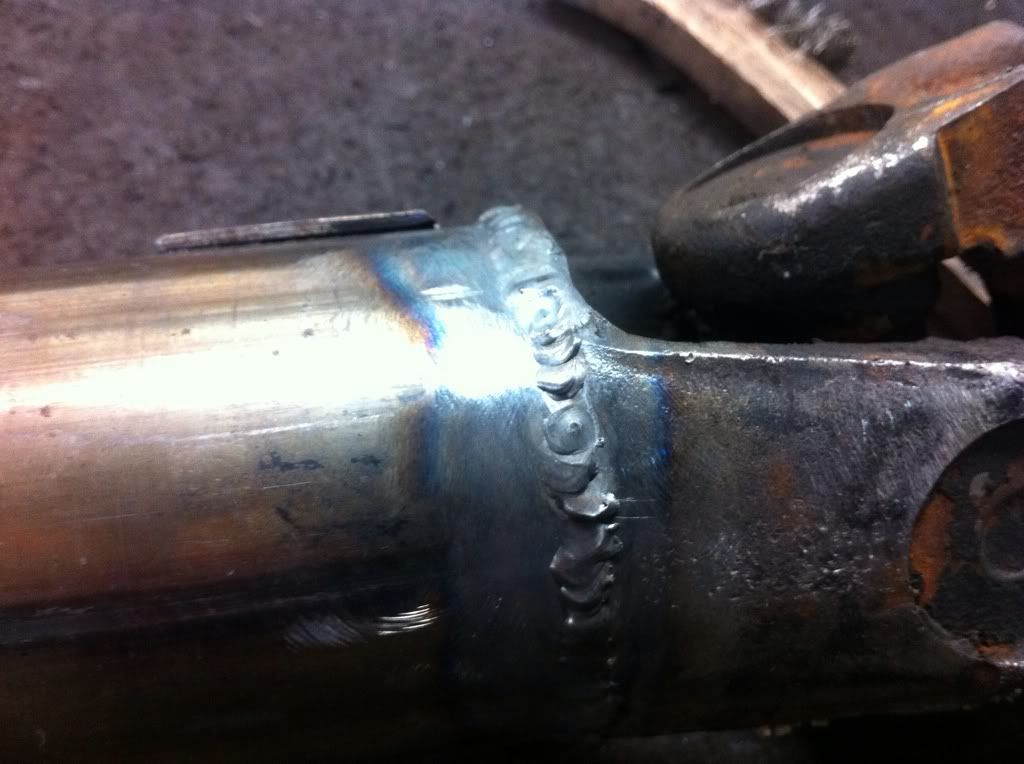
Weld was ground down flat, and painted black.
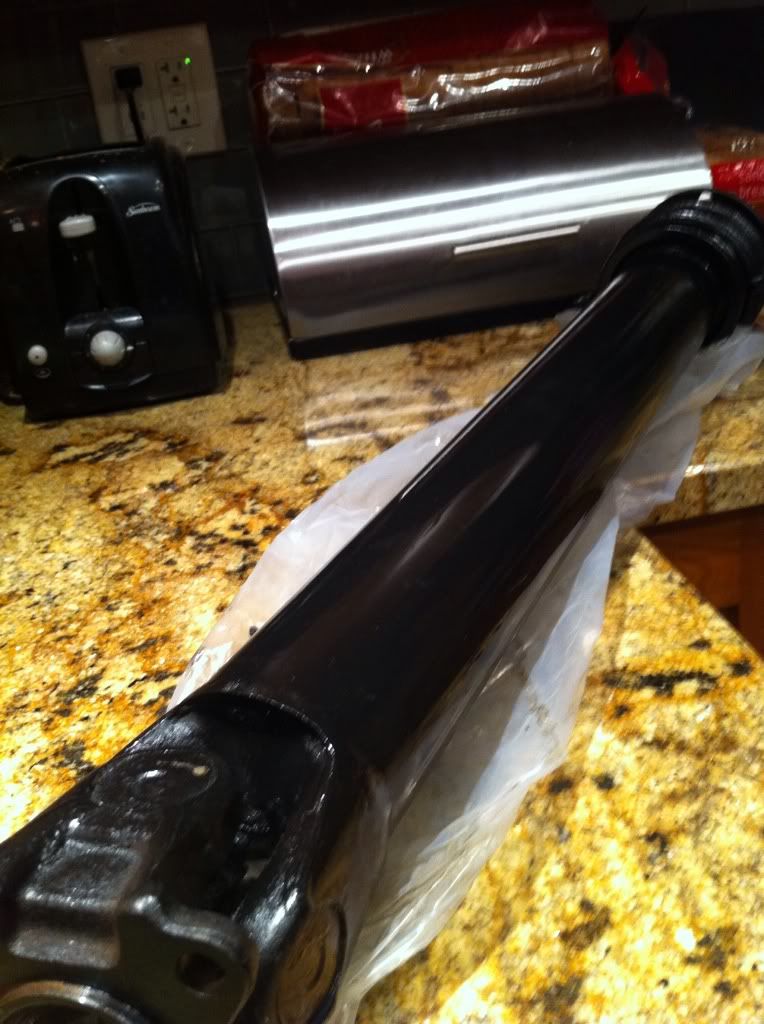
Got my shock hoops, and need to clean the rest of the frame rails.
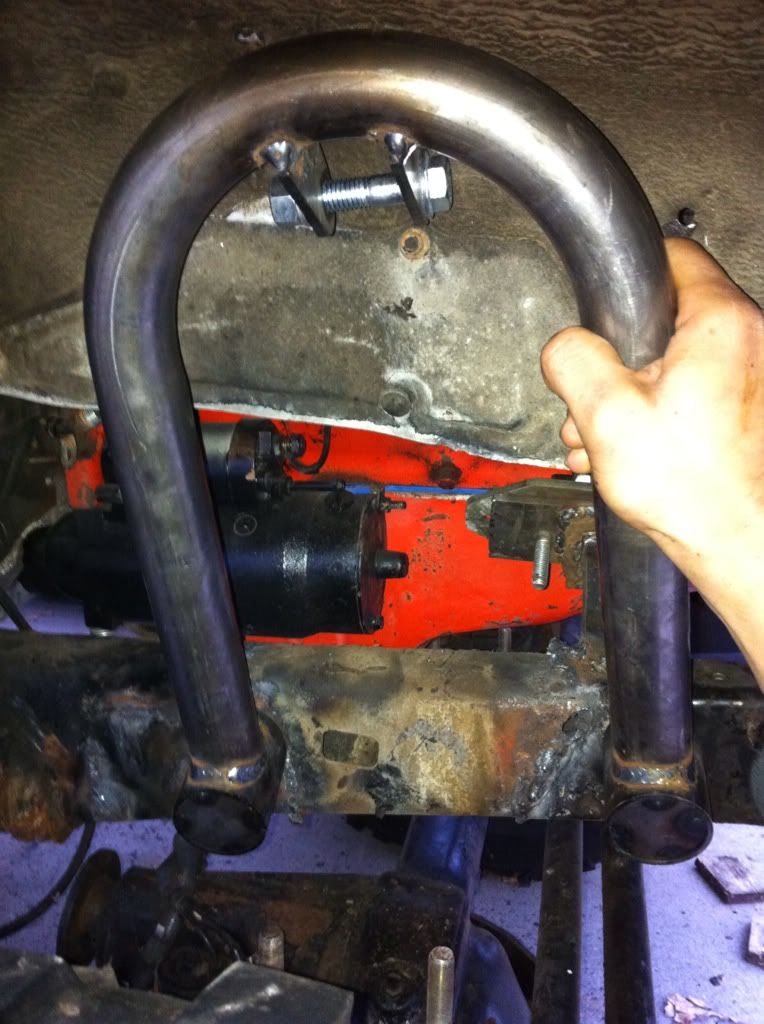
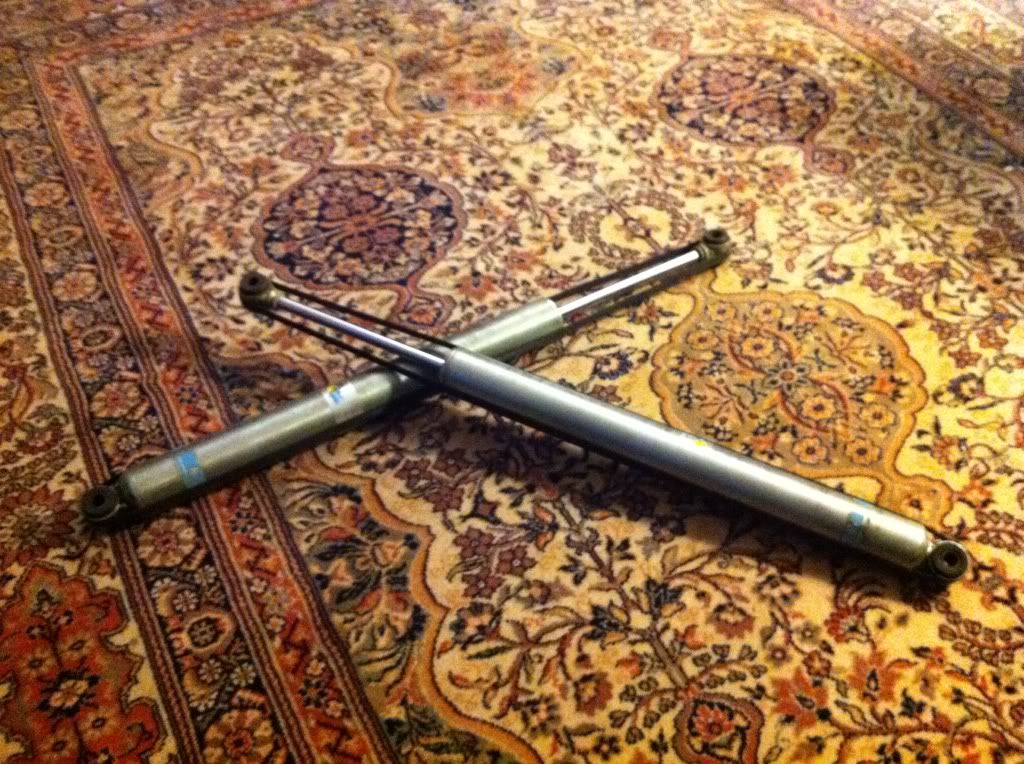
Also recieved my 14" Bilsteins in the mail.
Tacked.
Welded up and stripped of any material.
Weld was ground down flat, and painted black.
Got my shock hoops, and need to clean the rest of the frame rails.
Also recieved my 14" Bilsteins in the mail.
Last edited by 3uzfte; 03-02-2014 at 07:45 AM.
12-08-2011, 04:26 PM
#34
Registered User
Thread Starter
Join Date: Jan 2011
Location: Minneapolis, MN
Posts: 88
Likes: 0
Received 0 Likes
on
0 Posts
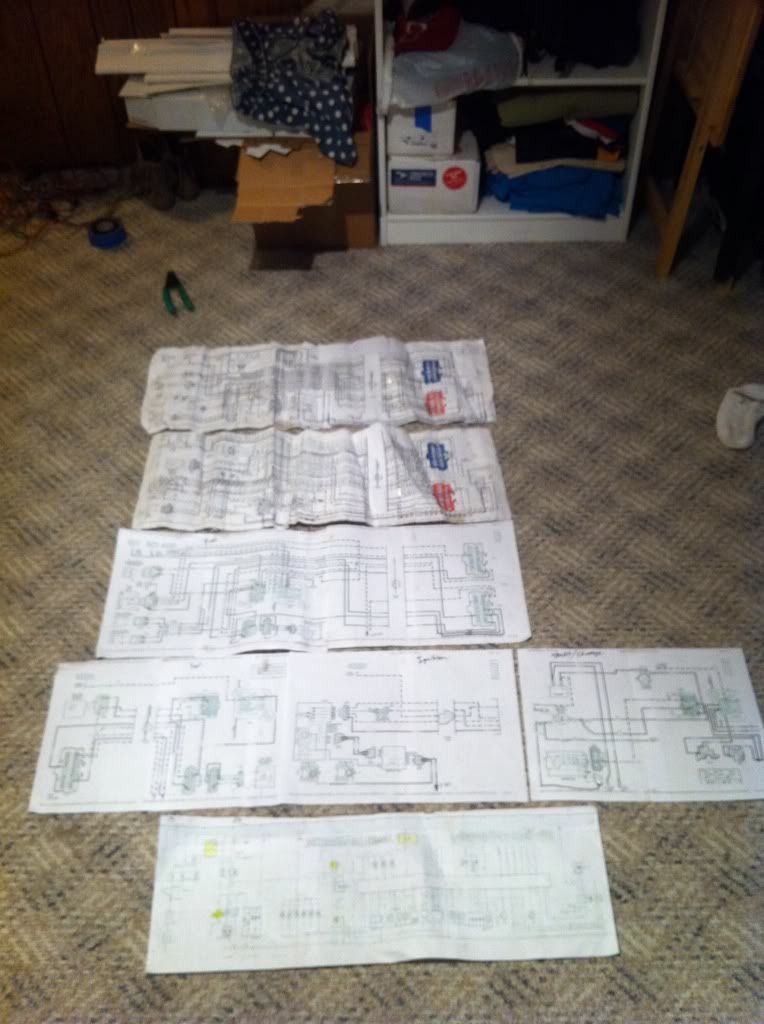
Finished the rest of the harness to be as plug n' play as possible, OBD connector, fuel pump relay, and pretty much everything else.
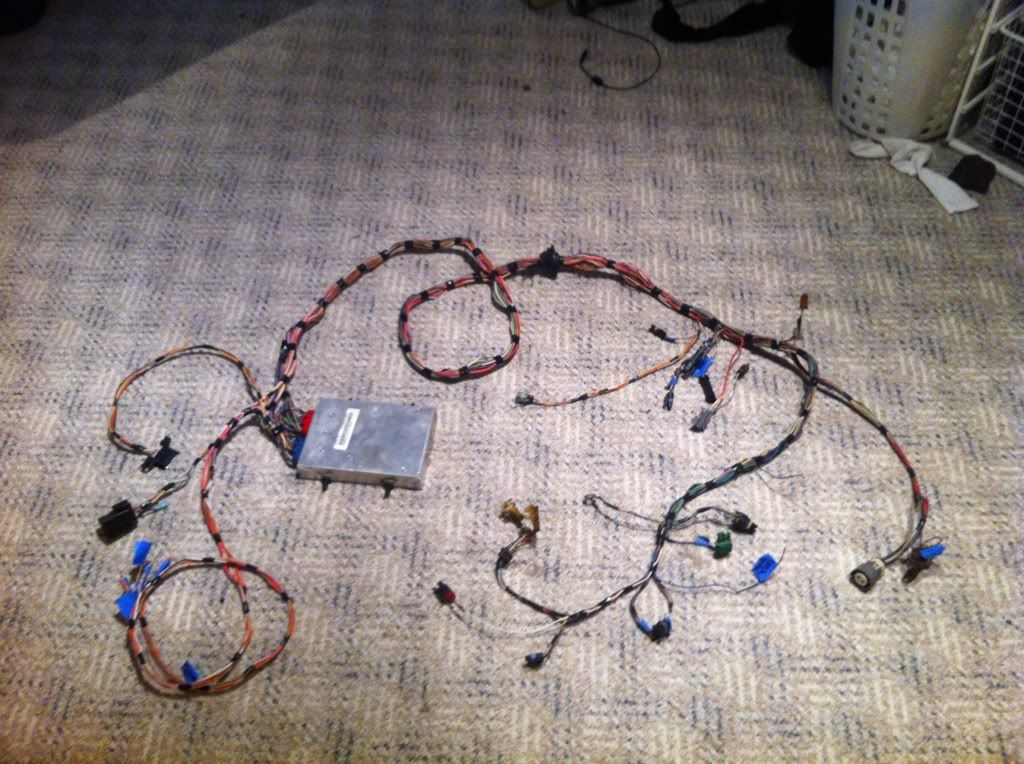
It took all of this to do it.
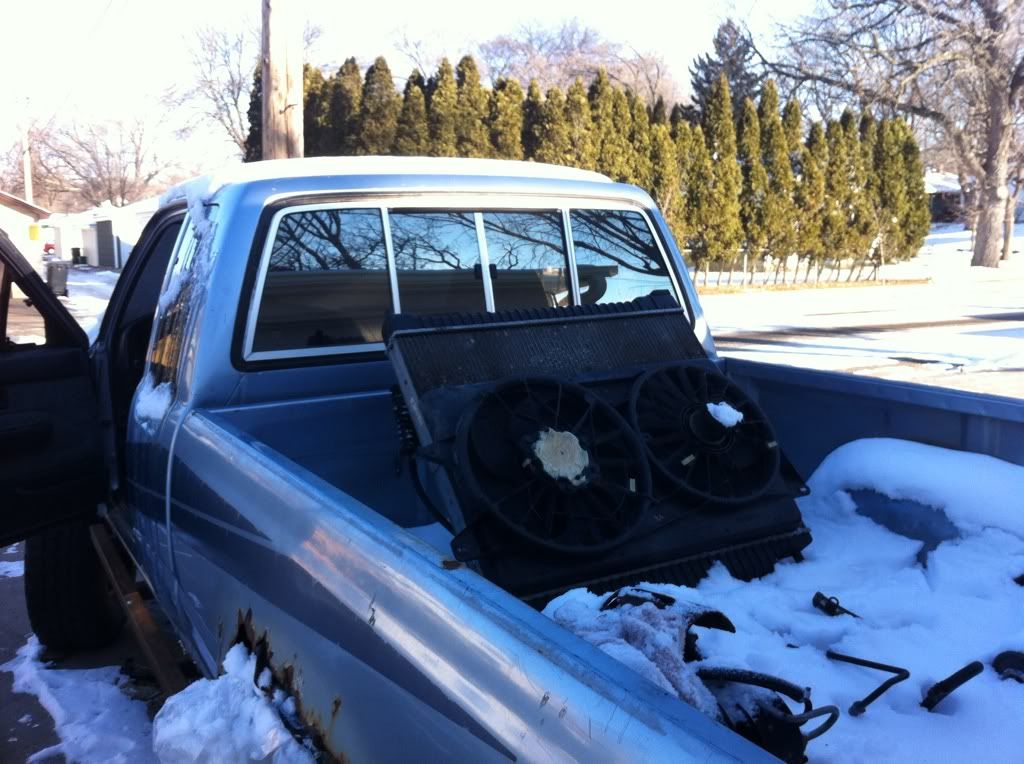
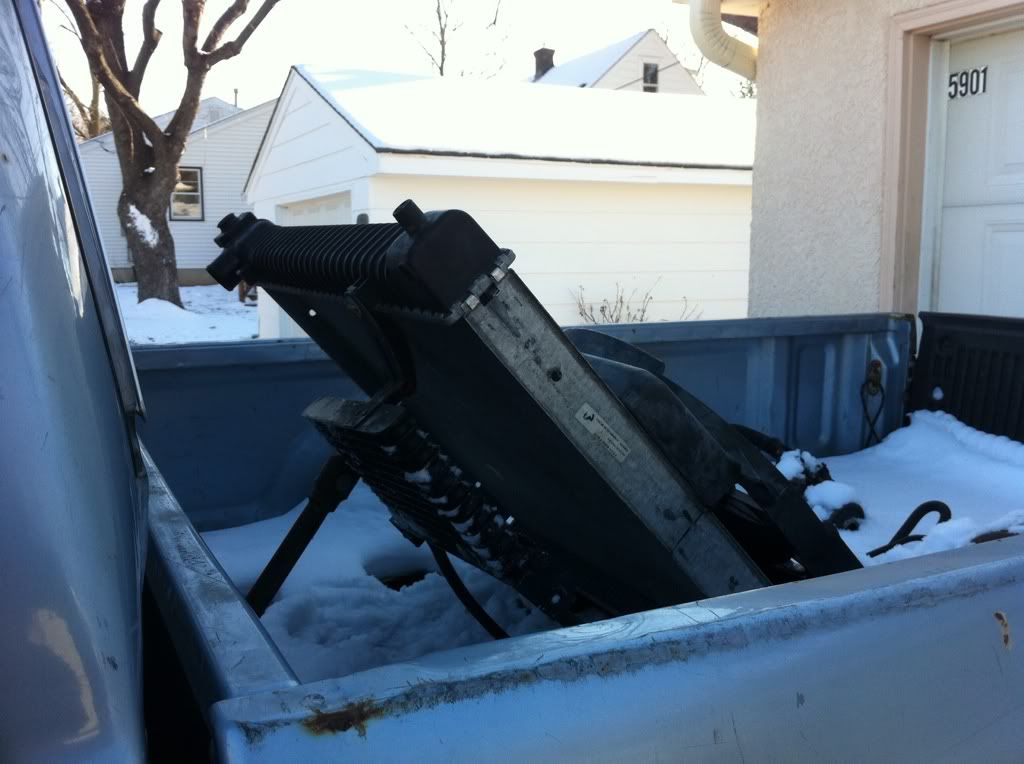
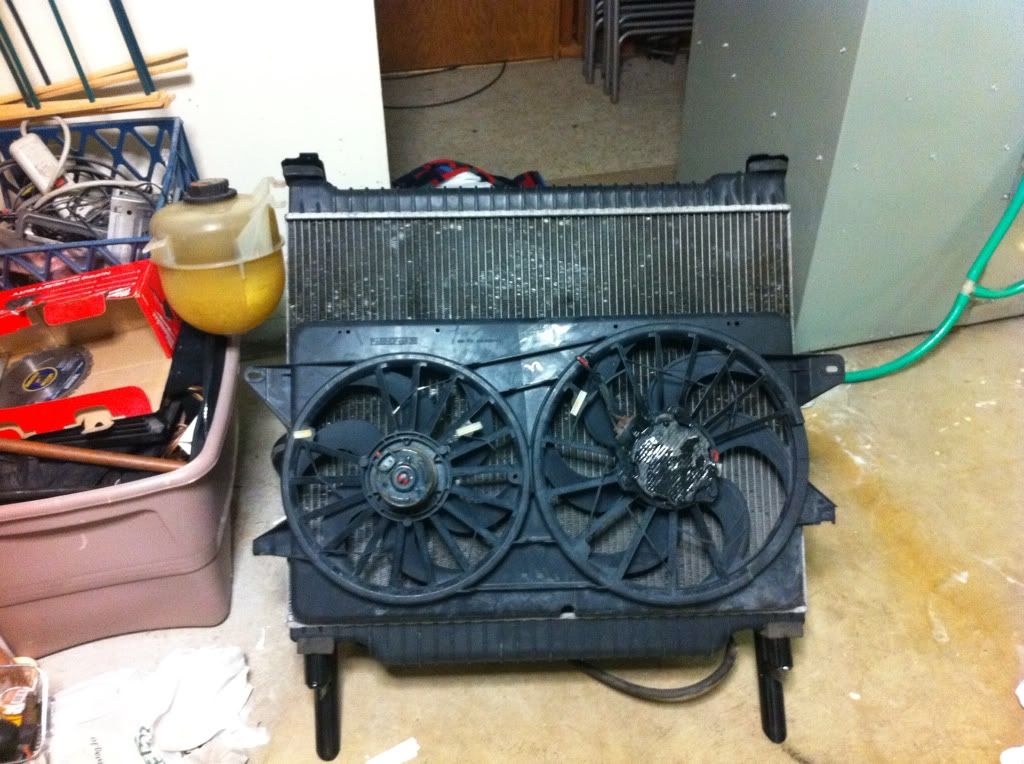
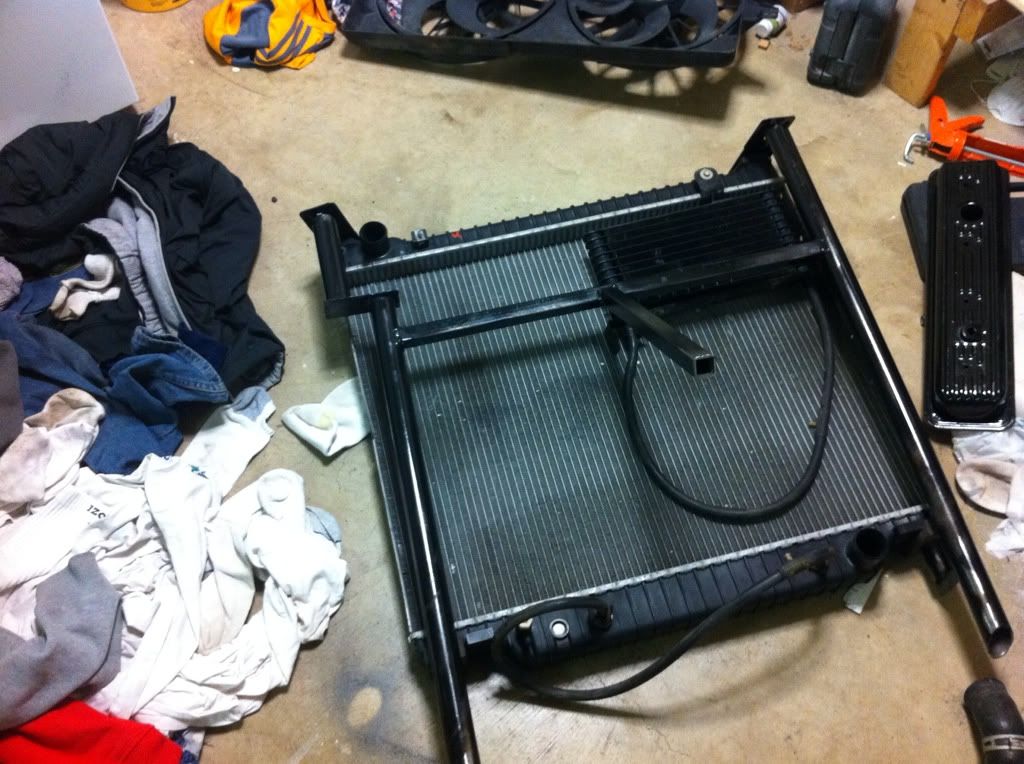
Since I have no choice but to run a rear radiator, I went out and got the biggest beast I could find. I found a 00's E-150 w/ a 5.4 V8 in great condition and got the monster radiator, mounts, trans cooler, radiator hoses and resevior, and the dual fans came from a 96' Mercury Villager. All for about $100, plus some fittings, wiring, and relays.
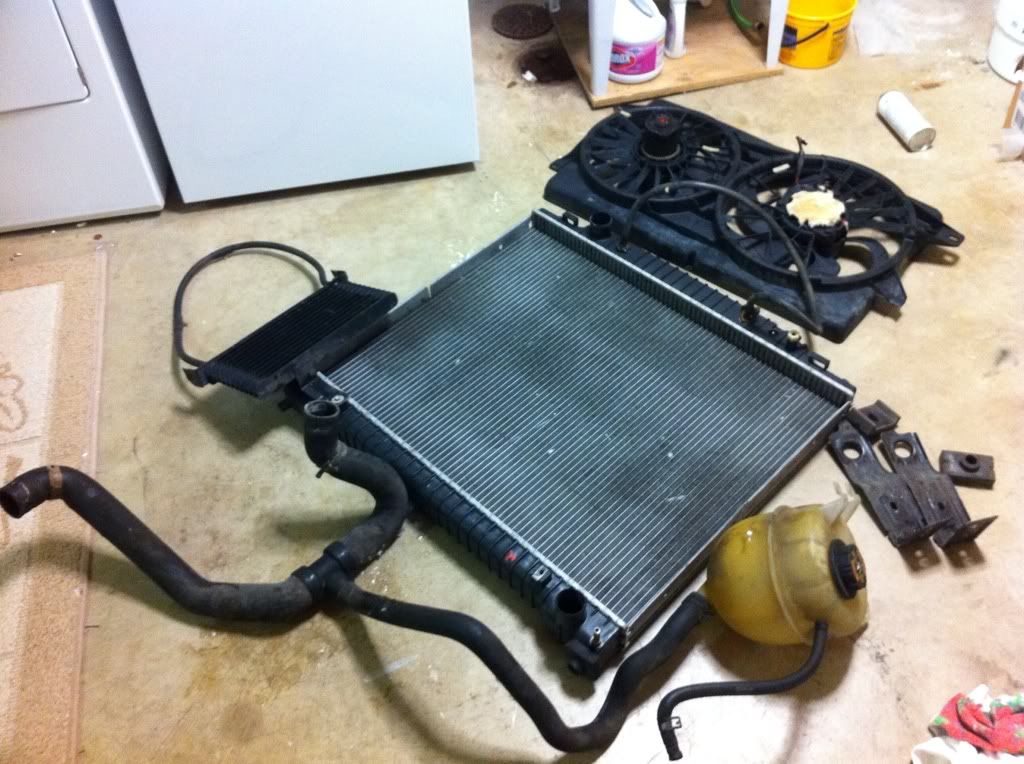
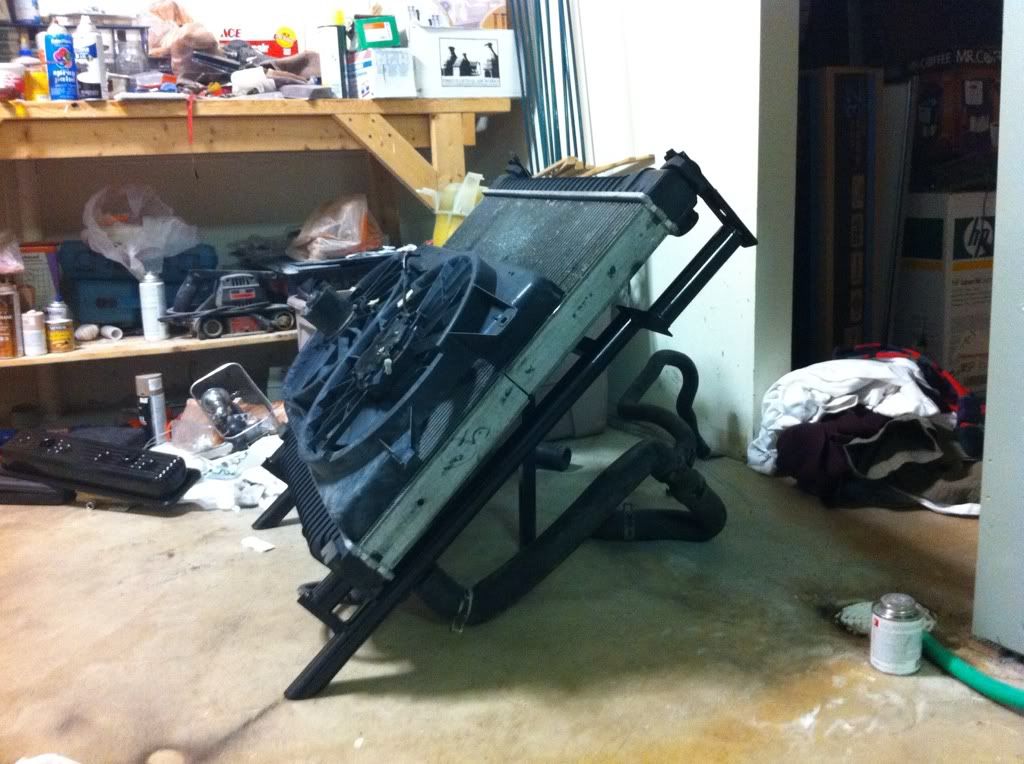
I am in the process of fabbing up a retaining bracket to hold the radiator like this. Fans will pull air.
I haven't totally settled on tranny cooler placement quite yet, but will go from trans to rad trans cooler, to aux. cooler, back to trans.
I've heard that people usually have had better results tilting the radiator, and I plan on making some holes and possibly ducting or shrouds to allow for air at speed. I'm sure these fans will keep me cool in stop and go, but I would very much like them to shut off via a thermostat switch in the intake manifold. Clearly I need to come up with some sort of protection for the exposed aluminum fins.
It took all of this to do it.
Since I have no choice but to run a rear radiator, I went out and got the biggest beast I could find. I found a 00's E-150 w/ a 5.4 V8 in great condition and got the monster radiator, mounts, trans cooler, radiator hoses and resevior, and the dual fans came from a 96' Mercury Villager. All for about $100, plus some fittings, wiring, and relays.
I am in the process of fabbing up a retaining bracket to hold the radiator like this. Fans will pull air.
I haven't totally settled on tranny cooler placement quite yet, but will go from trans to rad trans cooler, to aux. cooler, back to trans.
I've heard that people usually have had better results tilting the radiator, and I plan on making some holes and possibly ducting or shrouds to allow for air at speed. I'm sure these fans will keep me cool in stop and go, but I would very much like them to shut off via a thermostat switch in the intake manifold. Clearly I need to come up with some sort of protection for the exposed aluminum fins.
Last edited by 3uzfte; 03-02-2014 at 07:46 AM.
12-24-2011, 08:24 PM
#36
Registered User
Join Date: Dec 2011
Posts: 43
Likes: 0
Received 0 Likes
on
0 Posts
how far along are you in that rad build up??? my 82 has the battery in the box, and a 4 core landcruiser rad outta a diesel up front, with mount tabs on the side cut off and moved to the otehr side of the rad to move it forward on the rad support and i run a short water pump, its does all fit in there, and i'm pretty sure that yoru truck has more hood room that the 1st gens, then it looks stock and sounds dragster
12-24-2011, 08:48 PM
#38
Registered User

Join Date: Nov 2008
Posts: 302
Likes: 0
Received 0 Likes
on
0 Posts
Hmm, I ran all the power to my custom harness for my 4.3 from the 2 connectors right by where the stock ecm sits. They are the same plugs that supply all the power to the stock engine wiring harness. Good luck findin a pinout. I actually just turned the key on, pulled all fuses and put one in at a time and tested with a volt tester to figure out which pin was fused how many amps. I can go back through my paperwork and see if i wrote it down if you wanted me to. I just got my motor fired up yesterday!!!
12-27-2011, 10:25 AM
#39
Registered User
Thread Starter
Join Date: Jan 2011
Location: Minneapolis, MN
Posts: 88
Likes: 0
Received 0 Likes
on
0 Posts
that's looking pretty good , let me know if you have questions
how far along are you in that rad build up??? my 82 has the battery in the box, and a 4 core landcruiser rad outta a diesel up front, with mount tabs on the side cut off and moved to the other side of the rad to move it forward on the rad support and i run a short water pump, its does all fit in there, and i'm pretty sure that yoru truck has more hood room that the 1st gens, then it looks stock and sounds dragster
my tranny cooler is where the battery used to be mounted on an angle so max air flow is allowed
Do you have any pictures of your build, kinda interested in your custom shifter.
On my rad build, I'm roughly about 80% to finished, I've got everything built, but not placed in the bed. I've got all the materials, built the radiator frame, made coolant line brackets for the coolant feed/return lines. I did not like the fact that the radiator was going to be unprotected or super close to the serp setup. One thing to consider is that the 4L60E is ~3" longer than the TH400/350, so that extra space would've helped.
I am going to run my cooler in front of the radiator, to get natural airflow and close enough to get air from the fans. I'm going to use the E-150 radiator tranny cooler inline with the external HD cooler.
Hmm, I ran all the power to my custom harness for my 4.3 from the 2 connectors right by where the stock ecm sits. They are the same plugs that supply all the power to the stock engine wiring harness. Good luck findin a pinout. I actually just turned the key on, pulled all fuses and put one in at a time and tested with a volt tester to figure out which pin was fused how many amps. I can go back through my paperwork and see if i wrote it down if you wanted me to. I just got my motor fired up yesterday!!!
Last edited by 3uzfte; 03-02-2014 at 07:50 AM.
12-27-2011, 07:53 PM
#40
Registered User
Join Date: Nov 2008
Posts: 302
Likes: 0
Received 0 Likes
on
0 Posts
Now that looks fun... lol I actually have a 1uz I am planning on putting in my 4runner but I decided to do the truck first lol... Sounded easier What kinda tape is that? I started using white duct tape. Got tired of blue masking tape falling off (i'm hard on stuff)


