Project: 86 p/u sas/om617 diesel swap
 01-17-2012, 03:52 PM
#81
Registered User
Thread Starter
I was talking to my boss about the un-needed shim and he said that one time he was building a race car frame, but didn't notice a tire was low. It was at 10 psi while the others were at 40, and now the frames a 1/2" lower on that side. My passenger tire was at 10 psi this morning and 35 on the drivers. Aired all the tires up to 44 psi, measure again, and sure enough, the shim WAS needed lol. Driver's side is actually a hair lower, but good enough for the girls I go with. With a full tank of fuel on the pasengers side, it'll even out that 1/16" of an inch. Now I'm just wondering why my shackle angles are different. Maybe because of fuel tank weight? Or uneven shackle tubes in the frame? They shouldn't be, I measured them twice and they were spot on before I welded them.
 01-17-2012, 05:59 PM
#84
Registered User
Join Date: Jul 2009
Location: Eastern NC
Posts: 832
Likes: 0
Received 0 Likes
on
0 Posts
Yep sure did. I'm not running any proportioning valve at all. I have the stock 85 brake booster, 1" bore mc, IFS calipers, FJ vented rotors. My pedal is firm, and I have no problems with rear wheel lock up.
Go to a pick and pull, get the brake line distro block from another rig, the one mounted to the frame above and behind the passenger front tire. Cut the 90* fitting off, cut the "T" fitting off yours, weld on the 90*, then just remove the return line from your LSVP.
Go to a pick and pull, get the brake line distro block from another rig, the one mounted to the frame above and behind the passenger front tire. Cut the 90* fitting off, cut the "T" fitting off yours, weld on the 90*, then just remove the return line from your LSVP.
01-18-2012, 11:01 AM
#85
Registered User
Thread Starter
I'm an IDIOT! So I had this idea that maybe Miller could have Linweld give me my new gauge since they're a Miller distributor, and then just credit them so I could have my part on Monday. I didn't ask anyone, and I should have, cus today I asked and sure enough they said yep, that's one of their huge things to help their customers get back to work quickest. So I could have been done on Monday.....
01-18-2012, 09:20 PM
#86
Registered User
Thread Starter
It's days like today that REALLY make me feel dumb.... Got my new flow regulator from UPS right as I was going out to work on my truck. I read the destructions on it, and I guess you have to unscrew the valve to reduce gas flow. Guess I got 2 good flow gauges now.... Can't complain about that part, but it sure woulda been nice to finish the truck Monday in 60 degrees versus today in 28 degrees.
No time for pictures today as the UPS guy didn't get here till 3ish. Went ahead and jumped right in to welding the rest of the reinforcement plates engine mounts, and front hanger on. I'm gonna have my boss inspect my welds tomorrow for peace of mind. My the grace of God, the wind died down from 24mph to 4mph once I started welding so gas insulation wasn't a problem outside. Also wanted to note that the TG guy I spoke with on the phone was wrong about the rear shackle bushing size, and it's 1 1/4" not 1 3/4" so my assumption was right for once and they fit nicely in the rear shackle hangers I made. Bled the brakes, which wasn't fun, and will need to be done again. Slapped the steering on. Got my toe-in adjusted correctly I believe, but my steering side to side is *&%$ed up.
***Does anyone know how to properly adjust the steering and how to adjust the steering stop bolts on the knuckles? I found a thread a while back that vividly explained it, but I can't relocate it. My pitman arm is stopping before my stop bolts hit the steering stop brackets and I'm not sure I have much more bolt to unthread before it falls out of the knuckle. I'll have to adjust the drag link I suppose, but it looked to me like the steering wheel (pitman arm) and wheels were centered in the position I have it.
My steering box DEFINITELY needs to be moved forward, but I'm hoping I can get away with it for now and not have a problem flexing it out to mount the shocks. Once I get it driveable, I'm going to head over to work at 6 tomorrow and use the fork lift and car lift to do the bump stops and shocks. Paint it, and I'll be done messing with it till the diesel goes in.
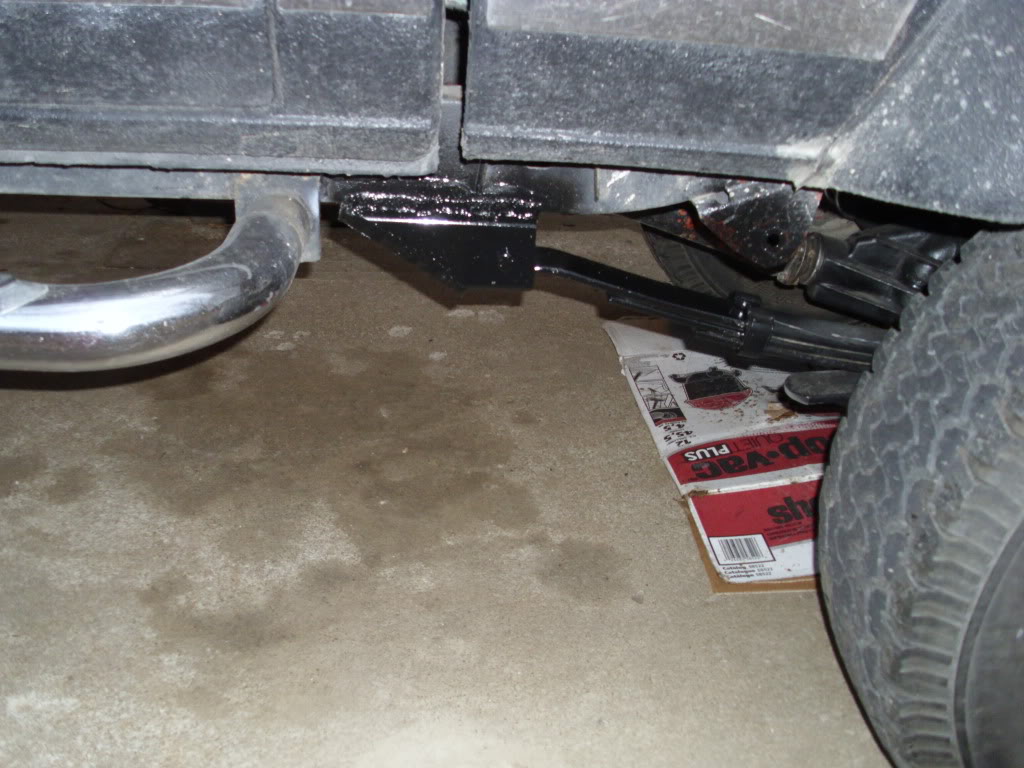
***What do people do for routing/mounting their extended steel braided brake lines??? Mine are just hanging out there, waiting to get caught on the tire or leaf spring.
I'll post pics up after I get it painted and everything. I think I got enough pics up for now.
No time for pictures today as the UPS guy didn't get here till 3ish. Went ahead and jumped right in to welding the rest of the reinforcement plates engine mounts, and front hanger on. I'm gonna have my boss inspect my welds tomorrow for peace of mind. My the grace of God, the wind died down from 24mph to 4mph once I started welding so gas insulation wasn't a problem outside. Also wanted to note that the TG guy I spoke with on the phone was wrong about the rear shackle bushing size, and it's 1 1/4" not 1 3/4" so my assumption was right for once and they fit nicely in the rear shackle hangers I made. Bled the brakes, which wasn't fun, and will need to be done again. Slapped the steering on. Got my toe-in adjusted correctly I believe, but my steering side to side is *&%$ed up.
***Does anyone know how to properly adjust the steering and how to adjust the steering stop bolts on the knuckles? I found a thread a while back that vividly explained it, but I can't relocate it. My pitman arm is stopping before my stop bolts hit the steering stop brackets and I'm not sure I have much more bolt to unthread before it falls out of the knuckle. I'll have to adjust the drag link I suppose, but it looked to me like the steering wheel (pitman arm) and wheels were centered in the position I have it.
My steering box DEFINITELY needs to be moved forward, but I'm hoping I can get away with it for now and not have a problem flexing it out to mount the shocks. Once I get it driveable, I'm going to head over to work at 6 tomorrow and use the fork lift and car lift to do the bump stops and shocks. Paint it, and I'll be done messing with it till the diesel goes in.
***What do people do for routing/mounting their extended steel braided brake lines??? Mine are just hanging out there, waiting to get caught on the tire or leaf spring.
I'll post pics up after I get it painted and everything. I think I got enough pics up for now.
01-19-2012, 10:23 PM
#87
Registered User
Thread Starter
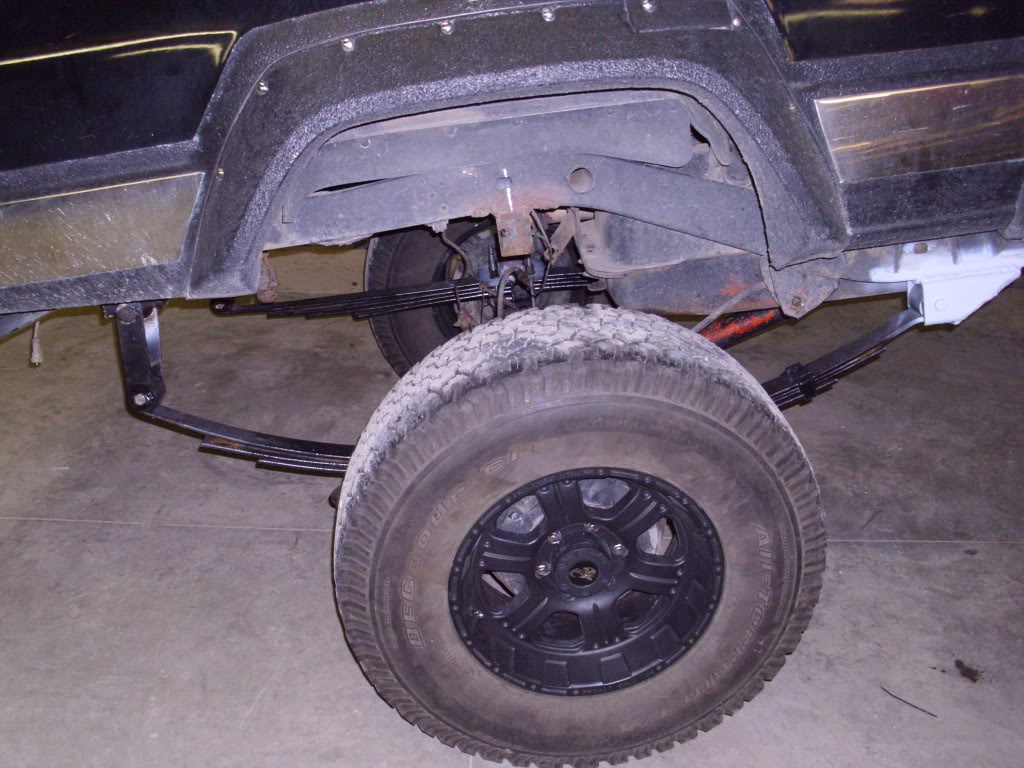
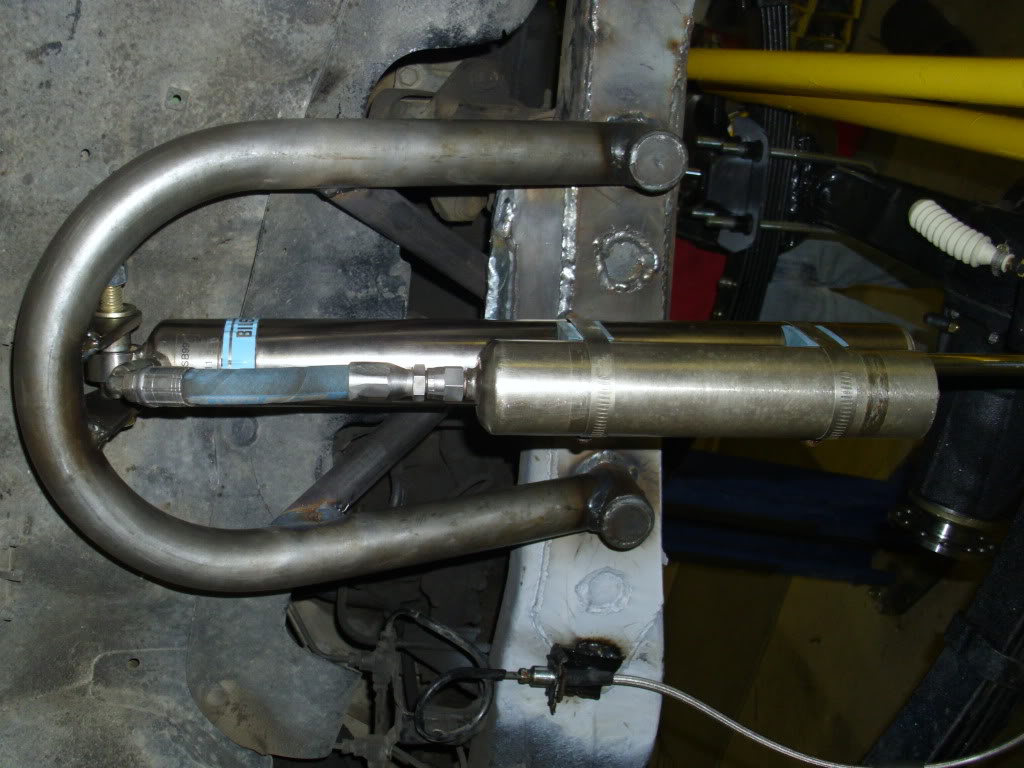
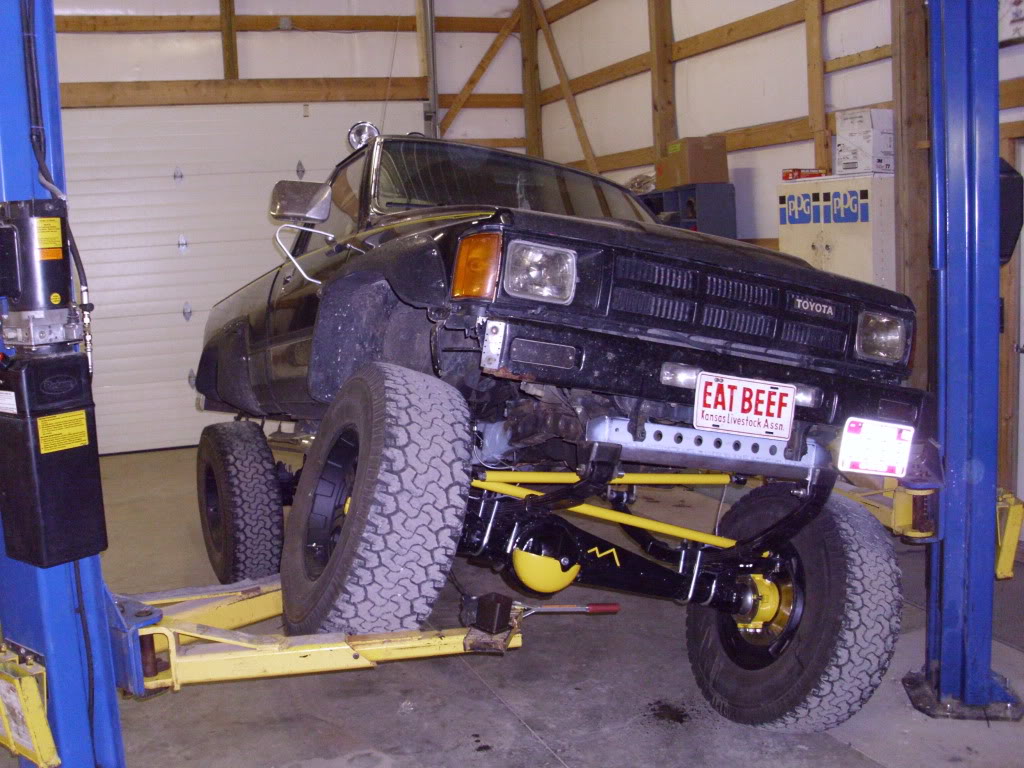
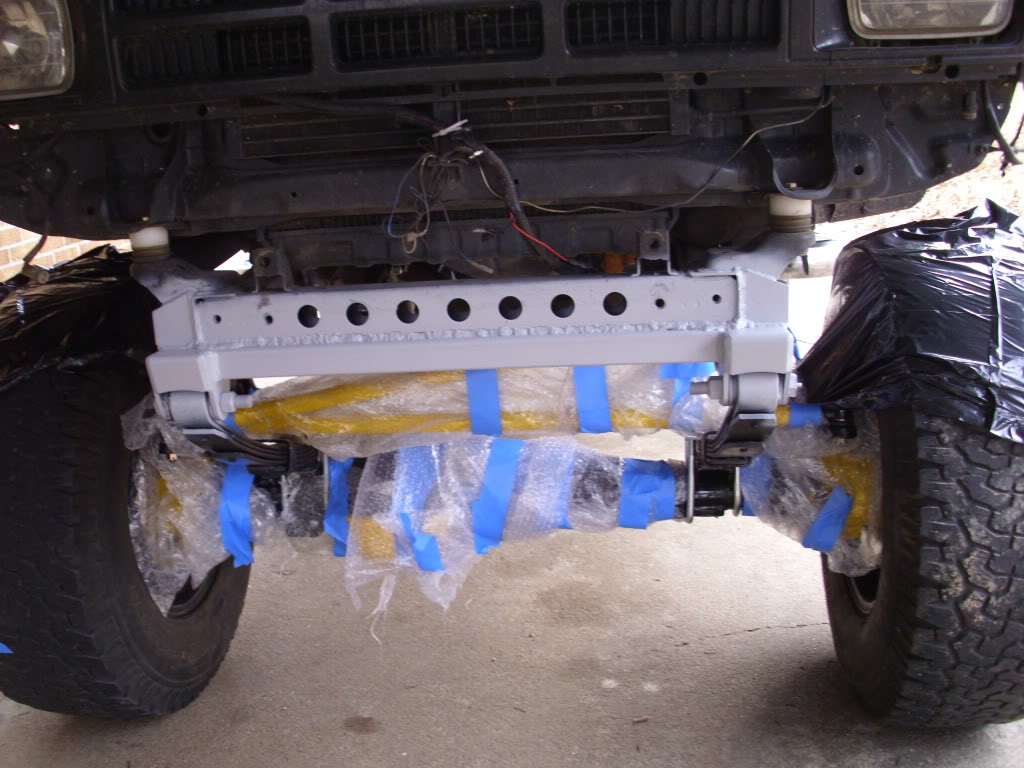
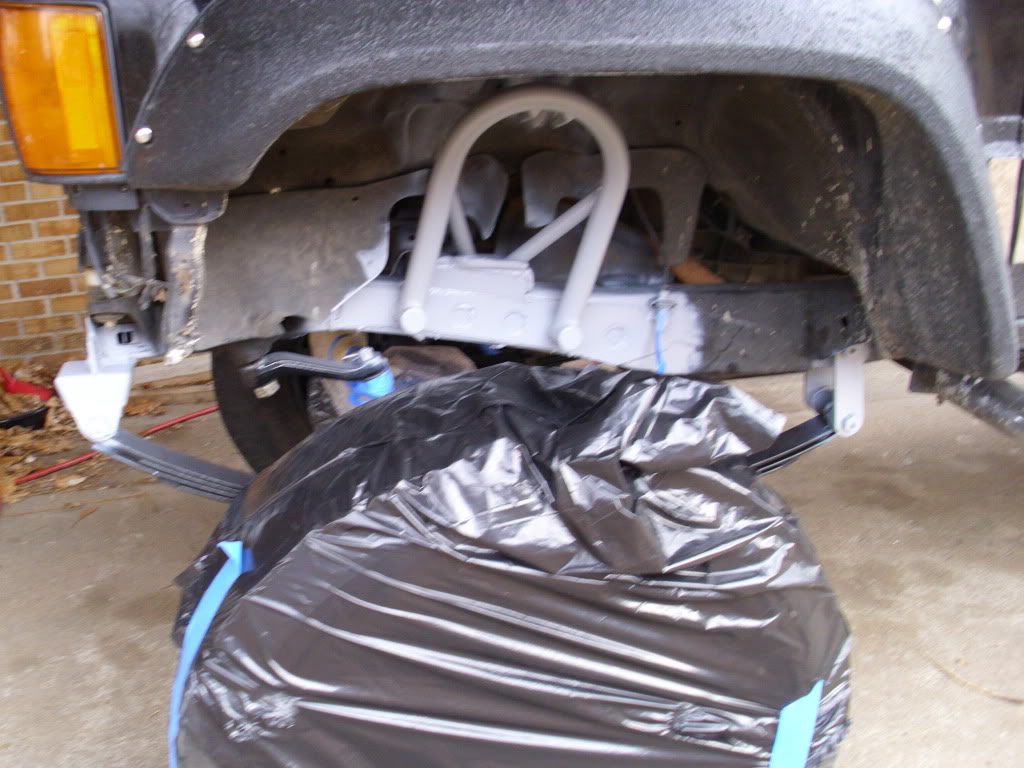
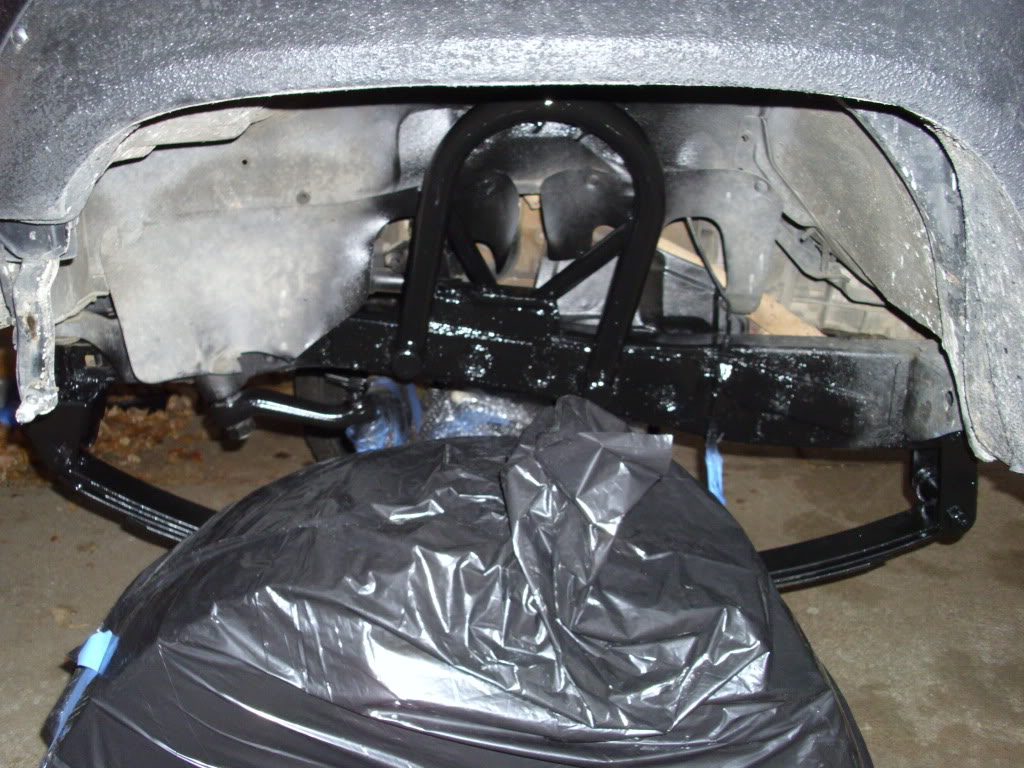
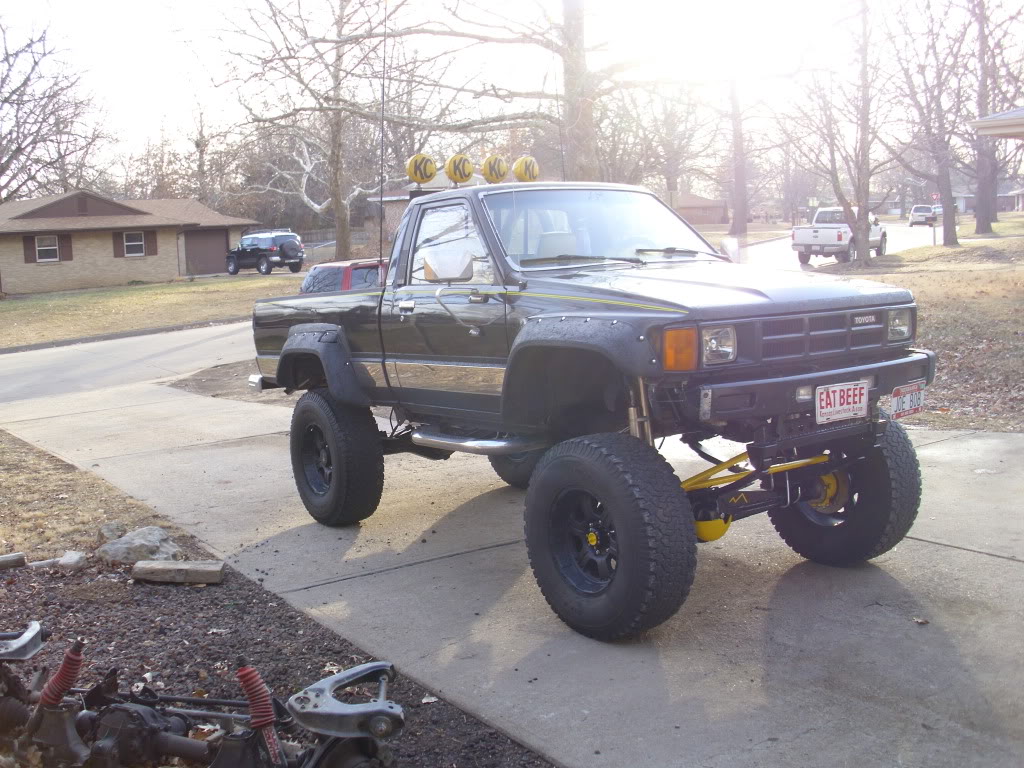
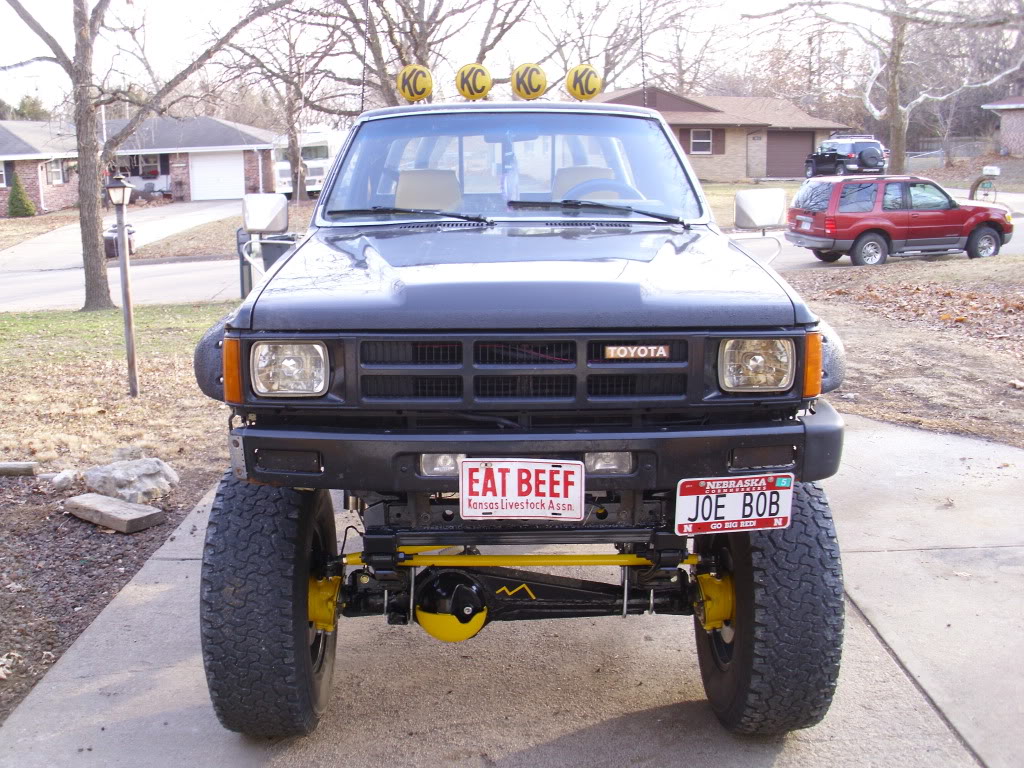
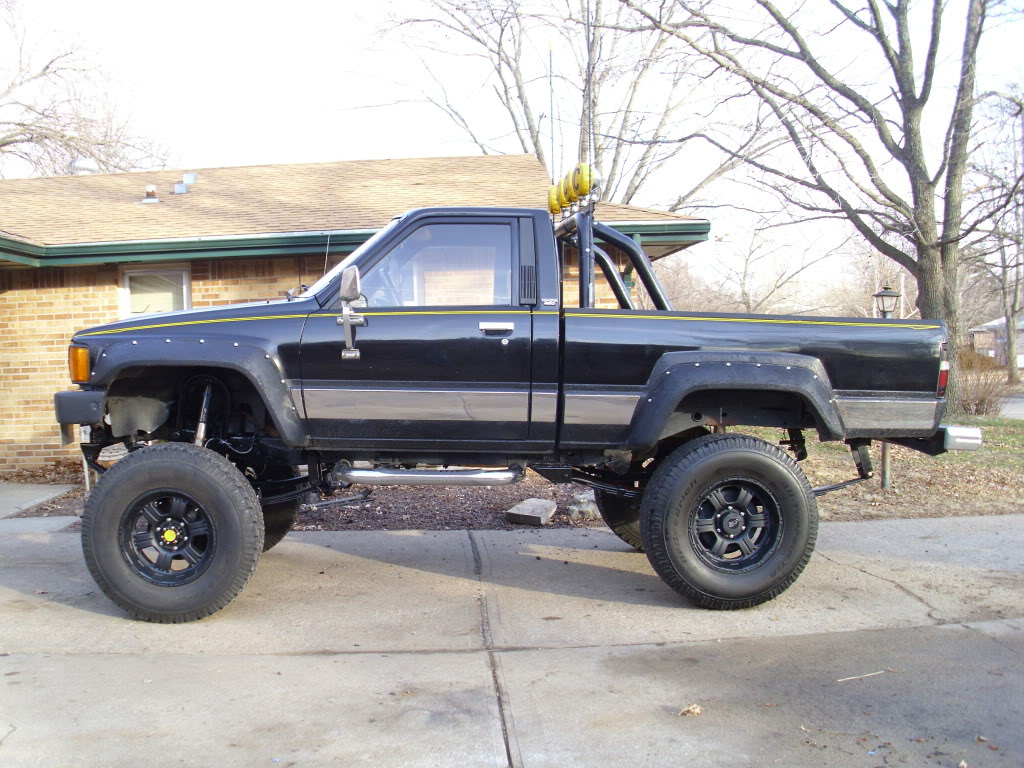
Aside from painting the bare metal and getting some brake line adapters tomorrow, I'm done with the SAS! Lifetime achievement right there. Been dreaming about this since I was in high school. Took 6 hours to get the shocks installed. And that was with a car lift and all the tools! Had my boss verify everything and he said it all appears to be spot-on. Installed my Bilstein 7100 shocks up front. I'll be remounting the external reservoir later to the rear side of the shock hoop to protect it more. My boss helped out a BUNCH by making be bushings to go on both sides of the heim joints. He knows more about trucks and off-roadin than I'll probably ever know, so I was extremely happy he jumped in. Here's my pics. Take note that the rear chevy's are limiting my flex. I will be removing the overload bar when I install the rear lift blocks. We couldn't get the front springs to even come close to bottoming out so I skipped bump stops front and rear for now. I mite add them when the diesel and bumpers are on and the springs can actually flex. My boss also told me to remove the travel robbing clips from the spring packs.
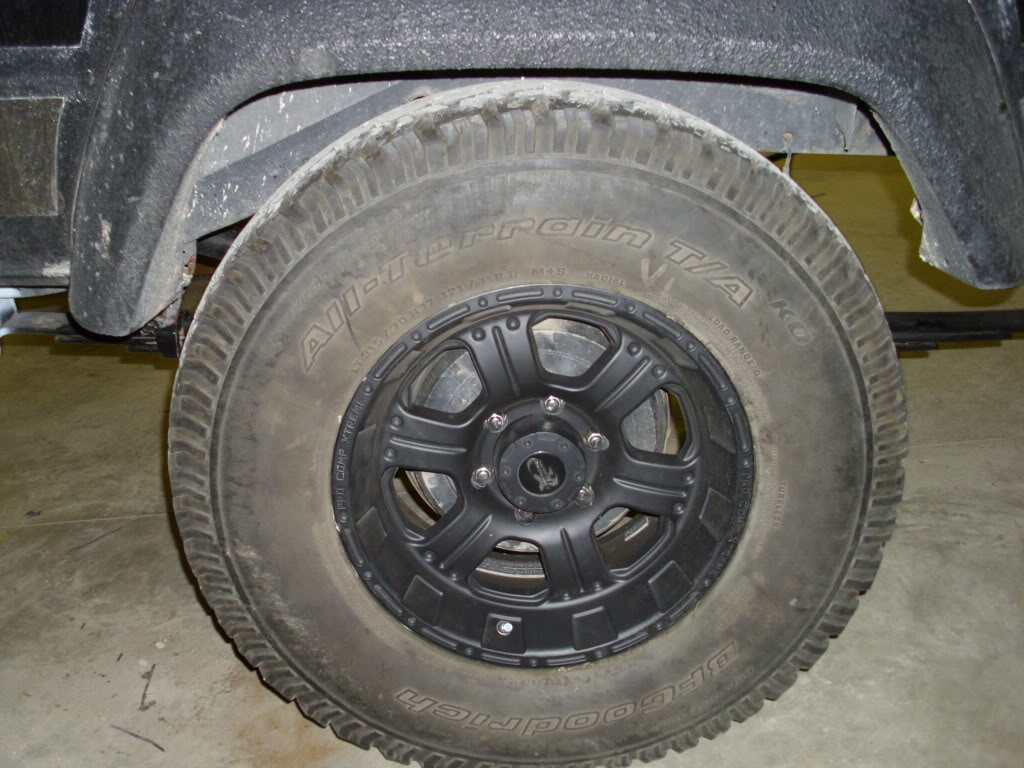
Rear tire centered beautifully and tucked in very nicely. Only negative thing I saw tonite was that since I let my boss talk me into buying these rims with more back spacing than I wanted, the rear tire rubs the frame at full flex. Guess I'll have to get some rear spacers.... Now my tires won't be lined up front to rear anymore (sigh)
Rear definitely needs to get lifted up more

Burnin' in the shock hoops

Bilstein 7100's I got off CRAIGSLIST! BOOYAW

I'm really depressed I sold my power wagon right now. I'm thinkin about buyin it back...
Rear tire centered beautifully and tucked in very nicely. Only negative thing I saw tonite was that since I let my boss talk me into buying these rims with more back spacing than I wanted, the rear tire rubs the frame at full flex. Guess I'll have to get some rear spacers.... Now my tires won't be lined up front to rear anymore (sigh)
Rear definitely needs to get lifted up more
Burnin' in the shock hoops
Bilstein 7100's I got off CRAIGSLIST! BOOYAW
I'm really depressed I sold my power wagon right now. I'm thinkin about buyin it back...
01-21-2012, 01:06 AM
#88
Registered User
Thread Starter
Just some helpful words for those doing a SAS project:
Tighten nuts on tie rod ends extremely tight
Cover tie rod end bolts that go into drag link/tie rod with anti seize and just tighten jam nuts firmly so that when you need to adjust it's not a pain to get them undone
Tighten U-Bolts as tight as you can get and forget about 90 lb*ft but still check them periodically for first 100 miles and every 500 miles afterwords
Ditch stock hard brake lines coming from calipers and get adapters to screw braided stainless cables right into the calipers
When mounting shocks, mount them angled towards the rear of the truck. This is because when the springs compress, the axle moves backwards. So to properly absorb the shock, the shocks need to be angled backwards so that they can slightly resist that rearward movement. If mounted straight up and down from the ground, they will be pointed forward when the springs are fully compressed, and won't absorb the shock.
Hope this helps someone.
For my first 50 miles, the ride started out intense and has only improved. Waiting for the diesel/bumper weight to improve things. Alignment seems to be great. Shocks are awesome!
01-22-2012, 02:11 PM
#89
Registered User
Thread Starter
Well to end the weekend, I got the house and garage cleaned and finally got my living room back after throwing out all the boxes.
Now I can focus on getting the engine reassembled and fired up. Probably gonna tackle that on Tuesday real hard and finish anything up we might have left next week. No classes on Tuesdays this semester so that will be my main day for working on the engine swap besides weekends. I started cleaning the engine mounting surfaces last night and went to replace the timing chain guide, but it looks like you might need an impact puller to get the retaining bolt out?
I knew I saved my bubble wrap for somethin. Used some high quality SEM Self Etching Primer at $20/can for the bare metal. Still should have enough out of the one can for the engine bay. It calls for 2-3 light coats at 10 minutes apart.
The top coat time on the primer is anytime after an hour without sanding, or after 24 hours with the primer scuffed up. My stupid paint gun had major clogging issues so I only got 1 1/2 to 2 coats laid down. I can always recoat it when the engine goes in, though. 38* yesterday and 60* here today, so I'm glad I waited till today to paint.
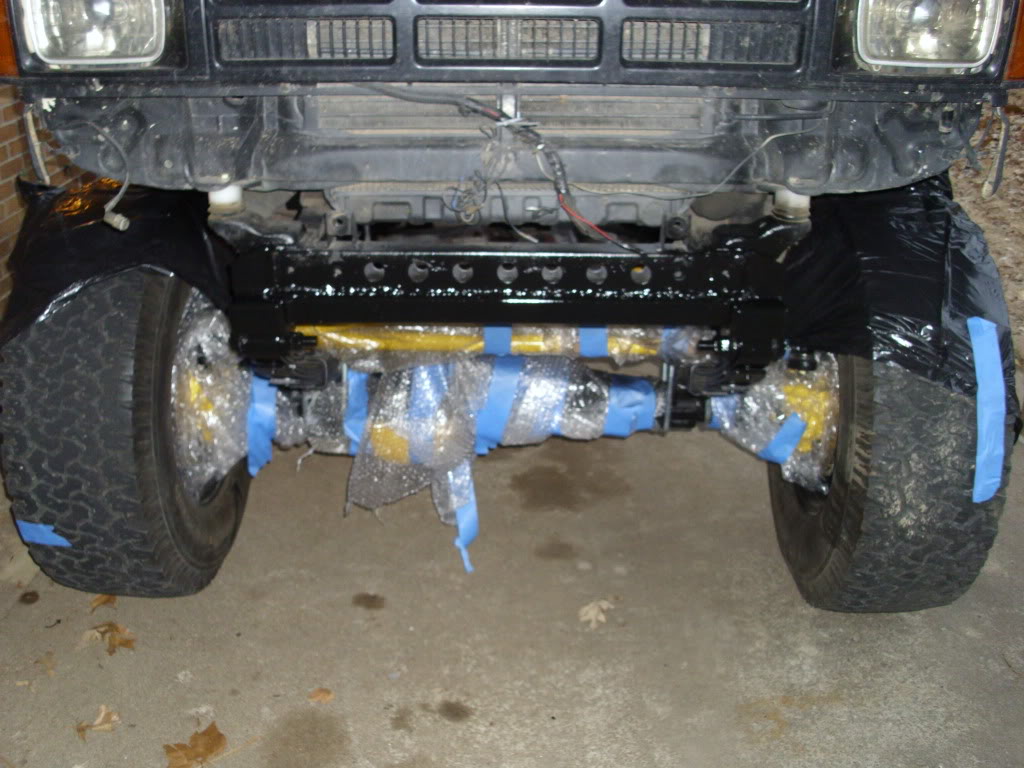
I've been laying down a coat of paint on the frame once a year for the last 3 years to prevent rust and maintain good looks. It was proven effective when I went to grind on the frame, as I found no rust. Last thing I'll do to the truck this week besides periodic tightening of all fasteners is find some adapter for the brake lines to eliminate the factory hard lines coming off the calipers.
Again, if anyone has a W56 forward shift tranny they could sell me, hit me up. That and the adapter plate are the last two pieces to this puzzle I'm waiting for.
Now I can focus on getting the engine reassembled and fired up. Probably gonna tackle that on Tuesday real hard and finish anything up we might have left next week. No classes on Tuesdays this semester so that will be my main day for working on the engine swap besides weekends. I started cleaning the engine mounting surfaces last night and went to replace the timing chain guide, but it looks like you might need an impact puller to get the retaining bolt out?
I knew I saved my bubble wrap for somethin. Used some high quality SEM Self Etching Primer at $20/can for the bare metal. Still should have enough out of the one can for the engine bay. It calls for 2-3 light coats at 10 minutes apart.
The top coat time on the primer is anytime after an hour without sanding, or after 24 hours with the primer scuffed up. My stupid paint gun had major clogging issues so I only got 1 1/2 to 2 coats laid down. I can always recoat it when the engine goes in, though. 38* yesterday and 60* here today, so I'm glad I waited till today to paint.
I've been laying down a coat of paint on the frame once a year for the last 3 years to prevent rust and maintain good looks. It was proven effective when I went to grind on the frame, as I found no rust. Last thing I'll do to the truck this week besides periodic tightening of all fasteners is find some adapter for the brake lines to eliminate the factory hard lines coming off the calipers.
Again, if anyone has a W56 forward shift tranny they could sell me, hit me up. That and the adapter plate are the last two pieces to this puzzle I'm waiting for.
01-22-2012, 05:48 PM
#90
Registered User
Join Date: Apr 2011
Location: Sedalia, MO
Posts: 317
Likes: 0
Received 0 Likes
on
0 Posts
Easiest way to get that rail out is to take one of the hex bolts out of the oil pan and use a slide hammer. I built one using a pair of old vise grips a steel rod and a piece of pipe. works like a champ!
 01-23-2012, 06:45 PM
#92
Registered User
Join Date: Dec 2011
Location: Front Range, C
Posts: 23
Likes: 0
Received 0 Likes
on
0 Posts
In regard to the fuel economy talk on powerstrokejoes's thread I re-calculated the final speed ratio for best mileage running at 2400rpm. I originally thought 1:1 was fifth but its .85:1 so with 37's, 68mph is your sweet spot. Nice cruising speed! Taking your time getting there, as in shifting before 3000rpm, should get you sweet mileage. I too am going for that overall "green machine performance" but I'm certainly looking forward to that pop-the-clutch-n-roll-over-anything angry monster mini truck. Love the drivetrain beefiness. If you get the extra cha-ching I'd suggest a Marlin heavy duty rear output shaft for your RF1A t-case. Might be a good drivetrain choice for the long haul. Especially if your gonna tweak your engine. Good luck on the swap in and keep postin. Even if people don't keep up now, there will always be someone diggin for info later. The more the merrier.
01-23-2012, 07:20 PM
#93
Registered User
Thread Starter
Thanks mountain goat. I got pretty intense with the updates there for a while lol, but now schools started and updates will slow way down again. I'm liking having the truck back too much to want to rip it apart again. That motorcycle is cold in 5 degree weather lol!! And for 68mph, that's literally the exact speed I'm usually driving. I try to keep it at 70 so that'll be perfect!
There's not too much left to do, besides find parts. Got my 4.88 rear diff today WITH AN ARB AIR LOCKER!! WOOOO! Got it for $450 ($525 shipped from Cali). The pinion teeth are chipped so I'll need to figure out what to do about that eventually. Hopefully it holds up for now. I wanna go home this weekend real bad. I'd like to just install a new pinion gear and skip the ring gear, not sure if that's possible though.
Still need a W56 forward shift tranny and an adapter plate (as well as a flywheel and pilot bushing).
Last thing to get is my on board air system. Now I might as well do it so I can at least have a locked rear if it snows, since I won't have 4wd for a while. But come to think of it, I can make my front driveshaft now since I have matching gears! WOOOO!!! Guess I'll be working on my driveshaft as soon as possible.
01-24-2012, 08:03 AM
#94
Registered User
Join Date: Dec 2011
Location: Front Range, C
Posts: 23
Likes: 0
Received 0 Likes
on
0 Posts
Yea I know how school can get in the way. I'm on my second try with this swap. First time I was still in college and had to juggle class and greasy hands. Do I drnk heady beer this weekend or order a part for the rig? Life is full of tough choices eh? I'd replace both ring and pinion if I were you. You'll thank yourself later.

 02-01-2012, 01:51 PM
#97
Registered User
Thread Starter
Brainstorming here on ways to get the engine running long enough to do a compression test and to tune the engine before it goes in the truck. I don't have a radiator or an oil cooler yet. So I figured I'd just splice the oil cooler lines together, and for the radiator, maybe take 2 garden hoses and get some adapter to connect them to the engine, and stick the other ends in a 5 gallon bucket? Is there any maximum length I can run for the garden hose? Any other ideas???
And just thought I'd let you guys know, my truck won't hold above 60mph right now. 5th gear is unusable. Thinking it's related to terrible aerodynamics from the backwards rake and just the overall lift. I also did a compression test on my 22R yesterday and found that it's lost an avg of 20psi in each cylinder compared to 2 years ago.
And just thought I'd let you guys know, my truck won't hold above 60mph right now. 5th gear is unusable. Thinking it's related to terrible aerodynamics from the backwards rake and just the overall lift. I also did a compression test on my 22R yesterday and found that it's lost an avg of 20psi in each cylinder compared to 2 years ago.
02-01-2012, 03:16 PM
#98
Registered User
Join Date: Feb 2008
Location: hendersonville, TN.
Posts: 1,417
Likes: 0
Received 0 Likes
on
0 Posts
This thing is gonna be awsome when the front springs settle.
As for keeping the motor running with a garden hose, it might keep the engine to cool without a t-stat and instant hot to tap cold could cause more problems with a t-stat. If I was you I would hook up a radiator...... that last part is free wisdom..
As for keeping the motor running with a garden hose, it might keep the engine to cool without a t-stat and instant hot to tap cold could cause more problems with a t-stat. If I was you I would hook up a radiator...... that last part is free wisdom..
02-01-2012, 04:04 PM
#99
Registered User
Thread Starter
Ya, i was seeing to many cons with running it straight from the well. Never thought of the cold part, thanks for that input. Also thought the water pressure might interfere with the water pump on the engine. But a 5gal bucket was the last thing we settled on. Figured the water could then heat up and we could keep on eye on it just from dipping our hand into it. I sold my spare radiator off the powerwagon (grrrrrr). I found a used one for $40 off a 2001 Chevy 1500 for $40. If I get lucky, maybe it'll fit and I can just use it.
One more question, my friend said we could run it for 15 seconds to make sure it runs, without water in it. Would that kill the water pump though?
One more question, my friend said we could run it for 15 seconds to make sure it runs, without water in it. Would that kill the water pump though?


