Can't wait for BOOST! egesledder's 7mgte swap
 09-10-2012, 07:47 AM
#21
Registered User
Thread Starter
Join Date: Aug 2008
Location: Boulder, CO
Posts: 145
Likes: 0
Received 0 Likes
on
0 Posts
Haha, I guess its more of a pet peeve of mine than anything else. I just see too many poser ricer dudes running around with hood pins on their honda civics. Also, its more of a challenge, which I like.
So I finally got it running last night for the first time! Here is what I have been doing since the last update:
Fuel lines: Like I mentioned earlier, I didn't want my fuel lines running right next to the turbo outlet. I decided to cross my fuel lines over and run them up the driver's side. I bought about 20' of 5/16" stainless hardline and started bending it up.
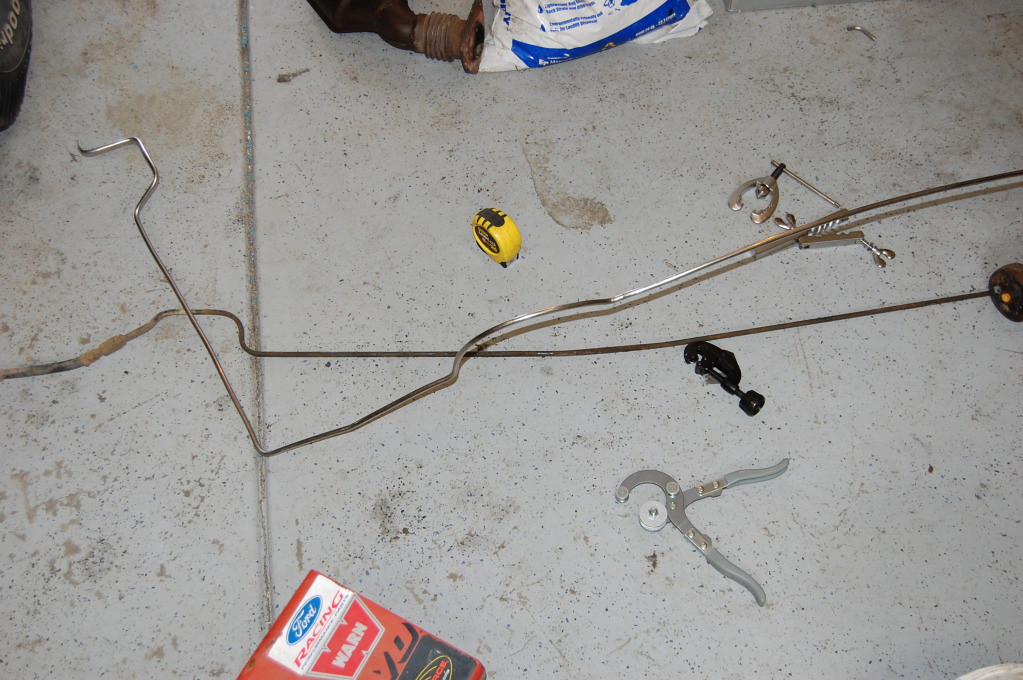
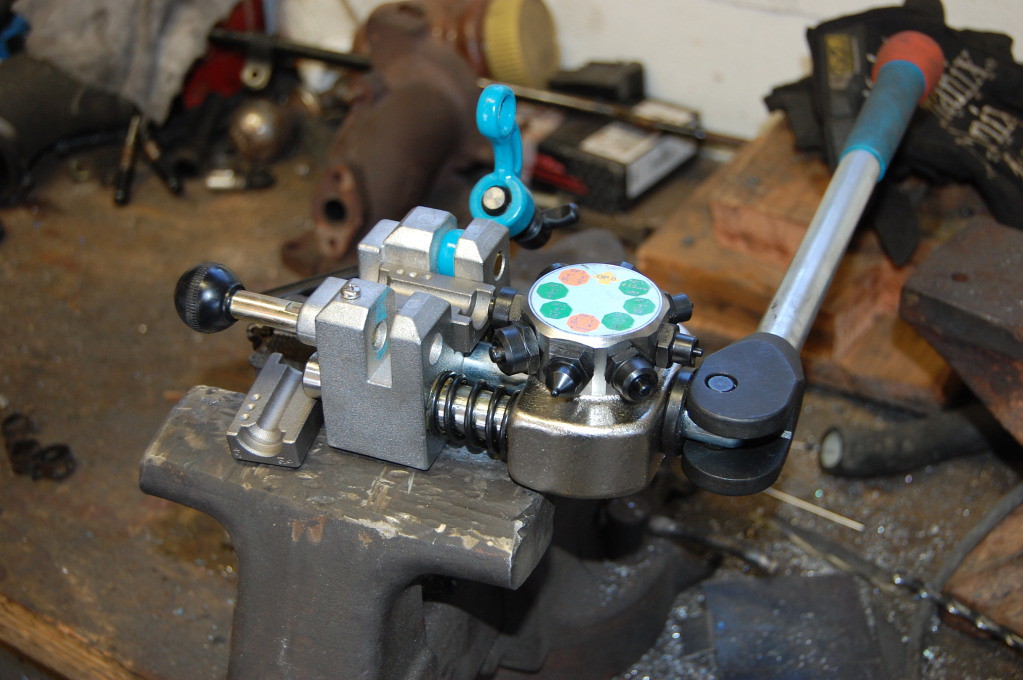
I found that the standard tube flaring tool DOES NOT work really at all on stainless line, its just too hard. I bought one of these from Summit, and its my new favorite tool. It makes flaring super easy and every flare comes out absolutely perfect:
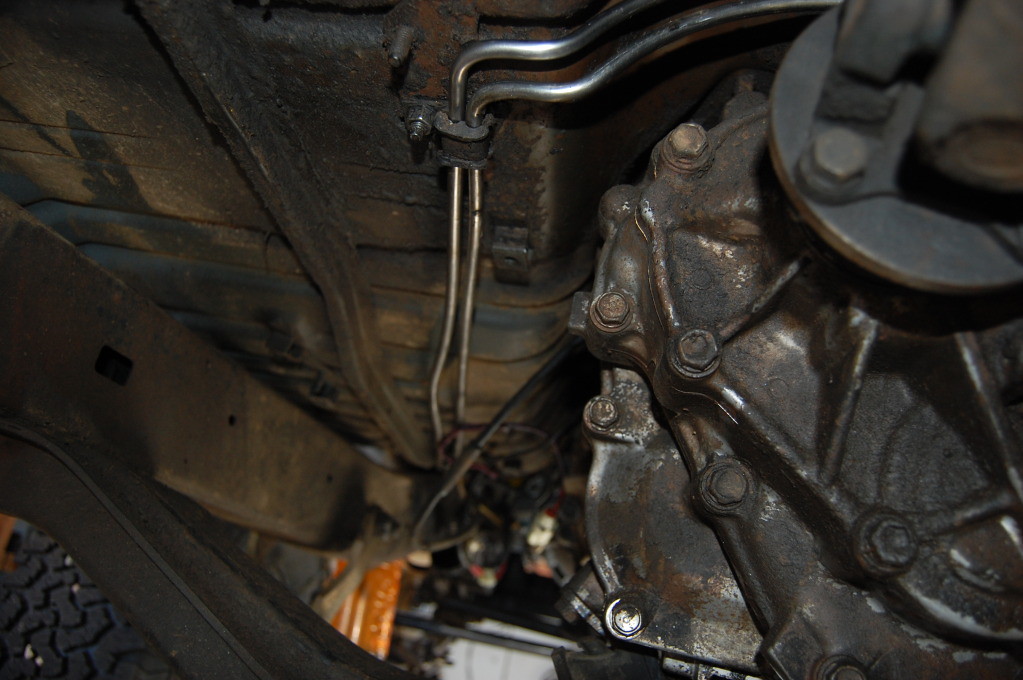
Finished and fitted lines:
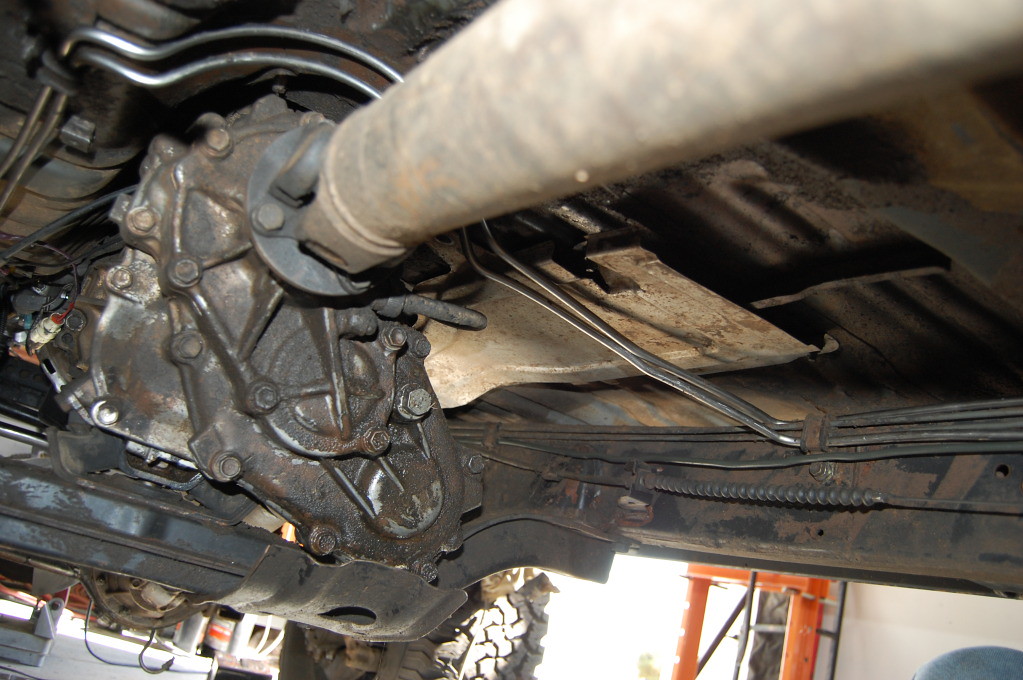
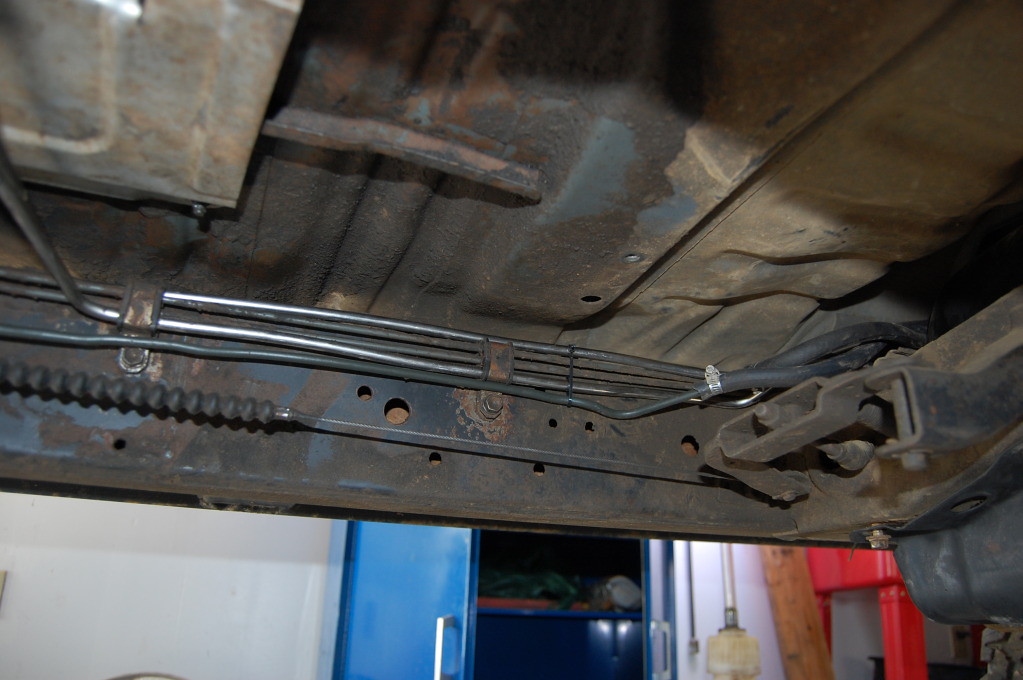
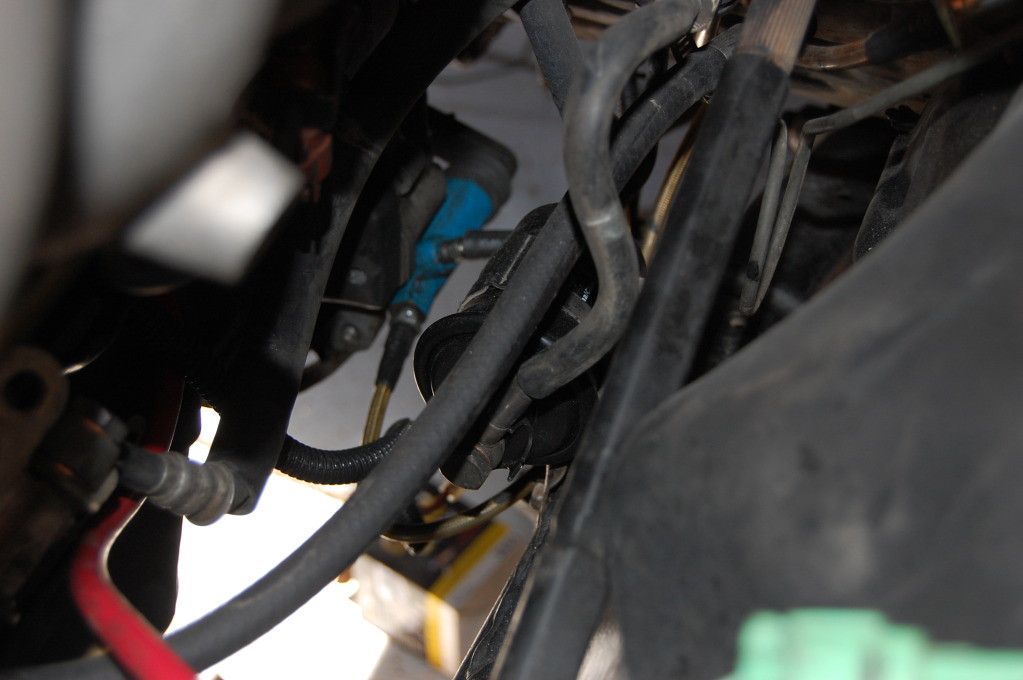
I mounted the new fuel filter on the frame rail up next to the engine:
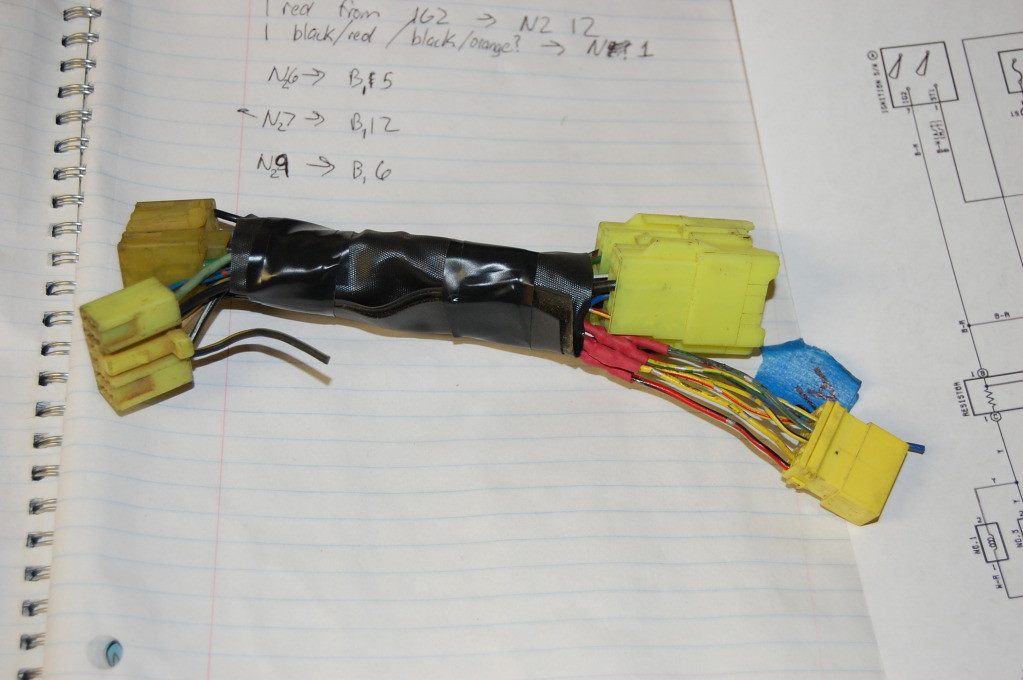
Wiring: Well, the wiring has been pretty well covered by a lot of other people, so I won't go too into detail. I made this small conversion harness from the Supra body harness and some truck plugs I had. There were still 3 wires or so that I had to splice into on the truck. One was the IG2, or starter ignition switch wire, one was the ignition fuse wire, and the last was a wire from the COR. The rest I was able to re-pin or move around. Conversion harness:
Installed:

I was able to make it all fit behind the passenger kick panel with a little modification to the ECU mounting brackets. I spent probably 30 hours on the wiring planning, double checking, and then soldering/heat shrinking every connection.
When I was finally able to hook up a battery and test it all out, I didn't have spark or fuel. I started going back through all the wiring that I had done. I couldn't find a single thing that looked wrong, so I was stumped. It turned out that the ignition fuse had been removed and the fuel pump hadn't been plugged back in. Soooo.... my wiring harness was perfect, haha. Even the 4wd, reverse lights, and engine check light worked!
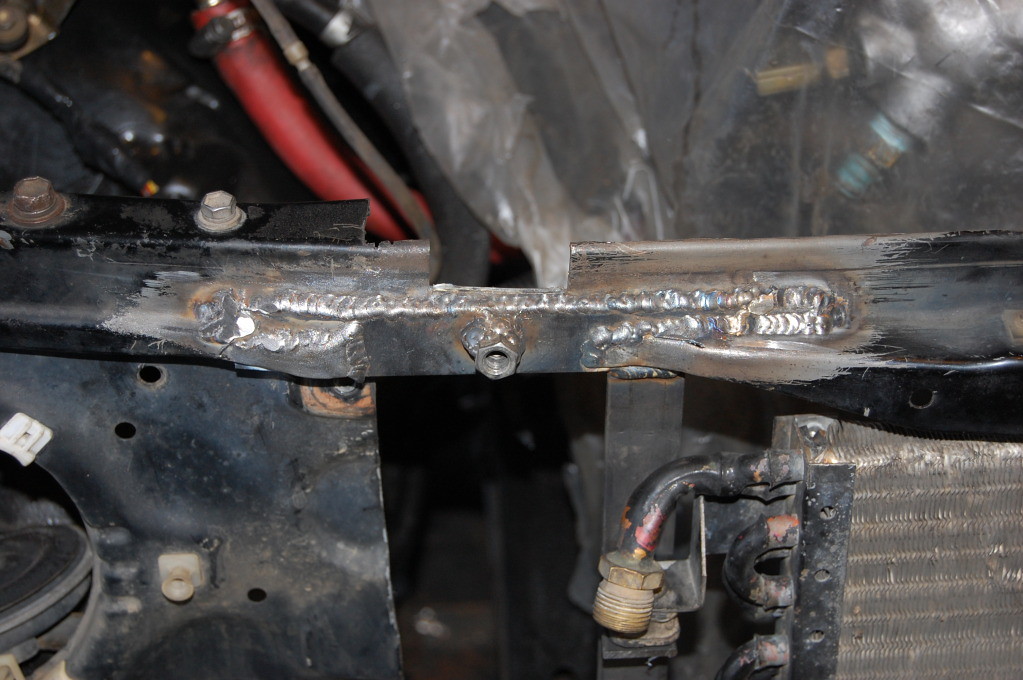
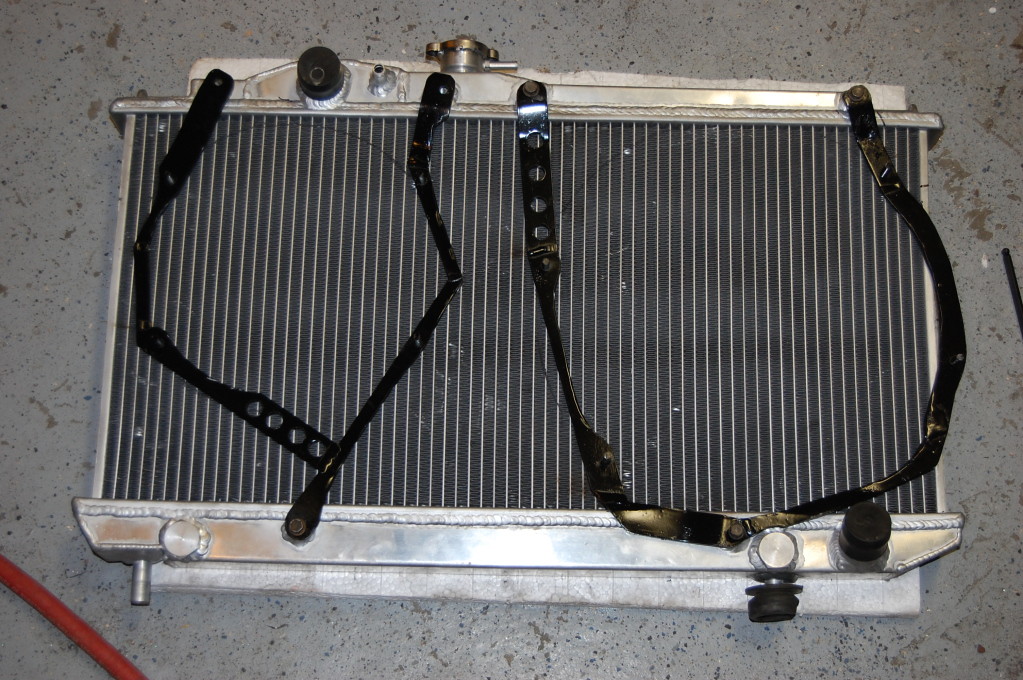
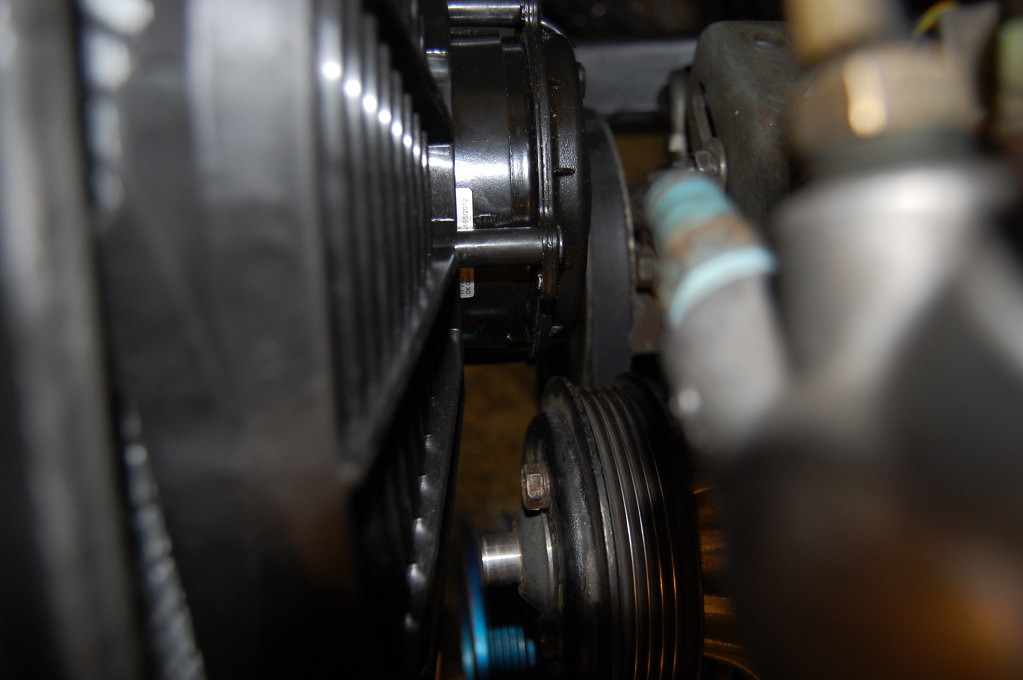
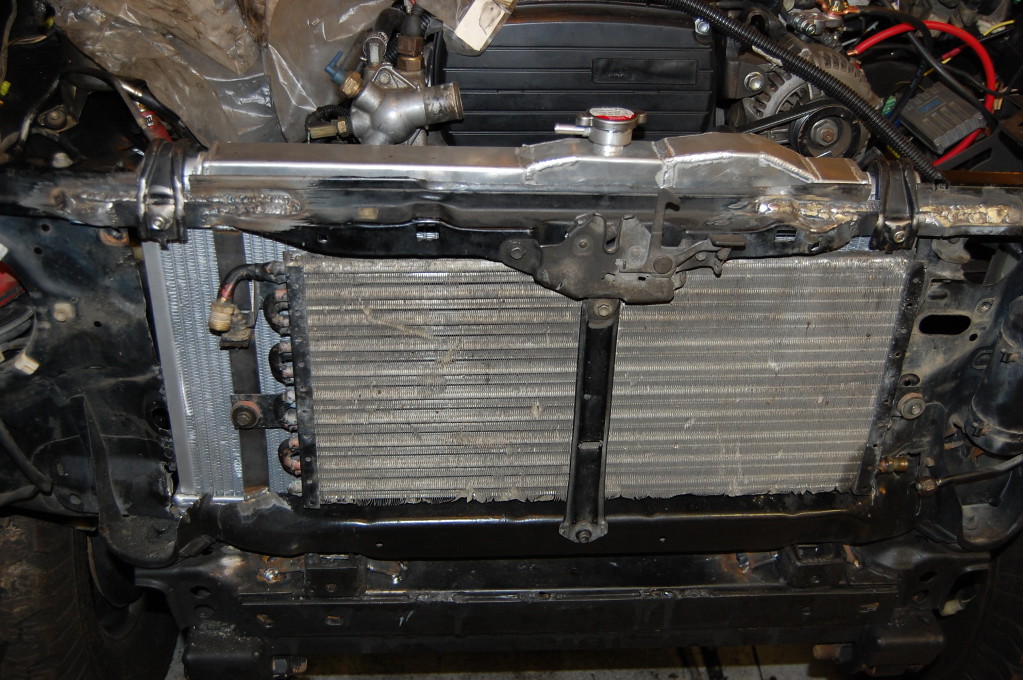
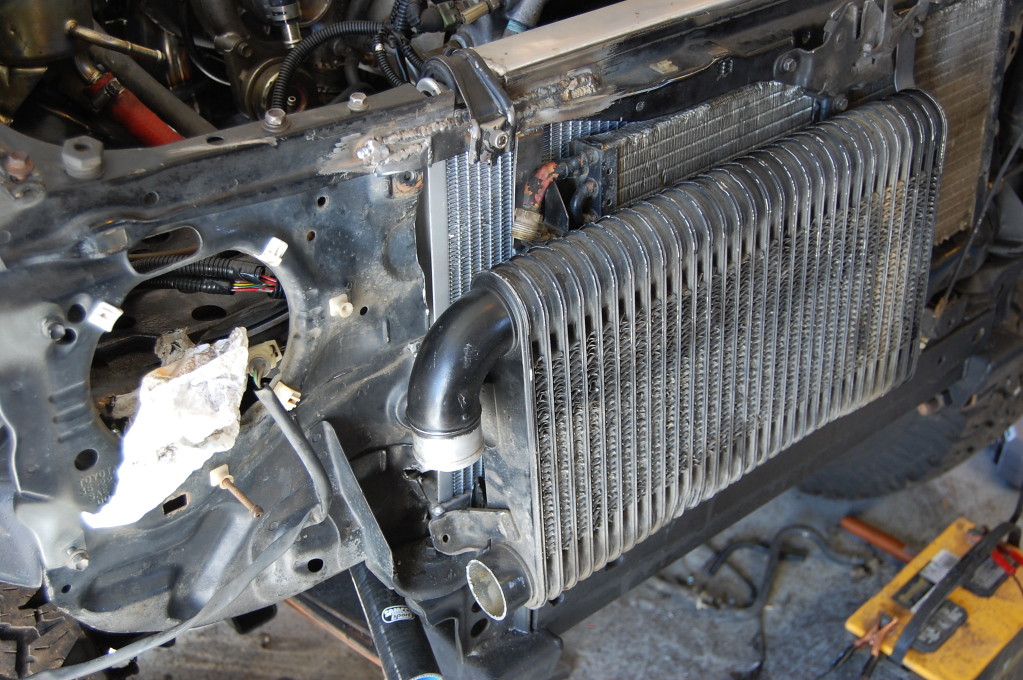
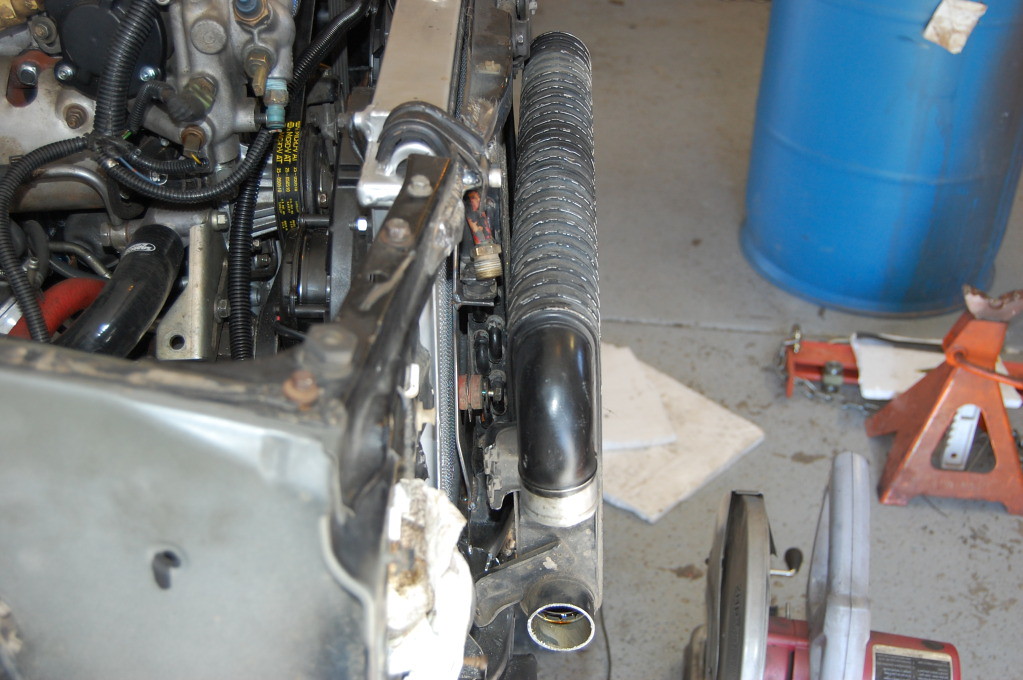
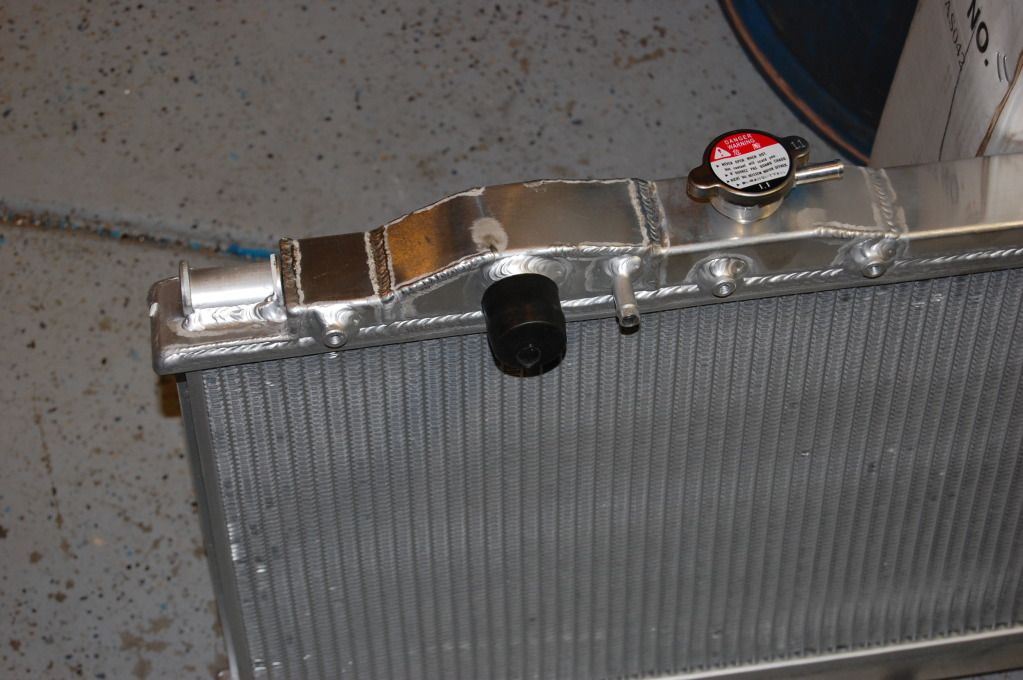
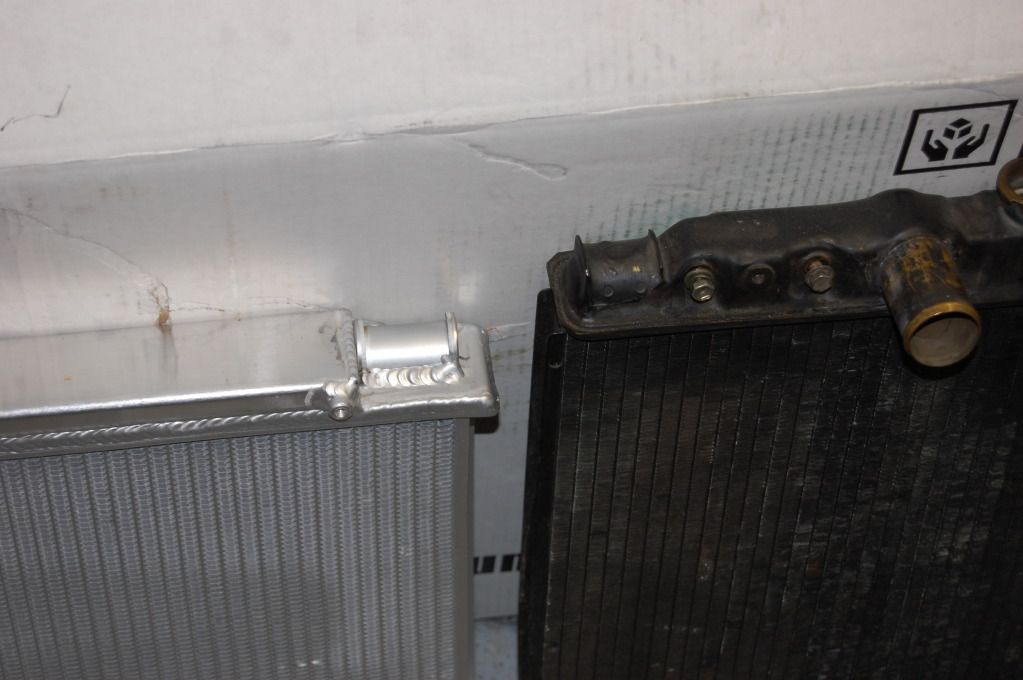
Cooling: I wanted to mount this new aluminum radiator like it would have been in a stock supra or celica. This makes it very easy to remove, which is required for any kind of work on the front of the motor due to the small space. The other benefit to this is the radiator is completely rubber isolated and won't have torsional stress put on it, which can kill these all aluminum "racing" radiators in a hurry.
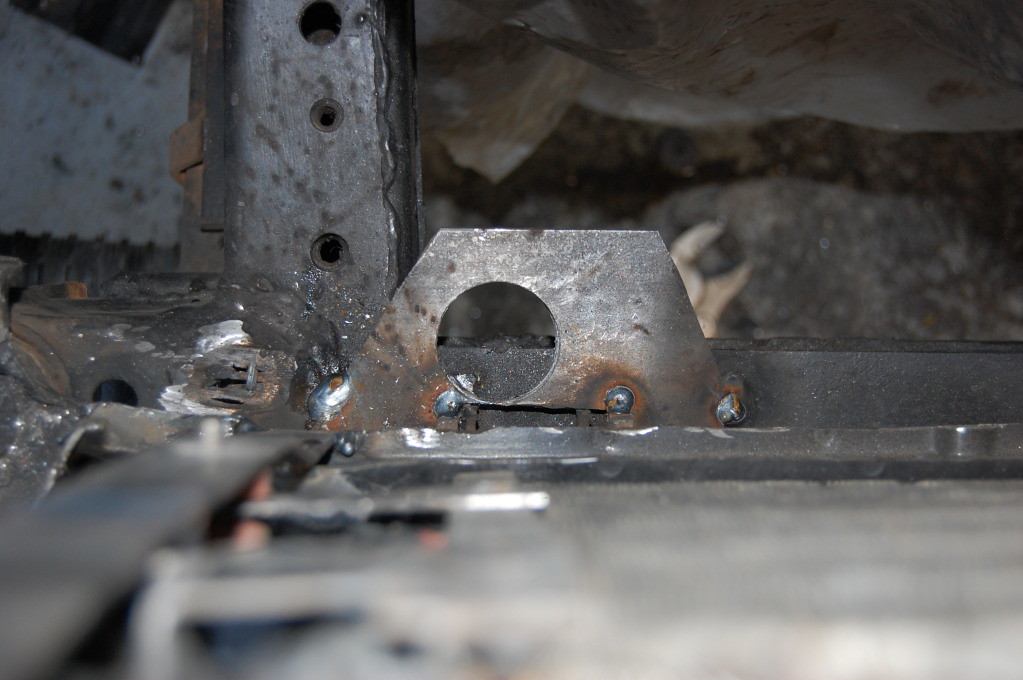
Tacked in a couple tabs for the bottom mounts:
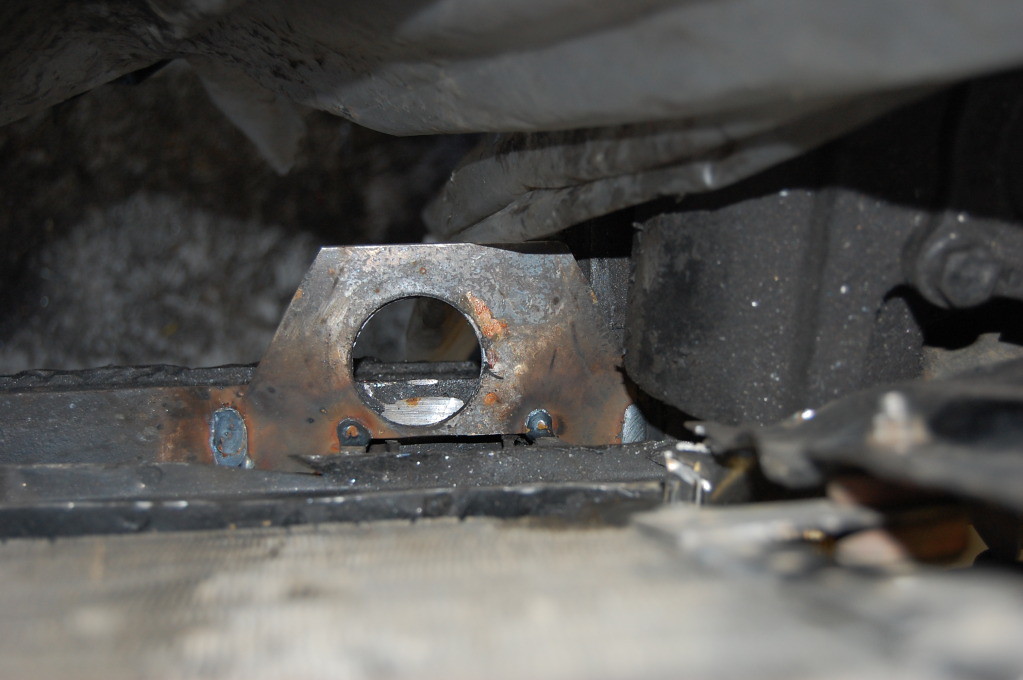
Modified the radiator support to use the supra upper brackets:

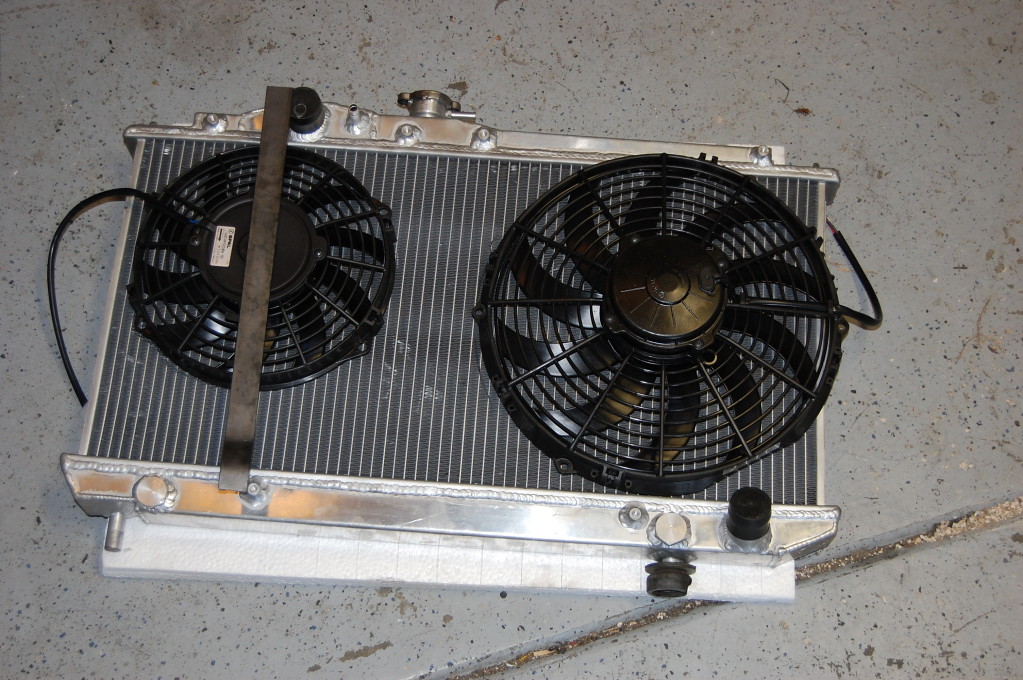
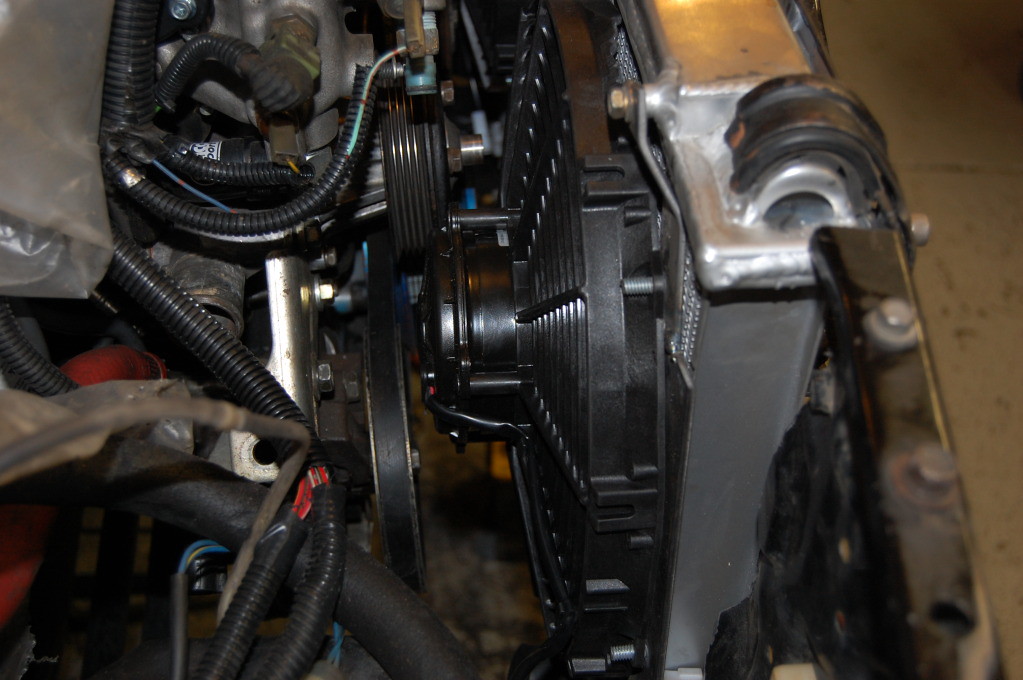
For the fans, I found that there was no way to fit the big Ford fans in there. After some measurements, I ordered a couple SPAL fans. One was their high powered 12" fan and the other was their low profile 9" fan. After I got them in and test fitted them, I found that I probably could have run the 12" low profile instead of the 9", but I'll run this for now and upgrade if needed. I built a couple brackets out of 1/8" strap:
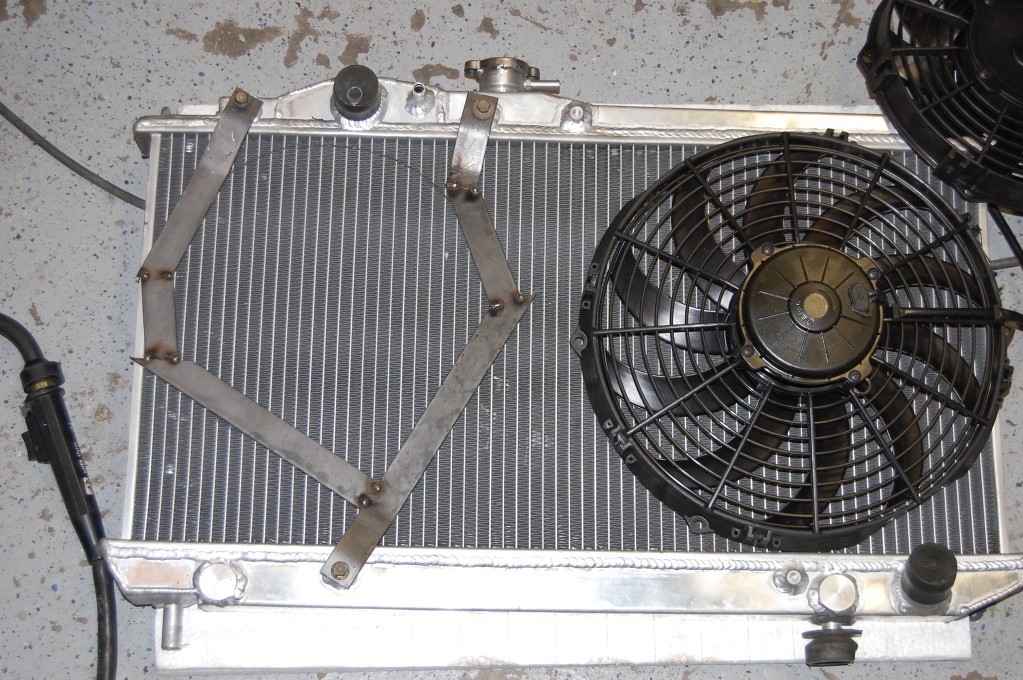
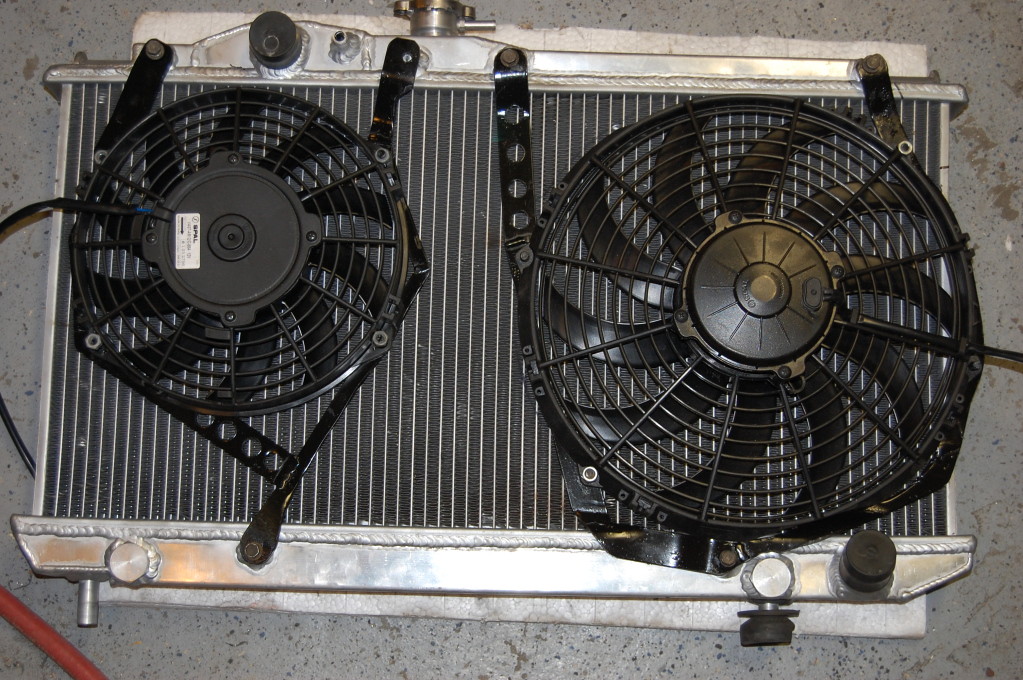
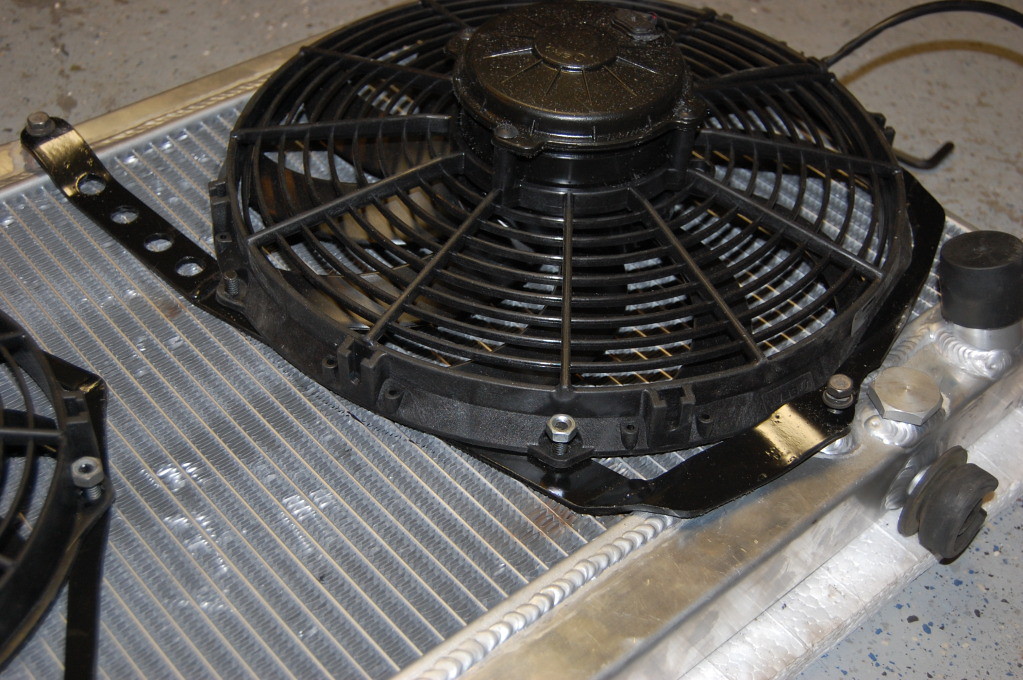
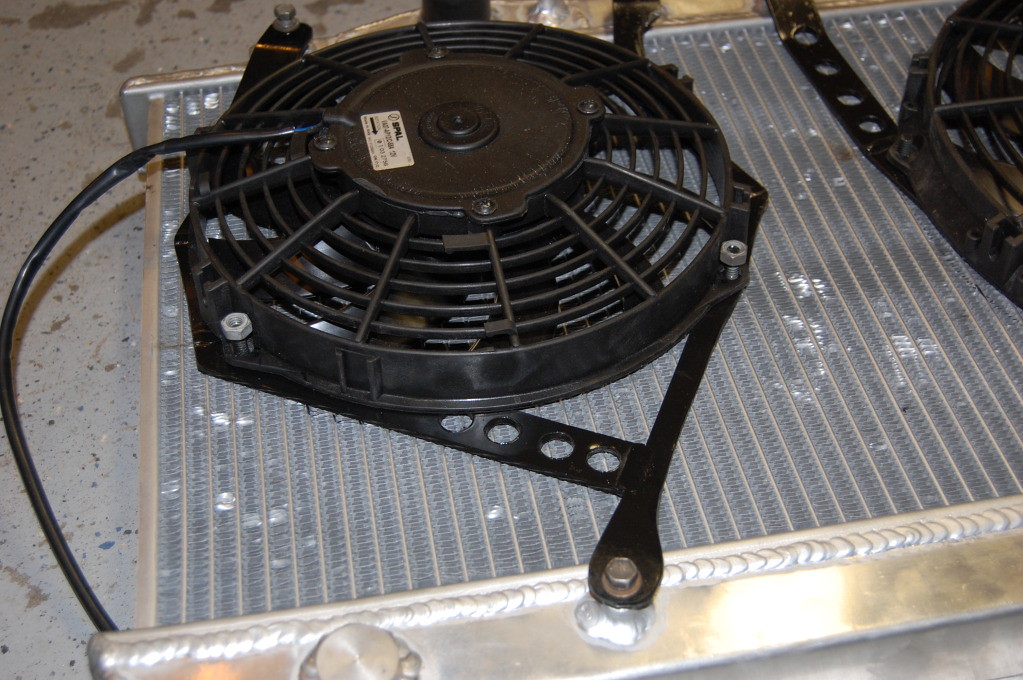
I didn't want to run the cheesy zip-tie-through-the-core mounts for obvious reasons, and these brackets are super easy to remove with 3 bolts a piece.
It fits, but its damn close. If its too close, I'll modify it eventually:
Also fabbed up some mounts for the A/C condenser:
Took a break to do some of this:
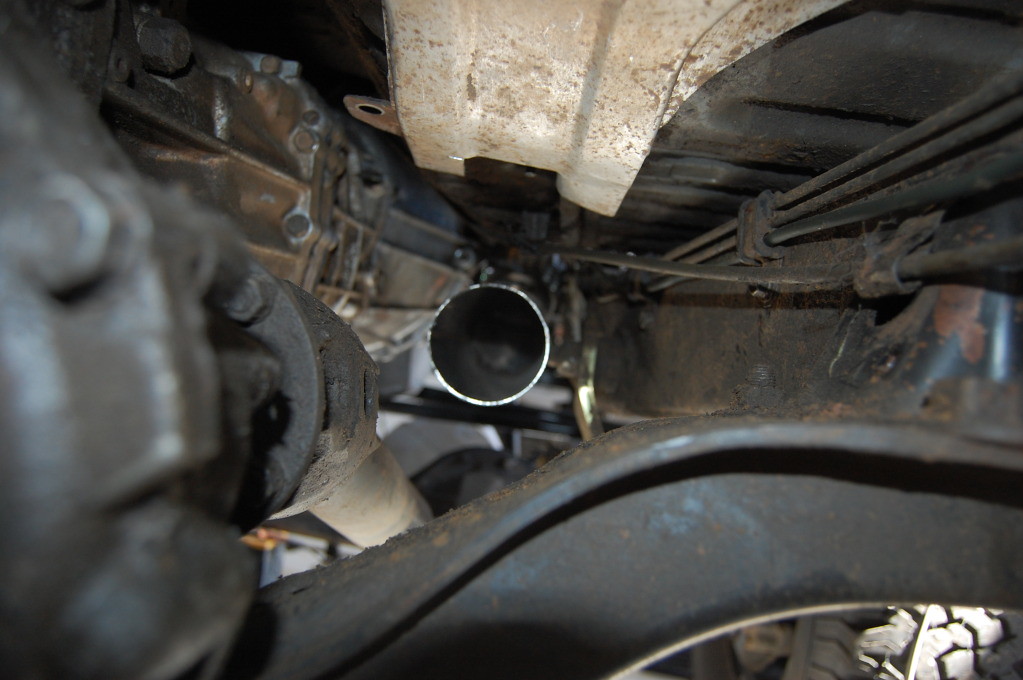
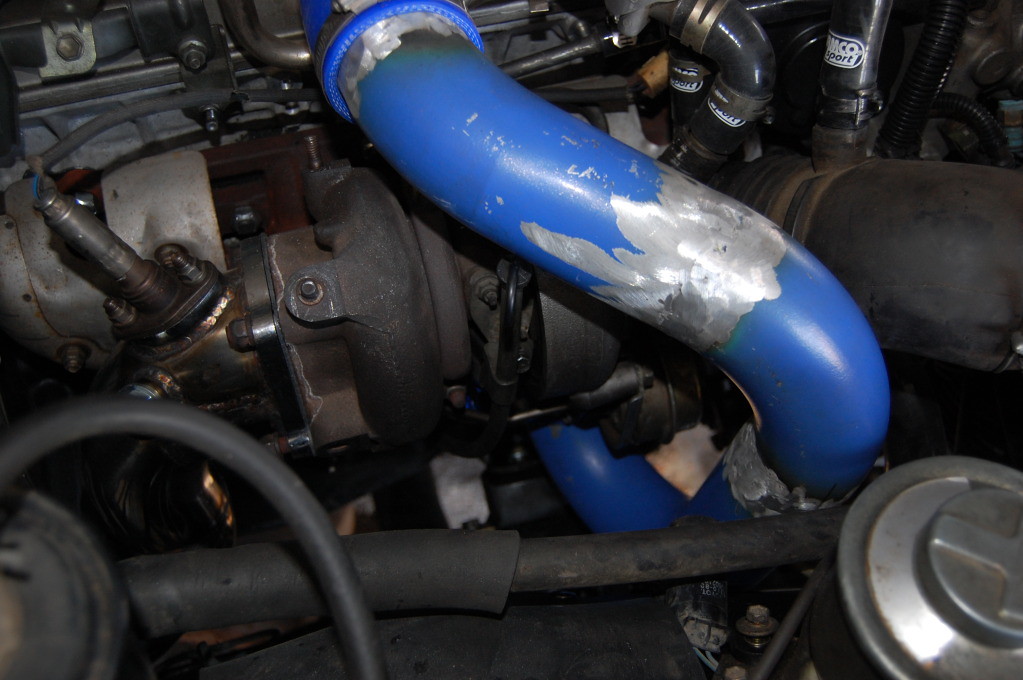
Downpipe: The downpipe is supra specific and it didn't really fit the truck very well. I had to cut about 8 inches off the back just so I could remove it without dropping the transfer case crossmember. I also had to rotate it away from the transmission about 5 degrees and move it up about 2 inches. Good thing I've got a TIG welder because that stuff was THIN.

How it sits now, its a little close the upper shackle bolt, but if its a problem, I'll just flip the bolt around. Notice the heat shielding I moved over from the driver's side. The down pipe will also be wrapped in header wrap to reduce more of the heat transfer to the cab.
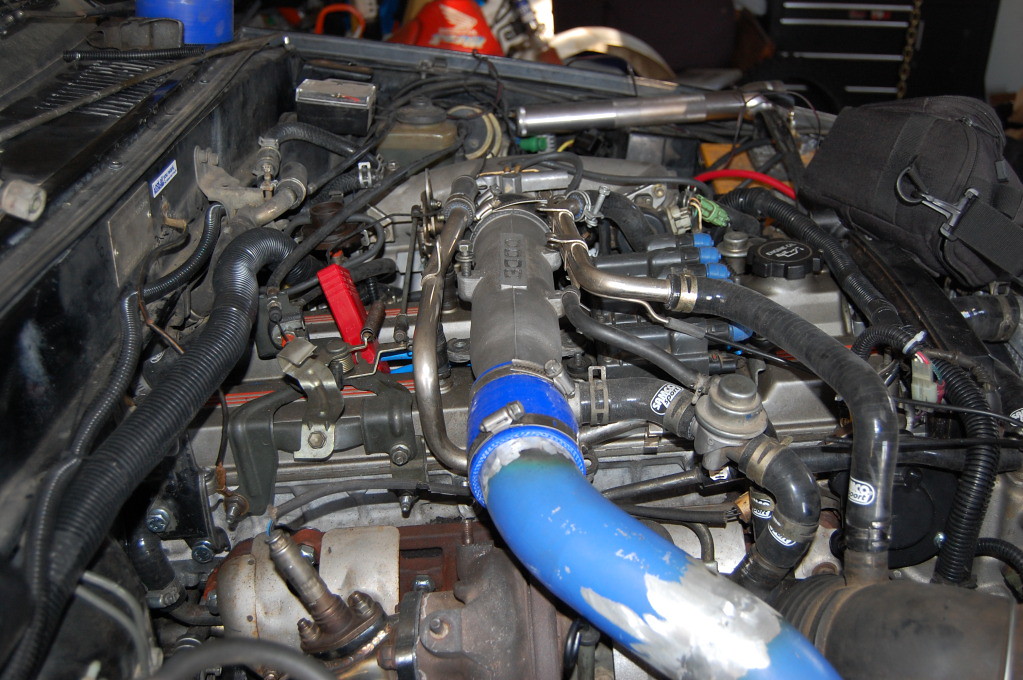
Intercooler: Well, the stock one just isn't going to fit very well and is really going to cut into my winch mounting area. I've decided to go with a water to air intercooler instead. This will save a bit of room up front, allow for smaller plumbing up front, and really reduce the intake charge path length. Supposedly its also more efficient, but there are arguments both ways. Here is the stock intercooler in about the closest position I could get it in:
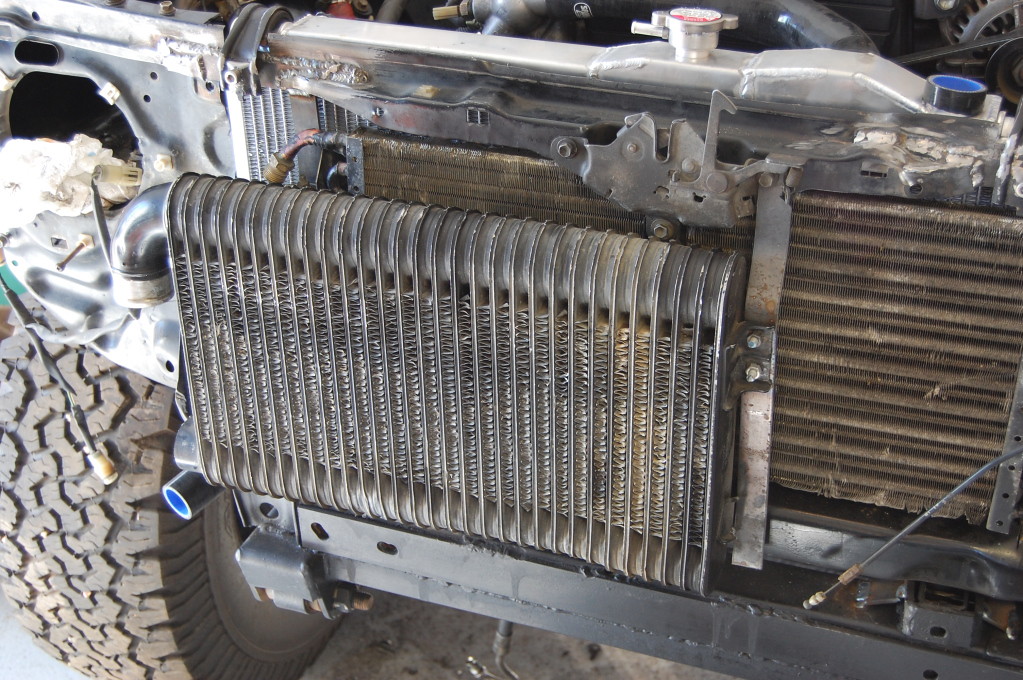
I'm going to go with one of those barrel type bar and plate charge coolers and it will sit right on top of the motor. Its probably not all that efficient, but should flow enough for around 300hp, which will work for me. This also allowed me to build up an intercooler pipe to connect directly to the "3000" pipe right now, which will eventually be replaced by the intercooler. Yes, its a ˟˟˟˟˟ty blue color because its cheap ebay aluminum pipe. It will be repainted, haha.
Of course, there is a ton of small stuff that I'm just not going to write about...
So I finally got it running last night for the first time! Here is what I have been doing since the last update:
Fuel lines: Like I mentioned earlier, I didn't want my fuel lines running right next to the turbo outlet. I decided to cross my fuel lines over and run them up the driver's side. I bought about 20' of 5/16" stainless hardline and started bending it up.
I found that the standard tube flaring tool DOES NOT work really at all on stainless line, its just too hard. I bought one of these from Summit, and its my new favorite tool. It makes flaring super easy and every flare comes out absolutely perfect:
Finished and fitted lines:
I mounted the new fuel filter on the frame rail up next to the engine:
Wiring: Well, the wiring has been pretty well covered by a lot of other people, so I won't go too into detail. I made this small conversion harness from the Supra body harness and some truck plugs I had. There were still 3 wires or so that I had to splice into on the truck. One was the IG2, or starter ignition switch wire, one was the ignition fuse wire, and the last was a wire from the COR. The rest I was able to re-pin or move around. Conversion harness:
Installed:
I was able to make it all fit behind the passenger kick panel with a little modification to the ECU mounting brackets. I spent probably 30 hours on the wiring planning, double checking, and then soldering/heat shrinking every connection.
When I was finally able to hook up a battery and test it all out, I didn't have spark or fuel. I started going back through all the wiring that I had done. I couldn't find a single thing that looked wrong, so I was stumped. It turned out that the ignition fuse had been removed and the fuel pump hadn't been plugged back in. Soooo.... my wiring harness was perfect, haha. Even the 4wd, reverse lights, and engine check light worked!
Cooling: I wanted to mount this new aluminum radiator like it would have been in a stock supra or celica. This makes it very easy to remove, which is required for any kind of work on the front of the motor due to the small space. The other benefit to this is the radiator is completely rubber isolated and won't have torsional stress put on it, which can kill these all aluminum "racing" radiators in a hurry.
Tacked in a couple tabs for the bottom mounts:
Modified the radiator support to use the supra upper brackets:
For the fans, I found that there was no way to fit the big Ford fans in there. After some measurements, I ordered a couple SPAL fans. One was their high powered 12" fan and the other was their low profile 9" fan. After I got them in and test fitted them, I found that I probably could have run the 12" low profile instead of the 9", but I'll run this for now and upgrade if needed. I built a couple brackets out of 1/8" strap:
I didn't want to run the cheesy zip-tie-through-the-core mounts for obvious reasons, and these brackets are super easy to remove with 3 bolts a piece.
It fits, but its damn close. If its too close, I'll modify it eventually:
Also fabbed up some mounts for the A/C condenser:
Took a break to do some of this:
Downpipe: The downpipe is supra specific and it didn't really fit the truck very well. I had to cut about 8 inches off the back just so I could remove it without dropping the transfer case crossmember. I also had to rotate it away from the transmission about 5 degrees and move it up about 2 inches. Good thing I've got a TIG welder because that stuff was THIN.
How it sits now, its a little close the upper shackle bolt, but if its a problem, I'll just flip the bolt around. Notice the heat shielding I moved over from the driver's side. The down pipe will also be wrapped in header wrap to reduce more of the heat transfer to the cab.
Intercooler: Well, the stock one just isn't going to fit very well and is really going to cut into my winch mounting area. I've decided to go with a water to air intercooler instead. This will save a bit of room up front, allow for smaller plumbing up front, and really reduce the intake charge path length. Supposedly its also more efficient, but there are arguments both ways. Here is the stock intercooler in about the closest position I could get it in:
I'm going to go with one of those barrel type bar and plate charge coolers and it will sit right on top of the motor. Its probably not all that efficient, but should flow enough for around 300hp, which will work for me. This also allowed me to build up an intercooler pipe to connect directly to the "3000" pipe right now, which will eventually be replaced by the intercooler. Yes, its a ˟˟˟˟˟ty blue color because its cheap ebay aluminum pipe. It will be repainted, haha.
Of course, there is a ton of small stuff that I'm just not going to write about...
Last edited by egesledder; 01-25-2018 at 06:38 PM.
 09-10-2012, 09:01 AM
#22
Registered User
Join Date: Jul 2012
Location: SC
Posts: 53
Likes: 0
Received 0 Likes
on
0 Posts
You do nice tidy work egesledder!  Thanks for all the pics and ideas as they will help others with there 7m swap. Man that is some absolutely beautiful land in your pics. Reminds me of the Tennessee mountains that I use to live near.
Great wheelin and camping terrain
  no doubt!
Take care.
Thanks for all the pics and ideas as they will help others with there 7m swap. Man that is some absolutely beautiful land in your pics. Reminds me of the Tennessee mountains that I use to live near. Great wheelin
and camping terrain no doubt! Take care.
09-10-2012, 04:34 PM
#24
Registered User
Join Date: Jul 2009
Location: Rocky Mtn. House AB, Canada
Posts: 727
Likes: 0
Received 1 Like
on
1 Post
what I have on mine is a subaru top mount intercooler. Well...I call it an interheater. The only place for it to sit is right on top of the turbo...which puts out huge amounts of heat. The intercooler can't be touched after cruising around town. It just gets too hot up there. Even with my custom cowl hood theres just not enough air flow to make it work. You'd be better off sticking with the pipe you have. Wrap it in heat tape and call it a day. I'm in the process of geting a FMIC setup. Long story short. DON'T GO TOP MOUNT!!!!
09-10-2012, 08:22 PM
#26
Registered User
Thread Starter
Join Date: Aug 2008
Location: Boulder, CO
Posts: 145
Likes: 0
Received 0 Likes
on
0 Posts
I'm guessing you're talking about the blue crank pulley. Its a stock crank pulley that someone painted blue. I'm going to repaint it, but I haven't got around to it. The rubber damper in it is in good condition and it was balanced along with the crank/rods/pistons when I did that a while back.
As far as intercooling, I'm going to run a water to air intercooler. That is quite a bit different than a top mount air-air cooler. I've measured the area and it won't sit over the turbo at all really. I'm sure I can figure out a way to heat shield the turbo as well.
As far as intercooling, I'm going to run a water to air intercooler. That is quite a bit different than a top mount air-air cooler. I've measured the area and it won't sit over the turbo at all really. I'm sure I can figure out a way to heat shield the turbo as well.
09-10-2012, 08:40 PM
#27
Registered User
Join Date: Jul 2012
Location: SC
Posts: 53
Likes: 0
Received 0 Likes
on
0 Posts
 This is the first I have heard about that although I can't say I've looked into it. Thanks for posting that info! That would just be horrible to go through so much work just to rag the engine.
09-11-2012, 06:07 AM
This is the first I have heard about that although I can't say I've looked into it. Thanks for posting that info! That would just be horrible to go through so much work just to rag the engine.
09-11-2012, 06:07 AM
#28
Registered User
Thread Starter
Join Date: Aug 2008
Location: Boulder, CO
Posts: 145
Likes: 0
Received 0 Likes
on
0 Posts
Here is some light reading on the subject:
http://www.suprasonic.org/public_htm...ech/dinan.html
09-11-2012, 10:19 AM
#30
Registered User
Thread Starter
Join Date: Aug 2008
Location: Boulder, CO
Posts: 145
Likes: 0
Received 0 Likes
on
0 Posts
The radiator worked fine with the hoses. Dimension wise, its almost identical to the supra radiator except for the height. There is one barb fitting that I welded shut because it wasn't needed. You can see it in the picture below (prior to welding) between the cap and upper hose connection. I'm sure you could just cap it off if you don't have welding access.
Last edited by egesledder; 01-25-2018 at 06:39 PM.
09-16-2012, 06:24 PM
#31
Registered User
oh here is what you were talking about...
i would recommend a vented hood or body lift or both. that motor makes a bunch of heat.
yes, it is fast, and fun to mess with people.
cant wait to see how yours turns out. mine is taking forever due to the other things i have going (moving, settling in, building a 82 for my uncle and trying to get a snowmobile running b4 the snow)
Last edited by INFINITY; 09-16-2012 at 06:29 PM.
09-27-2012, 06:06 AM
#32
excellent thank you!
I just received my EBay special downpipe. Mine looks similar to yours except my flex tube is on the horizontal section. Any pictures of the downpipe would also be appreciated.
I ended up getting the Volvo 240 Radiator. Good thing it is cold up where I live because it is not the biggest rad.
I just received my EBay special downpipe. Mine looks similar to yours except my flex tube is on the horizontal section. Any pictures of the downpipe would also be appreciated.
I ended up getting the Volvo 240 Radiator. Good thing it is cold up where I live because it is not the biggest rad.
09-28-2012, 06:11 AM
#34
Registered User
Thread Starter
Join Date: Aug 2008
Location: Boulder, CO
Posts: 145
Likes: 0
Received 0 Likes
on
0 Posts
I haven't run the exhaust completely yet, all I have is a down pipe. I haven't had time to work on it for a few weeks and I won't have time for another couple weeks or so due to some other projects.
I've got to take the down pipe back off to weld a flange on the end, so I'll take a picture then. Basically though, I just had to cut about 1.5-2 inches out of the vertical section (to bring the horizontal section up) and then rotate it slightly (5-10 degrees) towards the passenger side (as its sitting in the truck). There was quite a bit of tack welding and fit checking going on before it was perfect.
As far as the rest of the exhaust, it will be routed above the cross member and I'll be crossing it over right after the transfer case. The crossover section will be removable with a couple flanges so I can have better access to the drive train for service. I'll run a 3" high flow cat and a fairly large 3" muffler to cut down on noise a bit. All of this will be built with standard mandrel bent aluminized steel exhaust tube. I'm pretty sure that this should flow plenty for my needs.
Last edited by egesledder; 09-28-2012 at 06:13 AM.
 09-28-2012, 05:39 PM
#37
Registered User
Looking good, this was my other consideration before starting in on my 1UZ, I just couldn't pass up the deals I got on either of my 1UZ's (have 2).
Keep up the good work and hope to see a vid soon!
Keep up the good work and hope to see a vid soon!
10-01-2012, 06:13 AM
#38
Registered User
Thread Starter
Join Date: Aug 2008
Location: Boulder, CO
Posts: 145
Likes: 0
Received 0 Likes
on
0 Posts
Had a free night so I knocked out an intake. Its a 60 degree turn section of 4" aluminum pipe and it replaces the rubber accordion hose that is always cracked. I wasn't really wanting the ebay racer blue silicone reducers, but I couldn't find black ones when I bought them, so whatever... I bought some 1/4", 5/8" and 3/4" OD aluminum tube from McMaster to weld in for the hoses you see:
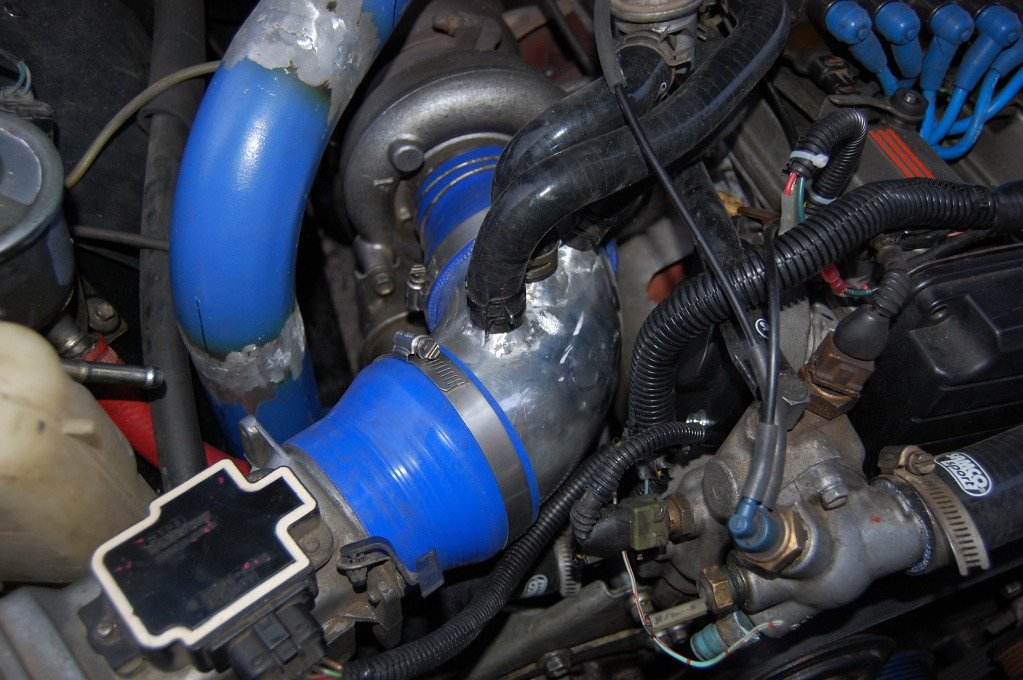
It fits very well with the 6" K&N cone filter I've got on the end.
It fits very well with the 6" K&N cone filter I've got on the end.
Last edited by egesledder; 07-14-2017 at 09:24 AM.


