22RE -> 7MGE 3.0 L Supra
 12-26-2008, 02:42 PM
#1
Registered User
Thread Starter
22RE -> 7MGE 3.0 L Supra
I just copied this from another thread I made somewhere else, thought I'd post it here for anyone who's looking
Originally my rig had a 22-RE, so the information I’m giving is geared to a 22RE-7MGE swap, the 3.0 V6 is a bit different. Also, I swapped in a naturally aspirated engine, the turbo can also be bolted in but uses a different harness, AFM and ECU, plus there is intercooler plumbing to find room for. The biggest difficulty in this swap is finding room in front of the engine since it is an inline 6, but some creative trimming goes a long way. The 7MGE is built typical Toyota rock solid, but many have had problems with headgasket leakage - the problem with the headgasket was insufficient factory torque (52 ft/lbs) and is remedied by increasing the torque to 72 ft/lbs. A completely bullet-proof fix would include an MLS (multi-layer steel) headgasket and ARP head bolts or studs.
Since everyone is considering fuel economy these days, I'll also say that my 22RE before the swap got 20mpg and I recently got 19.5 mpg highway cruising 80mph with the 7MGE (15mpg on the trails in Big Bear).
I spent ~ 3 months researching this swap during down time at work and several more months searching for parts in Junkyards. This swap could also be done by buying a running Supra. The engine I got from a JDM importer for $375 off ebay (2006 price - I picked it up in person to avoid shipping). Total cost for the entire project was less than $1k (can’t beat junkyard prices). The entire swap took me about 2 -3 days once I had all the parts together, however I’ve since tweaked and changed a few things here and there after driving it awhile. The biggest obstacle is fitting a large enough radiator that will still allow for an electric fan, a lesser problem is exhaust routing since it needs to cross over form the passenger side to join the rest of the exhaust on the driver side.
The majority of my research came from SupraCharged.com and the write-up that I liked best came from Andrew Hulse’s 1st gen 4runner swap.
1G 4runner swap pg 1
1G 4runner swap pg 2
1G 4runner swap pg 3
Here’s the thread 4RnrRick had when he swapped in a 7M 4RnrRick’s swap thread, though he concluded he would have been happier with a 3.4 swap. Here are the HP numbers from his thread
Toyota Motors
20R, 2.2L, 90 HP@4800, 122 Ft-Lbs@2400
22R, 2.4L, 96 HP@4800, 129 Ft-Lbs@2800
22RE, 2.4L, 112 HP@4600, 142 Ft-Lbs@3400
22RTE, 2.4L, 135 HP@4800, 173 Ft-Lbs@2800, 6psi
20R/22R Hybrid, Estimated 135-155 HP depending on build
2RZFE, 2.4L, 142 HP@5000, 160 Ft-Lbs@4000
3RZFE, 2.7L, 150 HP@4800, 177 Ft-Lbs@4000
3VZ-E, 3.0L, 150 HP@4800, 180 Ft-Lbs@3400
5VZ-FE,3.4L, 190 HP@4800, 220 Ft-Lbs@3600
5M-GE, 2.7L, 143 HP@5200, 154 Ft-Lbs@4400
7M-GE, 3.0L, 199 HP@6000, 188 Ft-Lbs@3600
7M-GTE,3.0L, 232 HP@5600, 254 Ft-Lbs@3200, 5psi
The write-ups above go through the actual install fairly well, so I’ll try to avoid repeating too much. What you’ll need to get the 7MGE bolted in:
- Supra bellhousing, clutch fork & throwout bearing retaining spring, clutch slave cylinder & hose - Supra’s used a “W” series transmission which uses the same bellhousing-trans bolt pattern as the “W” series truck trans – you will use your stock “W” series trans and transfer case – use a pre ’89 bellhousing, after this Toyota changed the clutch and pressure plate design, pre ’89 is the standard “fork and throwout” style


- 5MGE motor mount brackets – bolt on one position further back on the 7MGE block and allow you to use the stock 22RE rubber engine mounts

- 7MGE Cressida oil pan and oil pump – the Cressida used a front sump oil pan (vs Supra mid sump which interfered with the IFS front diff) which clears the front tie rod perfectly though you do need to remove the steering damper - also the Supra used a mid sump oil pan, so the dipstick needs to be relocated is using a Supra block, there is already a boss to drill through and it's no big deal using a hand held drill, just make sure you use a drill bit the same size as the dipstick tube, brace the tube to a nearby bolt and seal it up with black RTV


- wire harness – I junkyarded mine for $30 and made sure to be careful pulling it out – don’t break connectors pulling them off, don’t pull on wires and when you get to the big connectors that connect the engine harness to the rest of the vehicle (behind dash) leave yourself ~1’ of wire and take both sides of the connector (male and female side – it makes wiring everything together easier)
- ECU – I was able to mount everything in the stock location down in the passenger side kick panel using the 22RE ECU brackets - it's a tight fit, but works nice if you keep wire length to manageable lengths and tuck them up and behind the ECU


- Vane Airflow Meter to match your engine (smog will want everything to be the same year or newer as your vehicle, but they really have no visual way of checking)
- igniter and ignition coil - I moved the ignition coil to the passenger side so I could use a shorter coil wire

- Injector Resistor (leave this connected to the harness when you get it at the junkyard)

- use the factory throttle cable and fab a simple cable holder –or- use the factory Supra cables, setup and linkages

- factory 22RE fuel pump works fine, no upgrade needed, fuel filter will be factory mounted to the 7MGE block on driver side – need to bend fuel lines to run gas from the passenger side to driver side

- the 7M mechanical fan can not be used, so an electric fan is in order. I looked for a thin electric fan and found that you can get one with decent CFM under 3" thick. I wired an electric thermo switch and an extra sensor to warn of possible overheating (220* puts the gauge about 3/4 of the way to the red) - the threads are 3/8" NPT - the 3 hole t-stat housing was sourced from a 7MGTE (turbo) and had the 220* sensor already in it

- I was able to reuse the 22RE P/S pump by moving the reservoir down on the inner fender a bit and having the 7M pulley center bore machined to .710" and hand filing a keyway (7M uses a ribbed belt) - further the 7M A/C bracket needs to be cut up a bit and a simple bracket fabbed up to adapt the pump to the A/C bracket, I also made a nother bracket to brace the pump in an attempt to reduce vibration and bracket flex under belt tension


- for the exhaust I bought 2 tight radius u-bent pieces from Jegs and cut off bits of angle as I needed them to route the exhaust under the Cressida oil pan (with heat shields on top of the pipe to keep heat away from the oil pan) – also try to keep the catalytic converter as close to the engine as possible so it can get hot enough to pass emissions – another option would be to run the exhaust down the passenger side and cross it over under the t-case, there is just enough room to fish the pipe through a hole between the t-case / crossmember / frame rail, this setup would also allow you to mount the cat converter just after the exhaust manifold (while this routing would be easier, I didn’t like it for a couple reasons)


- firewall will need to be clearanced slightly for the EGR valve on the driver side and for the 90* coolant hose on the passenger side (hose barely touches metal if not clearanced)


- relocated battery from passenger to driver side, I used the factory alternator wire to get power from the new battery location to the original fuse box (I later ran an additional 10 ga wire and added a 120 amp manual reset circuit breaker for accident safety)

- the actual wiring of everything is in this link - 7M Wiring - if you are comfortable with a soldering iron and 12V electrical, there’s nothing to it.
Originally my rig had a 22-RE, so the information I’m giving is geared to a 22RE-7MGE swap, the 3.0 V6 is a bit different. Also, I swapped in a naturally aspirated engine, the turbo can also be bolted in but uses a different harness, AFM and ECU, plus there is intercooler plumbing to find room for. The biggest difficulty in this swap is finding room in front of the engine since it is an inline 6, but some creative trimming goes a long way. The 7MGE is built typical Toyota rock solid, but many have had problems with headgasket leakage - the problem with the headgasket was insufficient factory torque (52 ft/lbs) and is remedied by increasing the torque to 72 ft/lbs. A completely bullet-proof fix would include an MLS (multi-layer steel) headgasket and ARP head bolts or studs.
Since everyone is considering fuel economy these days, I'll also say that my 22RE before the swap got 20mpg and I recently got 19.5 mpg highway cruising 80mph with the 7MGE (15mpg on the trails in Big Bear).
I spent ~ 3 months researching this swap during down time at work and several more months searching for parts in Junkyards. This swap could also be done by buying a running Supra. The engine I got from a JDM importer for $375 off ebay (2006 price - I picked it up in person to avoid shipping). Total cost for the entire project was less than $1k (can’t beat junkyard prices). The entire swap took me about 2 -3 days once I had all the parts together, however I’ve since tweaked and changed a few things here and there after driving it awhile. The biggest obstacle is fitting a large enough radiator that will still allow for an electric fan, a lesser problem is exhaust routing since it needs to cross over form the passenger side to join the rest of the exhaust on the driver side.
The majority of my research came from SupraCharged.com and the write-up that I liked best came from Andrew Hulse’s 1st gen 4runner swap.
1G 4runner swap pg 1
1G 4runner swap pg 2
1G 4runner swap pg 3
Here’s the thread 4RnrRick had when he swapped in a 7M 4RnrRick’s swap thread, though he concluded he would have been happier with a 3.4 swap. Here are the HP numbers from his thread
Toyota Motors
20R, 2.2L, 90 HP@4800, 122 Ft-Lbs@2400
22R, 2.4L, 96 HP@4800, 129 Ft-Lbs@2800
22RE, 2.4L, 112 HP@4600, 142 Ft-Lbs@3400
22RTE, 2.4L, 135 HP@4800, 173 Ft-Lbs@2800, 6psi
20R/22R Hybrid, Estimated 135-155 HP depending on build
2RZFE, 2.4L, 142 HP@5000, 160 Ft-Lbs@4000
3RZFE, 2.7L, 150 HP@4800, 177 Ft-Lbs@4000
3VZ-E, 3.0L, 150 HP@4800, 180 Ft-Lbs@3400
5VZ-FE,3.4L, 190 HP@4800, 220 Ft-Lbs@3600
5M-GE, 2.7L, 143 HP@5200, 154 Ft-Lbs@4400
7M-GE, 3.0L, 199 HP@6000, 188 Ft-Lbs@3600
7M-GTE,3.0L, 232 HP@5600, 254 Ft-Lbs@3200, 5psi
The write-ups above go through the actual install fairly well, so I’ll try to avoid repeating too much. What you’ll need to get the 7MGE bolted in:
- Supra bellhousing, clutch fork & throwout bearing retaining spring, clutch slave cylinder & hose - Supra’s used a “W” series transmission which uses the same bellhousing-trans bolt pattern as the “W” series truck trans – you will use your stock “W” series trans and transfer case – use a pre ’89 bellhousing, after this Toyota changed the clutch and pressure plate design, pre ’89 is the standard “fork and throwout” style
- 5MGE motor mount brackets – bolt on one position further back on the 7MGE block and allow you to use the stock 22RE rubber engine mounts
- 7MGE Cressida oil pan and oil pump – the Cressida used a front sump oil pan (vs Supra mid sump which interfered with the IFS front diff) which clears the front tie rod perfectly though you do need to remove the steering damper - also the Supra used a mid sump oil pan, so the dipstick needs to be relocated is using a Supra block, there is already a boss to drill through and it's no big deal using a hand held drill, just make sure you use a drill bit the same size as the dipstick tube, brace the tube to a nearby bolt and seal it up with black RTV
- wire harness – I junkyarded mine for $30 and made sure to be careful pulling it out – don’t break connectors pulling them off, don’t pull on wires and when you get to the big connectors that connect the engine harness to the rest of the vehicle (behind dash) leave yourself ~1’ of wire and take both sides of the connector (male and female side – it makes wiring everything together easier)
- ECU – I was able to mount everything in the stock location down in the passenger side kick panel using the 22RE ECU brackets - it's a tight fit, but works nice if you keep wire length to manageable lengths and tuck them up and behind the ECU
- Vane Airflow Meter to match your engine (smog will want everything to be the same year or newer as your vehicle, but they really have no visual way of checking)
- igniter and ignition coil - I moved the ignition coil to the passenger side so I could use a shorter coil wire
- Injector Resistor (leave this connected to the harness when you get it at the junkyard)
- use the factory throttle cable and fab a simple cable holder –or- use the factory Supra cables, setup and linkages
- factory 22RE fuel pump works fine, no upgrade needed, fuel filter will be factory mounted to the 7MGE block on driver side – need to bend fuel lines to run gas from the passenger side to driver side
- the 7M mechanical fan can not be used, so an electric fan is in order. I looked for a thin electric fan and found that you can get one with decent CFM under 3" thick. I wired an electric thermo switch and an extra sensor to warn of possible overheating (220* puts the gauge about 3/4 of the way to the red) - the threads are 3/8" NPT - the 3 hole t-stat housing was sourced from a 7MGTE (turbo) and had the 220* sensor already in it
- I was able to reuse the 22RE P/S pump by moving the reservoir down on the inner fender a bit and having the 7M pulley center bore machined to .710" and hand filing a keyway (7M uses a ribbed belt) - further the 7M A/C bracket needs to be cut up a bit and a simple bracket fabbed up to adapt the pump to the A/C bracket, I also made a nother bracket to brace the pump in an attempt to reduce vibration and bracket flex under belt tension
- for the exhaust I bought 2 tight radius u-bent pieces from Jegs and cut off bits of angle as I needed them to route the exhaust under the Cressida oil pan (with heat shields on top of the pipe to keep heat away from the oil pan) – also try to keep the catalytic converter as close to the engine as possible so it can get hot enough to pass emissions – another option would be to run the exhaust down the passenger side and cross it over under the t-case, there is just enough room to fish the pipe through a hole between the t-case / crossmember / frame rail, this setup would also allow you to mount the cat converter just after the exhaust manifold (while this routing would be easier, I didn’t like it for a couple reasons)
- firewall will need to be clearanced slightly for the EGR valve on the driver side and for the 90* coolant hose on the passenger side (hose barely touches metal if not clearanced)
- relocated battery from passenger to driver side, I used the factory alternator wire to get power from the new battery location to the original fuse box (I later ran an additional 10 ga wire and added a 120 amp manual reset circuit breaker for accident safety)
- the actual wiring of everything is in this link - 7M Wiring - if you are comfortable with a soldering iron and 12V electrical, there’s nothing to it.
Last edited by corax; 01-01-2009 at 10:11 AM.
 01-07-2009, 02:06 PM
#3
Registered User
Join Date: Dec 2006
Location: Boise, ID
Posts: 611
Likes: 0
Received 0 Likes
on
0 Posts
nice write up! how happy are you with the swap? would you go with 4nrrick's assessment of going with the 3.4 instead? i like the idea of the older straight six's...cheap and fairly common. would you ever consider a 7mgte?
01-07-2009, 06:42 PM
#4
Registered User
Thread Starter
the only problem I had was with desert temps and cooling capacity . . . but that may have just been my choice of radiator (should have probably gone with at least a 2 core instead of large 1 core). I like the 7MGE, it's enough for my needs - it'll pull a 3,500 lb trailer with no problem and still get 20mpg with less expense than te 3.4L swap. I think I spent less than $1000 on the whole job withsome careful junkyarding.
By nature, inline 6's have good torque characteristics (just about every tractor trailer on the road uses an inline 6) - this is attributed to the firing order or "spacing" between firing events.
The 7MGTE would be nice, but I decided not to go with it to keep the reliability of the W56 trans I already had (though it is a Marlin HD rebuild). The Supra uses a W series trans also, but it isn't pulling as much weight or aerodynamic drag as the 4runner . . . .
01-11-2009, 11:52 PM
#5

i'll be doing this swap soon with my 87 pu, i have played with supra's for awhile, mostly turbo, i like the idea of a 7m truck.
hopefully my planes will play out and i can supercharge my n/a.
hopefully my planes will play out and i can supercharge my n/a.
01-12-2009, 02:56 AM
#6
Registered User
Thread Starter
do your research, collect your parts before you start, double check everything before you tear into it and you should be fine - this took me about (2) 8hour days to get running and on the road, a bit longer to make it look nice and sort out any issues (there's always something with a swap)
01-13-2009, 02:18 AM
#7
thanks corax, definitly am searching every thing i can think of here and google..
i haven't learned if i could use a newer electric pump hanger in an older tank, say 89 hanger into 87 tank.. or maybe a 87 hanger for intank pump?
i haven't learned if i could use a newer electric pump hanger in an older tank, say 89 hanger into 87 tank.. or maybe a 87 hanger for intank pump?
Trending Topics
01-22-2009, 10:58 AM
#9
Registered User

Join Date: Sep 2006
Location: Church Hill, Tn
Posts: 51
Likes: 0
Received 0 Likes
on
0 Posts
That makes it sound so easy. I just got my 7mge torn down and am looking at what I need to do next. I got a 89 Cressida and am putting it into my 93 extended cab.
01-24-2009, 07:37 PM
#10
Registered User
Join Date: Jul 2007
Location: Colorado Springs
Posts: 54
Likes: 0
Received 0 Likes
on
0 Posts
Thanks a lot for the writeup, im about to start mine within the next month and the info shoud help out a lot. Where did you pick up you brakes lines from?
Did you put the engine and transmission in the truck as together or seperate? It doesn't look easy either way, that's the part I am least looking forward to.
Did you put the engine and transmission in the truck as together or seperate? It doesn't look easy either way, that's the part I am least looking forward to.
Last edited by ronnie4; 01-24-2009 at 08:00 PM.
01-25-2009, 03:33 AM
#11
Registered User
Thread Starter
Thanks a lot for the writeup, im about to start mine within the next month and the info shoud help out a lot. Where did you pick up you brakes lines from?
Did you put the engine and transmission in the truck as together or seperate? It doesn't look easy either way, that's the part I am least looking forward to.
Did you put the engine and transmission in the truck as together or seperate? It doesn't look easy either way, that's the part I am least looking forward to.
I put a floor jack under the front of the transmission, pulled just the 22RE out, took the bolts out of the trans mount and slid it back a bit (you won't be able to move it that much because the bellhousing will hit the firewall), to get the 7MGE in the engine bay you might want to take off the crank pulley - although I left it on and ended up bending the radiator support the 1/4" that I needed and then just bent it back.
01-25-2009, 10:31 AM
#12
Registered User
Join Date: Jul 2007
Location: Colorado Springs
Posts: 54
Likes: 0
Received 0 Likes
on
0 Posts
I didn't think of taking the crank pulley off, that's a good idea. Were you able to get to the top transmission bolts with the 7M in, from the pictures it doesn't look easy at all. Do you have a body lift?
The brake lines, which I used to get fuel to the driver side, can be bought at just about any car parts store. Just ask for 5/16 diameter in whatever length you want - here's a tip, buy a foot longer than you think you might need
I put a floor jack under the front of the transmission, pulled just the 22RE out, took the bolts out of the trans mount and slid it back a bit (you won't be able to move it that much because the bellhousing will hit the firewall), to get the 7MGE in the engine bay you might want to take off the crank pulley - although I left it on and ended up bending the radiator support the 1/4" that I needed and then just bent it back.
I put a floor jack under the front of the transmission, pulled just the 22RE out, took the bolts out of the trans mount and slid it back a bit (you won't be able to move it that much because the bellhousing will hit the firewall), to get the 7MGE in the engine bay you might want to take off the crank pulley - although I left it on and ended up bending the radiator support the 1/4" that I needed and then just bent it back.
01-25-2009, 11:48 AM
#13
Registered User
Thread Starter
You should be able to get to all the trans-eng bolts from underneath with an extension and a u-joint on the socket.
I put a 1" body lift on after the engine was in, but I only needed that to make the upper radiator hose clear the alternator pulley because of the radiator I chose.
I put a 1" body lift on after the engine was in, but I only needed that to make the upper radiator hose clear the alternator pulley because of the radiator I chose.
01-25-2009, 06:46 PM
#14
Registered User
Join Date: Jul 2007
Location: Colorado Springs
Posts: 54
Likes: 0
Received 0 Likes
on
0 Posts
The wiring info on supracharged says it applies to 89-95 22re's. From what I can conclude form the wiring diagrams in my Hayne's manual the wiring colors look the same for my pre 89 (my truck is a 87). Did that hold true for you?
Did you splice the wire for the fuel pump? Supracharged says its for turbo only, but I know the turbo and non-turbo supras use the same pump.
Here is what they say:
Fuel pump - turbo only
The fuel pump is a green wire on the B1(6) connector. You need to connect this to the green/yellow on the IH1(23) connector. Again, this will supply a ground signal to your Circuit Opening Relay.
01-25-2009, 10:39 PM
#15
thye turbo model uses the same pump but has a 6v/12v relay that the ecu controls and if removed run's 12v "which is perfectly fine". and the green wire to the cor is to cut the fuel pump if the motor shut's off, the n/a modles use the flapper door to cut the fuel pump, if the door shut's it cut's pump's ground. iirc.
also i was able to install my motor with out removing the pully, or moving the transmission back.
i installed the motor and had it at about a 20-30* angle, and twisted the front of the motor towards the washer fluide bottle on the passenger side.
it cleared fine, i even have to pull it back out cause i forgot to clearence the fire wall and install the egr. it fit but i could tell i had the coolant hose pressed against the fire wall.
02-06-2009, 02:55 AM
#16
Registered User
Thread Starter
a question I got that I figured I'd post the answer to since I've been asked the same thing before
removing the steering damper really makes no difference, though if you really want you can always fab up a simple bracket later on to mount a damper on the bottom side of the steering linkage.
I passed the visual inspection with no problems (actually, the first time they failed me for not having an EGR), second time failed the tailpipe test (found an injector seal torn causing a vacuum leak) - when I was supposed to go back for a retest the stations were all shut down due to the budget crisis. Then I moved back east, so no final smog results (actually pisses me off because I wanted the sticker)
Just do your research and make a list of parts you'll need. The swap itself can be easy if you have everythig you need, though if you can do it, I would wait till the engine is in to worry about the radiator and fan. It is a tight fit, though I've heard a toyota V6 radiator will fit nicely
The engine I used was a JDM, they won't be able to tell the difference (or care) so long as you put all the "american parts" on it.
Hello, I am from california and i have a truck kinda like yours.... I have been reading on the swap with the 7m and would like to ask you some questions regarding stuff you took off and put back on...
I am from cali and u know how they are with smog laws... (biggest douches ever!). I saw you fixed that issue with the oil pan by replacing it with the cressida's one. Also I noticed you re drilled the oil dip stick thing... but what kinda took my attention was that you removed the steering damper thing. Did that make any difference? Did it shake more? and also how are you doing with the smog certification? You passed it already.. any suggestions or recommendations on what to get for the swap would be great... I have been looking at junk yards to get the mounts, bell housing, etc... I would like a jdm engine but since california has those really strict smog laws.... i would have to look in it... thank you for your time. and also thanks for the great wright ups!!
I am from cali and u know how they are with smog laws... (biggest douches ever!). I saw you fixed that issue with the oil pan by replacing it with the cressida's one. Also I noticed you re drilled the oil dip stick thing... but what kinda took my attention was that you removed the steering damper thing. Did that make any difference? Did it shake more? and also how are you doing with the smog certification? You passed it already.. any suggestions or recommendations on what to get for the swap would be great... I have been looking at junk yards to get the mounts, bell housing, etc... I would like a jdm engine but since california has those really strict smog laws.... i would have to look in it... thank you for your time. and also thanks for the great wright ups!!
I passed the visual inspection with no problems (actually, the first time they failed me for not having an EGR), second time failed the tailpipe test (found an injector seal torn causing a vacuum leak) - when I was supposed to go back for a retest the stations were all shut down due to the budget crisis. Then I moved back east, so no final smog results (actually pisses me off because I wanted the sticker)
Just do your research and make a list of parts you'll need. The swap itself can be easy if you have everythig you need, though if you can do it, I would wait till the engine is in to worry about the radiator and fan. It is a tight fit, though I've heard a toyota V6 radiator will fit nicely
The engine I used was a JDM, they won't be able to tell the difference (or care) so long as you put all the "american parts" on it.
02-09-2009, 06:44 PM
#17
Registered User
Join Date: Jul 2007
Location: Colorado Springs
Posts: 54
Likes: 0
Received 0 Likes
on
0 Posts
FWIW, I couldn't get the stock 4 cyl radiator to fit in the stock location without interference with the crank pulley.
a question I got that I figured I'd post the answer to since I've been asked the same thing before
removing the steering damper really makes no difference, though if you really want you can always fab up a simple bracket later on to mount a damper on the bottom side of the steering linkage.
I passed the visual inspection with no problems (actually, the first time they failed me for not having an EGR), second time failed the tailpipe test (found an injector seal torn causing a vacuum leak) - when I was supposed to go back for a retest the stations were all shut down due to the budget crisis. Then I moved back east, so no final smog results (actually pisses me off because I wanted the sticker)
Just do your research and make a list of parts you'll need. The swap itself can be easy if you have everythig you need, though if you can do it, I would wait till the engine is in to worry about the radiator and fan. It is a tight fit, though I've heard a toyota V6 radiator will fit nicely
The engine I used was a JDM, they won't be able to tell the difference (or care) so long as you put all the "american parts" on it.
02-10-2009, 01:24 AM
#18
Registered User
Thread Starter
BTW, I'm looking to upgrade to this beauty
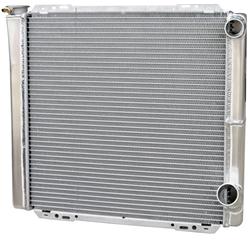
AFCO double pass radiator, $235 from Speedway
09-27-2009, 04:51 AM
#20
Registered User
Thread Starter


