Vasinvictor's budget 98/3.4/Auto into 95/3.0/Auto


 01-21-2012, 01:23 PM
#22
Once you remove the 10mm nut from the center of the clutch, you'll notice the clutch part is threaded. I used this bolt, don't recall the size to put back into the hole and remove the outer clutch

Snap ring that holds the pulley on

All apart

THIS. Don't lose this. It goes on top of the shaft to space the outer clutch from the pulley side. If you don't put this back in, the compressor will stay engaged all the time.

Put back together with 3.4 pulley and clutch

All the rusty stuff you see is the old 3.0 clutch and pulley. 3.4 stuff was nice and shiny going back on. I tried to finish up my wiring conversion harness, but the shrink tube I bought was too big, so now I get to unsolder about 10 connections
Snap ring that holds the pulley on
All apart
THIS. Don't lose this. It goes on top of the shaft to space the outer clutch from the pulley side. If you don't put this back in, the compressor will stay engaged all the time.
Put back together with 3.4 pulley and clutch
All the rusty stuff you see is the old 3.0 clutch and pulley. 3.4 stuff was nice and shiny going back on. I tried to finish up my wiring conversion harness, but the shrink tube I bought was too big, so now I get to unsolder about 10 connections
Last edited by vasinvictor; 01-21-2012 at 01:24 PM.
01-23-2012, 04:54 AM
#23
Registered User
Join Date: Sep 2010
Location: Honolulu, Hi
Posts: 150
Likes: 0
Received 0 Likes
on
0 Posts
Once you remove the 10mm nut from the center of the clutch, you'll notice the clutch part is threaded. I used this bolt, don't recall the size to put back into the hole and remove the outer clutch
Snap ring that holds the pulley on
All apart
THIS. Don't lose this. It goes on top of the shaft to space the outer clutch from the pulley side. If you don't put this back in, the compressor will stay engaged all the time.
Put back together with 3.4 pulley and clutch
All the rusty stuff you see is the old 3.0 clutch and pulley. 3.4 stuff was nice and shiny going back on. I tried to finish up my wiring conversion harness, but the shrink tube I bought was too big, so now I get to unsolder about 10 connections

 01-23-2012, 06:45 AM
#25
Registered User

Join Date: Aug 2010
Posts: 177
Likes: 0
Received 0 Likes
on
0 Posts
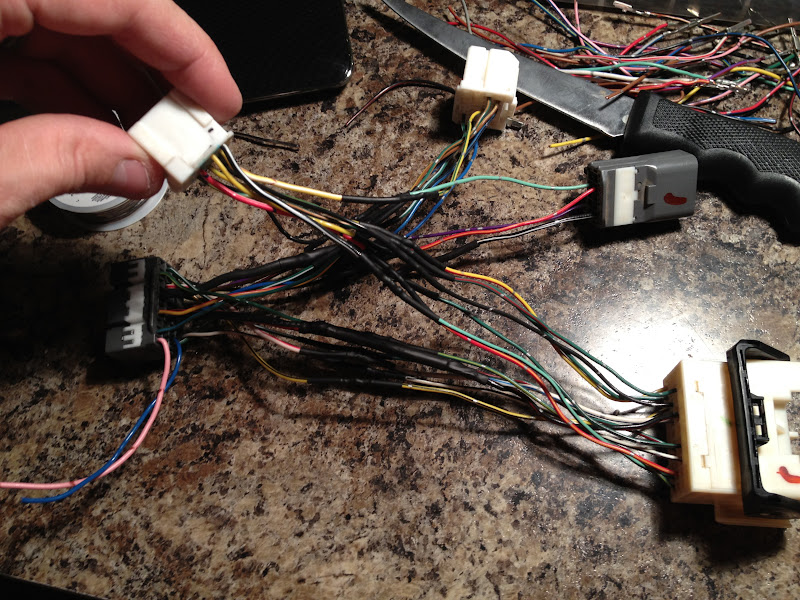
Wow you work quickly. I have to admit I am dreading the wiring harness aspect of this. I'm looking at the adapter you've made and I'd like to do the same so I can solder it together while being inside the house rather than repinning everything out in the cold.
I'm trying to figure out though. I recognize one of the plugs as one that plugs into the donor ECU, and one of the plugs that plugs into the body harness of the recipient, but I have to admit I'm at a loss of the other three plugs. Any insight?
I'm trying to figure out though. I recognize one of the plugs as one that plugs into the donor ECU, and one of the plugs that plugs into the body harness of the recipient, but I have to admit I'm at a loss of the other three plugs. Any insight?
 01-31-2012, 10:41 AM
#27
1.5" Body lift from 4Crawler- kit C+FB (standard 2" blocks, standard hardware, Front bumper brackets) $110 shipped Took about 1.5 hours to install

Fixed a couple tranny wires. I bent the bracket downward to give some more distance between exhaust and wire loom. I've got some convoluted heat shielded loom coming tomorrow to put over these wires, and the trans kickdown cable.

Fuel line flipped, and return line re-routed

Things I still need to do:
1. extend the start trigger wire
2. install motor
3. build battery tray
5. ???
6. profit
Fixed a couple tranny wires. I bent the bracket downward to give some more distance between exhaust and wire loom. I've got some convoluted heat shielded loom coming tomorrow to put over these wires, and the trans kickdown cable.
Fuel line flipped, and return line re-routed
Things I still need to do:
1. extend the start trigger wire
2. install motor
3. build battery tray
5. ???
6. profit
01-31-2012, 11:20 AM
#28
Also, I can't find reference to this situation anywhere on the whole wide internet. Auto swap guys, make sure you get a top shift gear driven case. A forward shift like I got will not work. Here's the factory auto/trans next to the 5speed/transfer case. So now I have a transfer case and 5 speed for sale 

Last edited by vasinvictor; 01-31-2012 at 11:21 AM.
02-04-2012, 12:17 PM
#29
It's a GOOD day
Corrugated heat shielded wire wrap where trans wires are near exhaust.

Took about 15 minutes to lift it up and in- transmission and all. It was an easy fit. Watch out for the transmission dispstick tubes. I bent mine up. I had to take the power steering tensioner bracket off to fit the A/C compressor back in.


Took about 15 minutes to lift it up and in- transmission and all. It was an easy fit. Watch out for the transmission dispstick tubes. I bent mine up. I had to take the power steering tensioner bracket off to fit the A/C compressor back in.
Last edited by vasinvictor; 02-04-2012 at 12:24 PM.
02-07-2012, 07:20 PM
#31
Registered User

Join Date: Jul 2008
Posts: 6
Likes: 0
Received 0 Likes
on
0 Posts
Also, I can't find reference to this situation anywhere on the whole wide internet. Auto swap guys, make sure you get a top shift gear driven case. A forward shift like I got will not work. Here's the factory auto/trans next to the 5speed/transfer case. So now I have a transfer case and 5 speed for sale
02-08-2012, 05:52 AM
#32
There is no way your stock 3.0 transfer case will go onto your newer transmission. The picture above shows the stock transmission and transfer case (top) next to the an '83 5 speed and gear driven transfer case (bottom). If you want to run the newer transmission, you MUST get an old top shift 4 cylinder transfer case, and Marlin or Inchworm "Tacoma" adapter, to get your front driveshaft on the correct side.
02-08-2012, 08:03 AM
#33
Registered User

Join Date: Jan 2011
Location: Sunny Saltless California
Posts: 50
Likes: 0
Received 0 Likes
on
0 Posts
vasinvictor,
can't you convert the t-case you have to top shifting?
http://www.marlincrawler.com/transfe...conversion-kit
can't you convert the t-case you have to top shifting?
http://www.marlincrawler.com/transfe...conversion-kit
Last edited by cjsgarage; 02-08-2012 at 08:04 AM.
02-08-2012, 08:32 AM
#34
I could, and still might. I am putting the stock transfer case in for now and leaving 4x4 inoperable. I want to make sure the motor will run (it's been sitting for a couple years) and the transmission will shift out nicely before spending any more money on adapters or top shift kits.
02-08-2012, 11:19 AM
#35
I finished my battery tray. I used machine screws and countersunk them a bit and then used a lock washer and a locking nut on the bottom. The 3.0 fuel injector rail black spacers were perfect to level the tray. I also had to cut off the plastic guard that covers the steering shaft knuckle thing because of clearance issues.

02-08-2012, 04:25 PM
#36
Registered User
Join Date: Jul 2008
Posts: 6
Likes: 0
Received 0 Likes
on
0 Posts
vasinvictor,
can't you convert the t-case you have to top shifting?
http://www.marlincrawler.com/transfe...conversion-kit
can't you convert the t-case you have to top shifting?
http://www.marlincrawler.com/transfe...conversion-kit
02-13-2012, 08:51 AM
#37
Coming together. I ended up drilling out the rivets on the stock battery tray to have more vertical room for the stock intake box. It probably would have fit without removing the tray.

Trans cooler lines needed to be rerouted underneath the steering stabilizer bar. I disco the bar, bent the lines down, and reconnected.

An A/C line hits the UCA. Hopefully a soft bend will alleviate this problem.

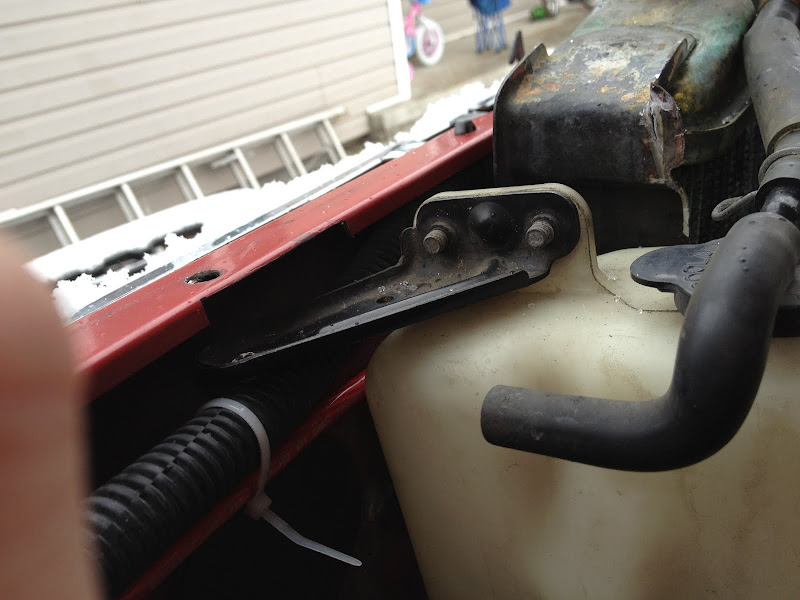
Flipped the coolant tank bracket and cut some vertical bracing so it'd sit flush
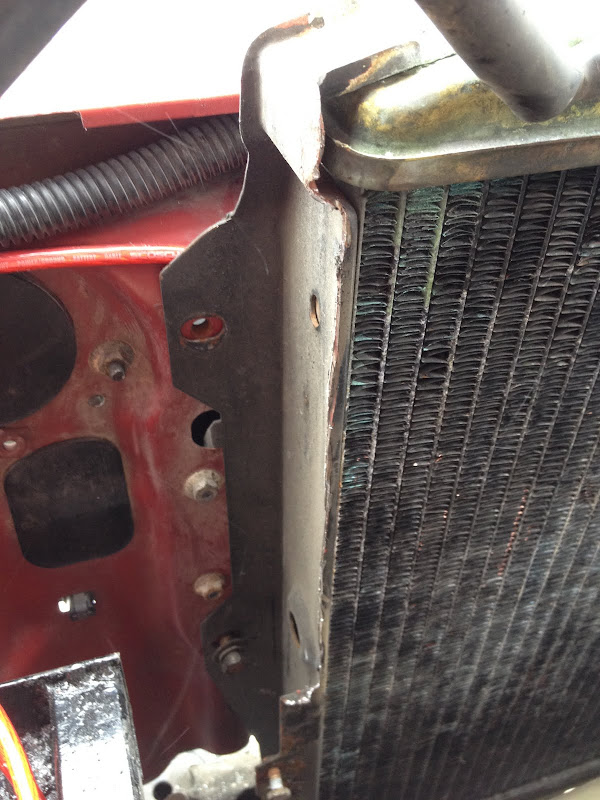
Also had to cut some of the rad support stuff because my battery tray was too close.
I got a "shorter than stock" alternator belt for a little more clearance. I'm now wishing I had not gotten Dremel happy and cut my steering shaft shield off Total length of the alternator belt is 41.25" vs the stock 42.625". Seven-eighths of and inch shorter.

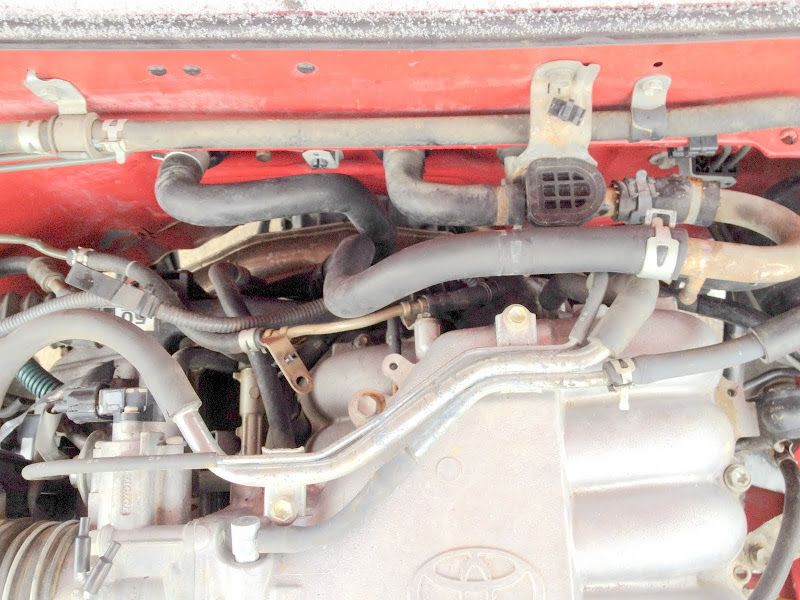
Heater hose routing. I removed the rear heater and lines FWIW. The hose coming from the driver side firewall gets routed of the passenger side outlet of the block. I just used the hoses I had available and they worked without too much stress.
Looking like an engine bay again.

Got the hood on. Zero clearance issues with 1.5" body lift.

I need to tackle the EVAP, but the nipples on my VSVs are broken on the 3.4 harness. I really want to completely take out the can and do away with it all like RobD, but I DO want to retain a functional CEL, and don't want it constantly on. I'll be studying the EWDs to see if I can trick the EVAP into thinking it's working properly, while removing the whole mess. It'd look really clean without it in there.
Trans cooler lines needed to be rerouted underneath the steering stabilizer bar. I disco the bar, bent the lines down, and reconnected.
An A/C line hits the UCA. Hopefully a soft bend will alleviate this problem.
Flipped the coolant tank bracket and cut some vertical bracing so it'd sit flush
Also had to cut some of the rad support stuff because my battery tray was too close.
I got a "shorter than stock" alternator belt for a little more clearance. I'm now wishing I had not gotten Dremel happy and cut my steering shaft shield off
Total length of the alternator belt is 41.25" vs the stock 42.625". Seven-eighths of and inch shorter. Heater hose routing. I removed the rear heater and lines FWIW. The hose coming from the driver side firewall gets routed of the passenger side outlet of the block. I just used the hoses I had available and they worked without too much stress.
Looking like an engine bay again.
Got the hood on. Zero clearance issues with 1.5" body lift.
I need to tackle the EVAP, but the nipples on my VSVs are broken on the 3.4 harness. I really want to completely take out the can and do away with it all like RobD, but I DO want to retain a functional CEL, and don't want it constantly on. I'll be studying the EWDs to see if I can trick the EVAP into thinking it's working properly, while removing the whole mess. It'd look really clean without it in there.
Last edited by vasinvictor; 02-13-2012 at 08:53 AM.
02-14-2012, 03:34 PM
#38
Well I turned the key on tonight to IG2, didn't try to start it. The whole time I left the key "on" the fuel pump was running and there was something clicking under the hood. It started smelling gassy. I unplugged the EFI 15 amp fuse and the fuel pump quit and the clicking quit. I am guessing the injectors, maybe just one of them, is squirting gas. I'm not really sure why yet. I didn't touch the engine harness. Anybody have any quick ideas?
Last edited by vasinvictor; 02-14-2012 at 04:17 PM. Reason: EDIT: Turned to IG2
02-14-2012, 04:04 PM
#39
Registered User
Join Date: Aug 2010
Posts: 177
Likes: 0
Received 0 Likes
on
0 Posts
You should wait until someone that knows what they're talking about comes on, but the only thing I can think of that would have any interaction with the fuel pump would be the COR wiring. As you said the engine harness is largely untouched.


