96 Auto meet 91 Manual...
 01-08-2012, 07:06 PM
#1
Registered User
Thread Starter
96 Auto meet 91 Manual...
So after 9 years and some 125,000 miles (that I've owned it) my 3.0 decided to die on me for the second time with a burnt exhaust valve (first was a head gasket). After listening to my mechanic tell me that it's not with me paying him to fix it and suggesting that I could do it over a couple of weekends, I started reading through some of the head gasket/top end rebuild threads and quickly decided that even if I did everything correctly it was only a matter of time before I would need yet another head gasket (this would have made it the 4th top end rebuild).
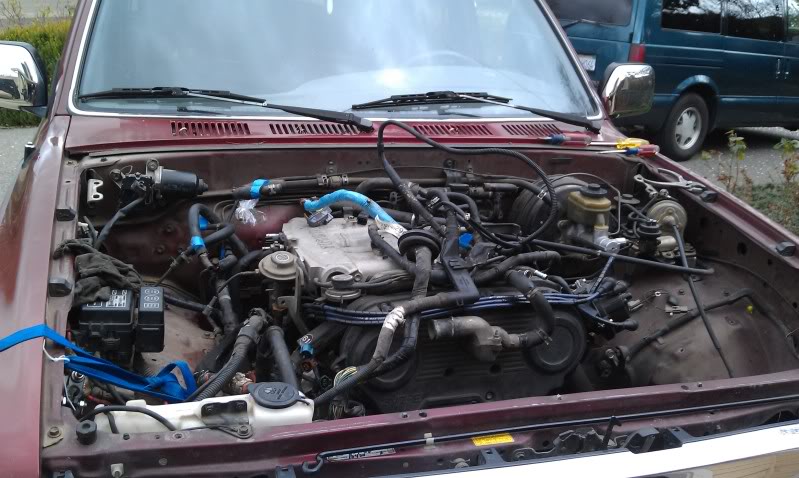
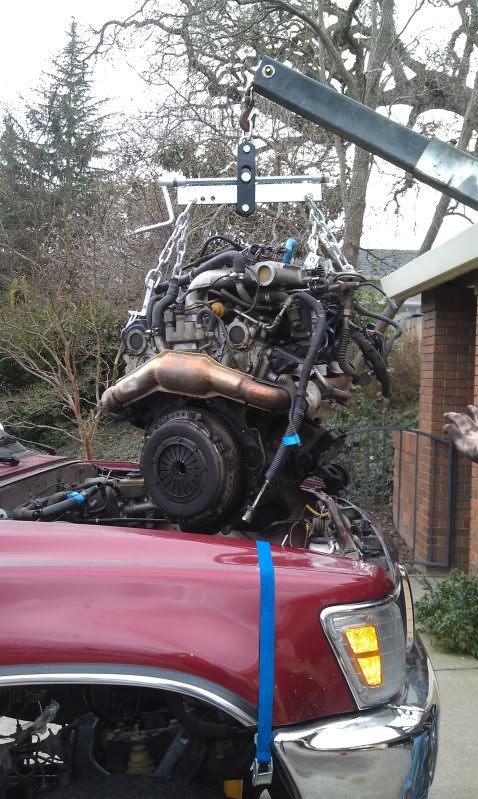
So with that I decided a 20 year old truck with 238,000 miles deserved something better; a 3.4L 5VZ-FE. After a couple of calls with the Smog Ref to clear up some of the known issues (intake, evap, exhaust, etc) I began my search and ended up finding a guy in Reno (~100 miles away) parting out a 1996 4Runner with a 3.4L and automatic 4WD with 125,000 miles. $1,200 later this was mine:
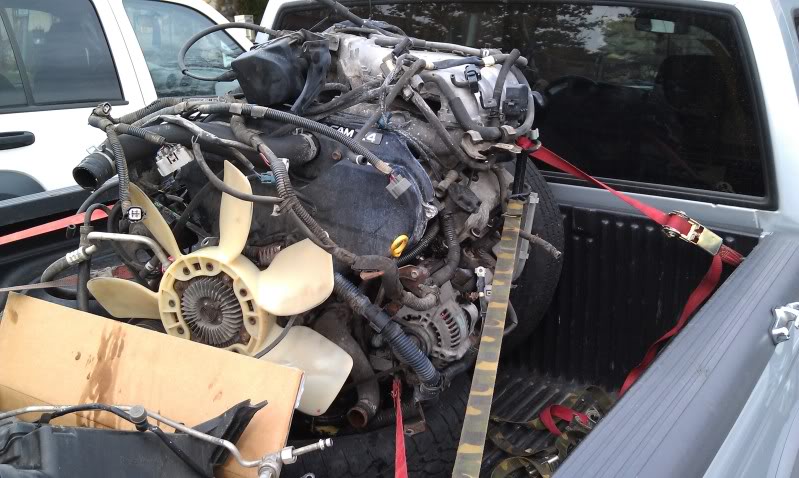
The outside of the motor was pretty corroded, worse than my 91, and as I would later find out, by running the VIN through TIS, this 4Runner had spent some time in Minnesota (it had a recall performed in '02 in Minnesota).
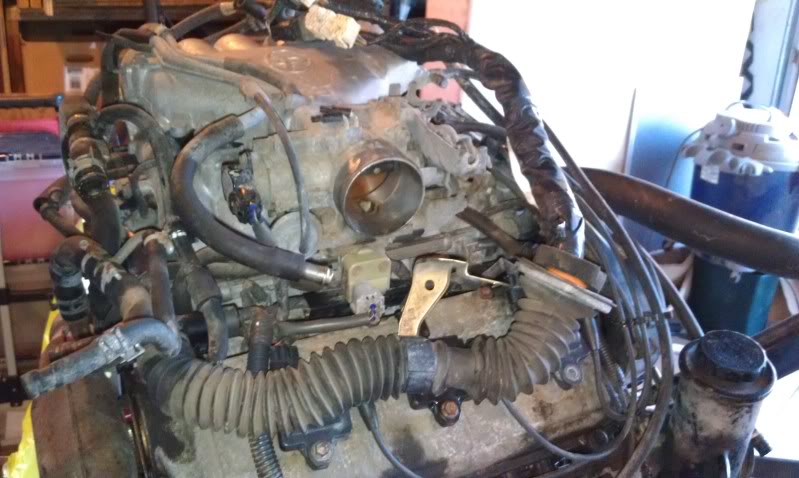
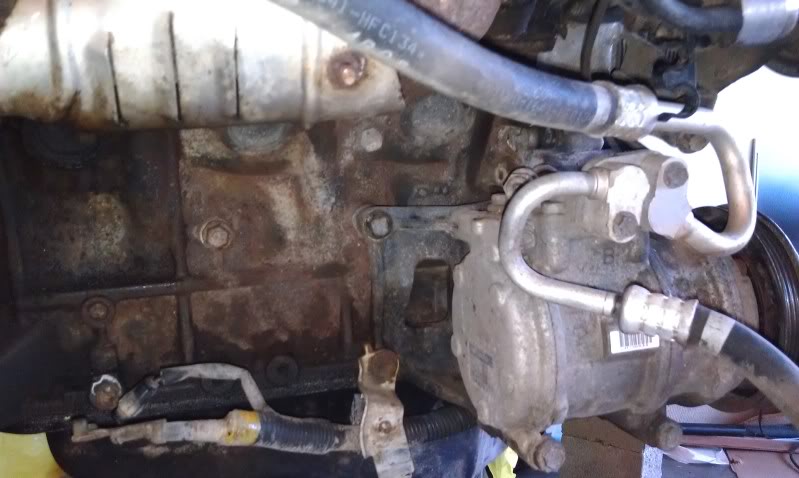
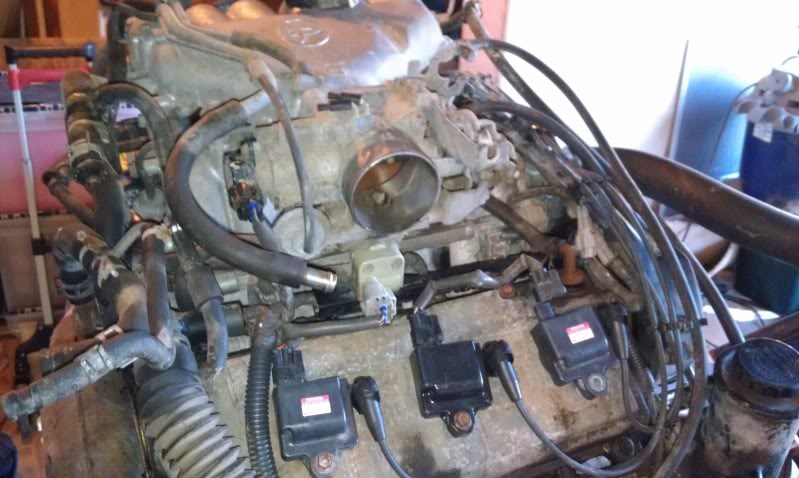
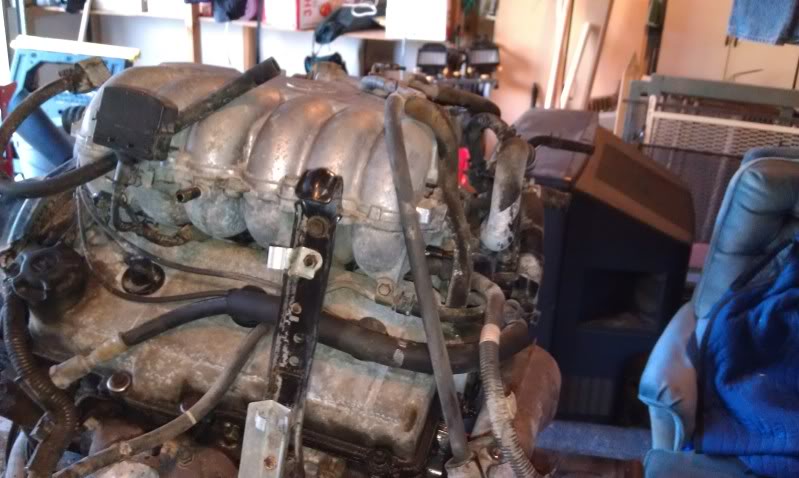
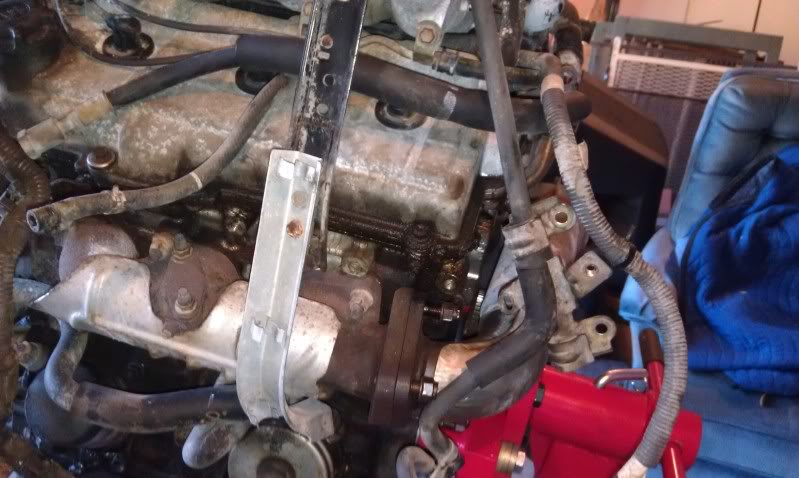
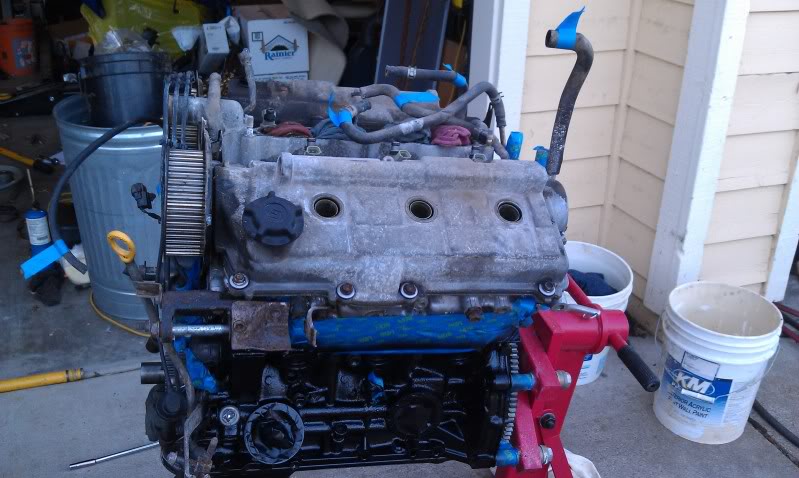
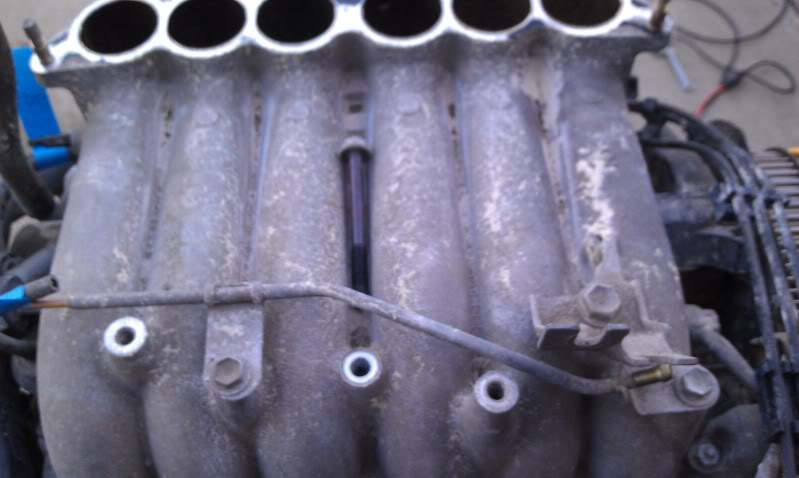
At that point my main goal was to get the grease and rust taken care of and perform the usual maintenance. I pulled the crossover, the exhaust manifolds (wrestled with rusted/seized nuts and studs for 3 weeks in the process), the throttle body, upper and lower intake plenums, valve covers, fuel rail, fuel injectors, and the wiring harness. Cleaned them up a bit, painted what needed it and am still in the process of re-assembling things.
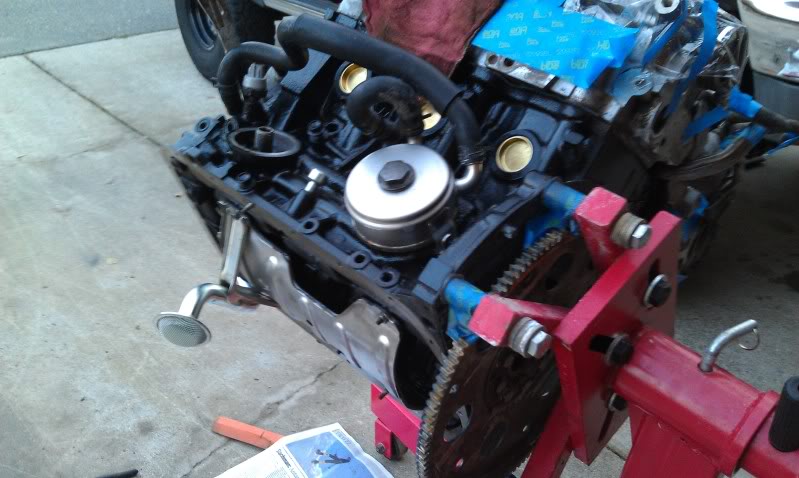
With everything off, I degreased the block at least 3 or 4 times, sprayed it down with rust neutralizers, wire wheeled it and finally painted with Rustoleum engine enamel.
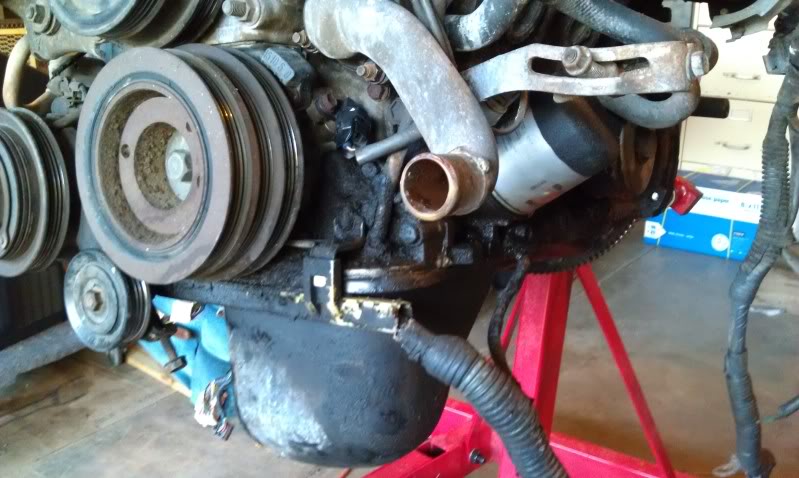
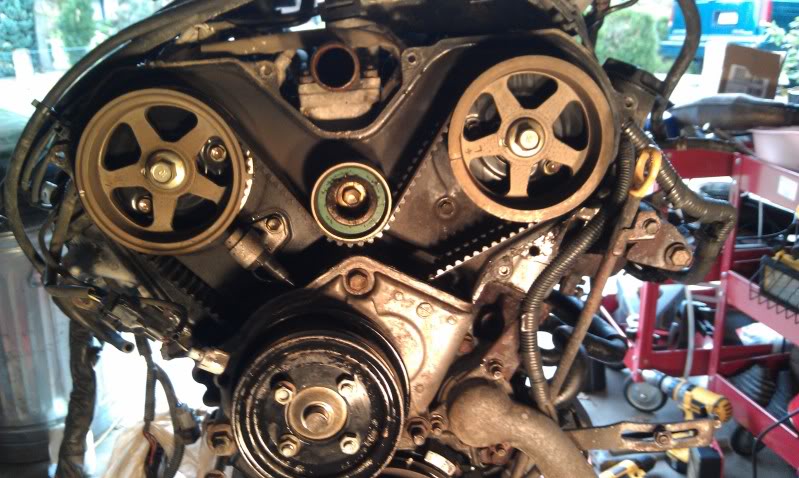
At the same time I tore the "front end" apart: timing belt, pulleys, tensioner, cam and crank seals, water pump and thermostat. The timing gear on the crank was pretty well seized to the crank; I ended up bending 6 or 8 6mm x1.00 bolts with a harmonic balancer puller before I broke down and used the impact gun on the puller. All while spraying with PB Blaster, torching it, spraying it, waiting a week, repeat for probably 3 weeks, that thing did not want to come off.
The cam gears are only torqued to 81 ft-lbs from the factory but I can guarantee mine took A LOT more than that to break them loose. 200 lbs on one end of a 3 ft breaker bar and 200 lbs on the other end of a SST to hold the pulley resulted in:
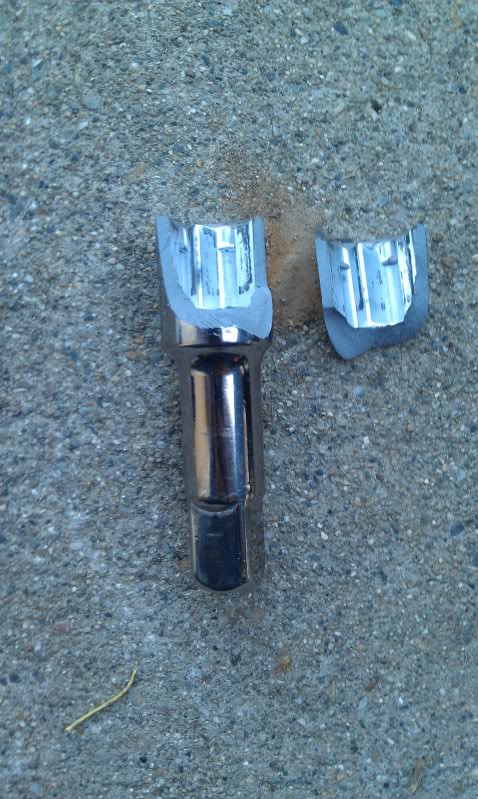
1/2" Craftsman 3" extension

3 ft of 2" wide 1/4" steel stock (and the 18" breaker bar without jack handle extension)
I didn't take too many "overall" shots during the tear down and clean up, mostly just close ups that I could use later to reassemble things. Anyways here's some assorted pictures:

So with that I decided a 20 year old truck with 238,000 miles deserved something better; a 3.4L 5VZ-FE. After a couple of calls with the Smog Ref to clear up some of the known issues (intake, evap, exhaust, etc) I began my search and ended up finding a guy in Reno (~100 miles away) parting out a 1996 4Runner with a 3.4L and automatic 4WD with 125,000 miles. $1,200 later this was mine:
The outside of the motor was pretty corroded, worse than my 91, and as I would later find out, by running the VIN through TIS, this 4Runner had spent some time in Minnesota (it had a recall performed in '02 in Minnesota).
At that point my main goal was to get the grease and rust taken care of and perform the usual maintenance. I pulled the crossover, the exhaust manifolds (wrestled with rusted/seized nuts and studs for 3 weeks in the process), the throttle body, upper and lower intake plenums, valve covers, fuel rail, fuel injectors, and the wiring harness. Cleaned them up a bit, painted what needed it and am still in the process of re-assembling things.
With everything off, I degreased the block at least 3 or 4 times, sprayed it down with rust neutralizers, wire wheeled it and finally painted with Rustoleum engine enamel.
At the same time I tore the "front end" apart: timing belt, pulleys, tensioner, cam and crank seals, water pump and thermostat. The timing gear on the crank was pretty well seized to the crank; I ended up bending 6 or 8 6mm x1.00 bolts with a harmonic balancer puller before I broke down and used the impact gun on the puller. All while spraying with PB Blaster, torching it, spraying it, waiting a week, repeat for probably 3 weeks, that thing did not want to come off.
The cam gears are only torqued to 81 ft-lbs from the factory but I can guarantee mine took A LOT more than that to break them loose. 200 lbs on one end of a 3 ft breaker bar and 200 lbs on the other end of a SST to hold the pulley resulted in:
1/2" Craftsman 3" extension
3 ft of 2" wide 1/4" steel stock (and the 18" breaker bar without jack handle extension)
I didn't take too many "overall" shots during the tear down and clean up, mostly just close ups that I could use later to reassemble things. Anyways here's some assorted pictures:
 01-08-2012, 07:31 PM
#3
Registered User
Thread Starter
My goal for this is to keep the 5 speed M/T I have now with the 3.0L but with an engine from an automatic some extra work is needed.
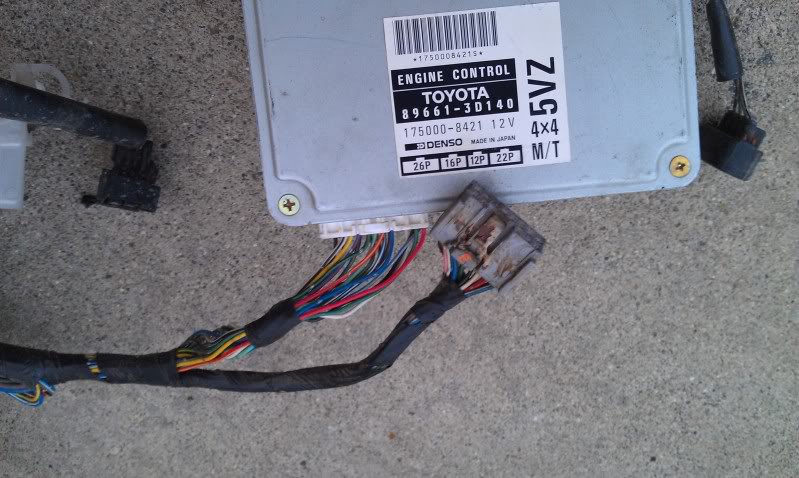
Junk yard ECM from a '96 4Runner v6 M/T 4WD; $50:
No pictures yet, but I'm still going through swapping plugs from the auto variety to the manuals.
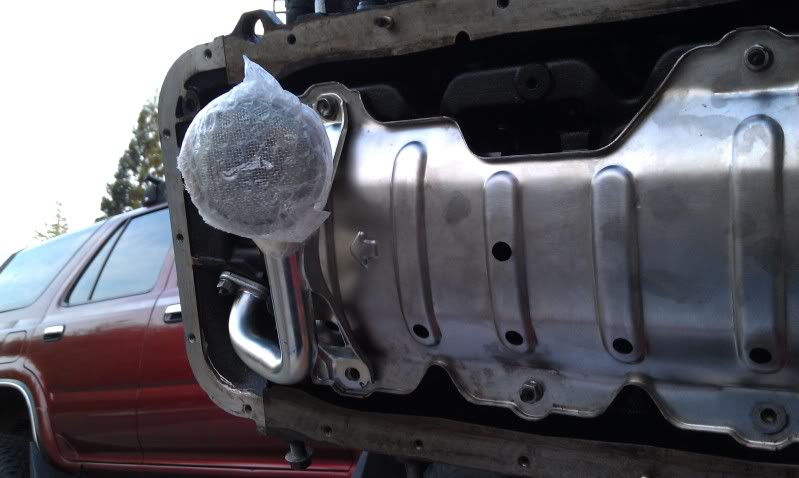
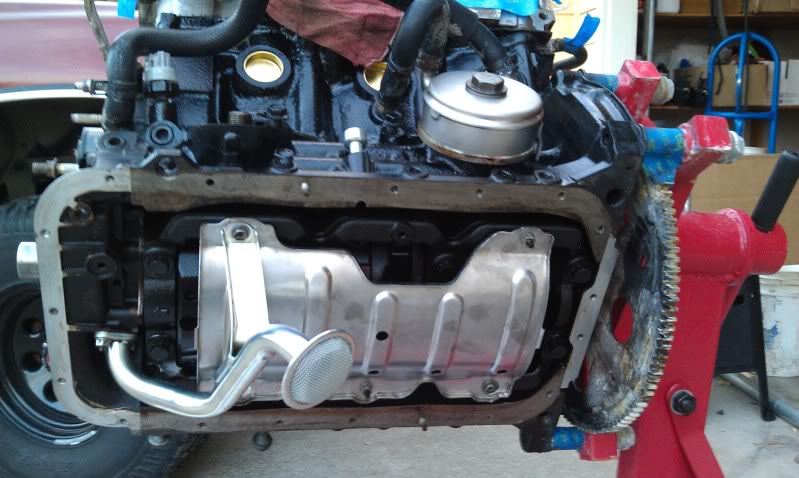
New 3.0L 4WD oil pan, cleaned the 3.4L baffle expecting to have to cut a hole to mount the oil pickup but as I conveniently found out, the T100 3.4L pick up works perfectly with the 3.4L baffle.
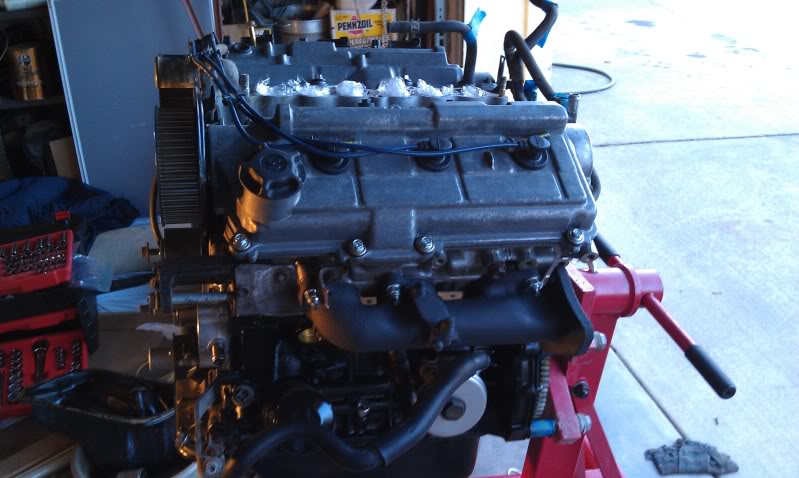
So far I've been working on this weekends only since mid November, the engine is 75% reassembled. I need to make a new SST to torque the cam and crank bolts, finish the timing belt, finish then re-install the engine wire harness, and reattach the 2 plenums and throttle body, then it'll be ready to drop in.
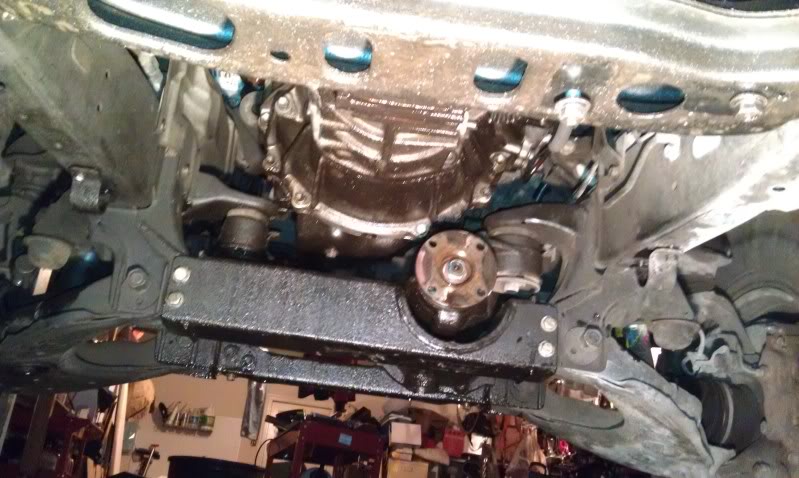
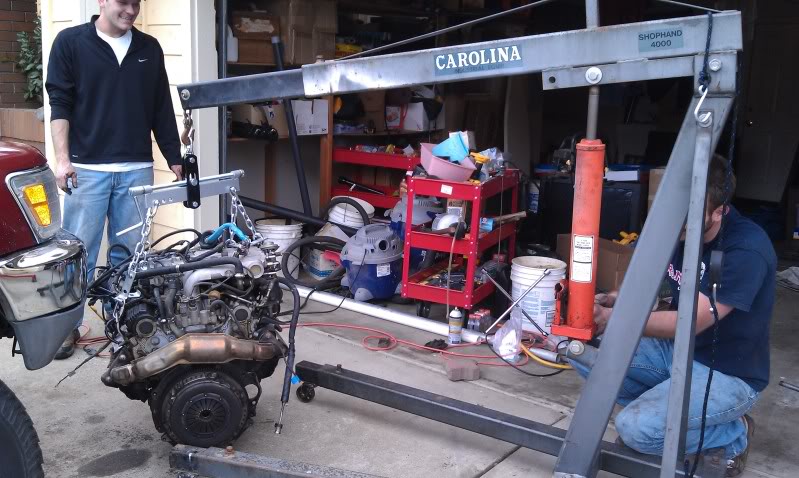
In the mean time I began working on my 4Runner; I'm still on the fence whether to pull the engine first or the transmission first. The front and rear drive shafts came out, as did the front sway bar and exhaust down-pipe. Under the hood, the intake, fan, shroud, radiator, ignitor, and battery came out, opening up lots of room.

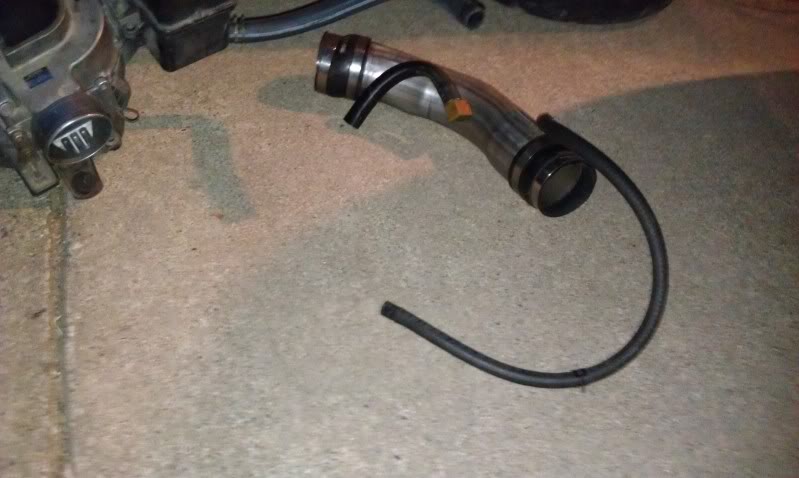
Anyone need an ISR tube?
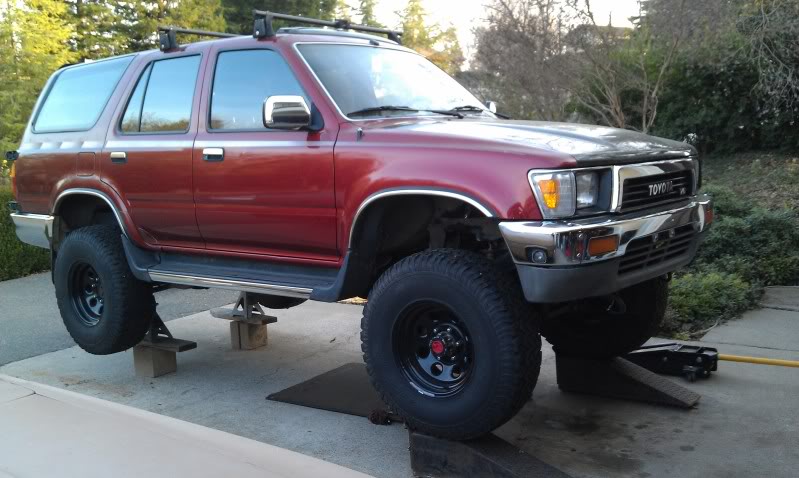
And one of the truck up on blocks.
Junk yard ECM from a '96 4Runner v6 M/T 4WD; $50:
No pictures yet, but I'm still going through swapping plugs from the auto variety to the manuals.
New 3.0L 4WD oil pan, cleaned the 3.4L baffle expecting to have to cut a hole to mount the oil pickup but as I conveniently found out, the T100 3.4L pick up works perfectly with the 3.4L baffle.
So far I've been working on this weekends only since mid November, the engine is 75% reassembled. I need to make a new SST to torque the cam and crank bolts, finish the timing belt, finish then re-install the engine wire harness, and reattach the 2 plenums and throttle body, then it'll be ready to drop in.
In the mean time I began working on my 4Runner; I'm still on the fence whether to pull the engine first or the transmission first. The front and rear drive shafts came out, as did the front sway bar and exhaust down-pipe. Under the hood, the intake, fan, shroud, radiator, ignitor, and battery came out, opening up lots of room.
Anyone need an ISR tube?
And one of the truck up on blocks.
01-10-2012, 06:04 AM
#4
Pretty truck! That's identical to the one I'm swapping too. I pulled the 3vze first, and then pulled the tranny, BUT I would not do it again like that. I would drop the crossmember and pull both at the same time. The time spent on removing the top 2 bellhousing bolts was not time well spent. Heed this warning, remove both at the same time!
You going with a body lift of hood scoop?
You going with a body lift of hood scoop?
01-10-2012, 10:36 AM
#5
Registered User
Thread Starter
Thanks for the compliment, aside from some oxidized paint the truck's actually in really good shape.
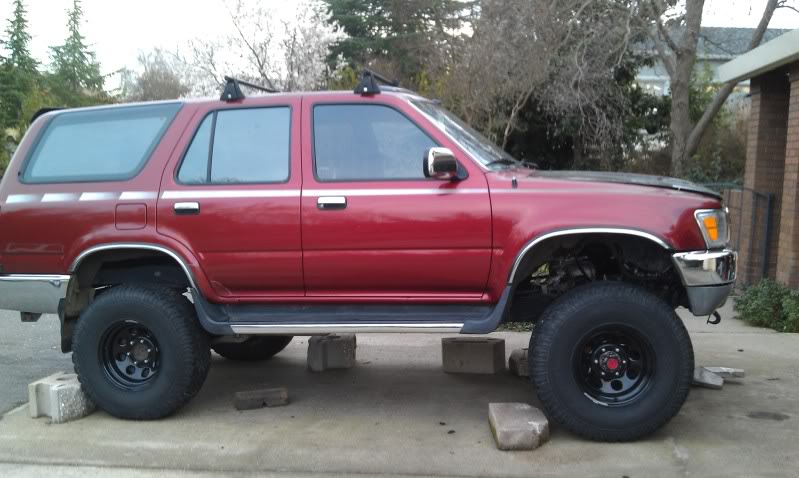
As much as I didn't want to, I ended up installing a 1.5" 4Crawler body lift back in October in anticipation of a 3.4. I will say it has been nice having that little bit of extra room between the frame and body while working on the gas tank and taking things apart in preparation for pulling the motor.
Ultimately my goal for this swap is:
A note on the SMOG issue, after reading through cadman's and dntsdad's threads and seeing the hassle they had to go through with a completely untouched exhaust, I called and talked with a local SMOG ref specifically about the exhaust before I made any decisions. He told me as long as I used all the factory flanges and kept all the O2 sensors and catalytic convert the same relative distance away from the previous component that I'll be fine. For me this was a make or break piece of information in deciding whether to swap a 3.4 or rebuild the 3.0. That same information was reconfirmed over 2 more calls; that's my story and I'm sticking to it...but we'll see when it comes time for that inspection.
And on a side note, this will most likely be a slow swap as I'll only be able to work on it on weekends; it's no longer my daily driver so I can handle it being out of commission for a while.
As much as I didn't want to, I ended up installing a 1.5" 4Crawler body lift back in October in anticipation of a 3.4. I will say it has been nice having that little bit of extra room between the frame and body while working on the gas tank and taking things apart in preparation for pulling the motor.
Ultimately my goal for this swap is:
- Convert auto harness to manual
- Re-use the 3.0L transmission and bell housing
- 3.4L flywheel and starter
- ToyOnlySwap crossover and route exhaust down the driver's side
- Keep 3.0L A/C intact (amplifier/compressor with 3.4L pulley/refrigerant) and splice it into the 3.4L ECM
- Keep the power steering idle up valve (I still need to take the 3.4L hose in to get re-worked to fit the ABS actuator.
- Keep ABS...not sure if its doing anything anymore but I'd rather have it and not need it than not have it and need it.
- SMOG it...
A note on the SMOG issue, after reading through cadman's and dntsdad's threads and seeing the hassle they had to go through with a completely untouched exhaust, I called and talked with a local SMOG ref specifically about the exhaust before I made any decisions. He told me as long as I used all the factory flanges and kept all the O2 sensors and catalytic convert the same relative distance away from the previous component that I'll be fine. For me this was a make or break piece of information in deciding whether to swap a 3.4 or rebuild the 3.0. That same information was reconfirmed over 2 more calls; that's my story and I'm sticking to it...but we'll see when it comes time for that inspection.
And on a side note, this will most likely be a slow swap as I'll only be able to work on it on weekends; it's no longer my daily driver so I can handle it being out of commission for a while.
01-17-2012, 09:05 AM
#6
Registered User
Thread Starter
Fan options?
At some point, possibly sooner than later, I am going to need a new cooling fan. The 3.4L fan had one of the blades break off while I was driving the engine home and the 3.0L fan is most likely the 20 year old factory fan with the ring around the outside. The general consensus seems to be to use the fan from the later 3.0L engines that do not have the ring around the outside of the blades.
The way I see it, I'm buying a new fan and my question is should I get the late model 3.0L or the 3.4L fan? Also if someone could help confirm part numbers/applications I would appreciate it (all the exploded part diagrams I've seen show the 3.0L fan whether 88-92 or 93-95 as having the outer ring), so that I don't end up ordering the wrong fan from Toyota.
Part numbers looked up: http://www.toyodiy.com/parts/q.html
Part number cross referenced:
http://www.toyotapartszone.com/oem/t...361-65010.html
http://www.toyotapartszone.com/oem/t...361-65020.html
http://www.toyotapartszone.com/oem/t...361-62010.html
I have the fan clutch from both the 3.0L and the 3.4L if that makes any difference.
EDIT...
I decided to go with the '94-'95 4Runner 3VZ-E fan without an outer ring (16361-65020)

The way I see it, I'm buying a new fan and my question is should I get the late model 3.0L or the 3.4L fan? Also if someone could help confirm part numbers/applications I would appreciate it (all the exploded part diagrams I've seen show the 3.0L fan whether 88-92 or 93-95 as having the outer ring), so that I don't end up ordering the wrong fan from Toyota.
- 16361‑65010 '88-'93 3.0L (with outer ring)
- 16361‑65020 '93-95 3.0L (without outer ring?)
- 16361‑62010 '95.5-'04 3.4L (without outer ring)
Part numbers looked up: http://www.toyodiy.com/parts/q.html
Part number cross referenced:
http://www.toyotapartszone.com/oem/t...361-65010.html
http://www.toyotapartszone.com/oem/t...361-65020.html
http://www.toyotapartszone.com/oem/t...361-62010.html
I have the fan clutch from both the 3.0L and the 3.4L if that makes any difference.
EDIT...
I decided to go with the '94-'95 4Runner 3VZ-E fan without an outer ring (16361-65020)

Last edited by SacRunner; 01-29-2012 at 09:19 PM. Reason: Answered my own question
Trending Topics
01-29-2012, 09:16 PM
#8
Registered User
Thread Starter
Heater fan removal?
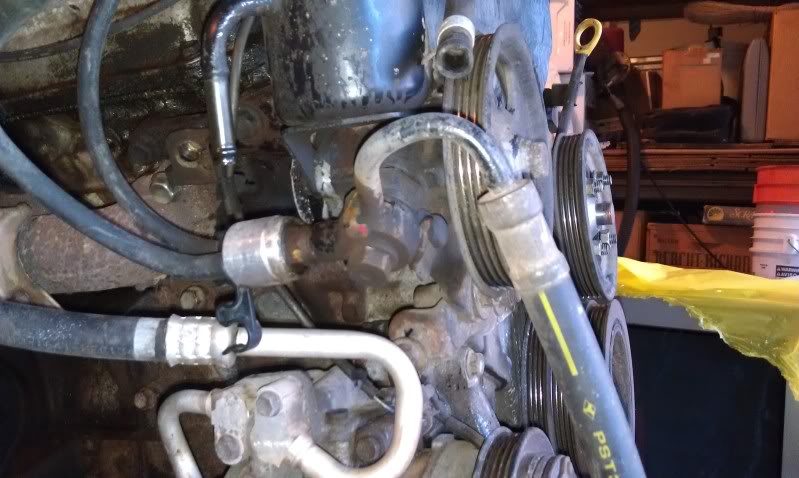
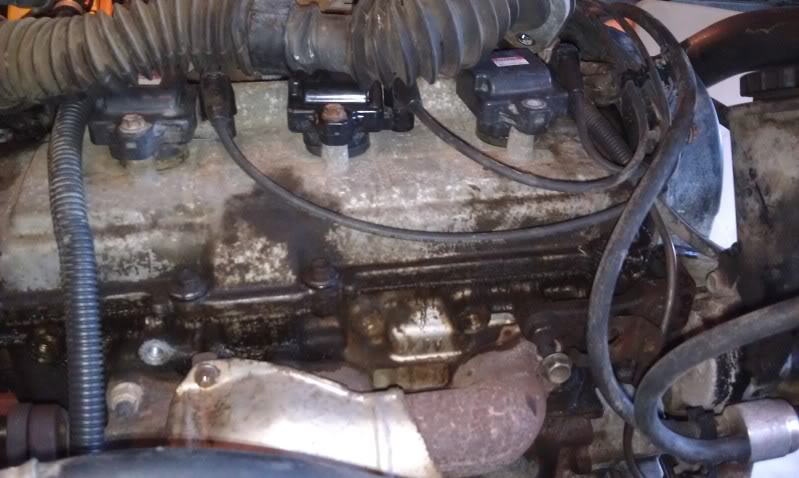
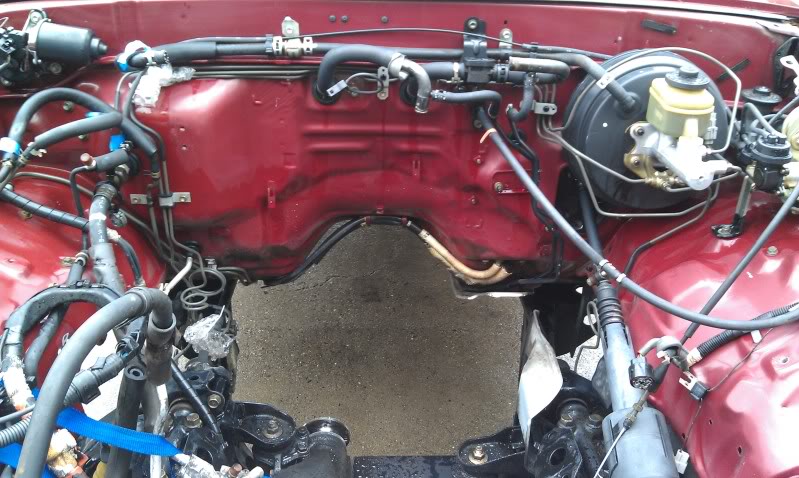
I've made some progress, slow, though still progress but I've ran into a bit of a snag pulling the heater fan. I've removed all the screws/bolts that I can tell holding it in, but it just doesn't seem to want to wiggle loose. Reading through some old threads, it sounds like it should just be 3 bolts and some contortioning and the box "should" just drop out. In the pic below I've removed all bolts and the one nut that are highlighted in the yellow circles (some of the circles are in the general area):
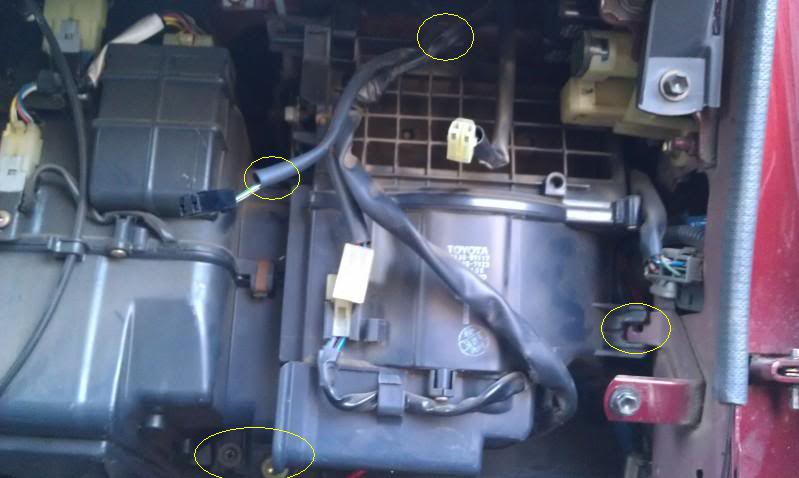
I'm trying to just remove the box on the right side of the pic and leave the box on the right untouched as it has the AC lines running into it for the condenser (or evaporator, I'm not sure on terminology). I must be missing something, any advice or suggestions are definitely welcome.
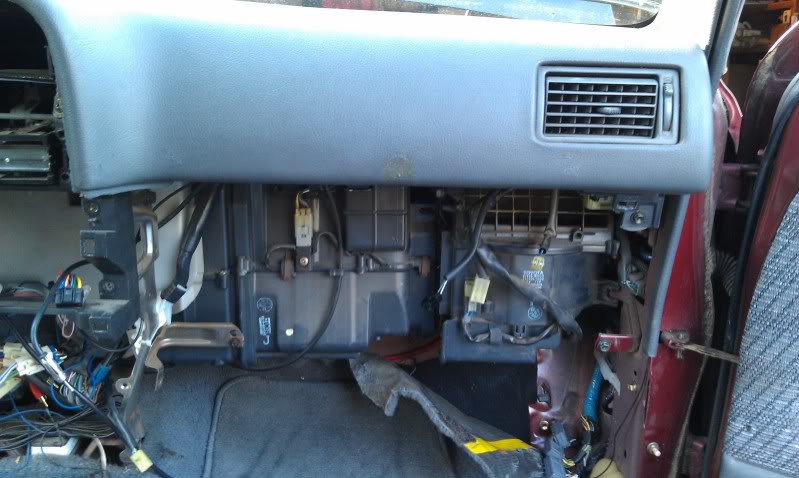
Here's a wider angle if it helps:
And just for kicks, all the "extra" parts that are normally in the front....
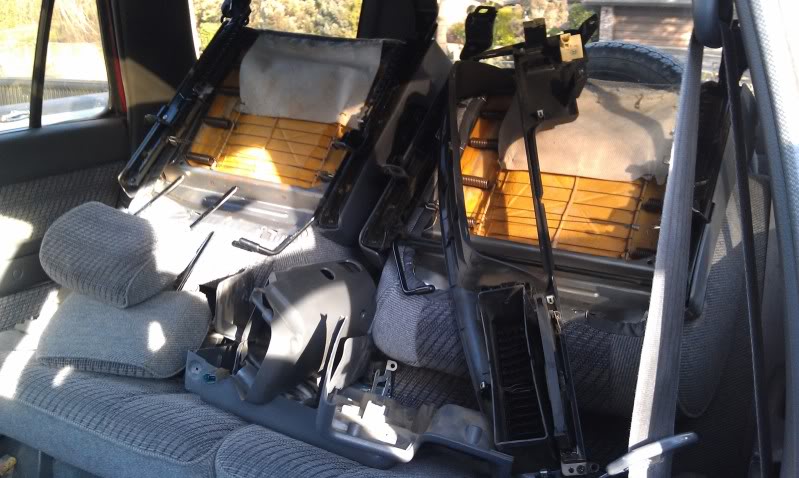
I'm trying to just remove the box on the right side of the pic and leave the box on the right untouched as it has the AC lines running into it for the condenser (or evaporator, I'm not sure on terminology). I must be missing something, any advice or suggestions are definitely welcome.
Here's a wider angle if it helps:
And just for kicks, all the "extra" parts that are normally in the front....
02-22-2012, 04:38 PM
#9
Registered User
Thread Starter
Good bye 3.0L
It's been a slow but productive couple of weeks of disassembling everything around the 3.0.
Labeled, photo'ed, and removed all the vacuum lines from the passenger side fender well, vsv's, the 3.0L evap canister, clutch slave cylinder and hoses, fuel lines, and managed to disconnect the 3.0L engine harness and pull it through the firewall.
After reading https://www.yotatech.com/forums/f161...tml#post661468, I decided to go back to my original plan and drop the transmission first, then pull the motor. I was surprised at how easily the top 2 bolts were with a 1.5" body lift; laying on the ground I had a direct line of sight to the top passenger bolt, 2x10" wobbles + 6" extension and a u-joint made quick work of that bolt. The driver's side was a bit more of a challenge but easy to see from the wheel well.
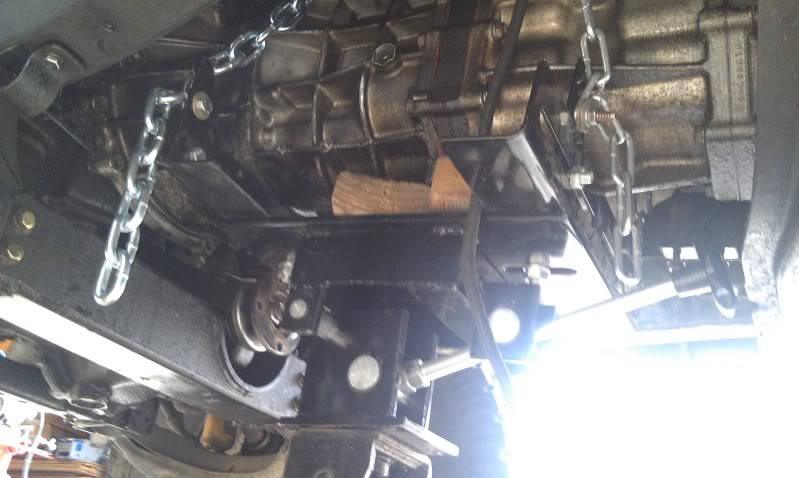
I ended up loosening all the transmission bolts one weekend, then on Saturday hooked up the transmission jack adapter and pulled the transmission out (surprisingly straight forward and easy).
Not the best picture, but at least something...
Then it was a matter of 2 heater hoses in the back of the motor, 4 bolts on the AC compressor, and the 2 engine mounts and....
And after a quick wash and pressure washer rinse...
And for some reason the front end is sitting a bit higher than it used to...
Labeled, photo'ed, and removed all the vacuum lines from the passenger side fender well, vsv's, the 3.0L evap canister, clutch slave cylinder and hoses, fuel lines, and managed to disconnect the 3.0L engine harness and pull it through the firewall.
After reading https://www.yotatech.com/forums/f161...tml#post661468, I decided to go back to my original plan and drop the transmission first, then pull the motor. I was surprised at how easily the top 2 bolts were with a 1.5" body lift; laying on the ground I had a direct line of sight to the top passenger bolt, 2x10" wobbles + 6" extension and a u-joint made quick work of that bolt. The driver's side was a bit more of a challenge but easy to see from the wheel well.
I ended up loosening all the transmission bolts one weekend, then on Saturday hooked up the transmission jack adapter and pulled the transmission out (surprisingly straight forward and easy).
Not the best picture, but at least something...
Then it was a matter of 2 heater hoses in the back of the motor, 4 bolts on the AC compressor, and the 2 engine mounts and....
And after a quick wash and pressure washer rinse...
And for some reason the front end is sitting a bit higher than it used to...
 03-01-2012, 08:29 PM
#11
Registered User

Join Date: May 2011
Location: arizona
Posts: 60
Likes: 0
Received 0 Likes
on
0 Posts
hey man i'm doing a very similar swap on my 89 single cab, i also have a 96 5vz out of an auto 4 runner. one question i had was about the wire harness, it seems your using the auto harness with the mt ecu, are the mt harness and the auto harnes any diffrent? i found a auto harnes but im wondering if it would be worth my while to look for one out of an mt
03-01-2012, 09:06 PM
#12
Registered User
Thread Starter
It really comes down to what ECU you're going to use, but the auto harness has ALL the connections needed for a manual trans and ECU (plus some extras that are A/T only) they're just in different places in different connectors.
The ECU connectors for the A/T ECU and the M/T ECU couldn't be any more different if they tried.
A/T ECU:
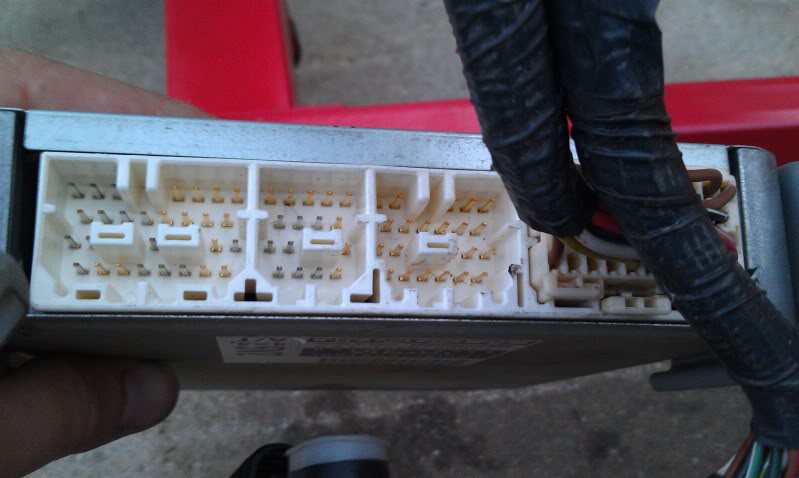
M/T ECU:
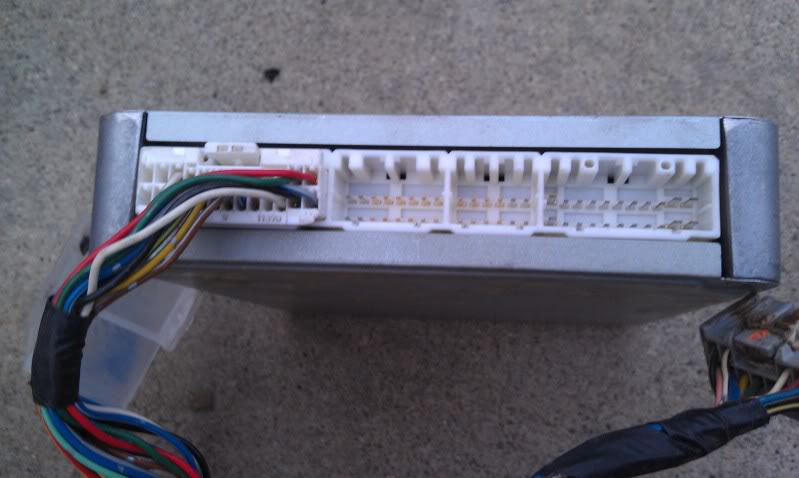
(Both ECUs are for a 96 4Runner 4x4)
You'll have to buy new connectors for the M/T ECU (or you can harvest some from the 3.0L harness) and repin the auto engine harness to match the M/T pinouts in the EWD. Check out the sticky 3.4 Swap 101 thread for further info. EDIT: Just as an FYI, the ECU pinouts are identical between the 96 and 97 4Runner ECUs.
You'll need to harvest the transmission/transfer case plugs from you're 3.0L engine harness and splice them onto the 3.4 A/T engine harness to actually fit your application. Just about all the "extra" A/T only wires and connections are on the transmission end of the harness and will need to be secured out of the way somehow.
That said, my conversion harness still looks like this:
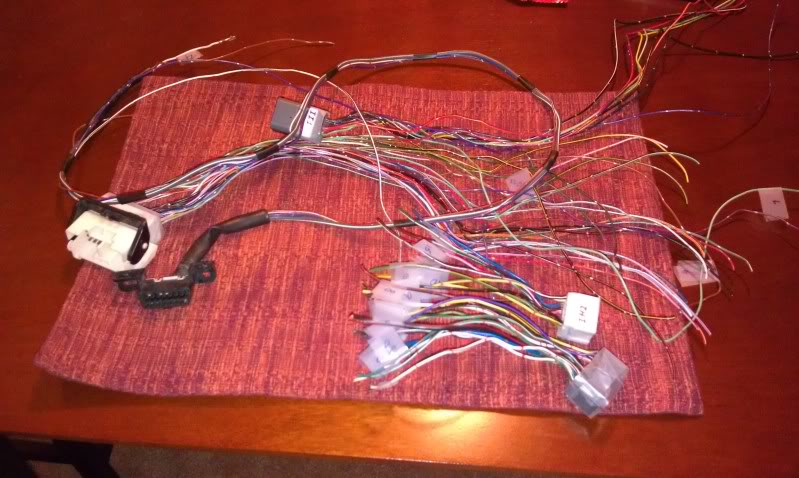
and the engine is still on the stand for another couple of weekends, so I could be wrong.
The ECU connectors for the A/T ECU and the M/T ECU couldn't be any more different if they tried.
A/T ECU:
M/T ECU:
(Both ECUs are for a 96 4Runner 4x4)
You'll have to buy new connectors for the M/T ECU (or you can harvest some from the 3.0L harness) and repin the auto engine harness to match the M/T pinouts in the EWD. Check out the sticky 3.4 Swap 101 thread for further info. EDIT: Just as an FYI, the ECU pinouts are identical between the 96 and 97 4Runner ECUs.
You'll need to harvest the transmission/transfer case plugs from you're 3.0L engine harness and splice them onto the 3.4 A/T engine harness to actually fit your application. Just about all the "extra" A/T only wires and connections are on the transmission end of the harness and will need to be secured out of the way somehow.
That said, my conversion harness still looks like this:
and the engine is still on the stand for another couple of weekends, so I could be wrong.
Last edited by SacRunner; 03-01-2012 at 09:09 PM.
03-10-2012, 11:06 AM
#14
Registered User
Thread Starter
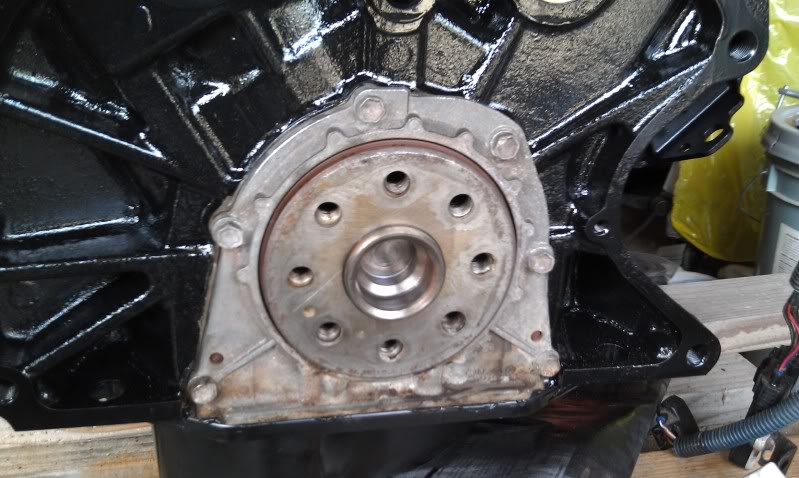
I finally got around to pulling the motor off the stand and am installing the new pilot bearing, flywheel, clutch, pressure plate before dropping the motor in. There was a spacer between the crank and the flex plate for the automatic transmission, do I need to keep this spacer when I mount the 3.4L flywheel?
This is also my first clutch job, so I'm not really sure what the 3.0L had behind it, and with it sitting (rather precariously) on an old tire in the corner of the garage, I really don't want to take any chances taking it apart to look.
This little guy:
was here:
This is also my first clutch job, so I'm not really sure what the 3.0L had behind it, and with it sitting (rather precariously) on an old tire in the corner of the garage, I really don't want to take any chances taking it apart to look.
This little guy:
was here:
03-10-2012, 12:10 PM
#16
Registered User
Thread Starter
Ok, thanks.
I couldn't see anything in the clutch section of the FSM, but in the 5VZ cylinder block component section it shows that spacer with the "drive plate" in a separate box for A/T but only shows the flywheel for the M/T.
It also looks like the FSM gives 2 torque specs for the flywheel bolts: 28 ft-lbs in the cylinder block section, and 63 ft-lbs in the clutch unit inspection section (when replacing the pilot bearing).
Anybody recall if the flywheel is torqued to 28 or 63 ft-lbs?
Thanks.
03-10-2012, 01:02 PM
#17
Registered User
http://home.comcast.net/~dntsdad//Cl...ue%20Specs.pdf
28 seems awfully low. Maybe 28 and the a 90 degree turn.
I believe that I used this link above
28 seems awfully low. Maybe 28 and the a 90 degree turn.
I believe that I used this link above
Last edited by dntsdad; 03-10-2012 at 01:05 PM.
03-10-2012, 07:02 PM
#18
Registered User
Thread Starter
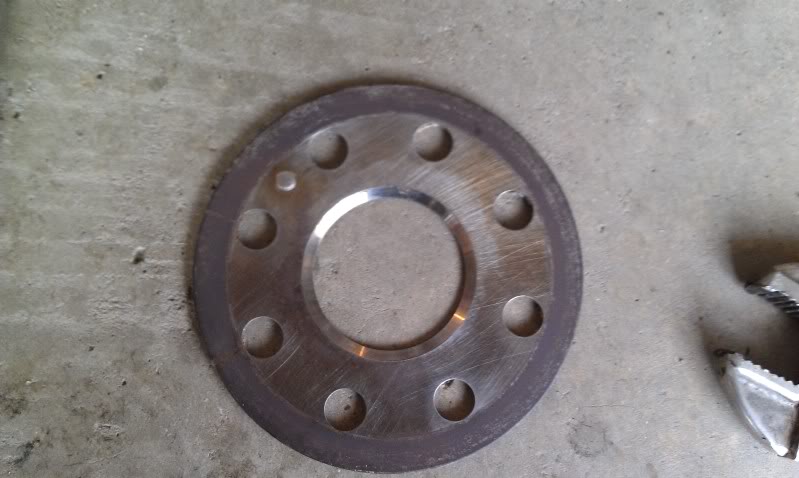
Yeah, there were 2 spacers that sandwiched the A/T flex plate, I just disregarded the transmission side and completely forgot about it till I saw it sitting on top of the flex plate next to the engine.
After looking at dntdad's link and digging through some old threads, I decided to torque the flywheel bolts to 63 ft-lbs.
I was a bit confused with how to install the clutch disk (3.4L clutch), and after reading the FSM and various threads on the subject and the fact that the disk had "FW Side" stamped on the opposite side from what I was anticipating. I ended up calling the local Toyota dealer and asked them, they said to install with the "FW Side" facing the fly wheel; hopefully that works.
Anyways, over the last couple days I cleaned up the rust from the back of the motor, degreased it, put a fresh coat of Rustoleum engine enamel, 2 new freeze plugs, new rear main seal, installed the Toy Only Swaps cross over, pilot bearing, flywheel, clutch disc, and pressure plate to end up with (in time lapse):
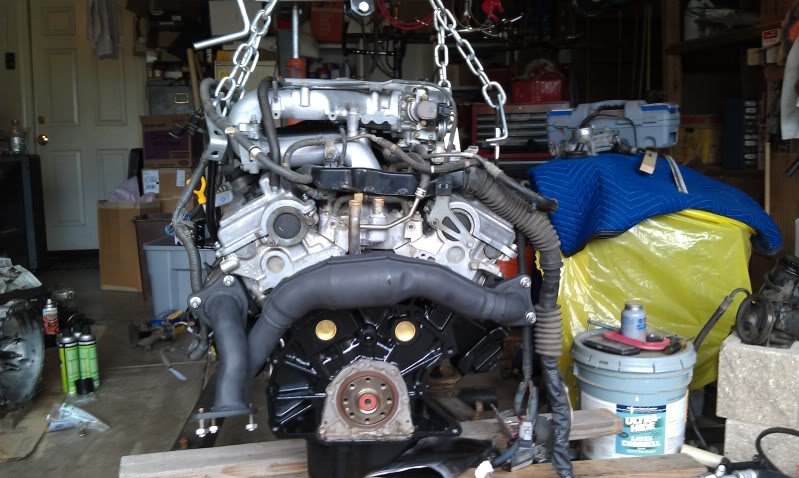

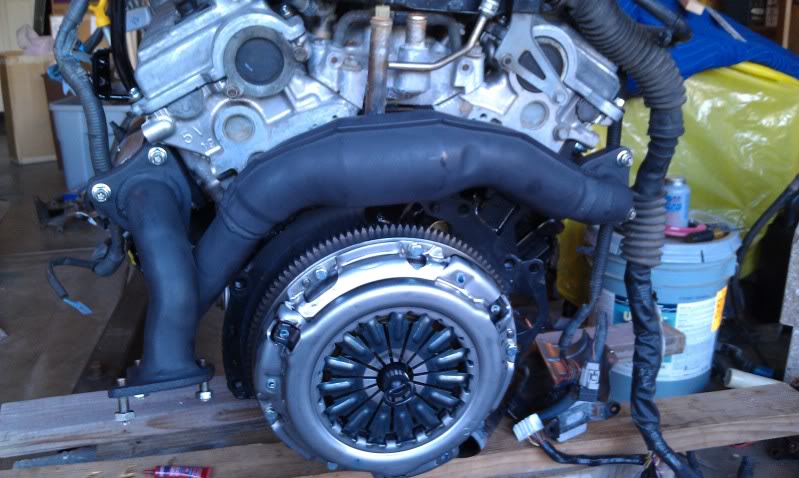
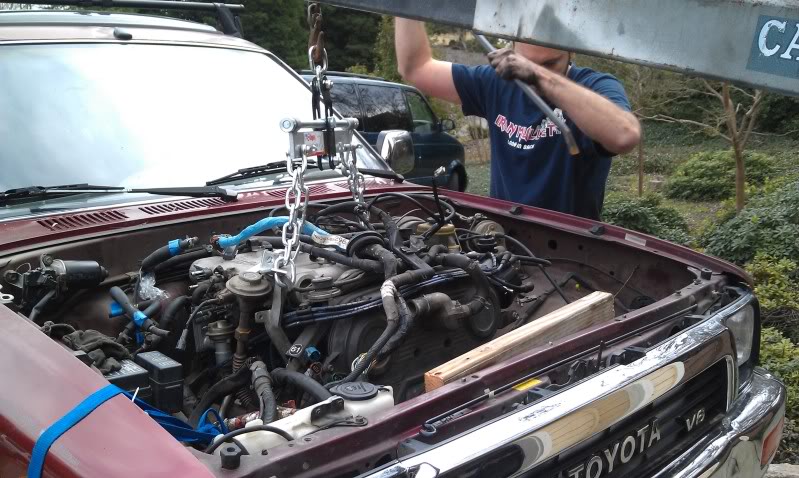
Then the only thing left to do was put it in:

After looking at dntdad's link and digging through some old threads, I decided to torque the flywheel bolts to 63 ft-lbs.
I was a bit confused with how to install the clutch disk (3.4L clutch), and after reading the FSM and various threads on the subject and the fact that the disk had "FW Side" stamped on the opposite side from what I was anticipating. I ended up calling the local Toyota dealer and asked them, they said to install with the "FW Side" facing the fly wheel; hopefully that works.
Anyways, over the last couple days I cleaned up the rust from the back of the motor, degreased it, put a fresh coat of Rustoleum engine enamel, 2 new freeze plugs, new rear main seal, installed the Toy Only Swaps cross over, pilot bearing, flywheel, clutch disc, and pressure plate to end up with (in time lapse):
Then the only thing left to do was put it in:
03-20-2012, 08:23 PM
#19
Registered User
Thread Starter
Transmission cleanup
Not much recent progress, but a bit of catch-up.
A couple of weeks ago before the engine was ready to go in, I decided it would be an interesting exercise to see how well the transmission/transfer case would clean up after 20 years of having grease, oil, and dirt covering it
Before:
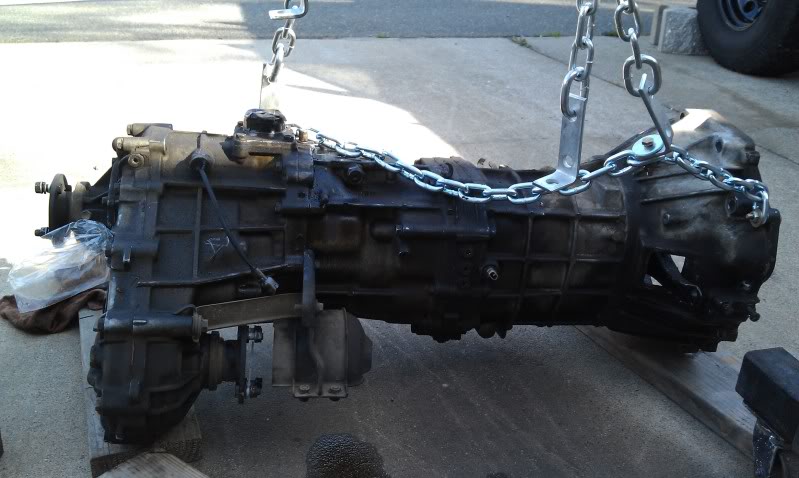
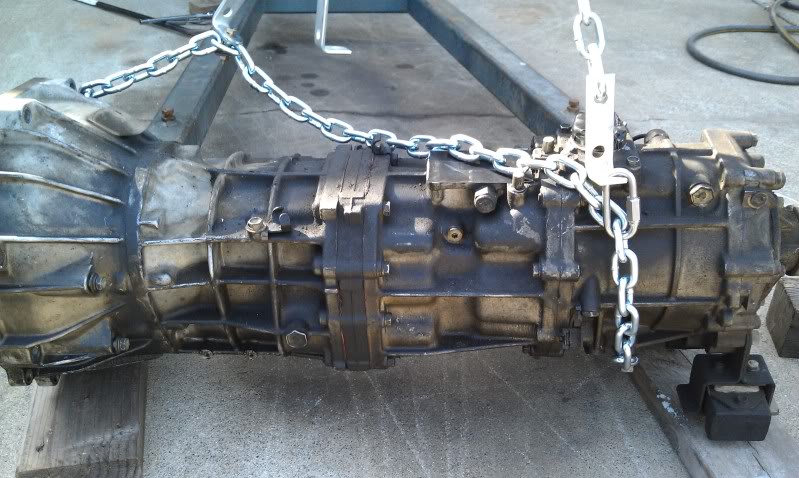
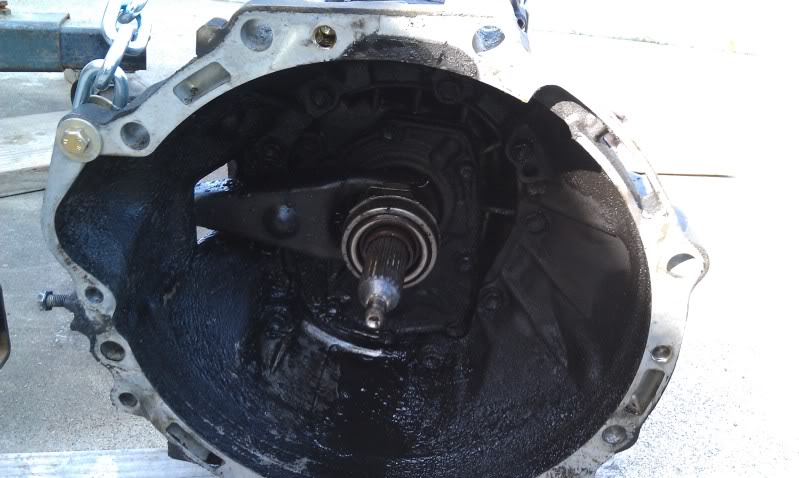
After a couple rounds of degreaser, scrubbing, and the pressure washer:
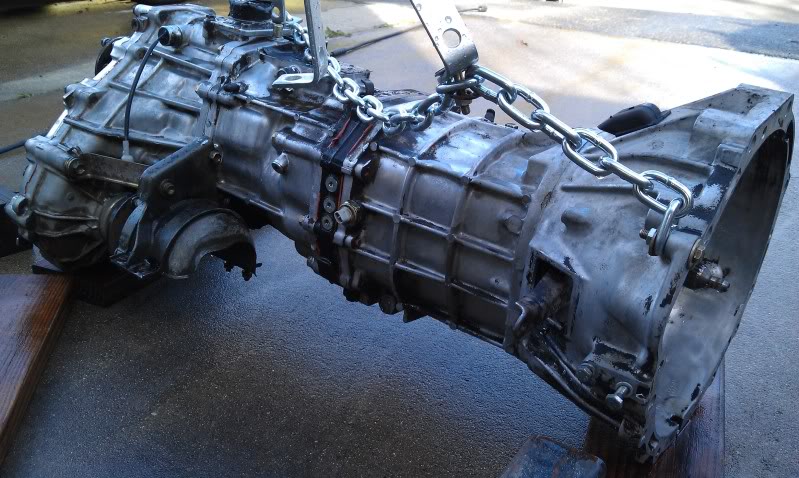
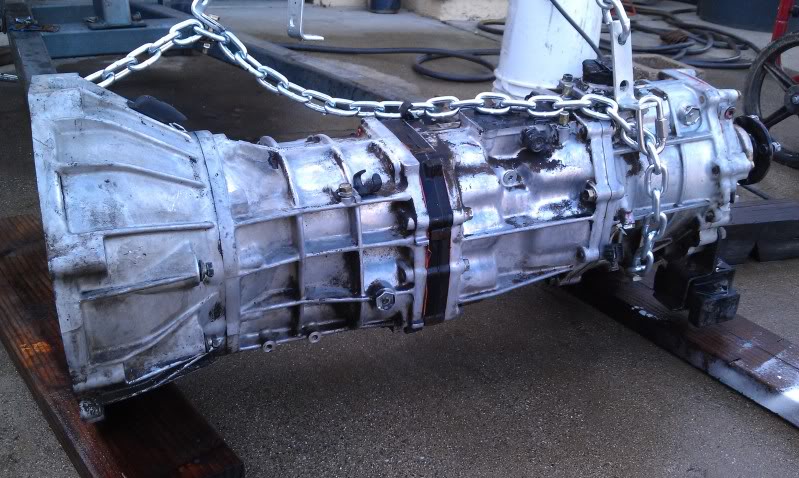
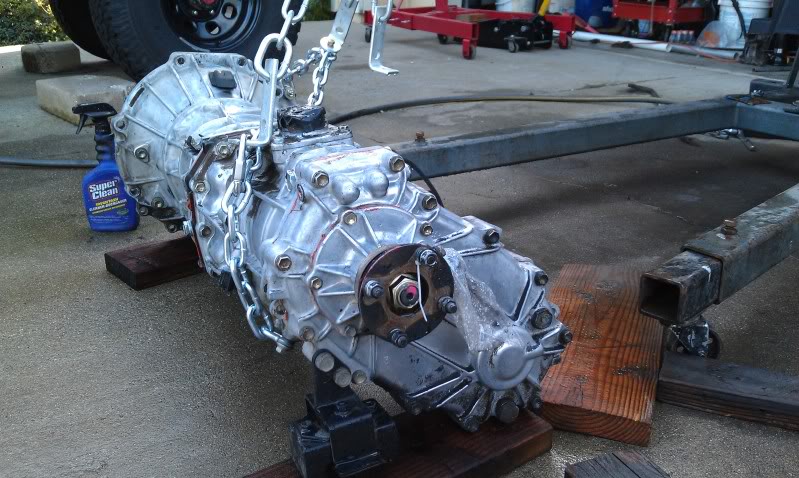
I can't say enough good things about that purple "Super Clean" in the last picture. Even the environmentally safe California formula works like a champ, spray it on and the white foam immediately turns brown as it starts doing its thing.
A couple of weeks ago before the engine was ready to go in, I decided it would be an interesting exercise to see how well the transmission/transfer case would clean up after 20 years of having grease, oil, and dirt covering it
Before:
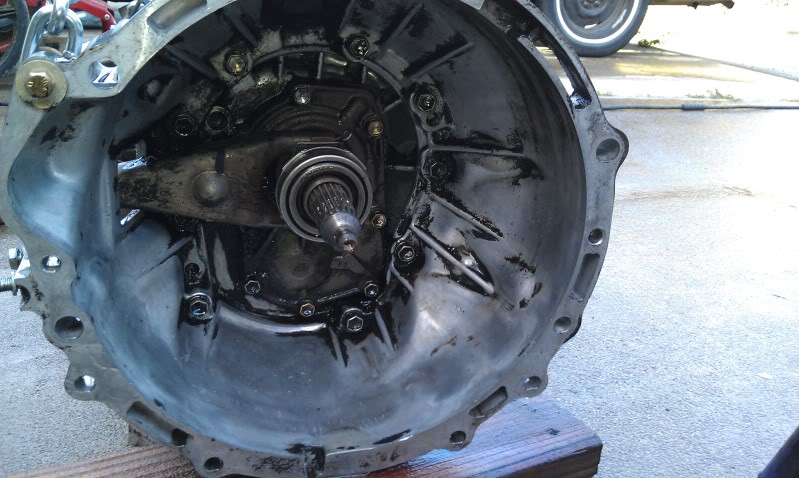
After a couple rounds of degreaser, scrubbing, and the pressure washer:
I can't say enough good things about that purple "Super Clean" in the last picture. Even the environmentally safe California formula works like a champ, spray it on and the white foam immediately turns brown as it starts doing its thing.
03-20-2012, 08:36 PM
#20
Registered User
Thread Starter
With the 3.4 dropped in Saturday afternoon (a couple weeks ago now), I decided to get working on the transmission Sunday, first installed the new 3.0L throwout bearing from Marlin:
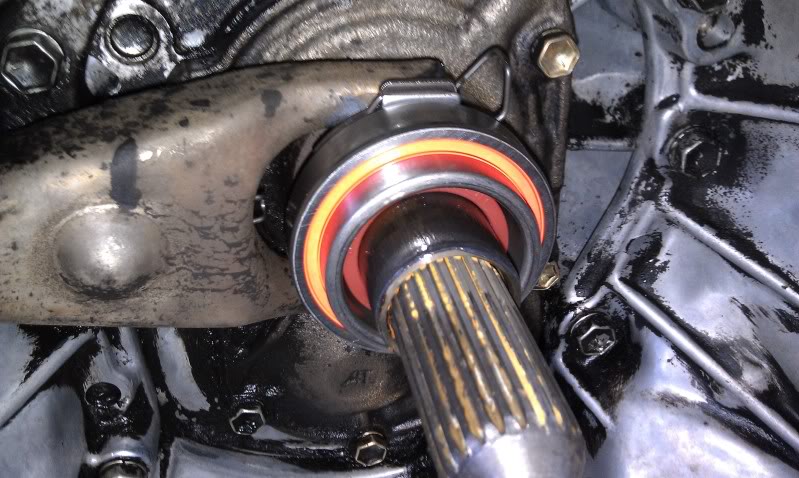
I'm about 90% sure that clip is on backward (that's how the old one came out) but I later reversed it per the FSM and various clutch install threads.
Then I had the opportunity to wrestle the transmission back in; talk about a PITA!!! Even with 4 of the transmission bolts (from the donor engine) with their heads cut off, a slot for a flat screw driver, screwed into the block to help with alignment, my dad an I spent a good 45 mins to an hour adjusting the angle of the tranny jack, lifting/lowering the jack, repeat 5-6 times. All the while it felt like it was hitting something, but nothing either of us could see.
Turns out the splines on the clutch and the transmission were out of alignment and with the transmission in neutral and no shifter installed, I turned the crank over a couple of turns and the transmission just slid right in. (Did I mention this was the first time I've done a clutch so some of these "obvious" things are still new to me ). Sorry, no pictures of this.
I'm about 90% sure that clip is on backward (that's how the old one came out) but I later reversed it per the FSM and various clutch install threads.
Then I had the opportunity to wrestle the transmission back in; talk about a PITA!!! Even with 4 of the transmission bolts (from the donor engine) with their heads cut off, a slot for a flat screw driver, screwed into the block to help with alignment, my dad an I spent a good 45 mins to an hour adjusting the angle of the tranny jack, lifting/lowering the jack, repeat 5-6 times. All the while it felt like it was hitting something, but nothing either of us could see.
Turns out the splines on the clutch and the transmission were out of alignment and with the transmission in neutral and no shifter installed, I turned the crank over a couple of turns and the transmission just slid right in. (Did I mention this was the first time I've done a clutch so some of these "obvious" things are still new to me
). Sorry, no pictures of this.


