When you click on links to various merchants on this site and make a purchase, this can result in this site earning a commission. Affiliate programs and affiliations include, but are not limited to, the eBay Partner Network.
The cool little switch is just about ready for final install now that the shoe goo is dry.....so in the meantime I addressed the front brake
pull to the left issue by replacing both calipers with fresh new ones. Not the oem FJ60 ones which are smaller but the upgraded
1994 4Runner V6 IFS calipers.....fit like a champ and now I have no more pull to the left(during hard braking) and now BOTH calipers
are working at 100% ability for much better braking power. The brake pedal is "softer". A larger master cyl would change that but
it's not an actual "issue" .
Brand new upgraded loaded calipers were included in the FJ60 axle package that I bought in Grand Junction, CO about 3 years ago.....
so you would think that being brand new that they will work perfect...ha....something was funky with the driver side caliper....was
sticking and biting too hard. The passenger side one appeared to be working at 50% ability as indicated by the almost new look
over the rotor. By contrast, the driver rotor had a deeper groove in it indicating it was doing most of the braking.
With the new calipers/pads on now, the braking performance is back up to par. It's nice to have decent brakes again
Anybody doing the brake upgrade....use the OEM rotors (designed for the 60) and get the 1990 ~ 1995 IFS V6 4Runner calipers
with matching pads. The braking performance is good with 35" tires. Got mine at O'Reilly Auto Parts part # 19-1600 and 19-1601
calipers for 47.99 exchange each.
I elected for the ceramic pads(SC611) for 37.99....lifetime warranty yaaaaa. Chose ceramic because of really no other quality option
at O'Reilly and kinda like these ceramics......Found this when researching ceramic pads........ These pads use ceramic compounds and copper fibers in place of the semi-metallic pad's steel fibers.
This allows the ceramic pads to handle high brake temperatures with less heat fade, provide faster
recovery after the stop, and generate less dust and wear on both the pads and rotors.
Wow.....this looks so easy routing the elocker 2 wire harness......this pic is of the e-brake cable that passes thru
the firewall so very close to the gas peddle I used a screwdriver to help pull the rubber grommet free....such a nice
big opening and it's about 18" as the bird flies from the 2 wires on top of the diff. This is gonna be so easy
Here's the in cab view....just pulled up the corner of the carpet a little and such easy access.
See the telecom wires coming from the diff?(yellow and pink wires)
See the 4 wires on top that used to go to the clock module?
The white with black tracer is ground....so that goes to one of the elocker wires(yellow)
The clock blue with yellowish tracer is a constant 12v that was powering the clock...
so just crimp the shown 2 butt connectors and it's done!!!!!
Like this.....
Same picture with a little text to explain how easy the basic wiring is.....All just using the clock circuit.
I said it was Shoo-Goo...but I just looked at the label and it's GOOP. All the same.
The steel plate was so thin that it wobbled around so used the Goop. The plate is
actually 2.5" x 2.125" and ideally should be a thickness of .100 up to .125".
Aluminum is probably better. You can see the 2 plastic mounting holes but notice
they are of a different height which makes fabrication of a flat mounting plate difficult.
Locker is functional.....pulls 2.7 amps measured....won't burn the small telecom wires
Now to go to Moab in 3 days and test it out on Gold Bar Rim. I'm the trail guide again
and that's the toughest trail I feel comfortable going on because Terry will be following
in his Black Jeep....he rolled it last time on Moab Rim Trail on the Z .......
and I don't want a repeat.
So, earlier this month (Oct 7-10) I went to Moab to try out some of the mods....and to pass
my business card around which is always a good thing. On Saturday, we went up Gold Bar Rim
Trail about 8 miles north of town. This is a view from a spot that the trail passes very close
to the edge showing the highway 191 below. This is shot with a GoPro wide angle camera
so be aware of distortion and how it makes things appear less "impressive" than they really are.
Beautiful scenery. I once camped from an edge close to here in my 99 TJ so that dates it
around the year 2000 that I stayed overnight. What a beautiful view at night I must say.
Here's Terri in the black TJ coming down the tricky drop-off
90% the way up the trail we stopped at the lunchspot and had a bite to eat here.Amazing scenery from here too.
The Harrop elocker was used on a couple spots on the Gold Bar Rim and performed flawlessly.
No clicking....no air compressor noise....just instant lock-up of the front wheels.
No more pics of trail on day 1.
Below is my brother-n-law Jeff chilling out in the patio area just watching Moab traffic go by
and waiting for the sunset to happen (again, a very scenic site)
Day 2 was the easy but extremely scenic Shafer Trail We found this rock part way up the
Potash dirt road just before the Shafer Trail. It was very well balanced
and 3 old seniors tried to change that but they just didn't have it in them
We stopped at the Visitor's Center and purchased a Park Pass. Went down the Pucker Pass route.
Located at the very top ridge of Pucker Pass is Mushroom Rock ..... In the past, I was known to
have been out on that rock....my brain said go for it but the body said "another day".
Here's a vid of starting down Pucker pass....the big boulder fell there in December of '95 (per the 1996 Easter Jeep Safari newspaper).....
watch in full screen mode
Was just going to replace the spark plugs and discovered this.
Wires were getting old....15 years old. The inside of the drivers front plug as shown.
Notice the drivers side plugs appear to be running hotter. Not sure why though.
New genuine Toyota wire set at the dealer was 104 out the door. Worth it. The wires
should have lasted longer....probably the fault of the SAS.
Shame on me for going 80,000 miles with these cryo-treated plugs....gap is .080 maybe .100" and it passed
emissions earlier this year. Amazing.
New double electrode plugs are going in(factory NGK)
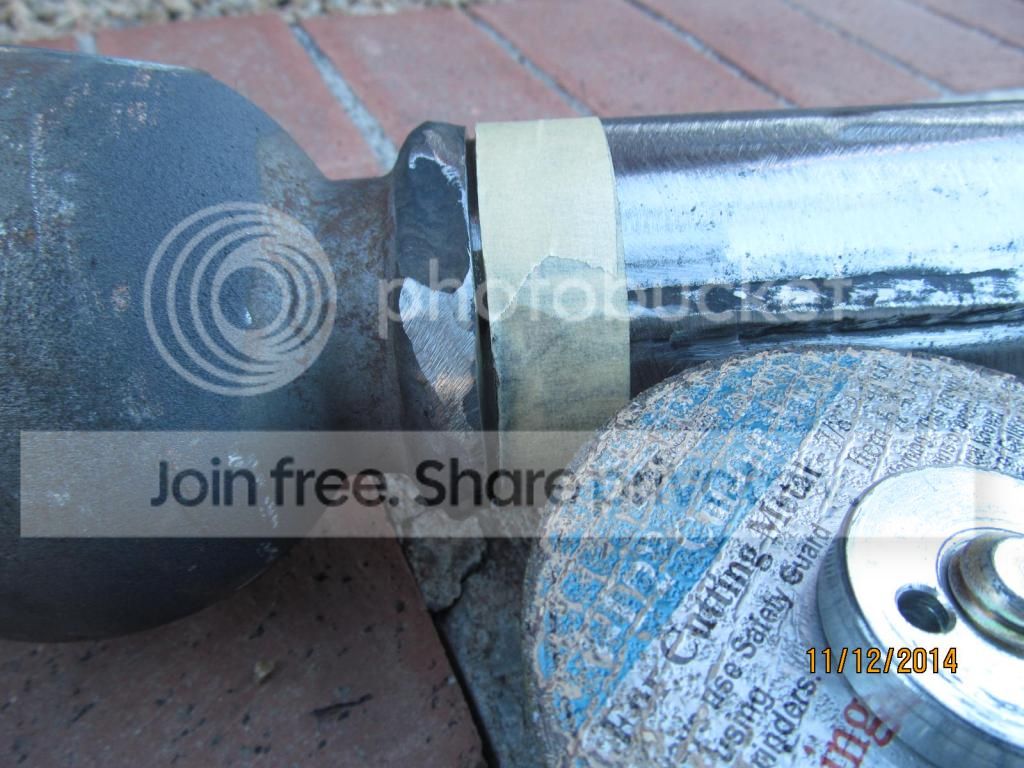
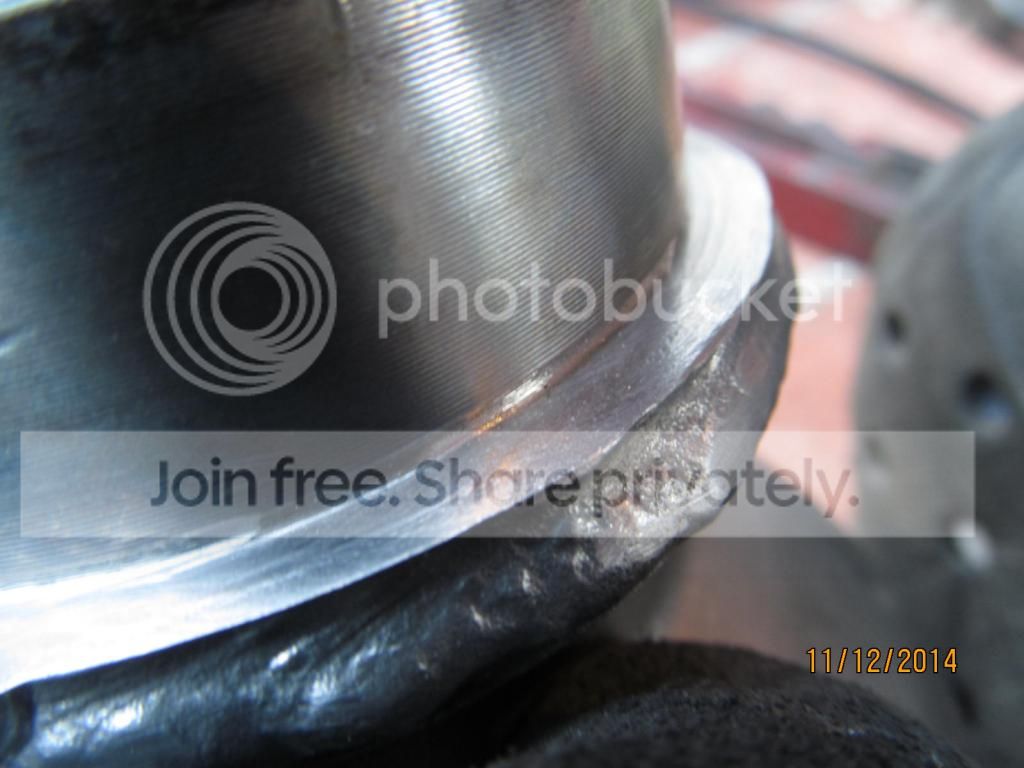
So I picked up on the technique that someone else did......and I cut not on the weld but just
behind it and I think that was a very good idea. I ran masking tape all the way around the
tube keeping it as straight as possible to get a nice straight line. It worked too.
Then I used a 4.5" cutting wheel and cut just about 3/16" into it all the way around. I could
feel the grinder grabbing a bit different when I reached the tube inside.
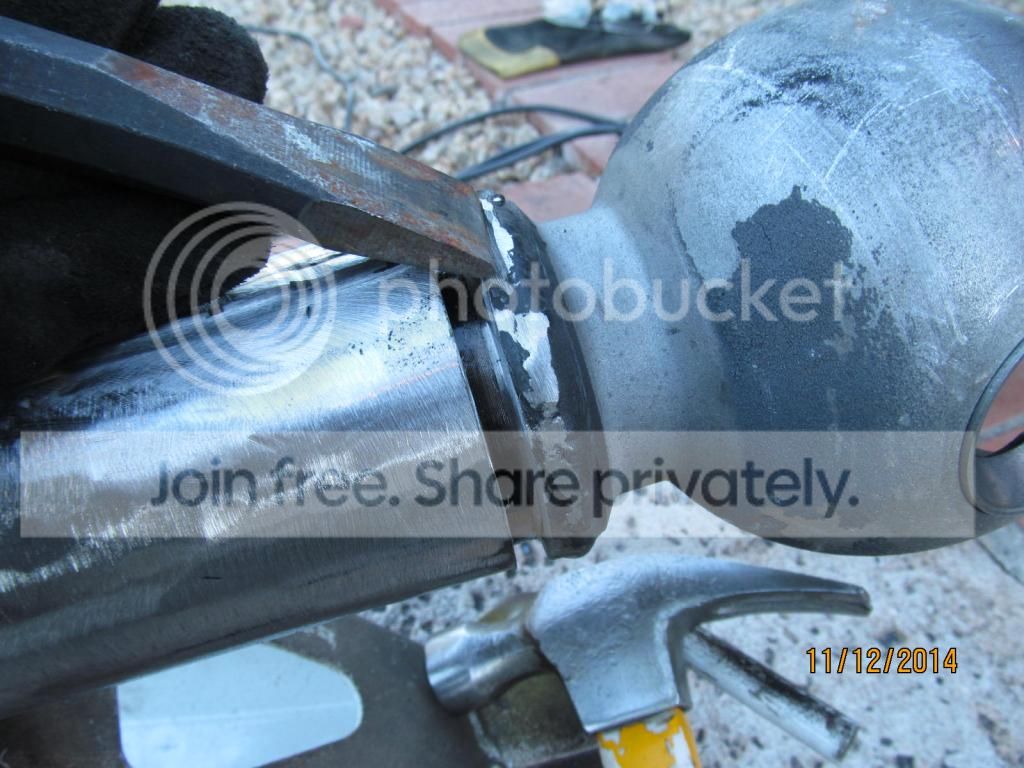
I used a chisel and hammer and was able to see separation. I'm banging
against the original weld so nothing is being damaged.
God bless America! Success!
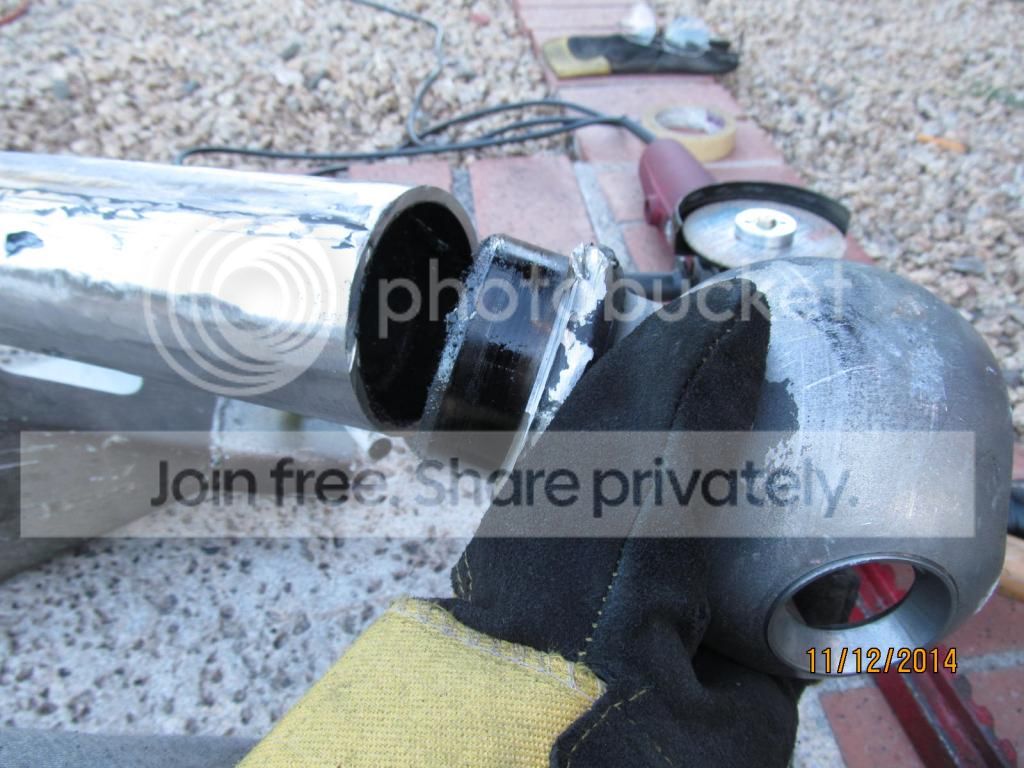
Cleaned it up with the flapper and also a high speed wire wheel.
Hardly a nick.
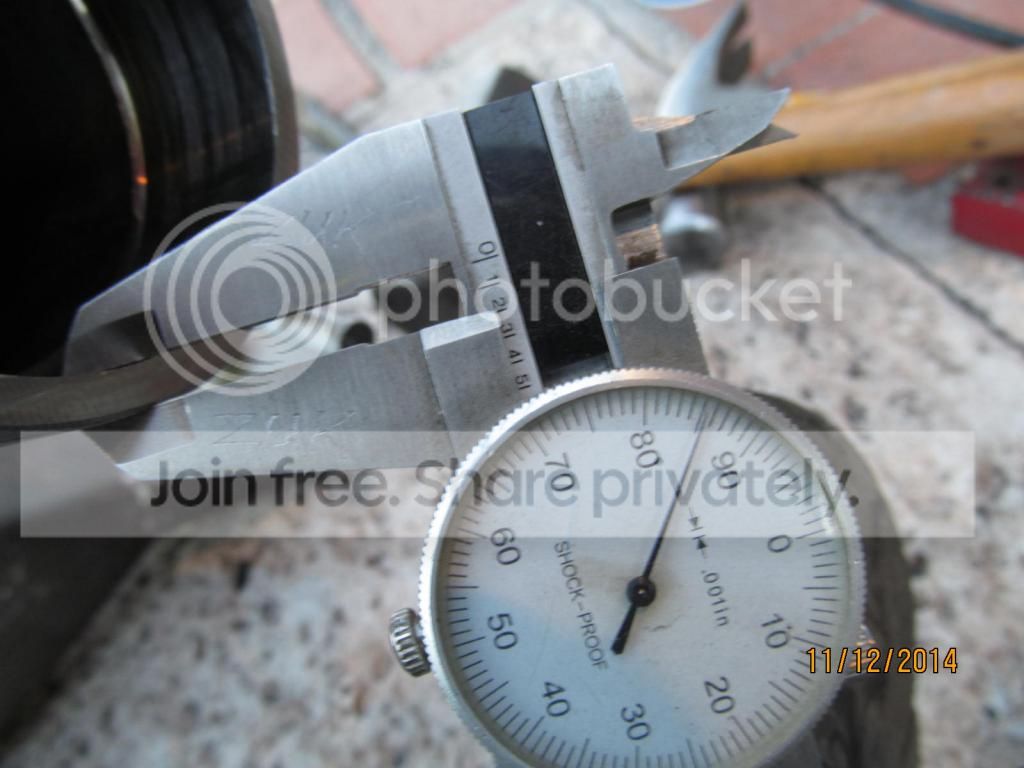
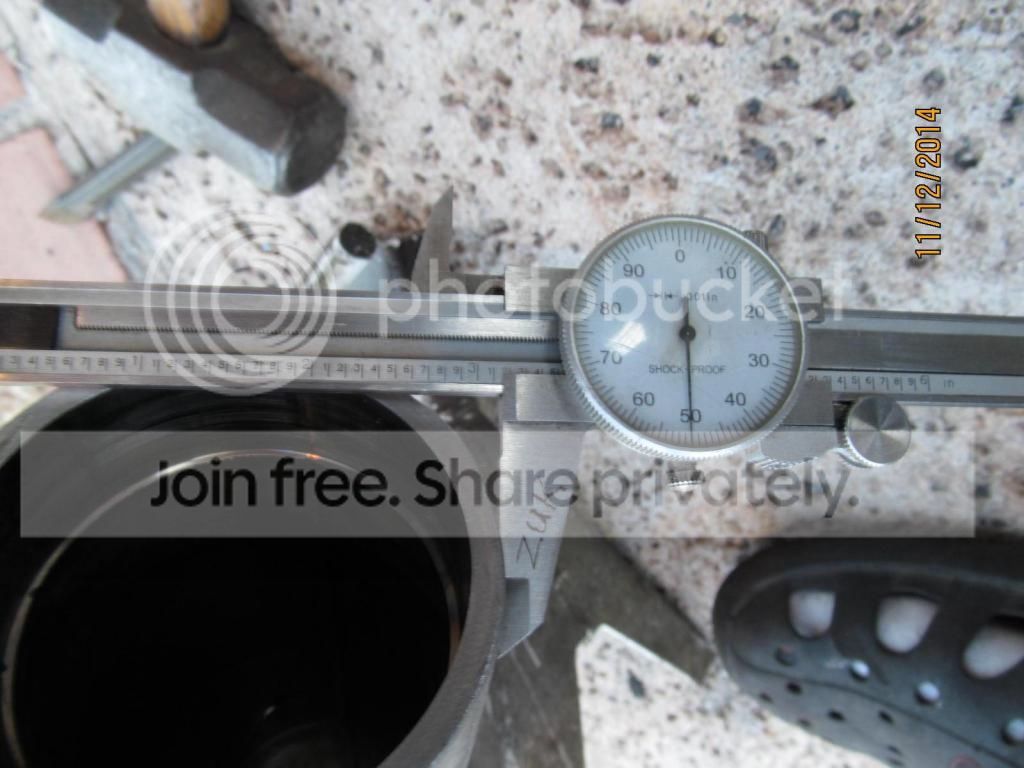
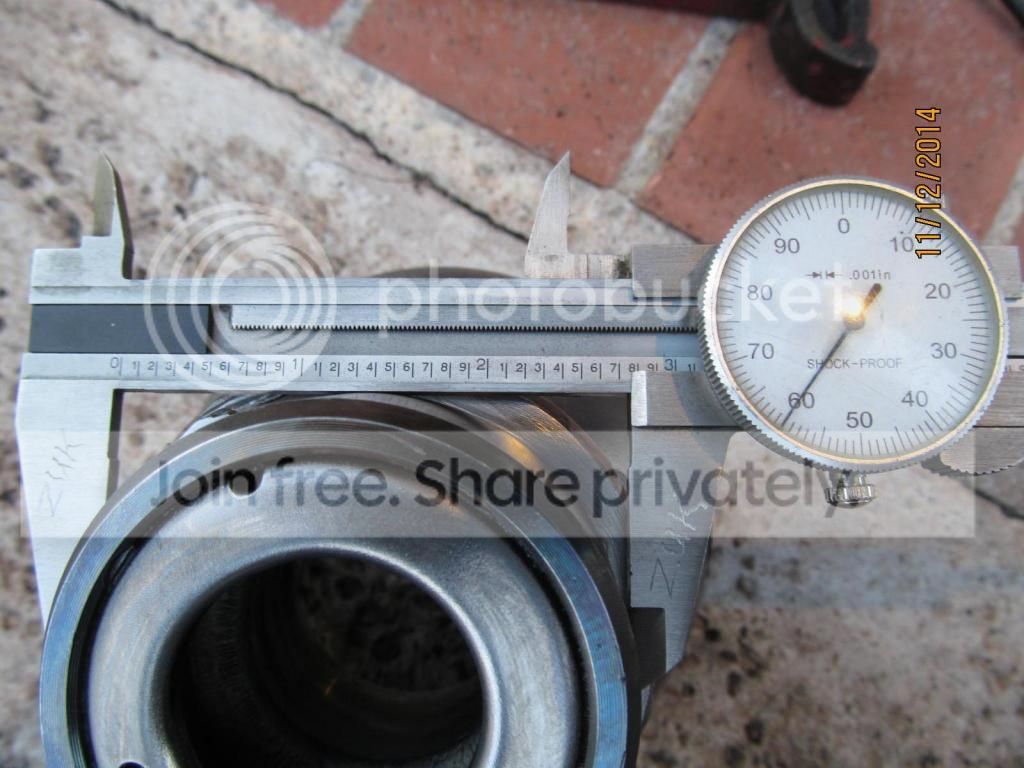
Thickness of the housing is just about 3/16".
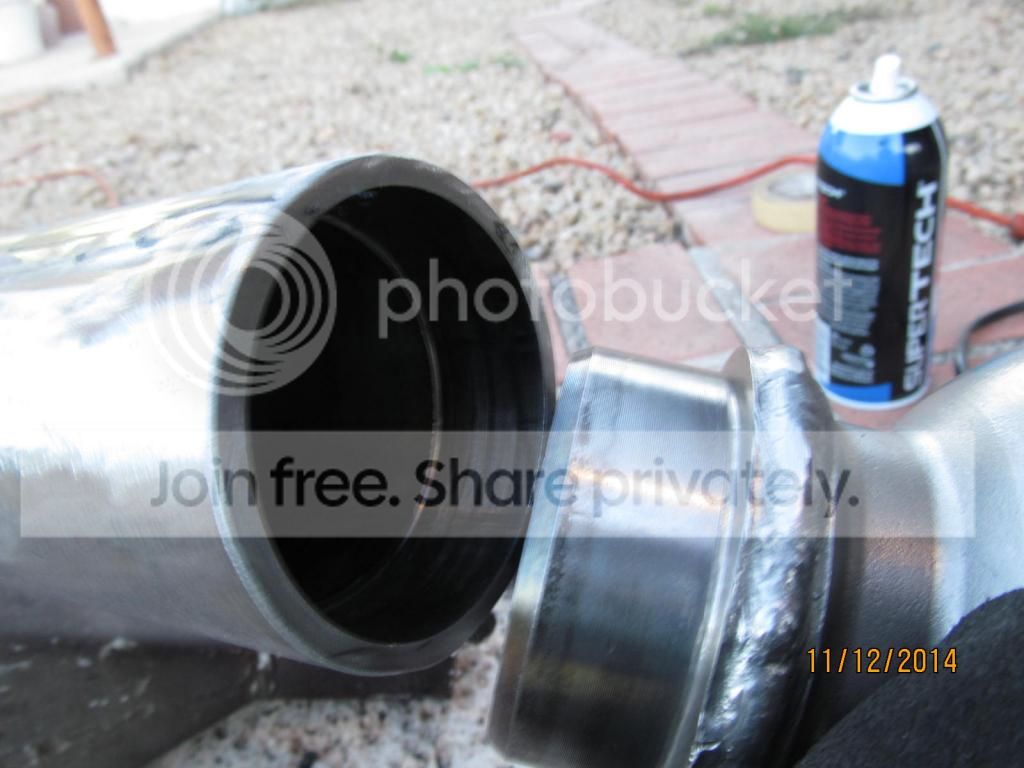
Outside diameter is 3.150"
The outer dia of the knuckle insert is close to 2.760" (2 3/4") [/QUOTE]
Ah-ha! When you first described your process I kept thinking, yeah you can flip the axle but your toe and caster is going to be backwards. This is awesome. Never knew the knuckle balls where on a inset coller. Your gonna have one badass taco! When I saw you cutting of the front diff cover I thought you were gonna flip it that way, by drilling and tapping diff studs on the front and welding the front cover to the back. Is there a reason why this wouldn't work? Seems it might be easier, dont have to change drain/ fill plug location. I guess the vertical angle of the knuckles would be off which could be an issue for steering arm clearance? What do you think?
Last edited by ChinkTruck; 12-05-2016 at 04:38 PM.
Ah-ha! When you first described your process I kept thinking, yeah you can flip the axle but your toe and caster is going to be backwards. This is awesome. Never knew the knuckle balls where on a inset coller. Your gonna have one badass taco!
Been enjoying it on the road and trails now for about a year and love it. Get compliments in the parking lots every now and then.
QUOTE=ChinkTruck;52343713]Ah-ha! When you first described your process I kept thinking, yeah you can flip the axle but your toe and caster is going to be backwards. This is awesome. Never knew the knuckle balls where on a inset coller. Your gonna have one badass taco! When I saw you cutting of the front diff cover I thought you were gonna flip it that way, by drilling and tapping diff studs on the front and welding the front cover to the back. Is there a reason why this wouldn't work? Seems it might be easier, dont have to change drain/ fill plug location. I guess the vertical angle of the knuckles would be off which could be an issue for steering arm clearance? What do you think?[/QUOTE]
I think it would be harder to flip it that way....because of what you said ...have to drill and tap for the 10 studs...a.nd there has to be a machined smooth surface for the paper gasket and there isn't so I think that kinda kills it. It's nice having the drain plug on top. Now, I don't have to worry about rocks nudging the plug and it falling out on the trail. Now it's turned into a fill plug. I don't worry about draining my oil....just filling it
wow you answered that quick. I went back and edited my post but had another question in there, when i saw you cutting the front diff cover i thought you were gonna flip it that way, by drilling and tapping diff studs on the front and welding the front cover to the back. Seems this might be easier? I know your vertical angle on the knuckle would be off slightly, may screw with your steering arm angles but dont know if it would enough to make it a fail. What do you think?
Should be business as usual but you have to rotate the knuckles AND reposition the perches.
Should be business as usual but you have to rotate the knuckles AND reposition the perches.
yeah that kinda kills it. I was thinking you could get away with not having to cut the knuckle balls out but if you still have to then its more work not less.
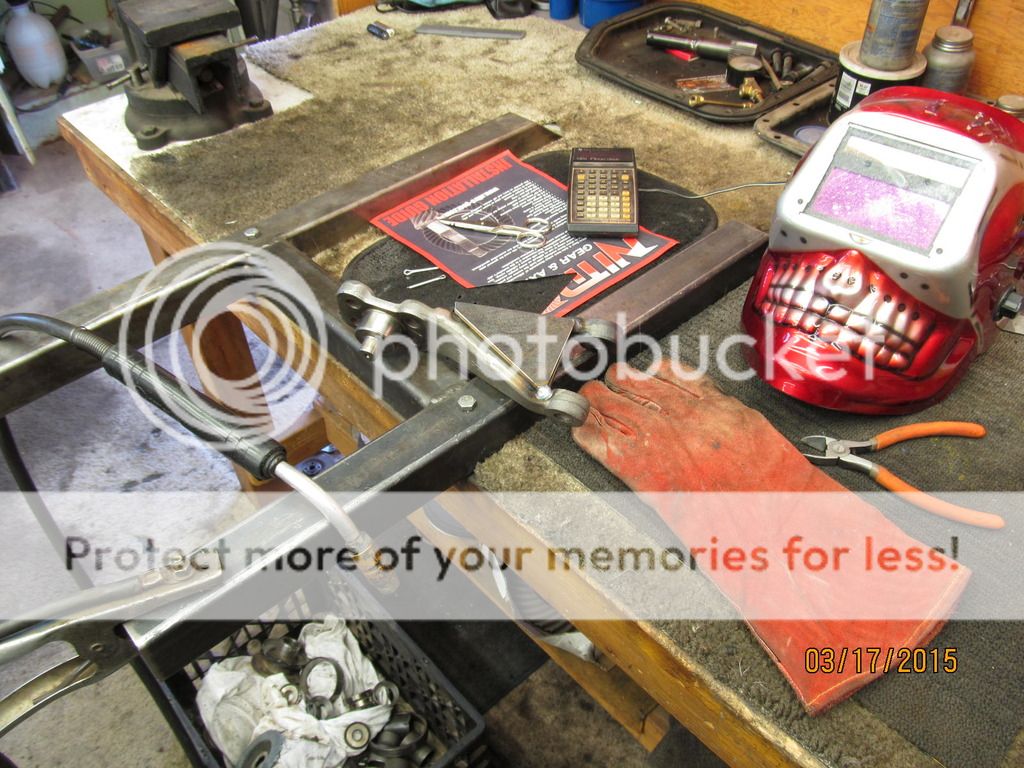
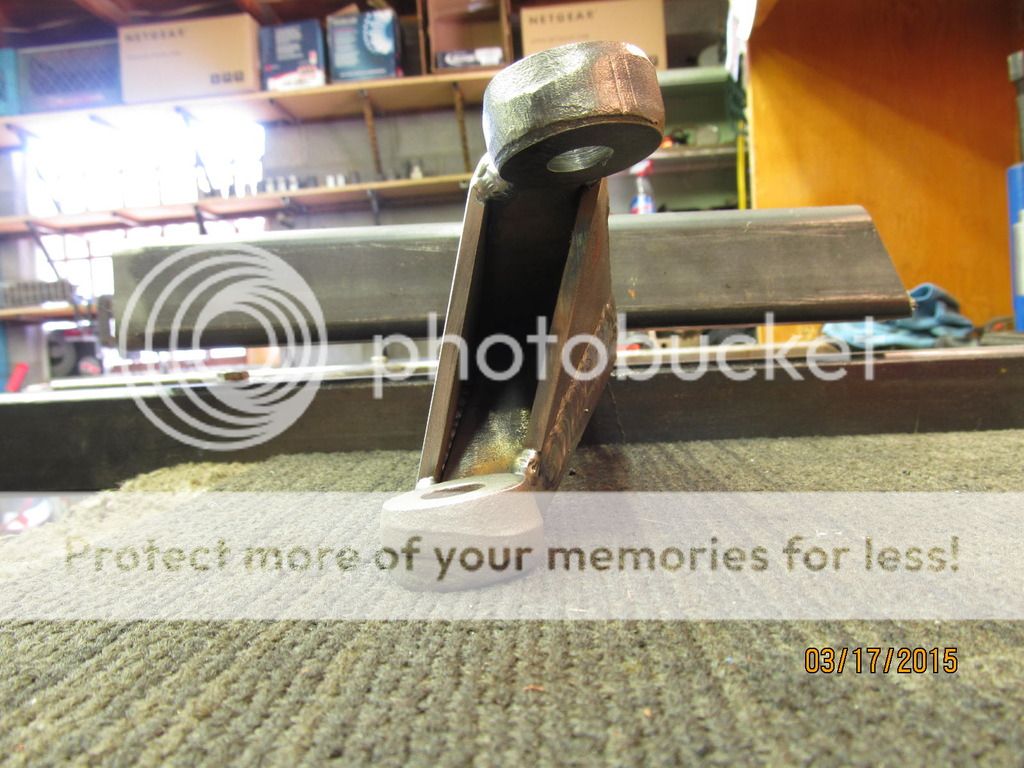
Made a template and shop-sawed some 3/16" plate....tacked in place
the approximate 1.5" offset to the inside can be seen.
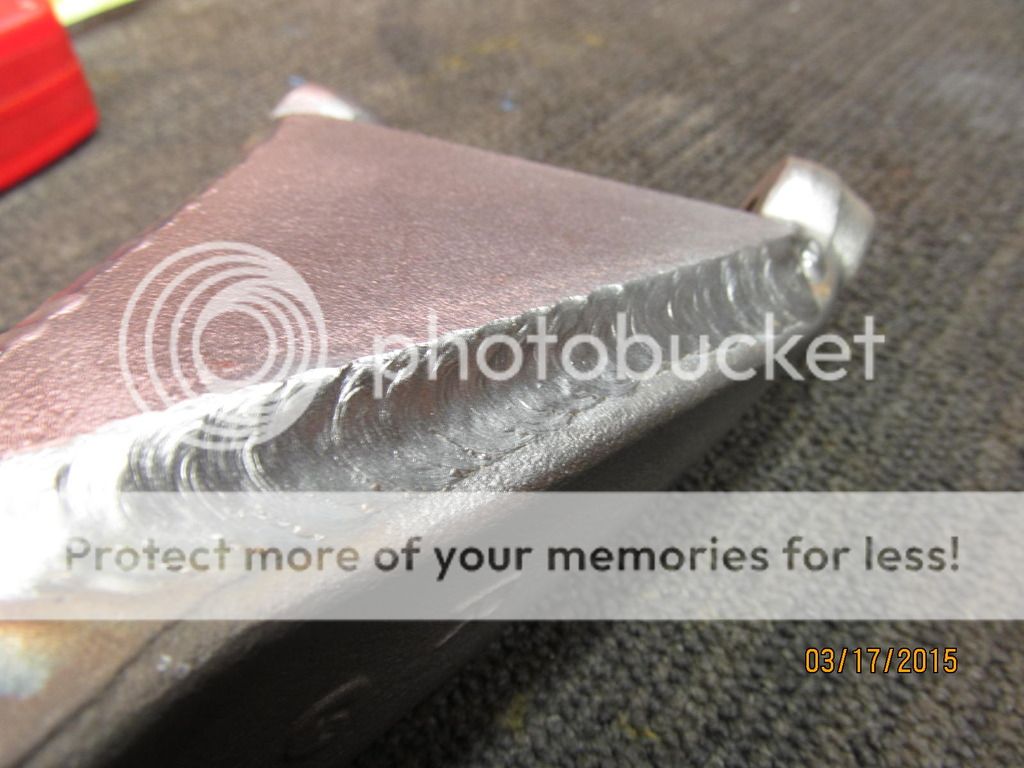
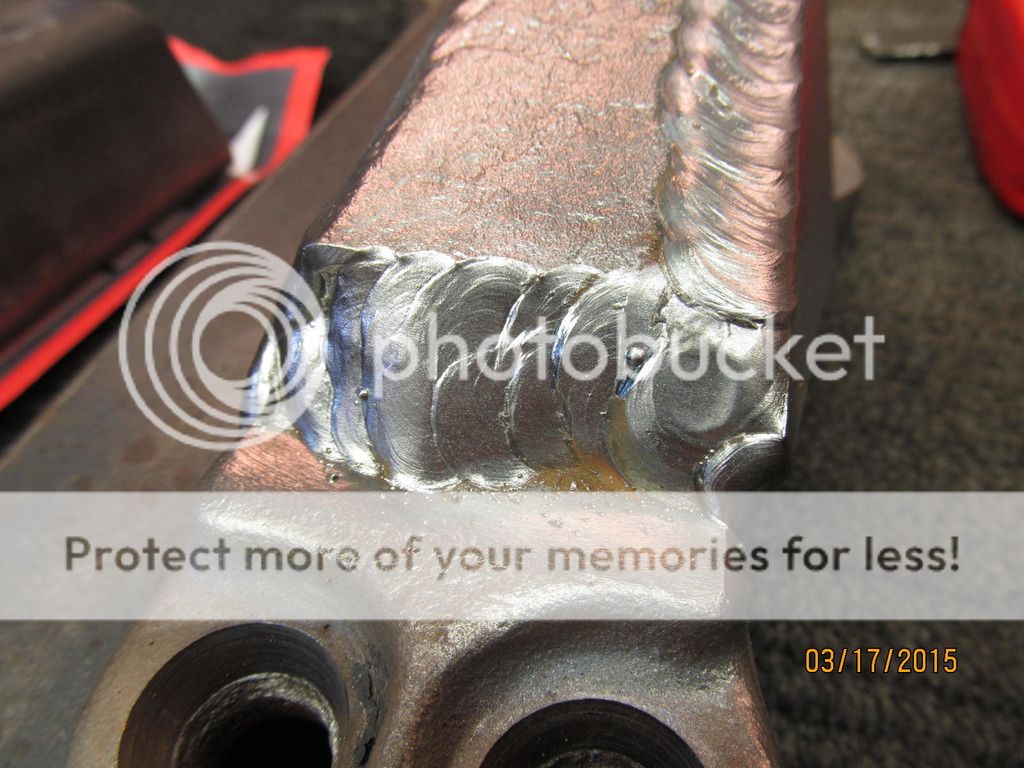
ahhh, it's good to have a glue gun....just squeeze the trigger and let it ooze out.
Made just one ssslllooowwww big pass and it will hold
Wow didn't realize you were thee "ZUK" world famous for his gear sets, among other things. Mind if I pick your brain for a sec. I'm wondering why you prefer the Y arm? I remember guys doing this before high steer but being that you obviously plan to do some rock climbing, hence the reinforced diff cover, wouldnt you want high steer to keep your tie rod protected? Another thing ive always wondered is if you could just flip a diff in toyota 8 inch axles? Notch and flip the cover like you did, to make it a high pinion design, it would also make the front ring gear contacting the drive side of the gear? Possible or no?
Don't hit rocks like that on the trail so not an issue smashing the rod. Besides, the Y arm is almost free...just find an old spare arm and weld it on with the hot glue gun.
Don't think I've heard of anyone flipping a low pinion 3rd to make it a high pinion but seems like the issues would be the wheels would turn backwards. And it would still be contacting the coast side when in 1st gear forward.....but if you put the truck in reverse gear the truck would move FORWARD and be contacting the drive. It would be all messed up
Don't hit rocks like that on the trail so not an issue smashing the rod. Besides, the Y arm is almost free...just find an old spare arm and weld it on with the hot glue gun.
Don't think I've heard of anyone flipping the 3rd to make it a high pinion but seems like the issues would be the wheels would turn backwards. And it would still be contacting the coast side when in 1st gear forward.....but if you put the truck in reverse gear the truck would move FORWARD and be contacting the drive. It would be all messed up
gotcha, so you would need to figure out how to make your front drive turn the opposite direction for it to work, making my idea impossible, damn! Thanks though.
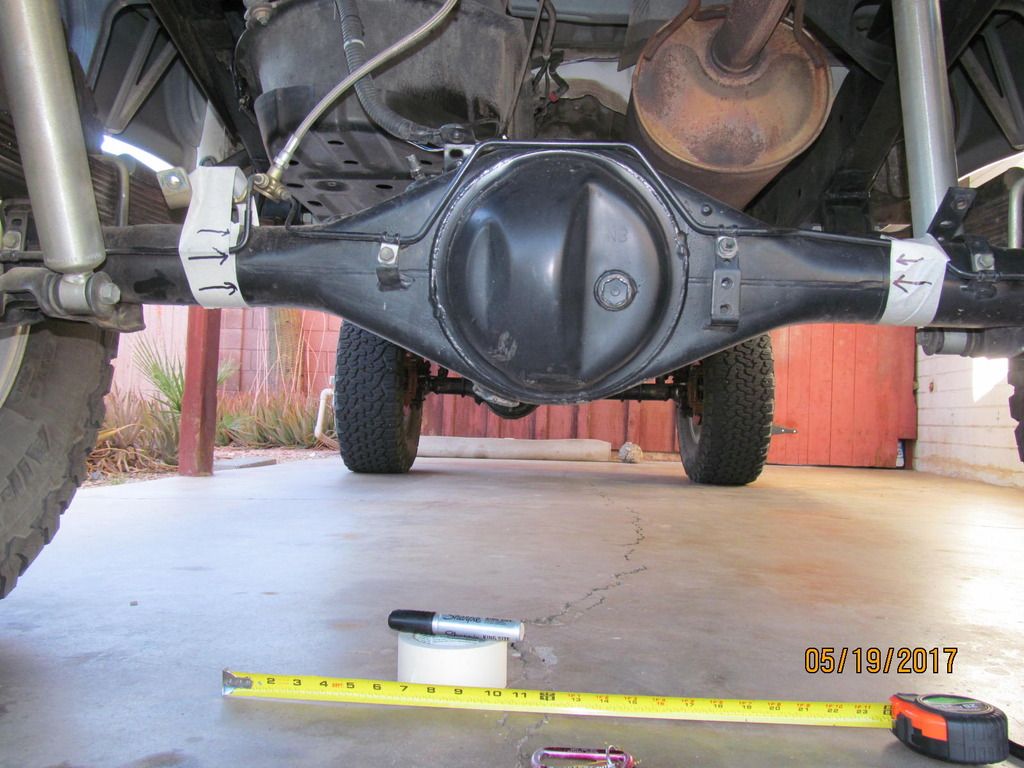
Was thinking about fabbing up a centered 9.5" rear end in place of my stock 8" factory elocker diff shown here.
That way I'll have front and rear Landcruiser diffs....both 9.5" ring gears. And I can remove the rear cover for the cool factor!
488 Nitro Gears and an Australian Harrop elocker.
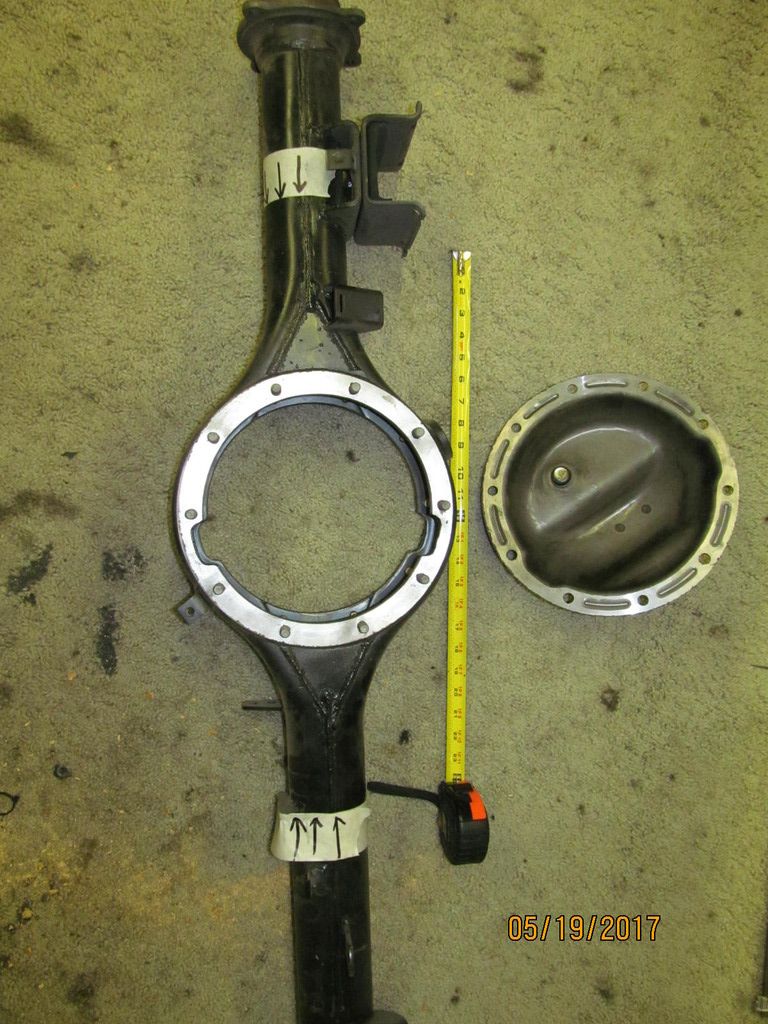
Mark 12" from the mounting pattern centerline and chop saw out the middle section.
Then cut the same 24" section out of the center of the severely offset FJ60 housing....
and match it up to my stock outer tubes.
I think that would be pretty cool set up. My neighbor had a similar axle set up by Proffit's Cruisers a few years ago. That 9.5 was pretty awesome sitting there.
 10-04-2016, 07:25 AM


 [/QUOTE]