General Electrical & Lighting Related Topics Ask here for electrical, wiring, and lighting info for your rig that could apply to all years
Sponsored by:
Sponsored by:

HID Projector Retro 7x6 sealed beam

Thread Tools
 
Search this Thread
 
Old 07-04-2015, 06:18 AM
  #1  
Registered User
Thread Starter
 
Regency's Avatar
 
Join Date: Mar 2015
Location: Alexandria, LA
Posts: 167
Likes: 0
Received 4 Likes on 4 Posts
HID Projector Retro 7x6 sealed beam

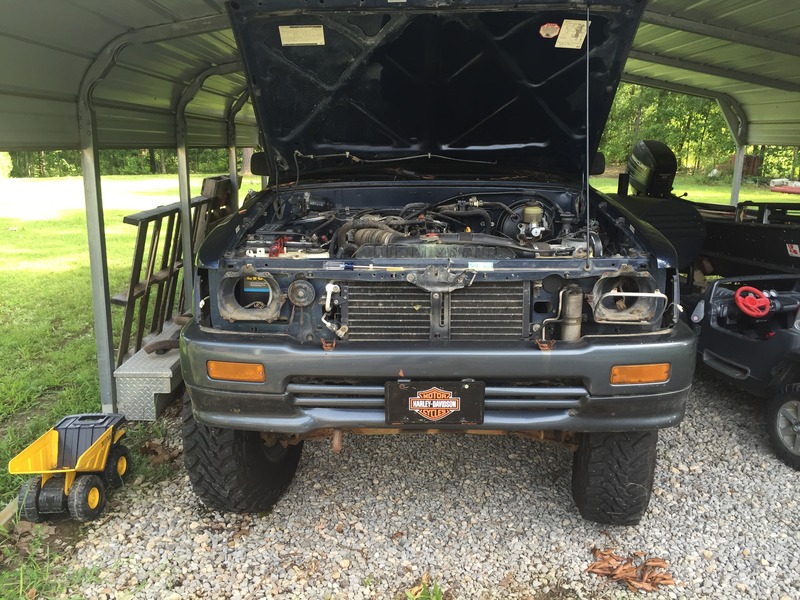
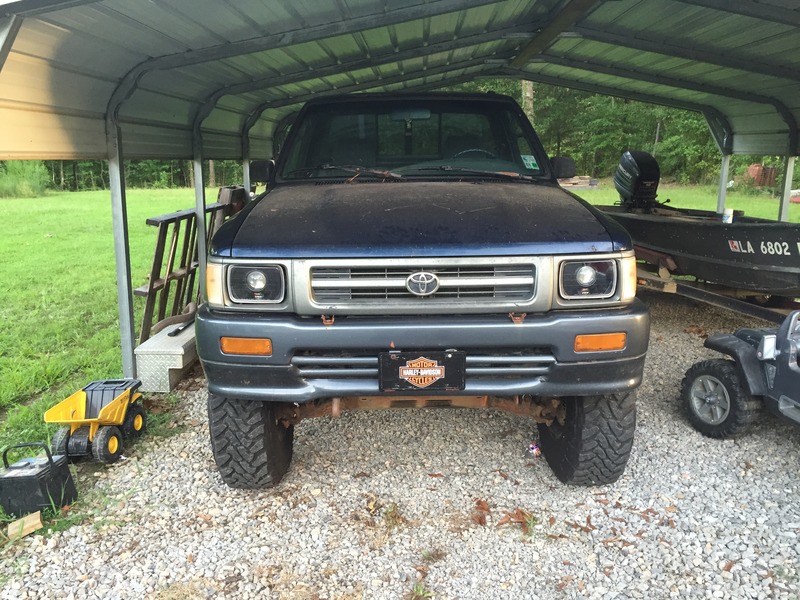
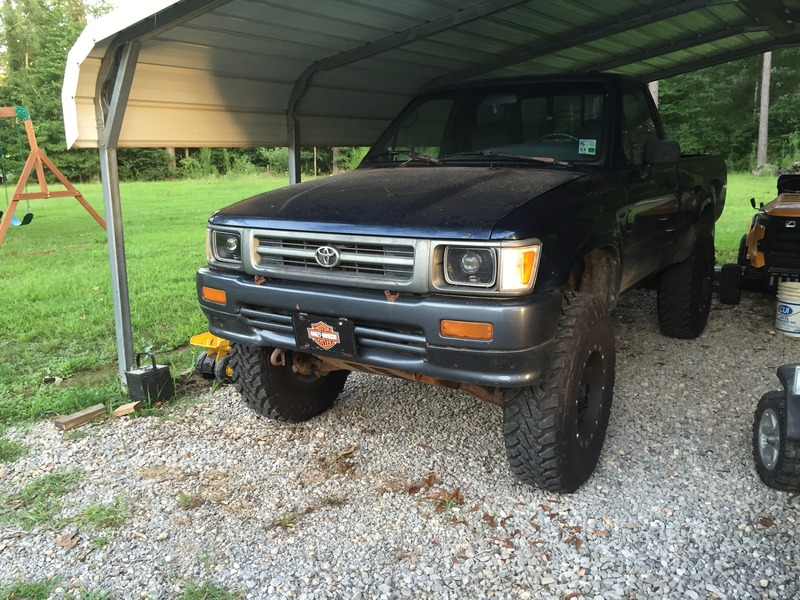
Getting around to doing the retro on my 92 pickup. I have had these projectors laying around from my previous retro just waiting to go in the yota.
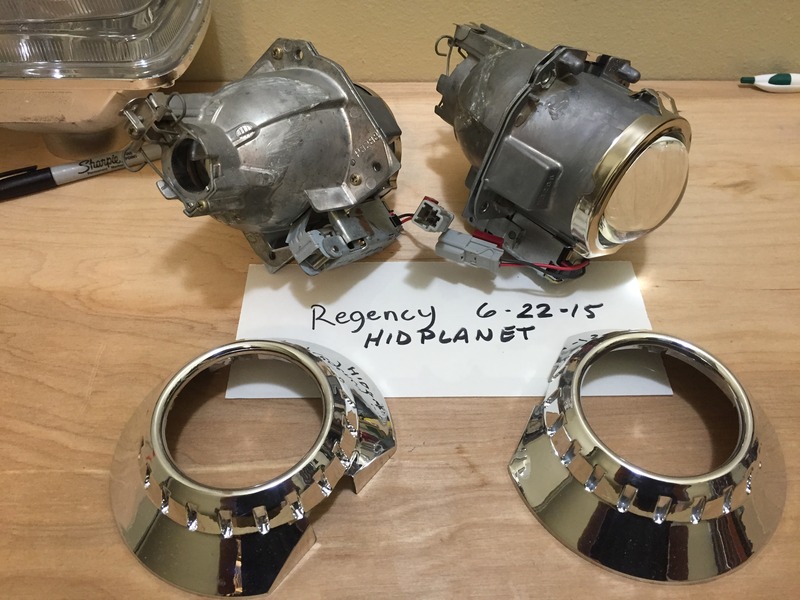
The projectors are Acura TL bixenon projectors with clear lenses.
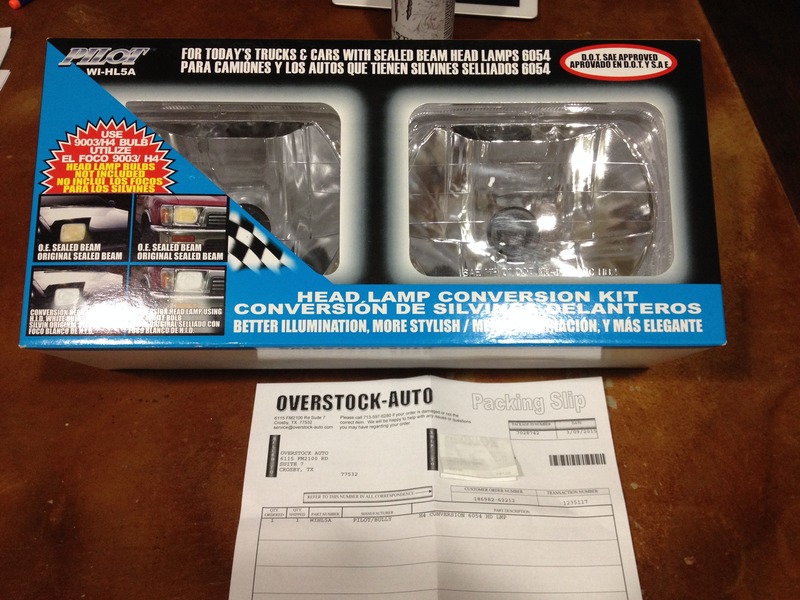
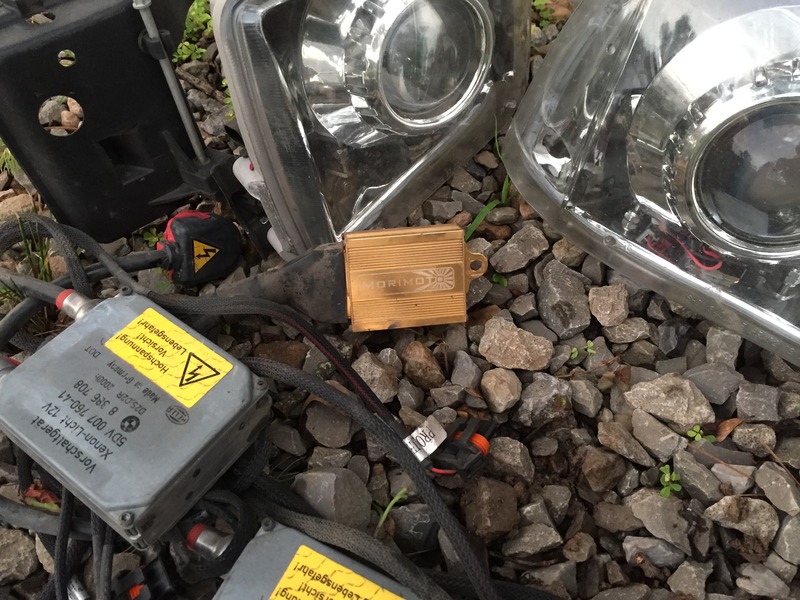
The other equipment is Hella ballasts, and a Morimoto H4 relay harness (3yrs old used everyday and not a single issue). Pilot housings which are preferred because of them being completely plastic.

Name:  46E4CF72-FB8C-4CEB-B383-2C65AB2CABD0_zpsyqidemhb.jpg
Views: 24168
Size:  162.4 KB
Name:  F38B0CCD-045B-4771-8FA1-A7E39803792D_zpsyux81zlt.jpg
Views: 24470
Size:  183.7 KB
Name:  FEC5C11A-46AC-49A1-8764-1CDC225606CF_zps09yeglxp.jpg
Views: 24329
Size:  147.9 KB

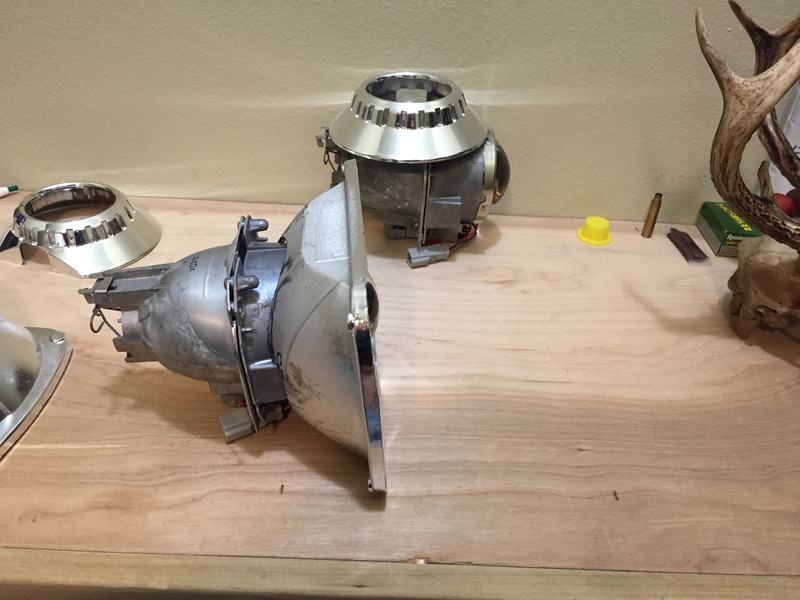
And i got started on one housing already
Name:  75A26D1B-7DCD-4ACF-8AE2-AC691E65214C_zps5bm02ltg.jpg
Views: 24953
Size:  124.6 KB
Old 07-05-2015, 03:42 PM
  #2  
Registered User
Thread Starter
 
Regency's Avatar
 
Join Date: Mar 2015
Location: Alexandria, LA
Posts: 167
Likes: 0
Received 4 Likes on 4 Posts
Got both projectors fitted in the housings. I need to install the relay harness so i can test cutoff rotation of the projector.

Name:  38A4F4F7-91E1-46C4-9E7A-7D678191BA60_zpsvpqtrkua.jpg
Views: 24756
Size:  125.0 KB
Name:  EE907B9F-E9FA-4E07-B743-75C8AFEC61F0_zpsrfgztfrg.jpg
Views: 24431
Size:  123.8 KB
Name:  4C7DB679-F545-4B33-9BDF-C487CA7150D6_zpsljeh19wf.jpg
Views: 24565
Size:  124.9 KB
Old 07-05-2015, 03:50 PM
  #3  
Registered User
iTrader: (2)
 
Robert m's Avatar
 
Join Date: May 2006
Location: Apple Valley, CA
Posts: 1,892
Received 104 Likes on 85 Posts
Is there enough room behind the housing to mount these? Are you going to have to cut out the core support or move anything?
Old 07-05-2015, 06:10 PM
  #4  
Registered User
Thread Starter
 
Regency's Avatar
 
Join Date: Mar 2015
Location: Alexandria, LA
Posts: 167
Likes: 0
Received 4 Likes on 4 Posts
The core is fine. The headlight bucket on the other hand will need to be cut to allow the projector to protrude through. I do not know how much yet but i dont think it will be that much.
The only thing that i think will need to be addressed is the battery but i wont know that until i set them in place.
Old 07-06-2015, 07:59 PM
  #5  
Registered User
Thread Starter
 
Regency's Avatar
 
Join Date: Mar 2015
Location: Alexandria, LA
Posts: 167
Likes: 0
Received 4 Likes on 4 Posts
Getting started installing the harness and test fitting the housings, i ran into a few obstacles.

Name:  0CDBCC13-A89D-4509-B4A7-9114AA0AC31E_zpsucwms4e6.jpg
Views: 25034
Size:  206.7 KB

One housing fit into position

Name:  EE280037-E86A-4A2A-AB1E-63F05D761038_zpsthxvslpf.jpg
Views: 24547
Size:  348.2 KB

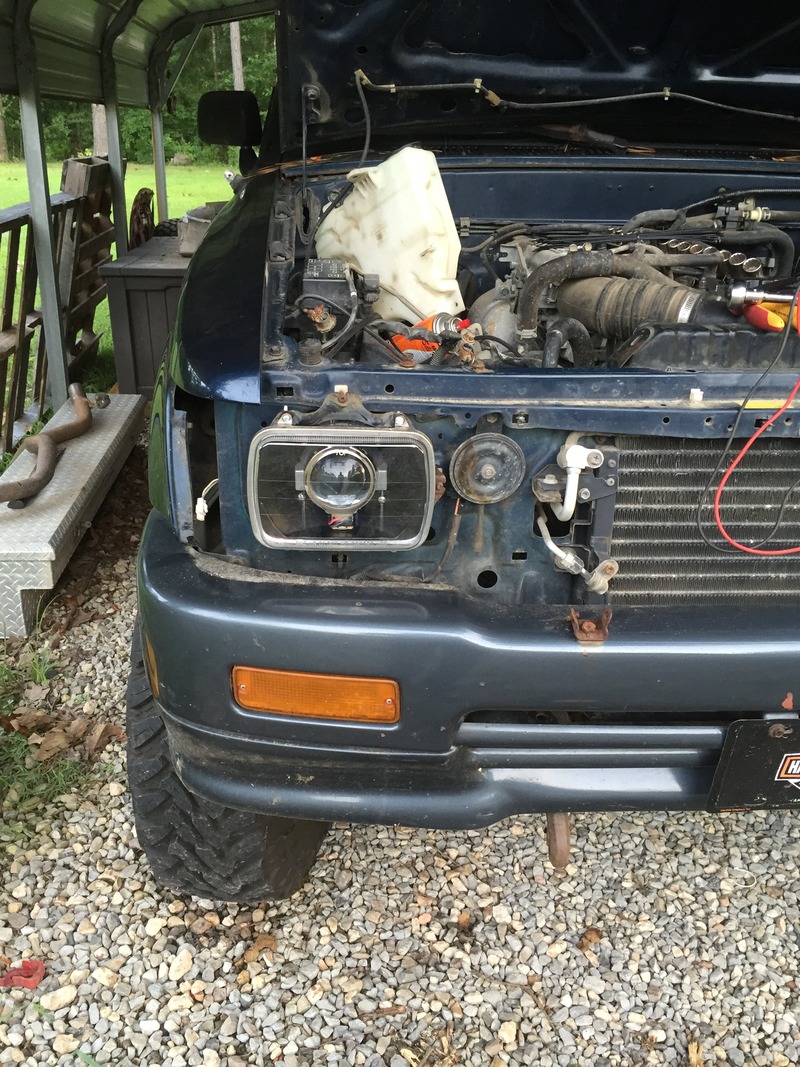
As you see here my battery will now not fit. No way, no how!!

Name:  144D97F0-DCD1-4F9F-8950-1D66E5C71603_zpsynm83dky.jpg
Views: 25055
Size:  269.8 KB

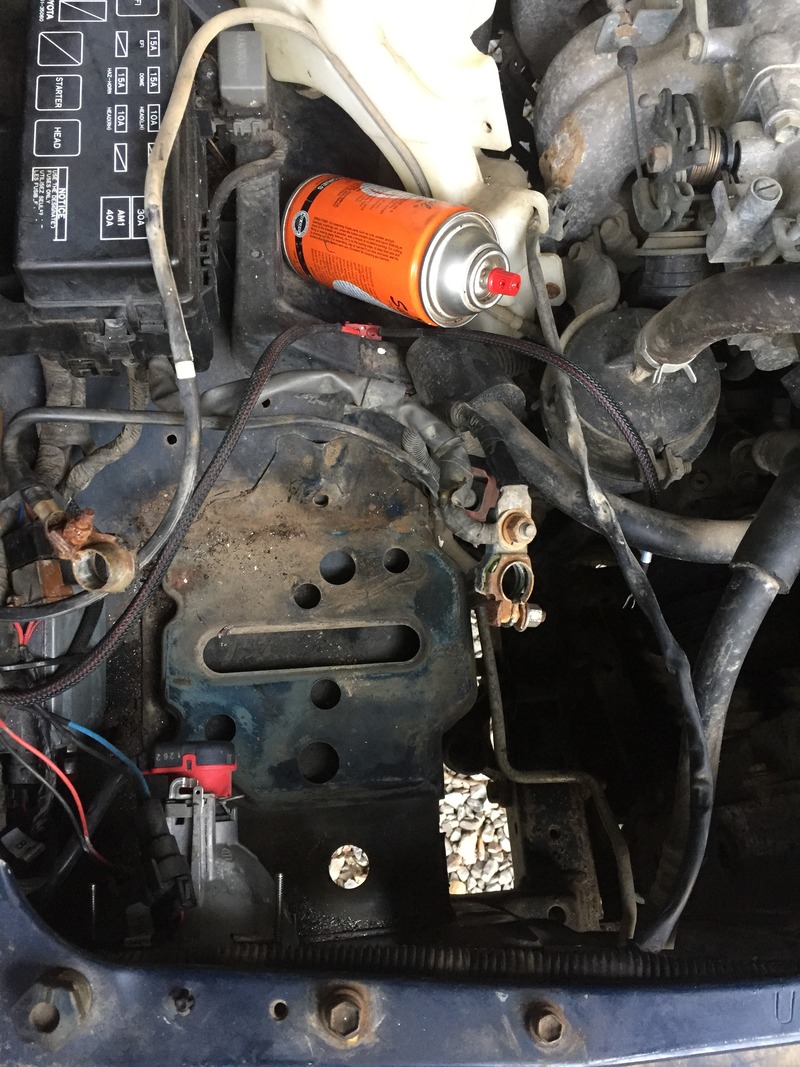
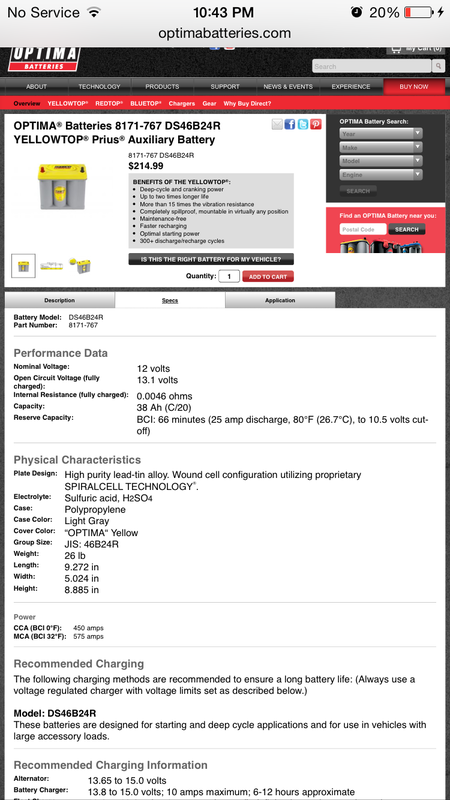
The battery is old and i have another vehicle that needs one so i can sell it, so its going in that vehicle. Now the new battery im going to purchase is made specifically for Toyota....

Name:  BBDE9D08-0237-4DDE-A524-0CC7C0267B96_zpssuodm6l6.png
Views: 24872
Size:  216.7 KB
Old 07-07-2015, 08:34 AM
  #6  
Super Moderator
Staff
iTrader: (3)
 
kawazx636's Avatar
 
Join Date: Jan 2012
Location: Salisbury, MD
Posts: 3,218
Likes: 0
Received 27 Likes on 23 Posts
Interested in how this turns out. I'll follow...
Old 07-07-2015, 05:00 PM
  #7  
Registered User
Thread Starter
 
Regency's Avatar
 
Join Date: Mar 2015
Location: Alexandria, LA
Posts: 167
Likes: 0
Received 4 Likes on 4 Posts
Got them up and running today. Need to get shrouds fit and test rotation.
Also waiting on new battery to be delivered.

Name:  13EBC1BE-3F81-4B40-B57C-25EFC9F976B7_zpsdzful6jz.jpg
Views: 24194
Size:  178.2 KB
Old 07-09-2015, 04:46 AM
  #8  
Registered User
Thread Starter
 
Regency's Avatar
 
Join Date: Mar 2015
Location: Alexandria, LA
Posts: 167
Likes: 0
Received 4 Likes on 4 Posts
Almost finished with the housings. Got a few small touch ups to do and seal them up.

Name:  C6C42256-0ED2-4BFC-9205-41855B14A8DF_zpso14hcb9f.jpg
Views: 24451
Size:  159.6 KB
Old 07-09-2015, 06:24 AM
  #9  
RBX
Registered User
 
RBX's Avatar
 
Join Date: Jan 2010
Location: Bloodymore
Posts: 3,794
Received 33 Likes on 22 Posts
Lets see a cut-off pattern shot at night.
Old 07-09-2015, 06:40 AM
  #10  
Registered User
Thread Starter
 
Regency's Avatar
 
Join Date: Mar 2015
Location: Alexandria, LA
Posts: 167
Likes: 0
Received 4 Likes on 4 Posts
Working on that. Probably be tomorrow night.
These projectors came out of my other truck so i do have some cutoff pics from them on it.
Old 07-11-2015, 07:23 PM
  #11  
Registered User
Thread Starter
 
Regency's Avatar
 
Join Date: Mar 2015
Location: Alexandria, LA
Posts: 167
Likes: 0
Received 4 Likes on 4 Posts
Having a few difficulties. Got one light mounted tonight but need to figure out a way to seal the reflector bowl where the cut off shield sticks out the back of the solenoid. New battery came in but I did not know it had the JIS terminals so I can't install it and with the original battery in place I can't install the other projector and housing.
Old 07-14-2015, 04:12 AM
  #12  
Registered User
Thread Starter
 
Regency's Avatar
 
Join Date: Mar 2015
Location: Alexandria, LA
Posts: 167
Likes: 0
Received 4 Likes on 4 Posts
All is left is to seal the solenoid area. Thinking on this one a little.

Name:  F26BE508-1AEB-47A9-B1C8-1BE5777D09E3_zpsgsv2gs1f.jpg
Views: 24425
Size:  217.9 KB
Name:  488D3AF9-3C17-4888-89A5-A72FF0B68C22_zpstvpse2uj.jpg
Views: 24296
Size:  203.7 KB
Old 07-14-2015, 04:18 AM
  #13  
Registered User
Thread Starter
 
Regency's Avatar
 
Join Date: Mar 2015
Location: Alexandria, LA
Posts: 167
Likes: 0
Received 4 Likes on 4 Posts
Need to find an adapter for the new battery also. The terminal needs to be cleaned also!

Name:  42798A3E-1D4B-4B1E-BC81-DDB999000E8C_zpsmkggpree.jpg
Views: 24368
Size:  166.2 KB

Last edited by Regency; 07-14-2015 at 04:21 AM.
Old 07-14-2015, 04:33 AM
  #14  
RBX
Registered User
 
RBX's Avatar
 
Join Date: Jan 2010
Location: Bloodymore
Posts: 3,794
Received 33 Likes on 22 Posts
just a suggestion..
Why not just epoxy the two housings together?
Old 07-14-2015, 05:12 AM
  #15  
Registered User
Thread Starter
 
Regency's Avatar
 
Join Date: Mar 2015
Location: Alexandria, LA
Posts: 167
Likes: 0
Received 4 Likes on 4 Posts
They are JB Weld together just aluminum tape over all the jb weld.
Old 07-14-2015, 05:23 AM
  #16  
RBX
Registered User
 
RBX's Avatar
 
Join Date: Jan 2010
Location: Bloodymore
Posts: 3,794
Received 33 Likes on 22 Posts
Gotcha

the solenoid area is under the projector, with the spring exposed?
Could you use a rigid plastic or ABS then epoxy that to the housing? Maybe a job box from DigiKey or Mouser cut to accommodate the housing.
Old 07-14-2015, 09:02 AM
  #17  
Registered User
Thread Starter
 
Regency's Avatar
 
Join Date: Mar 2015
Location: Alexandria, LA
Posts: 167
Likes: 0
Received 4 Likes on 4 Posts
Yea that area. Its open straight to the internals of the projector. I have some old legos my boys dont play with anymore that im going to check out. It wont be much work to seal it since its 4 sided with a top.
Old 07-14-2015, 05:06 PM
  #18  
Registered User
Thread Starter
 
Regency's Avatar
 
Join Date: Mar 2015
Location: Alexandria, LA
Posts: 167
Likes: 0
Received 4 Likes on 4 Posts
Sorry kiddos i needed 2 blue legos....

Name:  363763F7-60CF-4AD8-923D-25E440D14461_zpsxrwor8d1.jpg
Views: 24473
Size:  187.6 KB

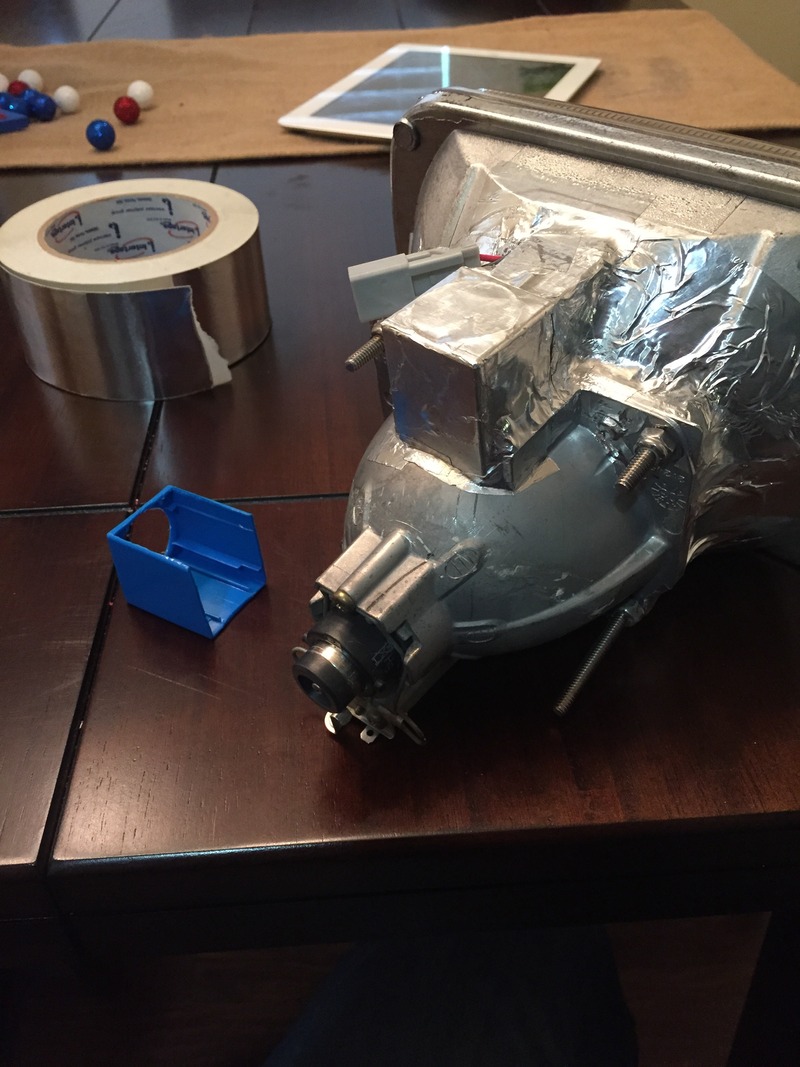
Got them sealed up and mounted. Also got the battery mounted in place, although i still cant put the terminals on the posts.

Name:  98E3F04D-6AA6-443E-83FE-31FECB3ABF58_zpsaxh2qwzd.jpg
Views: 24812
Size:  209.0 KB
Name:  8D9CD786-CD8A-46E3-951A-0139AFF437A0_zpspt4qos4j.jpg
Views: 24755
Size:  214.4 KB
Name:  52D37035-9C8D-4B9A-AEA2-82286C2A0695_zpsrhgg1cwk.jpg
Views: 24624
Size:  113.2 KB
Old 07-15-2015, 04:43 AM
  #19  
Super Moderator
Staff
iTrader: (3)
 
kawazx636's Avatar
 
Join Date: Jan 2012
Location: Salisbury, MD
Posts: 3,218
Likes: 0
Received 27 Likes on 23 Posts
I would just get new battery cables and terminals - pretty cheap fixes from any auto parts store. You'd be amazed at the amount of resistance you can get with old cruddy cables and terminals.
Old 07-15-2015, 03:45 PM
  #20  
Registered User
Thread Starter
 
Regency's Avatar
 
Join Date: Mar 2015
Location: Alexandria, LA
Posts: 167
Likes: 0
Received 4 Likes on 4 Posts
Going to test the cables this weekend and clean them then retest. I hope they are still decent so I can just shim them to fit for less than $15 compared to almost $100 for Prius cables.
The following users liked this post:
Ram1 (01-03-2020)


Quick Reply: HID Projector Retro 7x6 sealed beam


All times are GMT -8. The time now is 02:11 AM.