
Write up, how to remove your 3rd member with pics!
 03-21-2009, 03:45 PM
#1
Registered User
Thread Starter
Write up, how to remove your 3rd member with pics!
I got some donor axles to play around with, this is my first time taking apart an axle. It was pretty easy, does not take to much mechanical skill.
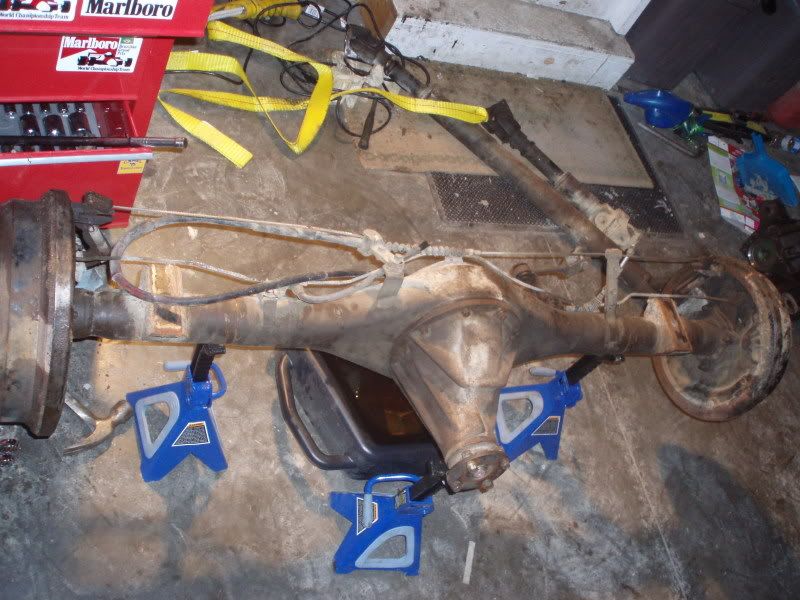
For this walk thru, my axles will be on jack stands since thats how i got them.
Tools required- Axle stands, Torque wrench, Various size box end wrenches, sockets, lots of paper towels/rags.
Time- Depending how fast you work, it took me about an hour, and that was with messing around in my garage in the meantime and learning how all the things work in the diff.
first off, this is how i had my axle setup
Nothing to fancy, no idea what gears where in it.
2nd step, drain the diff. Ps. this stuff stinks.
3rd- Remove lug nuts if you havent done so already.
4th- Slide off the rear drum covers. they should come out with ease, just wiggle them around a bit.

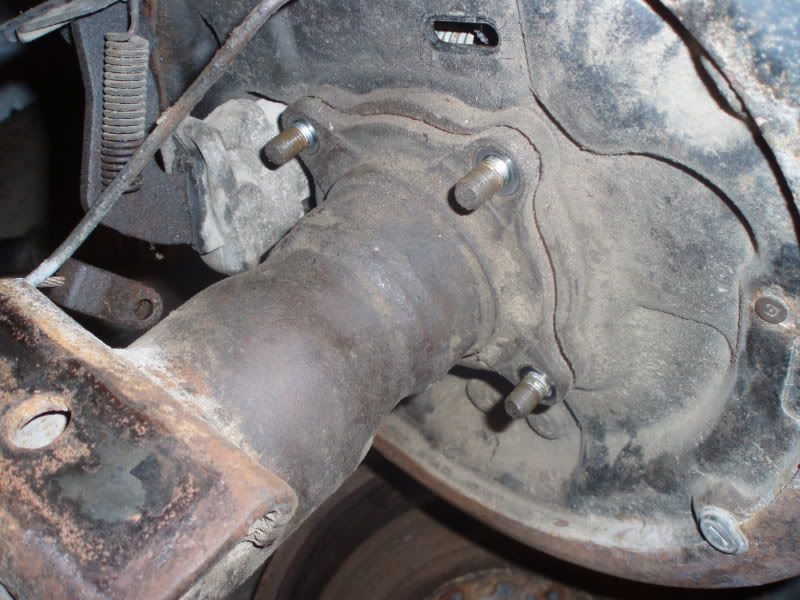
5th, Disconnect all the parking brake cables, the brake lines, there are two on each side.
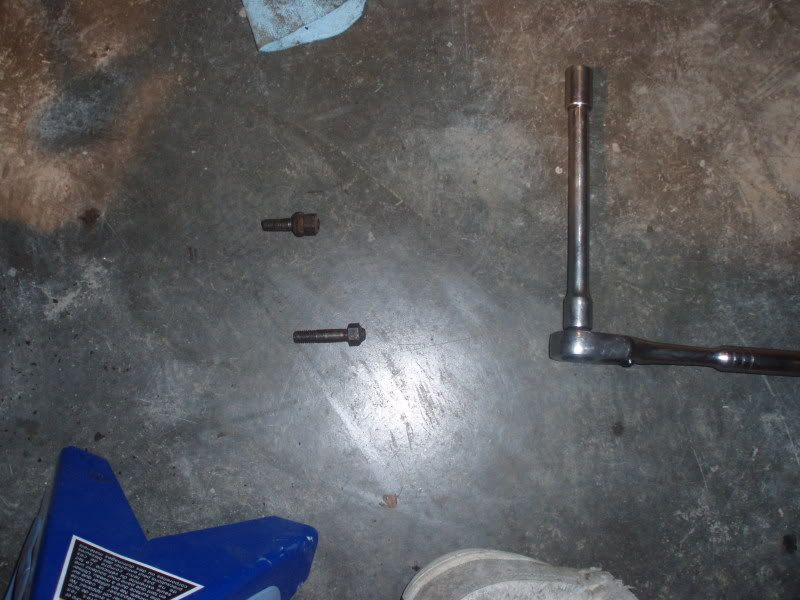
6th, Undo the 4 bolts holding on the axle shaft
These required some leverage, i used a breaker bar. Worked pretty good.
7th, Slide out the axle, the entire wheel assembly should slide out. Be careful of the seals.
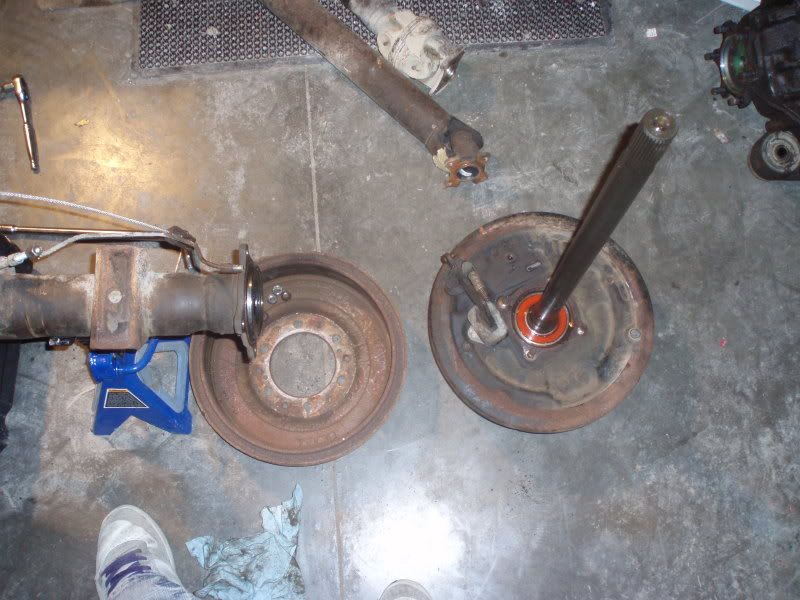
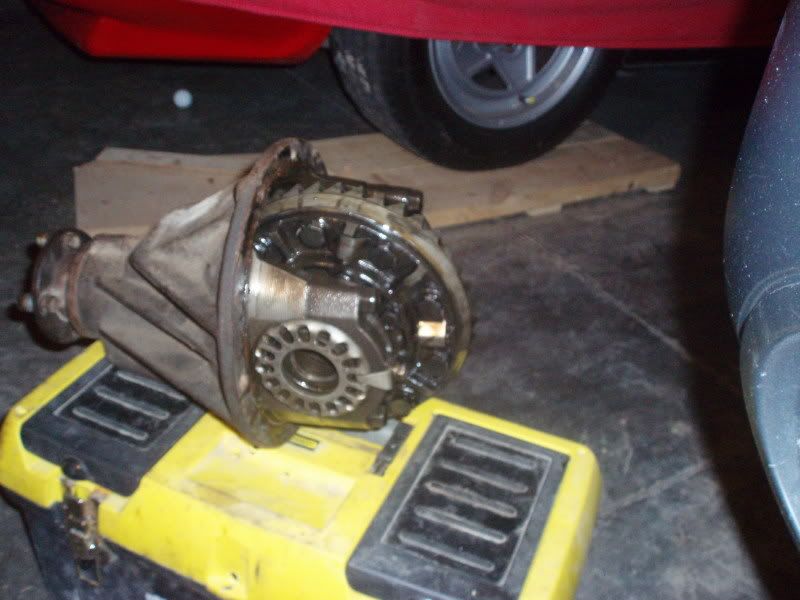
8th, Alright, so both sides are off now we will move onto the 3rd member.
Some of the studs came out, watch out for that.
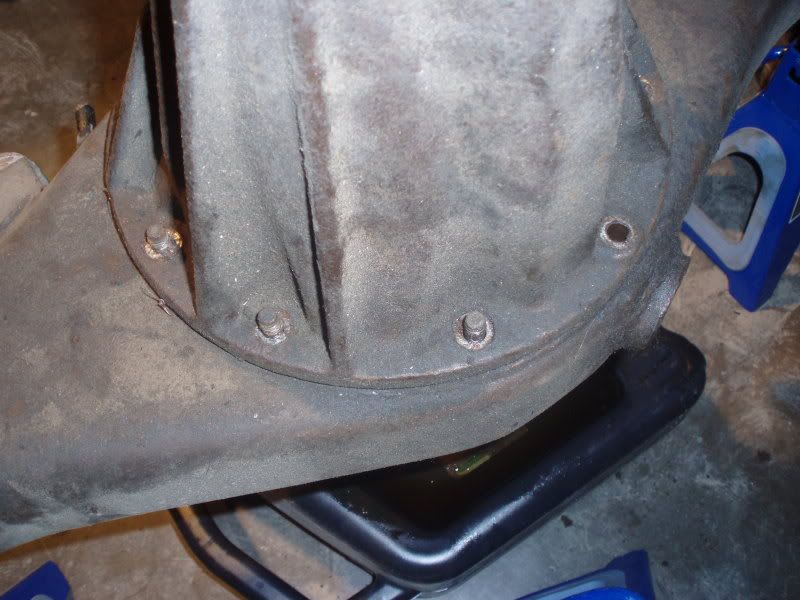
9th, time to remove the 3rd. Get a flat head screw driver and try to break the seal. Then lift up the 3rd.
10th, Now your are done!
I will be posting shortly on how to remove the front one to.
For this walk thru, my axles will be on jack stands since thats how i got them.
Tools required- Axle stands, Torque wrench, Various size box end wrenches, sockets, lots of paper towels/rags.
Time- Depending how fast you work, it took me about an hour, and that was with messing around in my garage in the meantime and learning how all the things work in the diff.
first off, this is how i had my axle setup
Nothing to fancy, no idea what gears where in it.
2nd step, drain the diff. Ps. this stuff stinks.
3rd- Remove lug nuts if you havent done so already.
4th- Slide off the rear drum covers. they should come out with ease, just wiggle them around a bit.
5th, Disconnect all the parking brake cables, the brake lines, there are two on each side.
6th, Undo the 4 bolts holding on the axle shaft
These required some leverage, i used a breaker bar. Worked pretty good.
7th, Slide out the axle, the entire wheel assembly should slide out. Be careful of the seals.
8th, Alright, so both sides are off now we will move onto the 3rd member.
Some of the studs came out, watch out for that.
9th, time to remove the 3rd. Get a flat head screw driver and try to break the seal. Then lift up the 3rd.
10th, Now your are done!
I will be posting shortly on how to remove the front one to.

 03-21-2009, 05:10 PM
#5
Registered User
Good write-up
Just like to add that if you do have problems getting the drums off, the drums are threaded in 2 spots to accept 12mm bolts to push the drums off. I use a spare set of 1st gen 4Runner top bolts, just the right length to get the drum off the shoes.
Just like to add that if you do have problems getting the drums off, the drums are threaded in 2 spots to accept 12mm bolts to push the drums off. I use a spare set of 1st gen 4Runner top bolts, just the right length to get the drum off the shoes.
03-21-2009, 05:22 PM
#6
Registered User
Trending Topics
03-21-2009, 05:27 PM
#8
Registered User
Thread Starter
its a ferrari 308gtsi


 03-21-2009, 05:49 PM
#13
Registered User
Thread Starter
haha, no not me. My dad, hopefully one day he'll pass it down to me  motor swap
ahaha, yeah
thanks man
Thanks alot, il pass it on to my dad
motor swapahaha, yeah
thanks man
Thanks alot, il pass it on to my dad
03-21-2009, 05:55 PM
#15
Registered User
Thread Starter
well, i was doing the left side so i had it all jacked up and it was leaning over. My dad came and checked how it was going and almost died when he saw what "could" happen if my truck fell.
on other note, one day it was SUPER WINDY and i had the garage door open to do some quick work, then this piece of drywall that is 2 by 2 for closing up the "storage" for the upper part of the garage fell down. It happened in slow motion, it was going towards the yota and i starter to cringe then the wind took it towards my dads car. it was a win lose situation lol.
03-21-2009, 06:57 PM
#16
Registered User
on other note, one day it was SUPER WINDY and i had the garage door open to do some quick work, then this piece of drywall that is 2 by 2 for closing up the "storage" for the upper part of the garage fell down. It happened in slow motion, it was going towards the yota and i starter to cringe then the wind took it towards my dads car. it was a win lose situation lol.
03-21-2009, 07:06 PM
#19
Registered User
The Aussie is really really easy to intall with a few hand tools and a work bench. Maybe a friend to hold the chunk while you torque it. Make no mistake I'm not telling you not to go to ZUK I'm just saying it's pretty easy to do yourself.
03-21-2009, 07:15 PM
#20
Registered User
Tools required- Axle stands, Torque wrench, Various size box end wrenches, sockets, lots of paper towels/rags.
Time- Depending how fast you work, it took me about an hour, and that was with messing around in my garage in the meantime and learning how all the things work in the diff.
Lets play "How Good is Junker's Memory".
You'll need a pair of 14mm wrenches for the driveshaft. (if it's still in the vehicle)
Large 1/2" ratchet with a 24mm socket on it for the drain plug.
Smaller 3/8" drive ratchet with a 14mm socket on it for the axle studs and a 12mm socket for the diff bolts.
One 10mm wrench for the brake lines. Good tip here is to use the factory dust nipples on the rear bleeders to cap off the brake lines when you pull them out. I only had a couple of drips on the driveway doing this.
Needle nose pliers for the cotter pin in the e-brake assembly.
Rags, Jack, Jack stands, something to block the front tires with, more rags.... unless I've missed something.
Um..... some RTV for a gasket when it goes back together and some diff lube.
I did this same thing today in two different vehicles. I pulled both thirds out of an 86 pickup, replaced those with the original diffs I took out a year ago, then pulled both thirds out of an 89 4runner and put the set of thirds out of the truck into the runner. Took all of 6 hours start to finish and I've never been so sore in my life.


