
W56 Top Shift Rebuild With Marlins Kit - Pics Along the Way
 08-23-2012, 11:12 PM
#1

W56 Top Shift Rebuild With Marlins Kit - Pics Along the Way
I am rebuilding the w56 top shift with Marlin's rebuild kit for the 4runner in my build thread: Live4soccer7's 84runner Build
Ok, so I have started the rebuilt on the w56 topshift that I have in my 84 4runner. I had a G-series, but swapped it out for the w56 and now I'm paying for it. Like an idiot, I checked everything on the tranny except the oil. Luckily, I didn't pay for it and only traded some parts that I was never going to use again. This includes my old tranny as well that didn't have issues.
So far I have followed this guide to help with disassembly: https://www.yotatech.com/forums/f116...thread-219038/
I have also been using the FSM as well. It is very informative, but nothing beats nice color photos and a couple words of explanation. Unfortunately the guide above ends before the whole thing is finished up.
I will do my best to take pics from here on out (I am to the point where the above guide ends). If anyone knows of a w56 tranny rebuild guide out there, it would help out a ton. If not, I will be pushing the frontier with some new info to contribute.
I have not done a tranny rebuild before, so this ought to be a good experience assuming that nothing goes terribly wrong or gets destroyed in the process. The bearings were shot in the tranny and my oil has a wonderful silver sheen and is nice and thick as well. The tranny makes some very interesting noises when in gear. Kind of like a constant "grinding/rubbing" noise and I can also hear the metal "rattling" (just small shavings, not chunks) around when the clutch is in it is put in gear. Anyways, time for a rebuild or my best attempt at one. I WILL PREVAIL!!!!!
The rebuild kit is from marlin and has syncros, bearings, seals, etc....
Last edited by live4soccer7; 09-09-2012 at 07:52 PM.
 08-24-2012, 10:52 AM
#2
Registered User
Join Date: Jun 2006
Location: Ocean Springs, MS
Posts: 262
Likes: 0
Received 0 Likes
on
0 Posts
The FSM is all I used, came out fine. A H.F. press and puller set for tools. Did the whole thing on the back porch in about 7 hours. My method of organization is to use sandwich bags and put each set of bolts in their own bag and label them. Then just put them in a shoe box or something and they are easy to keep up with. I used a cheap eBay kit and it had the same brand bearings as what I took out.
Side note, my W56 looked fine on the inside and the truck still made the noise afterwards. Ended up being the rear drive shaft needed a double cardan or CV as people call it...
Side note, my W56 looked fine on the inside and the truck still made the noise afterwards. Ended up being the rear drive shaft needed a double cardan or CV as people call it...
08-24-2012, 12:50 PM
#3
Registered User
iTrader: (2)
Join Date: Dec 2009
Location: Pleasanton, CA - SF Bay Area
Posts: 2,159
Likes: 0
Received 7 Likes
on
5 Posts
That's a great thread you found - I spent a lot of time looking through it when my tranny died. You're in for a fight I think, but have the right attitude 
Will be following this thread - good luck!
Will be following this thread - good luck!
08-26-2012, 05:39 PM
#4
I'm going to get some pics up soon, but am on the assembly of things now. I am a little confused as to properly measuring thrust clearance. I have looked around online and I am following the FSM and although they do a great job I am still a little confused and don't want to proceed until I get this info correct as I would hate to waste all of my time.
Last edited by live4soccer7; 08-26-2012 at 05:43 PM.
08-26-2012, 05:44 PM
#5
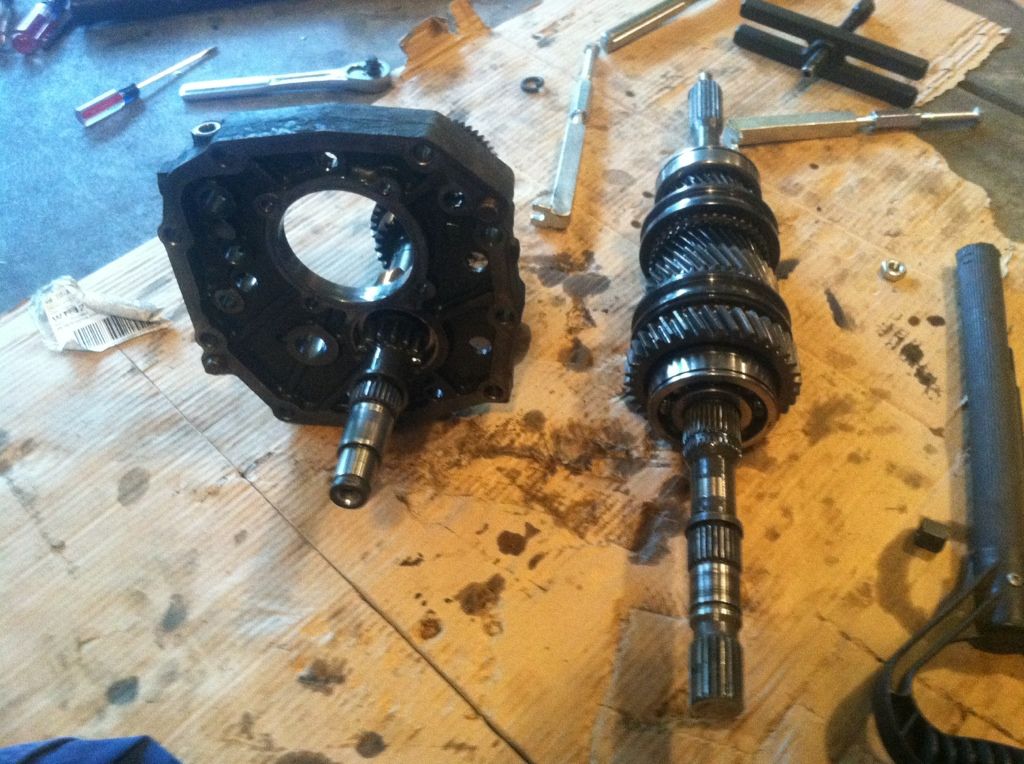
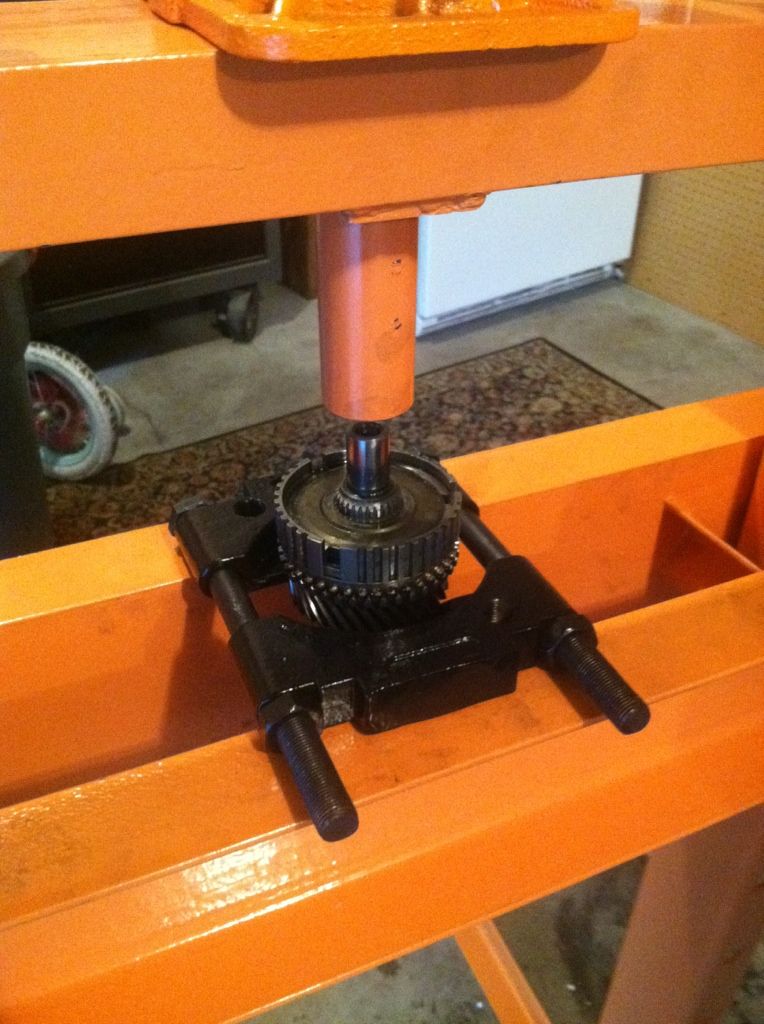
This is of about half of it disassembled. I started before taking photos... oops. Just follow fsm and you can take it apart. Not too bad. I used a large bearing puller from harbor freight, 14 pc puller set from there and the 20 ton shop press and I was able to get everything apart with those tools. I did have to extend the "jaws" on the puller with a coupler and bolt so that it would reach the reverse gear (I believe that's the correct one).
When first taking the case off make sure to follow the fsm. They also do both just separate from the center place. There aren't any special tricks or anything. Use a rubber mallet to help along the process once you have the items that the FSM recommends removed.
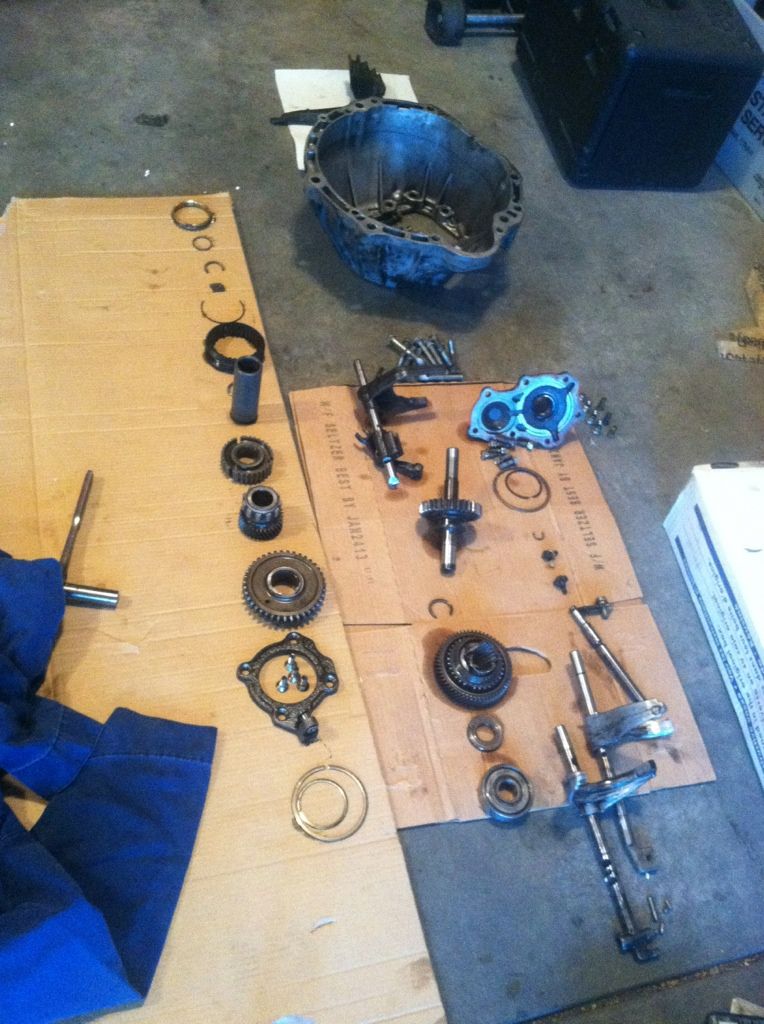
When first taking the case off make sure to follow the fsm. They also do both just separate from the center place. There aren't any special tricks or anything. Use a rubber mallet to help along the process once you have the items that the FSM recommends removed.
Last edited by live4soccer7; 08-26-2012 at 05:49 PM.
Trending Topics
 08-26-2012, 05:59 PM
#18
So, I am still unclear how to properly measure the thrust clearances. I am on the first and second gear thrust clearance. Any hints? Tips? Suggestions? I can't really proceed until I get this part figured out. Thanks and I hope this helps some people out. I hope to have lots of pics as it goes together. Once for each part press/install.
08-26-2012, 08:09 PM
#19
Ok, so I found a video that you can use to help you figure out how to properly measure the thrust clearances, or at the least know where to measure them all. This should give you a huge clue!
http://www.youtube.com/watch?v=yCjhPZzPb3s
Definitely help me understand what was necessary.
http://www.youtube.com/watch?v=yCjhPZzPb3s
Definitely help me understand what was necessary.
08-26-2012, 09:09 PM
#20
Now that I have gained the proper knowledge on thrust clearance, I have completed some more of the main shaft.
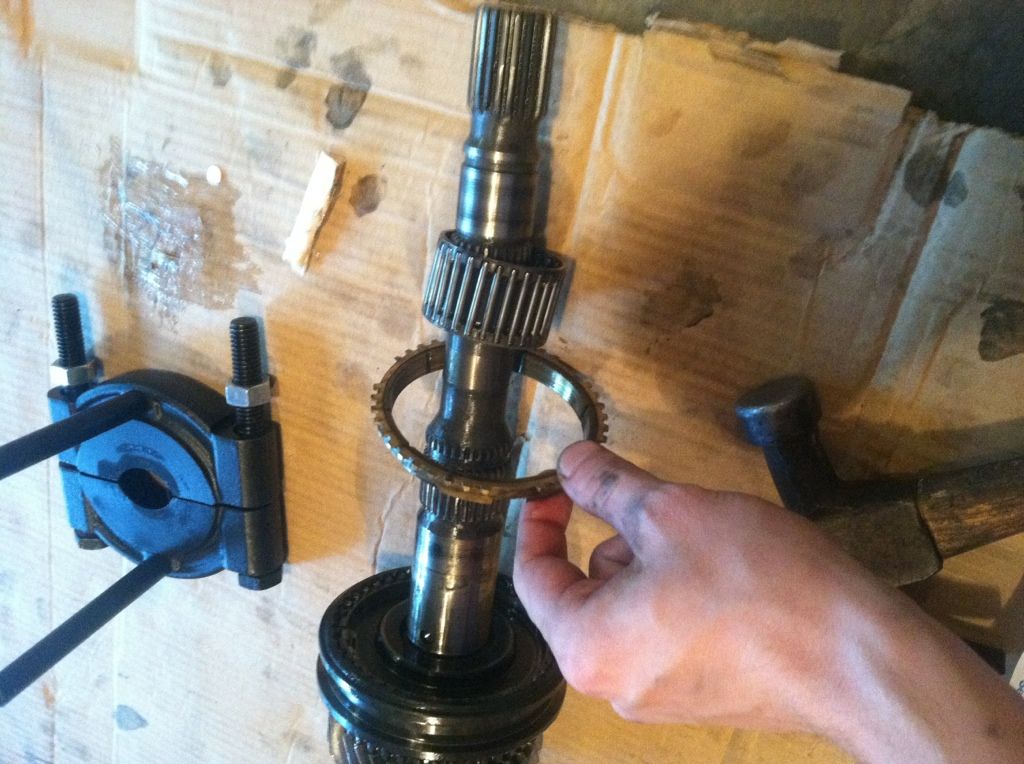
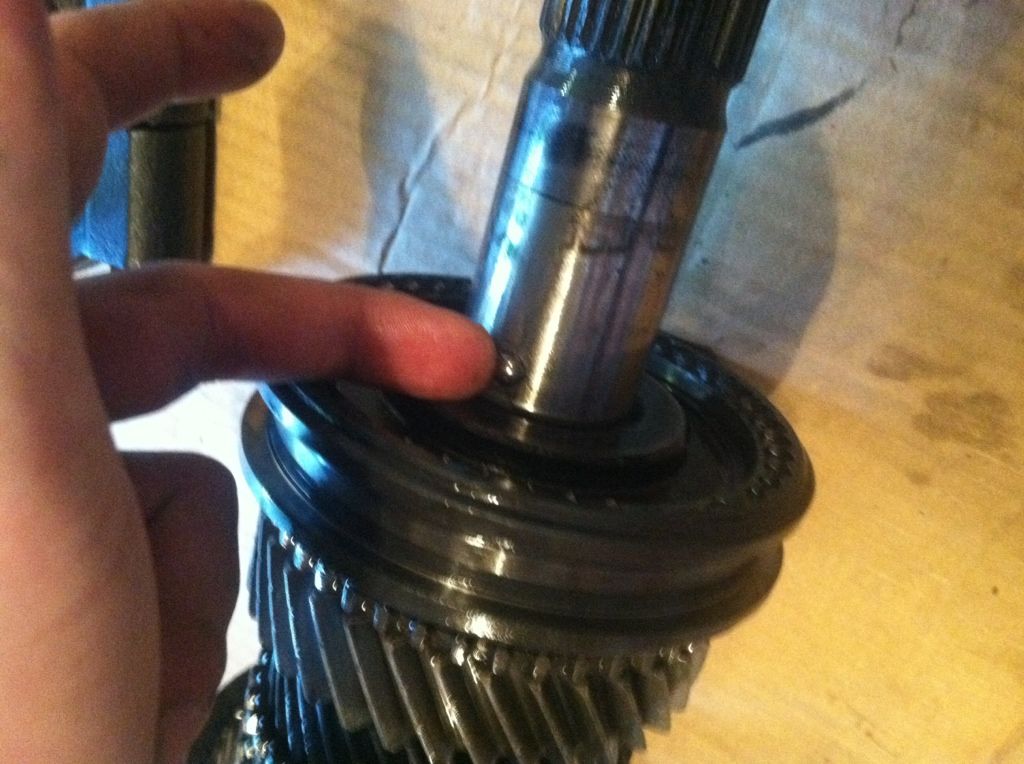
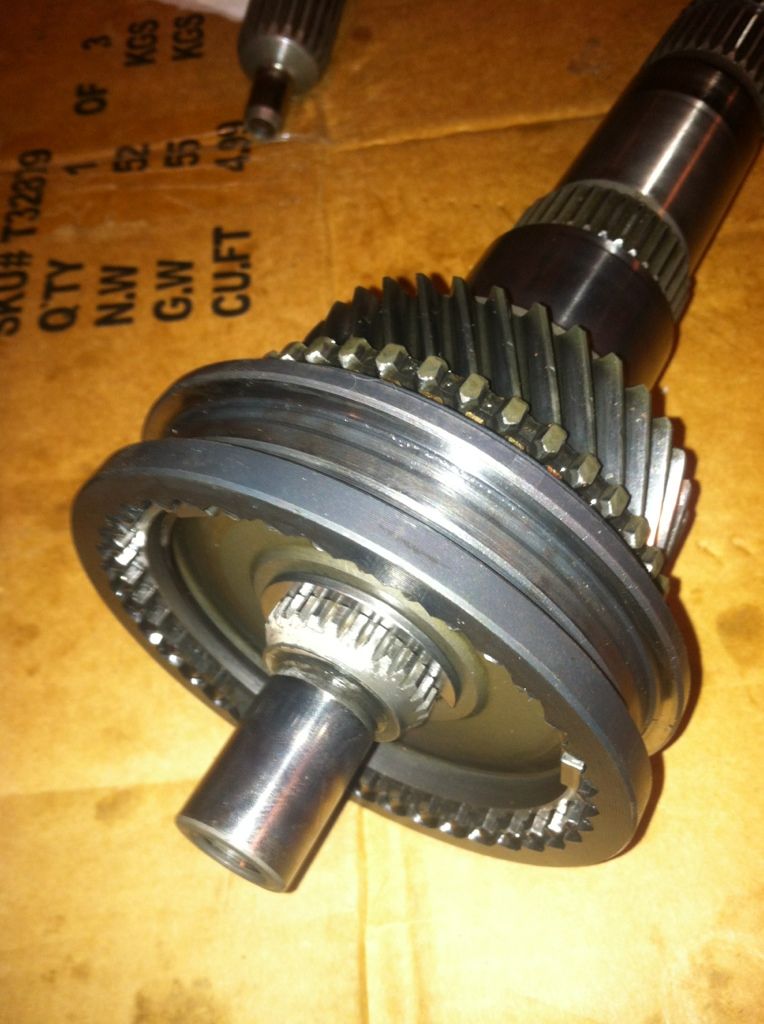
I have removed the color on this gear hub for pressing purposes, it was making it tough to get the proper thrust clearance with it on because it was forcing the gear up on the shaft and giving a false look/reading on the thrust clearance. I would recommend doing this when pressing this particular this gear assembly as shown.
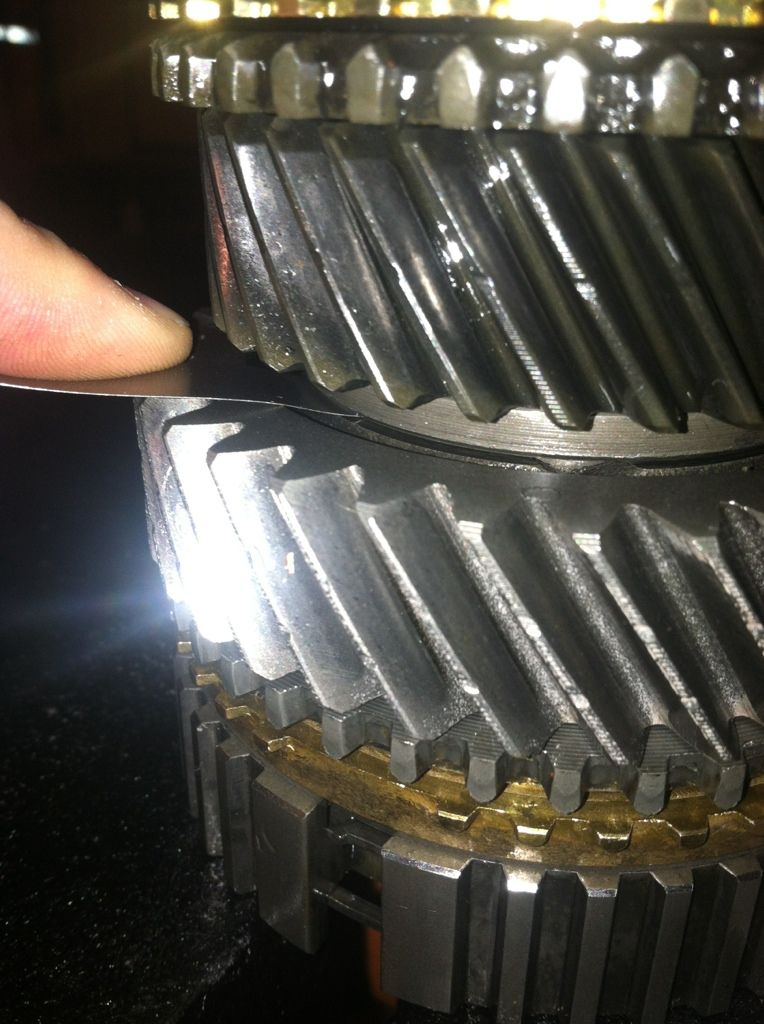
Measuring thrust clearances with a feeler gauge (specs in FSM, .0039-.0098 for most so far)
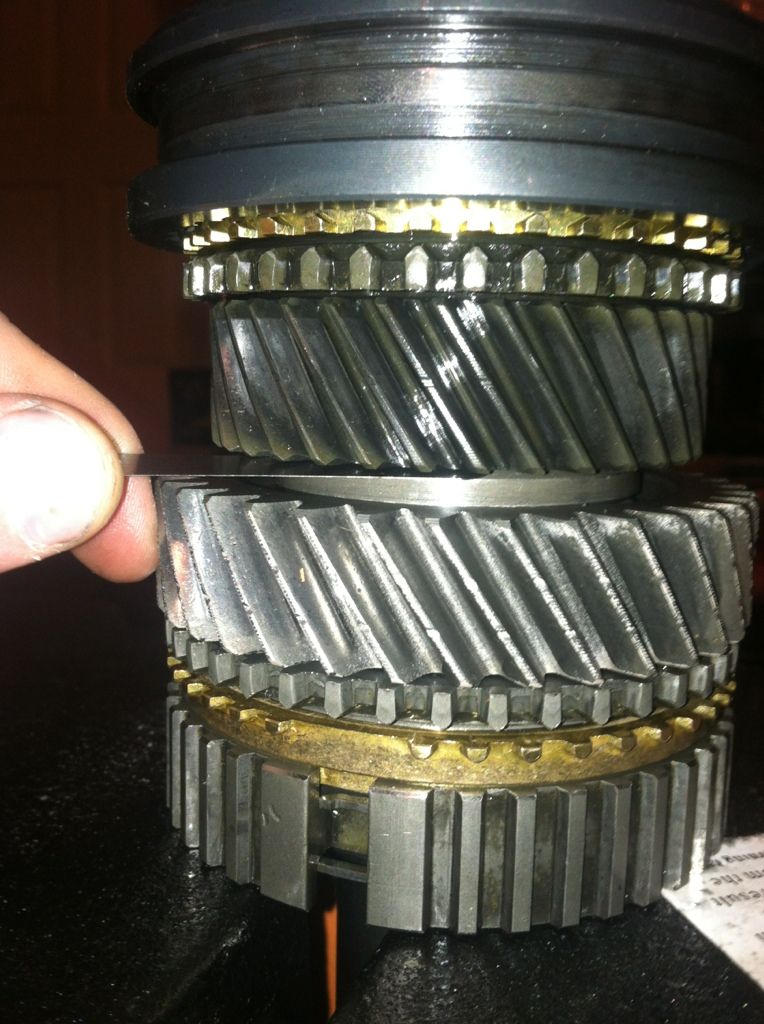
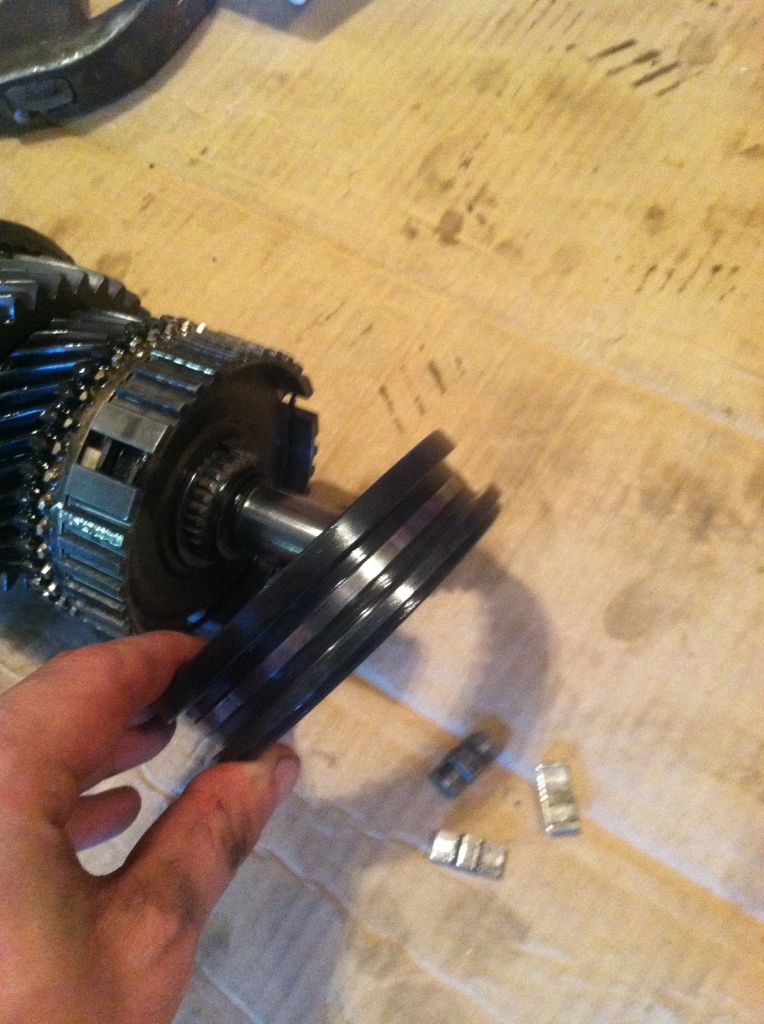
More thrust clearance measuring
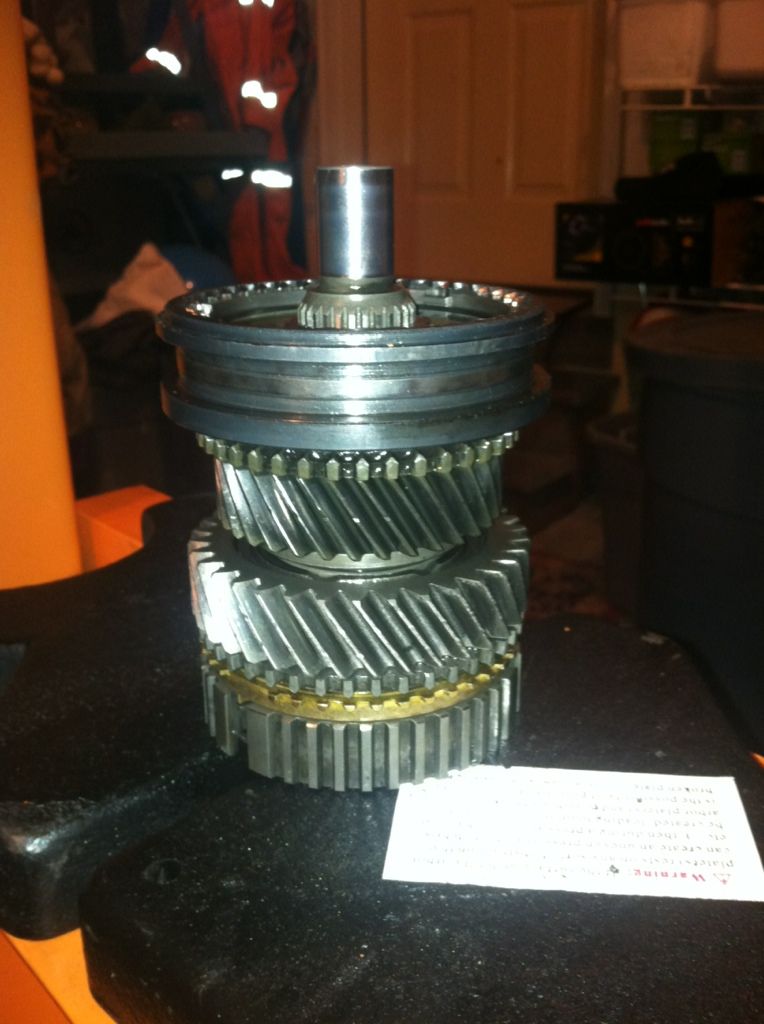
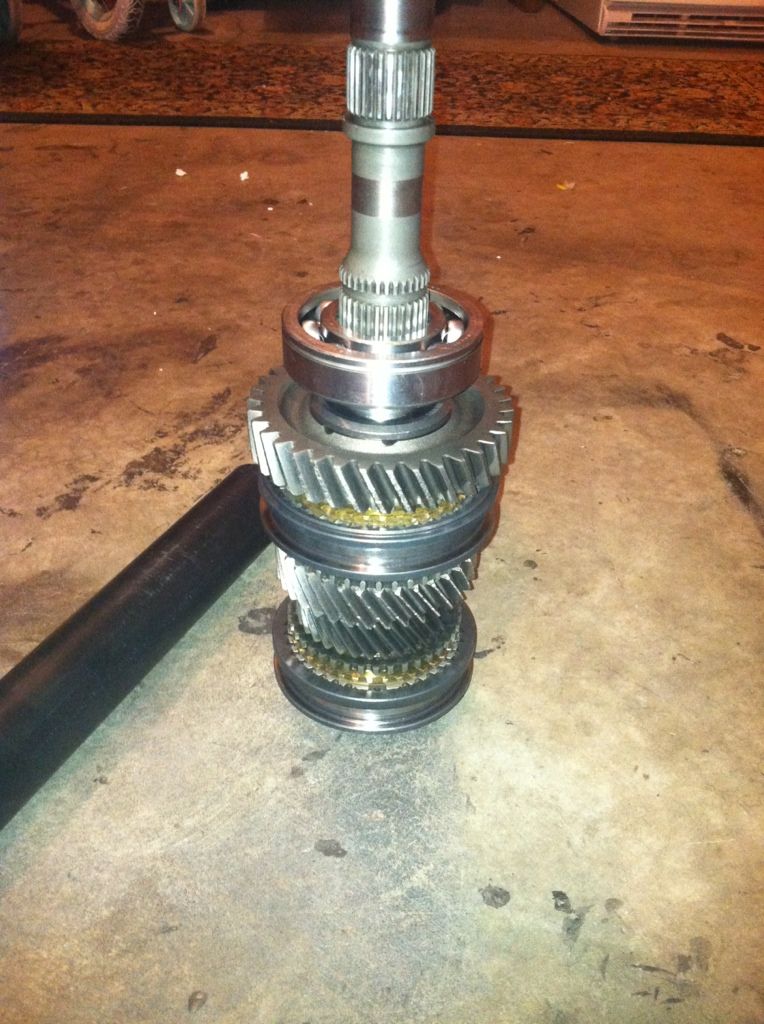
Pic with next gear assembly on:
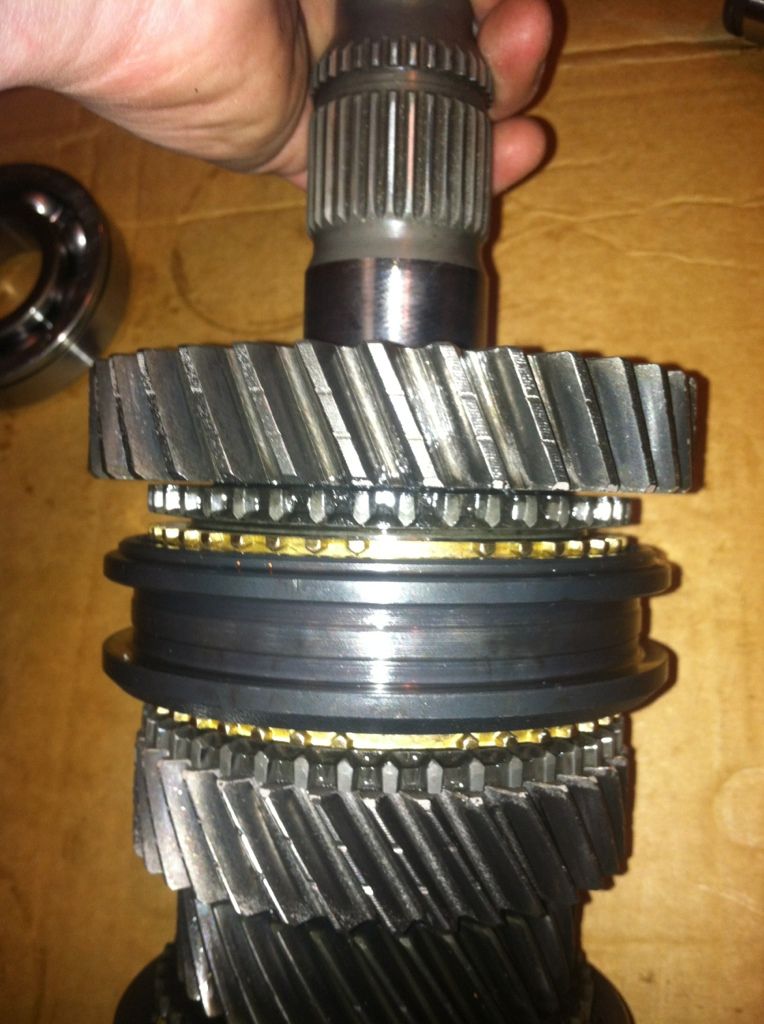
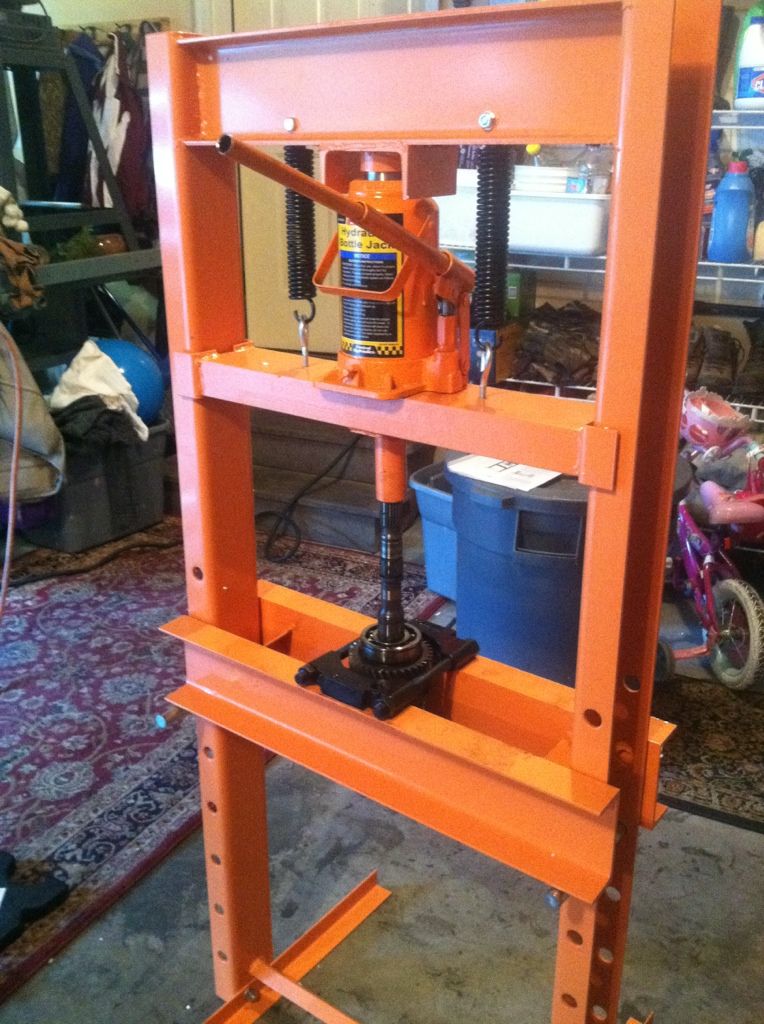
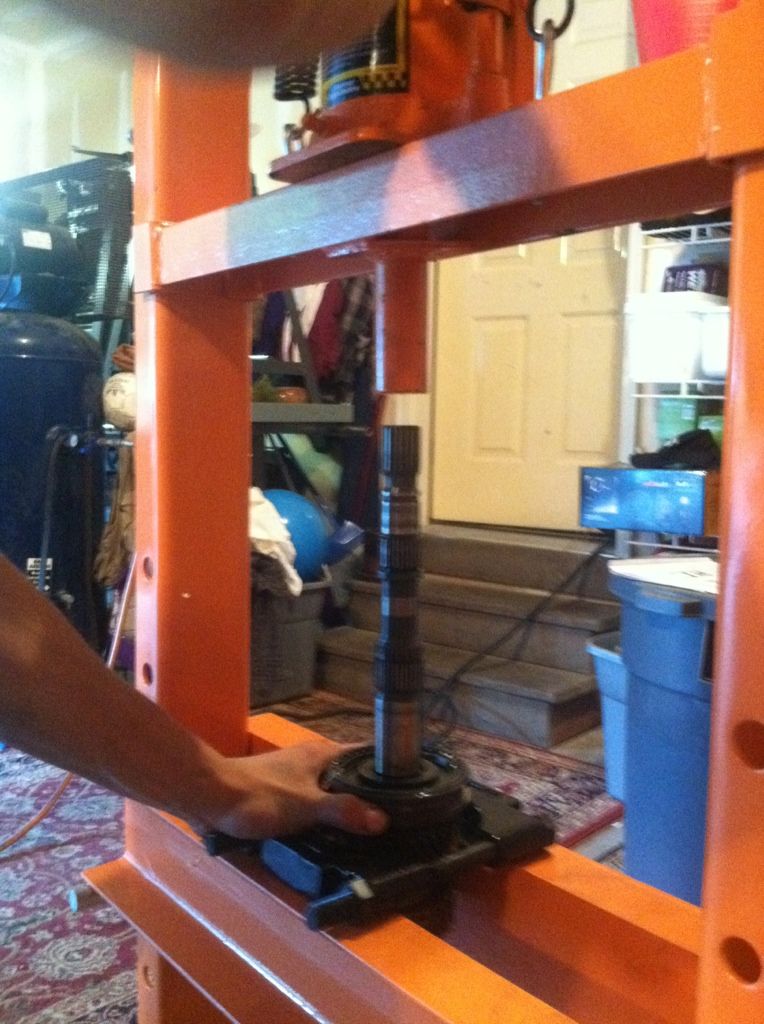
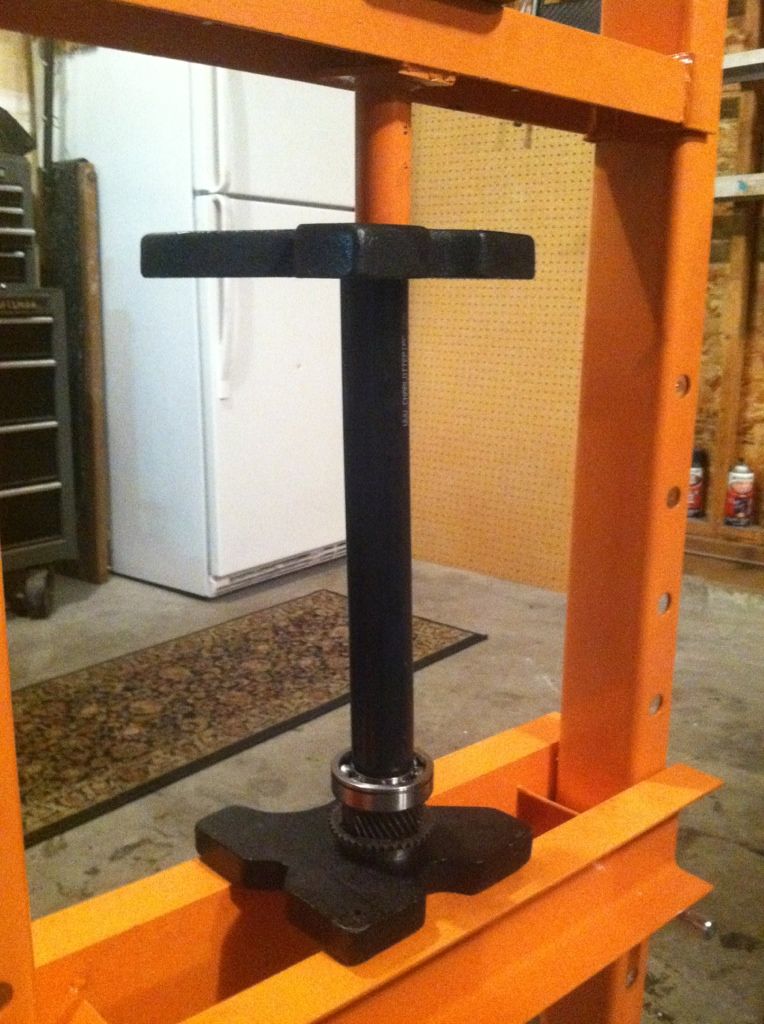
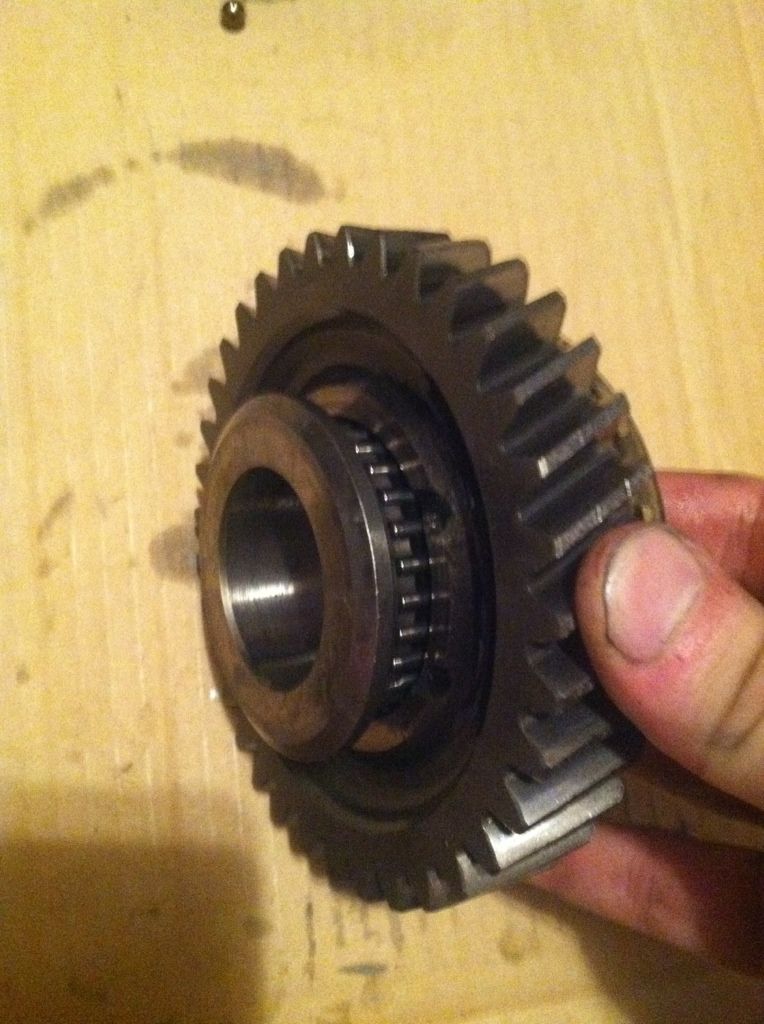
Picture with new bearing right before press, this also has a thrust clearance so don't just press away until it is solid tight. Notice which way the slot is for the snap ring on the bearing (IMPORTANT!) Well, pretty much every single piece of the install is important.
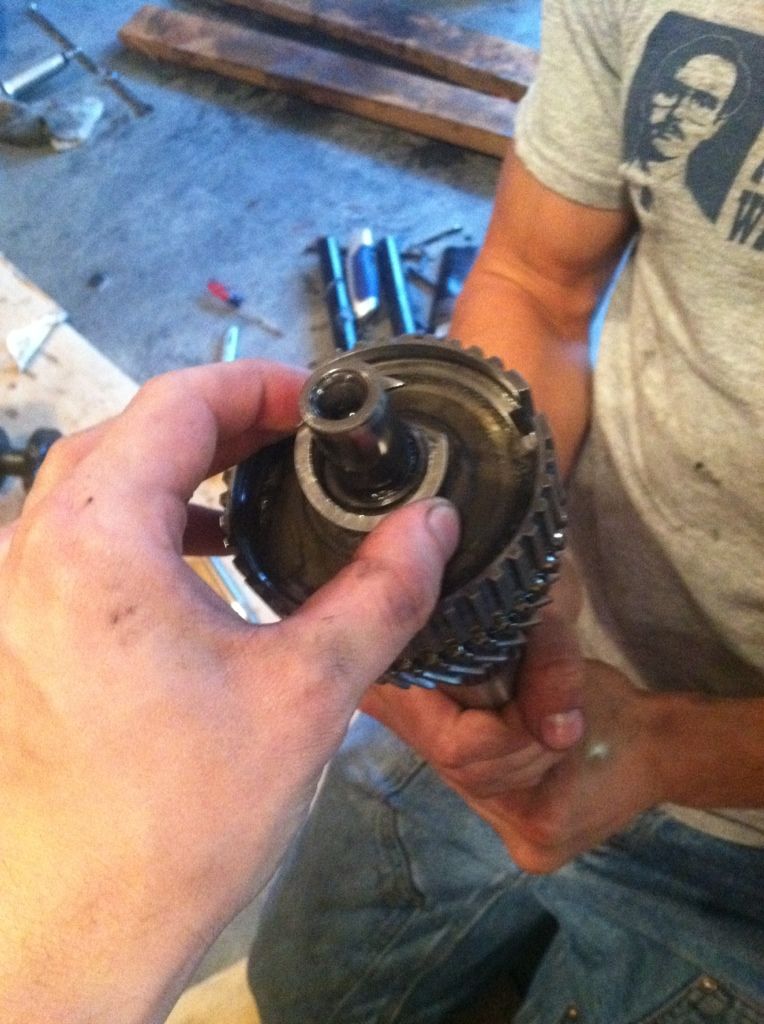
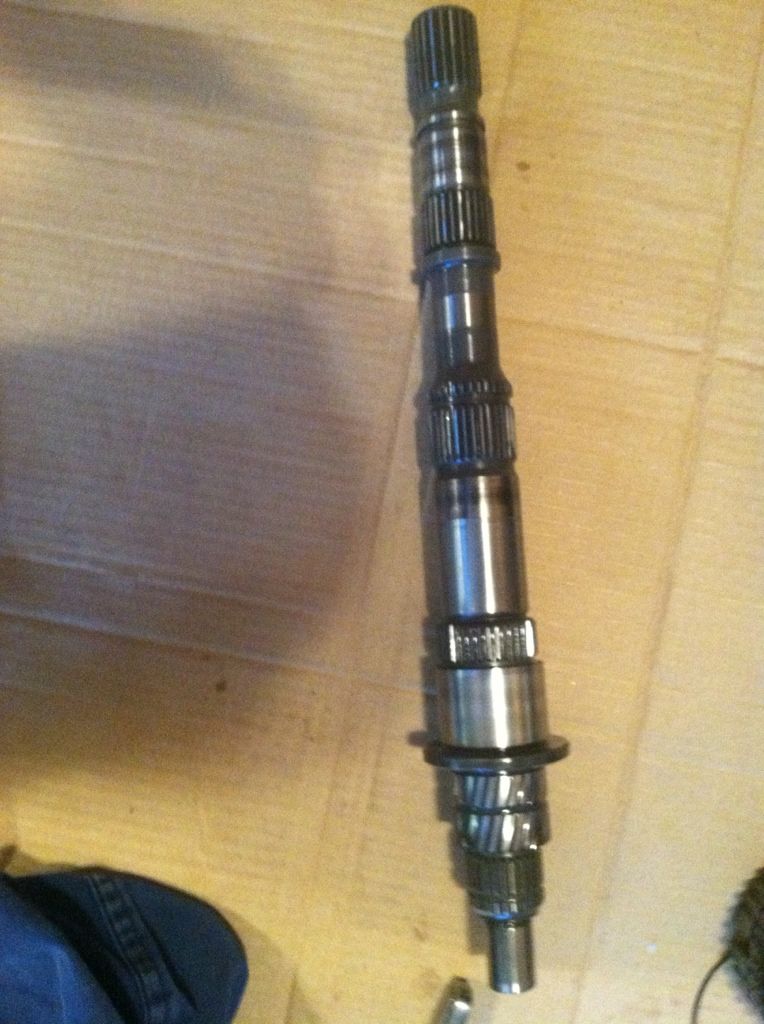
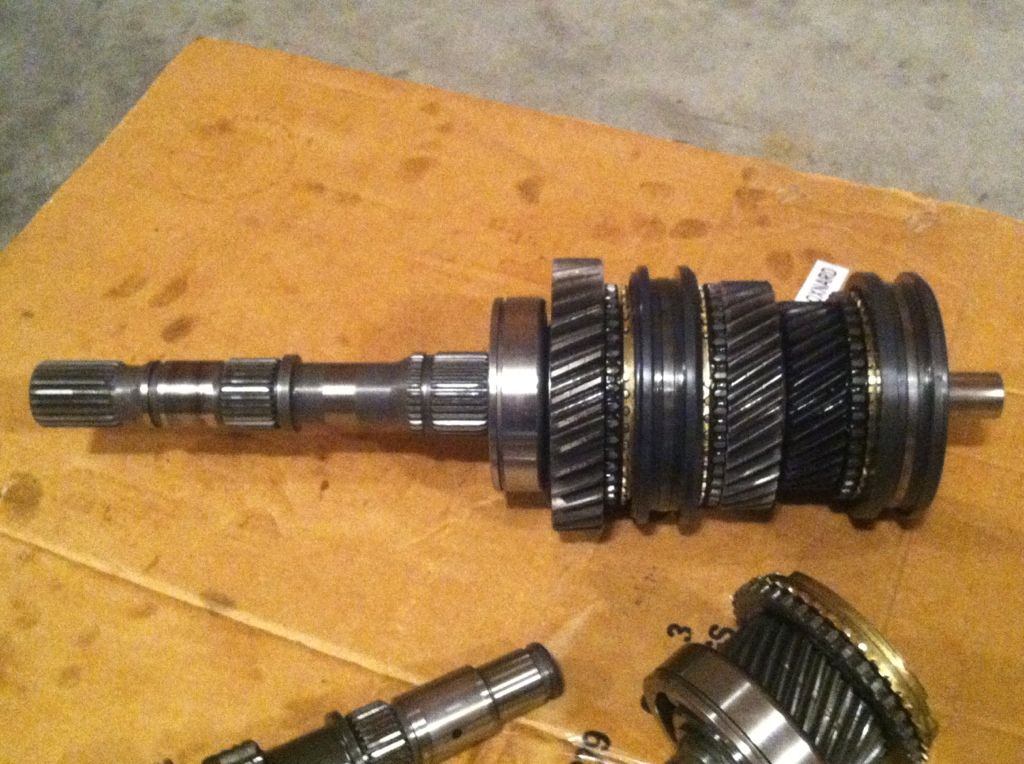
Side shot of the main shaft after it was pressed on and clearanced. I have been religiously following the fsm and my disassembly pics, but if you see something backwards please do let me know.
I have removed the color on this gear hub for pressing purposes, it was making it tough to get the proper thrust clearance with it on because it was forcing the gear up on the shaft and giving a false look/reading on the thrust clearance. I would recommend doing this when pressing this particular this gear assembly as shown.
Measuring thrust clearances with a feeler gauge (specs in FSM, .0039-.0098 for most so far)
More thrust clearance measuring
Pic with next gear assembly on:
Picture with new bearing right before press, this also has a thrust clearance so don't just press away until it is solid tight. Notice which way the slot is for the snap ring on the bearing (IMPORTANT!) Well, pretty much every single piece of the install is important.
Side shot of the main shaft after it was pressed on and clearanced. I have been religiously following the fsm and my disassembly pics, but if you see something backwards please do let me know.
Last edited by live4soccer7; 08-26-2012 at 09:13 PM.


