Tear Down Of The A340H Chain Drive T-Case
#1
Registered User
Thread Starter
Join Date: Jul 2008
Location: GA
Posts: 1,062
Likes: 0
Received 0 Likes
on
0 Posts
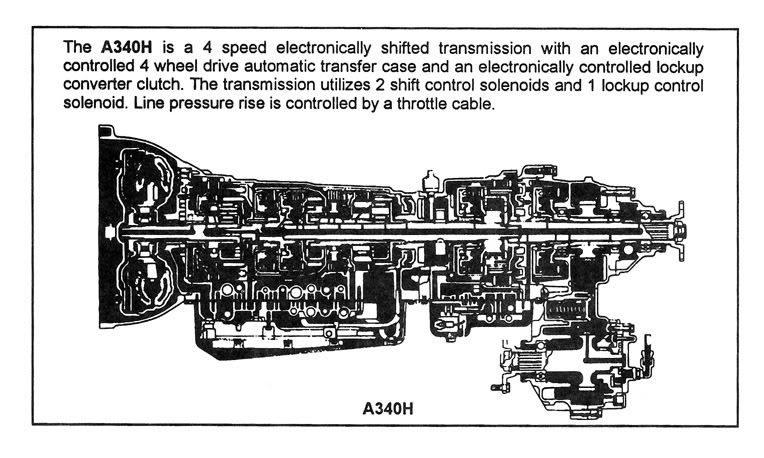
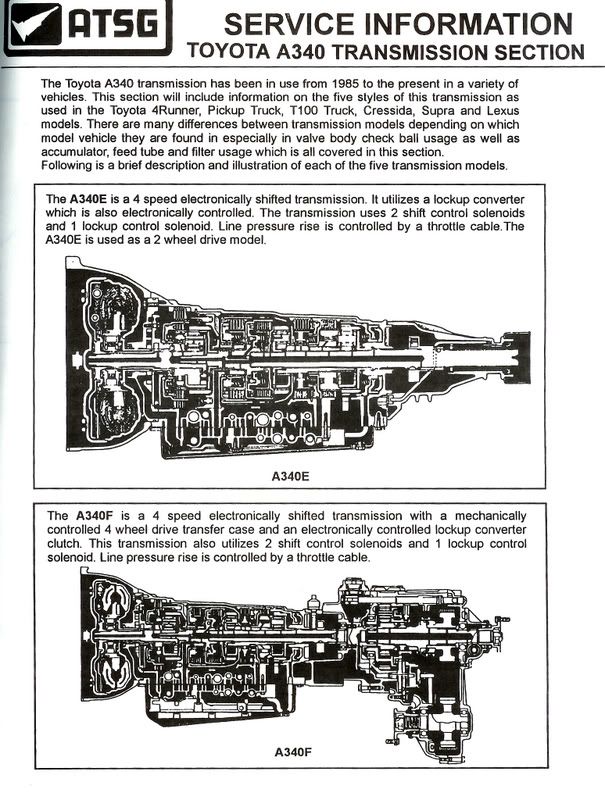
Tear Down Of The A340H Chain Drive T-Case
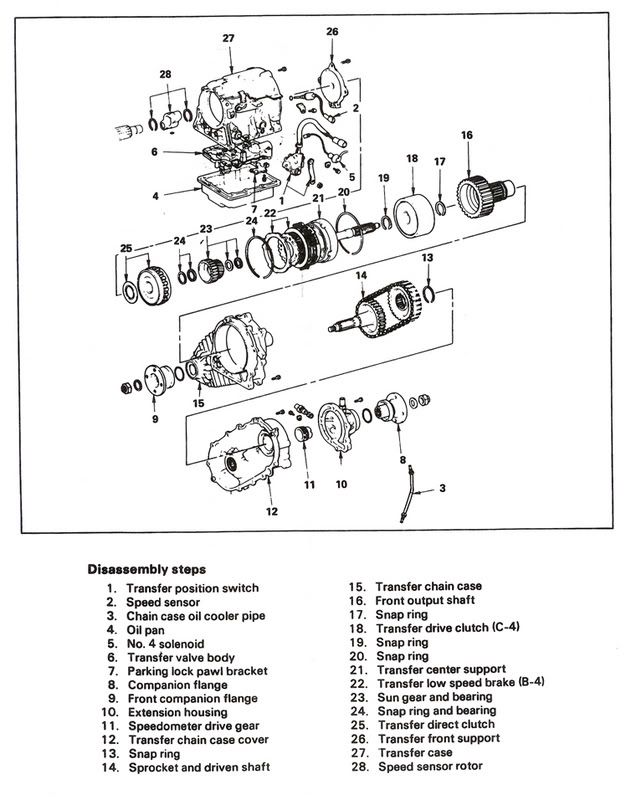
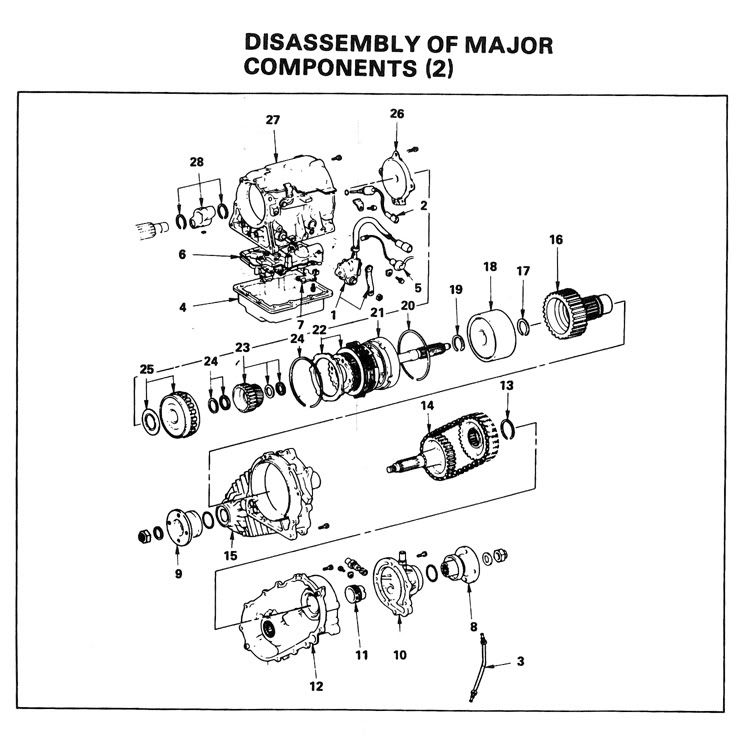
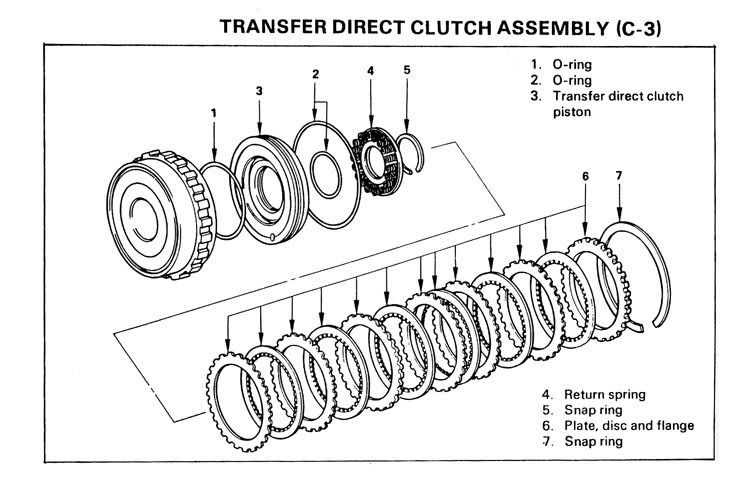
I have Pic's of my chain drive tear down I'll try to post them in order but It will take me some time to do this.I'm not a professional tranny expert I'm just your back yard do it my self and ask questions along the way kind of guy .... and search, search, for any info I can find...I haven't had much luck searching for the A340H chain drive tear down and rebuild so I purchased a used one with bad tranny but the t-case is tight, I'm doing the pic's step by step ....Just remember I'm not a professional doing this so please don't hate me if I do something that is not correct, just post what may be incorrect for all to learn from.....and by the way I'm working on this tranny still setting in the cargo area of my 4runner and the tranny is not pressure washed because I couldn't wash it when it's in my 4runner I hope all under stand that it's a good Idea to clean all parts before starting a project like this, so here is the first pic...and I'm not going into what they call the tranny section of this t-case, just the t-case and all the housings that go with it

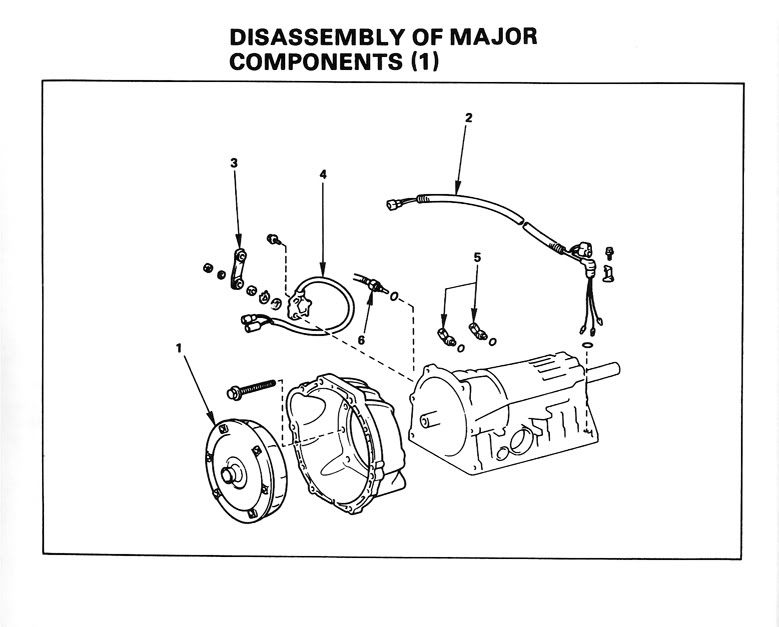
this is the A340H Automatic with chain drive t-case still in my 4runner and this is where I'll tear it down from because I don't have a shop or shed to do it in.I also want you to know that the Haynes Manual you see is USELESS for this tear down so I'm going to do the best I can in trying to discribe what I'm doing and so on.....the other pic's will come as time allows for to do it....

this is the rear of the chain drive t-case

this is the oil pump housing for the chain drive and front short shaft notice the 10mm hex drain plug hole at the bottom and the fitting for the tranny cooler I think it's called chime in if that's not correct term

I made a red mark on the t-case housing so I can line it up correctly when reinstalled later and bolts removed

this is the oil pump removed looking at it from the rear and remember that this chain case side uses Dextron 2 just like the tranny

this is looking at the inside of the area that the oil pump is attached to notice the small oil hole bottom left kinda center and notice the rear of the front output shaft and splines and this is as far as I can go for tonight I'll try to post more tomorrow if I get a chance

this is the A340H Automatic with chain drive t-case still in my 4runner and this is where I'll tear it down from because I don't have a shop or shed to do it in.I also want you to know that the Haynes Manual you see is USELESS for this tear down so I'm going to do the best I can in trying to discribe what I'm doing and so on.....the other pic's will come as time allows for to do it....

this is the rear of the chain drive t-case

this is the oil pump housing for the chain drive and front short shaft notice the 10mm hex drain plug hole at the bottom and the fitting for the tranny cooler I think it's called chime in if that's not correct term

I made a red mark on the t-case housing so I can line it up correctly when reinstalled later and bolts removed

this is the oil pump removed looking at it from the rear and remember that this chain case side uses Dextron 2 just like the tranny

this is looking at the inside of the area that the oil pump is attached to notice the small oil hole bottom left kinda center and notice the rear of the front output shaft and splines and this is as far as I can go for tonight I'll try to post more tomorrow if I get a chance
Last edited by buckz6319; 10-09-2008 at 08:11 AM.
#3
Registered User
Thread Starter
Join Date: Jul 2008
Location: GA
Posts: 1,062
Likes: 0
Received 0 Likes
on
0 Posts
thanks
thanks for the info...... I know that the 2 sections can be removed from from each other I did the chain drive t- case last Saturday and these pics are from my tear down of the t-case up to the actual tranny section on the t-case and it's just ment to inform someone on what the parts look like and how they come apart
Last edited by buckz6319; 10-09-2008 at 07:46 AM.
#5
Registered User
Thread Starter
Join Date: Jul 2008
Location: GA
Posts: 1,062
Likes: 0
Received 0 Likes
on
0 Posts
thanks for the good luck thing
like I said I have all ready did the tear down up to the parts that I'm going to replace on my 4runner t-case that is still in the truck and don't plan on going into the actual tranny part of the t-case that is bolted to the back of the tranny.......so until I under stand how that section works and comes apart I'll just leave it alone for now and will revisit it later when I gather enough info on that section
thanks for the input........
thanks for the input........
Last edited by buckz6319; 10-09-2008 at 08:14 AM.
#6
Registered User
Thread Starter
Join Date: Jul 2008
Location: GA
Posts: 1,062
Likes: 0
Received 0 Likes
on
0 Posts
continued pic's of the tear down of the A340H t-case

this is a pic of looking at the rear t-case companion flange and the 30mm staked nut (the end of the nut is pinched into the grove on the spline)
#7
Registered User
Thread Starter
Join Date: Jul 2008
Location: GA
Posts: 1,062
Likes: 0
Received 0 Likes
on
0 Posts

this pic shows that the staked nut will have to be un staked in order to be removed from the shaft (this nut 30mm per FSM is torques @90 foot pounds)..notice the speed cable hook up on the right side of the housing

this is a pic of the 30mm nut un-staked, removed and behind it is a large flat washer and the companion flange can be removed and now the housing is the next part to be removed
Last edited by buckz6319; 10-10-2008 at 02:41 AM.
Trending Topics
#9
Registered User
Sorry I think I missed what year your truck is?
I just want to know cuz I got an auto and a V6 in my 88 Runner and may have to do this myself some time soon.
Thanks, Phil
I just want to know cuz I got an auto and a V6 in my 88 Runner and may have to do this myself some time soon.
Thanks, Phil
Last edited by phildelfino; 10-10-2008 at 02:28 PM.
#10
Registered User
Thread Starter
Join Date: Jul 2008
Location: GA
Posts: 1,062
Likes: 0
Received 0 Likes
on
0 Posts
95 4runner SR5 V-6
Hi thanks for the manual pics and the positive input, just to let you know I have a 95 4runner automatic A340H V-6
I'll try to post more pics of the A340H chain drive tear down this week 10 14 08
I'll try to post more pics of the A340H chain drive tear down this week 10 14 08
Last edited by buckz6319; 10-14-2008 at 02:40 AM.
#12
Registered User
Thread Starter
Join Date: Jul 2008
Location: GA
Posts: 1,062
Likes: 0
Received 0 Likes
on
0 Posts
UP DATE>>>>>I have discovered that my grinding vibration is in the hydraulic t-case section just behind the tranny and maybe the T.C. but not sure.My tranny still shifts as it should but putting a load on it the grinding is much worse.I also disconnected the drive shaft @ the rear companion flange and put the front axle on stands but the 4runner in D and 4H with wheels off the ground and the vibration grinding is really bad. I can feel and here it even while just idling in D and when I click off the O.D. the noise is much worse.From 0-40 not to bad up on stands but 40-70 is really bad any suggestions?///next pic shows what I thought was caused by bad t-case bearings so now I'm back to square 1 where I started from trying to find out why the U-Joint & rear t-case is getting so.....
Last edited by buckz6319; 12-01-2008 at 10:57 AM.
#13
Registered User
Thread Starter
Join Date: Jul 2008
Location: GA
Posts: 1,062
Likes: 0
Received 0 Likes
on
0 Posts
.....HOTT!!
This is what's going on now...my rear t-case is getting so hot that it is melting the grease that I put in my new U-Joint every time I repack it and throwing it up onto the tranny tunnel above and the housing just behind the rear output shaft companion flange is so hot that I can spray water on it and it will just sizzle and pop off and it was doing this before I replaced the used tranny parts on so thats why I thought I had a bad rear output shaft bearing or bearings....but not the case.....I now have to go deeper and find out what is going on here...this is the 2nd new u-joint just a cheep one until I can find the problem of the high heat in that area ....is this normal heat from that area of the t-case ...My temp light on my tranny never has come on except for when turning on the ignition.....any suggestions?

This is what's going on now...my rear t-case is getting so hot that it is melting the grease that I put in my new U-Joint every time I repack it and throwing it up onto the tranny tunnel above and the housing just behind the rear output shaft companion flange is so hot that I can spray water on it and it will just sizzle and pop off and it was doing this before I replaced the used tranny parts on so thats why I thought I had a bad rear output shaft bearing or bearings....but not the case.....I now have to go deeper and find out what is going on here...this is the 2nd new u-joint just a cheep one until I can find the problem of the high heat in that area ....is this normal heat from that area of the t-case ...My temp light on my tranny never has come on except for when turning on the ignition.....any suggestions?
Last edited by buckz6319; 11-30-2008 at 01:44 PM.
#14
Registered User
That is normal for the grease to come out, all greaseable U-joints do this. But I do agree you do have problem with your case. If you spray water on it and it boils off then you definetly have an issue.
James
James
#16
The U-joints are spinning 4-5 times the speed of the tires, so there is tonnes of centrifugal force. I concur that is it normal to have lots of grease on the body around the u-joints.
#17
Registered User
Thread Starter
Join Date: Jul 2008
Location: GA
Posts: 1,062
Likes: 0
Received 0 Likes
on
0 Posts
A340H completed tear down
I have completed the tear down of the A340H donor tranny and let me tell you this is a cluster mess to say the least...I will never do this again with the proper knowledge of these trannys and not without the proper tools but I did it and I do not regret doing this because I have learned more about how this tranny works


 the rear companion flange has been sold....


 the rear companion flange has been sold....
#19
Registered User
Thread Starter
Join Date: Jul 2008
Location: GA
Posts: 1,062
Likes: 0
Received 0 Likes
on
0 Posts
What a mess and I wish I had a garage to do the tear down but I don't have one so I had to do the job with the tranny supported on my tail gate of my 4runner.I feel if any one want's to do this it's a good idea to pressure wash the whole tranny and disassemble it in a garage where every thing stays clean.I like to say that it took me an entire day just to remove all the stuff that I have setting on the black 6mil poly and I didn't have the special knowledge or Toyota special tools to do this which is a must have I think....but for now all these parts are going to the recycle center next week but I'll keep all the bolts ang wiring and just a few thing that I may need for my next A340H which I'm on the hunt for .....I need a good working unit now and don't plan on doing this tear down again any time soon


