
Replacing 1989 22re Headgasket
 11-06-2011, 01:05 PM
#1
Registered User
Thread Starter

Join Date: Jul 2011
Location: Atlantic Canada
Posts: 108
Likes: 0
Received 0 Likes
on
0 Posts
Replacing 1989 22re Headgasket
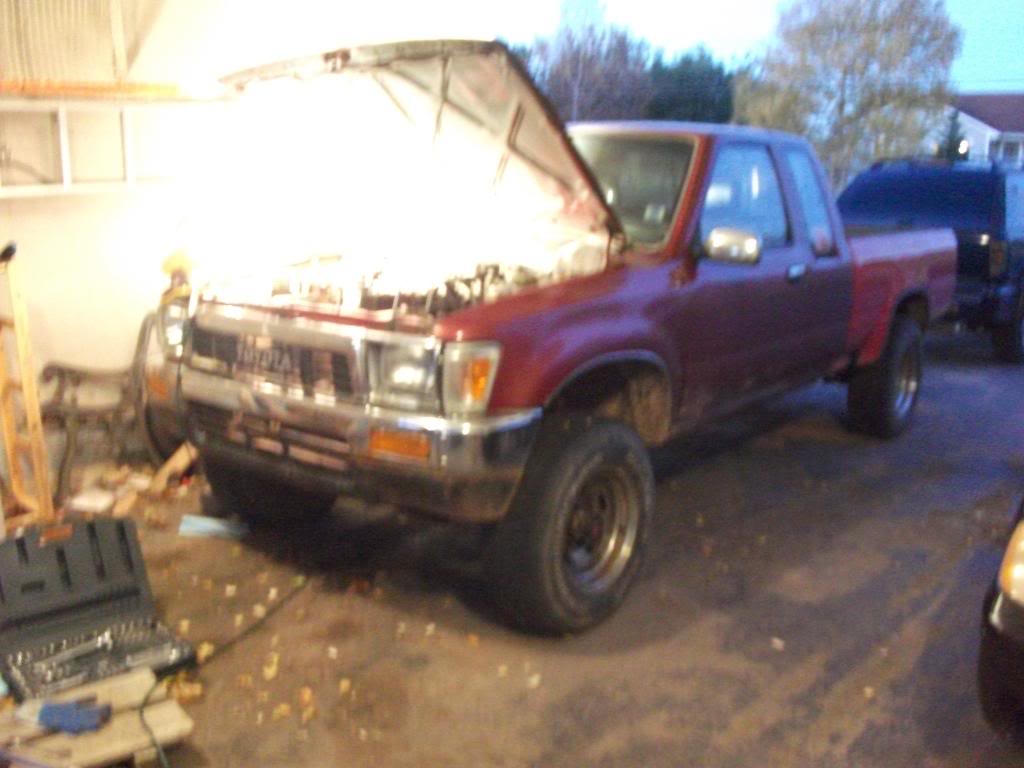
Alright, so I've been reading online for weeks, hours upon hours, about tearing down the 22re engine. I'm only 19 but do have experience working with Hondas.. I'm putting my honda away for the winter this year, and so I picked up a 1989 pickup 4x4 Xtra cab.. 22re, for $750 with a blown HG. I figured they're solid engines, more power than 22r, but fuel efficient for travelling to school and work.
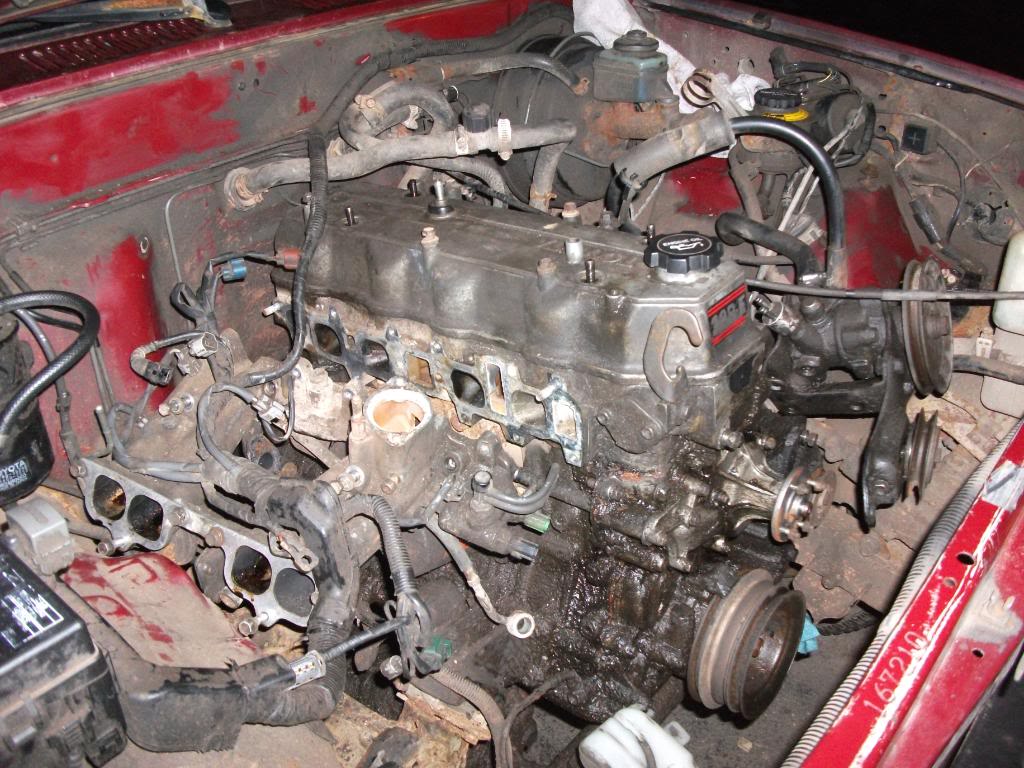
Anyways, I feel like I'm in so deep with this, I've been trying to keep things marked and organized. I've got the exhaust manifold unhooked, resting aside, same with the intake manifold, since the wiring harness is running through it. I set TDC, and removed the distributor after marking the rotor. (I think I did that right) I believe I need to remove the timing "chain" (I've only worked with belts, lol) and then unbolt the head in the correct sequencing..
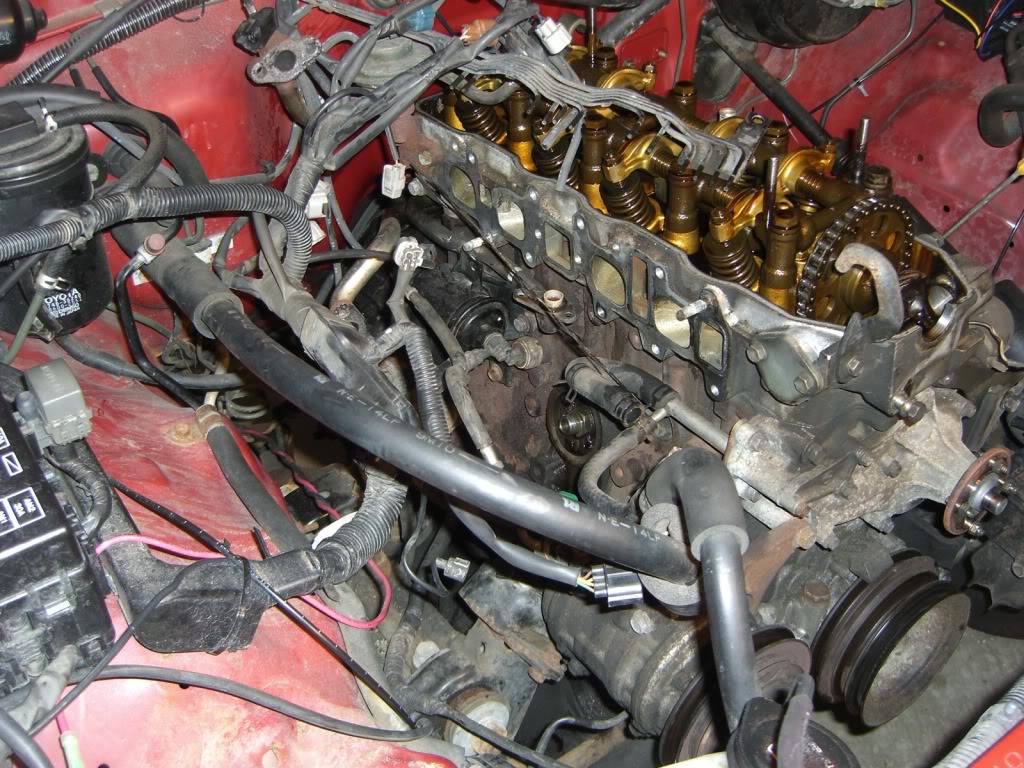
I'm following a Haynes manual as well, but its not very specific. Also I'm located in Atlantic Canada, so things like Autozone, and most online part sites don't really work for me. I picked up a Headgasket kit at Napa here for about $80, I'm hoping to re-use the head bolts. I don't really have any help besides you guys and the Haynes manual, lol. Should I be removing the timing chain next? I've got a some pics, this is how far along I am. I also picked up a replacement rad (the old brass kind) good condition for $40
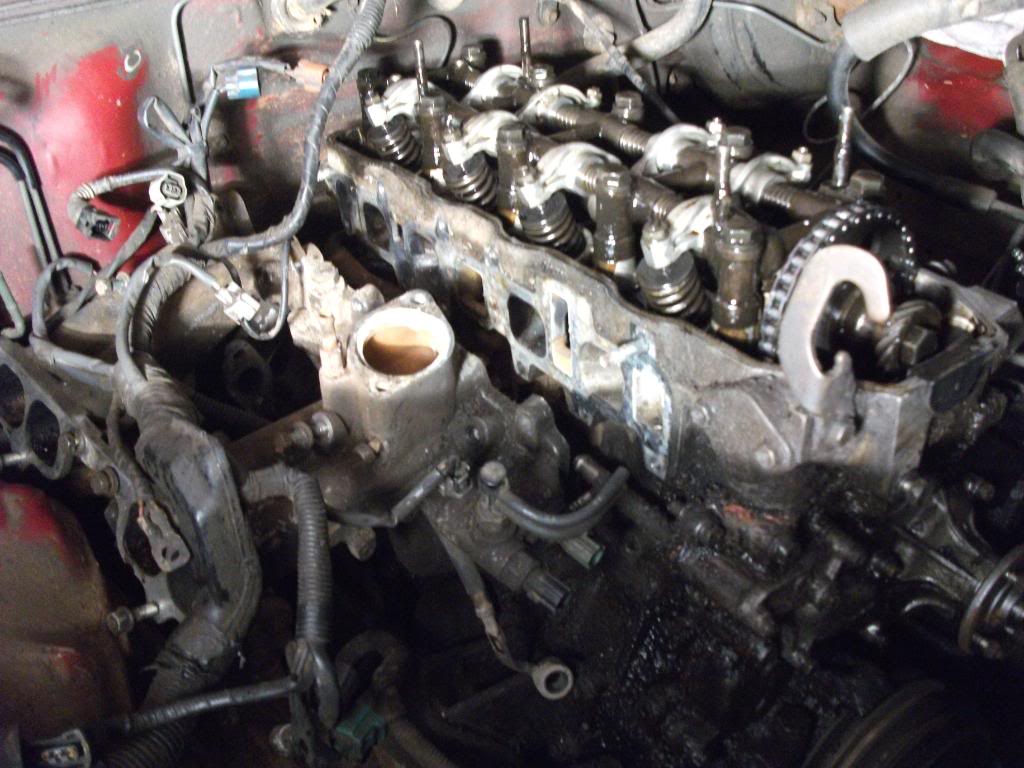

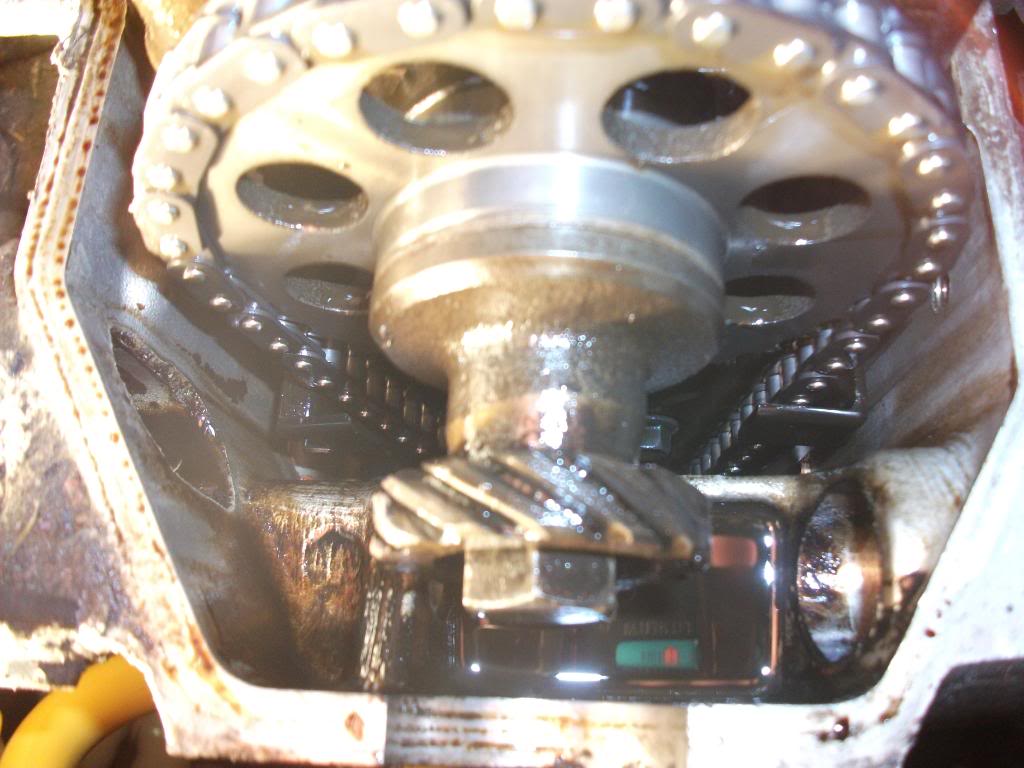
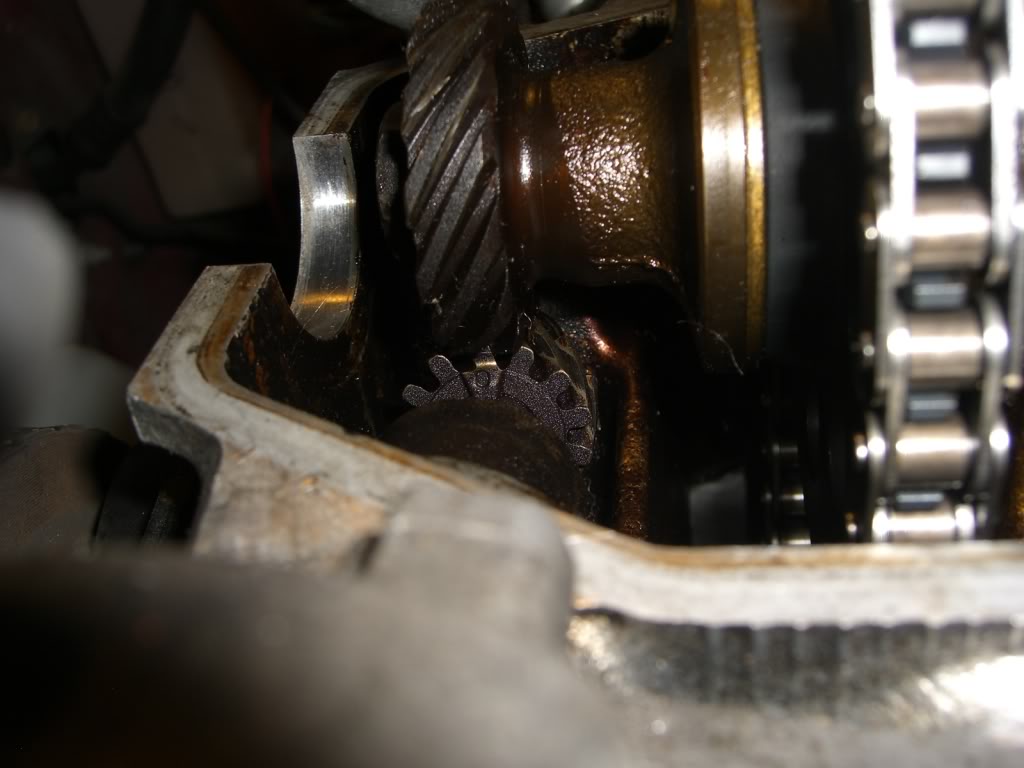
^ This shows that my chain guides are still okay I believe? I read about the known chain problem AFTER i bought the truck with a blown HG.. was scared until I pulled the VC to find them still there, lol..
Old rad..

I realize this is a very popular and respectful forum, I'm new to toyota, I apologize in advance for being a newbie.. Any nice advice or guidance is greatly appreciated
Anyways, I feel like I'm in so deep with this, I've been trying to keep things marked and organized. I've got the exhaust manifold unhooked, resting aside, same with the intake manifold, since the wiring harness is running through it. I set TDC, and removed the distributor after marking the rotor. (I think I did that right) I believe I need to remove the timing "chain" (I've only worked with belts, lol) and then unbolt the head in the correct sequencing..
I'm following a Haynes manual as well, but its not very specific. Also I'm located in Atlantic Canada, so things like Autozone, and most online part sites don't really work for me. I picked up a Headgasket kit at Napa here for about $80, I'm hoping to re-use the head bolts. I don't really have any help besides you guys and the Haynes manual, lol. Should I be removing the timing chain next? I've got a some pics, this is how far along I am. I also picked up a replacement rad (the old brass kind) good condition for $40
^ This shows that my chain guides are still okay I believe? I read about the known chain problem AFTER i bought the truck with a blown HG.. was scared until I pulled the VC to find them still there, lol..
Old rad..
I realize this is a very popular and respectful forum, I'm new to toyota, I apologize in advance for being a newbie.. Any nice advice or guidance is greatly appreciated

 11-06-2011, 01:38 PM
#3
Registered User
welcome to yota tech, always loved the new style trucks in ex cab with the 22r, normally there 3.slows, if your doing all that i would completely clean your eng bay and engine, alright changed things like the water pump, timing chain guides, etc etc, good luck and again welcome!
11-06-2011, 02:13 PM
#5
Registered User
Thread Starter
Join Date: Jul 2011
Location: Atlantic Canada
Posts: 108
Likes: 0
Received 0 Likes
on
0 Posts
Thanks for the link irabb, looks to be helpful, I'll be sure to read all through it 
westjohns, yeah I really liked the ex cab ones too, seats 2 extra (small) friends too, haha. Yeah I'm gonna definately clean up the bay, but not spotless right away as I really need to focus on getting it on the road, since I'm borrowing my moms car until its fixed.
Do you think I should replace the chain guides even if they're fine? Also yeah replacing those things would be good. I'm looking for a couple new rad hoses, a thermostat, and more possibly. Is the water pump just a bolt-off, bolt-on replacement?
drewski, good luck with everything, I'll try and help you with anything if you need it, lol.
Thanks to all for the warm welcome, much appreciated
11-06-2011, 02:22 PM
#6

great score for $750, I would have gone with OEM head gasket, you can reuse head bolts & go with engnbldr for everything else you might need, yes be sure to undo head bolts it right order and re-torque in the right sequence, be sure distributor is at 11 o'clock position and pointing to number 1 spark plug wire connector on cap and cam gear dowel is at 12 o'clock and crank key-way is at 12 o'clock and that should be intake TDC, if you have a straight edge like a framing square use the checking engine deck and bottom of head using diagram pics in manual and check head surface area flatness with a feeler gauge and if it check out good and after head gasket gets replace and head bolts in a torque in 3-20 lbs. incriments in the re-torquing sequence to 60 lbs's also check and adjust need be the valve lash to factory specks if factory cam, and get new valve cover gasket and half moons seal bottom on the half moon and the round bolt seals and get a new PCV valve and if the grommet is hard or cracked get a new one, good luck, check my thread for info and any questions let me know, just re-did mine, Later!!!!
Ps. Are you going to do anything else but head gasket? engine looks really filthy, not good for a cool running engine.
Ps. Are you going to do anything else but head gasket? engine looks really filthy, not good for a cool running engine.
Last edited by john4wd; 11-06-2011 at 02:28 PM. Reason: spelling again
11-06-2011, 02:23 PM
#7
Registered User
yes the water pump is a bolt on bolt off replaement, and it ties into the timing chain cover so u can pull off, you can even replace your oil pump while your at it, better safe than sorry, i just got done rebuilding my 22r completely, new pistions rods, bored .20 over, cam etc etc so anything you need just pm and im sure ill be able to awnser it,  as far as timing chain guides go yes you should, they even make metal replacement ones now other than the poly urathane, more durable
as far as timing chain guides go yes you should, they even make metal replacement ones now other than the poly urathane, more durable
Trending Topics
11-06-2011, 02:26 PM
#8
Registered User
K your gonna need to get the bolt holding the harmonic balancer onto the crank off.
Most people put a socket on the nut, then a big breaker bar on that, with a cheater bar to the ground and break it free with the starter..
Then you need to get the engine to TDC, then pull the tchain cover, timing chain top sprocket, and timing chain.. Pretty simple.
Most people put a socket on the nut, then a big breaker bar on that, with a cheater bar to the ground and break it free with the starter..
Then you need to get the engine to TDC, then pull the tchain cover, timing chain top sprocket, and timing chain.. Pretty simple.
11-07-2011, 05:22 PM
#9
Registered User
Thread Starter
Join Date: Jul 2011
Location: Atlantic Canada
Posts: 108
Likes: 0
Received 0 Likes
on
0 Posts
john4wd, I'll check out the surfaces with my dads framing square, I don't have a feeler gauge unfortunately.. my kit came with a VC gasket thankfully, along with the intake/exhaust gaskets, more gaskets, circle metal things, and the half-moon rubber. Also came with new VC grommets thanks, ill hit you up with any questions and take a look at your thread.
And no, for now my only plan is the head gasket, yeah the engine is really greasy, I'll give it a good degrease and spray once iv got it back together.. Believe it or not I already cleaned the valve cover, and a few more areas.. It should be pretty cold all winter, so grease holding the heat in shouldnt be a huge problem. This spring when I've got a second vehicle, I'll be able to give everything a good long cleaning and maybe even dig back in and replace more parts as I'll have much more time and money.
today I stopped at napa after school before they closed, and talked to the guy for a bit. He offered a timing kit for $100, that comes with a new chain, (tensioner i think too), a circle gasket, and a couple other small things I believe.. Also priced new chain guides $10 each, thermostat $15, and water pump like $35 ish. I think the previous owner mentioned replacing the W/P already, I guess replacing it again wouldn't hurt.. just really on a budget here. Napa guy told me to shop around first, online aswell for the best buy which is what I'll do. Didn't have time to do anything today, was busy all day after school..
westjohns, thanks for the advice, ill be sure to hit you up with any questions I've got too! W/P seems pretty straight forward to replace, I'm sure It'll all make more sense once i get it apart for the first time.
peow130, the bolt holding the harmonic balancer to the crank. I've always been fuzzy on this, the harmonic balancer is part of the whole lower crank pulley? I believe I know what bolt you're talking about.
So I'll break free the bolt, and THEN, set TDC? I don't have to set TDC before I start loosening the bolt? And in that case, would i turn the engine to set TDC by spinning the camshaft sprocket bolt instead of the crank bolt? I have been turning the engine by putting a strong bar onto the crank bolt, and turning it. But that will be loose now.
Thanks for the support yotatech, much appreciated
thanks, ill hit you up with any questions and take a look at your thread. And no, for now my only plan is the head gasket, yeah the engine is really greasy, I'll give it a good degrease and spray once iv got it back together.. Believe it or not I already cleaned the valve cover, and a few more areas.. It should be pretty cold all winter, so grease holding the heat in shouldnt be a huge problem. This spring when I've got a second vehicle, I'll be able to give everything a good long cleaning and maybe even dig back in and replace more parts as I'll have much more time and money.
today I stopped at napa after school before they closed, and talked to the guy for a bit. He offered a timing kit for $100, that comes with a new chain, (tensioner i think too), a circle gasket, and a couple other small things I believe.. Also priced new chain guides $10 each, thermostat $15, and water pump like $35 ish. I think the previous owner mentioned replacing the W/P already, I guess replacing it again wouldn't hurt.. just really on a budget here. Napa guy told me to shop around first, online aswell for the best buy which is what I'll do. Didn't have time to do anything today, was busy all day after school..
westjohns, thanks for the advice, ill be sure to hit you up with any questions I've got too!
W/P seems pretty straight forward to replace, I'm sure It'll all make more sense once i get it apart for the first time. peow130, the bolt holding the harmonic balancer to the crank. I've always been fuzzy on this, the harmonic balancer is part of the whole lower crank pulley? I believe I know what bolt you're talking about.
So I'll break free the bolt, and THEN, set TDC? I don't have to set TDC before I start loosening the bolt? And in that case, would i turn the engine to set TDC by spinning the camshaft sprocket bolt instead of the crank bolt? I have been turning the engine by putting a strong bar onto the crank bolt, and turning it. But that will be loose now.
Thanks for the support yotatech, much appreciated
11-07-2011, 06:56 PM
#10
To advance to TDC on intake so cam dowel is at 12 o'clock and distributer is pointing at the number one spark plug wire goes in on the cap, that is TDC, if it's pointing at number 3 spark plug wire plug in the it's at TDC at the exhaust which you don't want, I would use the crank bolt it has a higher weight mass and will turn the small cam easier, and when the cam dowel is at 12 o'clock the crank keyway will be at 12 o'clock too, in your manual it all should be shown as well as which rocker is loose at TDC on intake and and which ones are loose at TDC on exhaust and what the valve lash should be and you need to pick up a feeler gauge set at Sear or NAPA to check valve rocker gap and deck flatness and it can be used to gap spark plugs, need to be in everyone's tool box!!!!
Get a timing chain set with the straight left side steel guide, Auto Zone sells the steel guide called a damper for 13 bucks if your going to re-use the old set which you shouldn't since your replacing everything anyway. Engnbldr has a set cheaper with the steel guide. Read my thread...
Any questions let me know :}
11-08-2011, 03:17 AM
#11
Registered User
iTrader: (4)
Join Date: May 2010
Location: People's Republic of California
Posts: 720
Likes: 0
Received 15 Likes
on
12 Posts
That looks pretty messy in the front. If you're still only using the hayne's manual, then here's some resources for you that I've used in the past and currently. Make sure you look for the 22RE info and don't mix up with the 3.0 stuff.
http://arrc.epnet.com/autoapp/8682/8...ve__Cover_.htm
http://www.ncttora.com/fsm/
http://arrc.epnet.com/autoapp/8682/8...ve__Cover_.htm
http://www.ncttora.com/fsm/
 11-10-2011, 08:14 AM
#13
Registered User
Thread Starter
Join Date: Jul 2011
Location: Atlantic Canada
Posts: 108
Likes: 0
Received 0 Likes
on
0 Posts
My cousins coming down for the weekend, we're going to get a lot of work done, is the plan. Right now im trying to buy the parts we'll need, while everythings closed the next 3 days.
Thank you Grego92, those links look helpful.
mandy tuning, yeah I believe i have that gasket. thanks for the heads up.
john4wd, i would disregard where my distributor is pointing, since its already removed, right? I think I will be able to figure it out, timing always confuses me.
you mentioned i should replace with a steel guide since im replacing everything anyway. but i find myself 3 hours before everything closes, and thinking, i only need this to last the winter. I will have a second vehicle in the spring, and then I will be able to tear down the engine again, and NOT be outside in the freezing cold doing all this.. So i'm thinking I will just get this head gasket in, reaplace all the gaskets that came with my set. Replace T stat, and get a feeler gauge. I'll keep an eye on the T-chain and guides. Next spring/summer i'll make everything sparkly pretty.
Also, I'm pretty sure the previous owner replaced the water pump already last year. He was daily driving it until the HG went.
Last edited by 22r2tuff; 11-10-2011 at 08:23 AM.
11-10-2011, 08:34 AM
#14
My cousins coming down for the weekend, we're going to get a lot of work done, is the plan. Right now im trying to buy the parts we'll need, while everythings closed the next 3 days.
...
you mentioned i should replace with a steel guide since im replacing everything anyway. but i find myself 3 hours before everything closes, and thinking, i only need this to last the winter. I will have a second vehicle in the spring, and then I will be able to tear down the engine again, and NOT be outside in the freezing cold doing all this.. So i'm thinking I will just get this head gasket in, reaplace all the gaskets that came with my set. Replace T stat, and get a feeler gauge. I'll keep an eye on the T-chain and guides. Next spring/summer i'll make everything sparkly pretty.
Also, I'm pretty sure the previous owner replaced the water pump already last year. He was daily driving it until the HG went.
...john4wd, i would disregard where my distributor is pointing, since its already removed, right? I think I will be able to figure it out, timing always confuses me...
https://www.yotatech.com/forums/f116...l#post51710590
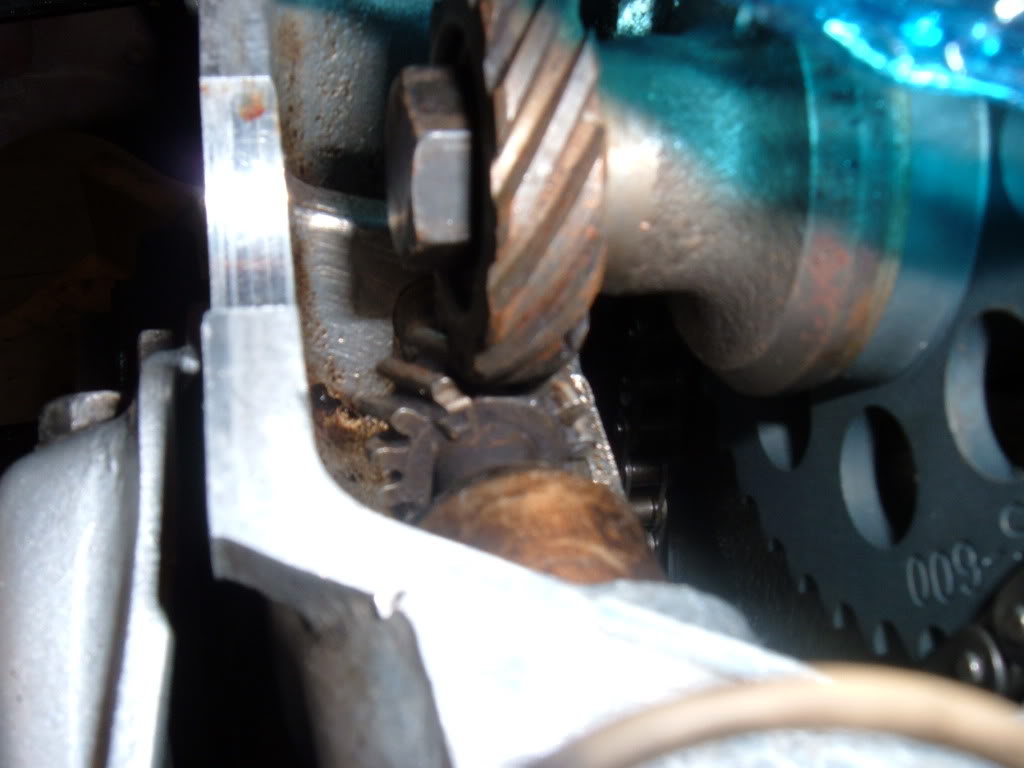
line the "notch" tooth straight up, and let it turn as you push the dizzy in
wrong:
right:
Last edited by irab88; 11-10-2011 at 08:36 AM.
11-10-2011, 06:06 PM
#15
on the back of the head there are 4 bolts holding on a plate. I dont remember if its one or 2 of those bolts hold on the metal heater tubes behind the head. Go with engnblder.com I've used them several times, a few days ago ordered my engine kit again. His prices are just about unbeatable.
Dont forget the 12mm bolt under the cam gear.
Dont forget the 12mm bolt under the cam gear.
11-10-2011, 08:16 PM
#16
Registered User
Thread Starter
Join Date: Jul 2011
Location: Atlantic Canada
Posts: 108
Likes: 0
Received 0 Likes
on
0 Posts
irab88, ohhhh I see. Yeah I read through that link, good to know for re-installation thanks
gottadog, yeah i noticed engnbldr has some good prices, just have to calculate if theyre still un-beatable after shipping to canada. about the plate, should i address that before pulling the head you think? I cant really see back there but ill figure it out if i have to.
My cousins up for the weekend, were getting started tomorrow. thanks everyone
thanksgottadog, yeah i noticed engnbldr has some good prices, just have to calculate if theyre still un-beatable after shipping to canada.
about the plate, should i address that before pulling the head you think? I cant really see back there but ill figure it out if i have to. My cousins up for the weekend, were getting started tomorrow.
thanks everyone
11-10-2011, 08:50 PM
#17
irab88, ohhhh I see. Yeah I read through that link, good to know for re-installation thanks
gottadog, yeah i noticed engnbldr has some good prices, just have to calculate if theyre still un-beatable after shipping to canada. about the plate, should i address that before pulling the head you think? I cant really see back there but ill figure it out if i have to.
My cousins up for the weekend, were getting started tomorrow. thanks everyone
thanksgottadog, yeah i noticed engnbldr has some good prices, just have to calculate if theyre still un-beatable after shipping to canada.
about the plate, should i address that before pulling the head you think? I cant really see back there but ill figure it out if i have to. My cousins up for the weekend, were getting started tomorrow.
thanks everyoneand i don't know what "plate" you mean, but i never saw or removed any type of "plate."
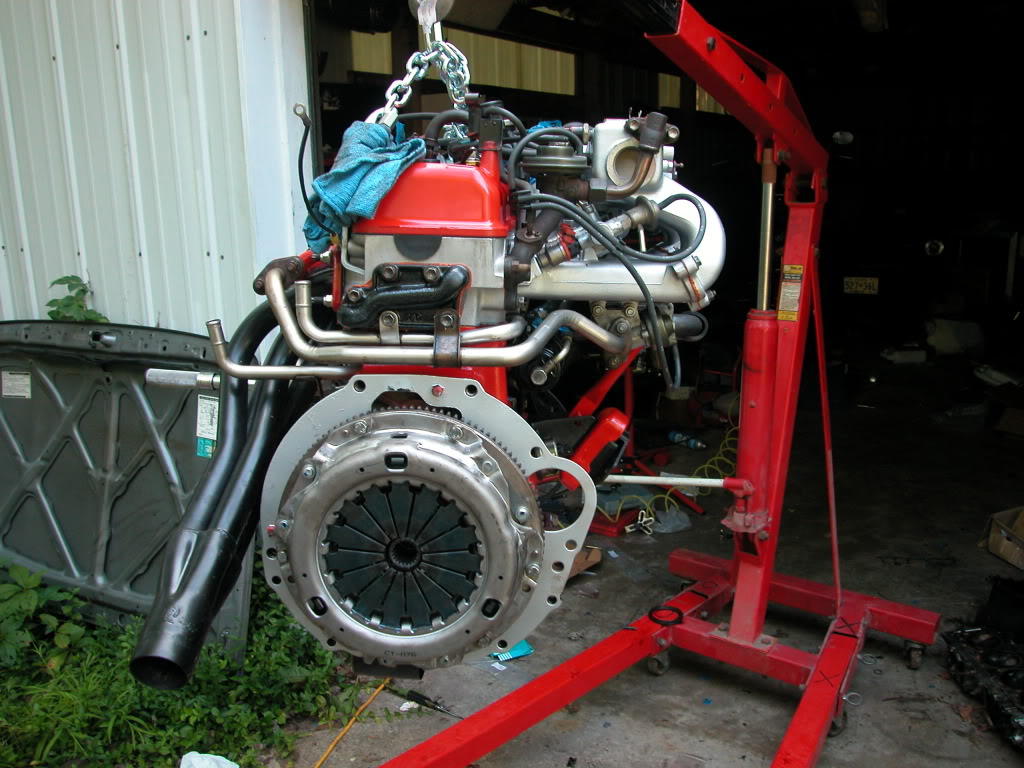
the 2 pipes in the back- one is egr, one is heater. each is held on with one 12mm (?) bolt, and is hard to get to. the pipes will not come out easily with the lower intake still on the head. once you get to just the head on the block (nothing else), those pipes will be fairly easy to get to:
 11-10-2011, 09:20 PM
#18
since distributor is removed already you said, when you reinstall it make sure it's pointing to the numer1 when you put it back in.
What manual do you have to help you do the work? I have the Haynes Pickup & 4Runner 1984-1995 number in top right corner #92075 and is very informative on how to do timing set up and un-torquing and re-torquing the head bolts and that cam dowel needs to be 12 o'clock, and the cam gear timing dot needs to be in 11 o'clock position and crank key-way @ 12'oclock and show with a pic of what rockers are loose at intake TDC with arrows and adjusting the valves and which rockers are loose at TDC at exhaust to do the valve adjusting. I thought it would be hard but doing the timing isn't hard at all. and also a pic on what distributor faces at TDC on intake.
Did the truck make any noise in the front when it was running before the HG blew? if you just going to use it till spring then redo everything, if you don't go crazy off roading and or racing just put new HG on and clean off the gunk and then put it all back together. Any questions send me a PM...
Ps. on the timing chain tensioner if you remove or check the torque, be sure not to go over the maximum torque, if to tight it won't function properly.
11-10-2011, 10:02 PM
#19
The plate there talking about is the bypass one on back of head that the water and the heater pipes attach to on the bottom, both pipes have a bolt tab with a hole one on each bottom bolt and there are 2 bolts and it's not to bad to get to both bolts out with just the head on, if it's not leaking and gasket not being replaced then leave both bypass's on the head when it's removed, if you take off bolts you might break the seal and cause a leak later on, but if your going to replace gasket anyway with the head off then go ahead and remove both tube.
11-11-2011, 06:01 AM
#20
so you're talking about this?
i never touched that plate, but did take the pipes off. no issues, as long as you don't over-torque anything. though that's some good advice, and it makes sense. i just found it easier to rest the head without them on
carry on haha
haha
i never touched that plate, but did take the pipes off. no issues, as long as you don't over-torque anything. though that's some good advice, and it makes sense. i just found it easier to rest the head without them on
carry on
haha
Last edited by irab88; 11-11-2011 at 06:03 AM.


