When you click on links to various merchants on this site and make a purchase, this can result in this site earning a commission. Affiliate programs and affiliations include, but are not limited to, the eBay Partner Network.
Overheated, now leaking coolant. What's this part?
1992 4runner 3.0L SR5 V6
Hey all. I was driving home the other night and suddenly my temperature shot up like crazy, jumping to almost red and fluctuating between there and 3/4 on the gauge. I pulled off the highway and figured I'd let it cool down and limp it home. Wasn't cooling down at all and lots more steam than I've ever seen from overheating, specifically from one point on top of the engine right behind the top of the timing-belt cover. The radiator was cool, so I figured it had to be either a bum thermostat (I had installed a crap one about four years ago when I was super broke) or a clog in the radiator, so I replaced both.
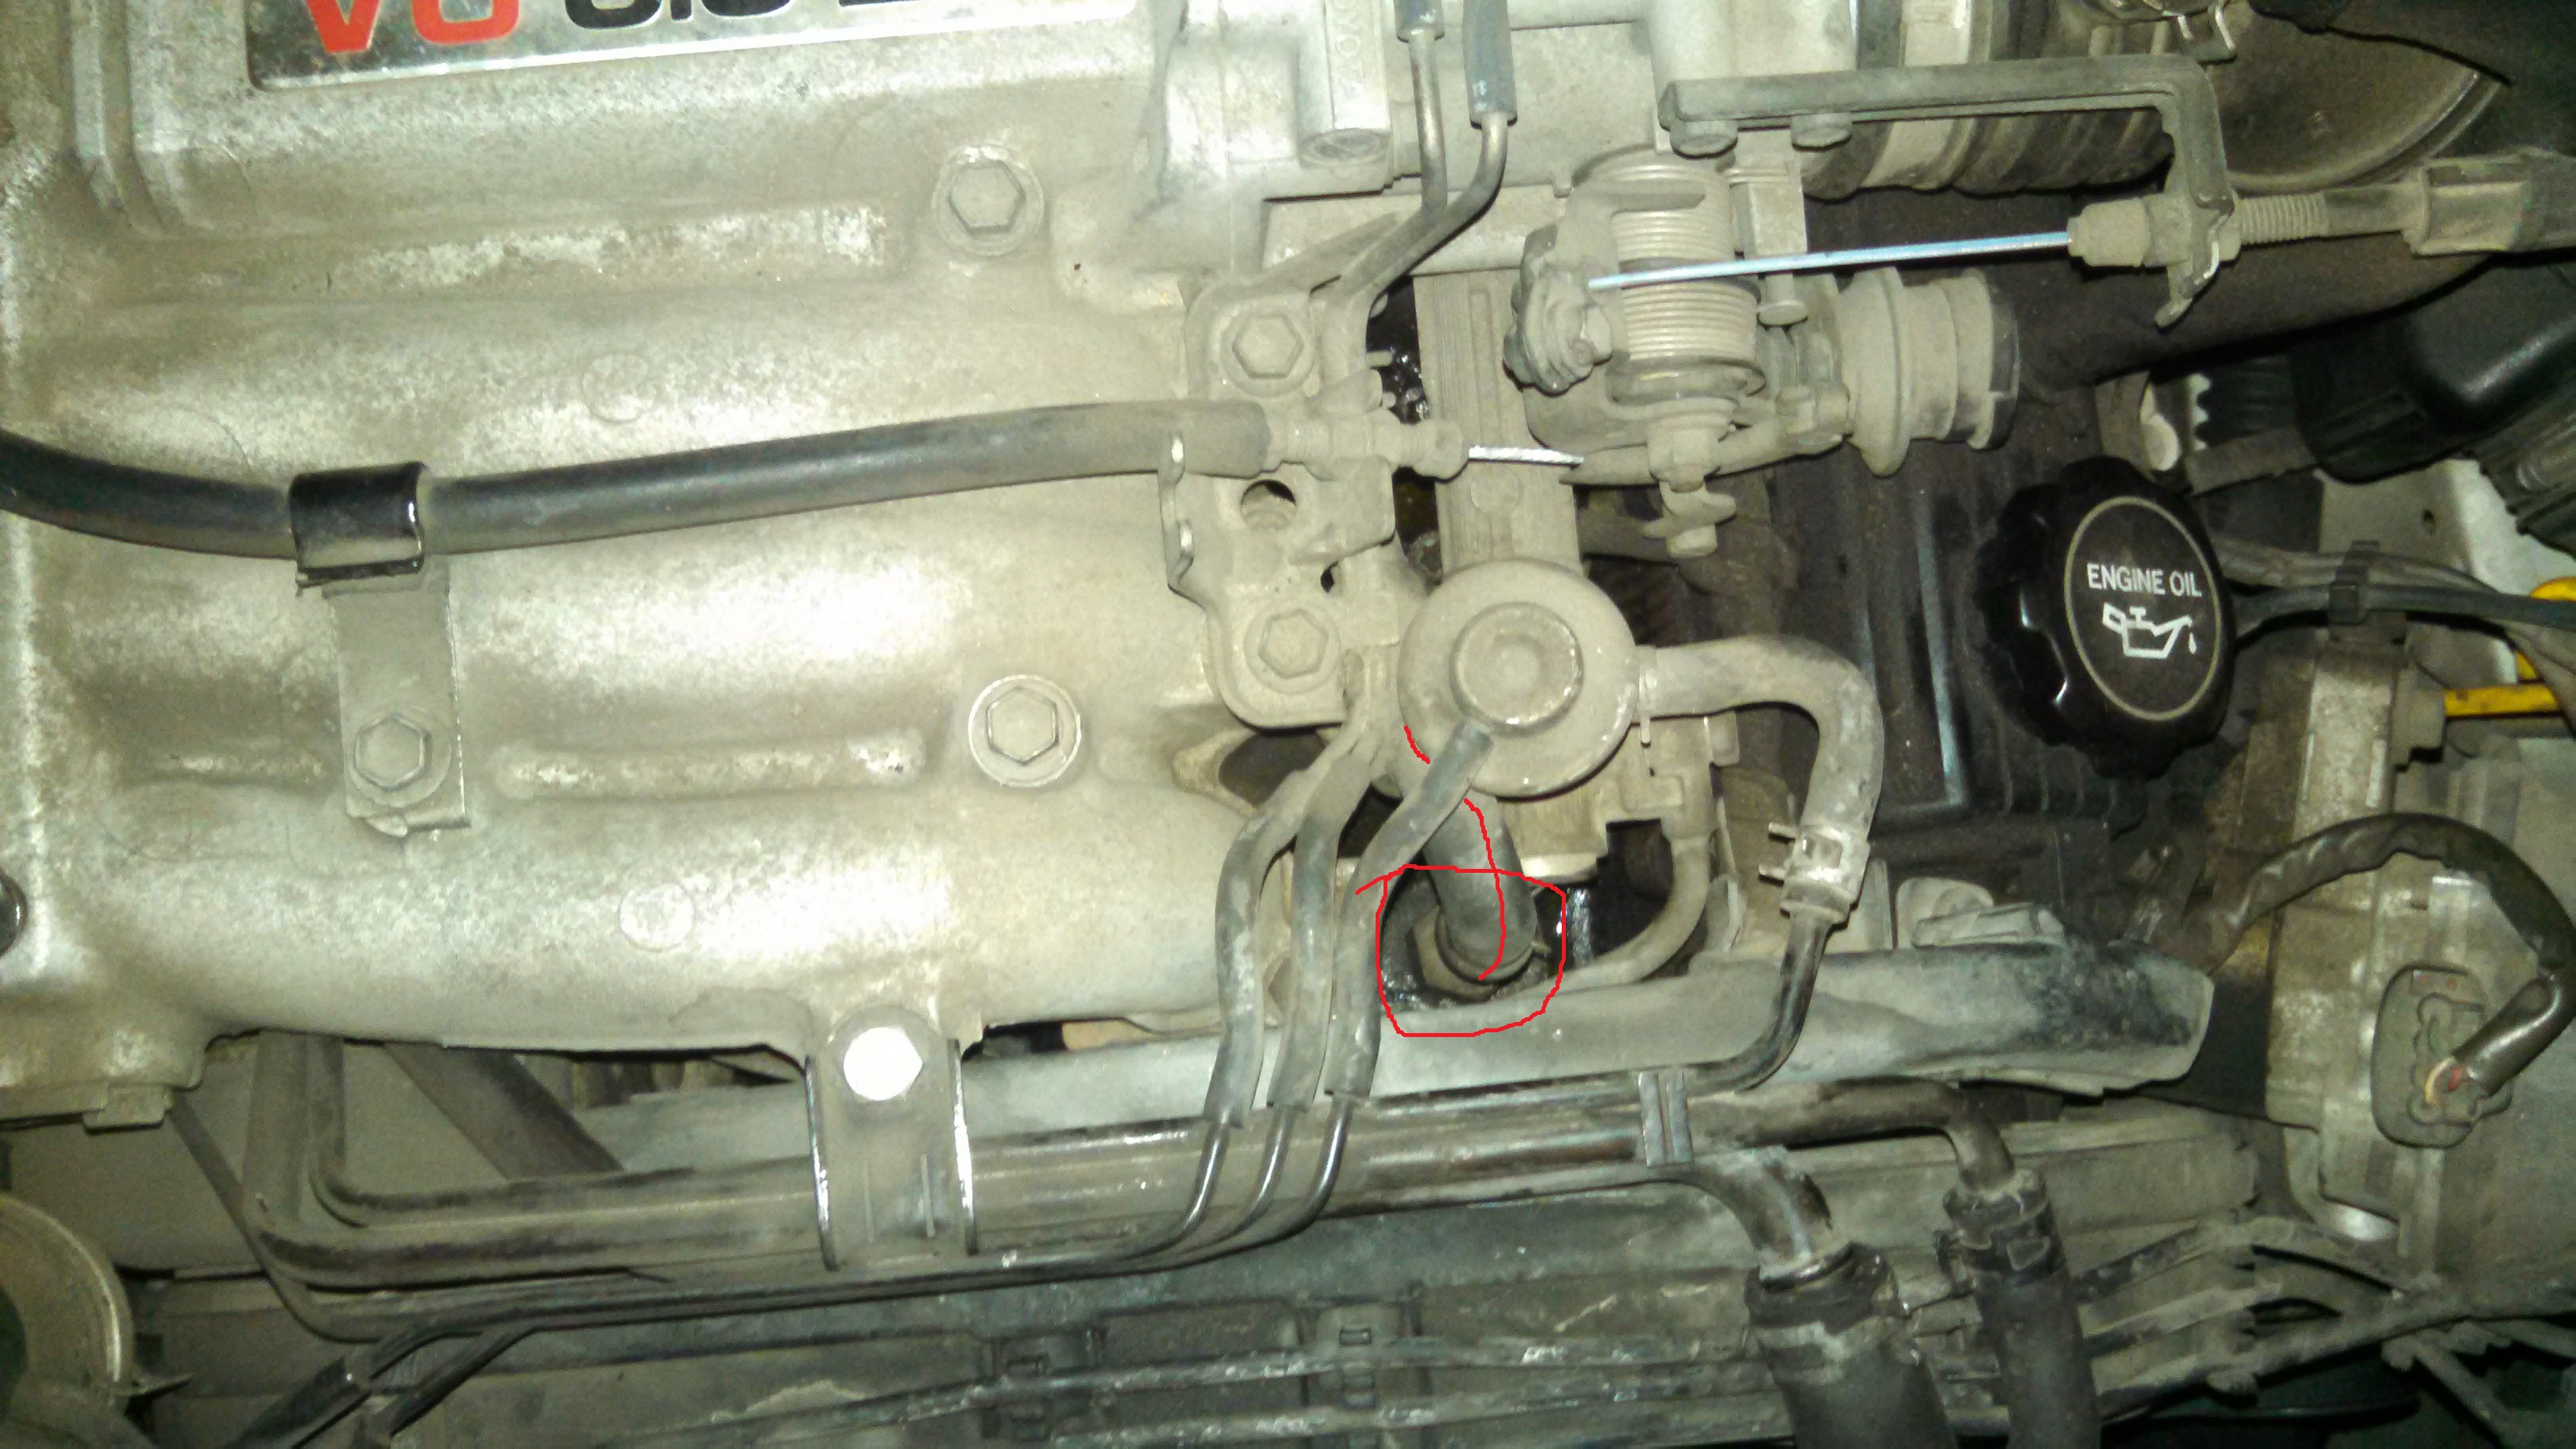
So I started filling up the system and once I was at the top of the radiator I heard dripping. Looked for quite some time but finally came across the leak. It appears to be spewing from the coupler at the top of the engine (right behind the TB cover, to the right of the head... thankfully it wasn't the head gasket.) Below are photos and a link to a youtube video so you can see the flow. (Ignore the little yellow/orange plastic pieces, I just discovered them. That was from when my cooling fan exploded during warm-up on a -10*F morning. There are dents in my hood from the inside.)
A few questions:
1) What's the part called?
2) What do I need to remove to get at it? (I have Chilton's and the stickied '93 manual if you can just point me in the right direction)
3) What type of repair? Is there a gasket or does the coupler (or whatever it is) screw in? If it's a crack will JB Weld work?
Thanks in advance for any help. I'm self-taught and I've done some big jobs, it just seems I learn new parts and systems as they break!
The circle is roughly where I think the leak is coming from, there's a swirling right there and it flows away from that point (better seen in video)
Here's the video. It was really hard getting the light right and the video to actually focus properly!
Replace that broken fan, it's out of balance and will destroy it's bearing.
Tough to tell from the pics/vid, but i think you're looking at an intake manifold gasket. I'll look at mine when I get to work, see if i can determine more.
I've been watching that video a few times, and it's probably just me, but I can't even tell where on the engine I'm looking.
There is no "throttle body cover," could you be referring to the plenum/upper intake manifold/air intake chamber? http://personal.utulsa.edu/~nathan-b...68cylinder.pdf There are two heads on a 3VZE; is the point you're looking at to the "right" of the driver's side head? (Remember: left/right is from sitting at the wheel, not staring into the open hood.)
Now I'm taking a WAG, but maybe your leak is in the "No. 4 water bypass hose." (See link above, page 54.) Getting to that is "relatively" easy; you just need to remove the plenum. http://www.toyotapartsoverstock.com/...rimLevel=18290 (no. 16281)
Or, you can use some of these drawings to elucidate where you're looking.
Replace that broken fan, it's out of balance and will destroy it's bearing.
Tough to tell from the pics/vid, but i think you're looking at an intake manifold gasket. I'll look at mine when I get to work, see if i can determine more.
Oh there's nothing left from the fan. It exploded years ago, taking out most of the air system, battery, and several lines. The plastic pieces in the photo are leftover, didn't even know they were there
Originally Posted by scope103
I've been watching that video a few times, and it's probably just me, but I can't even tell where on the engine I'm looking.
There is no "throttle body cover," could you be referring to the plenum/upper intake manifold/air intake chamber? http://personal.utulsa.edu/~nathan-b...68cylinder.pdf There are two heads on a 3VZE; is the point you're looking at to the "right" of the driver's side head? (Remember: left/right is from sitting at the wheel, not staring into the open hood.)
Now I'm taking a WAG, but maybe your leak is in the "No. 4 water bypass hose." (See link above, page 54.) Getting to that is "relatively" easy; you just need to remove the plenum. http://www.toyotapartsoverstock.com/...rimLevel=18290 (no. 16281)
Or, you can use some of these drawings to elucidate where you're looking.
My apologies. I should have taken a reference photo. Here it is now. And from the look of the link, I think it's 16281 unless I'm mistaken. But I don't think it's the hose that's leaking, it's at the base of the manifold the hose is attached to, where the manifold meets the engine. Is that removable/replaceable (is there a gasket to replace)? Is this a part I could find at an auto store or is this a job for Pick-n-Pull?
But I wouldn't get my hopes up. Even on my truck, I can see that this fitting is subject to corrosion. It wouldn't surprise me that you will find it almost impossible to unscrew (despite the leak), and once out the threads in the lower intake manifold will be damaged.
If you go the junk yard route, I'd search for a "good lookin'" lower intake manifold, with all the fittings in place. (Of course, to know what those fittings are, you'll have to schlep along the old one).
Or, you could try repairing the damaged threads. It might be as simple as getting the right tap (alas, probably a metric tapered thread, so not from your local Ace) and easing the threads a little deeper. Or you might have to add some epoxy designed for repairing aluminum.
Okay, so a couple more questions (SORRY, like I said I'm learning as I go for almost everything under the hood):
1) How do I go about removing the regulator (is that was that is? The flying saucer looking thing) and the metal tubing it's attached to? That seems to be the only things in the way for me to be able to easily remove the coupler and get a better look at what I'm dealing with here.
2) Would PB Blaster help get it out? Or is that not recommended...
3) Is there no gasket or is it just metal on metal? Would a Permatex gasket fix this?
And again, I'd like to thank you for taking time to help me!
Unless you can see it coming from directly under the hex fitting, I don't think that's the leak. That pool of coolant with the plastic piece in it, at the bottom is the top edge of the intake manifold gasket.
Try to blow or blot all the coolant out of the area, then start it and watch to see where the source is.
I'll definitely give it a look when I get home later. Yeah, I haven't tested it starting dry, but in the video is really looks like that swirling is indicative of where the leak is, which appears to be under the hex.
Also, it's leaking like that just from filling the system with coolant. I haven't had to start it at all to get any leaking, just add a bit more coolant.
...
Try to blow or blot all the coolant out of the area, then start it and watch to see where the source is.
I think Shady Cadence is right. Gravity is not your friend; if your leak is anywhere above the puddle (and you have a long piece of hose there), it will settle to the bottom. Engine vibration alone will swirl the puddle.
Bend up a piece of wire to grasp a piece of paper towel to hold under the hose (above the puddle). If it gets wet while running, the leak has to be above that.
To remove the Fuel Pressure Regulator, you have to first remove the plenum. http://personal.utulsa.edu/~nathan-b...89fuelpres.pdf So that doesn't save you anything. Plus, you'll need a new crush washer. Leaking coolant is bad, leaking gasoline is real bad.
I think Shady Cadence is right. Gravity is not your friend; if your leak is anywhere above the puddle (and you have a long piece of hose there), it will settle to the bottom. Engine vibration alone will swirl the puddle.
As I said before, the engine hasn't been running. The battery isn't even connected. I'm getting the leak simply from filling the system. The swirl is being caused by flow, not vibration.
I didn't get a chance last night to make the leak happen after everything dried up but I'll be able to test it in a bit.
To remove the Fuel Pressure Regulator, you have to first remove the plenum. http://personal.utulsa.edu/~nathan-b...89fuelpres.pdf So that doesn't save you anything. Plus, you'll need a new crush washer. Leaking coolant is bad, leaking gasoline is real bad.
I'm confused when you say it doesn't save me anything, partially because I can't tell what you're suggesting I do and partially because I don't know what a plenum is and it doesn't show up anywhere on the manual you linked. Is it the pipe the regulator connects to the top of?
Whelp, it would appear it's the lower intake manifold gasket. You called it, Shady. Time to embark on a new adventure is automotive repair!
Couple quick questions after looking through my Chilton's and various other guides/forums online:
1) What's the best way to relieve fuel pressure? Most sources say put a rag over the cold start injector and crack the union bolts. Would there be any pressure after sitting a few days?
2) Chilton's says "Disconnect the TPS connector at the air chamber. Disconnect the PCV hose at the union." I've looked all over and can't find what a PCV hose is... is it the one that connects to the top of the air intake hose? Found the PCV valve but everything I've found for that doesn't look right.
3) Should I replace the gasket between the intake manifold and the intake chamber while I'm in there?
4) Are there any other gaskets/special washers/non-reusable parts I will need to replace as I reassemble everything?
 03-18-2015, 09:53 PM