When you click on links to various merchants on this site and make a purchase, this can result in this site earning a commission. Affiliate programs and affiliations include, but are not limited to, the eBay Partner Network.
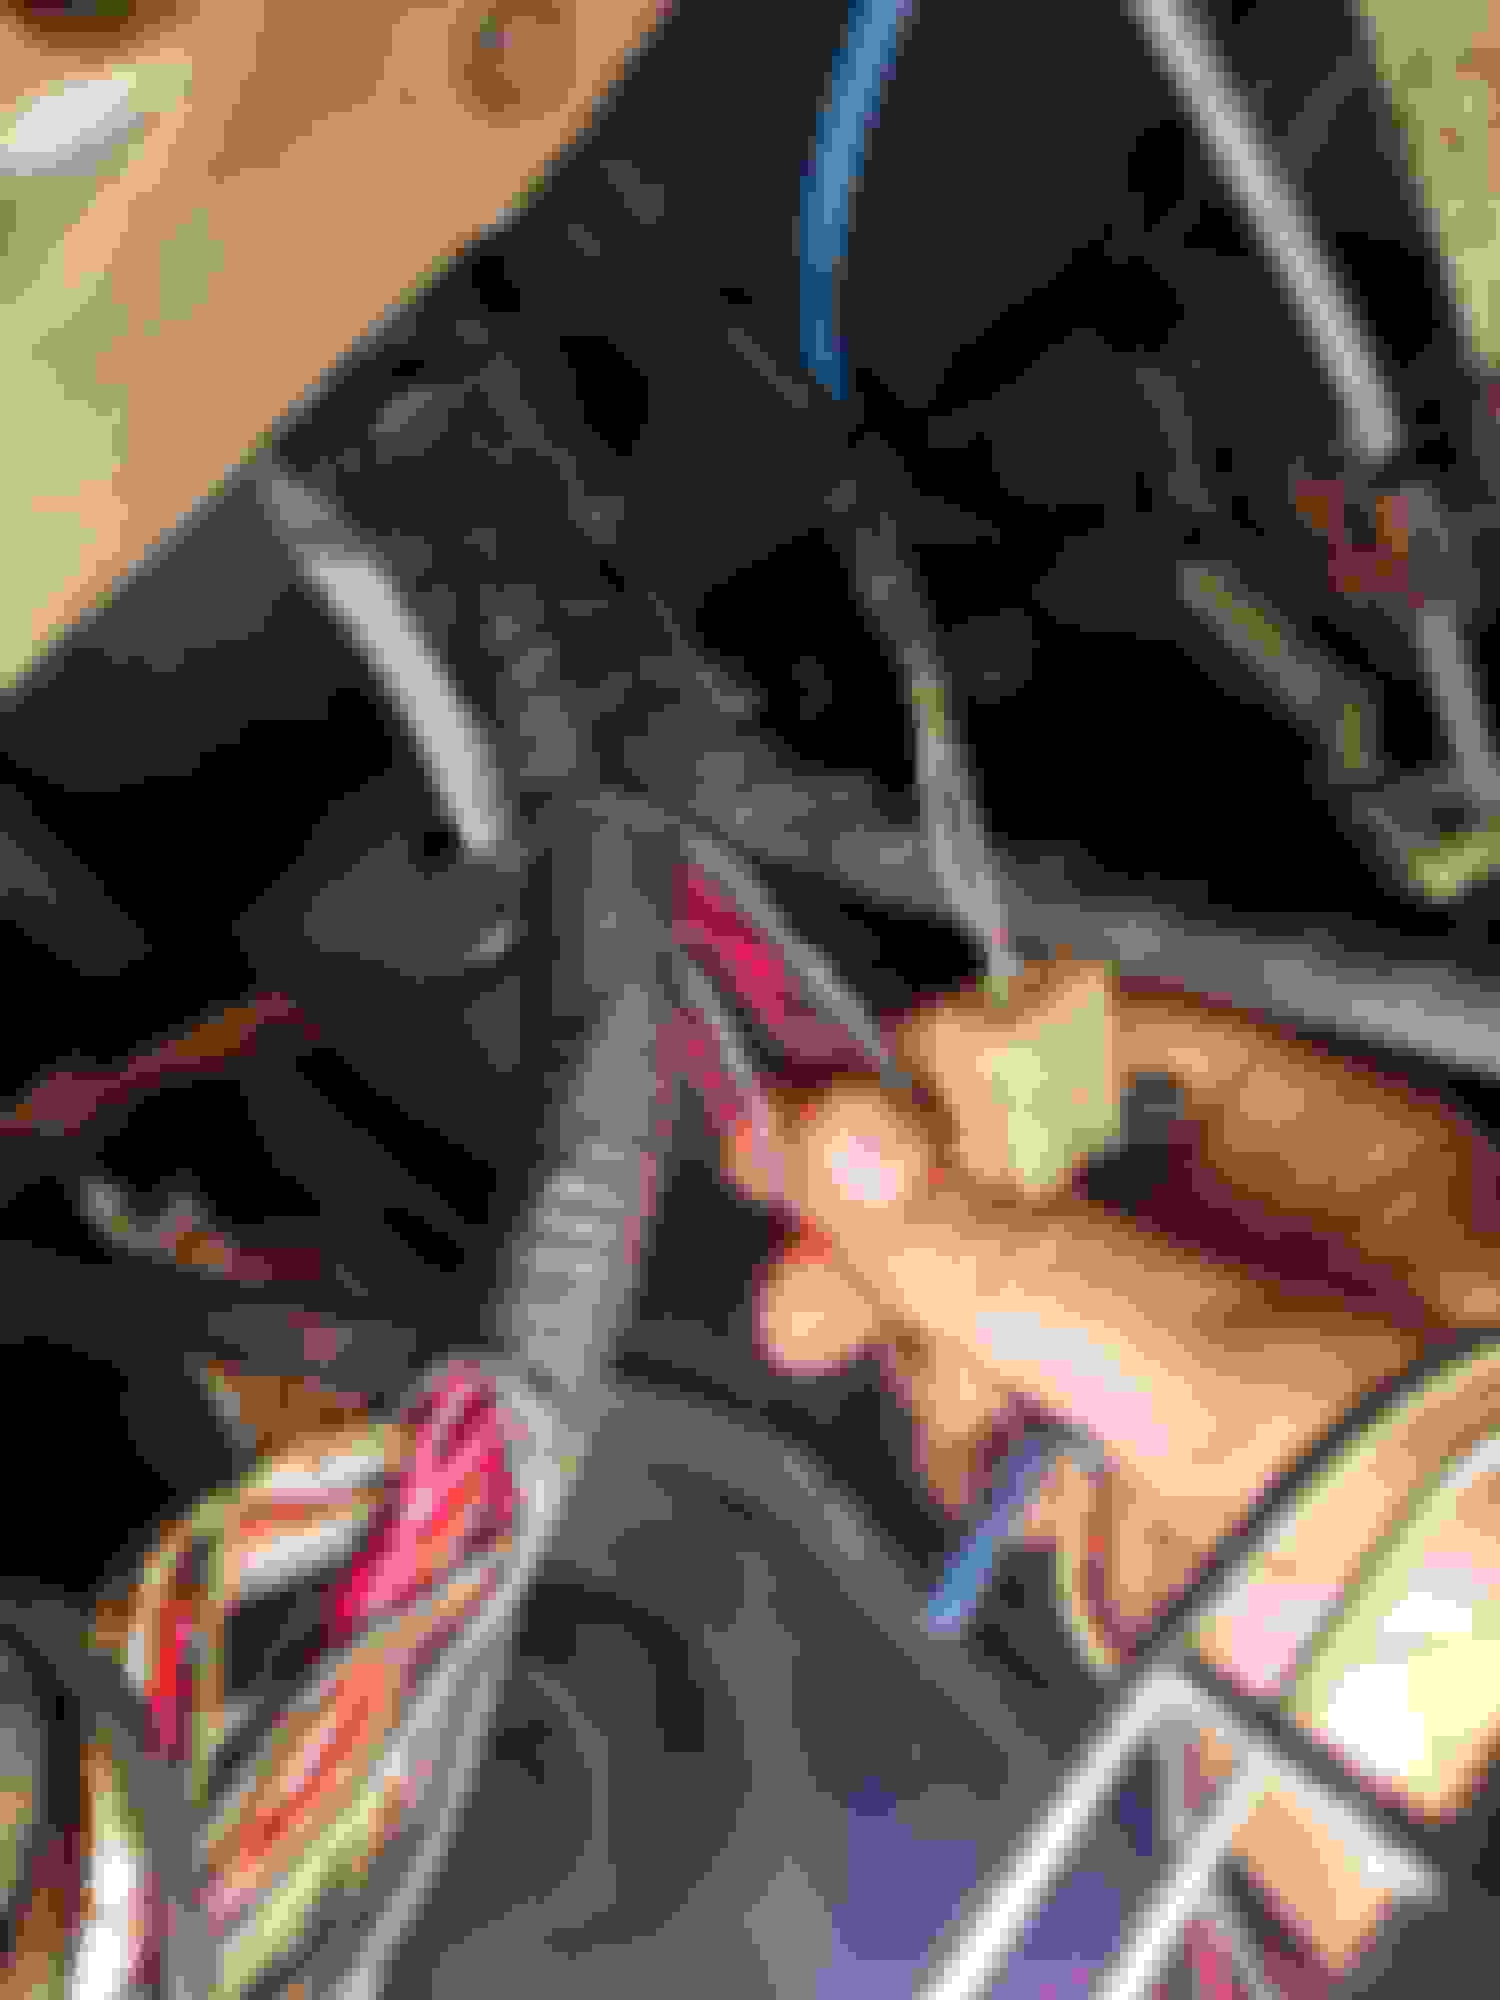
alright so i havnt had high beams so i did a little investigating an found this right above the pedals i know the red an yellow wires for my high beams an the RW is my flashers but i dont know what the others are an how to hook them up please help theres a dark green a dark green an white a black a red an a white an black
When you turn HB on, does your HB dash indicator come on?
How about Hazards?
If you have hazards but no HB, then like Terry says^^^ dimmer combo switch contact between pins 5 (where R-Y goes) and 13 (where W-B goes) is bad. (This contact connects the Red-Yellow wire to ground, and R-Y connects negative side of HB filament in order to turn on HB filament.)
Verify this way:
(1) Turn low beams on and verify they light up,
(2) Switch to high beams,
(2) Jump Pin 5 (where R-Y goes) to ground.
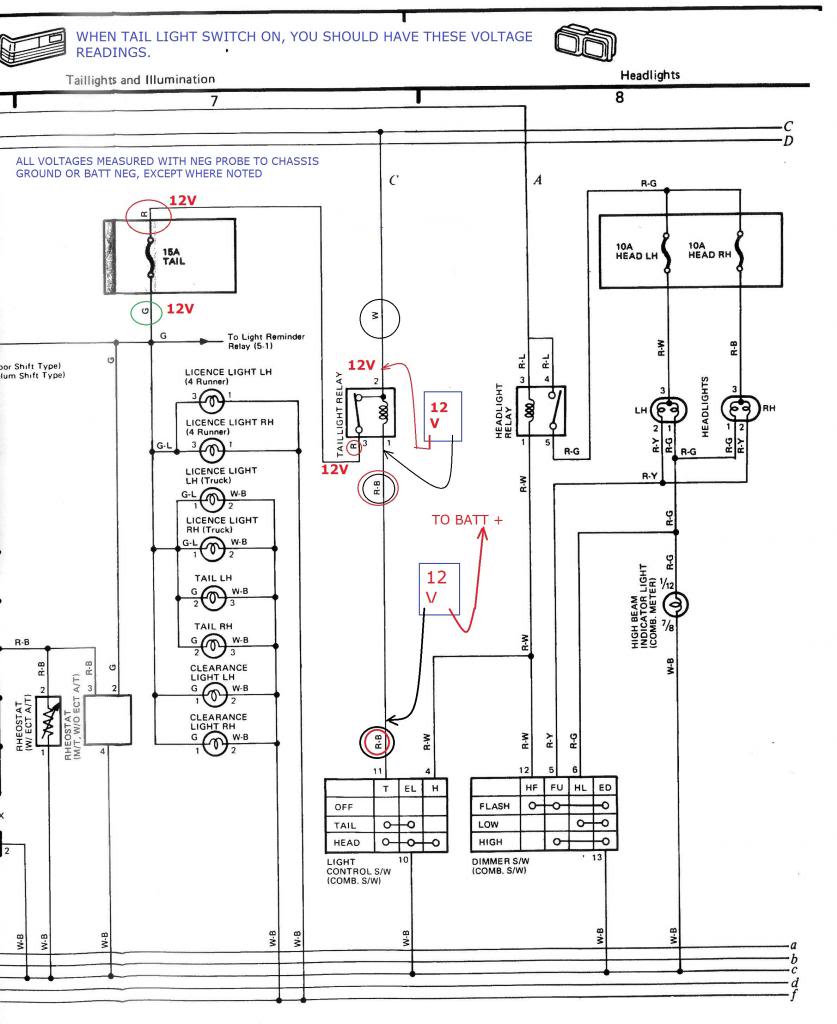
One cause of death of dimmer-combo switch is the flawed wiring of the headlight that subjects the dimmer-combo contacts to too much current as shown here.
Clean, robust and simple fix is the H4 conversion harness.
Schematic is here. NOTE: Test point notes are only needed if you do not have any headlights at all.
If you pull back on the hi/lo switch, to flash lights, and they work, it's the contacts. 1/2 hr to pull column and switchgear off and lightly sand contacts. If not, it's in the wires.
My front passenger wheel bearings exploded so I replaced them but I can't pull the driveshaft through enough so I can get the washers an snap ring to fit an I'm stumped
My front passenger wheel bearings exploded so I replaced them but I can't pull the driveshaft through enough so I can get the washers an snap ring to fit an I'm stumped
even though it's "your" thread, you might want to start a new one under a different title to get help re: wheel bearings.
coincidentally, i ran into the no high beams issue recently. i'd converted to the H4 harness about 1.5 years ago, and had no problems. however, about 2 months ago, i'd switch to hi and get no change. the lows would stay on, and the dash indicator would light up, but the lights themselves wouldn't go to hi. usually, if i flicked the switch back to lo and then to hi, the hi-beams would come on. the last week, however, they'd only work about 50% of the time. the low beams never went off, so no "in the dark driving", which i attribute to having already made the H4 conversion.
so, it was time to pull apart the column/wheel/switch. one screw to remove on the backside (low) of the horn pad. lift the pad carefully, and detach the horn connector and set the pad aside. use a 19mm to remove the steering wheel nut. i've previously had the wheel off to do the 22-shell casing mod for the horn contact, so the wheel came off with no fuss. set the wheel aside.
removed the four screws that hold the column covers together, and removed the two additional screws that attach the lower cover half to the column, and removed both cover halves. this exposes the switch stalks, switches, and wiring. (the wheel has to be removed to deal with cleaning the contacts, otherwise you'd need to be a contortionist with excellent close-vision). neither switch stalk has to be removed from the assembly; they can remain attached to it when it gets lifted from the column. there are four recessed screws on the front side of the switch assembly, and they need to be removed. the wiring loom needs to be "freed". the lower dashboard panel needs to be removed, and there are six screws to remove. once the dash panel is off, the wiring can be dealt with. this involves pulling down one of the loom keepers (it rotates down) and then gently bending the lower tab to sneak the wires out. there is also a plastic flat clip held with two tabs. a small flat-blade screwdriver can gently pry the tabs open, and the clip releases. there is also a sheetmetal "spring" retainer, partially covered with rubber, that has to be popped off. i used a pair of pliers to gently squeeze the tabe on the right side, and it drops down and can be slid off to the left. finally, the harness terminals/connectors are reached. two small screws hold the connector to the column. once they are removed, the harness can be disconnected, and the wiring fished off of the column, but still attached to the turn switch/head lamp switch assembly. now, the entire lamp/signal/wiper switch assembly can be lifted off of the column.
the signal lamp switch has to be removed. it is held by two screws. once removed, the switch can be gently lifted from the assembly, while working it down from it's connection with the hazard rocker switch. once the signal switch is free, let it hang down in a manner that the wires going to it are "in the clear" from the headlamp contact cover, which is clear plastic. the cover is brittle (old), and is held by 4 tabs (two on the left are hard to see, and two on the right are in plain view). i used a small flat-blade to gently disengage the left side tabs, and my fingers to disengage the right side tabs.
the cover should now lift off cleanly, exposing all of the copper springs (flat) and contacts. cycle the head lamp stalk to see which contacts are associated with each function - low, hi, flash. the hi contacts need to be gently cleaned. i used fine emery paper, folded over so both contacts would be cleaned. i cycled the stalk to "grip" the paper with the contacts, and gently moved the emery paper in a circular and side-to-side motion. don't overdo it. i also cleaned the low beam contacts, but i didn't bother with the flash contacts.
reassembled the thing, and tested. hi beams have so far operated correctly every time. i guess i'll find out for how long, but because i have the H4 conversion, the contacts should work for quite a long time before burning again.
Great write up Wally^^^ I was able to follow along with what you were saying with the link I have in the 2nd post of this thread. Your write up with the pictures I have in the above link I think would make it a lot easier. You do have to pull the steering wheel.
As far as the No Headlight Issue coming back, I have a truck that has been about 5 or 6 years with no issues after cleaning the contacts. I would guess that the conversion you did would help take some of the strain off of the contacts. In my opinion, I think these trucks came with the standard head lamp and most upgraded to the Halogen bulbs and I feel it draws more current causing some of the issue.
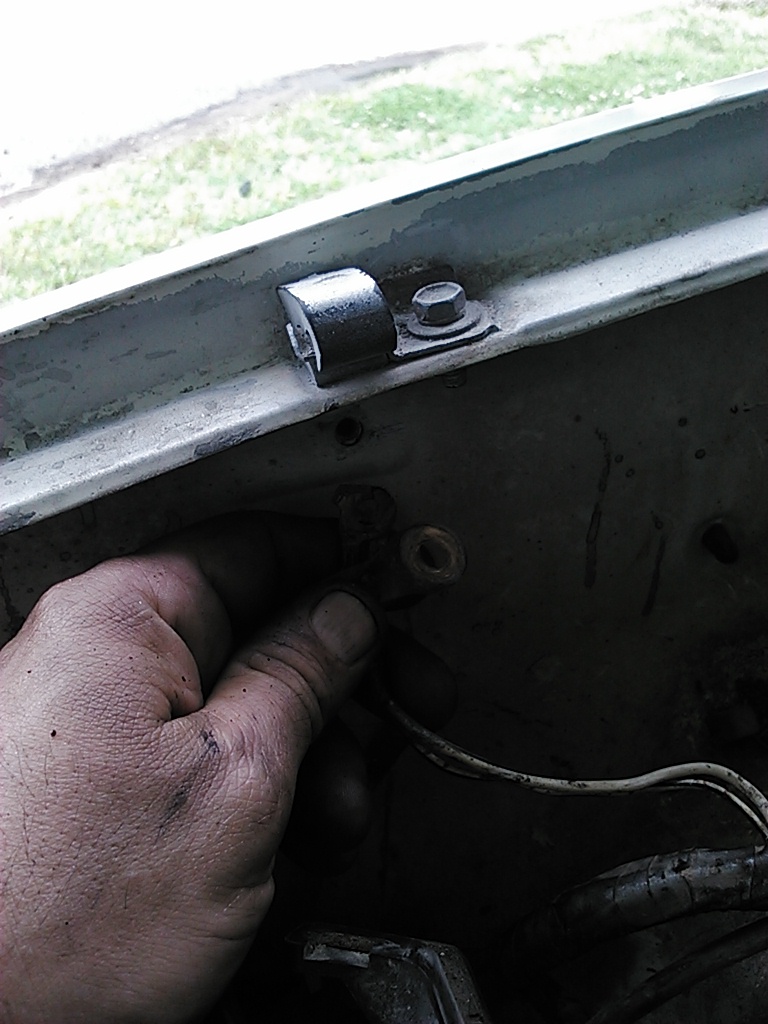
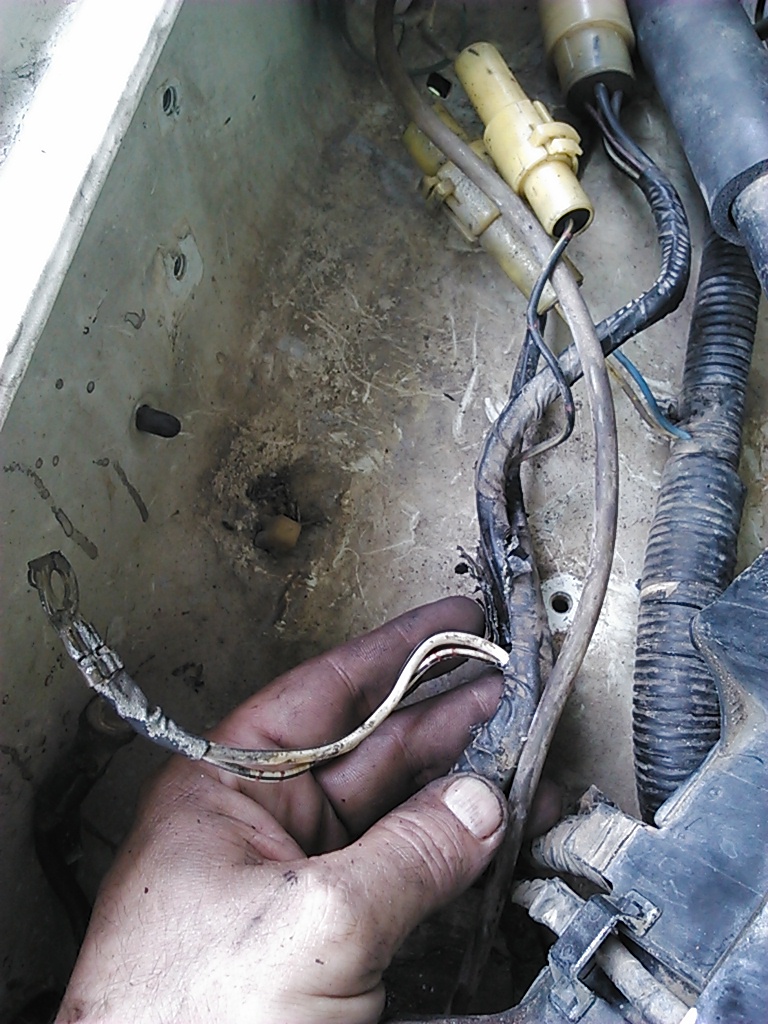
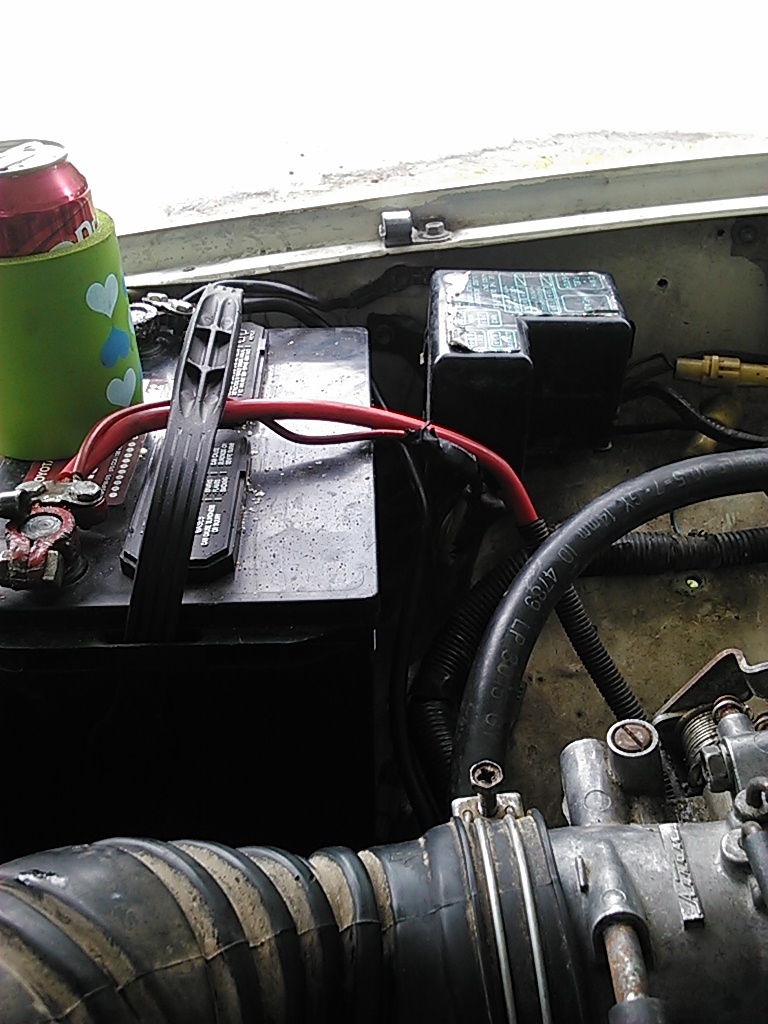
Another little upgrade that I think could help is to move the head light harness ground in direct contact with the battery ground.
Upgrade I got off of RAD.
I moved the headlight ground wire to the same point that the negative battery wire attaches to the body.
The bolt hole above I cleaned down to metal with a wire brush and cleaned the contacts. I did that in the past but just for reference for others. When I find the problem to this I will add it to my 88 Runners first page for trouble shooting and fix list.
You need to open the harness an inch or so to make them connect.
can see it just in the corner of the fuse box. I drink the hard stuff and that is Mistys cooler, cant find mine.
My front passenger wheel bearings exploded so I replaced them but I can't pull the driveshaft through enough so I can get the washers an snap ring to fit an I'm stumped
Can you post some pictures? I am not following your question real well. The drive shaft should collapse and allow you to remove it. It could be stubborn but should still collapse.
You should be able to work on the wheel bearings and drive shaft seperately without effecting each other. Are you meaning the CV shaft?
here's my H4 upgrade. although not attached directly to the battery body ground, it is located within 1 inch of that, using one of the fuse box fasteners.
 12-09-2015, 03:42 PM