
Luck with power steering gearbox rebuild
 02-21-2010, 07:00 PM
#1
Registered User
Thread Starter

Join Date: Jul 2008
Location: Phoenix, AZ
Posts: 156
Likes: 0
Received 0 Likes
on
0 Posts
Luck with power steering gearbox rebuild
I've seen plenty of threads about the pump rebuild and advice on the pittman arm, but has anyone had luck doing a seal rebuild on the gear box itself? 50 bucks is a whole lot more desirable than $250-300.
 02-21-2010, 07:09 PM
#2
Contributing Member
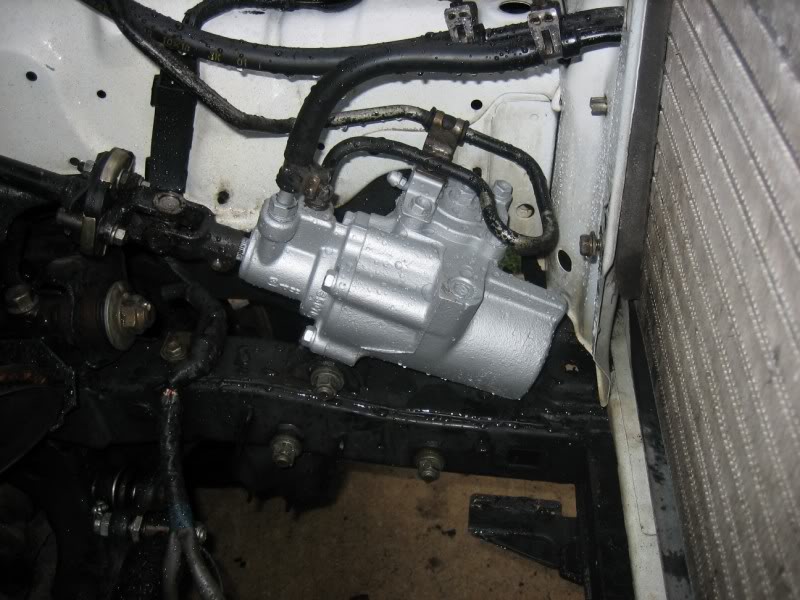
mine was leaking profusely from the input seal, AND the output seal, and instead of even attempting to rebuild it, I just pulled one off a junkyard 4Runner with only about 120k on it, cleaned it, painted it, and bolted it in, for about $40 
I still have my old leaky one... maybe one day I'll get a seal kit for it and venture into refurbishing it... maybe...
Old one:
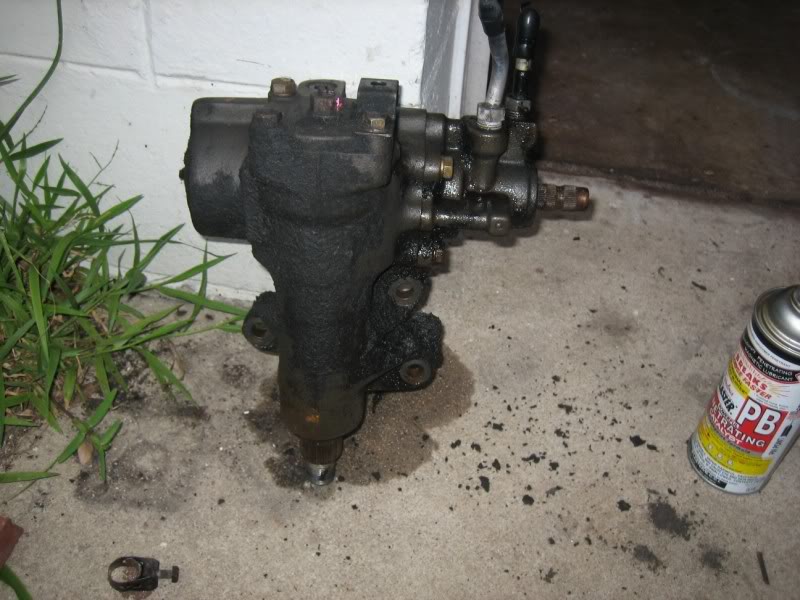
New(er) one:

I still have my old leaky one... maybe one day I'll get a seal kit for it and venture into refurbishing it... maybe...
Old one:
New(er) one:
Last edited by iamsuperbleeder; 02-21-2010 at 07:12 PM.
02-22-2010, 06:21 AM
#4
Registered User
Join Date: Jun 2009
Location: Pineland S.C./ Scott Depot W.V.
Posts: 182
Likes: 0
Received 0 Likes
on
0 Posts
I did mine a few months ago, if I would have had a helper to take pics for me as I rebuilt it I would have done a rebuild thread. It was actually easy, I was first intimidated, but said to myself just tear it down. Very easy to do, and to even install the balls into the worm gear.
02-22-2010, 06:33 PM
#5
Registered User
Thread Starter
Join Date: Jul 2008
Location: Phoenix, AZ
Posts: 156
Likes: 0
Received 0 Likes
on
0 Posts
wow... that looks brand new. I'm only asking because of the pressures, I know it has to come out perfect. I went through 2 rack and pinion rebuilds until I was told unless it's a machined perfect fit it will always leak. I think you got lucky with your junkyard snag dude, maybe I'll hit the pick n pull this week since I've got a pretty hefty list.
02-22-2010, 06:52 PM
#6
ya i had luck with mine....i got my seal rebuild kit at the dealership, it wasent that much...one thing i would look out for are the tiny ball barings in the gear box they like to go every where...other then that it sould only take less then a day. good luck!!ps if you dont already have a pitarm puller stay away from the ones at autozone , i broke two from ther...save your self the trip and get one from napa its made of a stronger metal one again good luck!
07-29-2010, 02:20 PM
#7
Registered User
Thread Starter
Join Date: Jul 2008
Location: Phoenix, AZ
Posts: 156
Likes: 0
Received 0 Likes
on
0 Posts
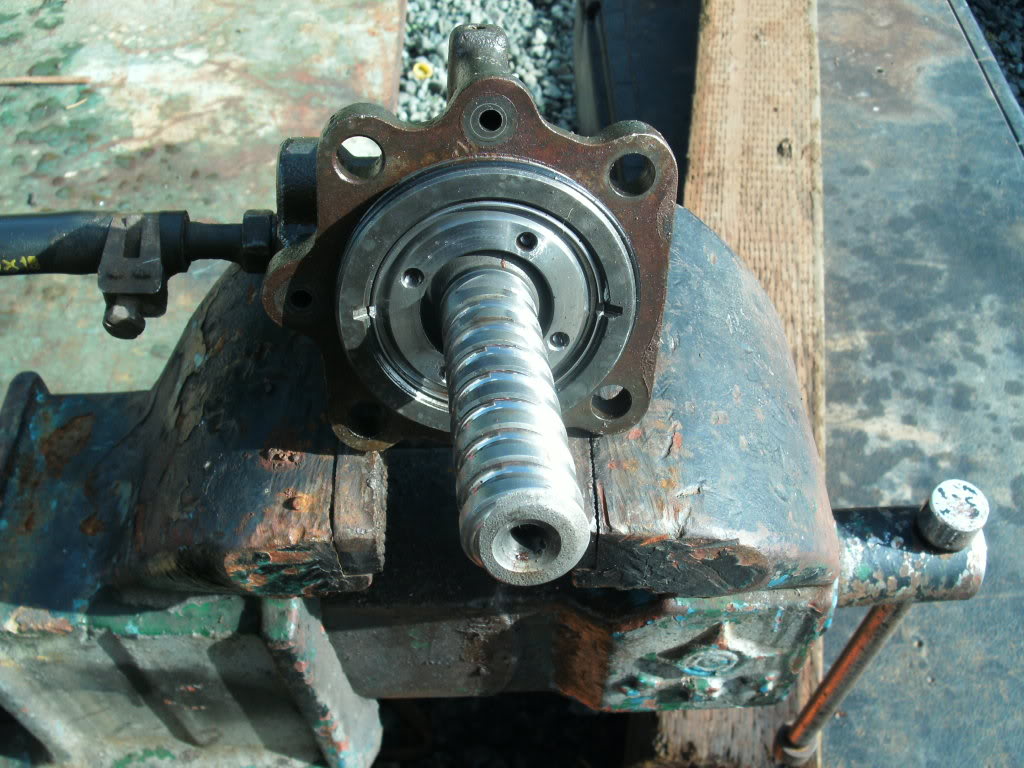
Smithy and crafthorse, I'm right in the middle of this and cannot get the adjustment plate to come off from the input housing. That aluminum one with the 4 holes. How did you guys unstake that?
Trending Topics
07-29-2010, 02:45 PM
#8
Registered User
Join Date: Jun 2009
Location: Pineland S.C./ Scott Depot W.V.
Posts: 182
Likes: 0
Received 0 Likes
on
0 Posts
You have to take and put it in a vice, and take a puch to knock it loose if you dont have a spanner wrench. I have a complete set of spanner wrenches (or gland nut wrenches for hydraulic cylinders) so I had no problem taking it loose. A punch should do the trick for you though. I believe from when I did mine, it was tight threads all the way loose, and putting it back together. any more help and let me know, and I will answer as soon as I can.
07-29-2010, 04:07 PM
#9
Registered User
07-29-2010, 08:09 PM
#10
Registered User
Thread Starter
Join Date: Jul 2008
Location: Phoenix, AZ
Posts: 156
Likes: 0
Received 0 Likes
on
0 Posts
Thanks craft... I finally got it moving with a little bit of work from a punch. I used a wire spanner I have to get it moving but it got harder and harder as it started to unthread.
Is this the wrench you used > http://www.summitracing.com/parts/OTC-6613/
Is this the wrench you used > http://www.summitracing.com/parts/OTC-6613/
07-30-2010, 06:59 PM
#12
Registered User
Thread Starter
Join Date: Jul 2008
Location: Phoenix, AZ
Posts: 156
Likes: 0
Received 0 Likes
on
0 Posts
Yep, got it moving with a park sp-1 pin spanner (steel rod not a heavy duty spanner wrench) and it just got tighter and tighter until it wouldn't budge, I thought maybe i was scaring the threads after using the punch but I can see at least 3 rows of threads and they are coming out clean. Looks like I just need the real deal pin spanner and a lil more hammer action 
07-30-2010, 07:46 PM
#13
Registered User
this might help https://www.yotatech.com/forums/f116...cement-194025/
07-30-2010, 08:28 PM
#15
Registered User
i would have killed for a good spanner wrench lol..
i got it done though, and it still works like a champ.
that flange just sets the preload on the worm gear bearings.
i got it done though, and it still works like a champ.
that flange just sets the preload on the worm gear bearings.
08-01-2010, 02:46 PM
#16
Registered User

Join Date: Jul 2010
Location: Costa Mesa CA
Posts: 52
Likes: 0
Received 0 Likes
on
0 Posts
I'm putting the worm gear back together and can't remember if I was able to turn the worm gear by hand before I took it apart. I put a scratch mark on the housing and the nut before apart. Putting it back together it pretty much stops an 1/8 turn short from line up and its pretty dam tight. Definitely can't be turned by hand. I backed it off so it is very snug but still able to turn by hand. Anyone remember how much preload or how tight the worm gear is supposed to be when assembled?
08-02-2010, 09:44 AM
#17
Registered User
Join Date: Jun 2009
Location: Pineland S.C./ Scott Depot W.V.
Posts: 182
Likes: 0
Received 0 Likes
on
0 Posts
The spanners I have are much more heavy duty, but its the same principle. I dont remember how much pre load I had, I think I had it just snug that it took a little effort to turn it by hand. I dont exactlt remember though. Good Job so far and keep at it!
08-02-2010, 01:21 PM
#18
Registered User
Join Date: Jul 2010
Location: Costa Mesa CA
Posts: 52
Likes: 0
Received 0 Likes
on
0 Posts
I got mine all back together. Any tighter on that worm gear didn't feel right. The housing with the spanner nut is cake compared to the recessed octogon nut mine has.
like this
http://www.pirate4x4.com/forum/showthread.php?t=488988
I'm a machinist so making tooling isn't a problem though. Its a bummer Toyota decided to make the worm gear nonserviceable, pretty easy to take apart/put back together.
like this
http://www.pirate4x4.com/forum/showthread.php?t=488988
I'm a machinist so making tooling isn't a problem though. Its a bummer Toyota decided to make the worm gear nonserviceable, pretty easy to take apart/put back together.


