
Lockright locker install into V6 rear-write-up with pics
 04-09-2009, 07:12 PM
#1
Registered User
Thread Starter

Join Date: Feb 2009
Posts: 590
Likes: 0
Received 0 Likes
on
0 Posts
Lockright locker install into V6 rear-write-up with pics
I just wanted to show everybody how easy this actually is on a V6 3rd. I was a bit nervous to do this, but after reading other installs on the 4cylinder 3rd's and hearing people say the V6 3rd is easier, I decided to just go for it. I am by no means a professional. I did this in my garage with simple hand tools. I am not saying my directions are perfect or they are to be followed by others. The directions supplied in the kit should fill in anything I have left out so you can make your own observations and install your locker the way you want to. I'm just giving a general idea of what has to be done to install this locker into a V6 rear. With that being said....onto the pics and stuff.
Lockright 1620-LR installation into Toyota V6 rear
First step is to block the front tires, front and back. Since the rear tires will be in the air and you don't want it rolling.
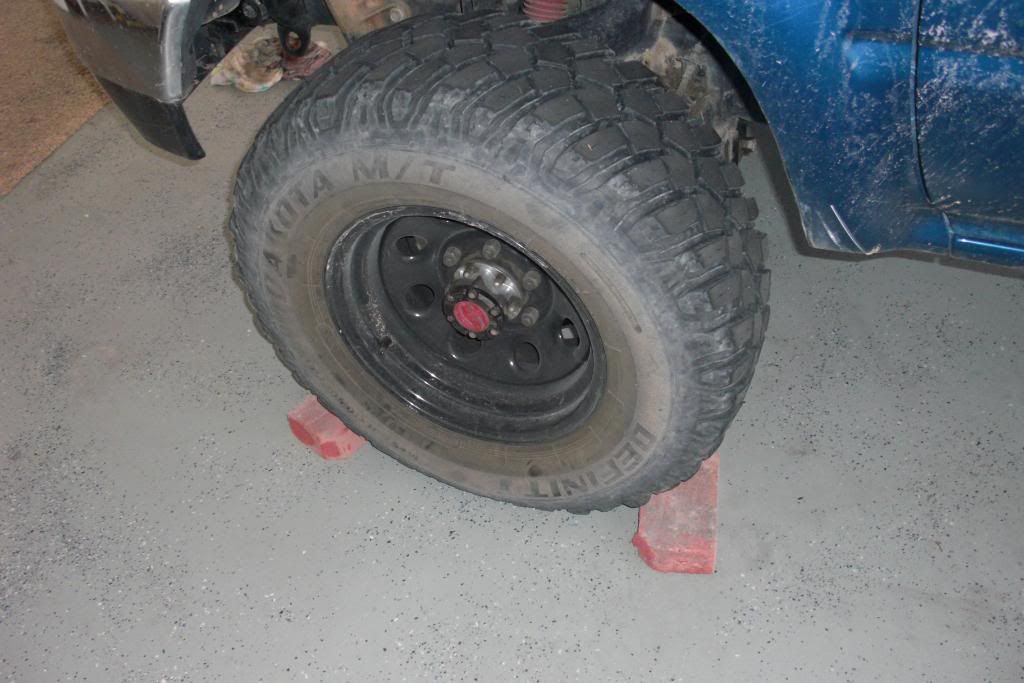
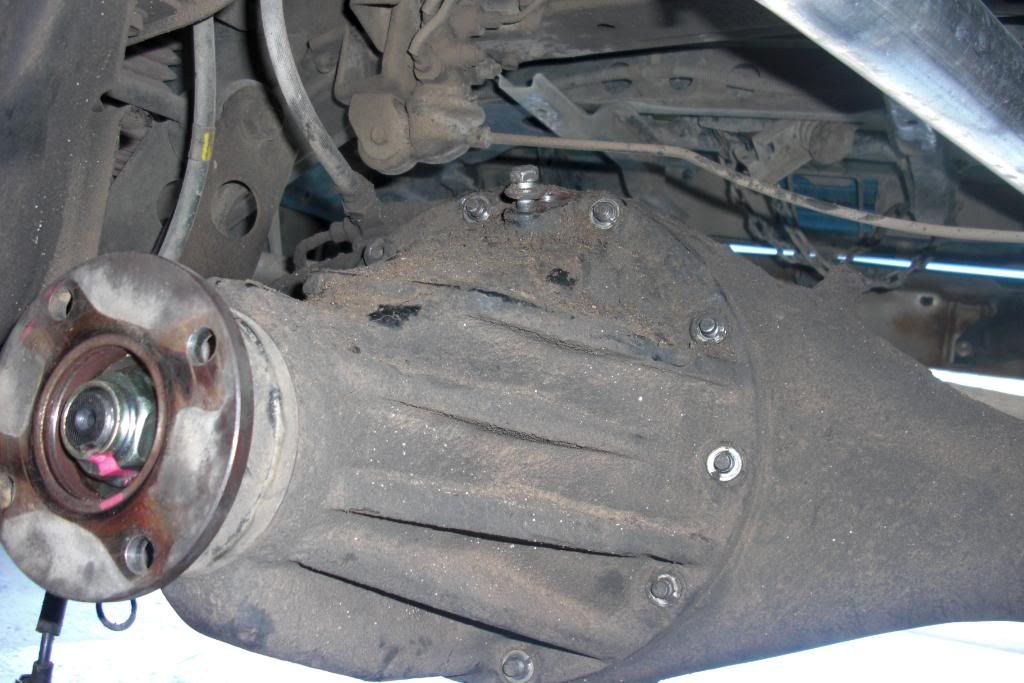
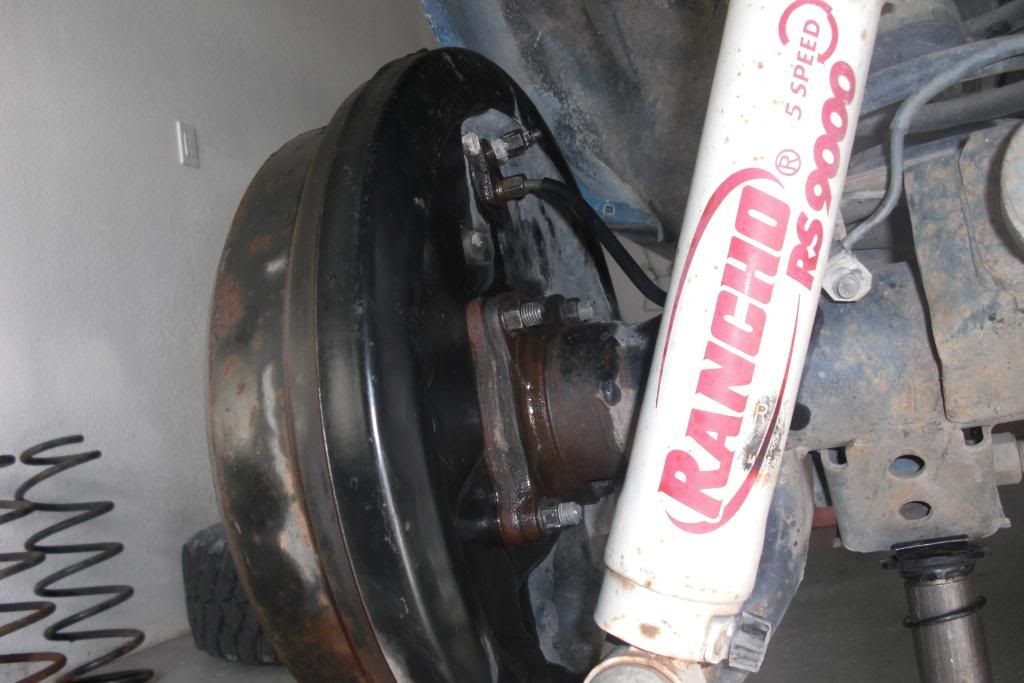
Jack up the rear and remove the rear tires(you actually don't have to remove the tires, but I wanted the extra room).

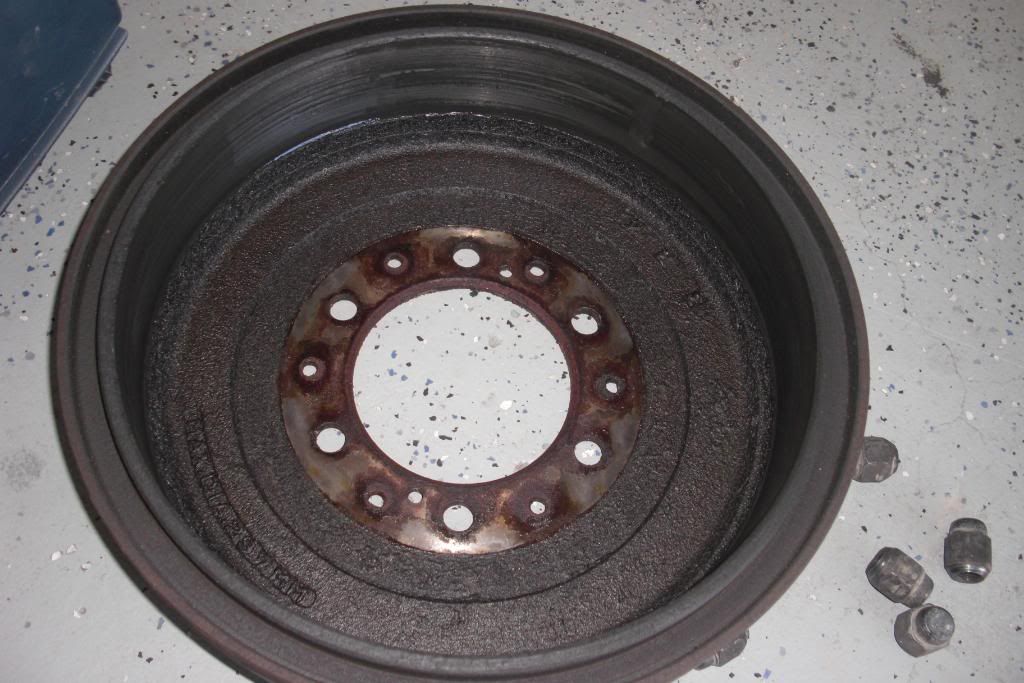
You don't have to remove the drum, but I wanted to see how my brakes were looking. About time for new pads....
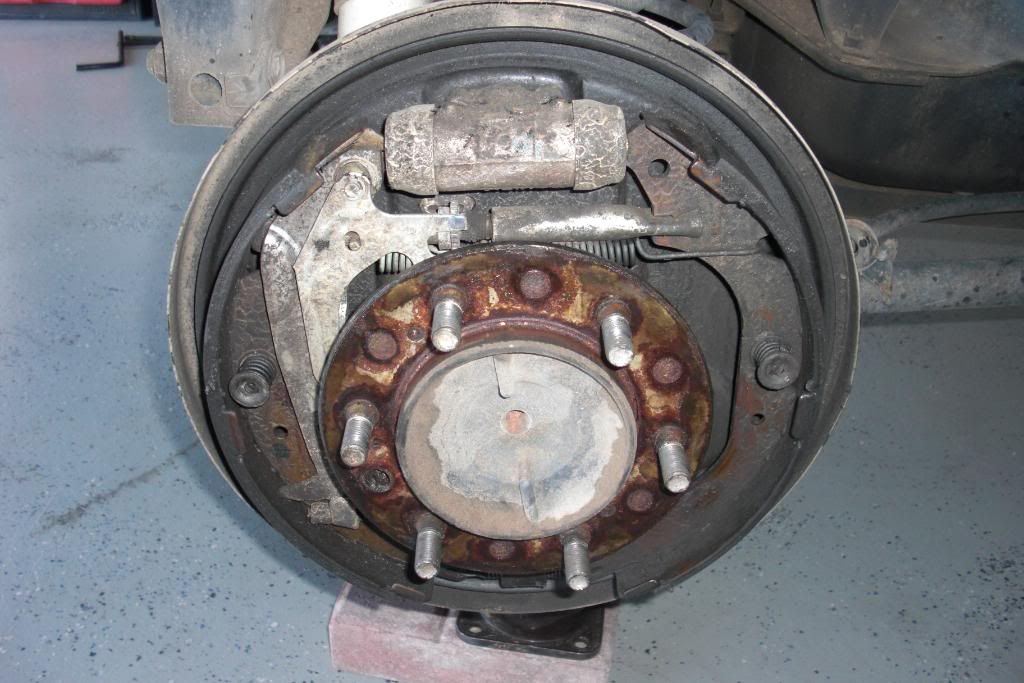
The drum isn't looking too hot either.
Drain the differential fluid and enjoy that smell because you're going to be swimming in that crap for the rest of the day.
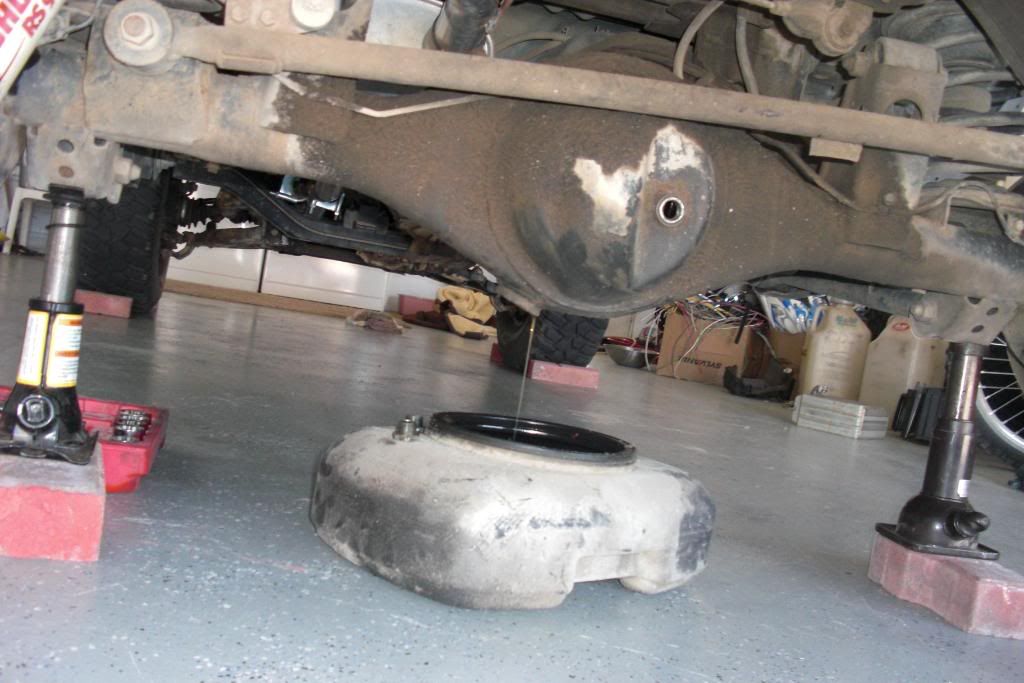
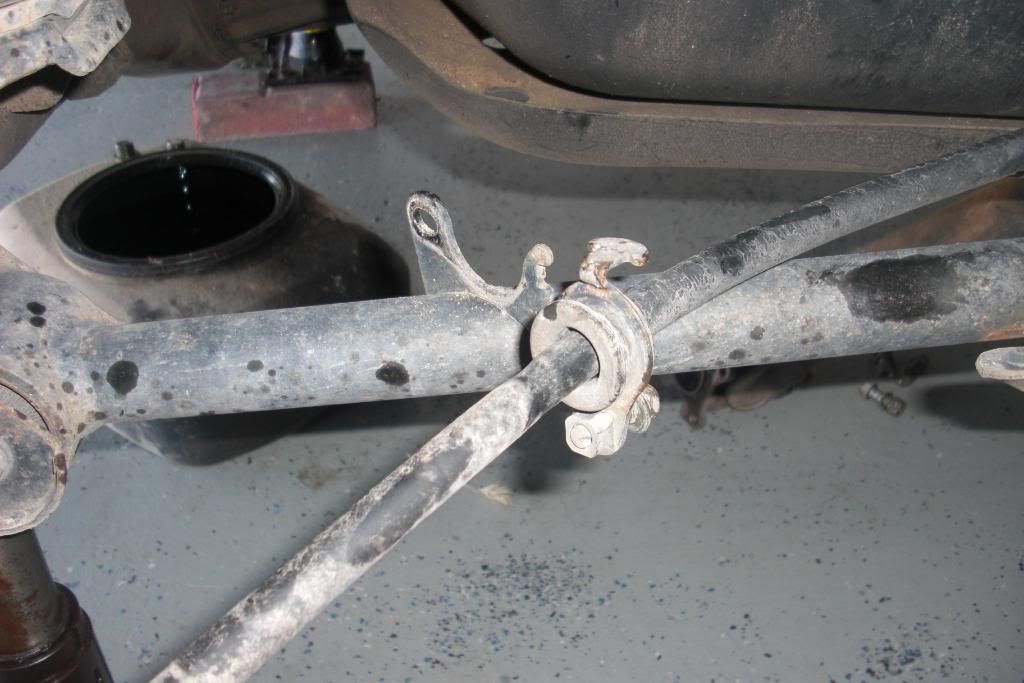
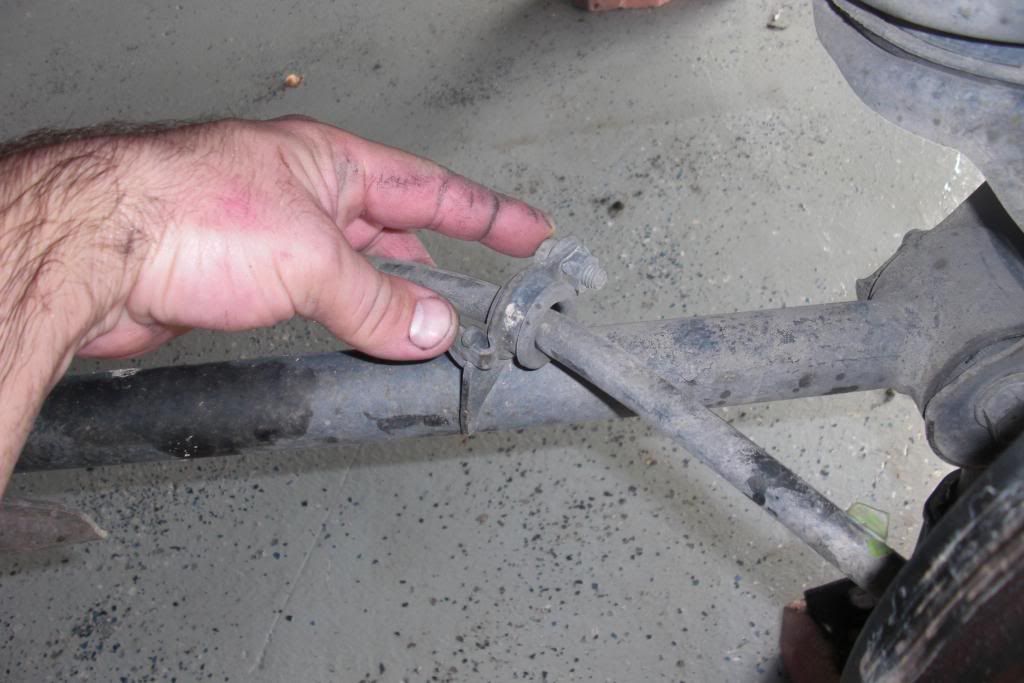
While the fluid is draining, disconnect the rear driveshaft(4 bolts with nuts)and move it out of the way.

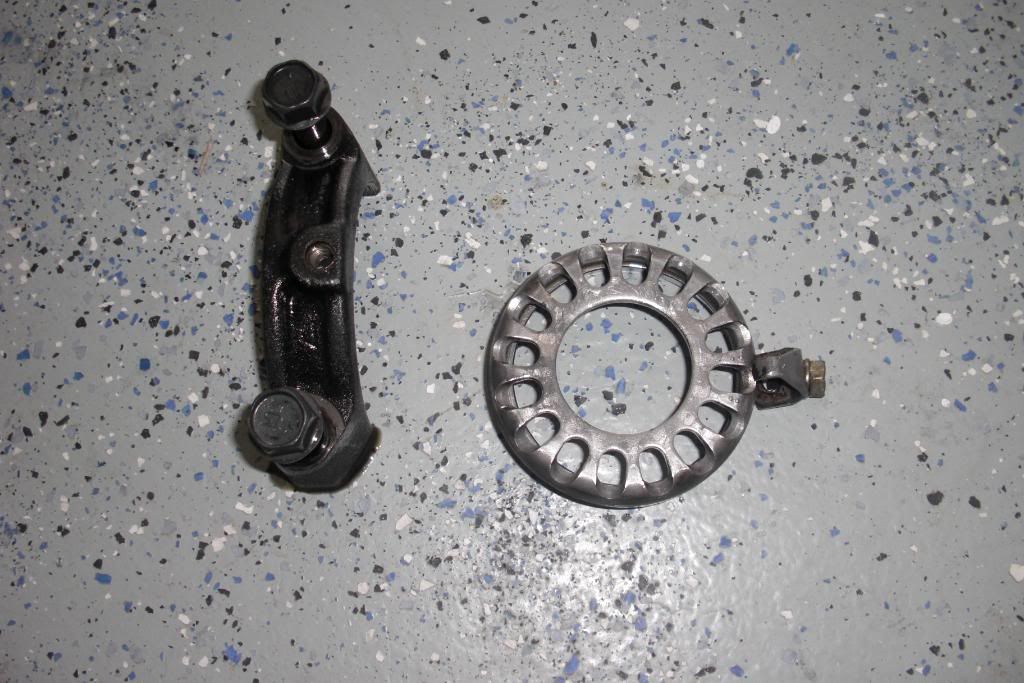
Remove the 4 nuts holding the axle housing to the drum assembly and disconnect the brake line. You will have to bleed the brakes when it's all back together.

Unbolt the e-brake cable holder so you have enough slack to pull the axle out.
You should be able to give the drum a yank and pull it right out. You don't need to pull it all the way out, just far enough so the carrier can be removed.
This has to be done on both sides.
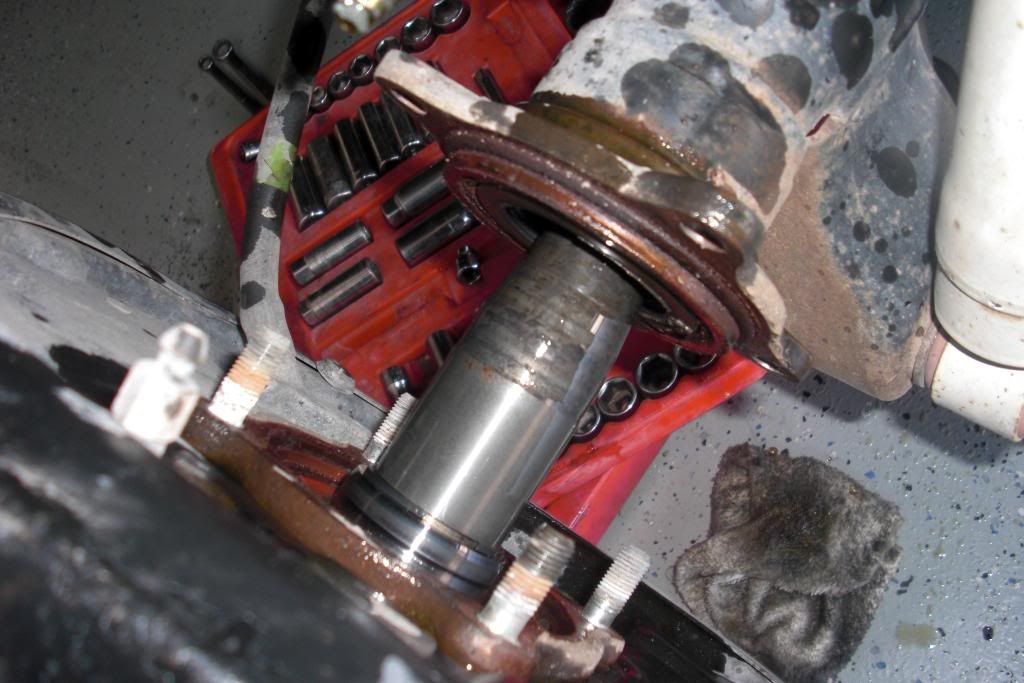
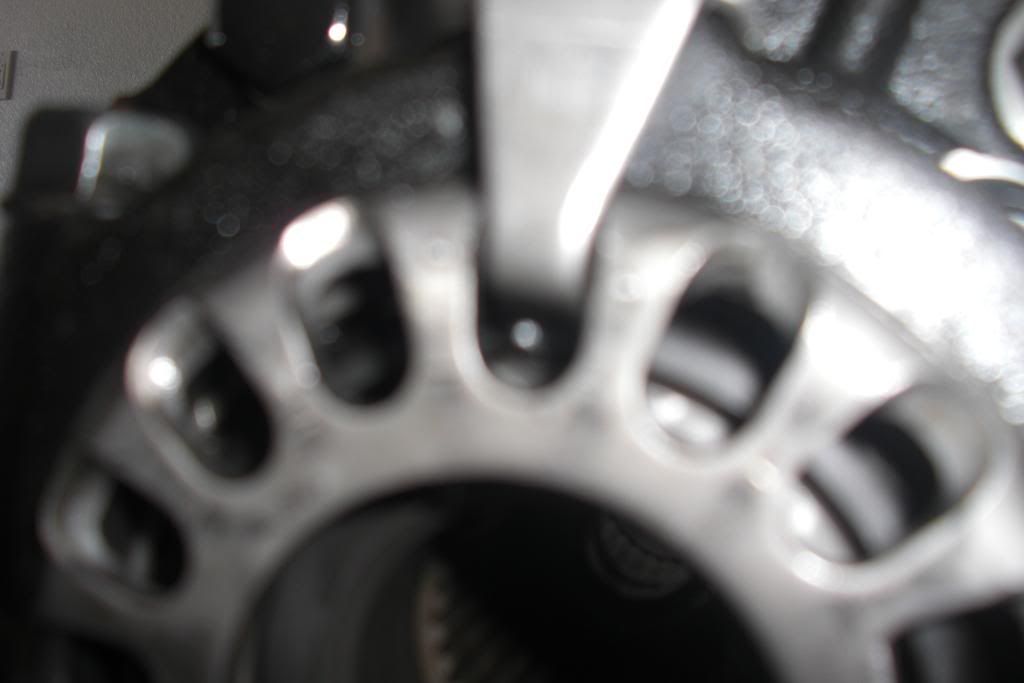
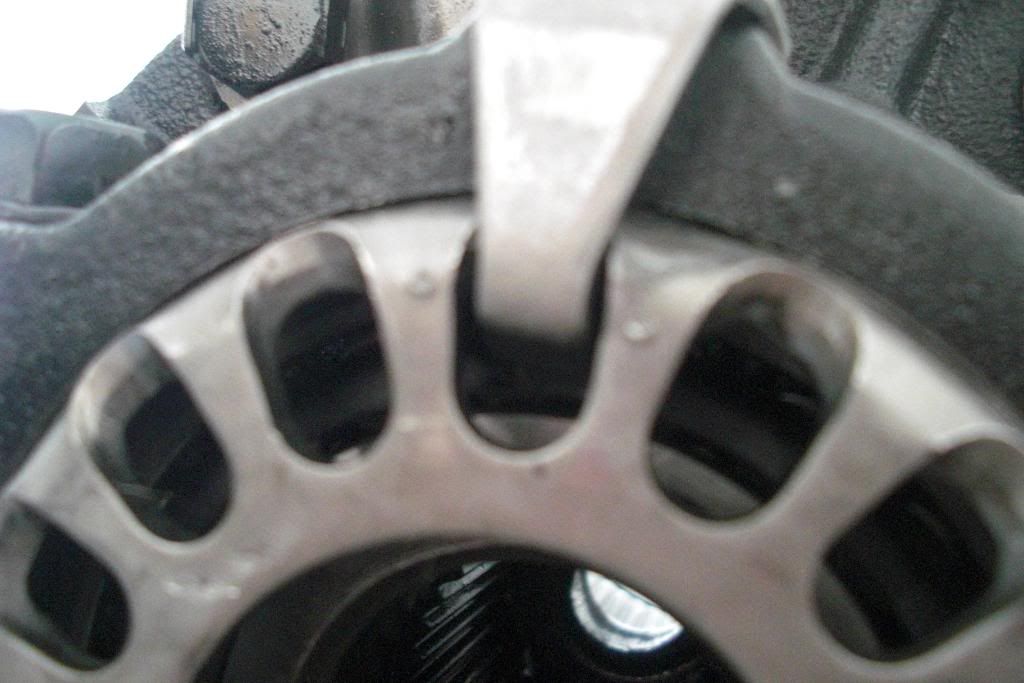
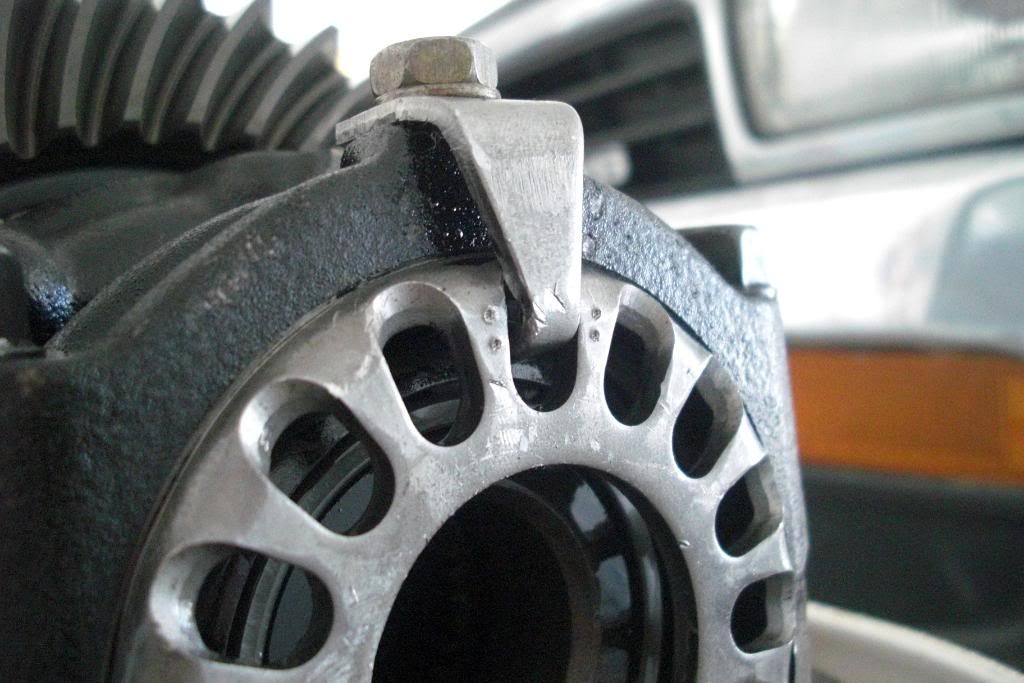
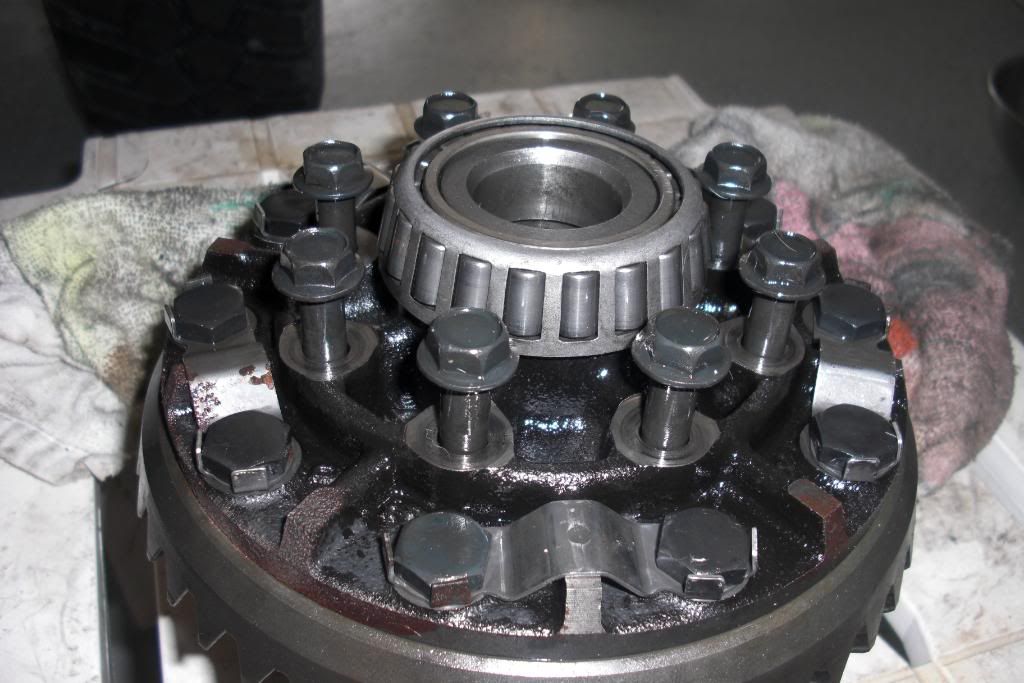
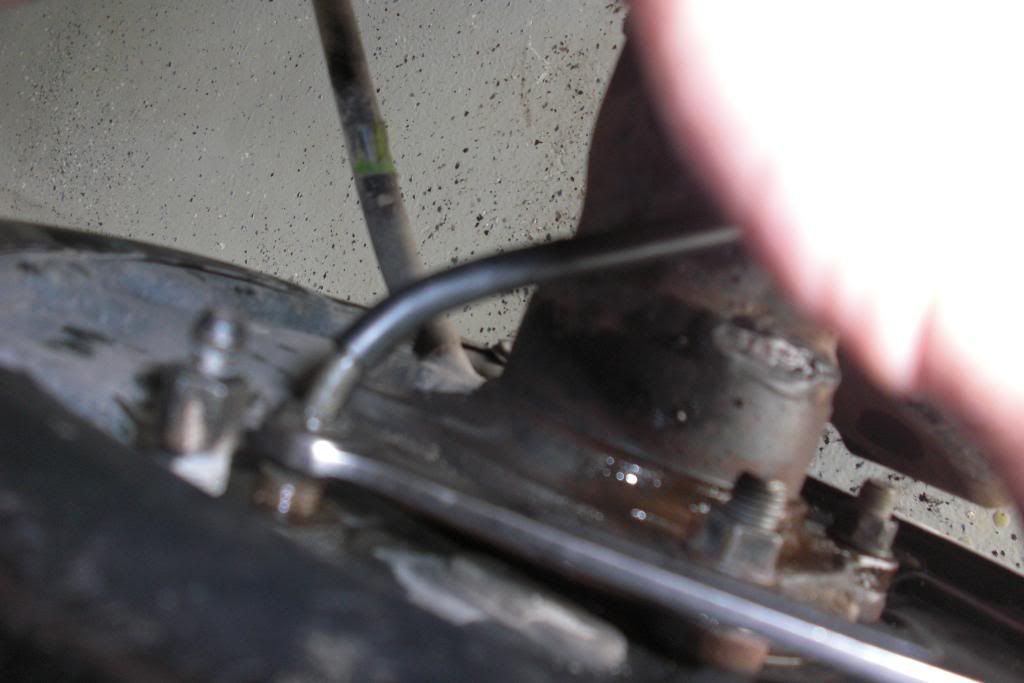
Now you can unbolt the carrier and get to the fun stuff. 10 bolts with lock washers. Unbolt the ABS sensor and pull it out. Be careful, that's a heavy sumbitch so be ready to grab it or have something ready to catch it so it doesn't slam onto the ground.
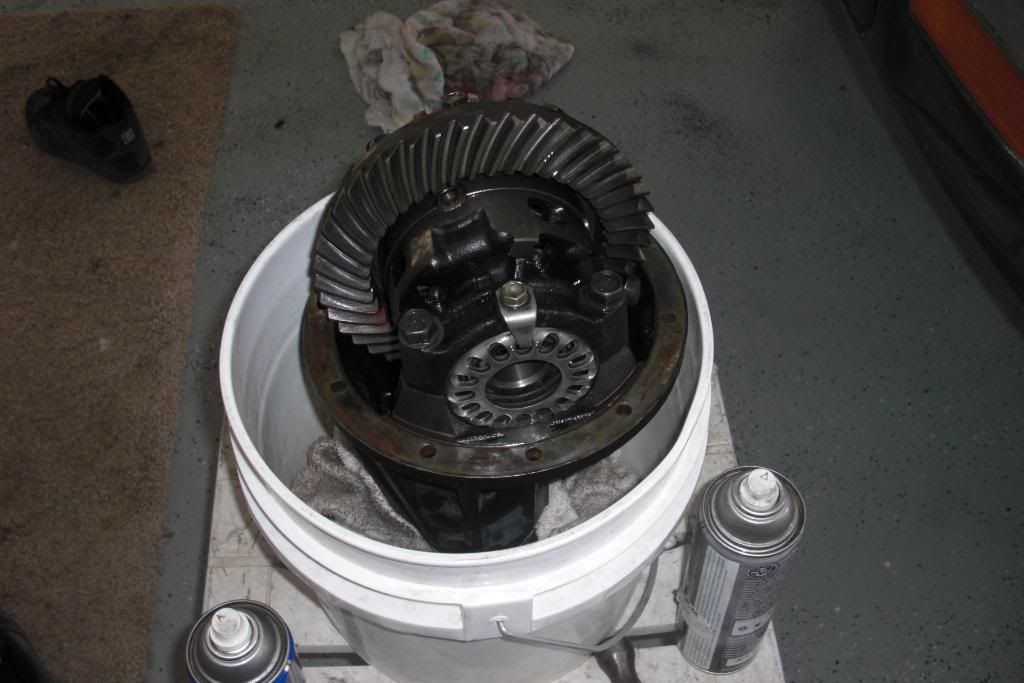
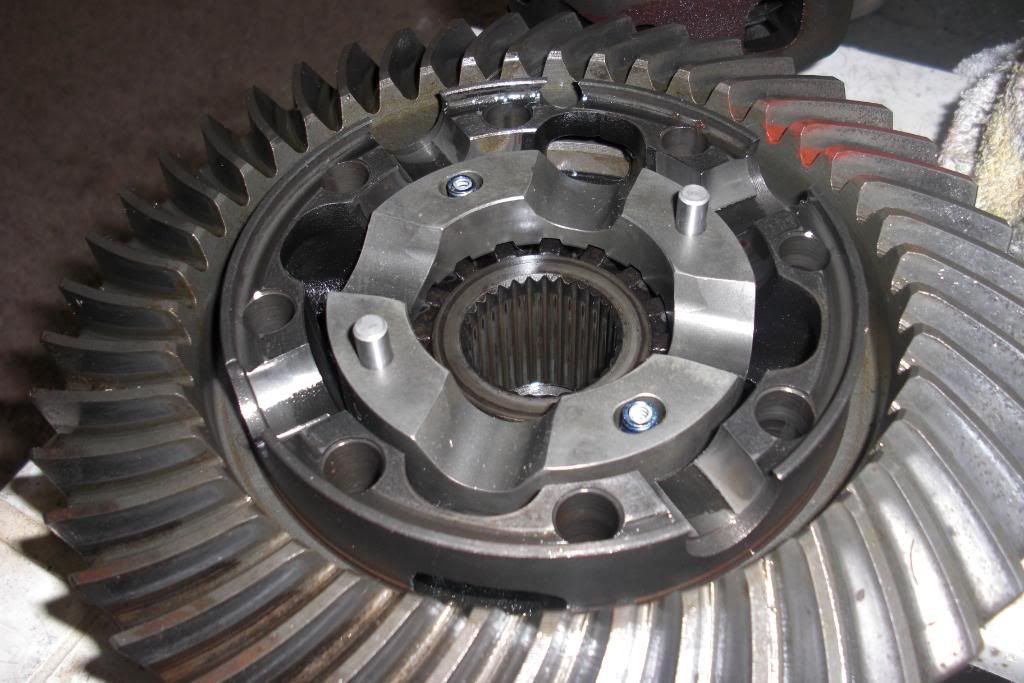
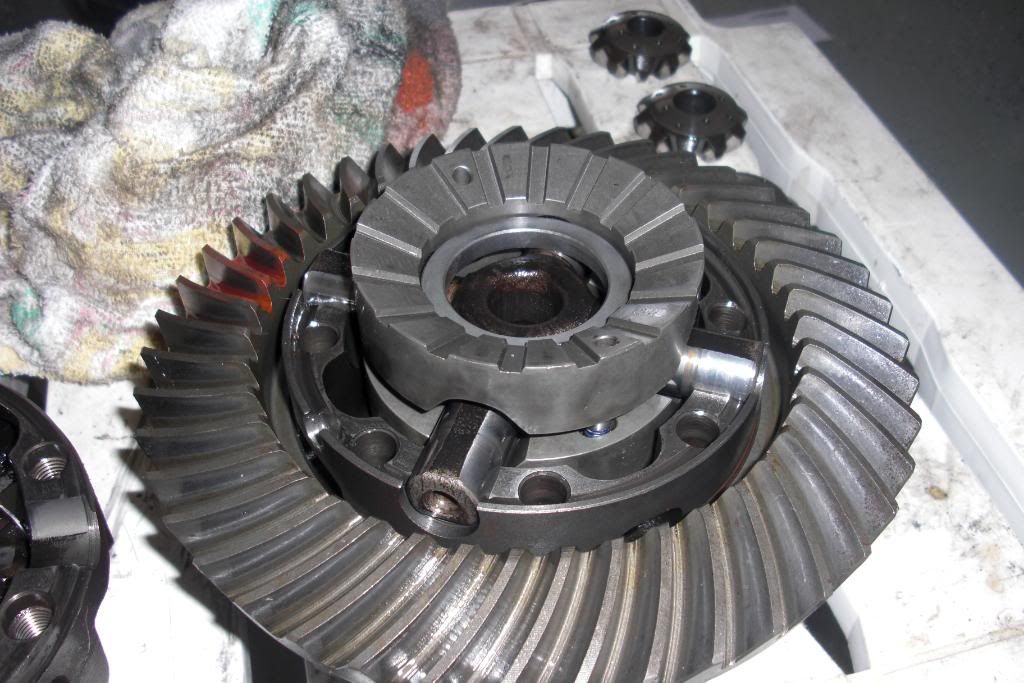
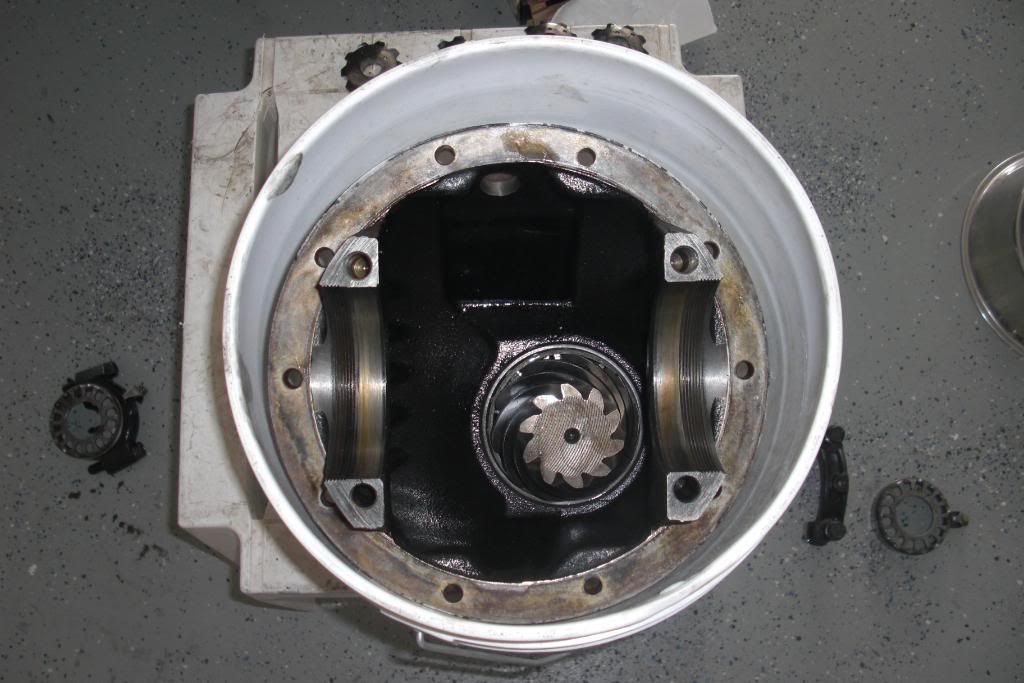
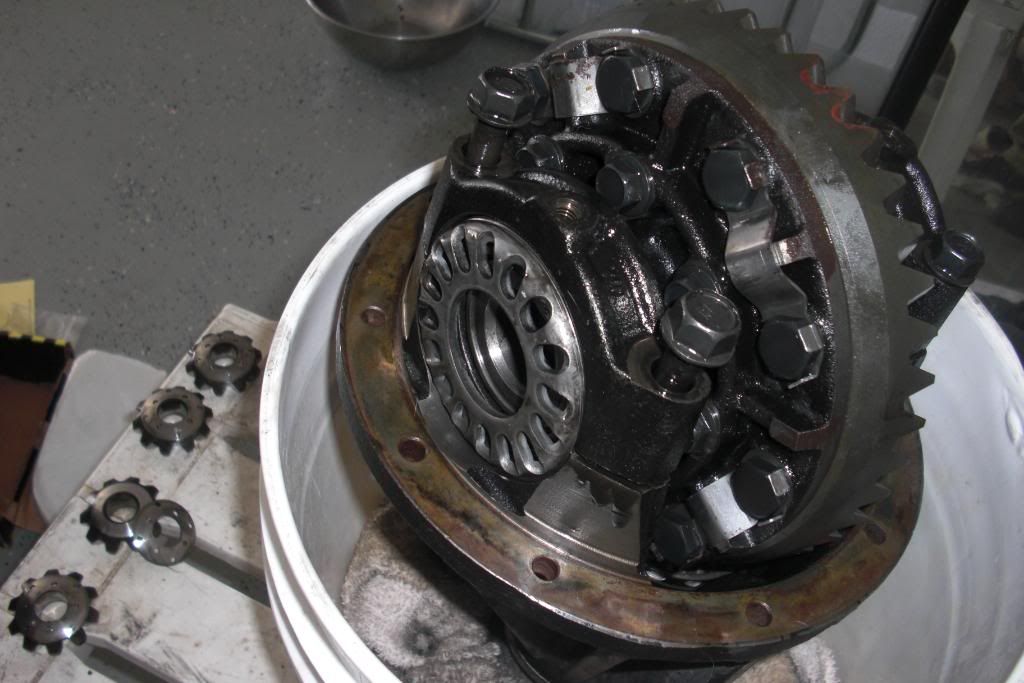
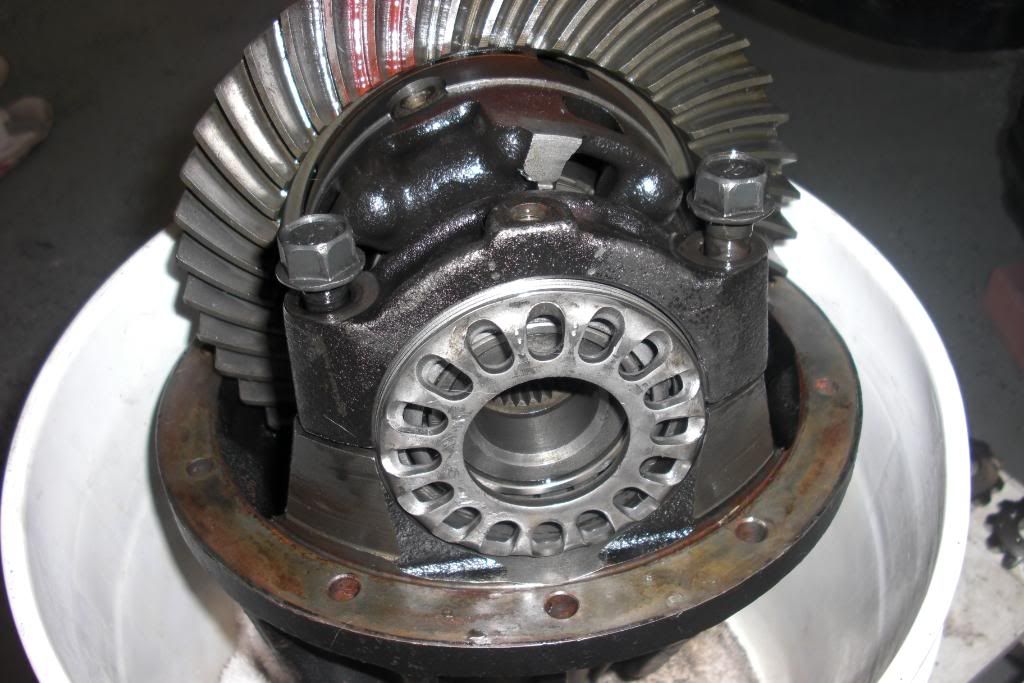
Here she is out of her home, dirty as hell.
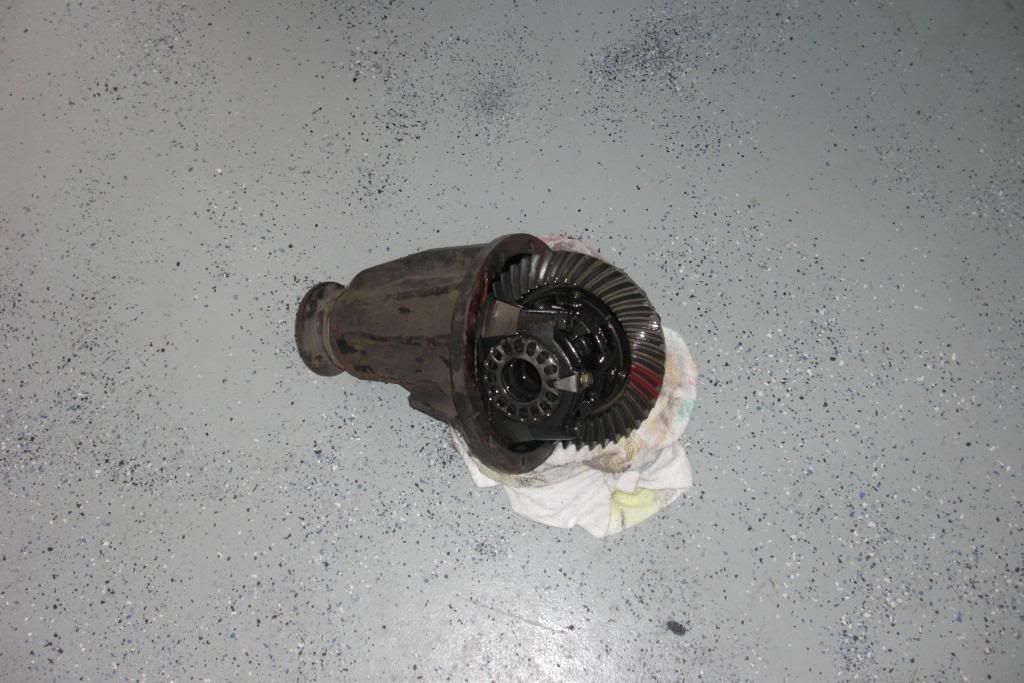
Looks like someone took the time to set this one up properly
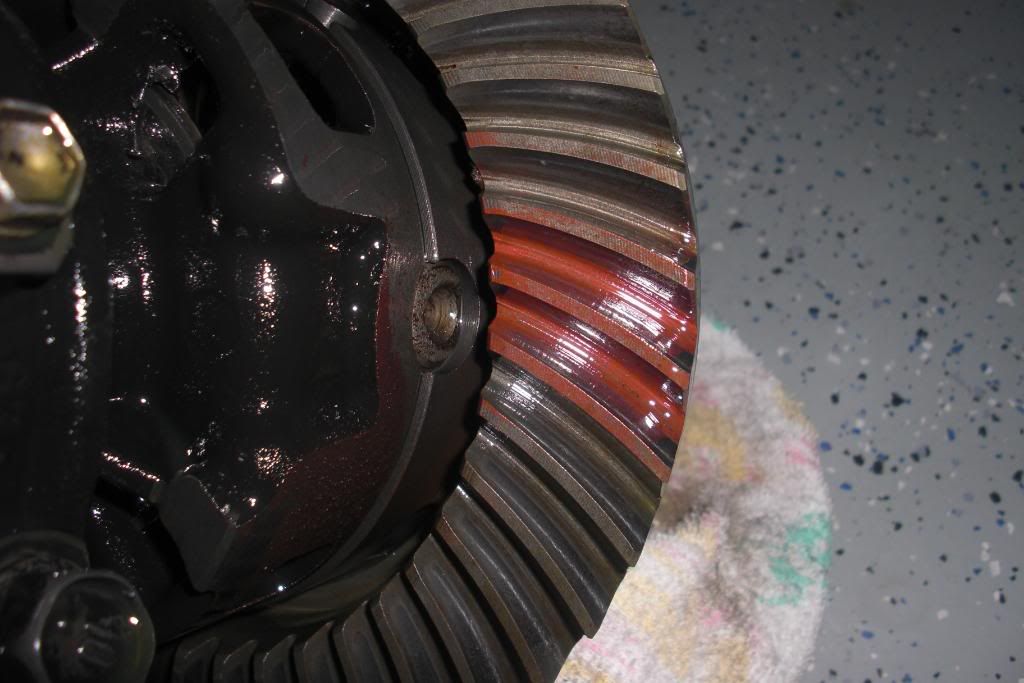
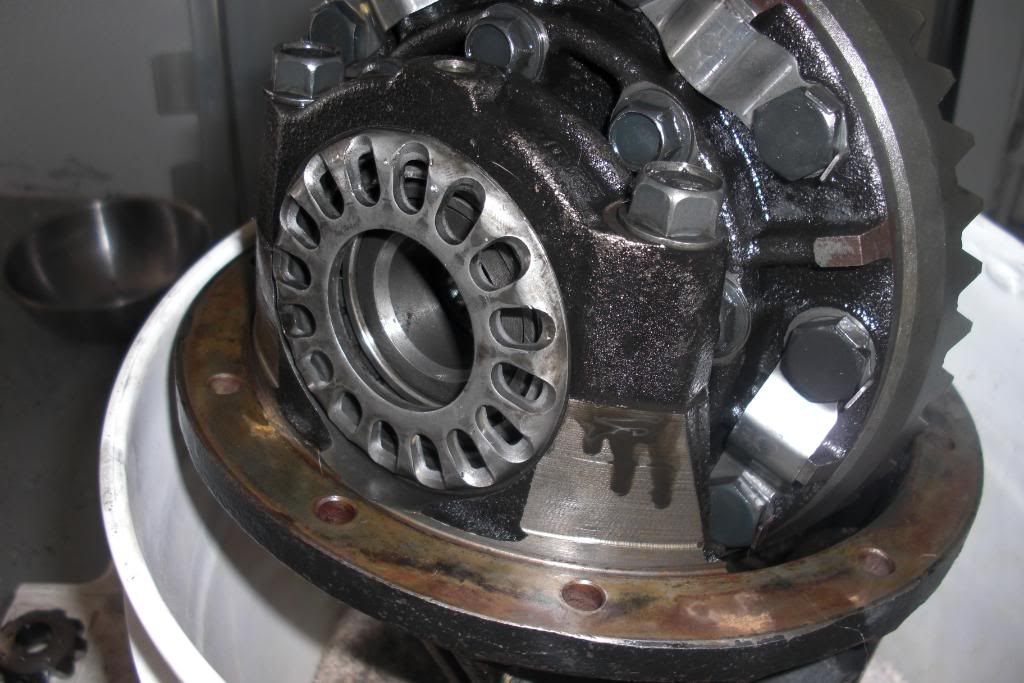
Here she is all cleaned up and ready to be torn apart.
I used a punch and marked each adjuster nut so I know where it was and which side it was on.
One punch for the left side
Two punches for the right side.
Remove the tabs that hold the aduster nuts and remove the 4 large bolts on the bearing caps that have been staring you down. They're kinda tight so give them hell. Make sure you set everything aside so you know EXACTLY where it came from.
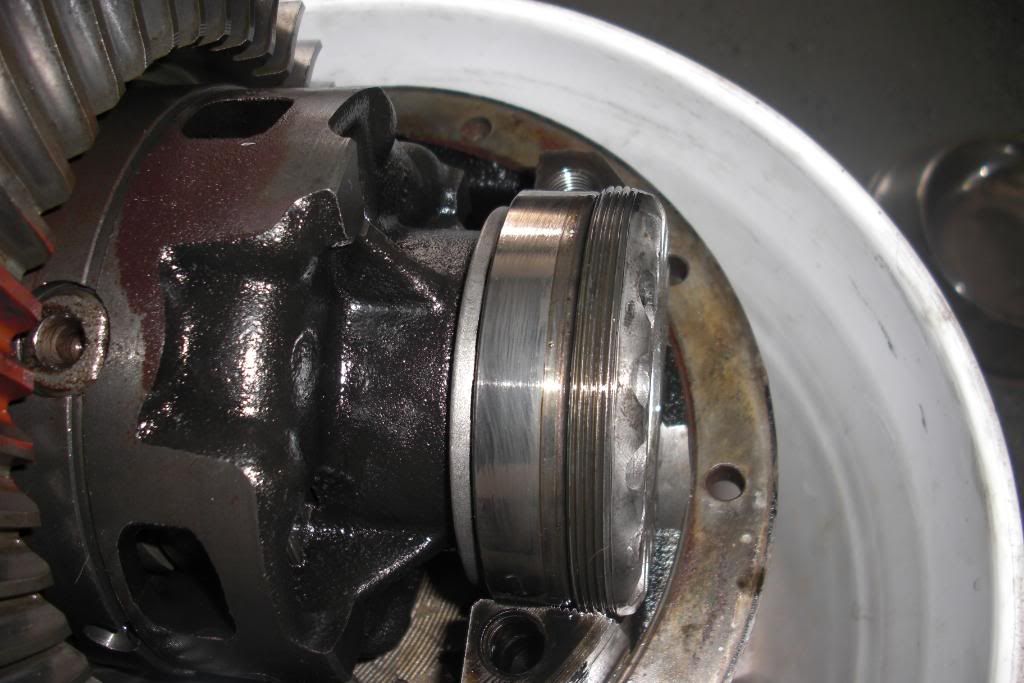
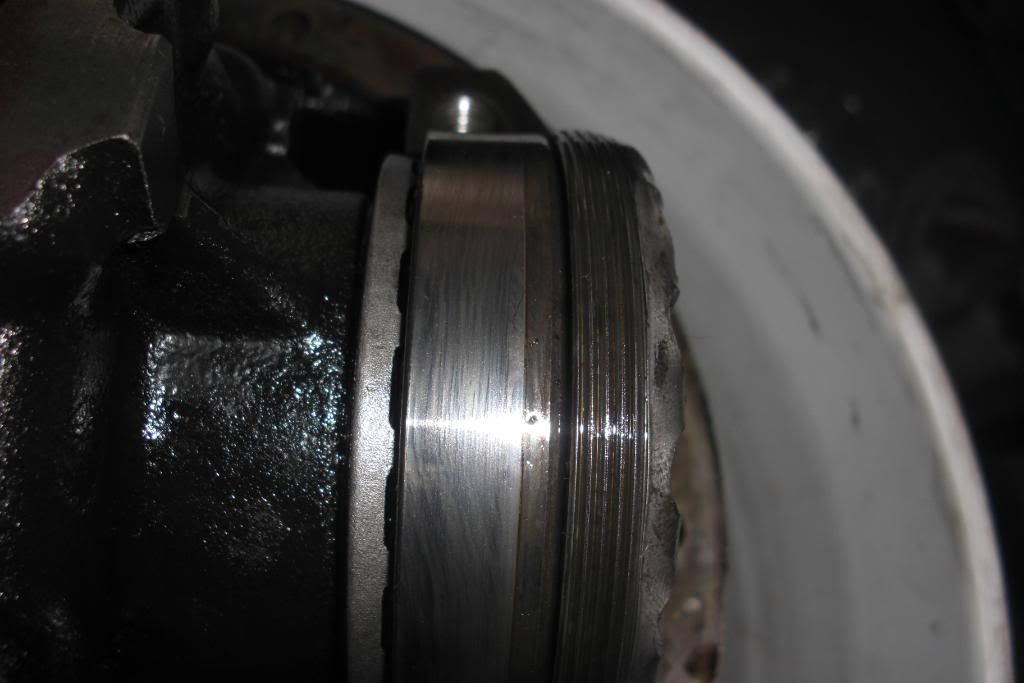
Right side bearing cap and adjuster nut with keeper.
Left side bearing cap and adjuster nut with keeper.

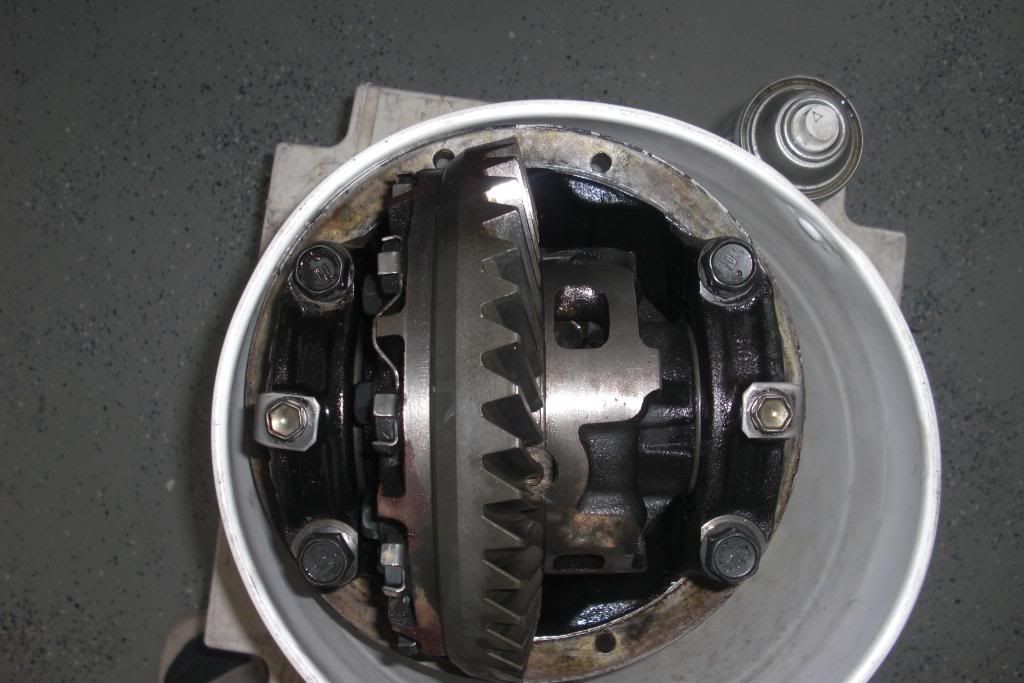
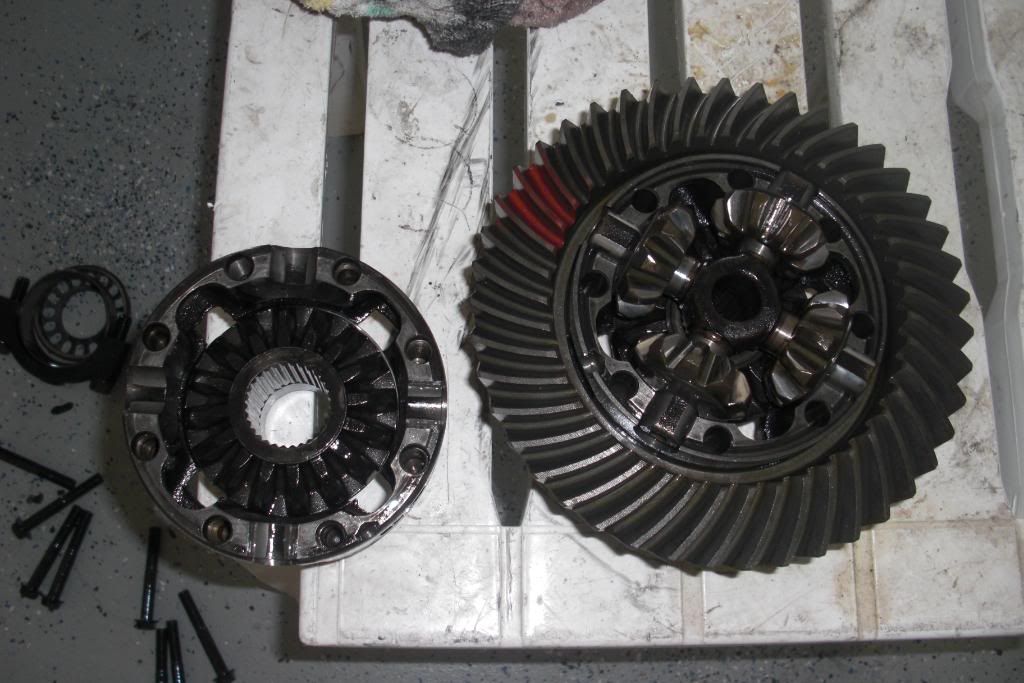
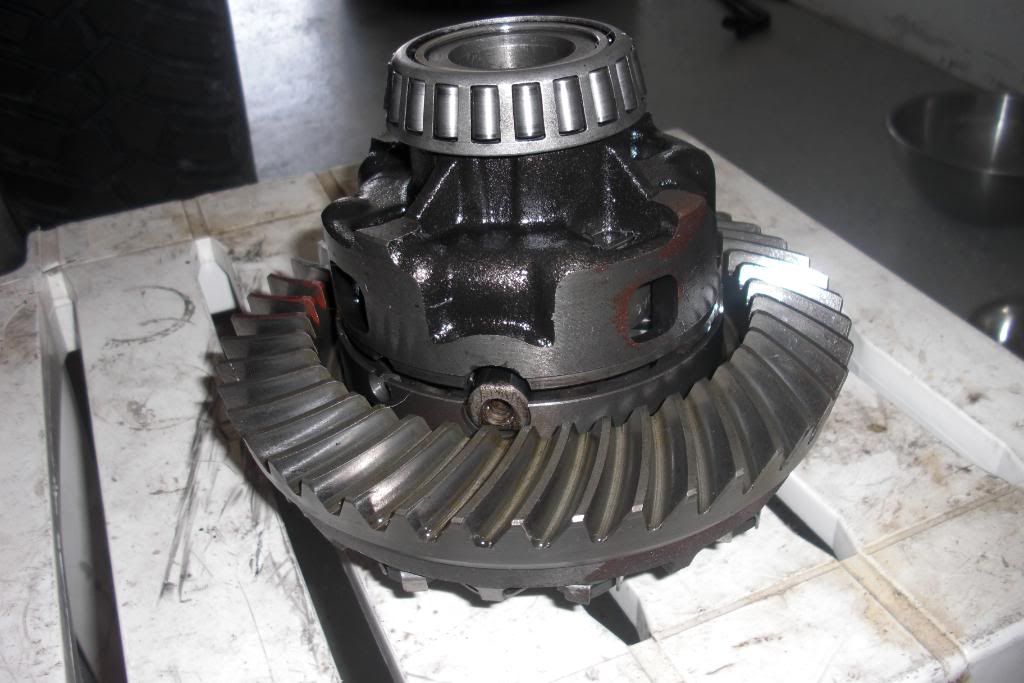
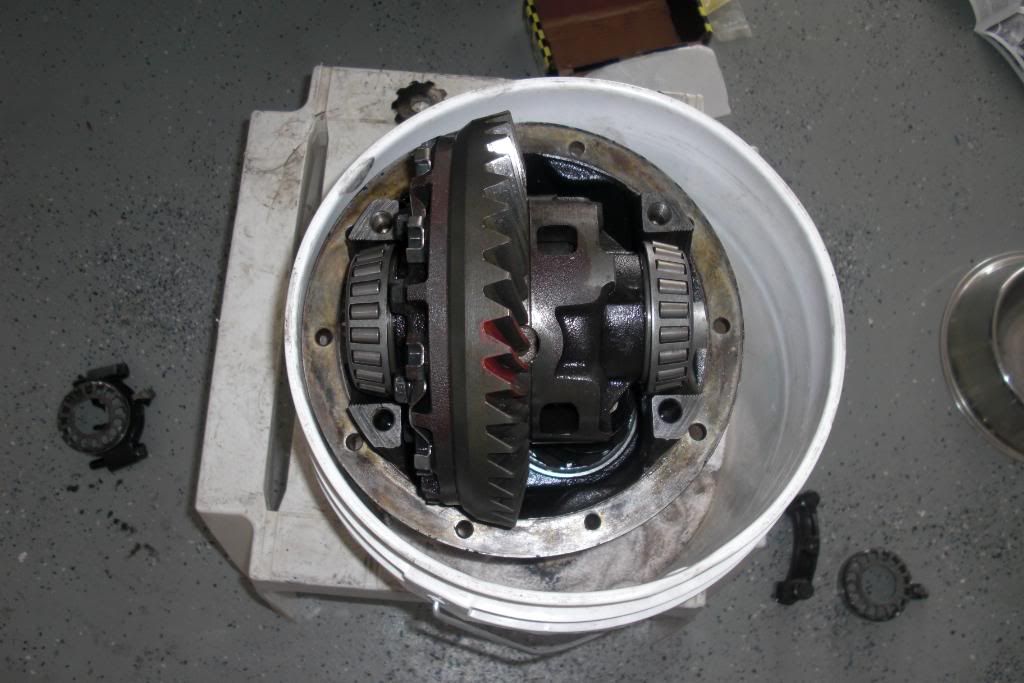
Remove the 8 14mm bolts on the ring gear side and then you can seperate the sections and have access to the spider gears.
Here it is apart. Remember, make sure you pull everything out and set it aside so you know EXACLY where it went and which side it came from.
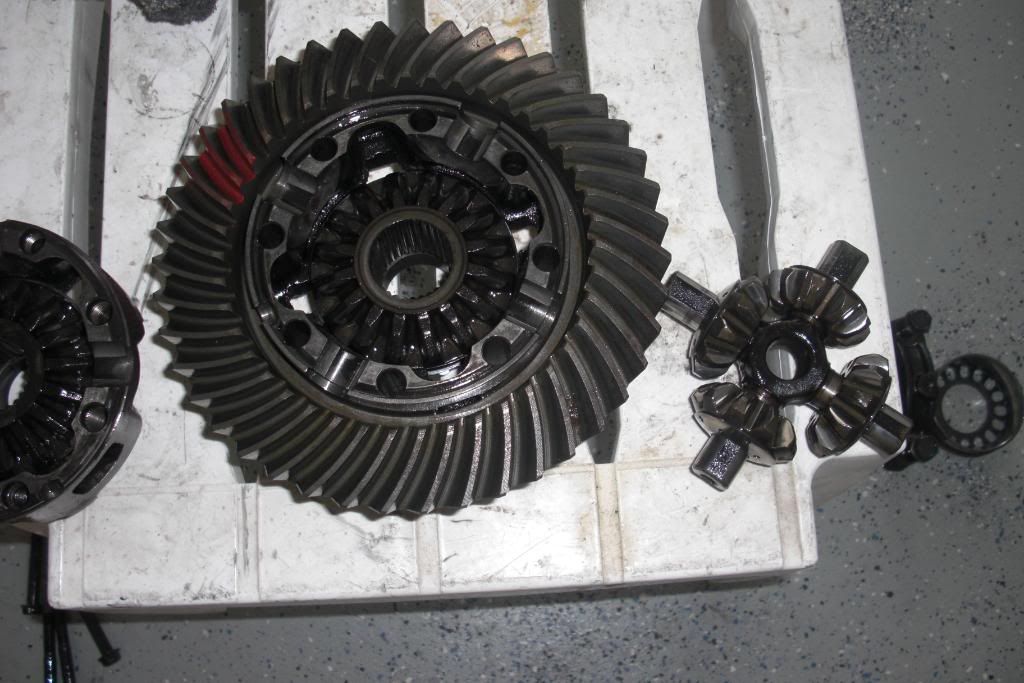
The spider gears lift right out. This is important....take those spider gears and throw them as far as you can away from you. You know damn well they are the sole reason you have been stuck with one tire spinning in the air on more than one occasion.
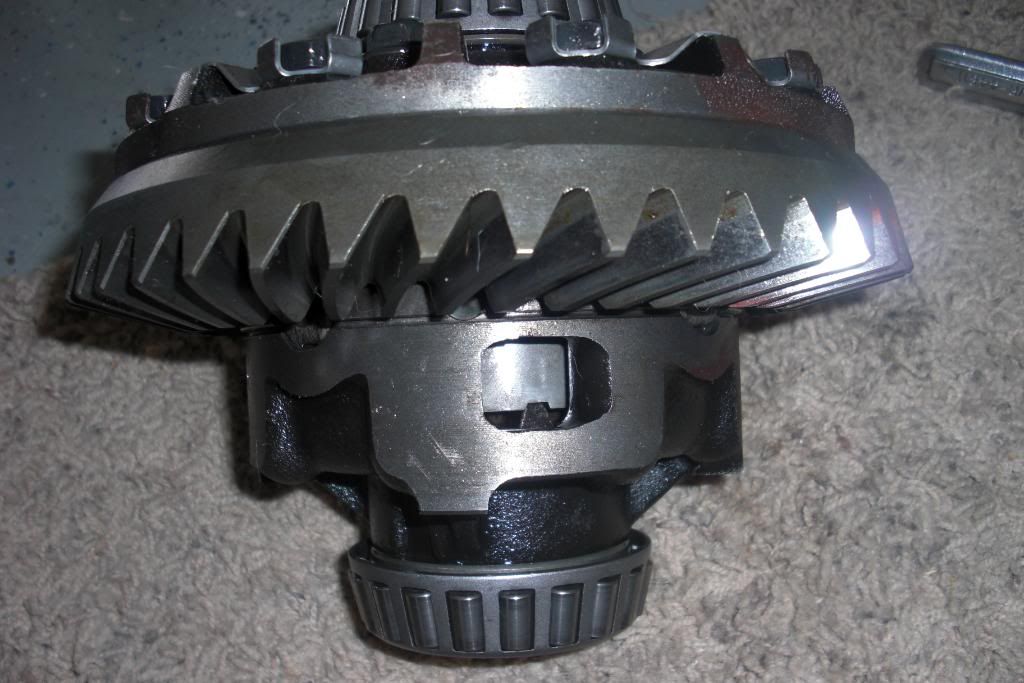
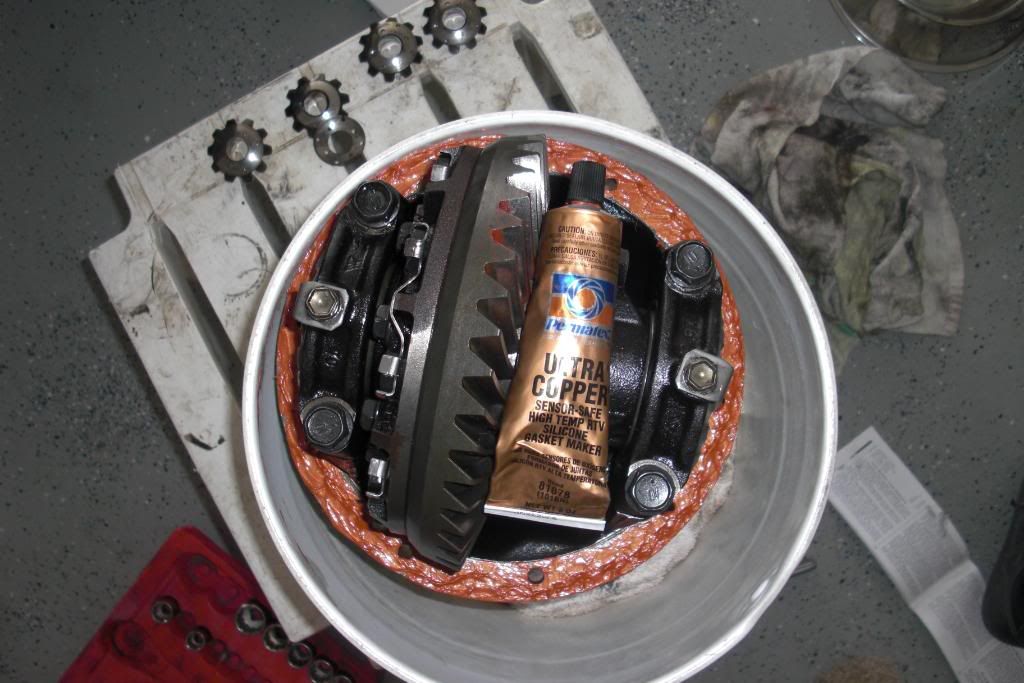
Here is the locker ready for action. Put the springs and pins where they go according to eh instructions.

Place one of the "drivers" in this section and align so the gears mesh with the teeth.
Place the supplied washer/spacer in the driver.
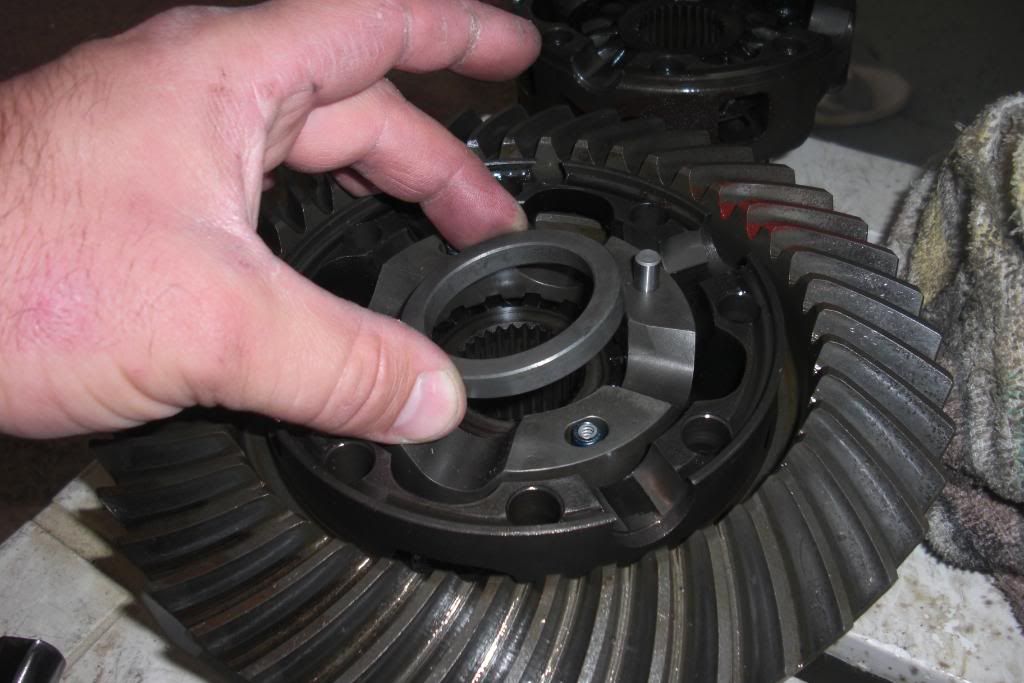
Place the "spider" inside the driver as shown.
Install the other supplied washer/spacer over the spider and place the other "driver" over the spider, making sure the springs and pins stay where they should be. The instructions supplied in the kit will tell you all the small details.
Place the other section over the assembly making sure it goes back on exactly how it was removed and making sure the teeth on the side gears mesh with the teeth on the driver.
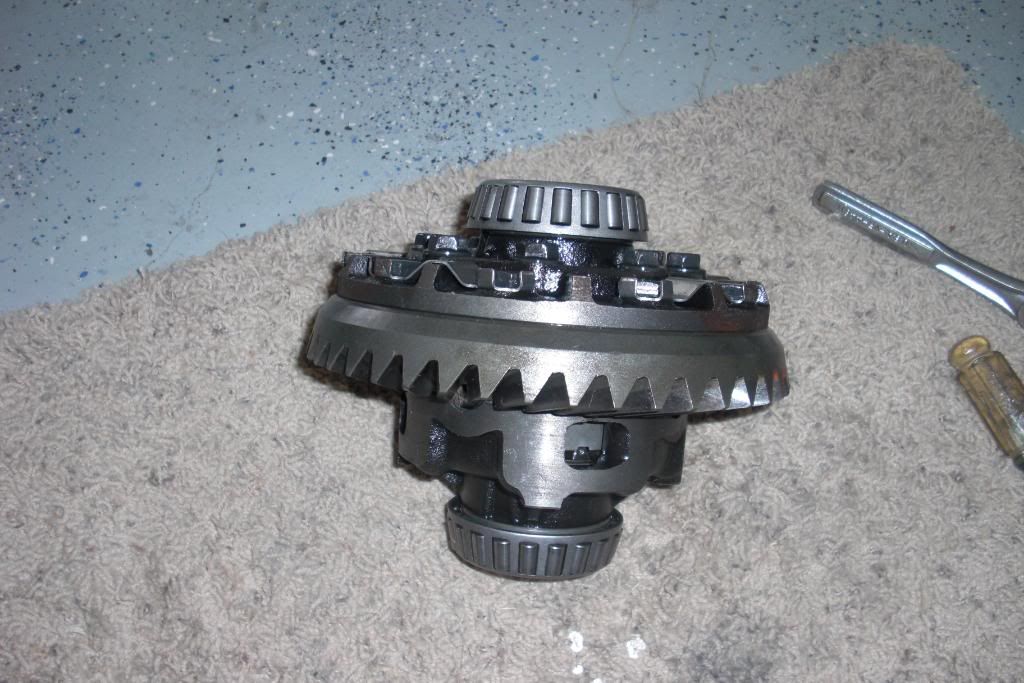
Flip the entire assembly over and stick those 8 bolts in and tighten them down. Make sure everything stayed where it should. You might have to hold it compressed as you flip it to make sure nothing moves out of place.

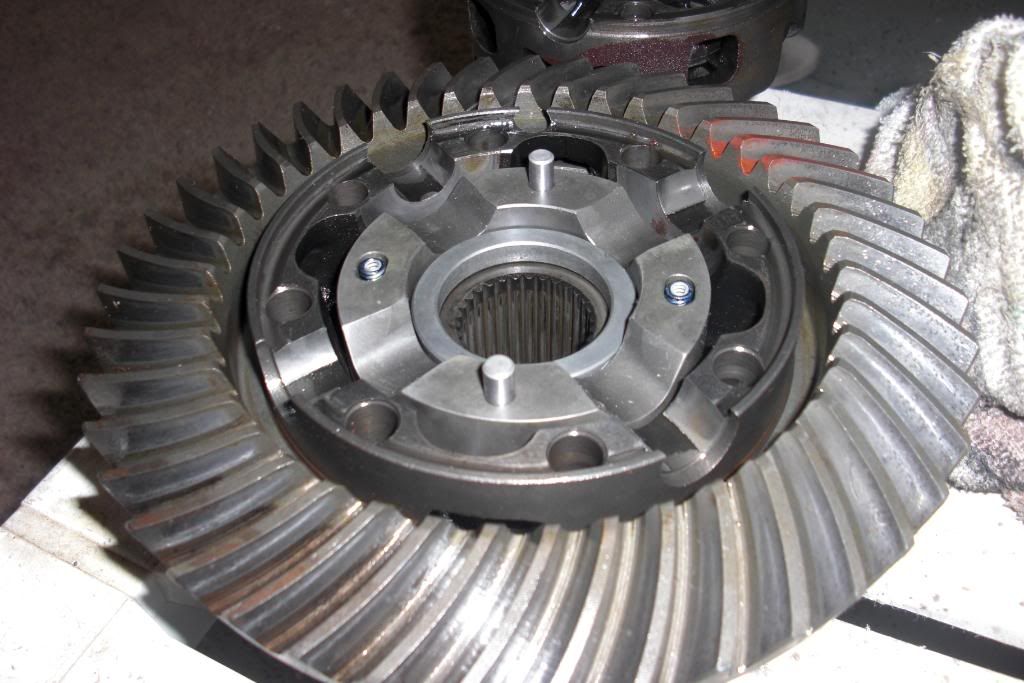
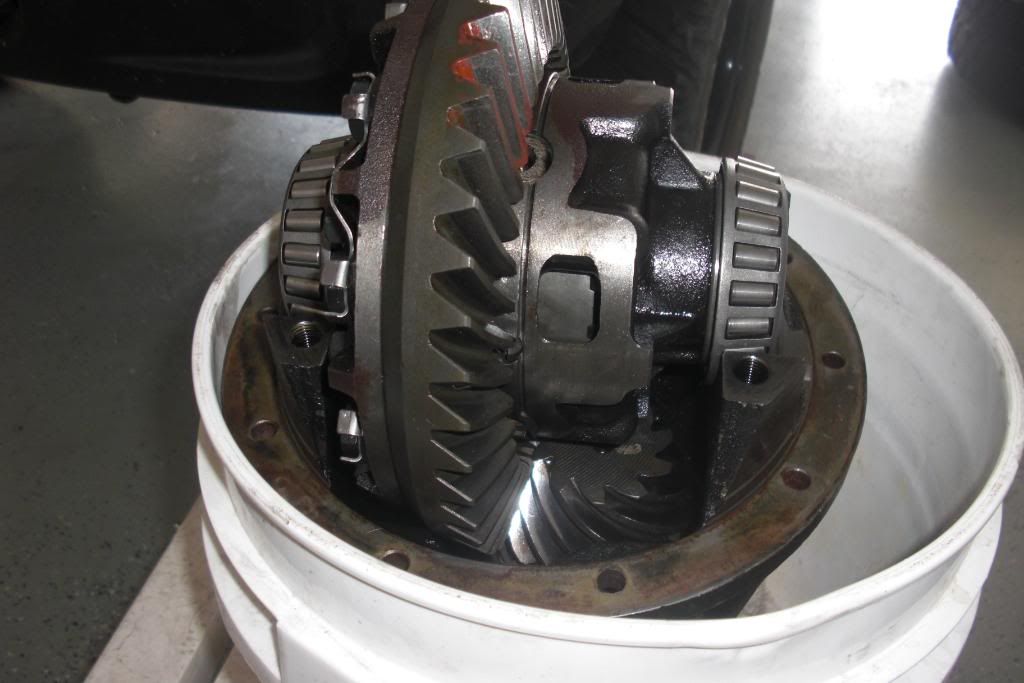
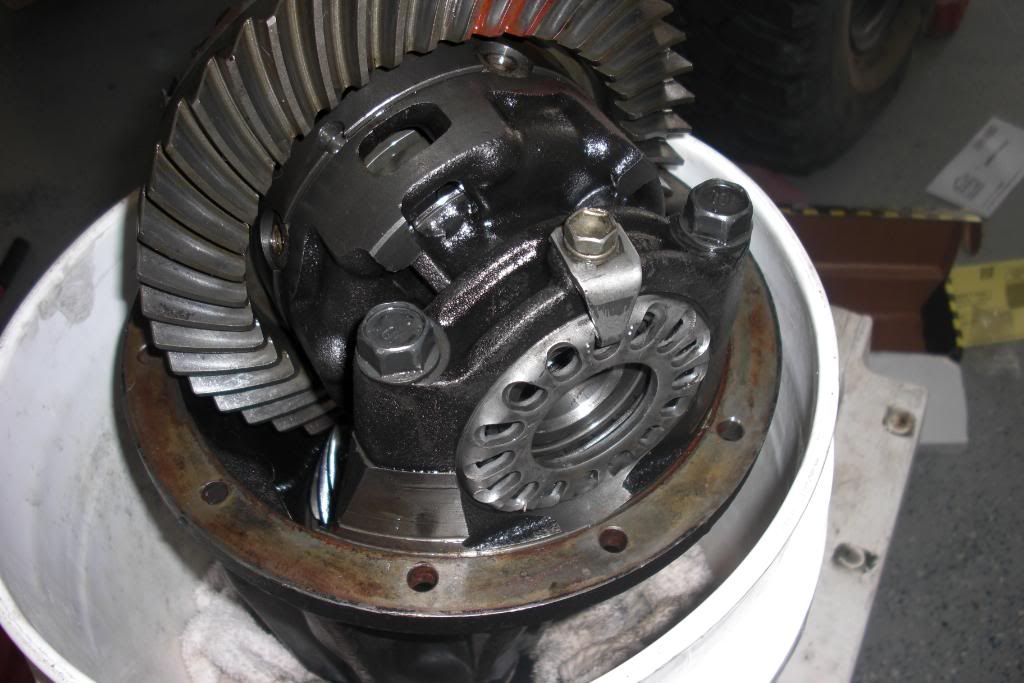
You should end up with this:
Now get your carrier housing ready to install
Set it in there exactly how it came out.
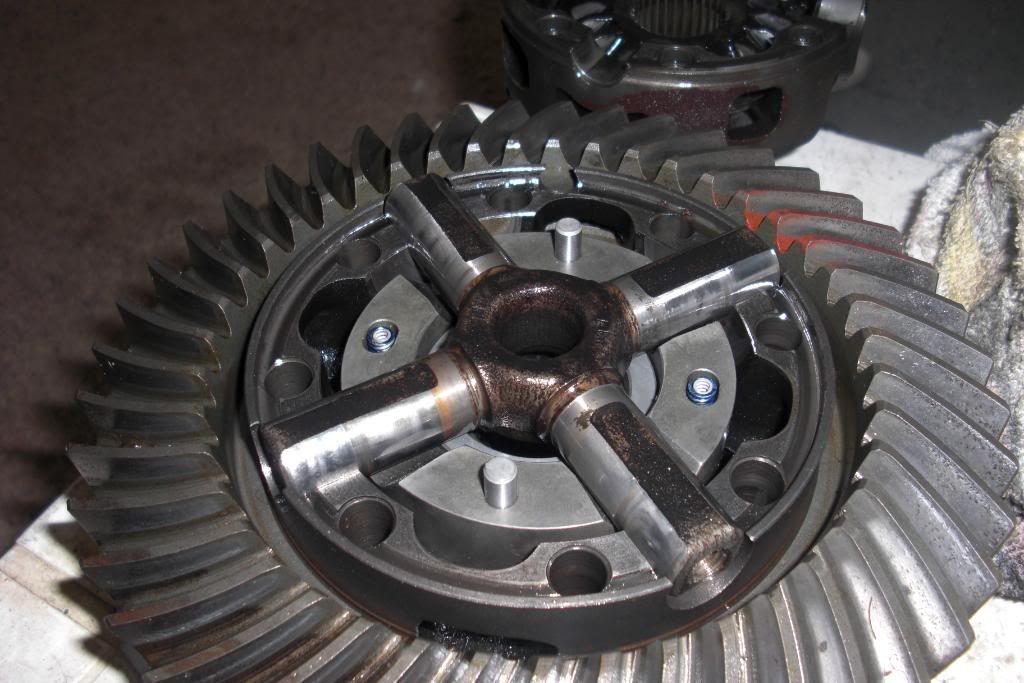
On the ring gear side, push the carrier as far towards the pinion as it will go and push the bearing race over the bearing as far as it will go, then slide the adjuster nut DOWN into the threads exactly where it was when you removed it making sure your punch marks are up where the adjuster tab goes. Also, make sure you install the right bearing and adjuster nut that came out of that side.
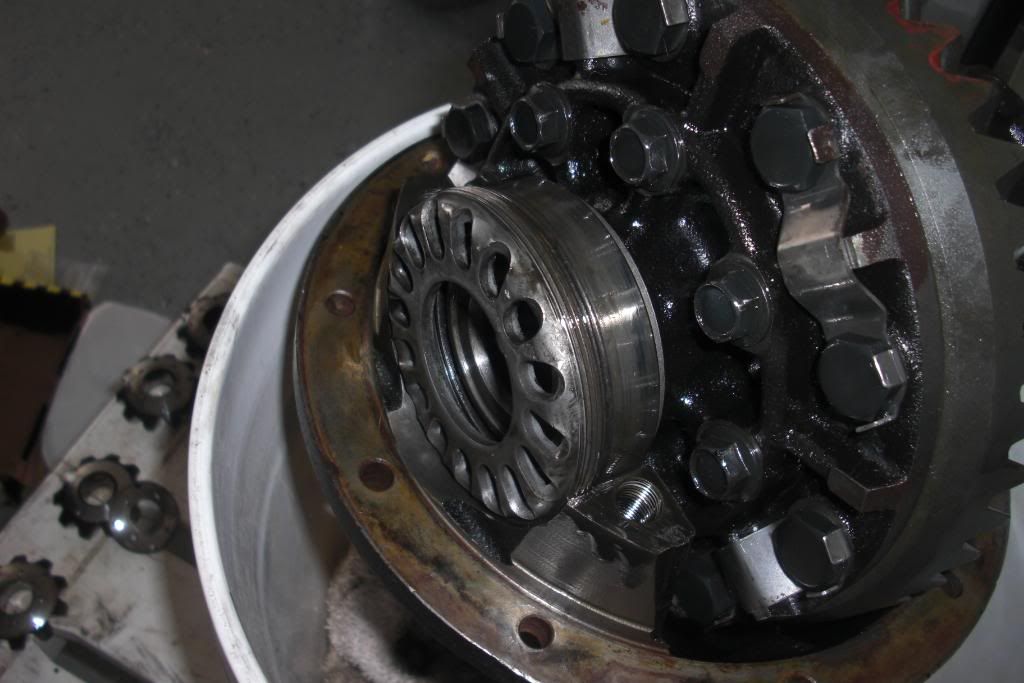
Install the bearing cap making sure it fits perfectly WITHOUT forcing it down. It should fit right into the threads of the adjuster nut. Snug tighten the bearing cap bolts.
Do the same thing on the other side, install the bearing race and drop the adjuster nut down into the threads exactly where it was when you removed it. There will be a very small gap between the bearing and the adjuster nut now.

Install the bearing cap just as you did on the ring gear side and snug it down. Once you have it snug you have to tighten the adjuster nut ONE full turn and stop where your marks were on the adjuster nut. It might get hard so you might need a brass punch to finish it off.
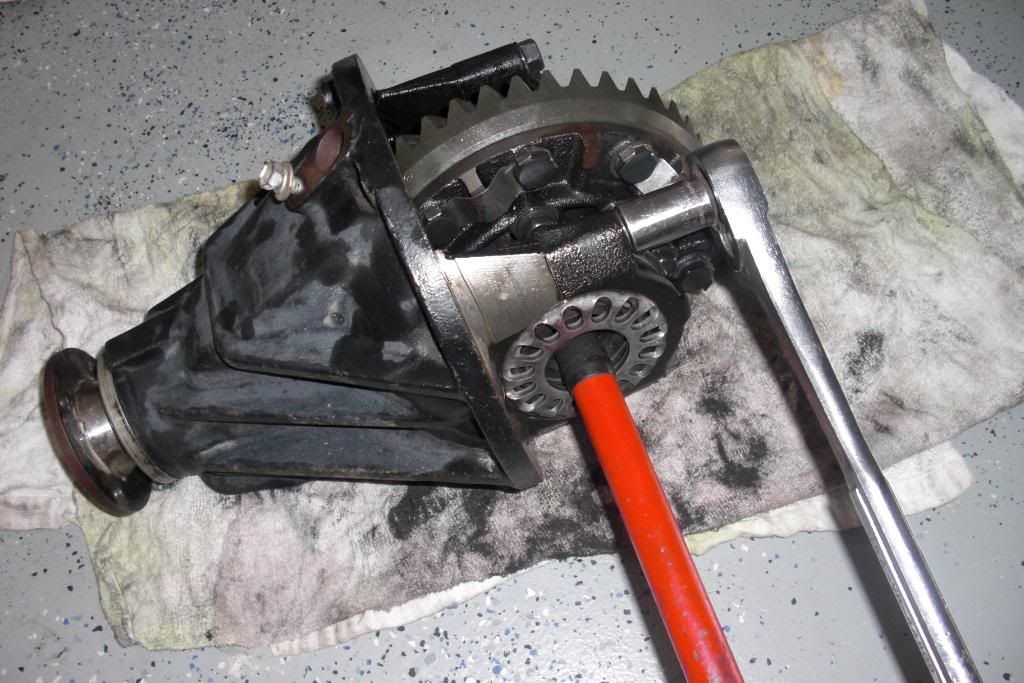
Now you need to torque the bearing caps to spec. I used the rubber end of a jack handle inside the splines so I could get enough leverage to torque them down.

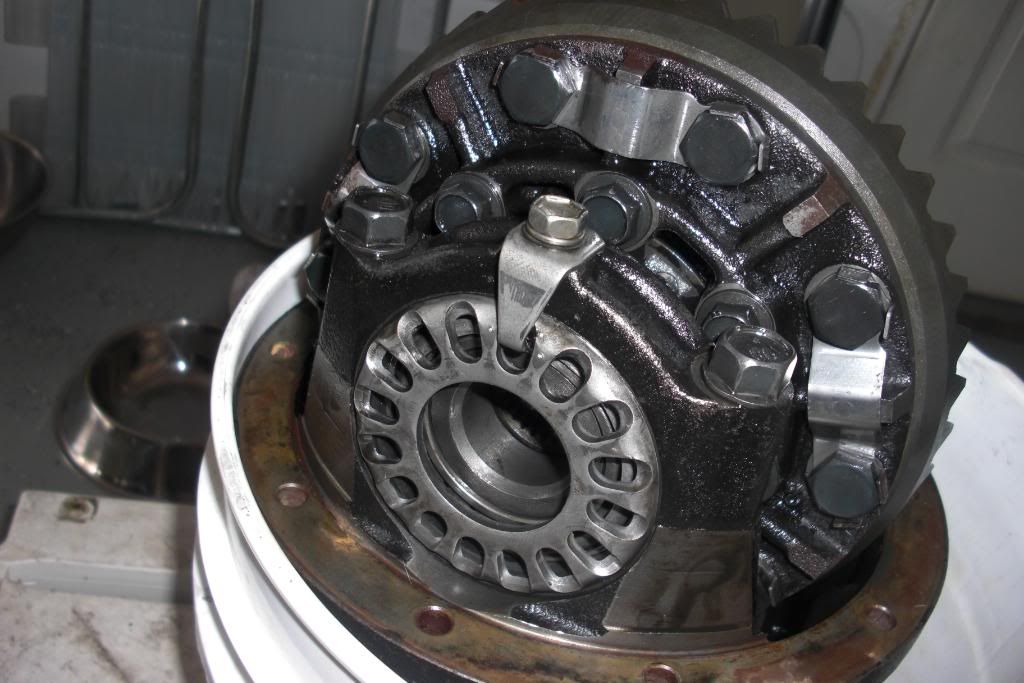
Install the adjuster nut tabs on both sides.
Now you're ready to rock.

Use your favorite gasket maker and coat the mating surface.
It's a heavy sumbitch, remember, so give it hell and get it back up there.
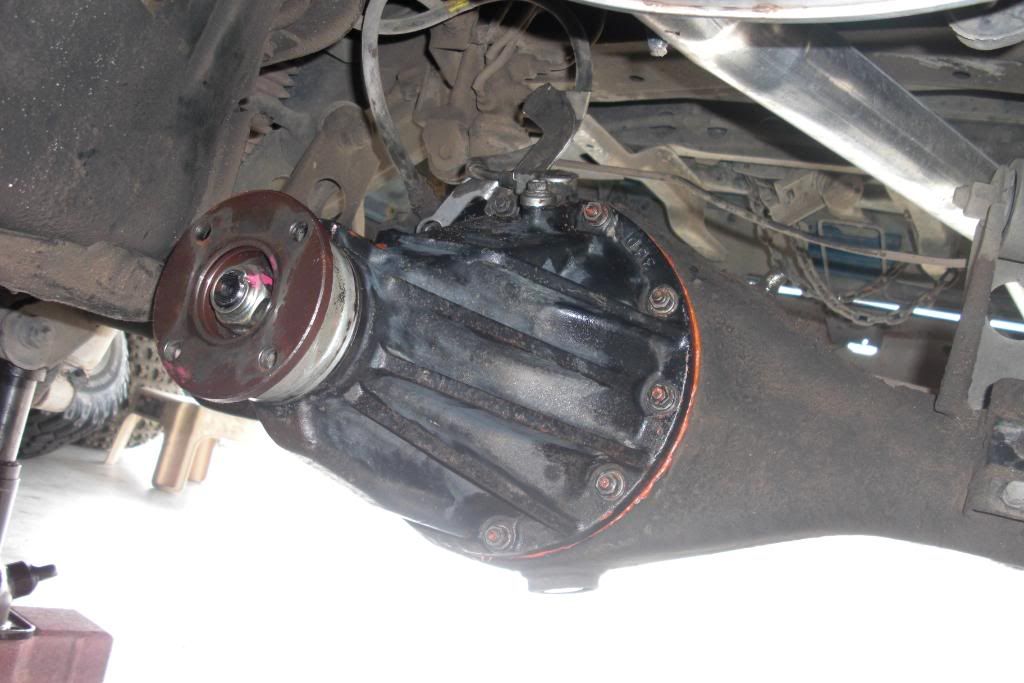
Get those nuts and washers on and torque to spec. Install the ABS sensor while you're up there.
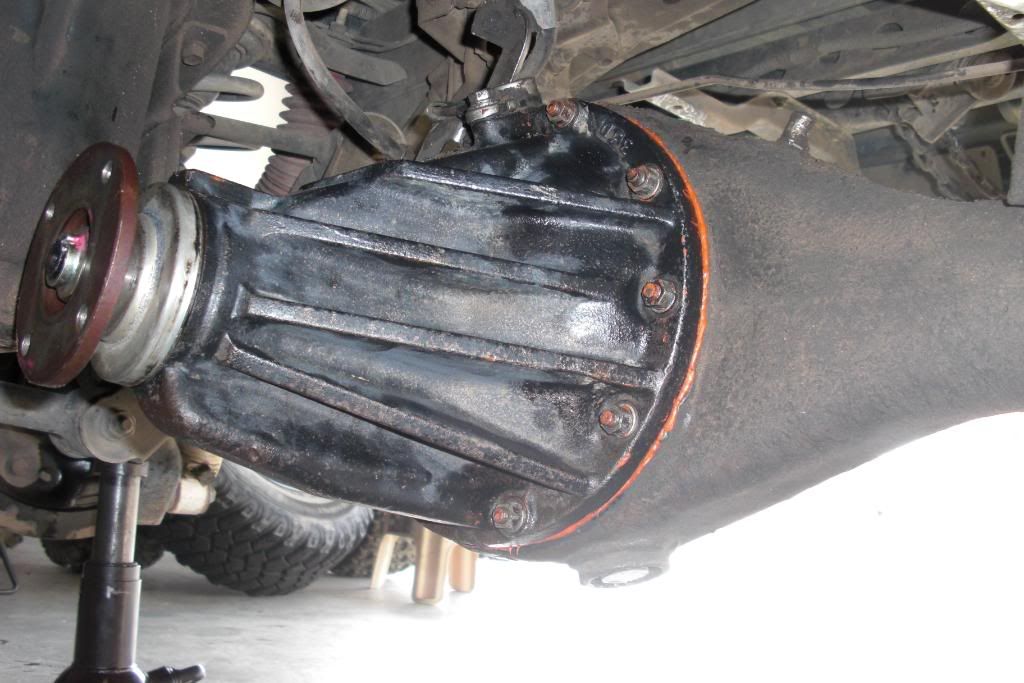
Install the driveshaft
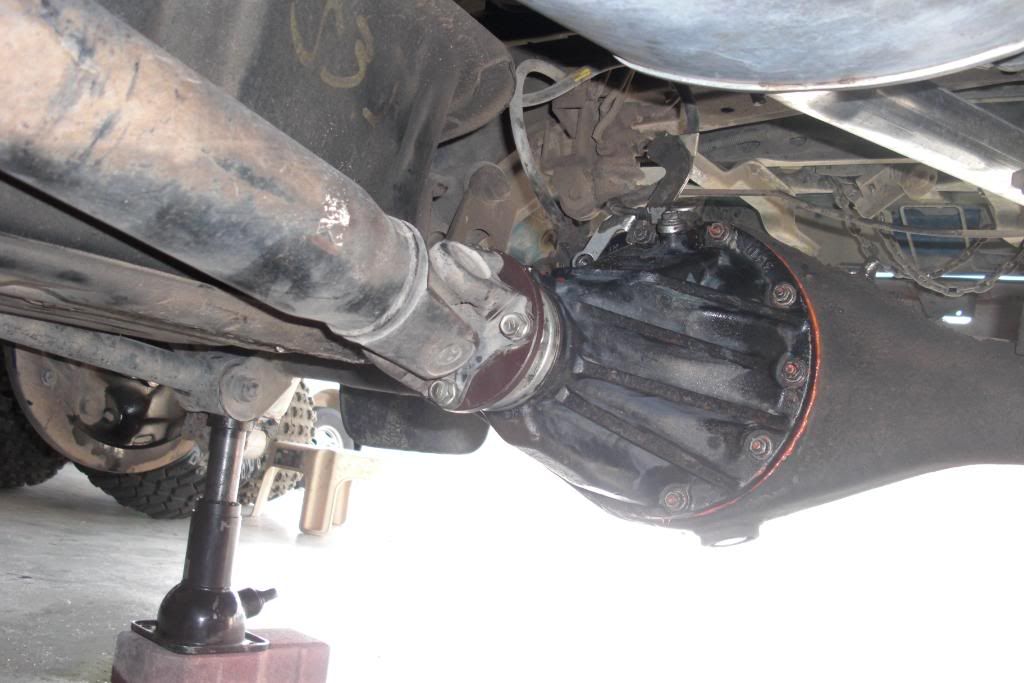
Wiggle the axles back in and tighten the 4 nuts up and tighten the brake lines.
Don't forget the e-brake cable holder thingy
Make sure the brake lines are tight
Fill the rear end with your favorite stinky stuff. I picked this because it was cheap and I've heard it hides the locker noises better.

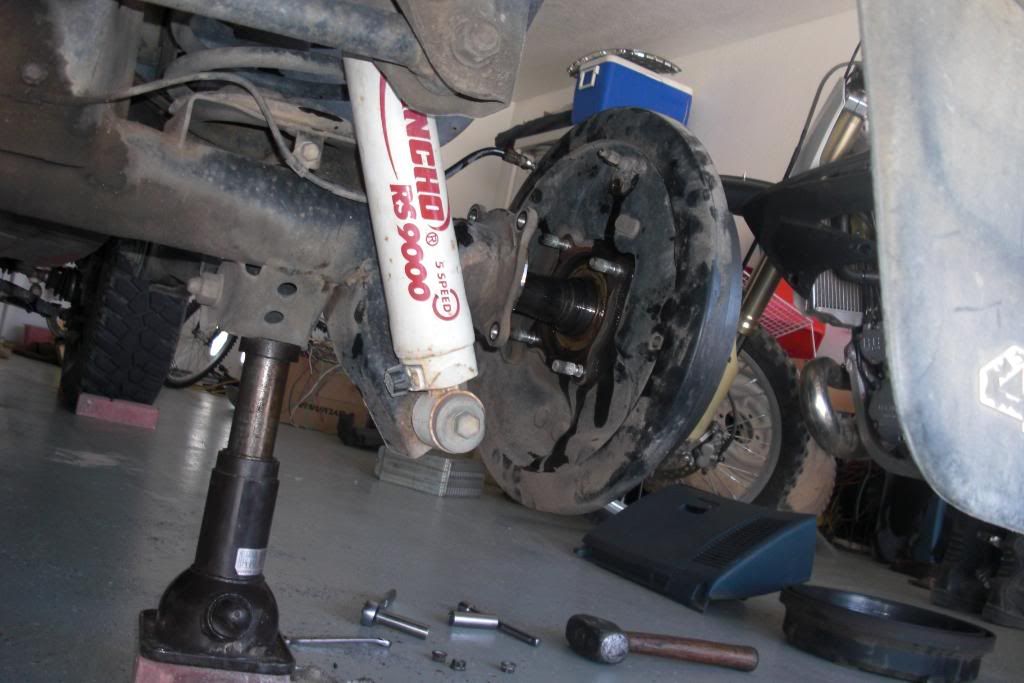
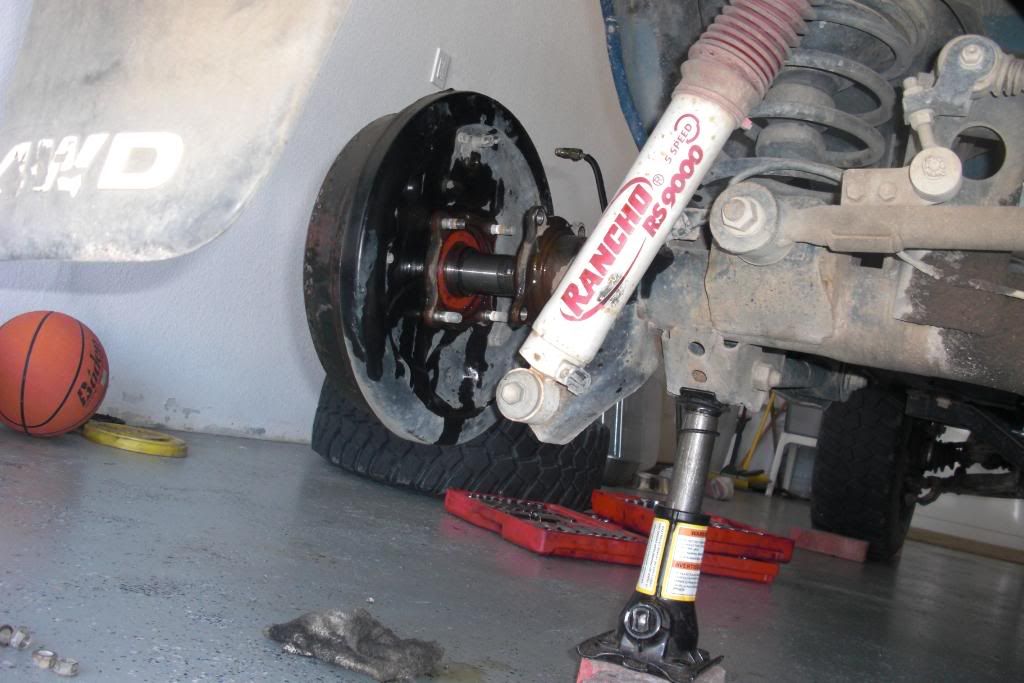
Bleed the brakes, put the tires back on and drop it down.

Now take it for a test drive. My first impressions were good. I love the noises and different charactaristics of the locker on the street. It doesn't bother me at all. Some people hate it, but I don't think it's bad at all. The extra off-road capability I gained makes up for any of the small quirks I have to deal with on the street.
Lockright 1620-LR installation into Toyota V6 rear
First step is to block the front tires, front and back. Since the rear tires will be in the air and you don't want it rolling.
Jack up the rear and remove the rear tires(you actually don't have to remove the tires, but I wanted the extra room).
You don't have to remove the drum, but I wanted to see how my brakes were looking. About time for new pads....
The drum isn't looking too hot either.
Drain the differential fluid and enjoy that smell because you're going to be swimming in that crap for the rest of the day.
While the fluid is draining, disconnect the rear driveshaft(4 bolts with nuts)and move it out of the way.
Remove the 4 nuts holding the axle housing to the drum assembly and disconnect the brake line. You will have to bleed the brakes when it's all back together.
Unbolt the e-brake cable holder so you have enough slack to pull the axle out.
You should be able to give the drum a yank and pull it right out. You don't need to pull it all the way out, just far enough so the carrier can be removed.
This has to be done on both sides.
Now you can unbolt the carrier and get to the fun stuff. 10 bolts with lock washers. Unbolt the ABS sensor and pull it out. Be careful, that's a heavy sumbitch so be ready to grab it or have something ready to catch it so it doesn't slam onto the ground.
Here she is out of her home, dirty as hell.
Looks like someone took the time to set this one up properly
Here she is all cleaned up and ready to be torn apart.
I used a punch and marked each adjuster nut so I know where it was and which side it was on.
One punch for the left side
Two punches for the right side.
Remove the tabs that hold the aduster nuts and remove the 4 large bolts on the bearing caps that have been staring you down. They're kinda tight so give them hell. Make sure you set everything aside so you know EXACTLY where it came from.
Right side bearing cap and adjuster nut with keeper.
Left side bearing cap and adjuster nut with keeper.
Remove the 8 14mm bolts on the ring gear side and then you can seperate the sections and have access to the spider gears.
Here it is apart. Remember, make sure you pull everything out and set it aside so you know EXACLY where it went and which side it came from.
The spider gears lift right out. This is important....take those spider gears and throw them as far as you can away from you. You know damn well they are the sole reason you have been stuck with one tire spinning in the air on more than one occasion.
Here is the locker ready for action. Put the springs and pins where they go according to eh instructions.
Place one of the "drivers" in this section and align so the gears mesh with the teeth.
Place the supplied washer/spacer in the driver.
Place the "spider" inside the driver as shown.
Install the other supplied washer/spacer over the spider and place the other "driver" over the spider, making sure the springs and pins stay where they should be. The instructions supplied in the kit will tell you all the small details.
Place the other section over the assembly making sure it goes back on exactly how it was removed and making sure the teeth on the side gears mesh with the teeth on the driver.
Flip the entire assembly over and stick those 8 bolts in and tighten them down. Make sure everything stayed where it should. You might have to hold it compressed as you flip it to make sure nothing moves out of place.
You should end up with this:
Now get your carrier housing ready to install
Set it in there exactly how it came out.
On the ring gear side, push the carrier as far towards the pinion as it will go and push the bearing race over the bearing as far as it will go, then slide the adjuster nut DOWN into the threads exactly where it was when you removed it making sure your punch marks are up where the adjuster tab goes. Also, make sure you install the right bearing and adjuster nut that came out of that side.
Install the bearing cap making sure it fits perfectly WITHOUT forcing it down. It should fit right into the threads of the adjuster nut. Snug tighten the bearing cap bolts.
Do the same thing on the other side, install the bearing race and drop the adjuster nut down into the threads exactly where it was when you removed it. There will be a very small gap between the bearing and the adjuster nut now.
Install the bearing cap just as you did on the ring gear side and snug it down. Once you have it snug you have to tighten the adjuster nut ONE full turn and stop where your marks were on the adjuster nut. It might get hard so you might need a brass punch to finish it off.
Now you need to torque the bearing caps to spec. I used the rubber end of a jack handle inside the splines so I could get enough leverage to torque them down.
Install the adjuster nut tabs on both sides.
Now you're ready to rock.
Use your favorite gasket maker and coat the mating surface.
It's a heavy sumbitch, remember, so give it hell and get it back up there.
Get those nuts and washers on and torque to spec. Install the ABS sensor while you're up there.
Install the driveshaft
Wiggle the axles back in and tighten the 4 nuts up and tighten the brake lines.
Don't forget the e-brake cable holder thingy
Make sure the brake lines are tight
Fill the rear end with your favorite stinky stuff. I picked this because it was cheap and I've heard it hides the locker noises better.
Bleed the brakes, put the tires back on and drop it down.
Now take it for a test drive. My first impressions were good. I love the noises and different charactaristics of the locker on the street. It doesn't bother me at all. Some people hate it, but I don't think it's bad at all. The extra off-road capability I gained makes up for any of the small quirks I have to deal with on the street.
Last edited by Justinlhc; 04-09-2009 at 08:32 PM.
 04-09-2009, 07:38 PM
#2
Contributing Member
LOoks good , I will be doing this very soon I have everything I need just need the time.
I dont think you should leave the axle hanging like that I have read that you can damage the seals doing that,Thanks for the great pictures.
I dont think you should leave the axle hanging like that I have read that you can damage the seals doing that,Thanks for the great pictures.
04-09-2009, 08:06 PM
#4
Registered User
yes, nice write up indeed!
though i am wondering about that thing on the top of the third, i thought that was an abs sensor? not a speedometer sensor?(not challenging you just curious).
though i am wondering about that thing on the top of the third, i thought that was an abs sensor? not a speedometer sensor?(not challenging you just curious).
04-09-2009, 08:10 PM
#7
Contributing Member
Join Date: Feb 2007
Location: maple ridge, British Columbia, Canada
Posts: 9,055
Likes: 0
Received 9 Likes
on
5 Posts
Great writeup! But you should always remove the axle shafts completly. Letting them sit like that can damage the seals..
Just wait till the first time you wheel. You will love it
Just wait till the first time you wheel. You will love it
Last edited by Jay351; 04-09-2009 at 08:16 PM.
Trending Topics
04-09-2009, 08:17 PM
#8
Registered User
Thread Starter
Join Date: Feb 2009
Posts: 590
Likes: 0
Received 0 Likes
on
0 Posts
lol I just assumed it was the speedo sensor. I had no idea it was actually an ABS sensor.
 At first I thought it was my vent to tell you the truth lol. I found the vent later on buried in about an inch of dirt/oil/crap.
04-09-2009, 08:23 PM
At first I thought it was my vent to tell you the truth lol. I found the vent later on buried in about an inch of dirt/oil/crap.
04-09-2009, 08:23 PM
#10
Registered User
Thread Starter
Join Date: Feb 2009
Posts: 590
Likes: 0
Received 0 Likes
on
0 Posts

I did some "testing" already.
 I kept it in 2WD for as long as I could to see just what it would do with just the 2 rear wheels and I was impressed.
 One thing that kills me is this 3.0 doesn't seem to have the power to turn both rear wheels and one front wheel in 4hi. I find myself having to shift into 4lo just because I need more power to climb certain areas. I actually stalled in 4hi trying to climb a hill. I was impressed that the motor died before I lost traction, but still.
04-09-2009, 08:31 PM
#12
Registered User
Thread Starter
Join Date: Feb 2009
Posts: 590
Likes: 0
Received 0 Likes
on
0 Posts
Yeah that's the same one I got. I got scared at first when I started looking at the carrier because from what I read on other write-ups the pin was supposed to clear the ring gear. I was all worried about it and then I realized I didn't even have to mess with that.
 I thought someone had swapped a 4cylinder rear into my 4Runner.
I think the hardest part of my install was getting the driver side drum off(which doesn't even have to be done for the locker installation). The rest of it was cake and the instructions are pretty cut and dry. I was shocked because gears have always been a no-no thing to mess with for me.

Last edited by Justinlhc; 04-09-2009 at 08:33 PM.
04-09-2009, 09:07 PM
#16
Registered User
Join Date: Jul 2008
Location: Grew up in S.C.V, So Cal.....now in Hampstead, NC
Posts: 4,592
Likes: 0
Received 0 Likes
on
0 Posts
Great write up! I'll be using this when I pick up my Lockright and do the install next month. I HATE working on a budget.....
04-09-2009, 09:10 PM
#17
Registered User
Here is more in depth info: http://www.gearinstalls.com/v6lockrite.htm
Last edited by JamesD; 04-09-2009 at 09:12 PM.
04-09-2009, 09:11 PM
#18
Contributing Member
Join Date: Feb 2007
Location: maple ridge, British Columbia, Canada
Posts: 9,055
Likes: 0
Received 9 Likes
on
5 Posts
I didn't want to deal with unhooking the e-brake cables so I just left it like that. I've seen other people do it so I blame them.
I did some "testing" already. I kept it in 2WD for as long as I could to see just what it would do with just the 2 rear wheels and I was impressed.
One thing that kills me is this 3.0 doesn't seem to have the power to turn both rear wheels and one front wheel in 4hi. I find myself having to shift into 4lo just because I need more power to climb certain areas. I actually stalled in 4hi trying to climb a hill. I was impressed that the motor died before I lost traction, but still.
I did some "testing" already.
I kept it in 2WD for as long as I could to see just what it would do with just the 2 rear wheels and I was impressed. One thing that kills me is this 3.0 doesn't seem to have the power to turn both rear wheels and one front wheel in 4hi. I find myself having to shift into 4lo just because I need more power to climb certain areas. I actually stalled in 4hi trying to climb a hill. I was impressed that the motor died before I lost traction, but still.
Odd, my e-brake lines unhooked easily with one little cotter pin type dealie.
04-10-2009, 07:40 PM
#19
Registered User
Thread Starter
Join Date: Feb 2009
Posts: 590
Likes: 0
Received 0 Likes
on
0 Posts
 04-10-2009, 08:43 PM
#20
Registered User
Good write up, but please get some proper jackstands.
Your 4Runner perched on those two tiny little bottlejacks gives me the willies, especially when you're yarding on a wrench under there.
Your 4Runner perched on those two tiny little bottlejacks gives me the willies, especially when you're yarding on a wrench under there.


