
Can't get my intake chamber off!
 04-06-2015, 08:09 AM
#1
Registered User
Thread Starter

Join Date: Nov 2010
Posts: 34
Likes: 0
Received 0 Likes
on
0 Posts
Can't get my intake chamber off!
1992 4Runner SR5 3.0L V6 3VZE
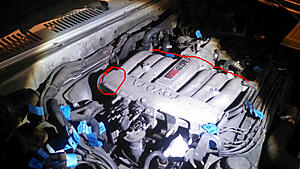
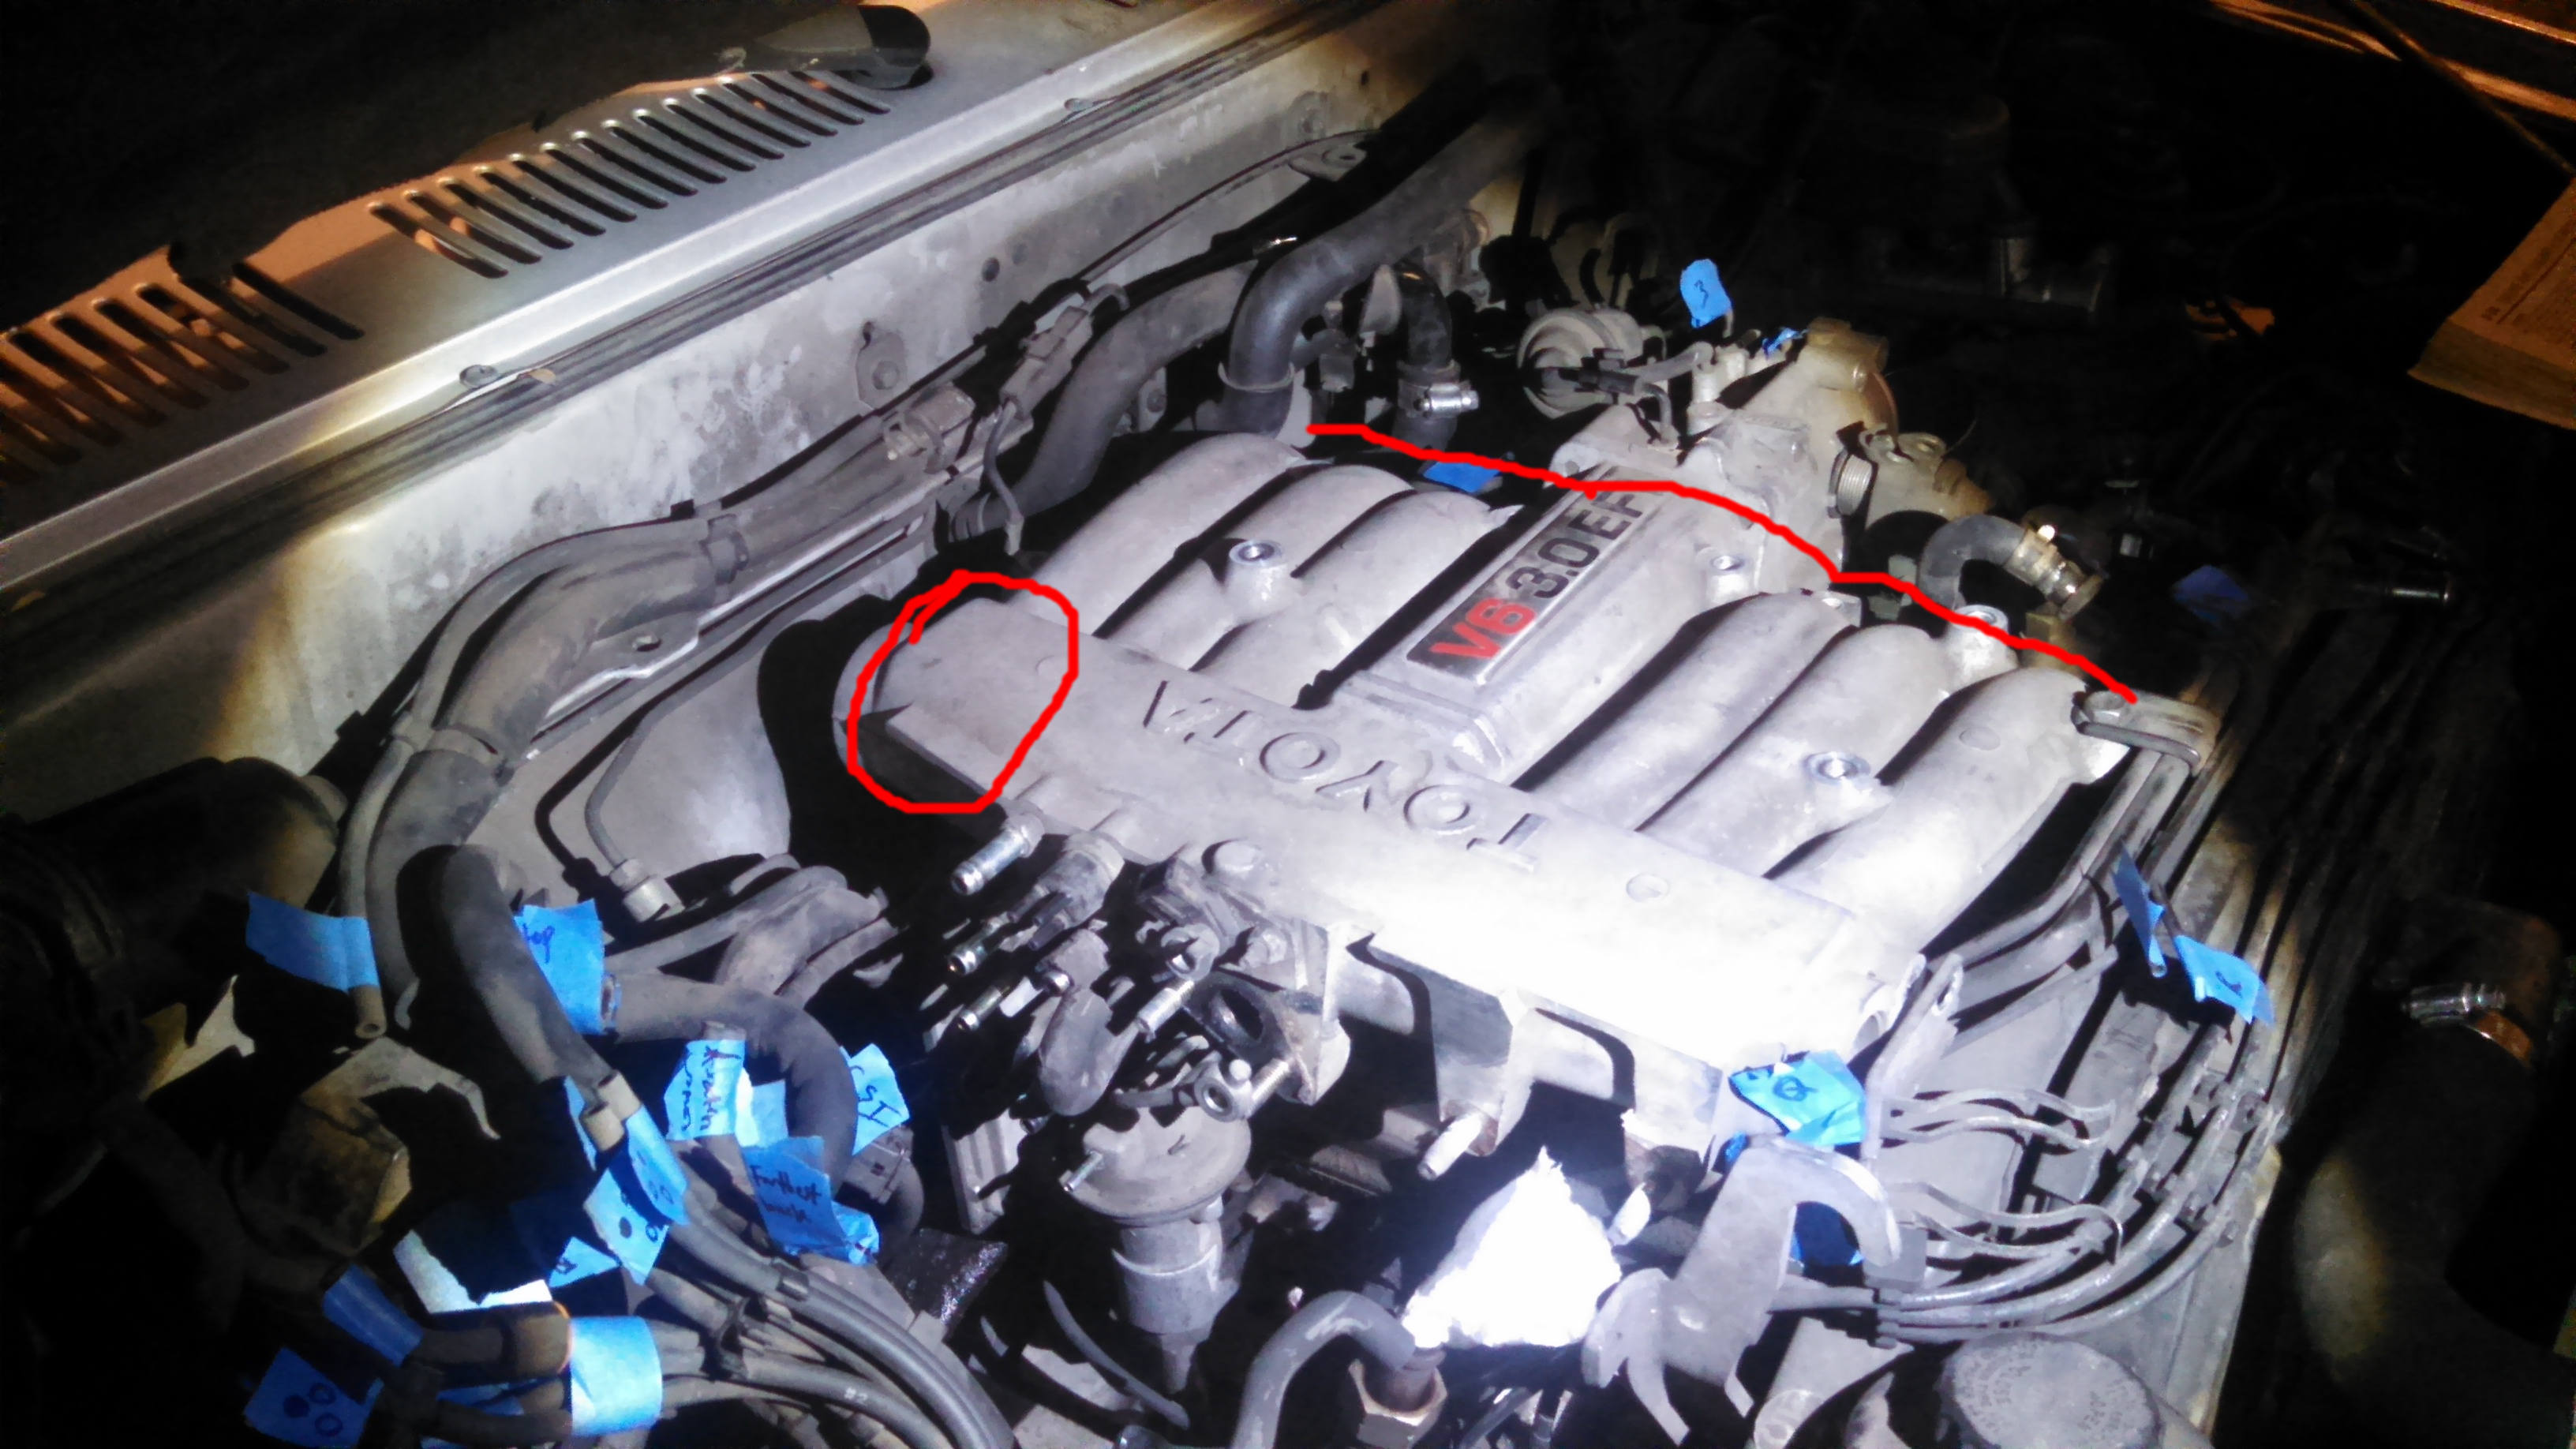
Hey all. So I'm trying to replace the intake manifold gasket and I've followed every manual/instruction/advice I could find and I can't get the intake chamber off. I can lift everything up but there still seems to be something securing it in the rear-passenger corner (the red circle in the image below). I've removed all of the lines in that corner and all of the other lines and bolts (four long bolts, two short ones, two nuts, pointed-out by the red line in the image).
Any help would be greatly appreciated!!

 04-06-2015, 08:19 AM
#3
Registered User

Join Date: Sep 2007
Location: San Francisco East Bay
Posts: 8,254
Likes: 0
Received 822 Likes
on
649 Posts
It's the hose to the PAIR valve. About 20mm.
The hose is only about 10cm long, so it will not flex much at all. There should be, but might not be, clamps at each end.
You will find it much easier to remove if you warm up the rubber, making it a little more pliable (this is true for any "rubber" fitting, but particularly large ones like this). I use a heat gun, but a hair dryer would do the trick. If you do use a heat gun, put your hand on the hose while you're warming it. A heat gun can do real damage; if it's too hot to hold your hand there, it's too hot.
PS You were very wise to label all the vacuum lines, but those labels can get pulled off pretty easily. As a backup, I would suggest you get a piece of paper and draw yourself a diagram. Each of the hoses is labeled (something like #4, a # without a number means it's just engine vacuum), but your diagram will show where each end of the hose goes in case you have to replace one (which then will not longer have the mark).
Last edited by scope103; 04-06-2015 at 08:22 AM.
04-06-2015, 08:36 AM
#4
Registered User
Thread Starter
Join Date: Nov 2010
Posts: 34
Likes: 0
Received 0 Likes
on
0 Posts
It's the hose to the PAIR valve. About 20mm.
The hose is only about 10cm long, so it will not flex much at all. There should be, but might not be, clamps at each end.
You will find it much easier to remove if you warm up the rubber, making it a little more pliable (this is true for any "rubber" fitting, but particularly large ones like this). I use a heat gun, but a hair dryer would do the trick. If you do use a heat gun, put your hand on the hose while you're warming it. A heat gun can do real damage; if it's too hot to hold your hand there, it's too hot.
PS You were very wise to label all the vacuum lines, but those labels can get pulled off pretty easily. As a backup, I would suggest you get a piece of paper and draw yourself a diagram. Each of the hoses is labeled (something like #4, a # without a number means it's just engine vacuum), but your diagram will show where each end of the hose goes in case you have to replace one (which then will not longer have the mark).
The hose is only about 10cm long, so it will not flex much at all. There should be, but might not be, clamps at each end.
You will find it much easier to remove if you warm up the rubber, making it a little more pliable (this is true for any "rubber" fitting, but particularly large ones like this). I use a heat gun, but a hair dryer would do the trick. If you do use a heat gun, put your hand on the hose while you're warming it. A heat gun can do real damage; if it's too hot to hold your hand there, it's too hot.
PS You were very wise to label all the vacuum lines, but those labels can get pulled off pretty easily. As a backup, I would suggest you get a piece of paper and draw yourself a diagram. Each of the hoses is labeled (something like #4, a # without a number means it's just engine vacuum), but your diagram will show where each end of the hose goes in case you have to replace one (which then will not longer have the mark).
It makes sense that you say it's stiff and short because it almost felt like a bolt... rear corner is very firmly in place.
I will report my results


Thread
Thread Starter
Forum
Replies
Last Post
kawazx636
The Classifieds GraveYard
34
10-06-2021 03:03 PM
LittleUgly
86-95 Trucks & 4Runners (Build-Up Section)
15
01-02-2020 01:30 PM


