
Broke shock hoop , help me put it back together better.
 12-05-2013, 10:23 AM
#1
Registered User
Thread Starter
Broke shock hoop , help me put it back together better.
Hey folks I broke my driver side shock hoop , ripped it right off the frame at the weld .
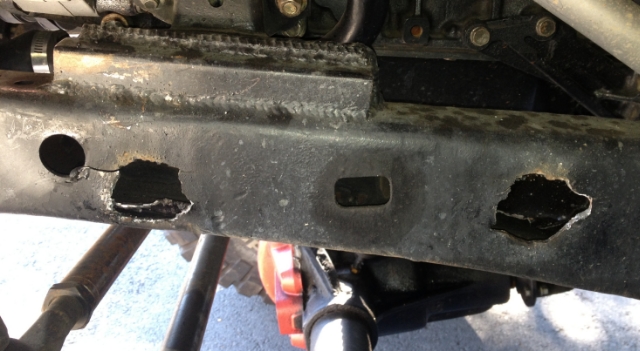
Small crack in the frame too...
I'm thinking of welding a plate over the frame there to reinforce the area , and then welding the shock hoop onto the plate .
Secondly , I think my shocks were too long for my SFA setup . I only have about 3.5" on rod exposed , not much room for the axle to compress without bottoming out the shock .
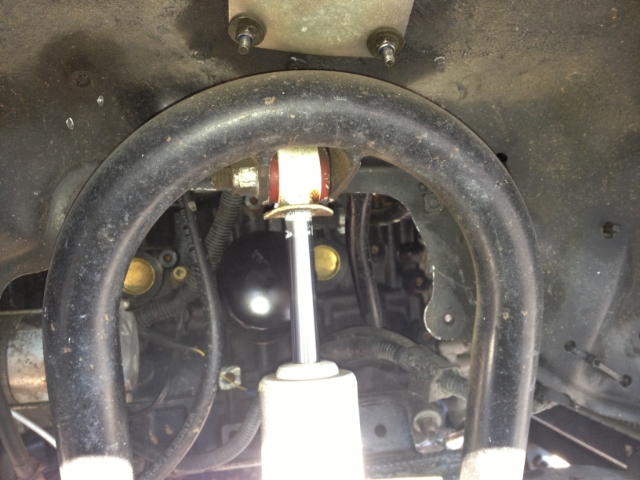
So ... I'm thinking of running bump stops to limit axle compression , and then maybe getting shorter shocks? But would that limit flex a couple of inches ?
Any advice here regarding the weld repair , running different size shocks , do bump stops work well ?
Thanks in advance ...
Small crack in the frame too...
I'm thinking of welding a plate over the frame there to reinforce the area , and then welding the shock hoop onto the plate .
Secondly , I think my shocks were too long for my SFA setup . I only have about 3.5" on rod exposed , not much room for the axle to compress without bottoming out the shock .
So ... I'm thinking of running bump stops to limit axle compression , and then maybe getting shorter shocks? But would that limit flex a couple of inches ?
Any advice here regarding the weld repair , running different size shocks , do bump stops work well ?
Thanks in advance ...
 12-05-2013, 03:41 PM
#2
Registered User
Join Date: Nov 2007
Location: Dillsburg, PA
Posts: 954
Likes: 0
Received 0 Likes
on
0 Posts
First of all, wow.
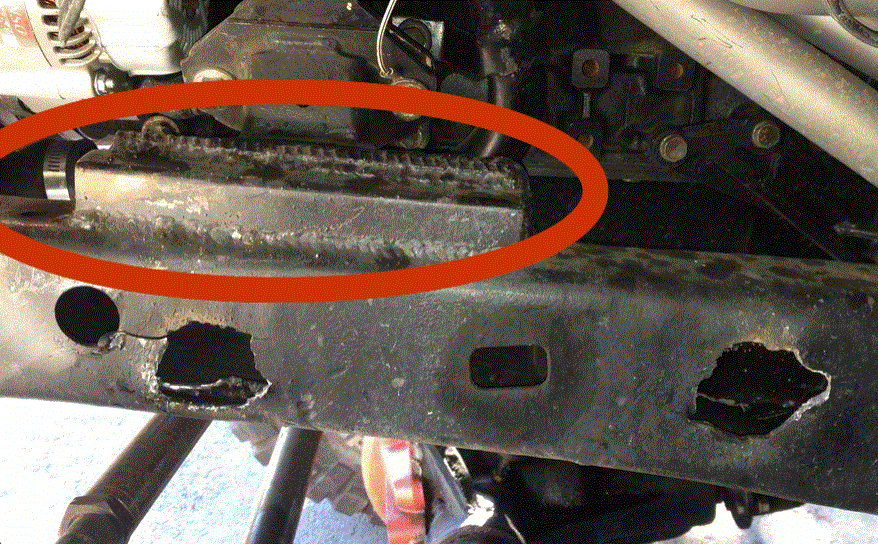
Did the shock hoop have the extra tubes attached to the rear that are welded to the top of the frame? (Check my build-up thread, post #185)
What length are the shocks and what lift are the springs?
Looks like you'll need a decent length of plate on there.
Definitely run bump stops, especially if the shocks bottom out. My SAS kit actually cam with bump sop extensions.
12-05-2013, 06:52 PM
#3
Registered User
Thread Starter
Shocks are ~ 18" compressed , with ~ 13" of travel .
No I did not reinforce the hoop like you did , great idea .
I think bump stops will be a must ... just got a 14" plate of 1/4 inch , hopefully to beef up the frame and get the hoop back on , running on 3 out 4 is getting a little exciting !
No I did not reinforce the hoop like you did , great idea .
I think bump stops will be a must ... just got a 14" plate of 1/4 inch , hopefully to beef up the frame and get the hoop back on , running on 3 out 4 is getting a little exciting !
12-05-2013, 11:56 PM
#4
 Are you planning to do both sides??
1/4" is a bit of over kill considering your frame is between 3and 4 mm
instead of plate I would have used angle catching the top of the original frame.
just remember to keep away from vertical welds and a few plug welds don`t hurt
12-06-2013, 05:43 AM
#5
Registered User
Thread Starter
Yes I'll be doing both sides .
I also bought a 3/16 plate , so I might use that instead , I agree the 1/4 plate was pretty beefy when I mocked it up on the frame . I got a lot to learn .
Thanks for the input , I'll do some research on using angle ...
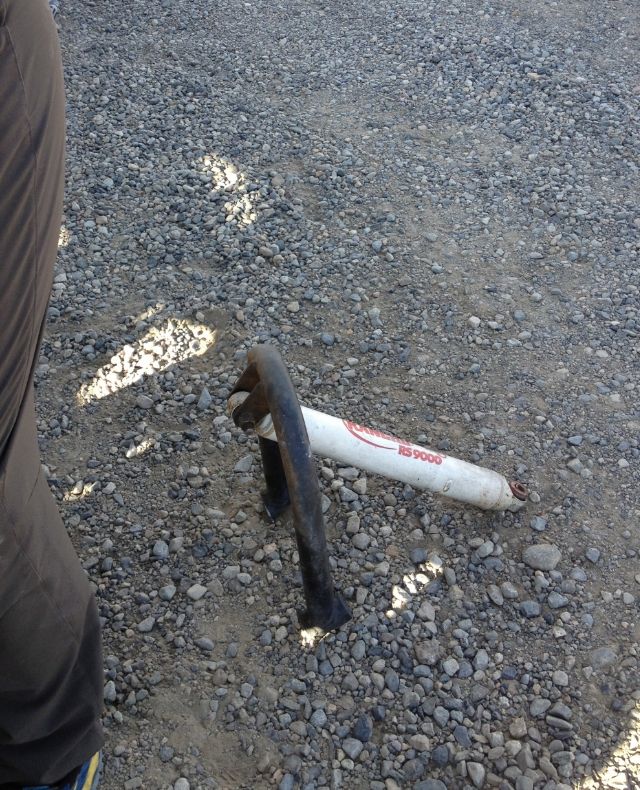
Broken on the side of the road near Bridgeport CA. Drove over the Sierra with no driver side shock ... !
I also bought a 3/16 plate , so I might use that instead , I agree the 1/4 plate was pretty beefy when I mocked it up on the frame . I got a lot to learn .
Thanks for the input , I'll do some research on using angle ...
Broken on the side of the road near Bridgeport CA. Drove over the Sierra with no driver side shock ... !
Last edited by v_man; 12-06-2013 at 08:34 AM.
 I will try and get some pictures to show you.
Trending Topics
12-06-2013, 02:33 PM
#8
Registered User
Thread Starter
Any advice on best place to mount front bump stops ?
Weld bump stops to frame ? Or weld bump stops to the leaf spring plates on the front axle ?
Or both frame and spring plate and they bump somewhere in the middle ?
Weld bump stops to frame ? Or weld bump stops to the leaf spring plates on the front axle ?
Or both frame and spring plate and they bump somewhere in the middle ?
12-07-2013, 07:31 AM
#11
Registered User
Thread Starter
Yes I will be adding gussets , that seems like a no brainer now .
Wyoming , any way you can put up some pics using angle in the manner you suggested , perhaps around the top and bottom corner of the frame , instead of just throwing a plate on the frame?
Wyoming , any way you can put up some pics using angle in the manner you suggested , perhaps around the top and bottom corner of the frame , instead of just throwing a plate on the frame?
 ones!!!!!!
12-07-2013, 09:48 AM
ones!!!!!!
12-07-2013, 09:48 AM
#13
Since I really don`t have any solid axles here and a IFS is so different I just used a piece of 1/2" x4"" to simulate the frame .
The patch piece is 1/8X6" strip bent on a break to give me about 2"x4"angle which is great for the mid -eighties 4x4 vehicles.
Nothing is measured but it should give you the idea .
The circles on the angle can be plug welds just don`t get any over the damaged area Been there done that!!
The idea is to get your shock hoops as much bearing surface as practical
Questions feel free
12-07-2013, 11:41 AM
#14
Registered User
Thread Starter
Thanks Wyoming .
I have an engine mount reinforcement on top of the frame right where that angle would go ...
I'm assuming I could use an angle as you suggested on the underside of the frame ?
Also , what would you recommend , 1/8 ? That seems a little light , but I understand these frames ain't much thicker .... Thanks again .
12-07-2013, 02:44 PM
#15
in your case you can notch the angle to fit around the brace.
Think suspension bridge if need be an interlocking piece that catches top and bottom .
You have to figure out where the most stress load is going to be.
Is most of it going to be a downward force pushing down or when the shock is pushed up
Your new pieces should extend several inches past the damaged sections.
I use 1/8" it works for me but if your going to be doing a lot of dropping off rocks 3/16" won`t hurt .
Last edited by wyoming9; 12-07-2013 at 02:48 PM.
12-07-2013, 03:09 PM
#16
If it was me this is exactly what I would do:
Use a piece of cardboard and make a exact template if the front section of your frame. Lay that out on a 1/8" piece of steel and cut it out. Lay that template onto the side of frame and weld it solid all the way around. You can drill a few holes and weld them if needed. I don't see no need in wrapping the frame or using angle. Suede that's a great idea but I do not see it needed is this situation. Although if you do try the angle then don't buy a piece of angle. Use 1/8" sheet and bend it your self. This is easily done if you weld the top of the frame first notching out the motor mount of course. Once welded take a large pair of pliers and bend the steel over. Finishing it off with a hammer. As you weld beat it with a hammer so you get a nice flush plate. Upon finishing you can trim the left over steel with a grinder making a nice clean plate that matches the frame exact.
These are just suggestions. However once it's fixed you better brace it. I would brace it using a Y design. Have to pieces welded to the hoop making a V then tie one piece from it to the frame making you a nice little Y... If you notch some tubing you can make a nice little brace fairly easy.
Hope this info helps bud...
 12-15-2013, 05:21 PM
#19
Registered User
Thread Starter
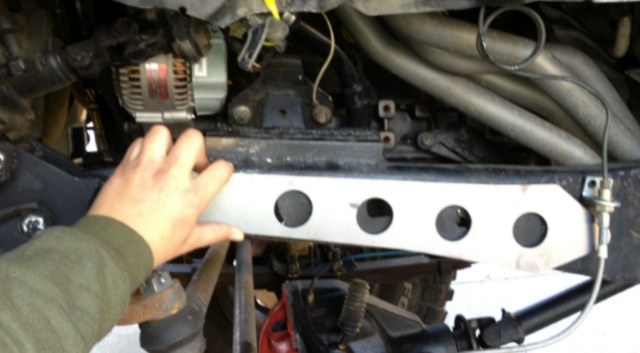
Got the plate and hoop back on
I was able to find some pre cut frame reinforcement steel (3/16") from trail gear.
I guess a lot of people are breaking stuff on their Yota's...
The 3/16" piece
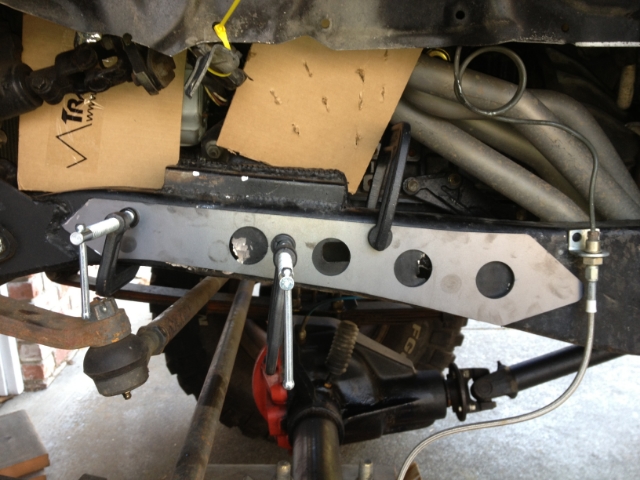
All clamped up

All scratched up
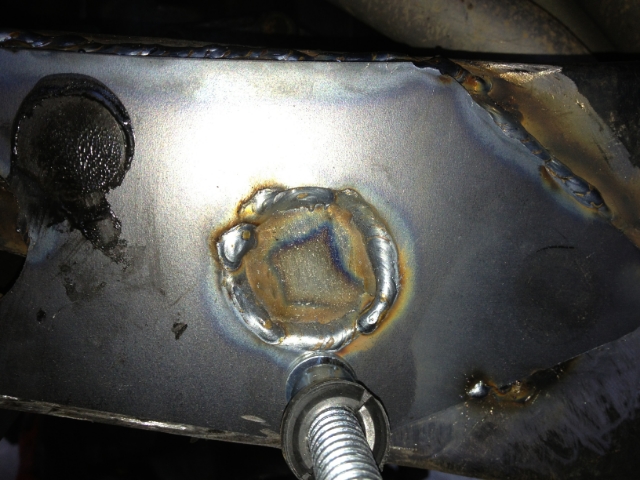
The quality and appearance of the weld was directly related to how well I could
move my fat head in the fender well , and get a good position to weld .
This end wasn't too bad
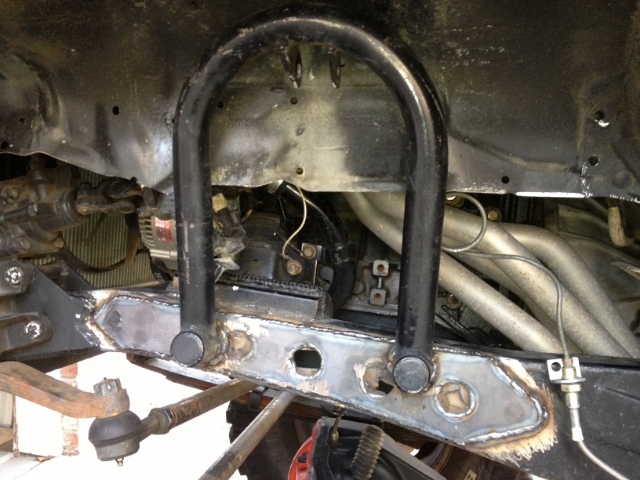
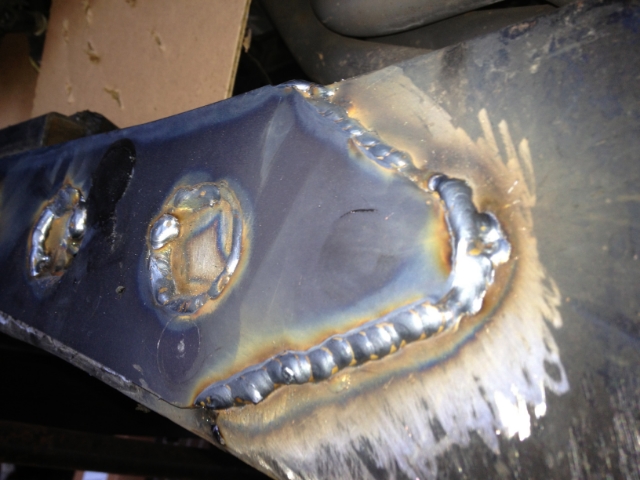
Getting the hoop on now
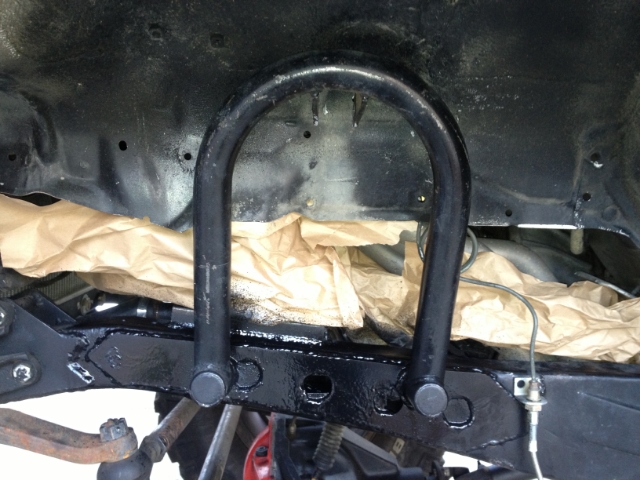
A little paint to make it look pretty , and keep the iron oxide at bay
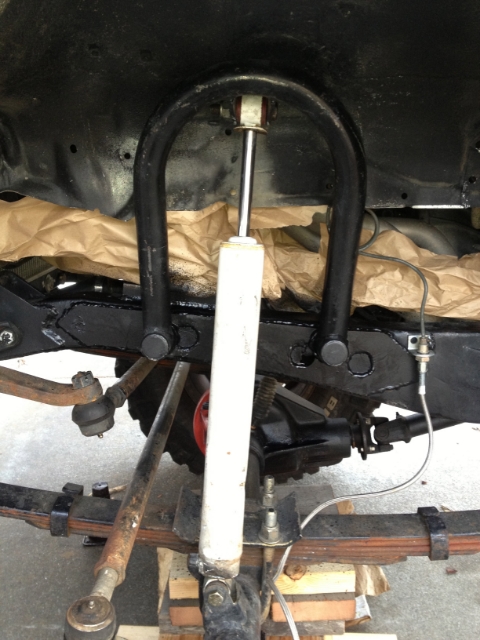
And finally , the whole point of it , getting my shock back on , she's riding a bit
smoother tonight
I guess a lot of people are breaking stuff on their Yota's...
The 3/16" piece
All clamped up
All scratched up
The quality and appearance of the weld was directly related to how well I could
move my fat head in the fender well , and get a good position to weld .
This end wasn't too bad
Getting the hoop on now
A little paint to make it look pretty , and keep the iron oxide at bay
And finally , the whole point of it , getting my shock back on , she's riding a bit
smoother tonight


