
1st Gen 4Runner ZUK Mod DIY/How to (Lots 'o' photos!)
 03-21-2010, 12:22 AM
#1
Registered User
Thread Starter
iTrader: (2)
Join Date: Dec 2009
Location: Pleasanton, CA - SF Bay Area
Posts: 2,159
Likes: 0
Received 7 Likes
on
5 Posts
1st Gen 4Runner ZUK Mod DIY/How to (Lots 'o' photos!)
(this is the non-welding version)
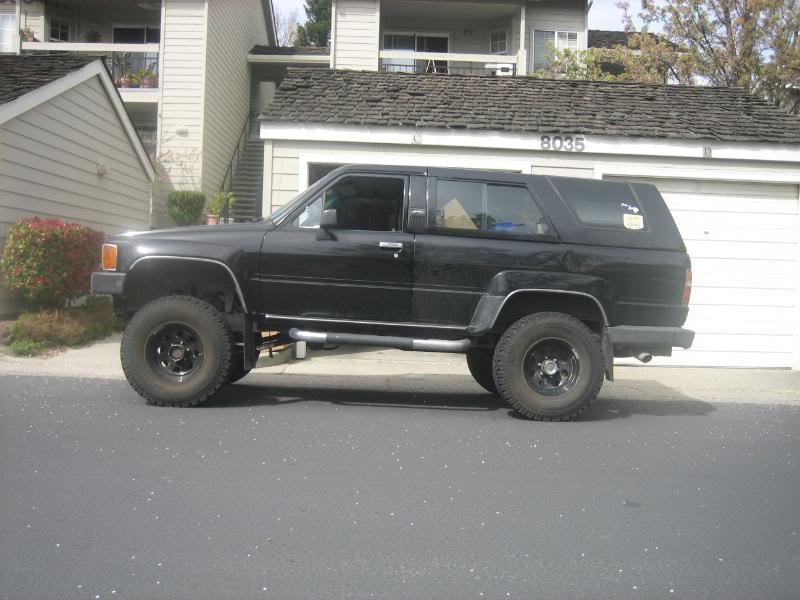
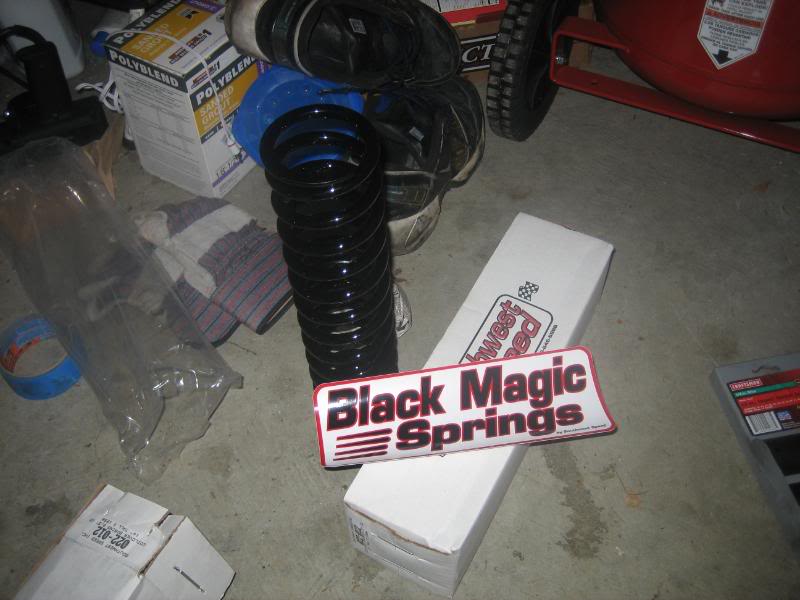
My 1987 4runner has had saggy rear leafs since I bought it in 2002 with 200,000 miles on it. Now, over 60,000 miles later, and after a 4” Pro Comp lift kit in 2004 that added 4” blocks to my saggy rear springs, I wanted to remedy the sag, and the awful spine jarring ride that I’d been putting up with for years. I bought the springs on eBay from the seller that ZUK recommended on his site – the link is here (I went for the 14” 125# version).
I don’t have welding tools and don’t know how to, so I was going to have to get creative on the install. I also don’t have a torch, so I had to REALLY get the creative juices flowing when spreading the cut bumpstops apart (more on that later).
The steps are pretty simple (I’m writing this for a non-lifted 4runner):
1) Get the truck up on jack stands in the back and take of the rear wheels (chock the front wheels)
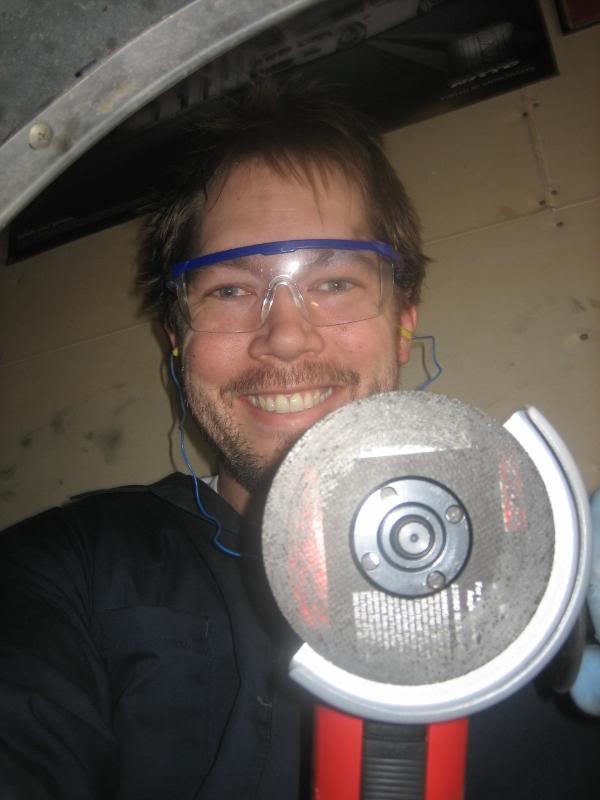
2) Cut the OEM frame mounted bump stops (it’s a “U” shape, and you cut the bottom of the “U” out with an angle grinder (I used a 4.5” cutting wheel)
3) Move the front part of the remaining cut “U” shaped bump stop forward to accommodate the Black Magic springs (I believe a width of 3.5” was the magic number for me).
4) Cram the springs into the cut “U” shaped bumpstops you’ve just cut, and the rubber “pyramid” on top of the OEM leaf (also a bumpstop). You may need a bottle jack to spread the leaf wider, or use spring compressors).
5) Reassemble and enjoy.
Note: I already had a 4” block lift in the back, so I had extended SS brake lines and a bracket for the LSPV; if running stock suspension, you may need to disconnect brake lines, buy longer ones, or even buy longer shocks.
Below are some before and after measurements of the rear suspension:
Before (with 4” blocks on stock leafs):
Top of fender to top of wheel rim: 13.0” (driver), 12.5” (passenger)
Frame to top of axle: 13.0” (driver), 12.75” (passenger)
Frame to ground: 29.0” (driver), 28.5” (passenger)
After (no blocks, stock leads, coil springs):
Top of fender to top of wheel rim: 13.5” (driver), 13.5” (passenger)
Frame to top of axle: 14.0” (driver), 14.5” (passenger)
Frame to ground: 29.5” (driver), 29.5” (passenger)
If the 4” blocks are taken into account with these numbers, the truck gained about 4.5” to 5” of lift with the coil springs added on (so, assume this for an OEM setup with no previous lift). The ride height is roughly the same after this, but with over 5” of space between the leaf and the bump stop now, where before I had about an inch, and was bottoming out on speed bumps in parking lots. MUCH BETTER!
Here are the steps I took with the mod:
Tip: It’s a good idea to use Liquid wrench or WD40 to loosen up all the components you’ll be working on beforehand. Spray liberally a week before, 3 days before and the day before your project to get it adequately primed. Then, before you get everything going, break the nuts on the U bolts before you raise the truck, as well as the rear lug nuts.
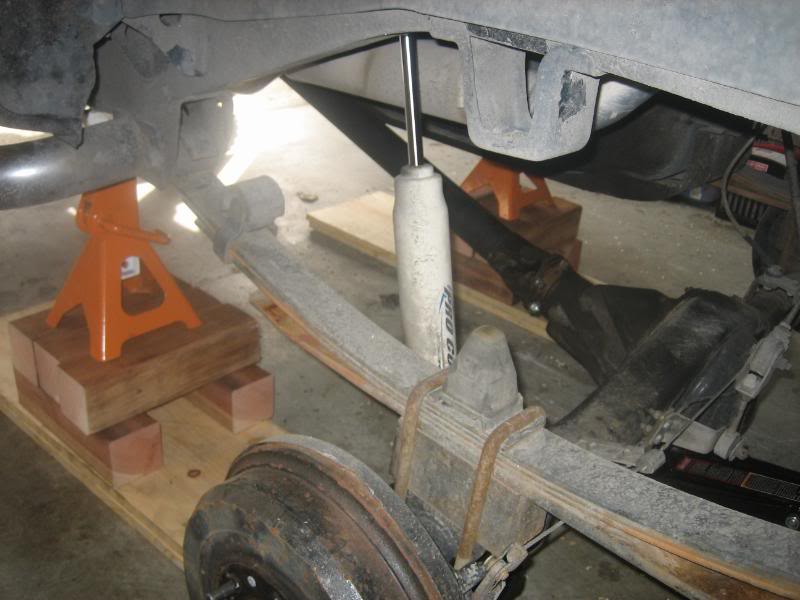
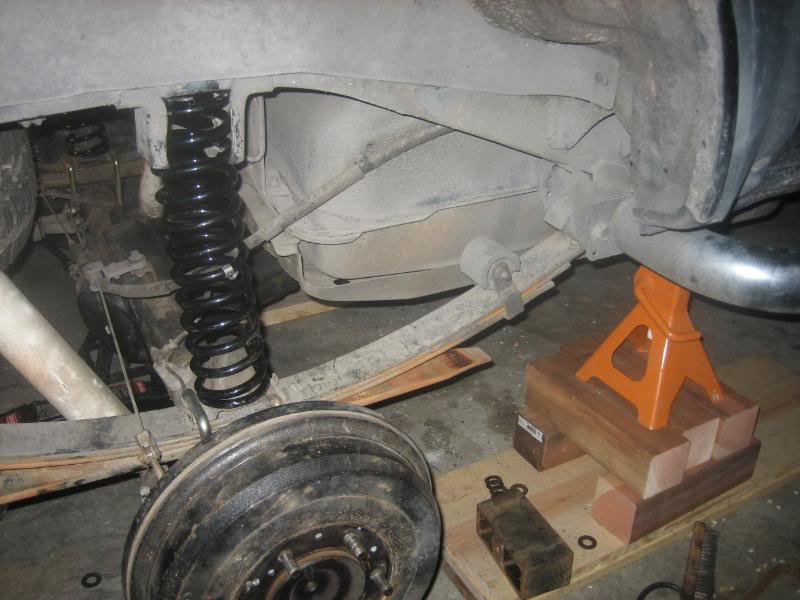
Get the truck up on jack stands (with a 4” block lift this was challenging, as I had to account for the extra space; I used stacked 4x4s, and 2 �” boards under jack stands to get the truck’s rear high enough in the air). Make sure you chock the front wheels well first. Put the jack stands on the frame, just forward of the front rear leaf hanger.
Remove the rear wheels ( I put them in front of the front wheels, which were already chocked, as an extra precaution).
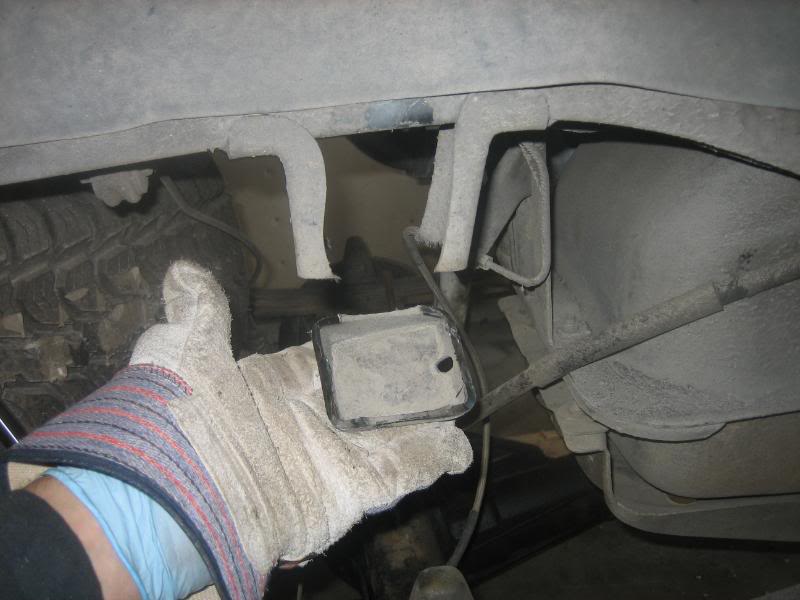
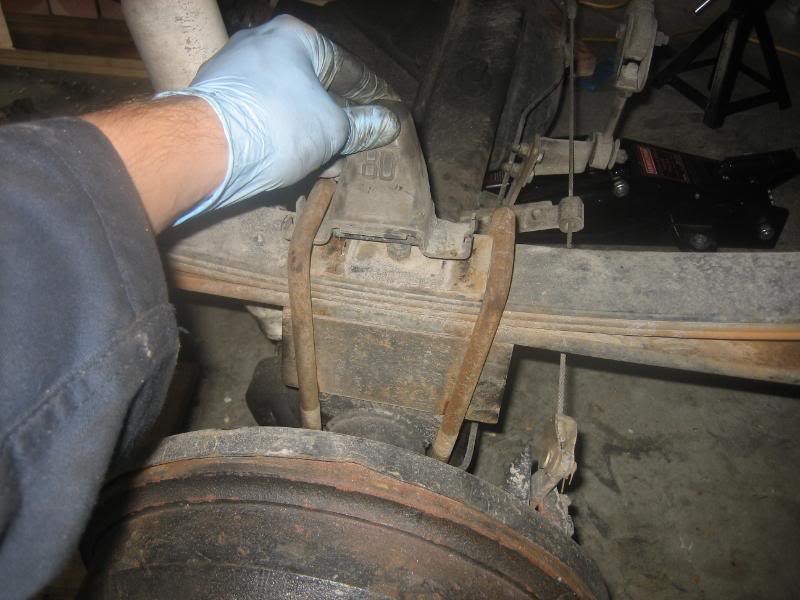
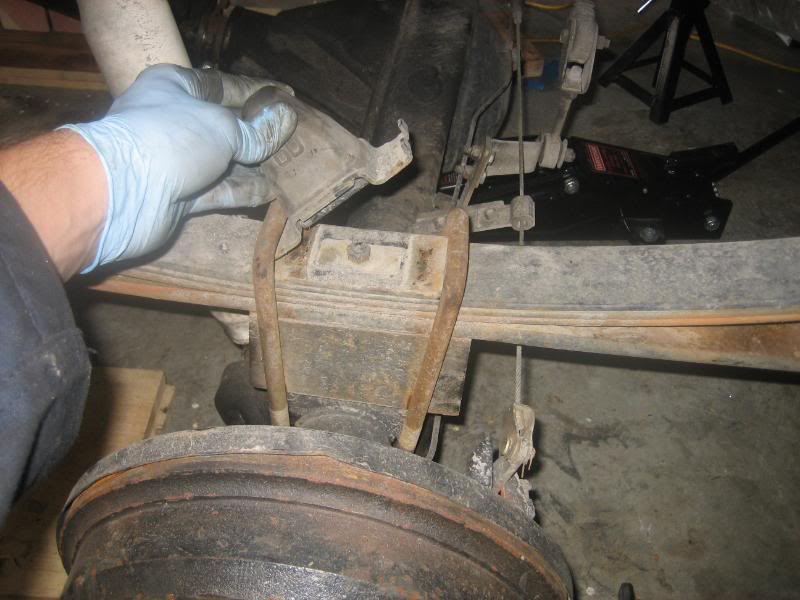
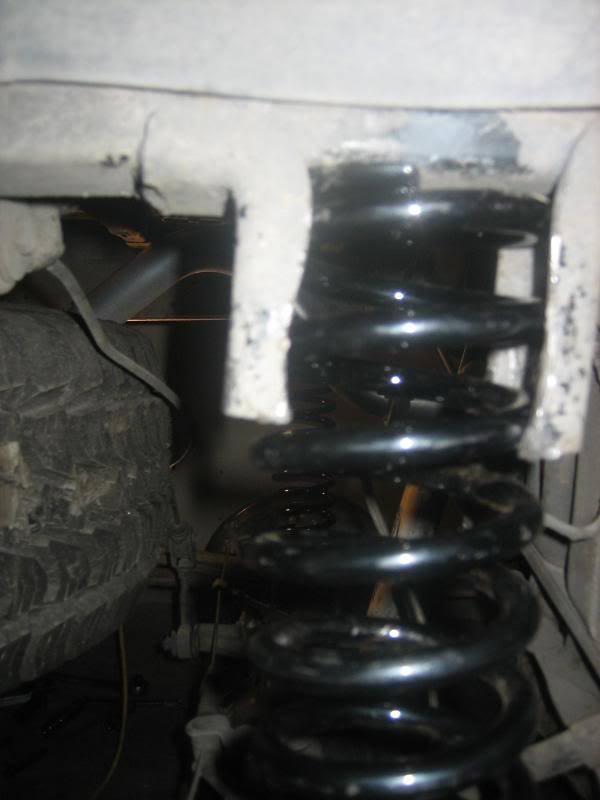
Using an angle grinder/cutoff tool, cut the very bottom of the OEM bumptops attached to the frame. I used painter’s tape to mark an even line across the bottom. I wanted to keep as much of the vertical parts of the “U” bumpstop as possible to support the new coil springs.
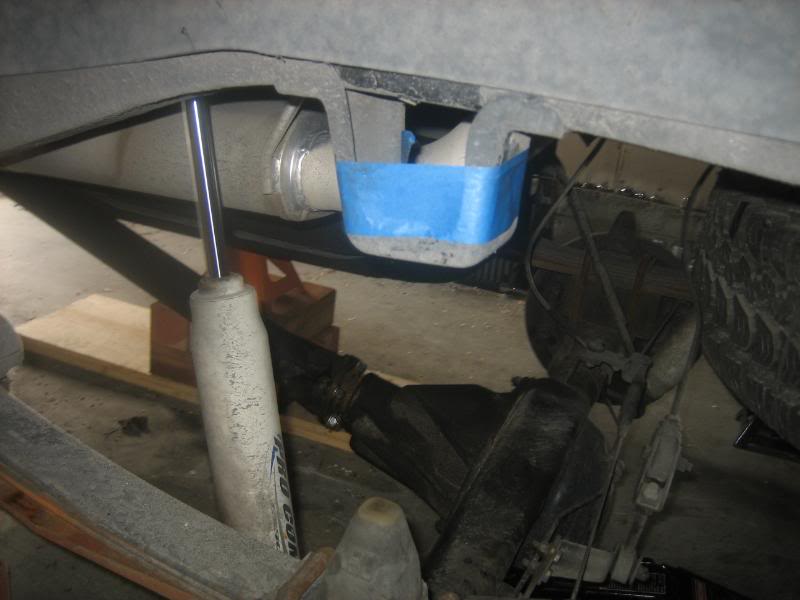
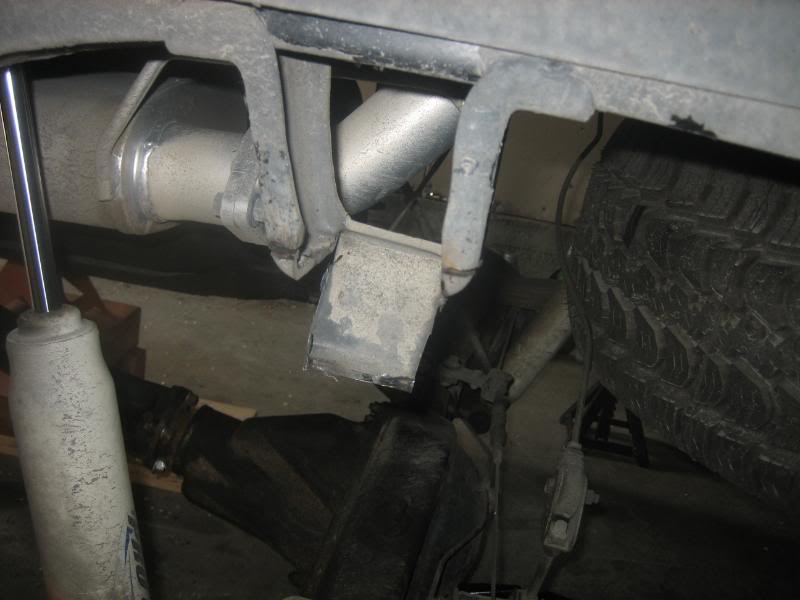
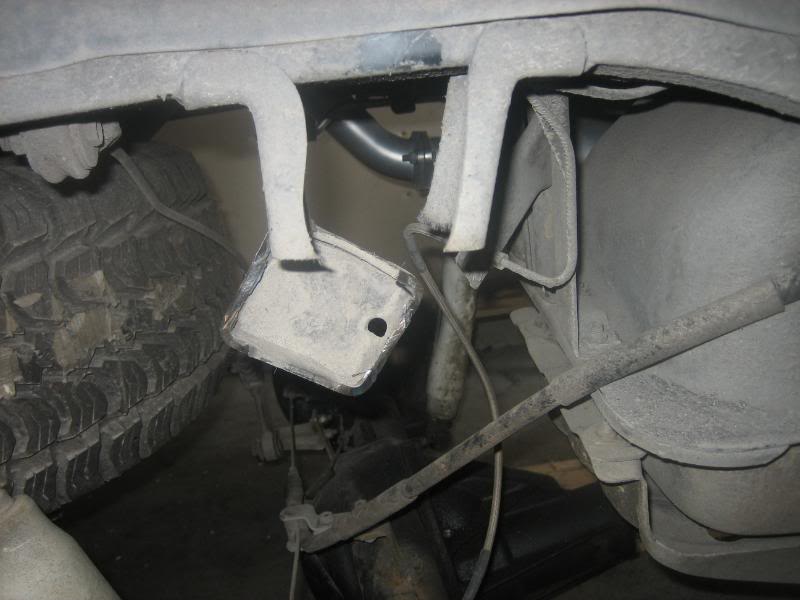
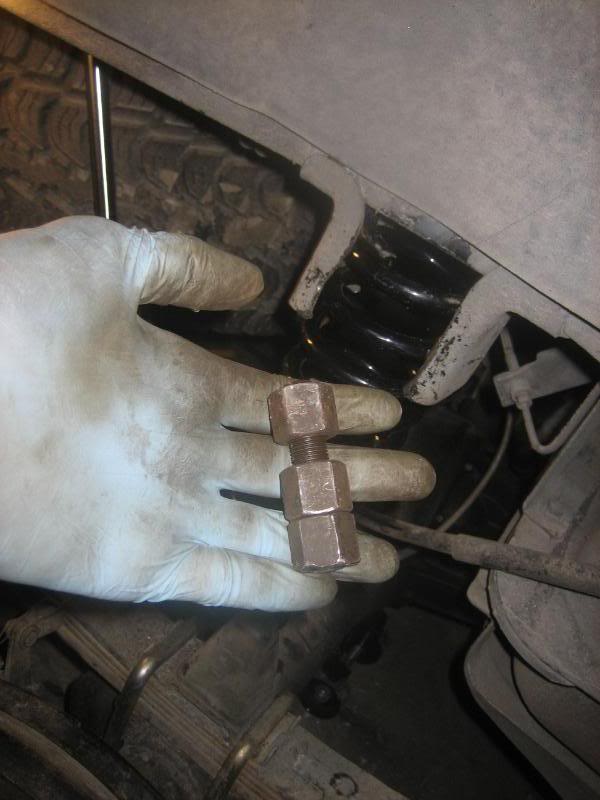
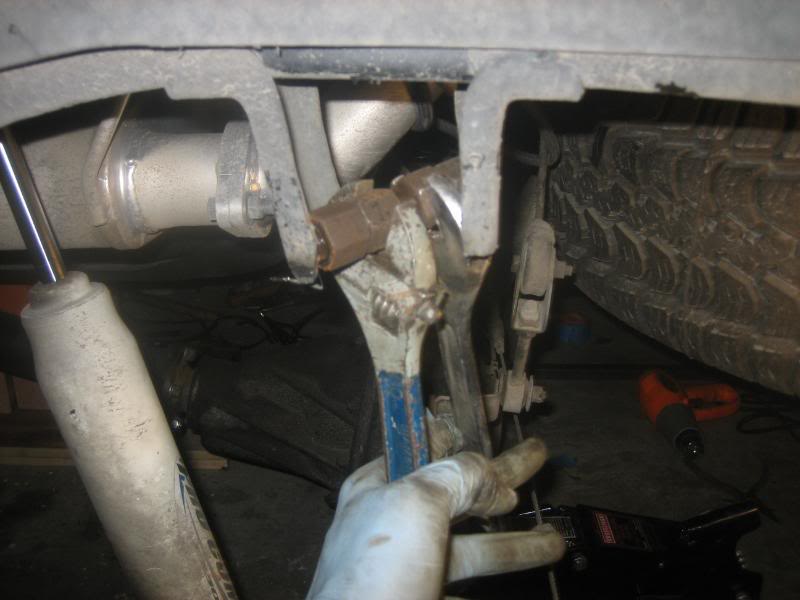
Spread the remaining vertical portions of the OEM bumpstops (I needed about 3.5” of distance between). If you have a torch, heat it up and then use a hammer to tap the front part forward to better align with the rear vertical bumpstop portion. If you DON’T have a torch, bending it will be tough. I ended up using the old 4” block U bolts and nuts to make an expander tool (I cut it t a length just wide enough to fit between the 2 vertical walls of the OEM bumpstop, and fitted the old nuts onto it (4 of them); I then used wrenches to *expand* the segment while between the OEM bumpstop vertical walls, and expanded the walls to make them wide enough to accommodate the new coil springs.
Support the differential with a floor jack before moving on. It's also a good idea to unbolt the LSPV from the rear axle - two 12mm bolts; suspend it out of the way with a bungee tied to the exhuast or something similar.
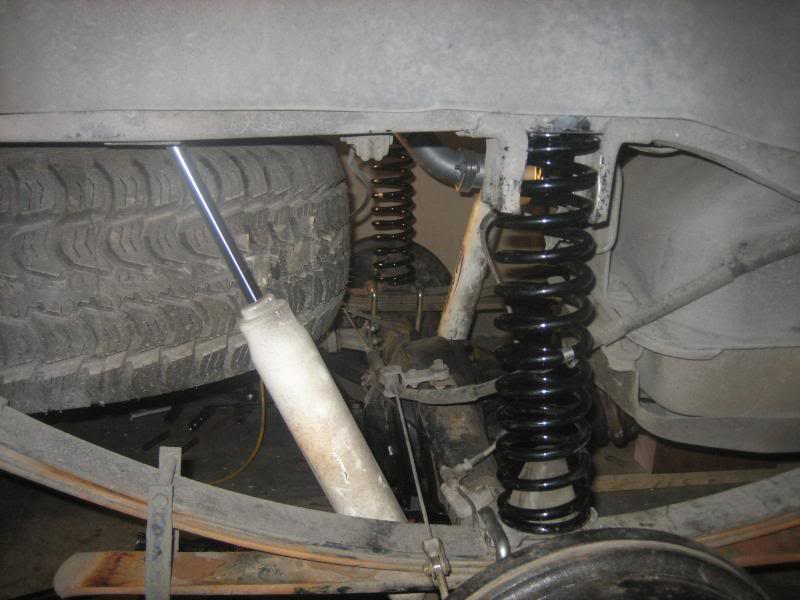
With the differential supported with a floor jack, now it’s time to loosen up the U bolts. Loosen the Ubolts enough that you can slide in/out the rubber triangle bump stop. If you have a bottle jack, place it on top of the rear leaf and expand it toward the frame to move the leaf farther away from the frame; this will allow you to better cram the new coil spring into place. If you don’t have a bottle jack, you may be able to use either spring compressors or a shim of some sort to leverage the new spring in between the bump stop rubber triangle and the old “U” shaped bump stop that you just cut.

Note: Since I had the 4” blocks installed, I need to get back to factory U Bolts for this mod since I wasn’t using the blocks anymore. I got lucky a few weeks ago when shopping for generic U bolts at AutoZone….a guy who worked there had a newer model Tacoma and had just installed some aftermarket springs, so he sold me his OEM U bolts and nuts for $10 – score!
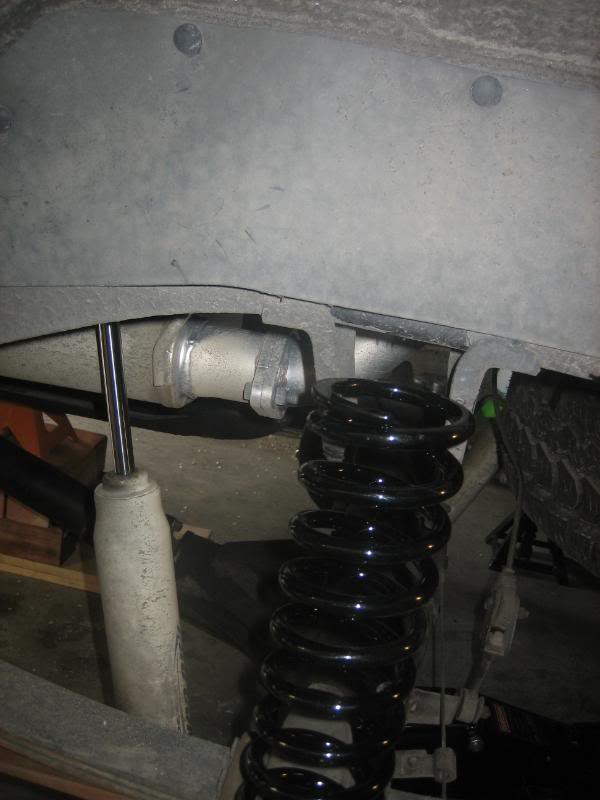
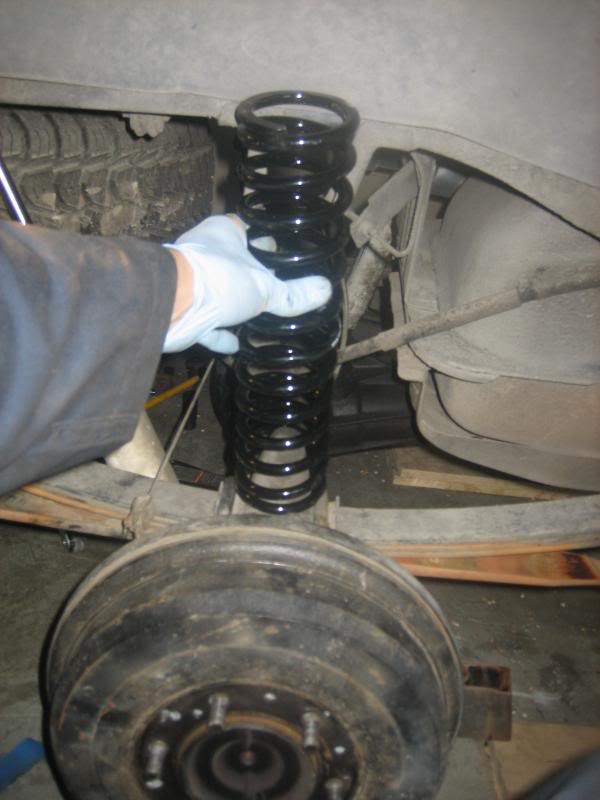
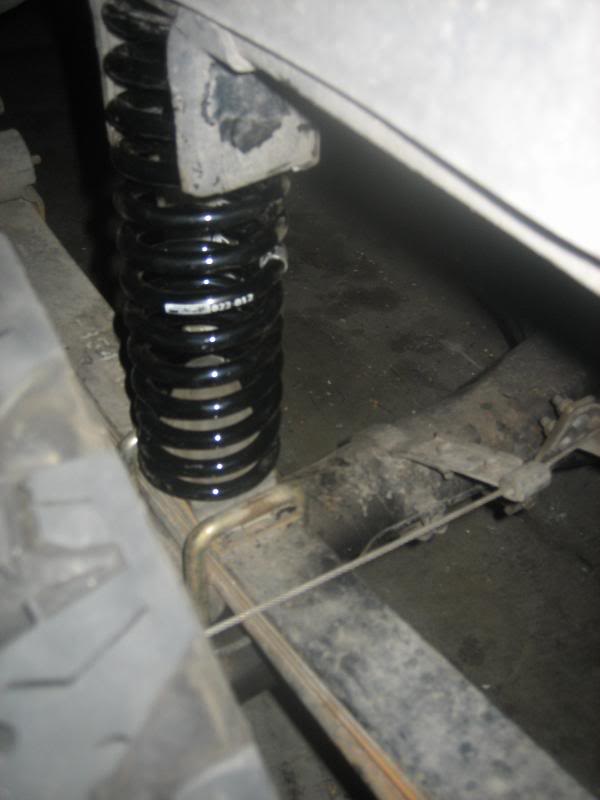
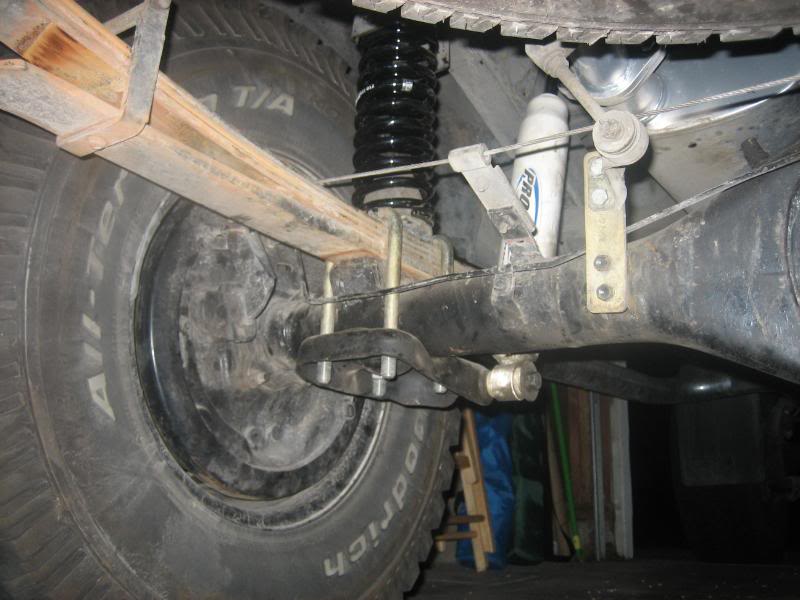
Remove the rubber triangle bump stop and place it into the bottom of the new coil spring; cram the other end of the coil spring into the recently cut “U” shaped bumpstop. With the new spring planted into the upper, cut bumpstop, leverage the bottom part (with rubber triangle installed) back onto the rear leaf spring perch where it was before (this is where the bottle jack expansion trick comes in handy).
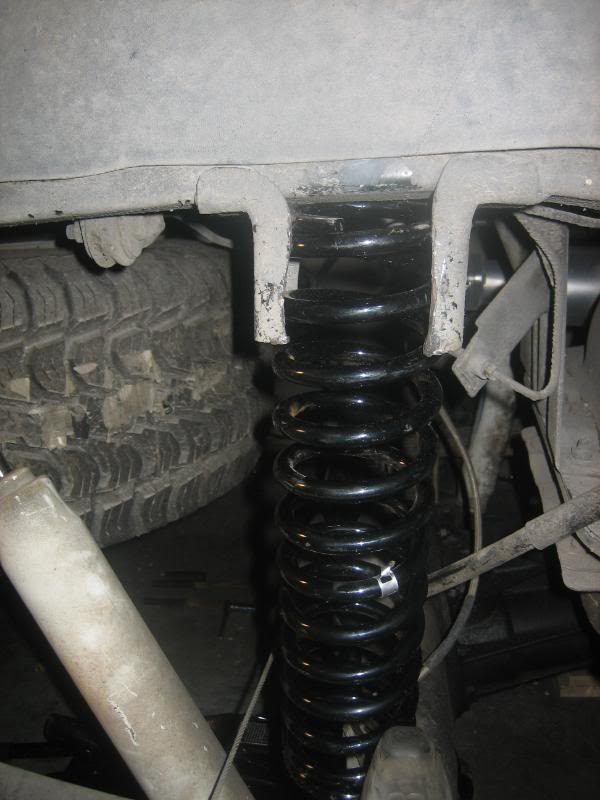
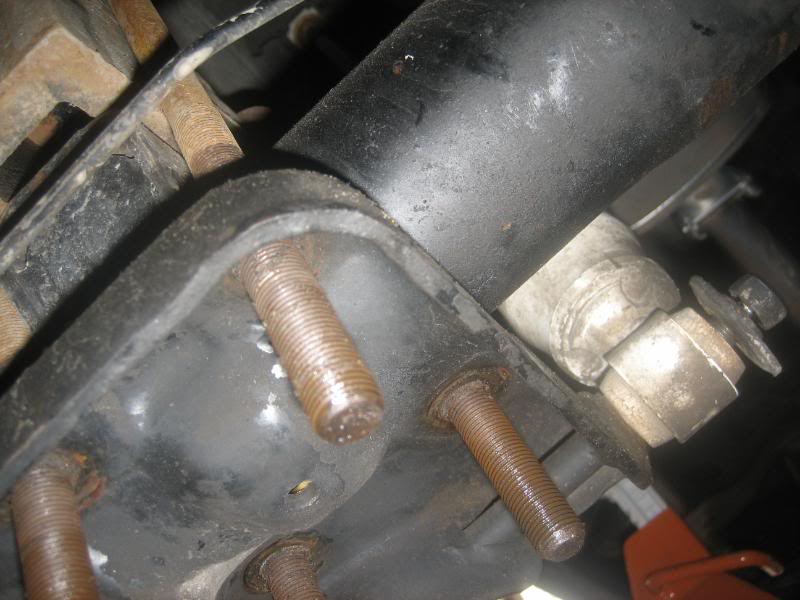
Once situated, slip the U Bolts back over the sides of the rubber triangle bumpstop and tighten the 4 nuts on the bottom.
Jack the truck up by the differential and install wheels.
Lower to ground and torque wheel lugs to spec (76 ft/lbs I think). Tighten U bolt nuts to factory spec (I don’t know – that’s on the list for tomorrow…)
Enjoy your new cushy ride!!

My 1987 4runner has had saggy rear leafs since I bought it in 2002 with 200,000 miles on it. Now, over 60,000 miles later, and after a 4” Pro Comp lift kit in 2004 that added 4” blocks to my saggy rear springs, I wanted to remedy the sag, and the awful spine jarring ride that I’d been putting up with for years. I bought the springs on eBay from the seller that ZUK recommended on his site – the link is here (I went for the 14” 125# version).
I don’t have welding tools and don’t know how to, so I was going to have to get creative on the install. I also don’t have a torch, so I had to REALLY get the creative juices flowing when spreading the cut bumpstops apart (more on that later).
The steps are pretty simple (I’m writing this for a non-lifted 4runner):
1) Get the truck up on jack stands in the back and take of the rear wheels (chock the front wheels)
2) Cut the OEM frame mounted bump stops (it’s a “U” shape, and you cut the bottom of the “U” out with an angle grinder (I used a 4.5” cutting wheel)
3) Move the front part of the remaining cut “U” shaped bump stop forward to accommodate the Black Magic springs (I believe a width of 3.5” was the magic number for me).
4) Cram the springs into the cut “U” shaped bumpstops you’ve just cut, and the rubber “pyramid” on top of the OEM leaf (also a bumpstop). You may need a bottle jack to spread the leaf wider, or use spring compressors).
5) Reassemble and enjoy.
Note: I already had a 4” block lift in the back, so I had extended SS brake lines and a bracket for the LSPV; if running stock suspension, you may need to disconnect brake lines, buy longer ones, or even buy longer shocks.
Below are some before and after measurements of the rear suspension:
Before (with 4” blocks on stock leafs):
Top of fender to top of wheel rim: 13.0” (driver), 12.5” (passenger)
Frame to top of axle: 13.0” (driver), 12.75” (passenger)
Frame to ground: 29.0” (driver), 28.5” (passenger)
After (no blocks, stock leads, coil springs):
Top of fender to top of wheel rim: 13.5” (driver), 13.5” (passenger)
Frame to top of axle: 14.0” (driver), 14.5” (passenger)
Frame to ground: 29.5” (driver), 29.5” (passenger)
If the 4” blocks are taken into account with these numbers, the truck gained about 4.5” to 5” of lift with the coil springs added on (so, assume this for an OEM setup with no previous lift). The ride height is roughly the same after this, but with over 5” of space between the leaf and the bump stop now, where before I had about an inch, and was bottoming out on speed bumps in parking lots. MUCH BETTER!
Here are the steps I took with the mod:
Tip: It’s a good idea to use Liquid wrench or WD40 to loosen up all the components you’ll be working on beforehand. Spray liberally a week before, 3 days before and the day before your project to get it adequately primed. Then, before you get everything going, break the nuts on the U bolts before you raise the truck, as well as the rear lug nuts.
Get the truck up on jack stands (with a 4” block lift this was challenging, as I had to account for the extra space; I used stacked 4x4s, and 2 �” boards under jack stands to get the truck’s rear high enough in the air). Make sure you chock the front wheels well first. Put the jack stands on the frame, just forward of the front rear leaf hanger.
Remove the rear wheels ( I put them in front of the front wheels, which were already chocked, as an extra precaution).
Using an angle grinder/cutoff tool, cut the very bottom of the OEM bumptops attached to the frame. I used painter’s tape to mark an even line across the bottom. I wanted to keep as much of the vertical parts of the “U” bumpstop as possible to support the new coil springs.
Spread the remaining vertical portions of the OEM bumpstops (I needed about 3.5” of distance between). If you have a torch, heat it up and then use a hammer to tap the front part forward to better align with the rear vertical bumpstop portion. If you DON’T have a torch, bending it will be tough. I ended up using the old 4” block U bolts and nuts to make an expander tool (I cut it t a length just wide enough to fit between the 2 vertical walls of the OEM bumpstop, and fitted the old nuts onto it (4 of them); I then used wrenches to *expand* the segment while between the OEM bumpstop vertical walls, and expanded the walls to make them wide enough to accommodate the new coil springs.
Support the differential with a floor jack before moving on. It's also a good idea to unbolt the LSPV from the rear axle - two 12mm bolts; suspend it out of the way with a bungee tied to the exhuast or something similar.
With the differential supported with a floor jack, now it’s time to loosen up the U bolts. Loosen the Ubolts enough that you can slide in/out the rubber triangle bump stop. If you have a bottle jack, place it on top of the rear leaf and expand it toward the frame to move the leaf farther away from the frame; this will allow you to better cram the new coil spring into place. If you don’t have a bottle jack, you may be able to use either spring compressors or a shim of some sort to leverage the new spring in between the bump stop rubber triangle and the old “U” shaped bump stop that you just cut.
Note: Since I had the 4” blocks installed, I need to get back to factory U Bolts for this mod since I wasn’t using the blocks anymore. I got lucky a few weeks ago when shopping for generic U bolts at AutoZone….a guy who worked there had a newer model Tacoma and had just installed some aftermarket springs, so he sold me his OEM U bolts and nuts for $10 – score!
Remove the rubber triangle bump stop and place it into the bottom of the new coil spring; cram the other end of the coil spring into the recently cut “U” shaped bumpstop. With the new spring planted into the upper, cut bumpstop, leverage the bottom part (with rubber triangle installed) back onto the rear leaf spring perch where it was before (this is where the bottle jack expansion trick comes in handy).
Once situated, slip the U Bolts back over the sides of the rubber triangle bumpstop and tighten the 4 nuts on the bottom.
Jack the truck up by the differential and install wheels.
Lower to ground and torque wheel lugs to spec (76 ft/lbs I think). Tighten U bolt nuts to factory spec (I don’t know – that’s on the list for tomorrow…)
Enjoy your new cushy ride!!
Last edited by Philbert; 03-21-2010 at 08:53 AM. Reason: forgot the "no welding" callout
 03-21-2010, 12:52 AM
#2
Registered User
Nice write up!
Got any "after" pics? I know you said it's close to the same height. I used the 14inch 125 lb springs. But I just have ball joint spacers up front not a lift, and mine ended up with a nice little rake on it. Interested to see the final product.
Can you relax the torsion bars a little for a little more leveling action?
Good work, dude!
Last edited by kiyobrown; 03-21-2010 at 12:54 AM.
03-21-2010, 08:54 AM
#5
Registered User
Thread Starter
iTrader: (2)
Join Date: Dec 2009
Location: Pleasanton, CA - SF Bay Area
Posts: 2,159
Likes: 0
Received 7 Likes
on
5 Posts
Nice write up!
Got any "after" pics? I know you said it's close to the same height. I used the 14inch 125 lb springs. But I just have ball joint spacers up front not a lift, and mine ended up with a nice little rake on it. Interested to see the final product.
Can you relax the torsion bars a little for a little more leveling action?
Good work, dude!
Got any "after" pics? I know you said it's close to the same height. I used the 14inch 125 lb springs. But I just have ball joint spacers up front not a lift, and mine ended up with a nice little rake on it. Interested to see the final product.
Can you relax the torsion bars a little for a little more leveling action?
Good work, dude!
I finished when it was dark and my "after" shots didn't come out well. Will try to grab some today when I road test it.
Phil
03-21-2010, 09:27 AM
#7
Registered User
Join Date: Sep 2008
Location: Tucson, AZ
Posts: 228
Likes: 0
Received 0 Likes
on
0 Posts
Sweet! Looks like I know what im doing soon. Quick question though. Will any kind of springs work, that are the proper size? I know Zuk recommends that ebay seller's products but will any springs work? Aslong as they are 12"-14"?
Trending Topics
03-21-2010, 09:34 AM
#9
Nice job Philbert! I really think the weldless option you chose is the best all around quicky lift that can be had
 Your spreader was very creative. Great pics....I'll link this to my site. Please be sure to "lock" the pictures so they don't accidentally get erased...I'll probably save those pics in a folder just to be sure.
 I bet the ride is sooo much better than before.
ps-- Get 3" longer shackles if you want an extra 1.5" lift

ps again....I see you have Procomps on the rear. Those are among the stiffest gas shock around but they are known to be very heavy duty and 'beefy'. If you ever replace those think about Bilsteins...they have digressive valving and ride the smoothest.
Last edited by ZUK; 03-21-2010 at 09:38 AM.
03-21-2010, 09:41 AM
#10
Registered User
I still like the TJ 4" springs I used that fit around the top bump stop without cutting, and the fact that the smaller end fits the bottom bump stop perfectly also. If I wanted to, I could remove them and the truck would be back to where it was before the mod. They were around $40 for a used pair. They came 14", but I cut them down to 12".
Last edited by DJ99; 03-21-2010 at 09:43 AM.
03-21-2010, 10:27 AM
#12
I still like the TJ 4" springs I used that fit around the top bump stop without cutting, and the fact that the smaller end fits the bottom bump stop perfectly also. If I wanted to, I could remove them and the truck would be back to where it was before the mod. They were around $40 for a used pair. They came 14", but I cut them down to 12".
On some with fat tires there is the minor issue of the extra wide TJ coils rubbing the sidewall so that has to be considered sometimes...and that can be addressed with wheel spacers probably.
and ohyeahcrx....the higher rate coils may be a more firm ride...with added better payload capacity. Most everyone will be using 100 pounds and maybe 125....unless you like to haul the occasional cord of wood.
Bouncy happens when shocks don't do their job. Worn out leaky shocks bring out the bouncy in the ride. Now, here's the interesting thing....with a stock saggy Runner with 25 year old factory crappy worn out piece of shocks, the bouncy factor is not very noticeable when the leafs are sagged and resting on the overloads....but as soon as the coils lift the leafs off the overloads then the bounce is there (with bad shocks). With most of the weight off the leafs(using coils for lift and support) the leaf to leaf resistance goes way down....the whole package behaves like a coil sprung axle and absorbs bumps much better.
03-21-2010, 10:44 AM
#13
Registered User
I still like the TJ 4" springs I used that fit around the top bump stop without cutting, and the fact that the smaller end fits the bottom bump stop perfectly also. If I wanted to, I could remove them and the truck would be back to where it was before the mod. They were around $40 for a used pair. They came 14", but I cut them down to 12".
03-21-2010, 11:19 AM
#14
Registered User
The springs are the front springs off a '97-'06 Jeep TJ.
http://i287.photobucket.com/albums/l...ingsBefore.jpg
http://i287.photobucket.com/albums/l...0_03210026.jpg
http://i287.photobucket.com/albums/l...0_03210027.jpg
http://i287.photobucket.com/albums/l...0_03210028.jpg
http://i287.photobucket.com/albums/l...0_03210029.jpg
http://i287.photobucket.com/albums/l...0_03210031.jpg
Enjoy!
03-21-2010, 11:32 AM
#16
Registered User
Only the avatar picture. It was a good 3 inches. I could have left the springs at original 14" and got more lift. The rear does appears to be a bit higher than the front, unlike what it was. The ride is also very nice.
03-21-2010, 11:34 AM
#17
The springs are the front springs off a '97-'06 Jeep TJ.
http://i287.photobucket.com/albums/l...ingsBefore.jpg
http://i287.photobucket.com/albums/l...0_03210026.jpg
http://i287.photobucket.com/albums/l...0_03210027.jpg
http://i287.photobucket.com/albums/l...0_03210028.jpg
http://i287.photobucket.com/albums/l...0_03210029.jpg
http://i287.photobucket.com/albums/l...0_03210031.jpg
Enjoy!
http://i287.photobucket.com/albums/l...ingsBefore.jpg
http://i287.photobucket.com/albums/l...0_03210026.jpg
http://i287.photobucket.com/albums/l...0_03210027.jpg
http://i287.photobucket.com/albums/l...0_03210028.jpg
http://i287.photobucket.com/albums/l...0_03210029.jpg
http://i287.photobucket.com/albums/l...0_03210031.jpg
Enjoy!
Your pick-up frame is higher than the Runners....so if the same thing was done to a Runner then lift would be 1 or 2" higher than your 3" pick-up lift.
Here's my link so far...... http://gearinstalls.com/coilphilbert.htm
Last edited by ZUK; 03-21-2010 at 11:39 AM.
03-21-2010, 01:25 PM
#20
Agreed...getting rid of the blocks is worth it alone....they can aggravate axle shudder and make leafpacks s-shaped.
Finished the link ... http://gearinstalls.com/coilphilbert.htm
Finished the link ... http://gearinstalls.com/coilphilbert.htm


