Window Regulators?
 02-08-2011, 08:11 PM
#1
Registered User
Thread Starter

Join Date: Jan 2011
Posts: 10
Likes: 0
Received 0 Likes
on
0 Posts
Window Regulators?
Does anyone know if the 1984-89 Vent Window regulator will work with the 1979-83 pickup with vent window? The pictures look virtually identical. I can't imagine Toyota changing them a whole lot.
Any input would be greatly appreciated.
Any input would be greatly appreciated.
 02-09-2011, 02:35 PM
#2
Registered User
Bump for your thread but I can't help you.
I agree with you...but then a lot of funny things changed throughout the years that you wouldn't expect...I wouldn't trust they're the same unless I had them both in my hands to compare. Try DeathCougar, he seems to know most parts.
I agree with you...but then a lot of funny things changed throughout the years that you wouldn't expect...I wouldn't trust they're the same unless I had them both in my hands to compare. Try DeathCougar, he seems to know most parts.
02-09-2011, 06:01 PM
#3
I am pretty sure that 2nd Gen doors are longer than a first gen door.
If you need 79-83 Regulators, PM (Link): TrekkerPaul
last time I was at his place he had a stack of them.
If you need 79-83 Regulators, PM (Link): TrekkerPaul
last time I was at his place he had a stack of them.
02-10-2017, 02:59 PM
#4
Registered User
Going to update this thread for others looking for pre 84 window regulators. The 84+ vent regulator will not fit the earlier door without a modification, the arm is clocked about 30 degrees differently from the original part. But, it can work with some cutting and welding.
I had difficulty finding a pre-84 regulator, and when I finally did, it was about $80. These are about as low-tech as you can get, so I wasn't going to pay that.
So I decided to drop $17 on an 84+ on Amazon: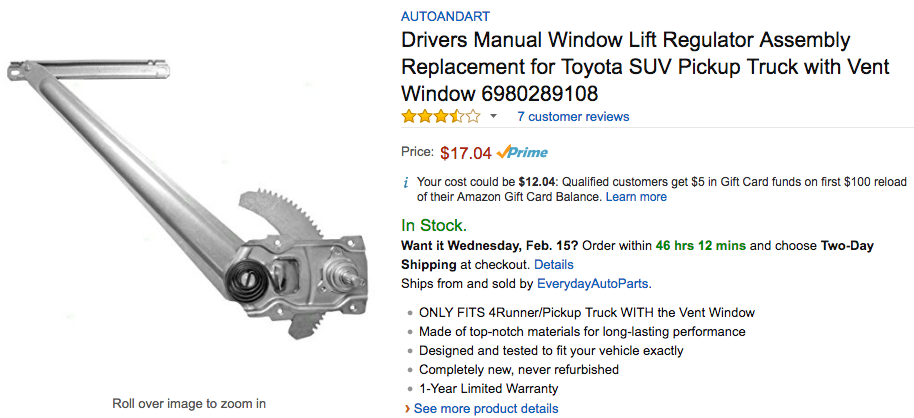
It took about 30 minutes for me to get it installed and working correctly. Here are a few pics to show the differences and what I did to get it to fit. Hope this info helps someone out.
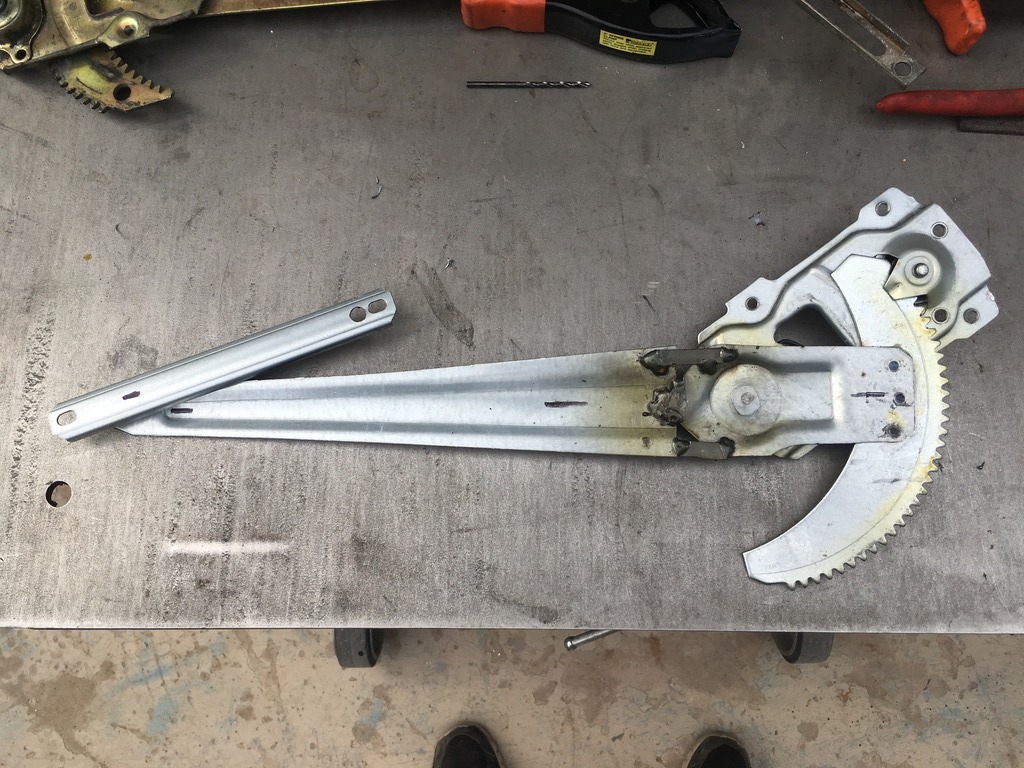
Comparison, original 83 to the 84. See the difference in the arm - it's bent about 30 degrees. Note the gear radius is placed in approximately the same position on both.
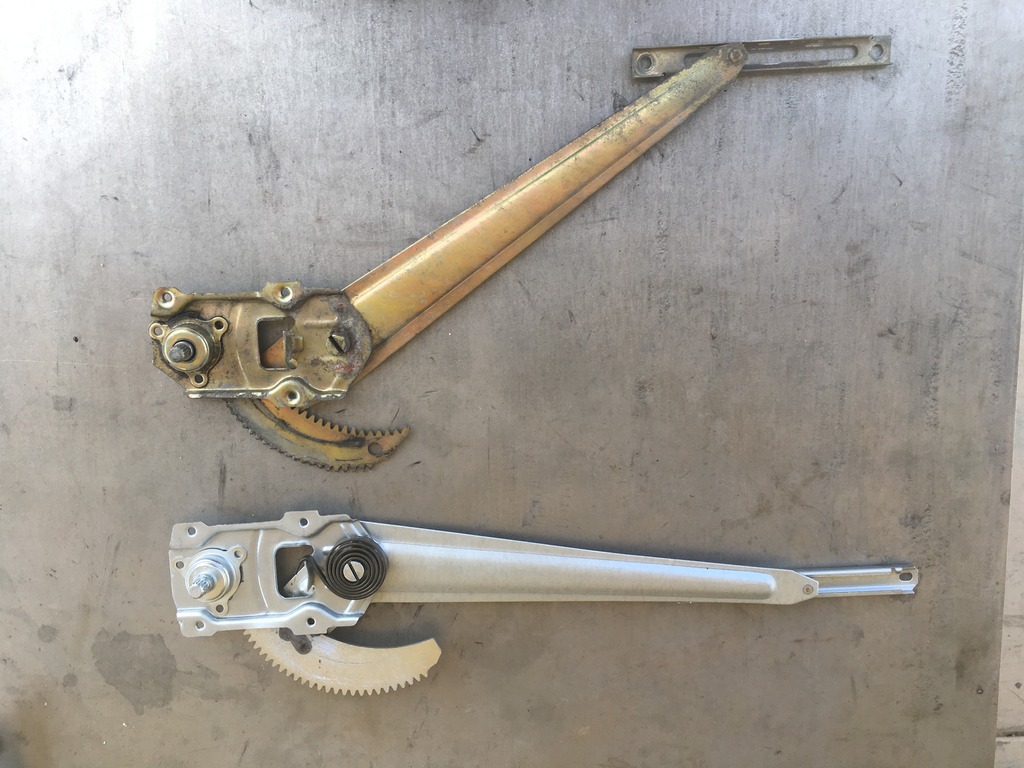
The key is keeping the length the same. The original is 33cm from the center of the main pivot pin to the center of the pin on the window mount rail.
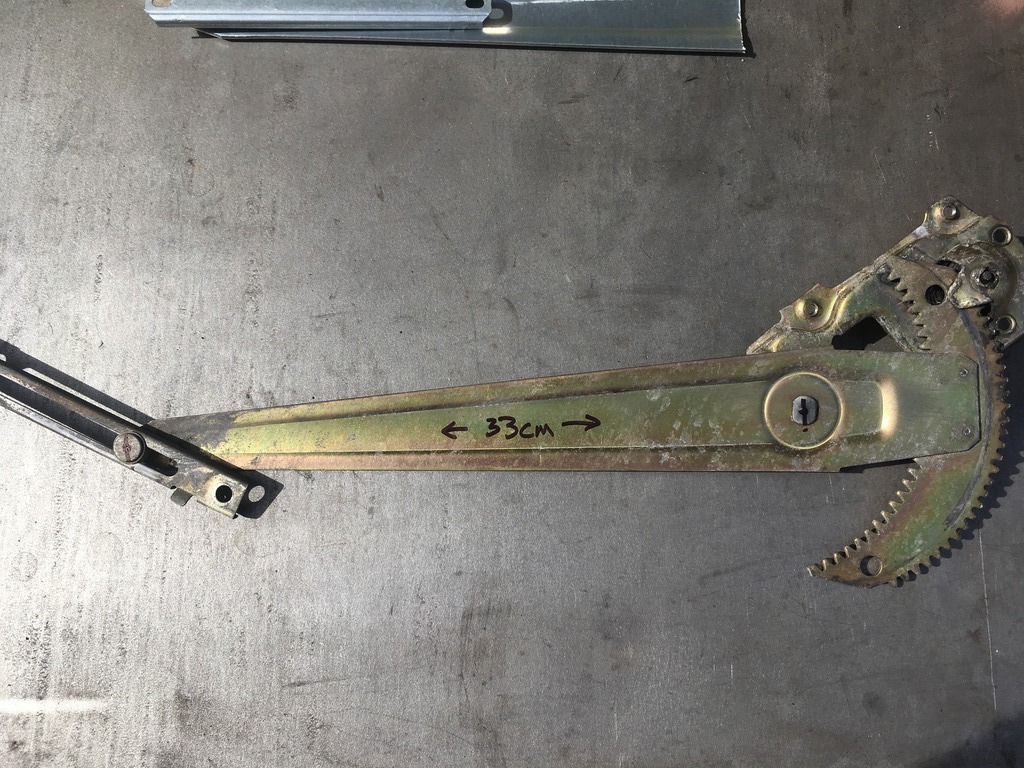
Here the arm is cut, and I'm holding it in position so that the 33cm measurement retained. Of course you'll want to make sure the arm is straight as well, note the sharpie centering marks I made to line it up.
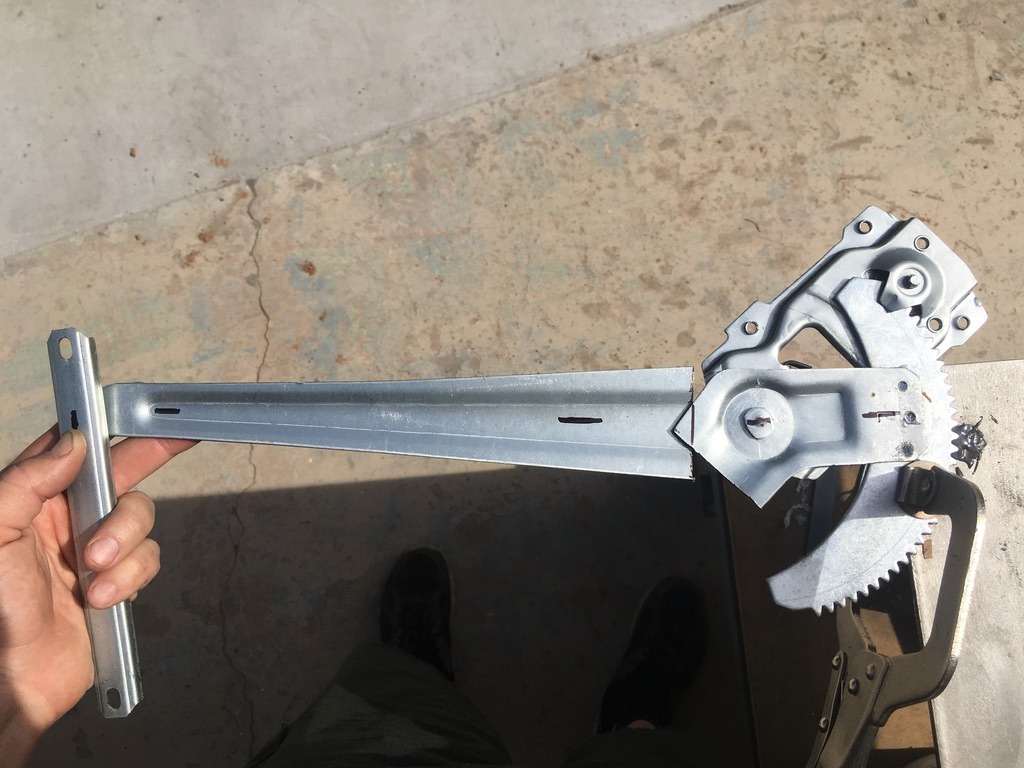
Here is it welded. It isn't pretty, but it doesn't have to be - you'll never see it after installed. I added reinforcing pieces as well.
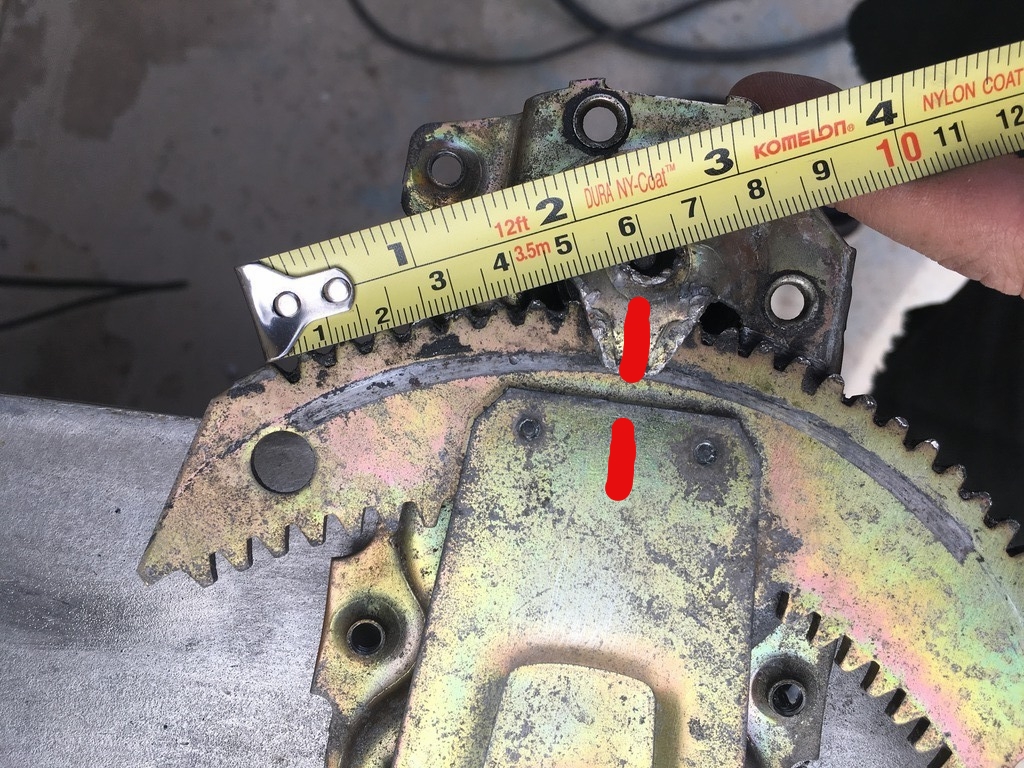
On the first installation, i noted that the window rolled down a little too far, below the top of the door by about an inch. I removed it and made this measurement from the old to the new. Note the two red marks I made, line the arm up as such, then I measured from the center of the gear to the end of the last tooth. See next pic.
Here is the same measurement on the new arm... It has two too many teeth allowing the window to roll down a little further than stock. No problem, weld it up
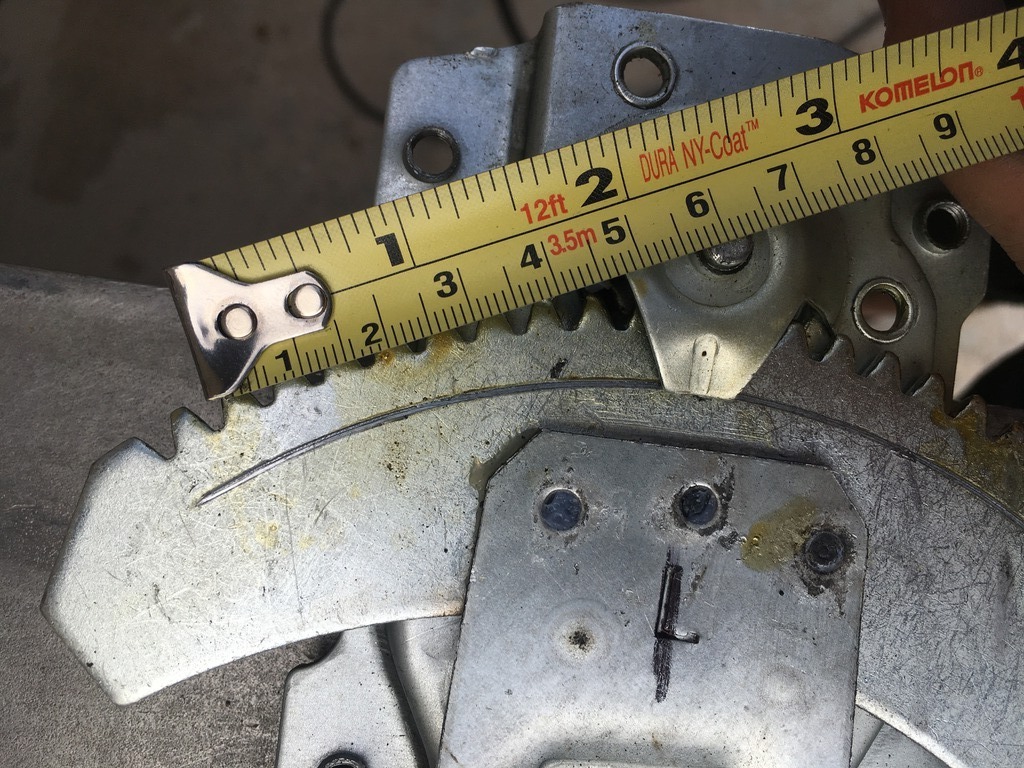
Last two teeth welded.

Last adjustment needed was a new mounting hole in the window rail to match the existing. I had to trim some of the channel for the original bolt & washer to clear.

I had difficulty finding a pre-84 regulator, and when I finally did, it was about $80. These are about as low-tech as you can get, so I wasn't going to pay that.
So I decided to drop $17 on an 84+ on Amazon:
It took about 30 minutes for me to get it installed and working correctly. Here are a few pics to show the differences and what I did to get it to fit. Hope this info helps someone out.
Comparison, original 83 to the 84. See the difference in the arm - it's bent about 30 degrees. Note the gear radius is placed in approximately the same position on both.
The key is keeping the length the same. The original is 33cm from the center of the main pivot pin to the center of the pin on the window mount rail.
Here the arm is cut, and I'm holding it in position so that the 33cm measurement retained. Of course you'll want to make sure the arm is straight as well, note the sharpie centering marks I made to line it up.
Here is it welded. It isn't pretty, but it doesn't have to be - you'll never see it after installed. I added reinforcing pieces as well.
On the first installation, i noted that the window rolled down a little too far, below the top of the door by about an inch. I removed it and made this measurement from the old to the new. Note the two red marks I made, line the arm up as such, then I measured from the center of the gear to the end of the last tooth. See next pic.
Here is the same measurement on the new arm... It has two too many teeth allowing the window to roll down a little further than stock. No problem, weld it up
Last two teeth welded.
Last adjustment needed was a new mounting hole in the window rail to match the existing. I had to trim some of the channel for the original bolt & washer to clear.
Last edited by toy_tek; 02-11-2017 at 10:51 AM.
02-12-2017, 07:17 AM
#5
Great write up and pics. I looked for a long time trying to one for my vented door. Finally found the reason that mine was worn out. The bushing on the back side of the winder stem was missing, binding the gear and stripping the gears off. Made a bushing, welded some gears material onto the gears, filed to original profile. Works good now
02-12-2017, 10:49 AM
#6

Going to update this thread for others looking for pre 84 window regulators. The 84+ vent regulator will not fit the earlier door without a modification, the arm is clocked about 30 degrees differently from the original part. But, it can work with some cutting and welding.
I had difficulty finding a pre-84 regulator, and when I finally did, it was about $80. These are about as low-tech as you can get, so I wasn't going to pay that.
So I decided to drop $17 on an 84+ on Amazon: https://www.amazon.com/gp/product/B007TY3AWU/ref=oh_aui_detailpage_o00_s00?ie=UTF8&psc=1
It took about 30 minutes for me to get it installed and working correctly. Here are a few pics to show the differences and what I did to get it to fit. Hope this info helps someone out.
Comparison, original 83 to the 84. See the difference in the arm - it's bent about 30 degrees. Note the gear radius is placed in approximately the same position on both.
The key is keeping the length the same. The original is 33cm from the center of the main pivot pin to the center of the pin on the window mount rail.
Here the arm is cut, and I'm holding it in position so that the 33cm measurement retained. Of course you'll want to make sure the arm is straight as well, note the sharpie centering marks I made to line it up.
Here is it welded. It isn't pretty, but it doesn't have to be - you'll never see it after installed. I added reinforcing pieces as well.
On the first installation, i noted that the window rolled down a little too far, below the top of the door by about an inch. I removed it and made this measurement from the old to the new. Note the two red marks I made, line the arm up as such, then I measured from the center of the gear to the end of the last tooth. See next pic.
Here is the same measurement on the new arm... It has two too many teeth allowing the window to roll down a little further than stock. No problem, weld it up
Last two teeth welded.
Last adjustment needed was a new mounting hole in the window rail to match the existing. I had to trim some of the channel for the original bolt & washer to clear.
First off. Excellent! This deserves its own thread in the how-to section for sure.
I have questions. Would it be possible and maybe less work to drill out the spot welds of the arm to gear and adjust the angle there, is the hole distance correct and the angle small enough to not place the end off the gear wheel?
02-12-2017, 12:37 PM
#7
Registered User
Actually I thought I would have to drill those spot welds and re-clock the gear as well, but after cutting the arm I realized I wouldn't have to. Either way you need to cut the arm. If you look at the pics closely, the arm on the new one is actually bent (or doglegs), so reclocking the gear alone wouldn't work. Besides that, because the arm isn't straight, it contacts the forward window track support (where it bolts to the inner door skin) before it can reach the full down position.
Trending Topics
02-12-2017, 01:45 PM
#8
Actually I thought I would have to drill those spot welds and re-clock the gear as well, but after cutting the arm I realized I wouldn't have to. Either way you need to cut the arm. If you look at the pics closely, the arm on the new one is actually bent (or doglegs), so reclocking the gear alone wouldn't work. Besides that, because the arm isn't straight, it contacts the forward window track support (where it bolts to the inner door skin) before it can reach the full down position.
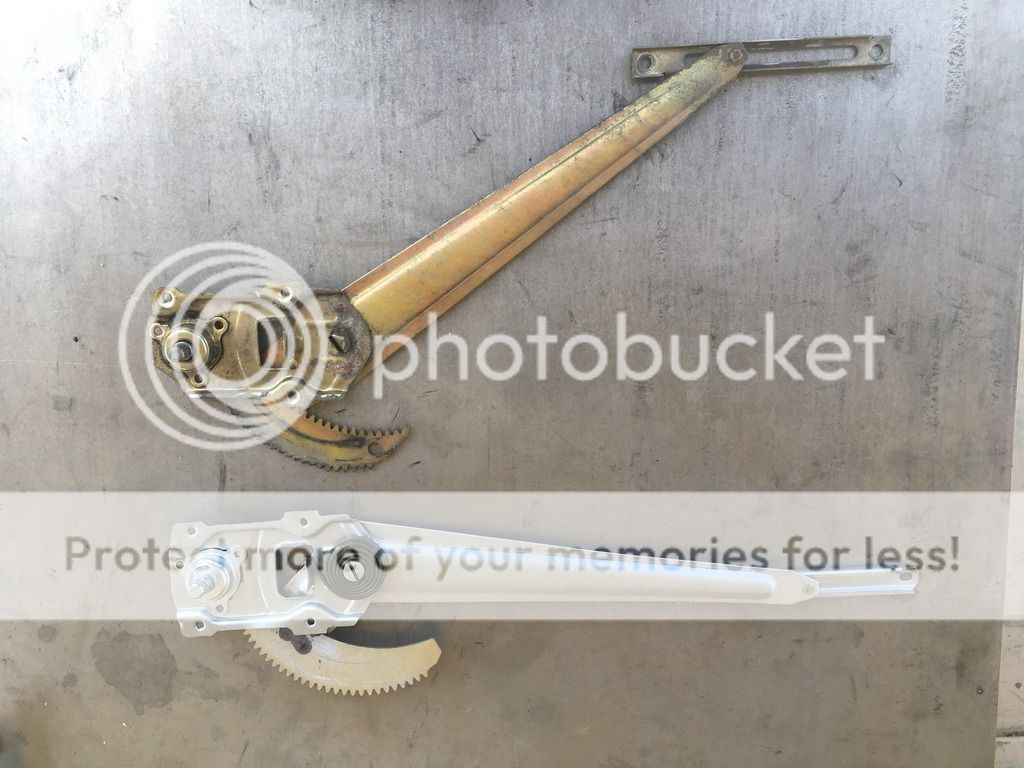
Was being a bit lazy before, I don't like drawing on my tablet.. forgive the crude crayon look
This is what I had in mind. Both photos show a left side regulator in the most downward position. If this doesn't interfere it can be done with just a drill and not require welding. The tab could be reattached via machine screws.

 02-12-2017, 02:46 PM
#9
Registered User
Also, the new one I got had the three tack welds visible in this photo, plus three on the other side, from the arm to the gear. If a welder is available, much faster to only cut the arm and re-weld.

Thread
Thread Starter
Forum
Replies
Last Post
PNW94Runner
86-95 Trucks & 4Runners
3
09-29-2015 02:55 PM
tazman1972
General Electrical & Lighting Related Topics
11
09-28-2015 10:32 PM


