When you click on links to various merchants on this site and make a purchase, this can result in this site earning a commission. Affiliate programs and affiliations include, but are not limited to, the eBay Partner Network.
Any chance you have any tan leather?
82 with two tone brown interior.
Thanks.
I can probably get something really close to that tan color in either upholstery leatherette (vinyl) or upholstery leather. Most upholstery leather is coated in a thin layer of vinyl anyway, but for a little more I could probably find some genuine leather with no vinyl on it. It depends how particular you are and what you want to budget for the shifter boot. I have a tan dash pad in the back of my truck I can use to color match it for you.
How to install your shifter boot.
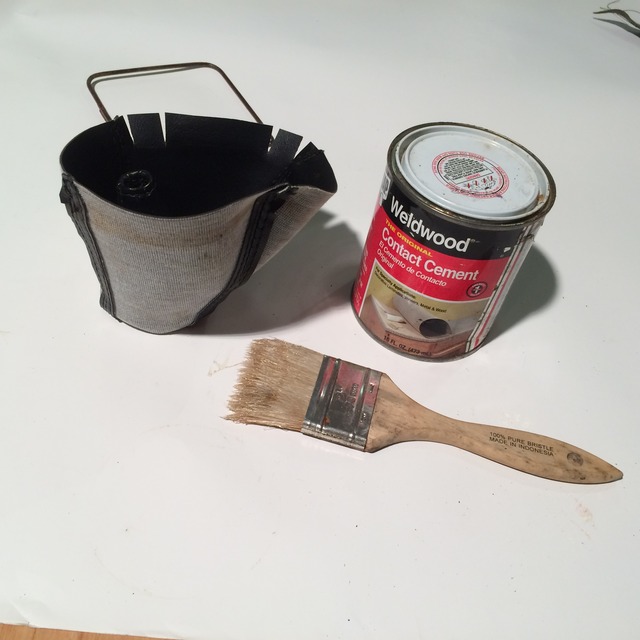
Supplies:
1. New shifter boot
2. the old wire frame
3. sandpaper if wire frame has surface rust (if you've painted or powdercoated this part, it will be even better)
4.Contact cement and brush or spray adhesive
5. Philips head screwdriver
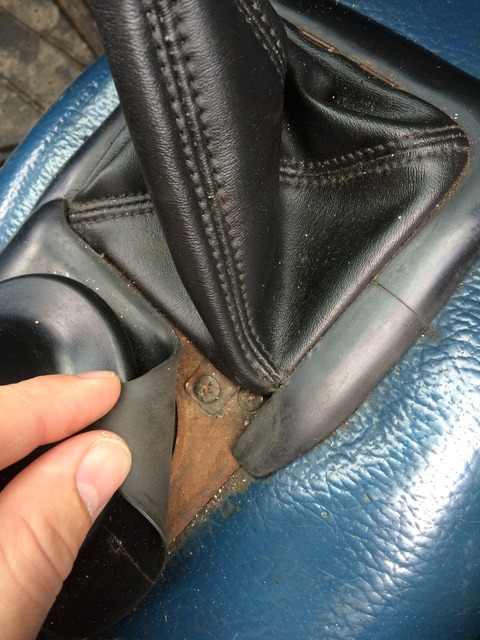
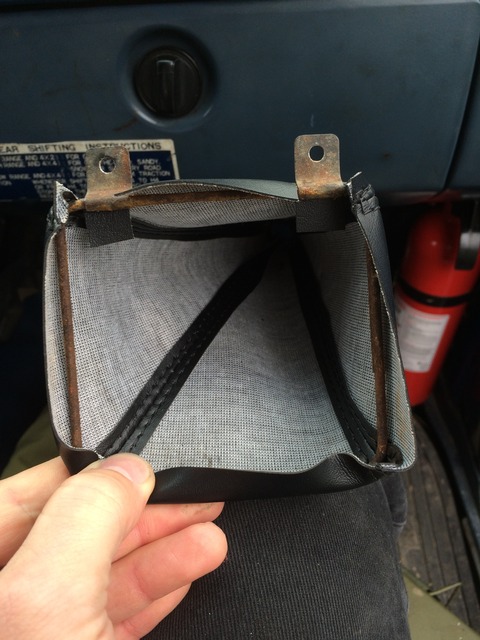
Remove your wire hoop frame and what's left of your crumbling, faded shifter boot, if it's still there. (of course, the first one I made is still there, but let's pretend I burned through it while welding in the new floor pans or something...)
Note the orientation of the tabs. From what I've been able to figure out, the tabs should mount "underhanded", otherwise they will just bend when you tighten the screws. The front hooks seem to be at a higher level, which supports my findings.
The wrong way- I had to flatten my bent taps back out with a hammer- don't let this happen to you after you're all glued up:
Wrong orientation- only using double sided tape here:
Dry fit the boot to the hoop so you know where the tabs will be aligned with my cutouts, how much it will stretch, and to start getting the parts acquainted with each other. I don't know how in the world I was able to mount my first one without any glue, but you'll need that. You may want to sand the rust off of your hoop first, but I waited until I was ready to glue, and a little rust dust didn't hurt. Sanding it off helps the glue stick to the metal though.
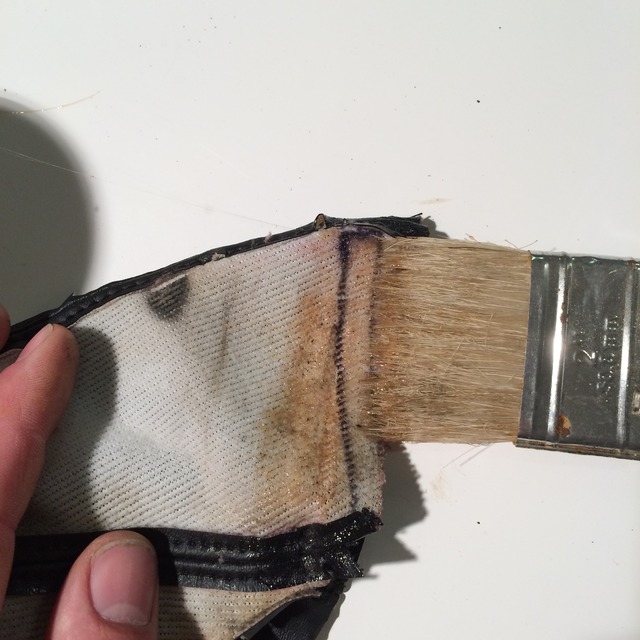
Sand off any loose rust, and coat the wire frame in contact adhesive. You can also hang it and spray it with aerosol contact cement like 3M Super 77 or similar. Then you can partially turn the boot inside out and either brush or spray the bottom edge about 3/4"-1" up from the bottom edge. If you're careful to spray down and away along the bottom without getting any on the nice outer material, you can use spray adhesive. Follow the instructions on the adhesive and let it get dry and tacky for the specified time, and assemble. It really only needs to be glued to the metal frame to work, but folding it up and adhering it back to itself is not a bad thing either. This is where all that dry fitting familiarity comes in handy.
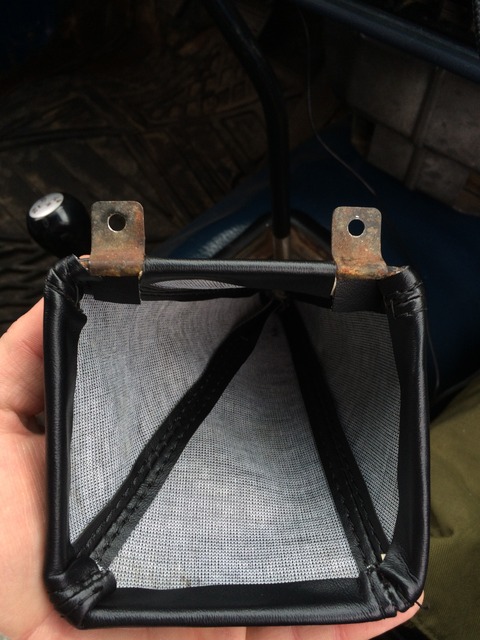
Here, I'm gluing my old one back on.
This is the later prototype from new material, here I'm faking it with double stick tape, as you can see the outer corners near the tabs aren't stretched as nicely into place as they could be with some good strong contact cement.
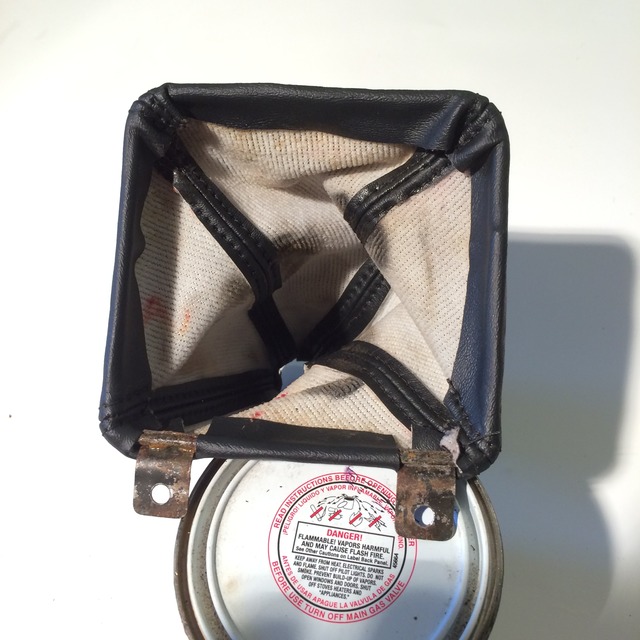
My old one, done up right and going back into the truck:
The folded drying position I described:
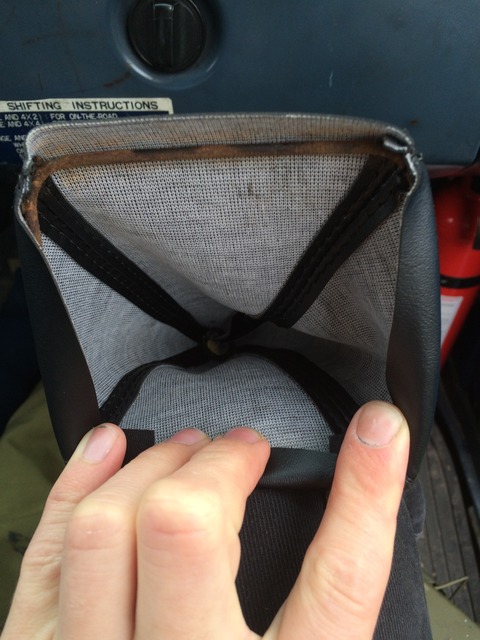
Take off the shift knob and slide the new boot on. Note how the seam area is opened when it goes on rather than folded to one side. This may or may not matter to you. Note that the prototype shown here had to be changed. I optimized the size of the opening to be not as snug. This one caused annoying squeaky rubbing when shifting.
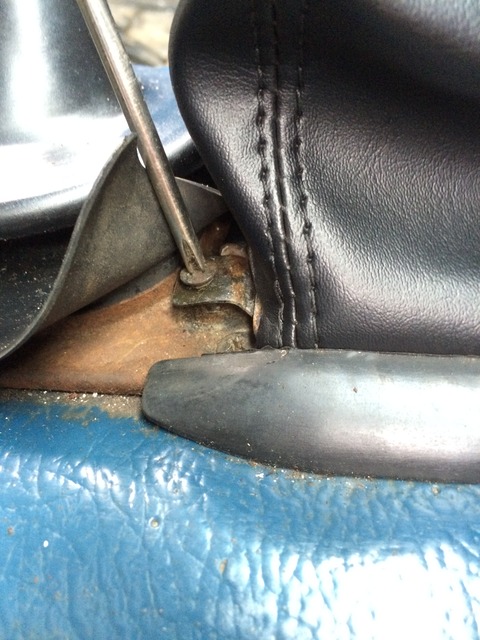
Reinstall the screws, and you're done.
I'll get the closest color matching leather I can find at the leather supplier this coming Saturday. If you want to pay half up front by the weekend I should have it ready to ship by Monday. The leather ones are 45, shipping/ handling probably 5 bucks or so. [edit: shipping turns out to be about 3 times that amount for future reference]. PayPal createstuf@hotmail.com thanks!
Last edited by zombie_stomp; 02-28-2016 at 10:59 PM.
Looks great! any update on the leather shift knob? Thanks.
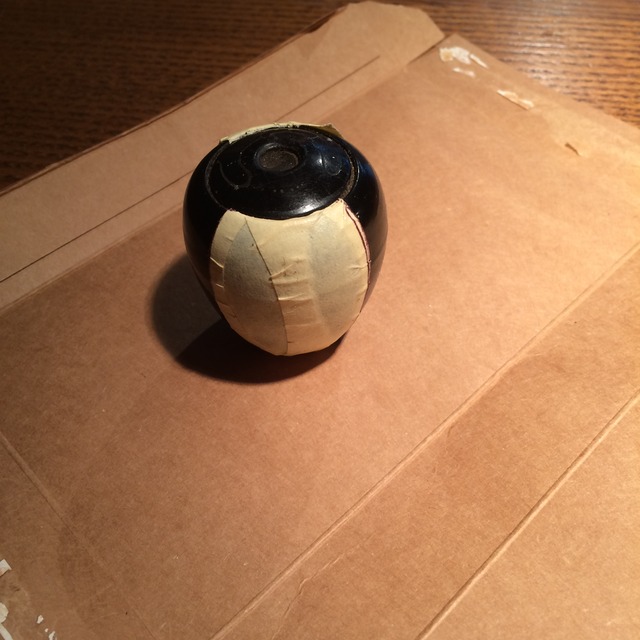
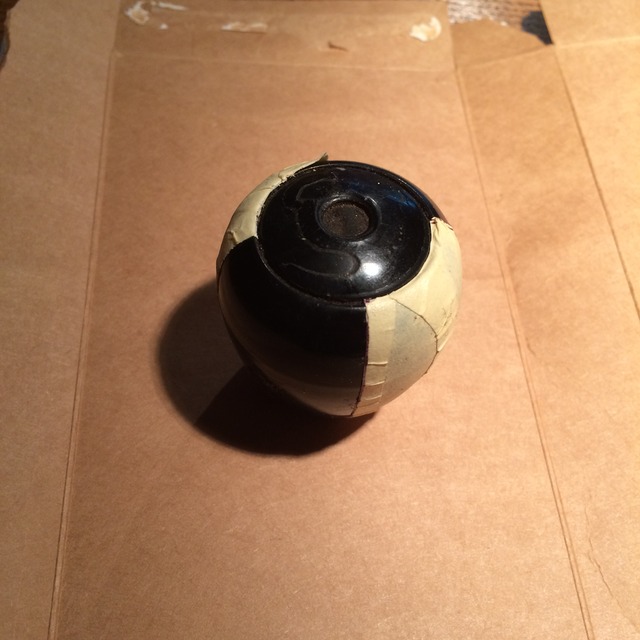
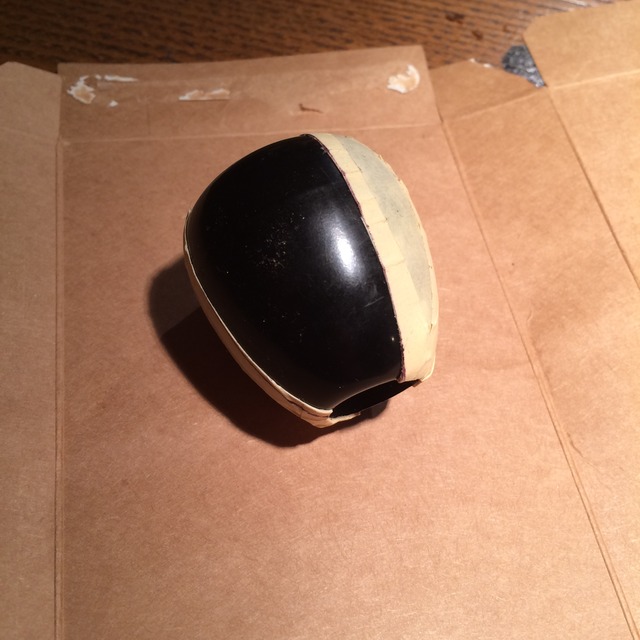
I AM making slow progress, and learning more about how it can and should be done. After I got the patterns pictured below, I found another technique in some videos. I just picked up some free time since my work is out of jobs at the moment, and my truck also needs brake pads and the rotors turned ASAP, which I am also going to do myself.
Last edited by zombie_stomp; 02-23-2016 at 10:08 AM.
By "basic", do you mean without the diamond stitching? And I am assuming you want the masonite fiberboard backing with all the holes cut and the mounting hardware? Once I have a complete understanding of what you're after, I can work out a quote.
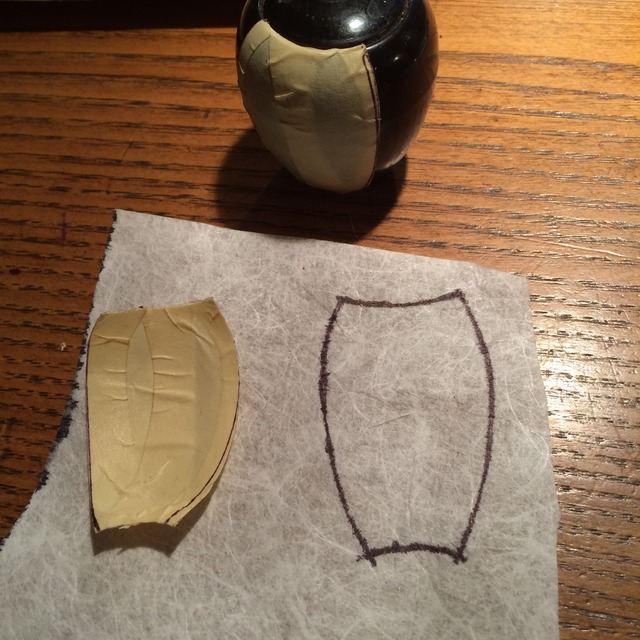
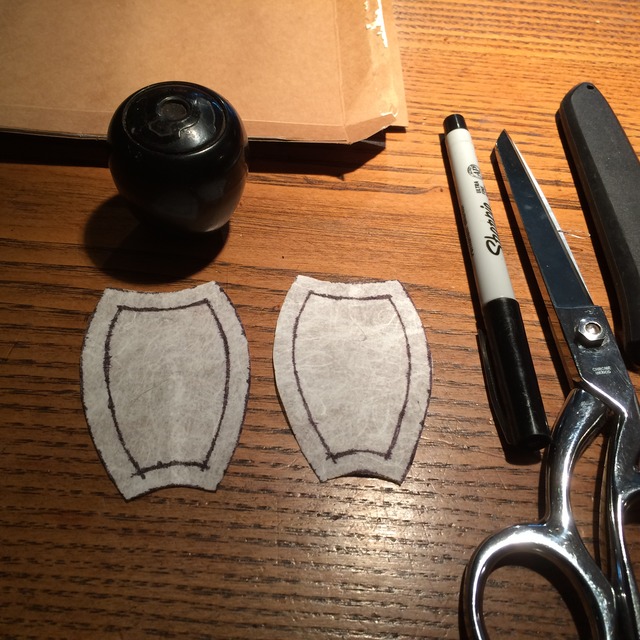
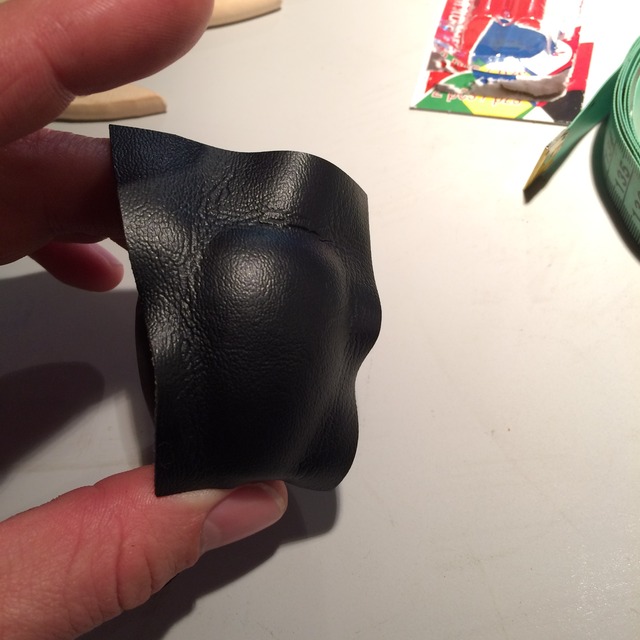
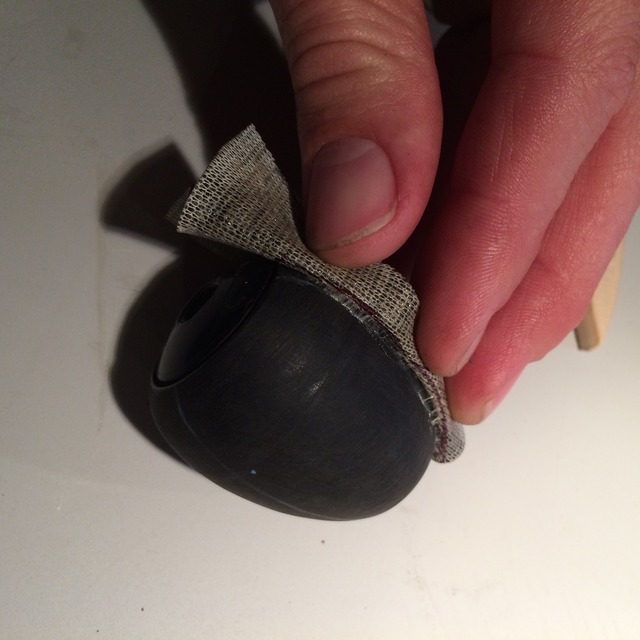
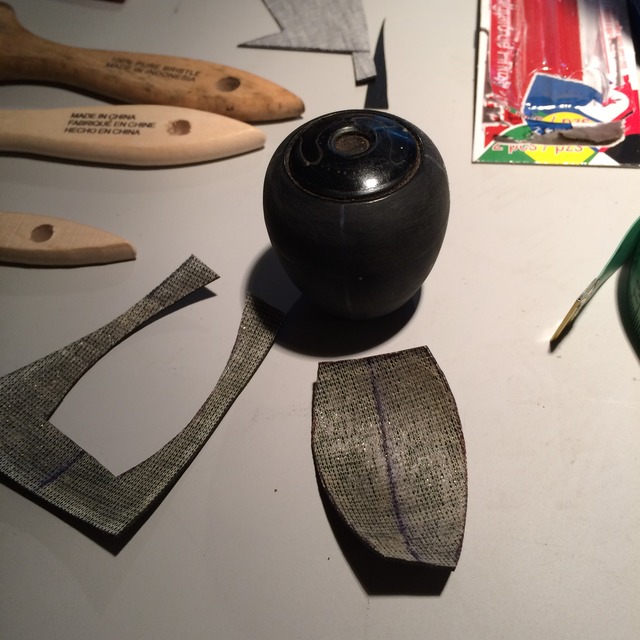
More teasers for the shift knob project. I'm practicing mounting upholstery vinyl with contact adhesive to use as a pattern instead, then mounting the leather parts. 1985, you do want the top area open to have the shifting pattern showing right? I can also wrap the entire knob, covering that to make it more comfortable instead, which is simpler to do in some ways. The next thing I needed to do was try out the leather I had. It had some layer separation issues, so I went to the leather store which I needed to do anyway and picked up some more suitable black leather pieces (and some tan to make another shift boot). Next I can cut parts from the new leather, carve the backside and fold/glue it back for the shift diagram plate window on top (unless that is not wanted) and mount the pieces, mark the stitch pattern, sew the parts individually, glue mount and tie them off top and bottom, and connect the stitches by hand with a blunt needle.
The new pattern making process:
Last edited by zombie_stomp; 02-28-2016 at 04:01 PM.
Meaning just the cut outs and maybe flat vinyl overlay. No need for diamond stitching or fancy stuff.
I'm going to check the prices of materials I use in making the panels my way, and develop a pattern for the door cutouts. Are you interested in doing some of the work yourself to save money? With a drill and a jigsaw, you can get most of the process done yourself, and I can just sell you an accurate door cutout pattern and instructions, if you like. Have a lot on my plate right now, will get around to your premade basic panel estimate ASAP.

 02-14-2016, 11:53 AM