Toyota Tacoma: How to Replace Brake Master Cylinder
A bad master cylinder in the Toyota Tacoma can make your brake pedal feel spongy, as well as affect your brake performance. Read on to learn how to replace it.
This article applies to the Toyota Tacoma (1996-2015).
The master cylinder in the Toyota Tacoma is what carries the brake fluid. The fluid gets pumped by the brake booster using pressure. If the master cylinder goes bad, the pressure gets altered, which causes the brake pedal to feel very spongy. The brake pedal feel isn't the only issue, the brake performance decreases tremendously as the master cylinder goes bad. Whether you have a leaking master cylinder or your master cylinder has completely stopped working, this guide will show you how to replace it on your own in the Toyota Tacoma.


Materials Needed
- Socket
- Turkey baster
- Bottle
- Clear hose
- Wrench
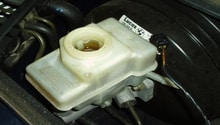
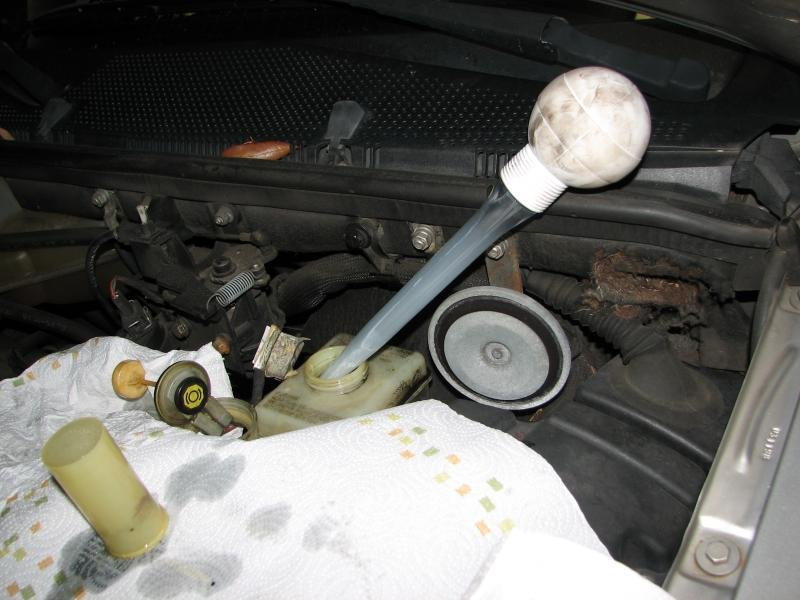
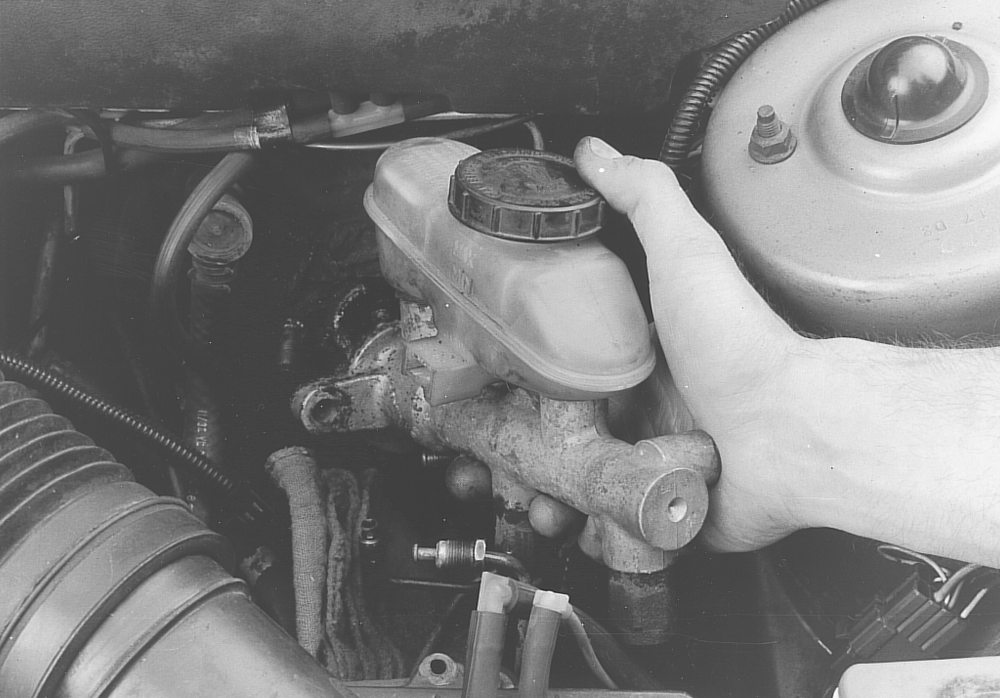
Step 1 – Remove fluid from master cylinder
Use your turkey baster to suck the fluid from the old reservoir. Get it all out of the reservoir, and be sure to place a rag under the master cylinder. The brake fluid is corrosive to paint and skin.
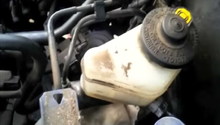
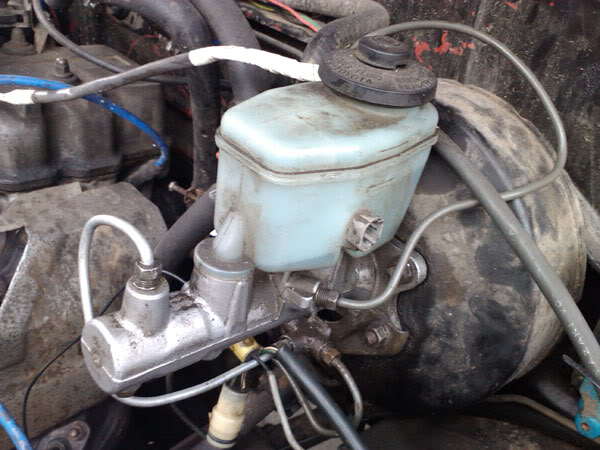
Step 2 – Remove connections
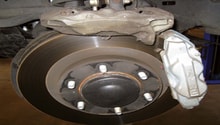
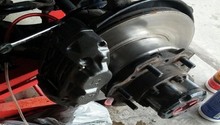
Remove the two brake lines connected to the master cylinder; you can use your wrench to remove their nuts. Again, be sure to have a rag underneath them. Unplug the electrical connection to the master cylinder. Simply, squeeze its tabs, then pull it out.
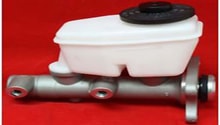
Step 3 – Replace master cylinder
The master cylinder is held in place by two studs with two nuts. It is attached to the brake booster. Use your socket to remove the two nuts, then pull the master cylinder off the studs and out. Install the new master cylinder in place, then tighten the two nuts. Install the two brake lines in place, and tighten their nuts. Finally, connect the electrical connection to the side of the new master cylinder.
Step 4 – Fill and bleed brake system
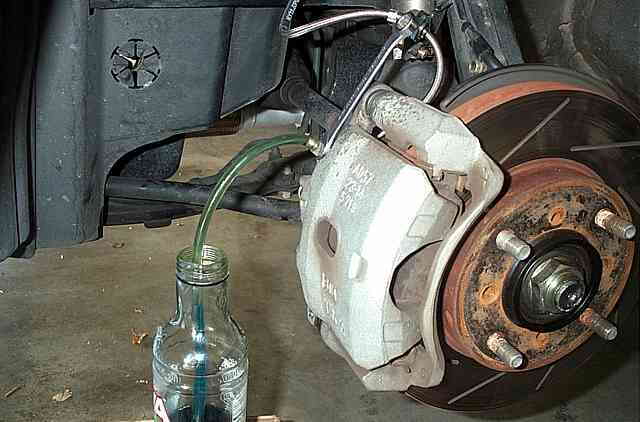
Fill the master cylinder with fresh brake fluid. Bleed the brake system, starting from the passenger side's rear caliper, then passenger's caliper, driver side's rear caliper, and end with the driver's caliper. Locate the bleeder valve on each caliper, and place the clear hose on it. Connect the other end of the hose to the bottle. Ask a helper to pump the brake pedal a few times, then keep it pressed down. Loosen the bleeder's valve, and watch the fluid coming out. As soon as you stop seeing bubbles, tighten the bleeder's valve first, then ask the helper to let go of the brake pedal. You may need to repeat the process of pumping the pedal and opening the bleeder a few times for all of the air bubbles to escape. Repeat the process for each caliper, but make sure you refill the master cylinder between each caliper. If the fluid gets too low and air enters the system, you will have to start all over.
Related Discussions
- Master Cylinder Problem - YotaTech.com
- Bad Master Cylinder - YotaTech.com
- Master Cylinder Issues - YotaTech.com