Toyota 4Runner and Tacoma: How to Repair and Replace Parking Brake
The parking brake on various 4Runner and Tacoma models functions by pushing the brake shoes against the drum to keep the rear axle from spinning. As brake shoes wear out, braking function will diminish as well as parking brake functionality.
This article applies to the Toyota 4Runner (1996-2002) and Toyota Tacoma (1995-2015).
Although we are over a decade into the 21st century and vehicle manufacturers are designing new and innovative braking system components, various Toyota vehicles are still using an old-school drum brake setup. While today's society often looks down on this ancient brake design, drum brakes have a very good service life and also seamlessly incorporate the parking brake assembly into one unit. Although these drum brakes will last for extended service intervals compared to modern disc brakes, they will eventually need replacing. A common problem that can lead to shortened brake life is if the parking brake is engaged and the vehicle is driven for a significant distance. Since drum brake shoes serve as the primary brakes and parking brakes, a dragging brake will damage components in a hurry and need replacement. This article will outline the procedure for replacing the brake shoes/parking brakes on Toyota 4Runner and Tacoma models equipped with rear drum brakes.

Materials Needed
- Floor jack and jack stands
- Tire iron
- Brake parts cleaner
- Screwdriver(s)
- Brake adjusting tool
- Drum brake spring tool (or various types of pliers)
- (2) 8mm x 1.25 bolts
- Catch pan
- Hammer and rubber mallet
- Penetrating oil (WD-40, PB Blaster, etc.)
- Wire brush
- Shop rags
Step 1 – Lift vehicle and remove rear wheels
- Lift the vehicle using a floor jack at the specified lift points and support it with jacks stands.
- Remove the rear wheels to access the rear brake assemblies in which you will be changing the brake shoes.
Pro Tip
It is usually a good idea to service only one brake at a time. This will allow you to use one side as a reference in case you get lost during reassembly.
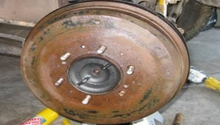
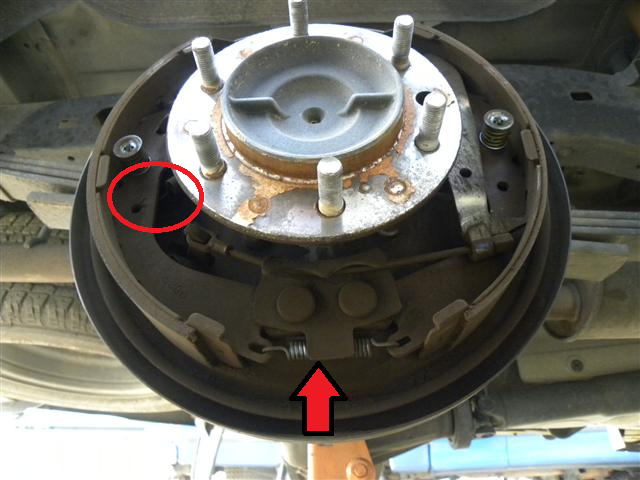
Step 2 – Remove brake drums
The brake drum should simply slide off of the hub to reveal the brake shoes, but in some cases the shoes are set too tight and must be backed-off to allow for drum removal.
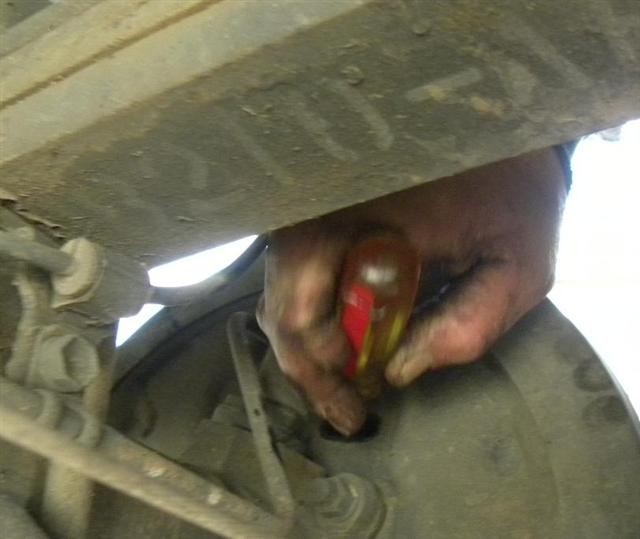
- Remove the inspection plug from the backing plate to reveal the star wheel adjuster. With a screwdriver, press on the tensioner plate of the automatic adjuster and spin the star wheel with a brake adjusting tool or screwdriver to back-off the shoes.
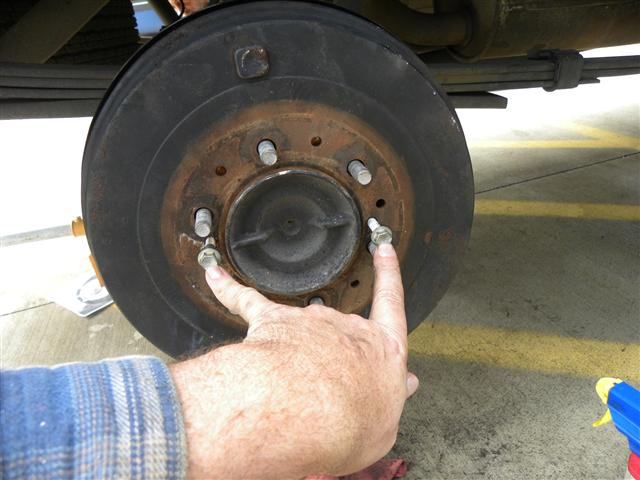
- Remove the drum from the hub. The drum can often be removed by tapping it with a hammer or rubber mallet, or by installing 8mm bolts into the threaded holes of the drum to push it off of the hub with relative ease. Additionally, applying a liberal amount of penetrating oil to the hub area can allow for easier drum removal.
Pro Tip
After removing the drum, it is typically a good idea to spray all brake components with brake cleaner to remove accumulated brake dust.
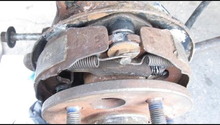
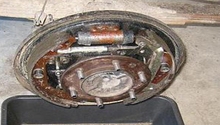
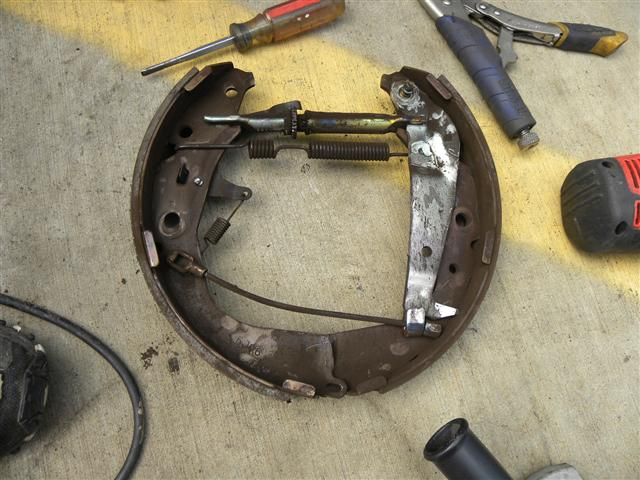
Step 3 – Replace brake shoes
Having the proper drum brake tools makes shoe replacement much easier; however, a combination of pliers and screwdrivers can often be used to complete the job.
- Begin by removing the top tension spring from the leading brake shoe.
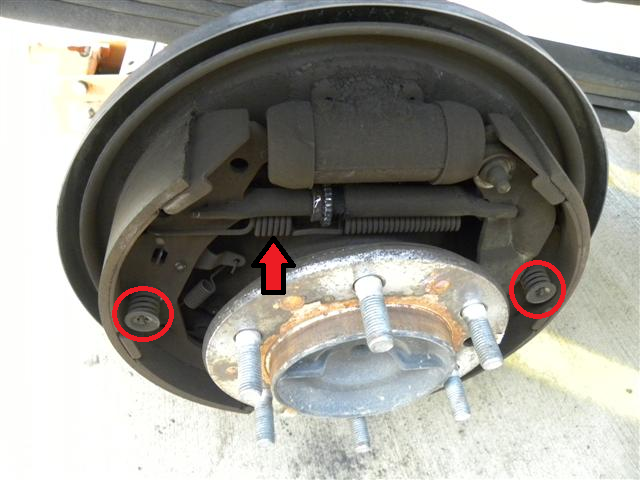
- Remove the brake shoe hold-down springs by compressing the springs and turning them 1/4 turn. Be careful as the spring washers can fly off if tension is not carefully released. Collect the spring pins from the backing plate.
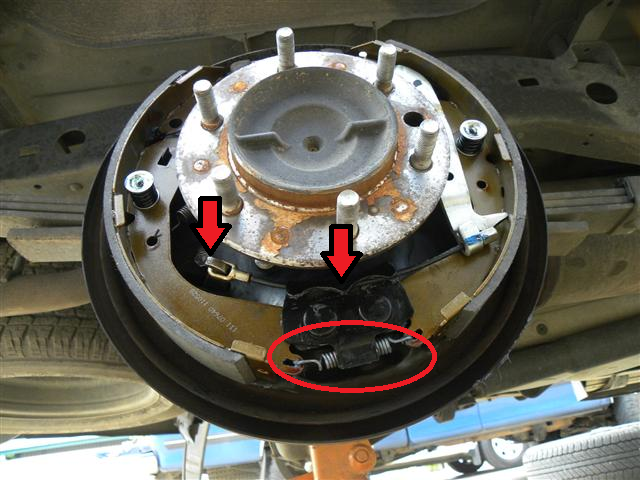
- Remove the lower return spring from the bottom of the brake shoes as well as the adjuster tensioning spring.
- With all springs removed, the brake shoes can be spread apart and the star wheel adjuster mechanism removed from the top of the shoes. Additionally, the end of the parking brake cable can be slid out of its track and the end of the cable removed from bell crank arm.
- The shoes can now be removed from the backing plate.
Pro Tip
When servicing the brake shoes, carefully inspect the wheel cylinders for leaks and replace if necessary.
Step 4 – Reassembly
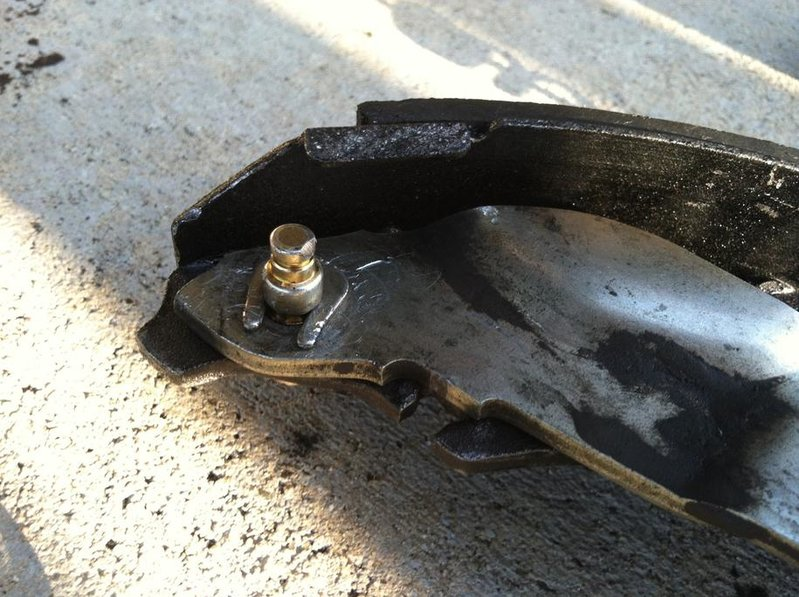
The parking brake lever needs to be transferred to the new brake pads before installation.
- Remove the horseshoe lock ring from parking brake lever and remove the lever from the shoe. Drive the new lever support pin into the new shoe (typically supplied with a brake shoe kit). Transfer the lever to the new brake shoe and install a new lock ring onto the lever pin to secure the lever in place. If necessary, the parking brake cable can be replaced at this time by simply slipping it out of the brake lever.
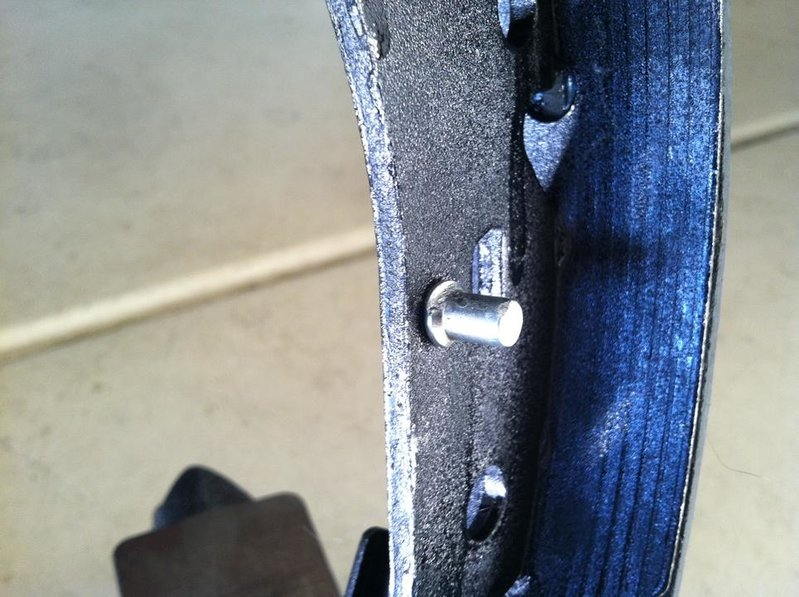
- Using a hammer, drive a new adjuster pin into the brake shoe and transfer the star wheel tensioner assembly to the new brake shoe. The tensioner spring can be installed as well.
- Attach the bottom return spring to the bottom of both brake shoes before placing the shoes onto the backing plate.
- Re-attach the parking brake cable, making sure it is properly routed in its guide groove.
- Install the shoe hold-down springs.
- Install the star wheel adjuster. It is recommended that the adjuster be screwed all the way in to allow for easier top tension spring installation.
- Attach the top tension spring to pull the top of the brake shoes together. Be sure the end of the shoes are properly seated in the wheel cylinder pins.

- Install the brake drum onto the hub.
- Adjust the brake shoes by spinning the star wheel adjuster until the shoes contact the drum lining and the drum cannot be spun by hand. Then back off the star wheel adjuster 15 clicks.
- Repeat procedure for other side before installing the wheels and letting the vehicle down off of the jack stands.
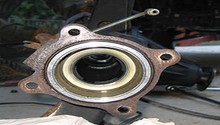
Pro Tip
Any rust on the hub flange can be cleaned with a brush. A clean hub will make for easy installation of the drum.
Related Discussions
- How Long Do (Rear) Drum Brakes Last? - YotaTech.com
- Drum Brakes Squeaking - YotaTech.com
- Changing Drums and Shoes - YotaTech.com