Toyota 4Runner 1996-2002: How to Replace Spark Plugs and Wires
Changing your spark plugs and plug wires is an often overlooked regular maintenance task that shouldn't be forgotten.
This article applies to the Toyota 4Runner (1996-2002).
Changing your spark plugs and plug wires is an important task that is often overlooked or forgotten about completely when it's time for regular maintenance work on your 4Runner. Properly maintained plugs and wires keep your engine running smooth and burning clean; it will also ensure that your ride stays on the road for as long as possible. When your plugs start getting worn down or start fouling, they can cause cylinder misfires and knocks. This also leads to more carbon buildup in your engine, which makes it run rough and sluggish. Keep your engine in tip top shape by making sure that your plugs and wires are changed at the proper intervals, which should be around 100,000 to 120,000 miles. With an interval this long, it is easy enough to completely forget about them. Changing your plugs and wires is an easy job to do and can be done in your own garage in less than an two hours, saving you a small boatload of cash from not taking it to a pro.

Materials Needed
- Ratchet with extensions and 5/8" spark plug socket, 10mm socket
- Flat head screwdriver
- Needle nose pliers
- Anti-seize compound and dielectric grease (optional)
These instructions are for the 3rd gen 4Runner, which uses a waste spark ignition system. This may have you wondering why you only see three plug wires and coil packs. The three coil packs are on the passenger side on top of the plugs. On the passenger side, during the compression stroke, they fire on that side and during the exhaust stroke, they fire again for the plugs on the driver's side who are experiencing their compression stroke. For this reason, many owners purchase and use only double grounded plugs since they are firing twice as often.
Step 1 – Locate spark plug bank
- Pull the hood release latch in the cabin just below the steering wheel.
- From the front of the truck, slide your hand in between the top of the grill and under the hood until you feel the safety catch.
- Press up on the release lever and raise the hood.
- On either side of the engine you'll find the plug wires terminating in a boot attached to the engine. These are your plugs.
Figure 1. Pull up on the hood release latch found under your steering wheel. 
Figure 2. Press up on the level to release the safety catch. Raise hood. 
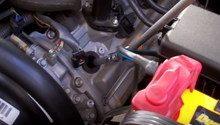
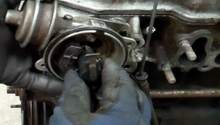
Figure 3. The plug wires terminate into a boot that caps the spark plugs on the side of the engine.
Step 2 – Replace first spark plug (driver's side)
It's very important to keep the same wire with the same plug when you replace them. If you get the wires out of order, you'll have an engine trying to fire out of sync and that's not good. Replace one plug and then its corresponding wire before moving onto the next plug and wire.
- The boot pops right off, but it can be a little stubborn. Wiggle it back and forth and twist while pulling. It should come off with an audible pop.
- The boot is very long and you'll see why you needed the extension with your ratchet.
- With the boot completely out, slide your spark plug socket into the hole, then unscrew the spark plug and remove.
- It is always highly advisable to apply some anti-seize compound onto the threads of the new spark plug before you install it.
- Make sure that your replacement plugs are gapped correctly.
- Insert the spark plug back into the hole and tighten. Do not over-tighten.
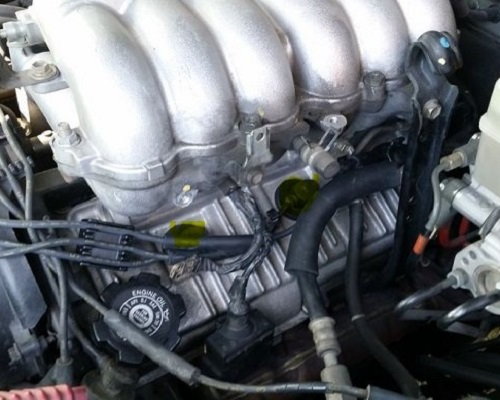
Figure 4. Three spark plug boots on driver's side, and three on the passenger side. 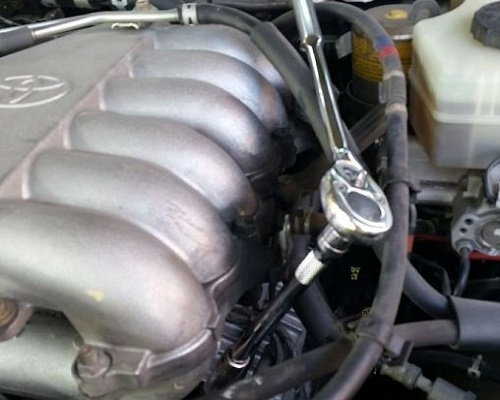
Figure 5. Use your spark plug socket plus 12" of extension to reach the plugs. 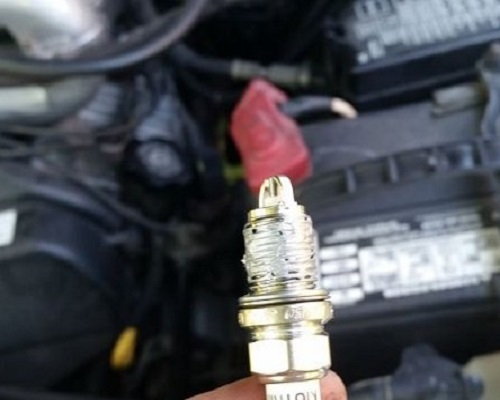
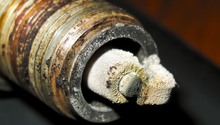
Figure 6. Apply anti-seize to the threads and check the gap before installing.
Step 3 – Replace first plug wire
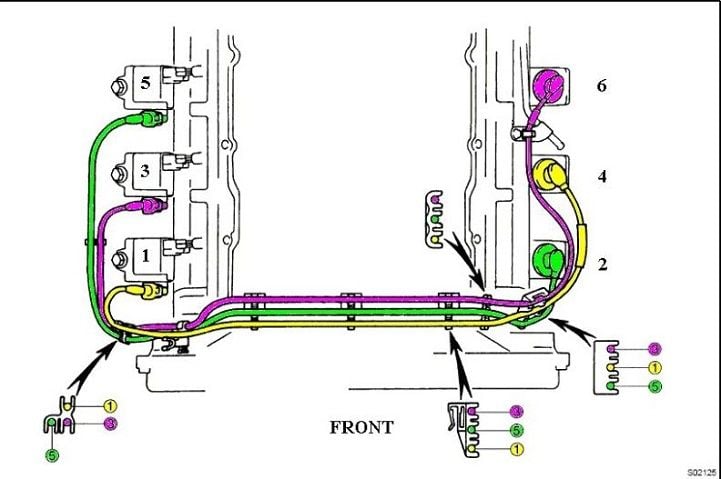
Once the new spark plug is installed, do not replace the plug wire and boot. Instead, you'll start removing this wire. Begin tracing it back. If you ever lose contact with the wire, start over again from the boot. It is very easy to let go of the wire, re-acquire the wrong wire and start pulling the wrong one. If you keep your hand or fingers wrapped around the wire the entire time, you'll not cross over to a different wire on accident. You'll likely come to a point where the wire is clamped into a harness to keep them organized. It's very tight in the clamps, but pop it out and continue tracing until you reach the end of the wire, which will terminate into a plug next to the corresponding coil pack. Remove the plug wire and match it up in length to the new replacement wire. Reinstall this wire completely before moving on to the next plug. You might not be able to remove and replace the plug at the terminal points on the passenger side until the intake is removed, which is highlighted in later steps. If this is the case for you, just be sure to use tape and markers to clearly mark where each plug wire is supposed to be terminated. Follow the diagram below if you get confused.
Step 4 – Repeat for remaining plugs and wires
Repeat Steps 2 and 3 for the remaining plugs and wires on the driver's side.
After you complete your first plug and wire replacement, begin working on the next plug. Repeat this process for the third (and last time) for the last plug on the driver's side. Following this methodology, you won't cross any wires and create a roughly running truck. We are working on the driver's side first because it is slightly different than the passenger side. Once this side is finished, move on to the passenger side.
Step 5 – Complete the passenger side
There is some pre-work to do before you get down to the plugs on the passenger side. There are some things in your way that you need to get out of your way before you can get to the coil packs. Once you pop off the coil packs, the plugs come out in the exact same fashion as the other side. Fortunately, the passenger side only has coil packs on top, so you shouldn't worry about keeping track of the plug wires.
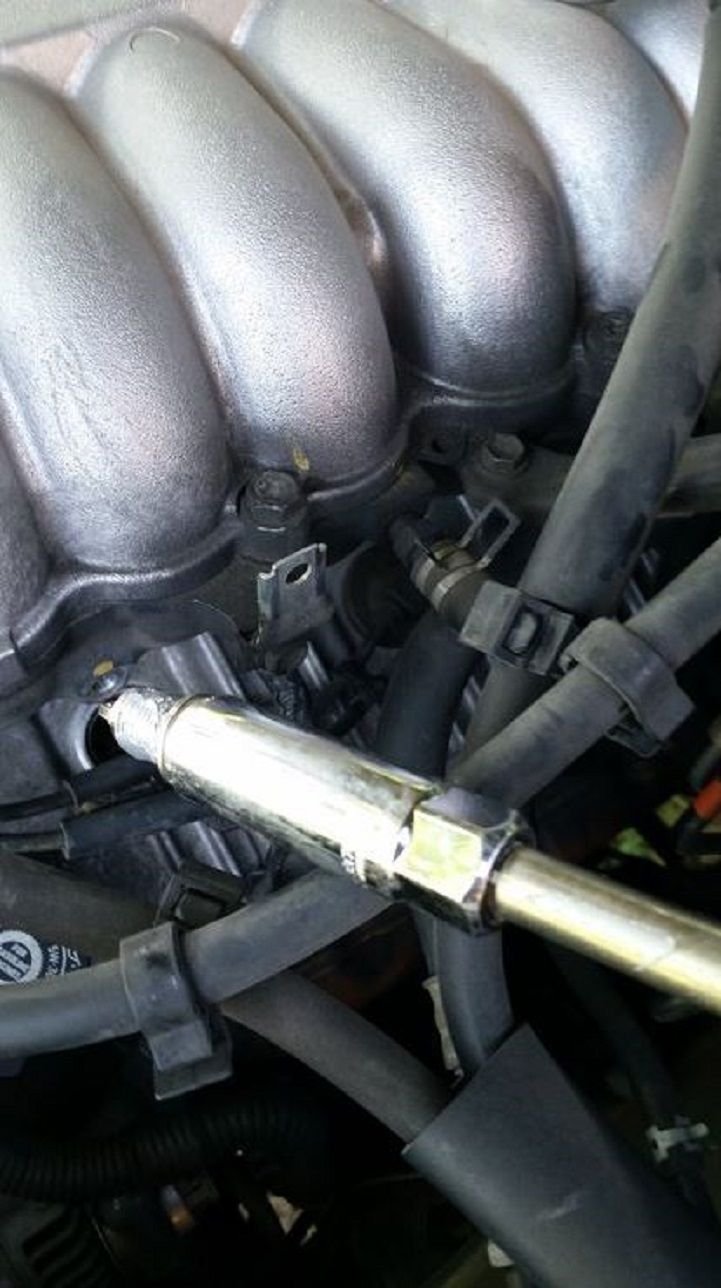
- You'll need to remove the intake system first in order to get access to the coil packs on top of the plugs. It looks a lot more confusing than it really is.
- There are several clips to remove and clamps to loosen, but everything is very simple to disconnect and move aside.
- Once the intake is off, the coil packs and wire terminal plug locations are out in the open.
- You may not have been able to pop off the old plug wires from the side of the coil packs because of the intake.
- Remove the old plug wires now. You should have the new plugs clearly marked with which wire goes to with plug at the ready.
- Use a 10mm socket and ratchet to remove the single bolt mounting the coil packs to the side of the engine.
- Disconnect the quick clip wiring harness from the top left of each coil pack.
- Pull the coil pack straight up and out of the plug hole.
- With the coil packs removed, pull the plugs just as you did on the driver's side and replace with new plugs.
- Reinstall the coil packs.
- Plug in the terminal ends of the new plug wires into their applicable plug port on each coil pack.
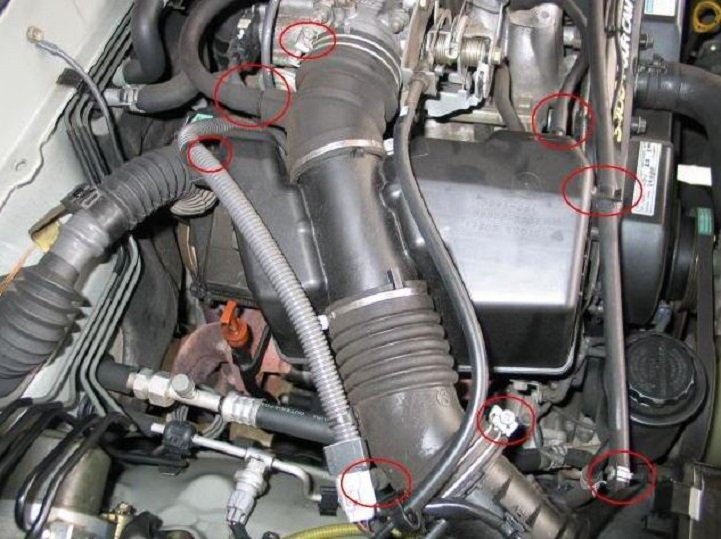
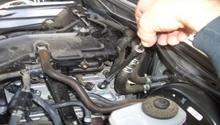
Figure 9. The contact points that need loosened or removed in order to remove the intake system to get to the plugs. 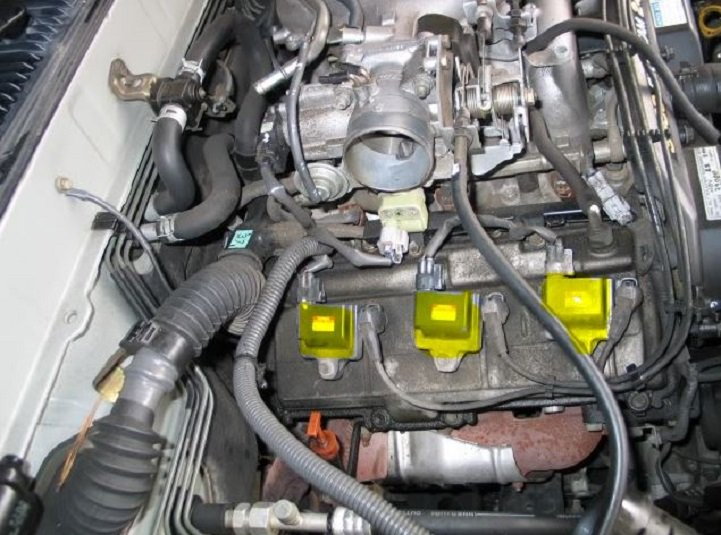
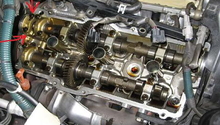
Figure 10. Once the intake it removed, you can easily find the coil packs and plugs. 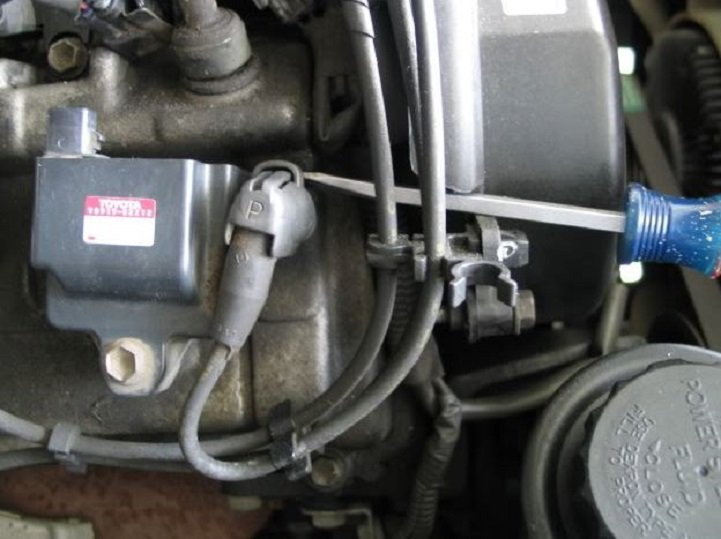
Figure 11. Disconnect the old plug wires from each coil pack. 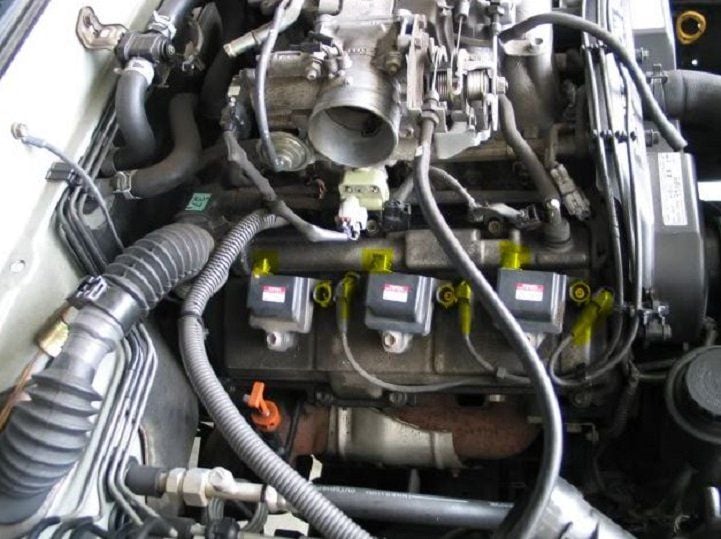
Figure 12. Have the new plug wires in place to plug back in when needed. Disconnect the wiring harness from the coil pack as well as the 10mm mounting bolt.
Step 6 – Reinstall intake and take a test ride
After the new plugs are installed on the passenger side along with reinstalling the coil packs, electrical wiring harness to the coil pack and plugged the new plug wires into the port, your job is almost done. Before replacing the intake system, take a quick double check of the wiring to make sure that you did not cross connect any of the wires. Once you are sure that you have the plug wires connected correctly, put the intake system back together and start her up. If she sounds great and you are not getting any CEL codes, your job is done. Take her for a test ride and enjoy the smoother running engine.

Featured Videos: Toyota Truck Ignition System Replacement
-
Spark Plug Replacement
-
Spark Plug Wire Replacement
Related Discussions
- Changing Spark Plugs on 3rd Gen? - YotaTech.com
- Broken Spark Plug Wires, Stranded T4R - YotaTech.com
- Better than OEM Spark Plug Wires? - YotaTech.com
- 99 4Runner Toyota Spark Plug Wires - YotaTech.com