Traction Bar Fab
 08-17-2007, 11:16 PM
#1
Contributing Member
Thread Starter
Traction Bar Fab
Goal: try and keep my axle from wrapping and add protection for the rear driveshaft while I was at it, all the while not limiting flex or articulation.
Decided to go with the shackle style instead of a "slip and twist". Seemed simple, more bullet proof and wouldn't bind if I ever had the misfortune of bending.
I had an old pair of Marlin shackles laying around, so I shortened them a bit. Designed and built the front pivot to mount on the factory horseshoe crossmember. Then picked up a set of shackle mounts from TG for the shackle to pivot through.
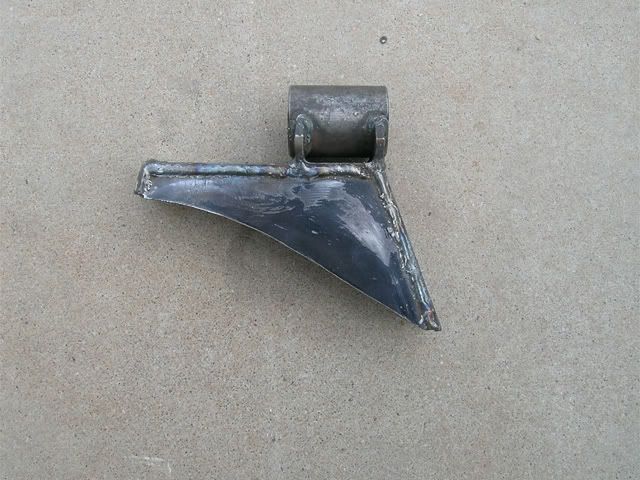
Side pic (still working on the whole "welding as art" thing ):
):
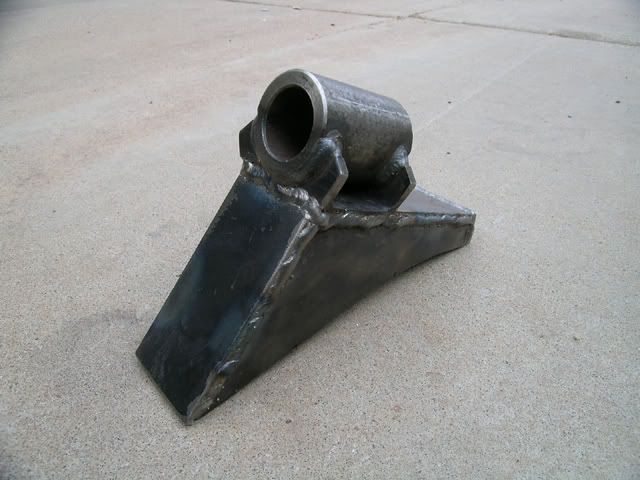
3/4 view:
Pic of it mounted with shackle installed (driveshaft removed):

Now I needed brackets for the axle. I mocked them up with cardboard first, then hit a friend of mine who had a plasma cutter and wasn't afraid to use it... plus knew how.
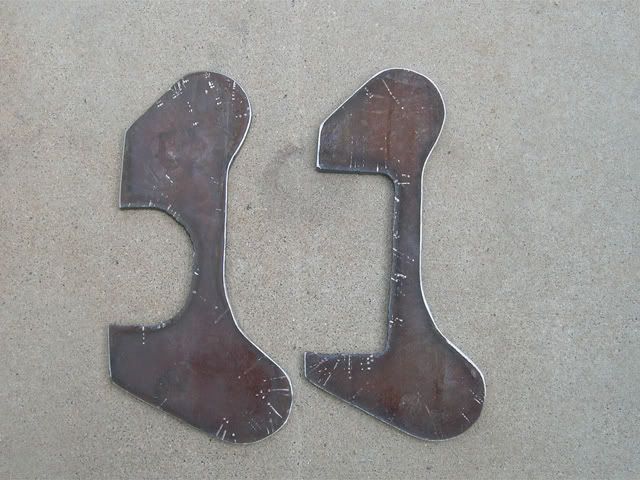
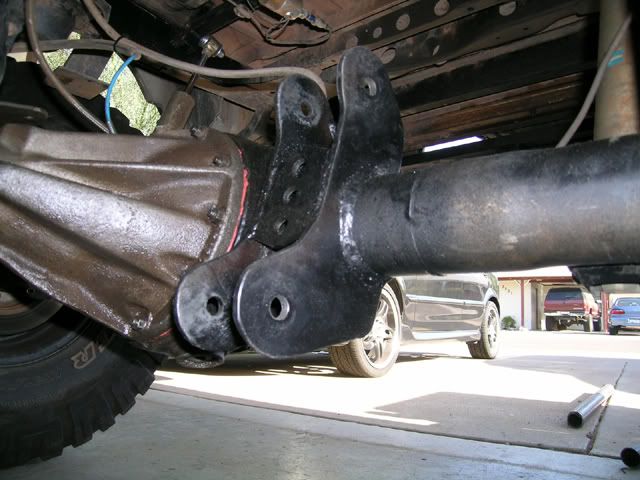
Pulled apart the axle, removed the housing and welded the brackets on. The main brackets are 1/4" plate, other gussets and reinforcements were cut from some 3/16" plate I had laying around. Pic of brackets on the axle:
For the bar itself, I knew I wanted bushings for the rear mounts, and they had to be stout. So I got these from Rubicon Express (Part #RE3765):

The front of the bar needed to be able to twist with the axle, and also be as bulletproof as possible. Back to Rubicon Express (Part #RE3792):
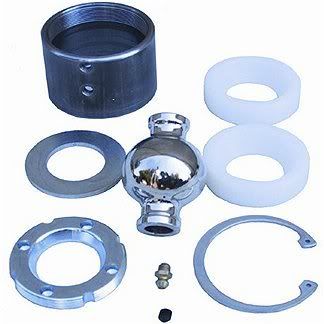
Both parts where quality, huge, and used 9/16" hardware. As mentioned before, I wanted the bar to double as a bash guard, so not only did it have to fight axle torque, but defend against the rocks as well.
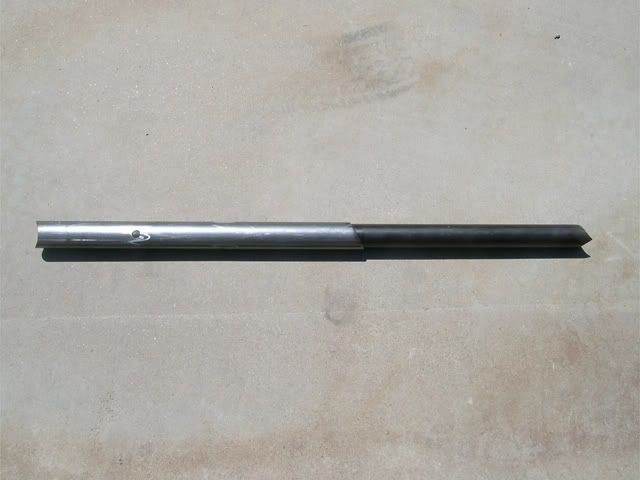
The lower section of bar had to be the toughest, as that would take the brunt of any impact. I sleeved some 1.75" DOM with some scrap HREW I found at the local yard that happened to be a perfect fit. Probably ended up to greater than 1/4" wall thickness when I was done.
4 plug welds, plus internally welded at the tail and around the front seam. What once was two will now act as one... thank you sensei.
As an added benefit of this design, I was able to lengthen or shorten the lower bar ever so slightly for a perfect fit when I began final assembly: (pic before welding)
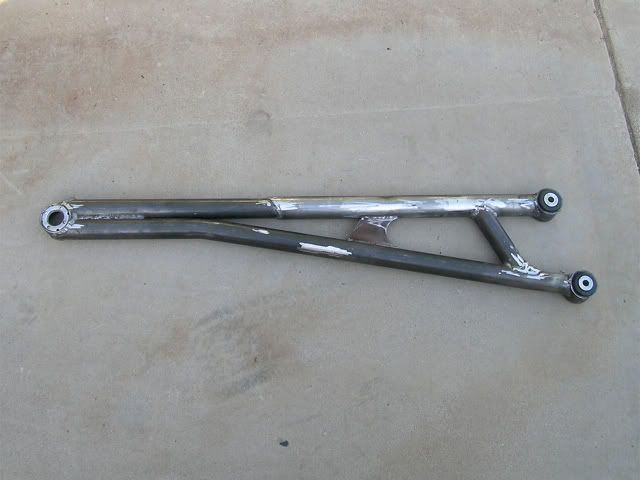
So now I had to get all the parts welded together, add a cross support... then another plate support. This is what I came up with. It's upside down in this pic. I had the top bar bent 15 degrees in order to clear my muffler:
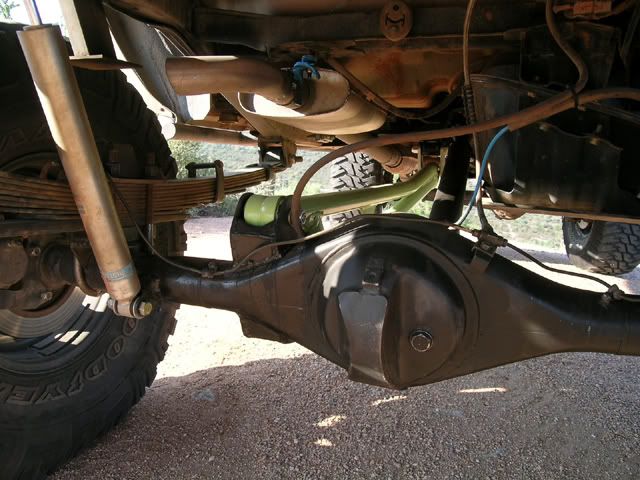
Then of course I had to paint it... GREEN... and mount it as so:
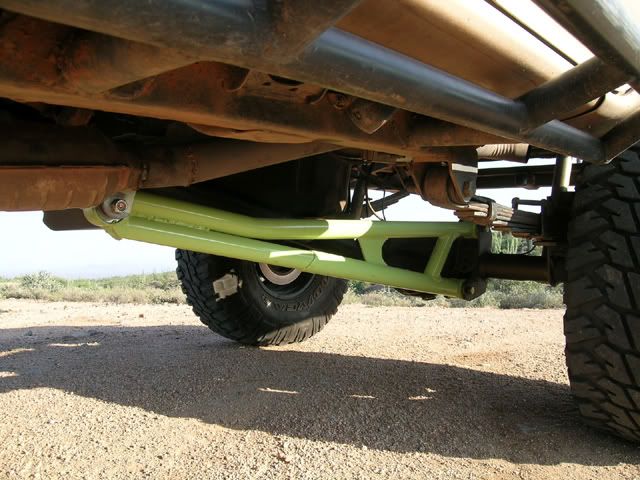
From the rear:
I tested it around the block, then out on the trail. Does seem to have lessened the hop I was getting off road, but time will tell. Generally a more solid feel overall. Took the 4Runner out on one of my favorite known trails in an attempt to get a non-biased seat of the pants opinion. No binding. No clearance issues. I must have done a few things right.
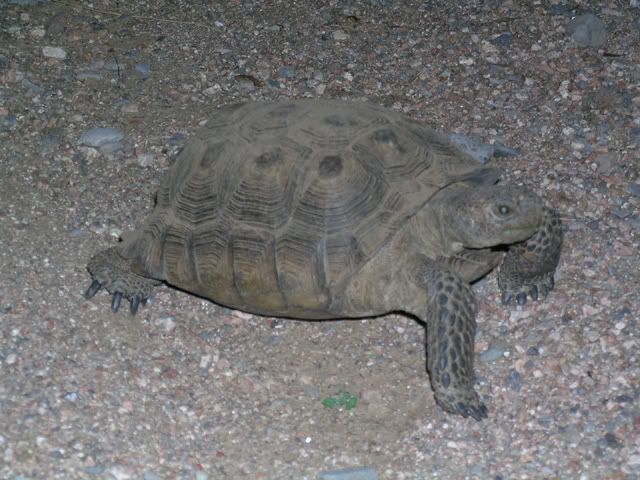
Found this guy in a creek bed while I was out doing R&D. Probably as big as a a basketball!! Don't see the desert tortoise very often, especially that size. He just needed a Marlin Crawler sticker and he would have been good to go:
I had been tossing some ideas to my fellow YT'rs during the build which helped a lot. Maybe this thread will return the favor and give others ideas to go on.
Decided to go with the shackle style instead of a "slip and twist". Seemed simple, more bullet proof and wouldn't bind if I ever had the misfortune of bending.
I had an old pair of Marlin shackles laying around, so I shortened them a bit. Designed and built the front pivot to mount on the factory horseshoe crossmember. Then picked up a set of shackle mounts from TG for the shackle to pivot through.
Side pic (still working on the whole "welding as art" thing
):3/4 view:
Pic of it mounted with shackle installed (driveshaft removed):
Now I needed brackets for the axle. I mocked them up with cardboard first, then hit a friend of mine who had a plasma cutter and wasn't afraid to use it... plus knew how.
Pulled apart the axle, removed the housing and welded the brackets on. The main brackets are 1/4" plate, other gussets and reinforcements were cut from some 3/16" plate I had laying around. Pic of brackets on the axle:
For the bar itself, I knew I wanted bushings for the rear mounts, and they had to be stout. So I got these from Rubicon Express (Part #RE3765):
The front of the bar needed to be able to twist with the axle, and also be as bulletproof as possible. Back to Rubicon Express (Part #RE3792):
Both parts where quality, huge, and used 9/16" hardware. As mentioned before, I wanted the bar to double as a bash guard, so not only did it have to fight axle torque, but defend against the rocks as well.
The lower section of bar had to be the toughest, as that would take the brunt of any impact. I sleeved some 1.75" DOM with some scrap HREW I found at the local yard that happened to be a perfect fit. Probably ended up to greater than 1/4" wall thickness when I was done.
4 plug welds, plus internally welded at the tail and around the front seam. What once was two will now act as one... thank you sensei.
As an added benefit of this design, I was able to lengthen or shorten the lower bar ever so slightly for a perfect fit when I began final assembly: (pic before welding)
So now I had to get all the parts welded together, add a cross support... then another plate support. This is what I came up with. It's upside down in this pic. I had the top bar bent 15 degrees in order to clear my muffler:
Then of course I had to paint it... GREEN... and mount it as so:
From the rear:
I tested it around the block, then out on the trail. Does seem to have lessened the hop I was getting off road, but time will tell. Generally a more solid feel overall. Took the 4Runner out on one of my favorite known trails in an attempt to get a non-biased seat of the pants opinion. No binding. No clearance issues. I must have done a few things right.
Found this guy in a creek bed while I was out doing R&D. Probably as big as a a basketball!! Don't see the desert tortoise very often, especially that size. He just needed a Marlin Crawler sticker and he would have been good to go:
I had been tossing some ideas to my fellow YT'rs during the build which helped a lot. Maybe this thread will return the favor and give others ideas to go on.
Last edited by Elvota; 08-19-2008 at 03:00 PM.
 08-18-2007, 02:27 AM
#3
Contributing Member
iTrader: (1)
Join Date: Jul 2007
Location: shreveport, La
Posts: 1,391
Likes: 0
Received 0 Likes
on
0 Posts
nice write up. i noticed you exited your exhaust in front of your rear tire. has that given you any problems, like over heating your tire on long highway trips/ i was thinking about doing the same thing is the reason i am asking.
08-18-2007, 08:12 AM
#4
Contributing Member
Thread Starter
I have never really been happy with the way my exhaust turns out on this vehicle. I have reworked it several times. I have no issue yet with the way it currently is, but may end up extending or turning down the end. It's hard to tell from the pic, but it's close to a foot away from the tire.

Trending Topics
08-18-2007, 10:05 PM
#8
Contributing Member
Thread Starter
The best part will be leaving that color behind on the rocks. 
Because you probably have better things to do than crawl under your truck and mess with stuff all the time.
https://www.yotatech.com/forums/f116...c-swap-107749/
Because you probably have better things to do than crawl under your truck and mess with stuff all the time.
https://www.yotatech.com/forums/f116...c-swap-107749/
08-19-2007, 06:12 PM
#9
Registered User
Join Date: Jan 2007
Posts: 123
Likes: 0
Received 0 Likes
on
0 Posts
Nice fab work If you spend that much time on everything on your truck, it must be clean! People dont appreciated the time it takes for good fabwork
We usually make the lower mount not lower than the axle tube though rock magnet
If you spend that much time on everything on your truck, it must be clean! People dont appreciated the time it takes for good fabwork We usually make the lower mount not lower than the axle tube though
rock magnet
08-19-2007, 09:32 PM
#10
Contributing Member
Thread Starter
I had thought about lowering my clearance as I did. Realizing more ground clearance is better, I tried to split the difference. Figured if I am going to drag something, it may as well be something that has been made to be drug. I am hoping the flat angle of the bar will ramp over most hangups... but I guess we'll have to see.
Part of the fun. Design, fab, test... repeat.
03-14-2012, 09:43 AM
#13
Registered User
I was also wondering, what are the advantages/disadvantages to converting a strait axle rig to coil springs front and rear. Any thoughts or helpful links?

Thread
Thread Starter
Forum
Replies
Last Post
justdifferentials
Vendors Build-Ups (Build-Up Section)
14
06-11-2017 08:36 PM
live4soccer7
84-85 Trucks & 4Runners
3
05-11-2016 06:52 PM
WTB[PacNorWest]: Old Man Emu Torison Bars
A2theK
Axles - Suspensions - Tires - Wheels
2
10-14-2015 07:10 AM


