Rear bumper brackets on aftermarket swingout

 09-12-2009, 11:04 PM
#22
Contributing Member
He cant take the brackets out.
Just take the whole truck to who ever is going to weld for you and have them do it like that... with the brackets in the frame .
Dont cut the body , if you really have to take the body mounts off and lift it.
Just take the whole truck to who ever is going to weld for you and have them do it like that... with the brackets in the frame .
Dont cut the body , if you really have to take the body mounts off and lift it.
09-13-2009, 07:17 AM
#23
Contributing Member
Thread Starter
iTrader: (3)
Hmmmmm, well I suppose I could drive the truck there. Don't know if I want to truck my tack welds in traffic! lol!! I might just have to lift the body, cutting a notch looks ok? 
09-13-2009, 08:50 AM
#24
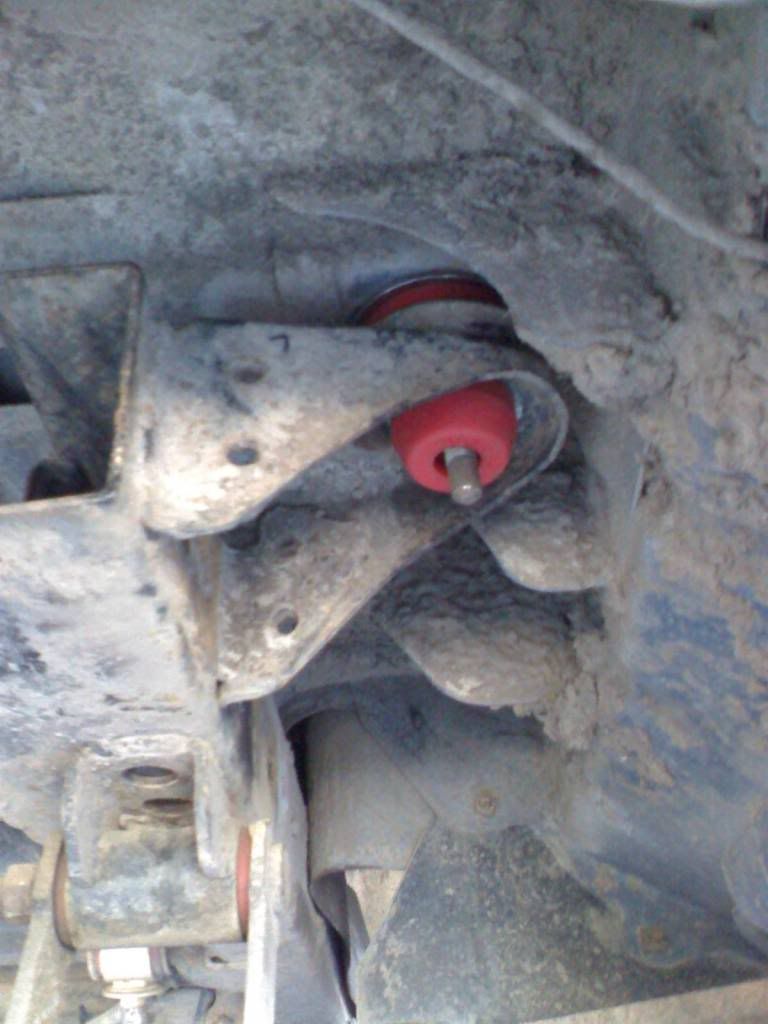
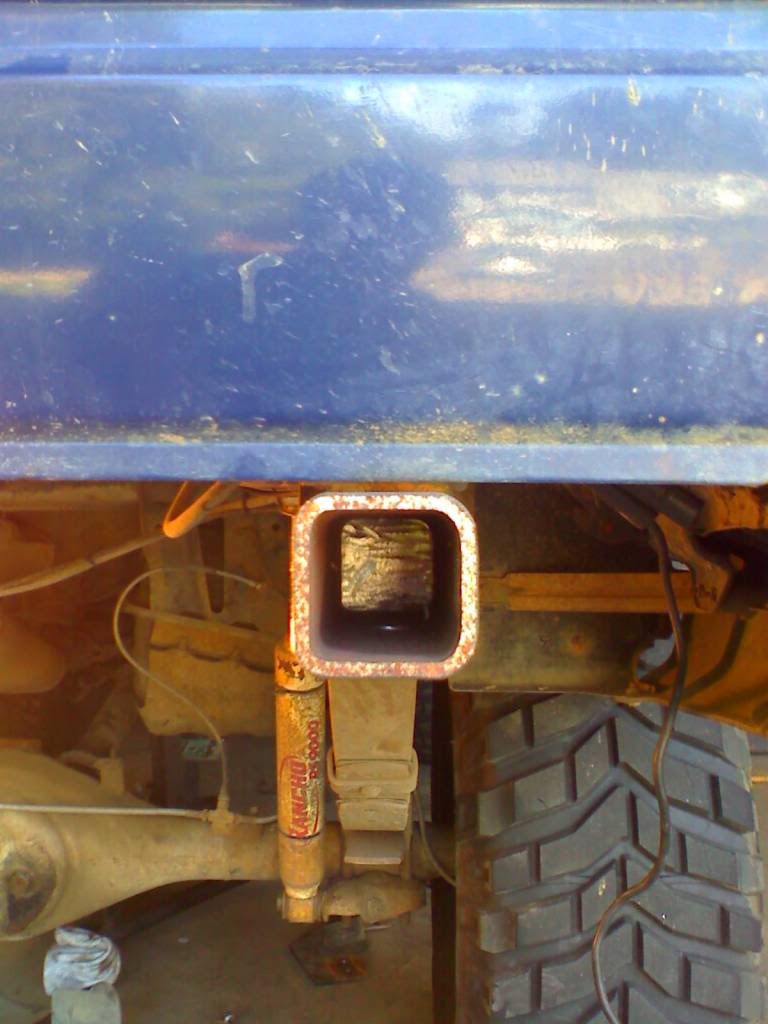
Should be able to turn the bracket to the inside to swing them out of the frame:
Your frame might be a little tighter than normal, if so, see if you can grind out the tack welds and pull out the piece in the frame and grind it down just a little where it is hanging up. I recall once having to grind a little notch back along the channel just at the point where it would hang up on the frame rail, just a small notch to allow the channel to rotate out of the frame rail.
Your frame might be a little tighter than normal, if so, see if you can grind out the tack welds and pull out the piece in the frame and grind it down just a little where it is hanging up. I recall once having to grind a little notch back along the channel just at the point where it would hang up on the frame rail, just a small notch to allow the channel to rotate out of the frame rail.
Last edited by 4Crawler; 09-13-2009 at 09:22 AM.
09-13-2009, 11:22 AM
#25
Contributing Member
Thread Starter
iTrader: (3)
Hmmmm, yeah, trust me I tried to bring the bracket toward the center. It's a no-go. I'll probably have to grind the tacks off and notch the bracket in the one spot. The drivers bracket fits in smooth, but the other side not so much. The frame rail has gotta be tweeked a little.
We'll see, I tacked it all together pretty darn well.
We'll see, I tacked it all together pretty darn well.
09-15-2009, 04:41 PM
#28
Contributing Member
Thread Starter
iTrader: (3)
Update, 15SEP09
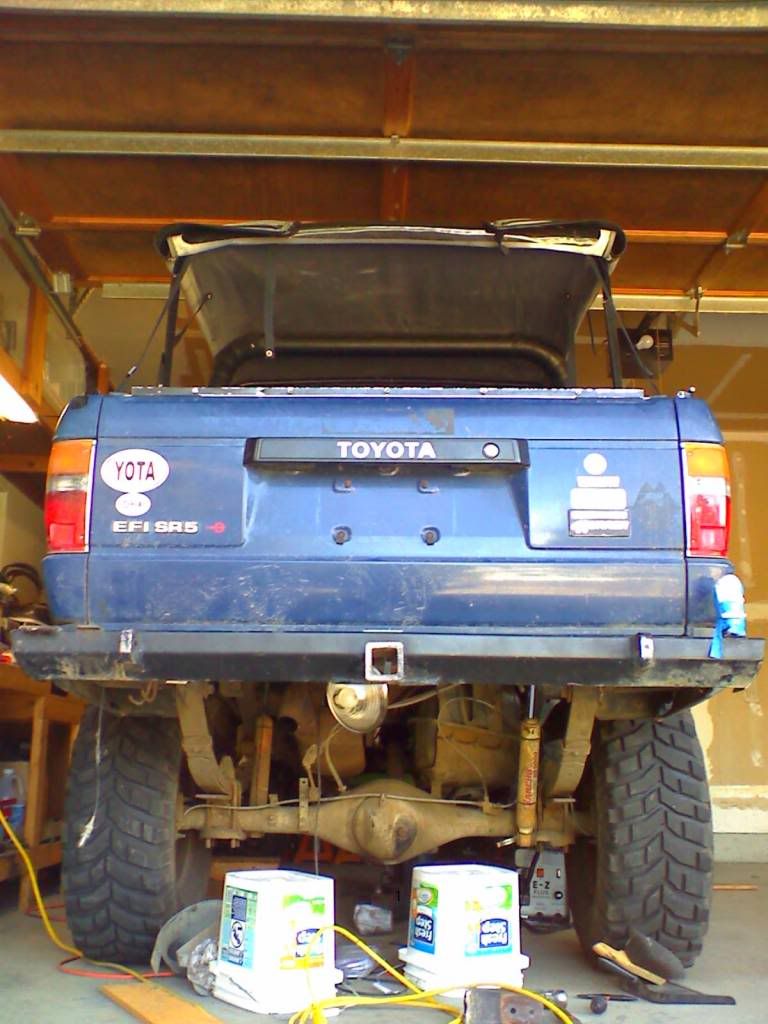
Ok, well today I soaked down all the body mount bolts with PB and moved carpet and paneling around to get to the black caps that cover the bolt locations. I then took a wire brush and cleaned all the threads up. I could not believe how easy the bolts came out. I had this done in no time!!! 
**NOTE, wash your truck if you attempt this...LOL!!**
I had freakin dried mud all over the place and my face!!!
After I took all the bolts loose I was able to jack the body up and remove the bumper brackets.
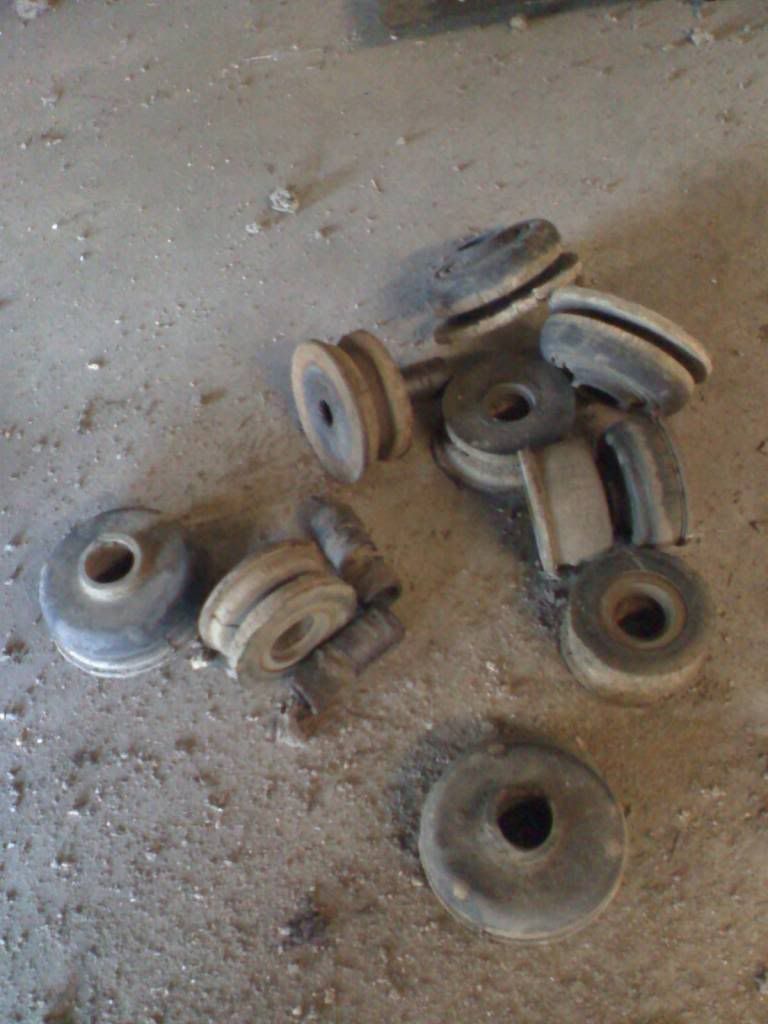
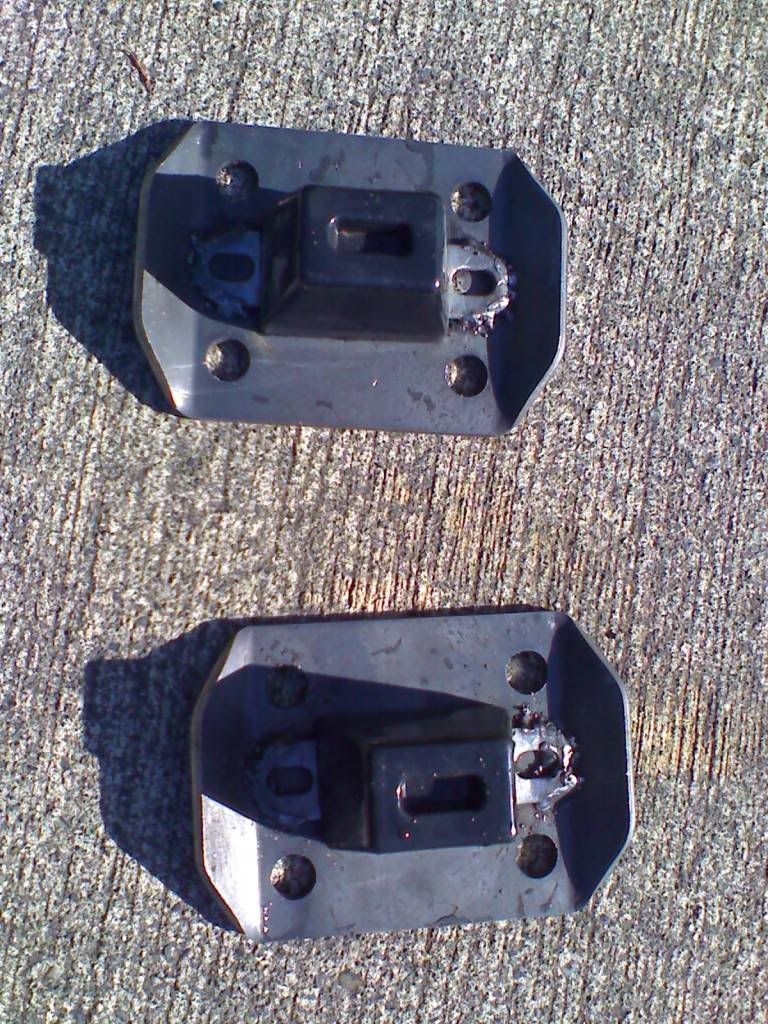
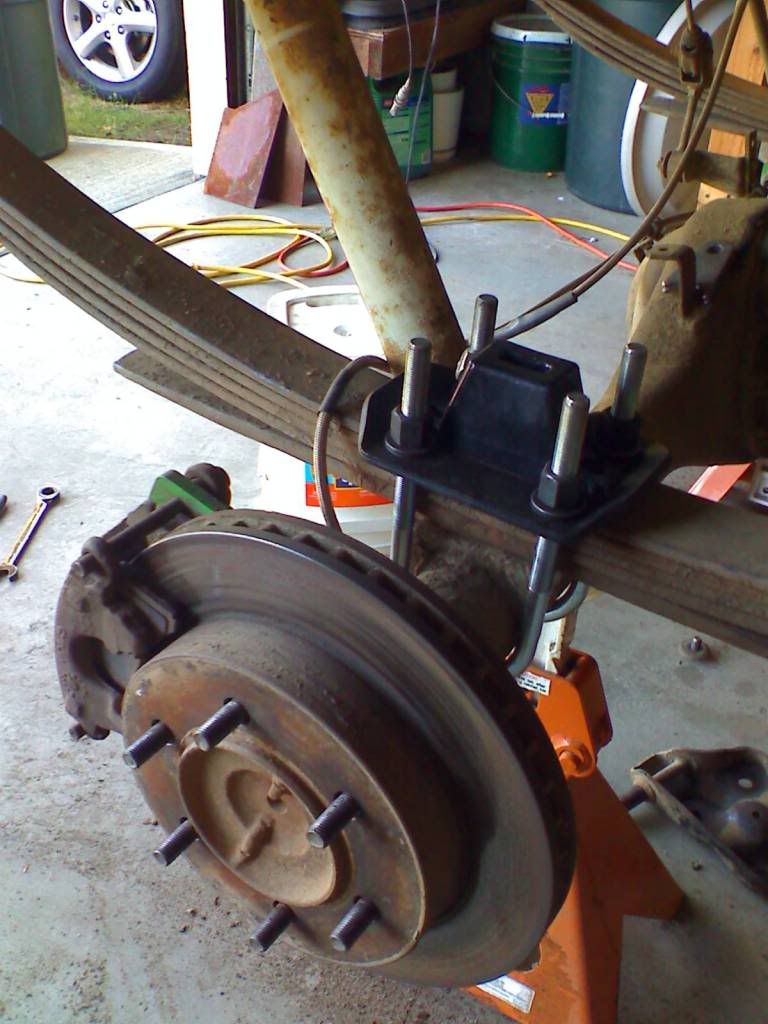
This was a great time for me to FINALLY replace my OEM rubber mounts with these poly ones that I've had kickin around three years now.
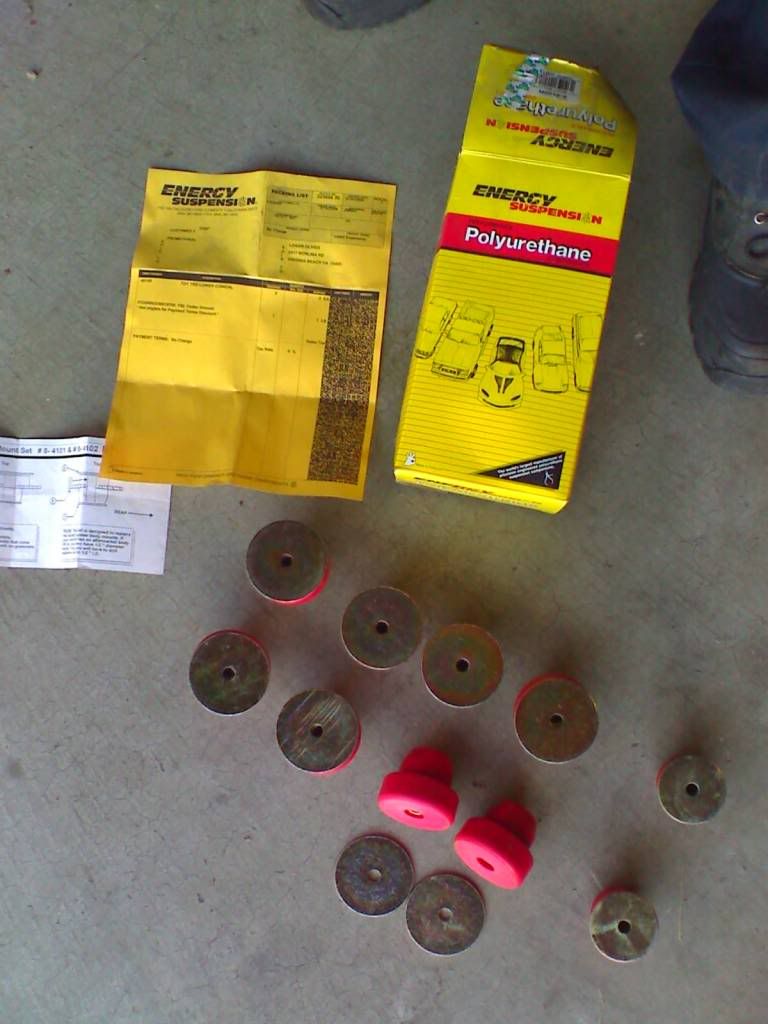
Heres the old ones, pretty bad.
Next, I'll notch the brackets and bolt them and the truck back together!
To do:
-Notch brackets
-Bolt body mounts up
-Weld bumper to brackets
-Weld bumpstops to ubolt flip kit
**NOTE, wash your truck if you attempt this...LOL!!**
I had freakin dried mud all over the place and my face!!!
After I took all the bolts loose I was able to jack the body up and remove the bumper brackets.
This was a great time for me to FINALLY replace my OEM rubber mounts with these poly ones that I've had kickin around three years now.
Heres the old ones, pretty bad.
Next, I'll notch the brackets and bolt them and the truck back together!
To do:
-Notch brackets
-Bolt body mounts up
-Weld bumper to brackets
-Weld bumpstops to ubolt flip kit
09-17-2009, 04:42 PM
#29
Contributing Member
Thread Starter
iTrader: (3)
Update, 17SEP09
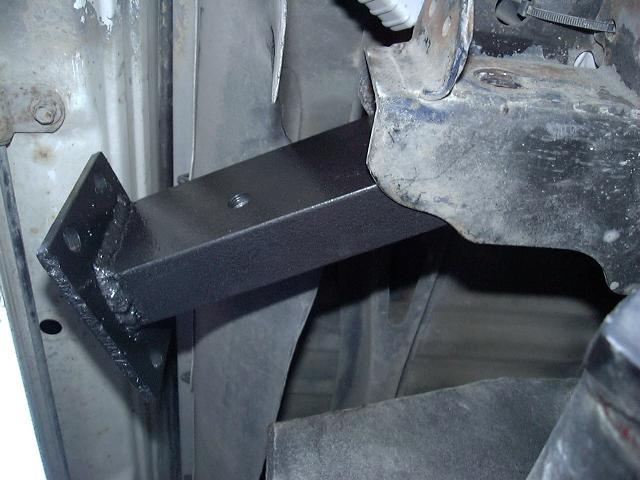
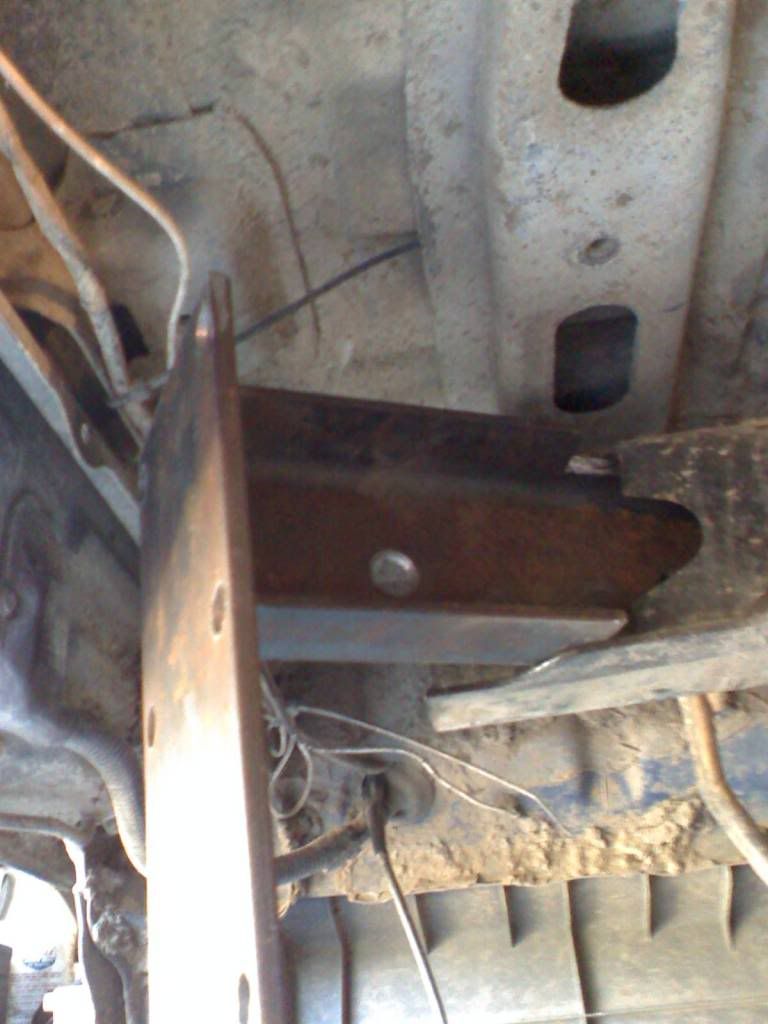
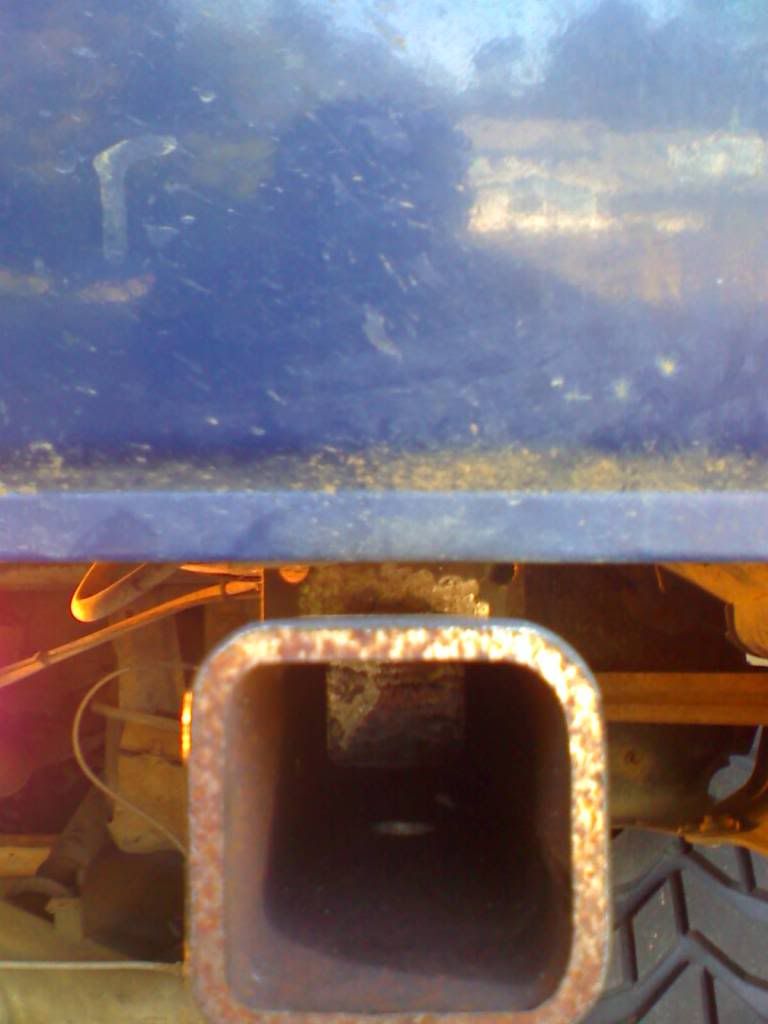
Well, today I got the body mounts tightened up and everything put back together from that. Now it was time to notch the frame brackets so that I can install them without having to lift the body up again!
oh, shiny!
Now they will easily go in, no problem!!
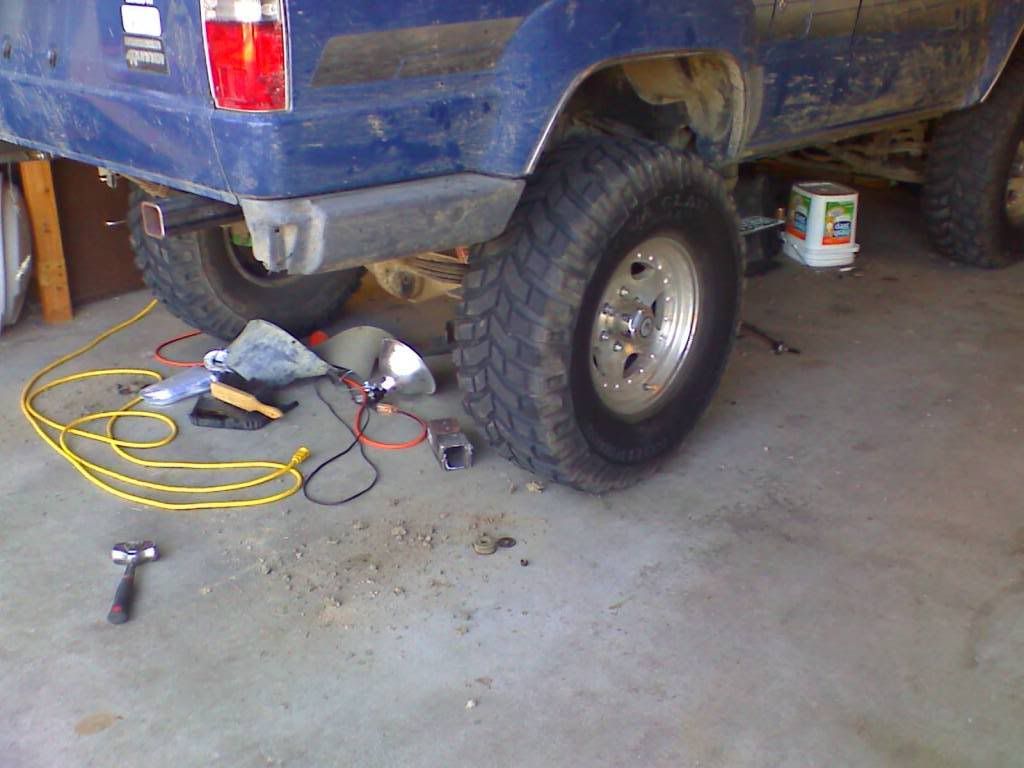
With the new body mounts in, it actually raised the truck up and extra 1/4".
Before:
After:
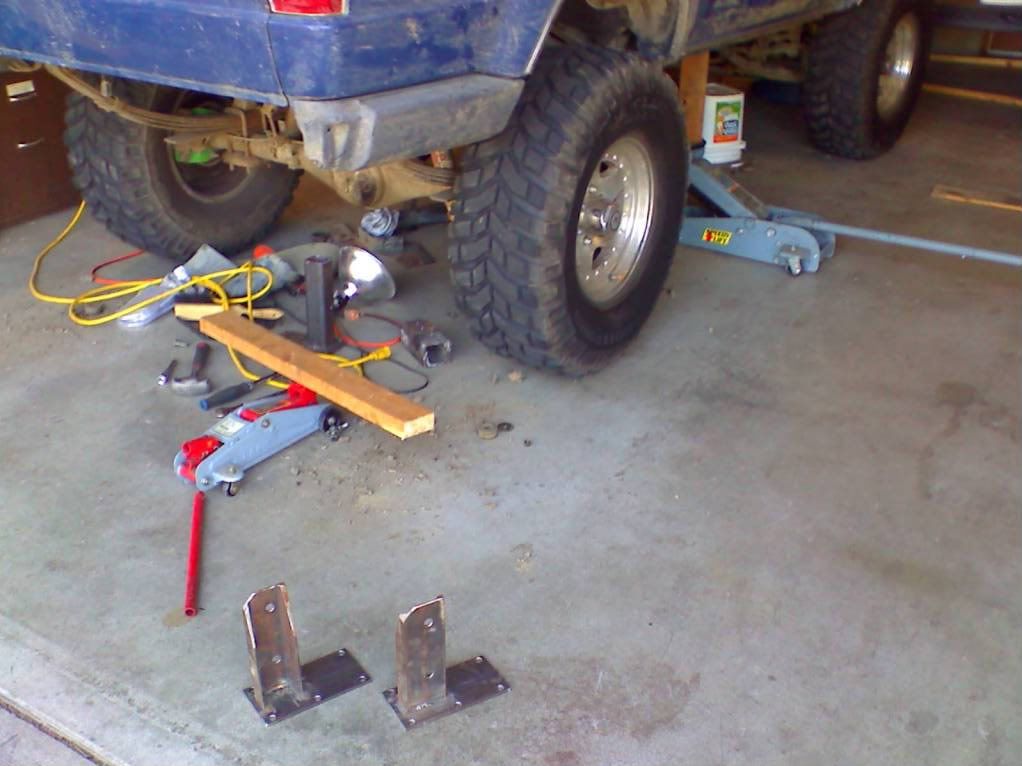
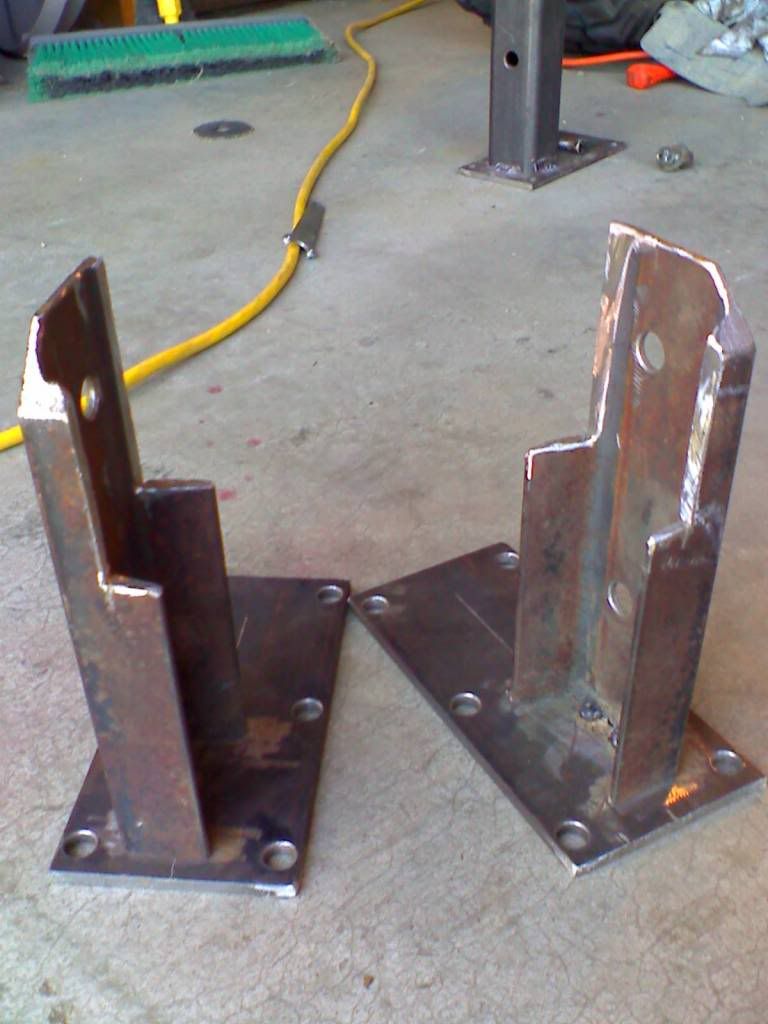
Also, while I'm working the rear end, backside...undercarriage?... I'll be flipping my ubolts, so I welded the bump-stops to the plates. I also painted them black(not shown...)
Unfortunately, I'm going to have to cut the welds on the bumper brackets because they are too high and need to be dropped down a 1/2".
oh, shiny!
Now they will easily go in, no problem!!
With the new body mounts in, it actually raised the truck up and extra 1/4".
Before:
After:
Also, while I'm working the rear end, backside...undercarriage?...
I'll be flipping my ubolts, so I welded the bump-stops to the plates. I also painted them black(not shown...)Unfortunately, I'm going to have to cut the welds on the bumper brackets because they are too high and need to be dropped down a 1/2".
09-18-2009, 05:41 PM
#31
Contributing Member
lol sometimes it seems as if your alone out here huh..
Hey my body mounts were black , you got red ones , same brand.
What will you do about the shocks ? When I did my ubolt flip kit , I totally forgot about the shocks and then had to order some mounts to weld to my axle .
other than that , notching the brackets was a good Idea ..
Hey my body mounts were black , you got red ones , same brand.
What will you do about the shocks ? When I did my ubolt flip kit , I totally forgot about the shocks and then had to order some mounts to weld to my axle .
other than that , notching the brackets was a good Idea ..
09-18-2009, 05:49 PM
#32
Contributing Member
Thread Starter
iTrader: (3)
Update, 18SEP09
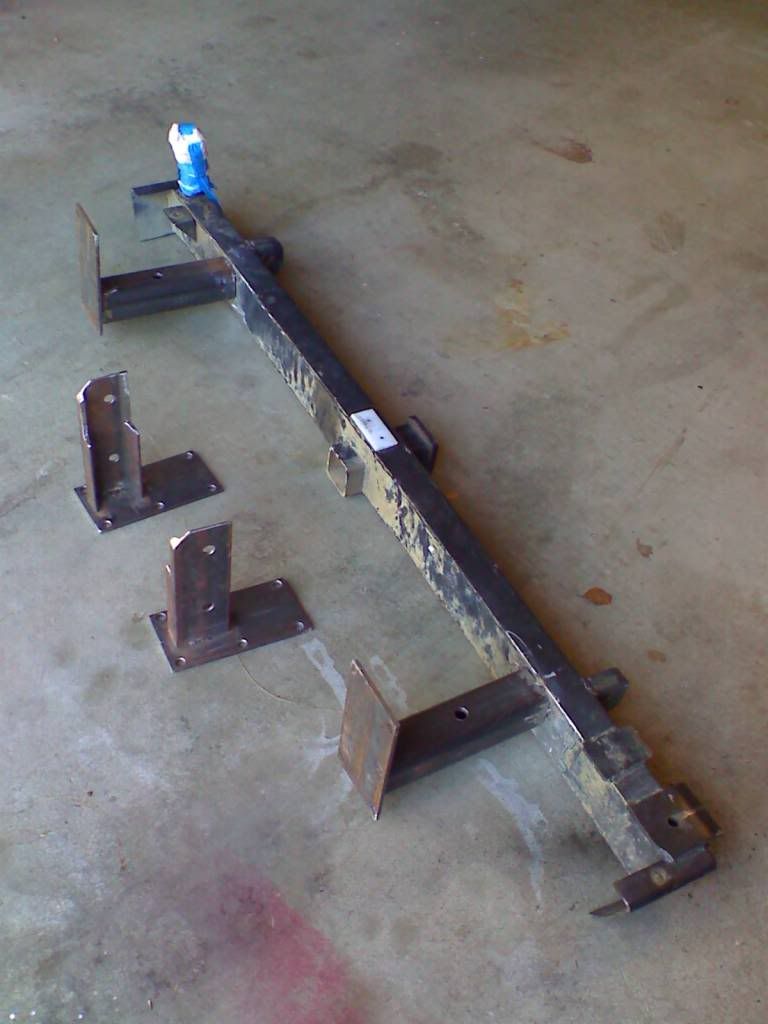
Today I cut the brackets apart and dropped them down and tacked them back together.
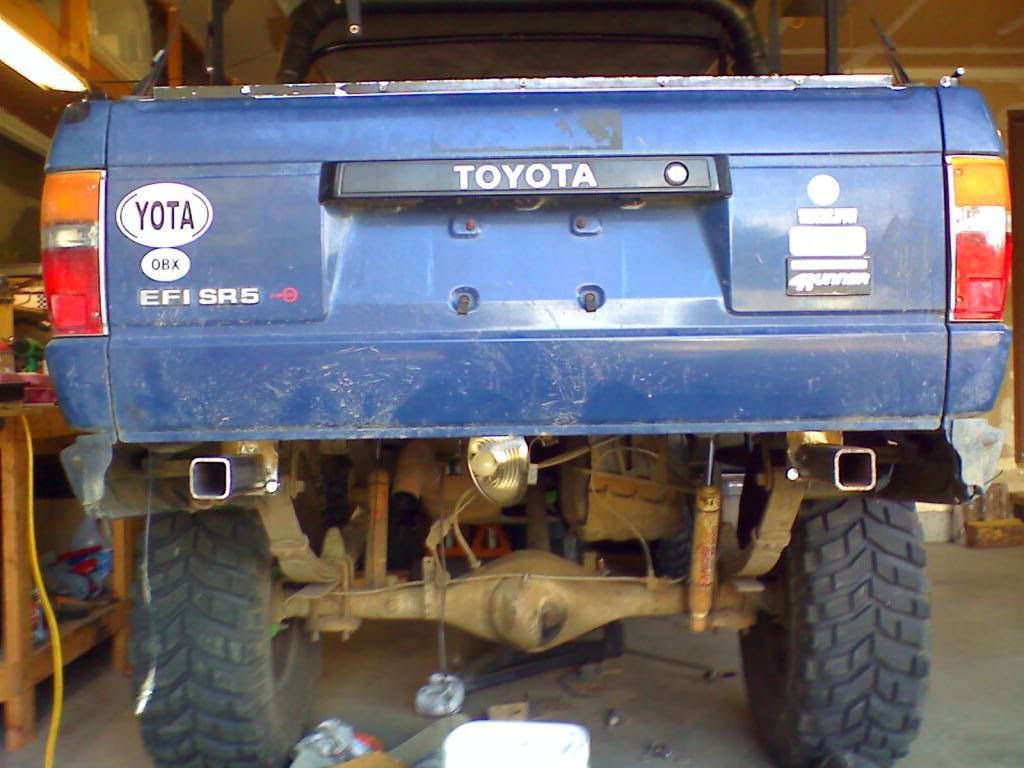
Mocked bumper in place and checked to make sure tailgate cleared:
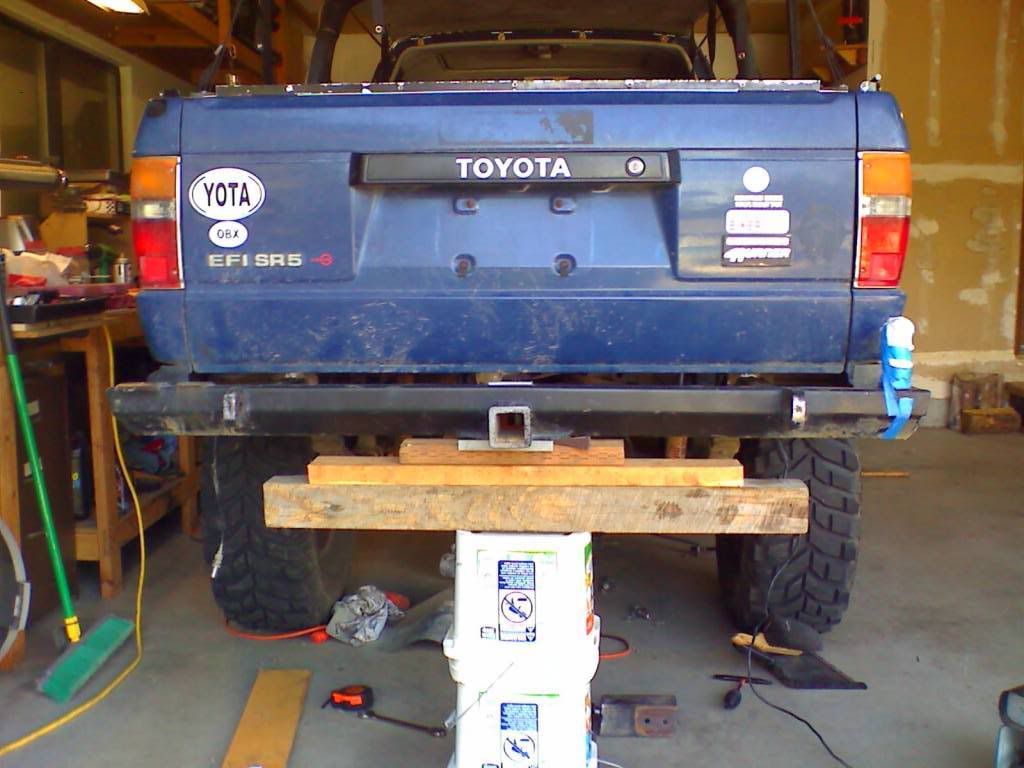
Tacked together and swing arm installed to check for clearance:
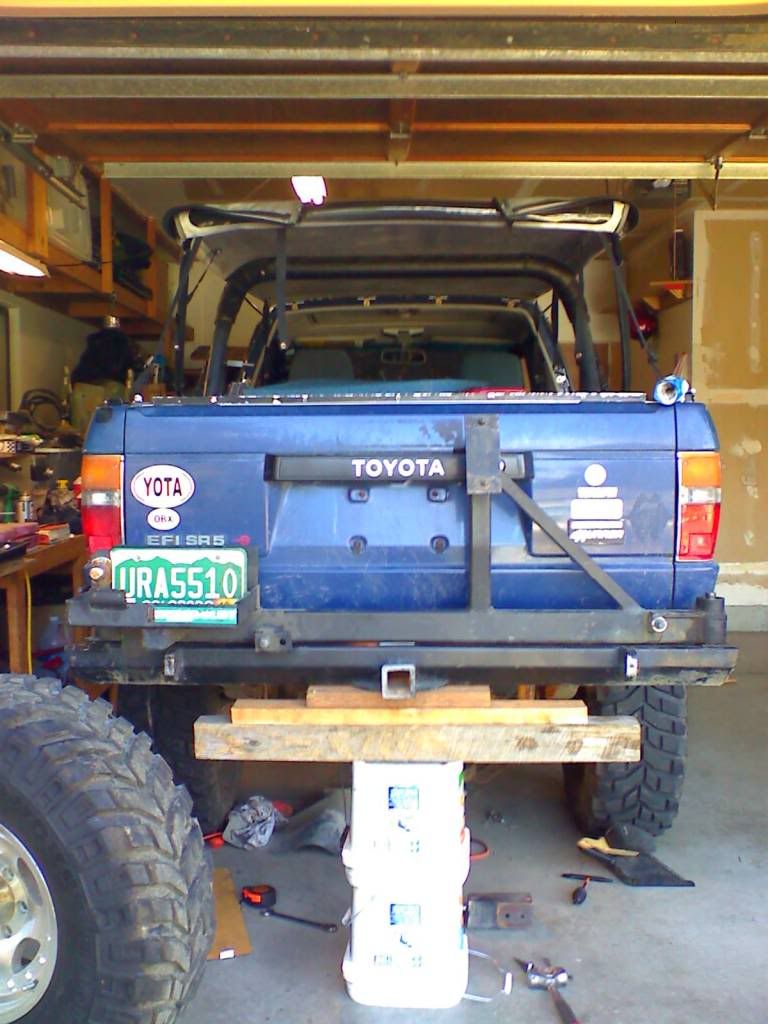
I did intall my spare and it clears fine, but I didn't want to leave it on very long 'cause it's only tacked!:
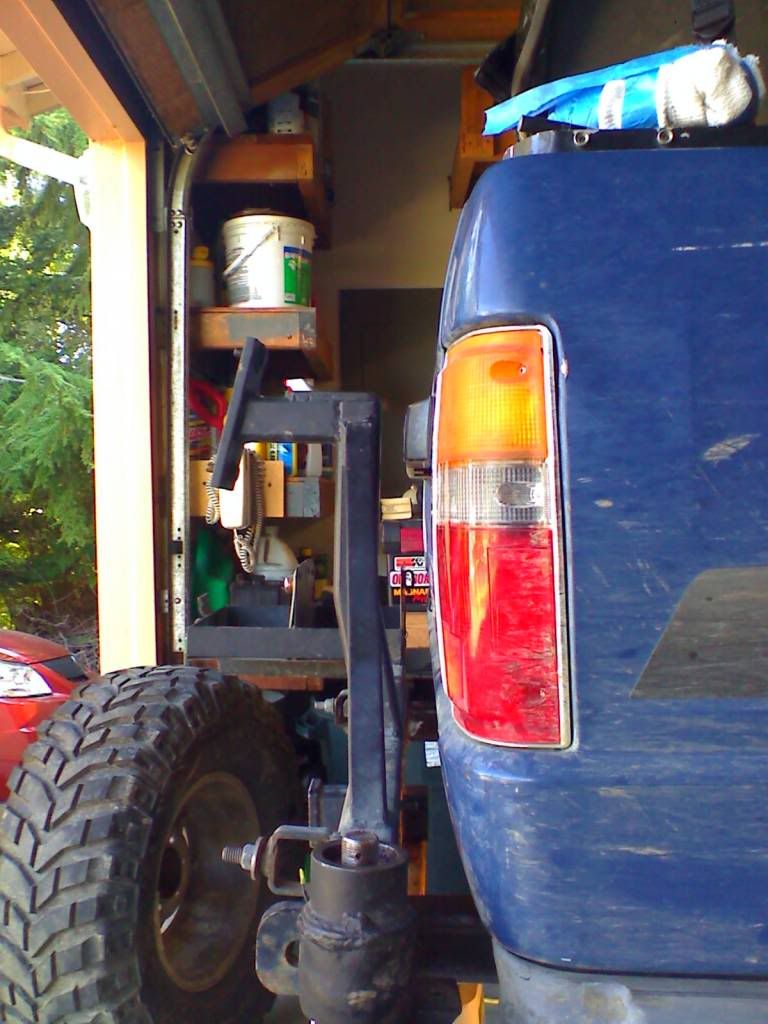
As you can see, I'll need to gusset some things:

But at least it's actually on the truck again!! LOL!
Next, I need to wrangle up some 1/8" plate to began cutting and fitting support pieces. I also picked up some shock mount tabs so I can relocate my shocks after I install my ubolt flip kit.
Mocked bumper in place and checked to make sure tailgate cleared:
Tacked together and swing arm installed to check for clearance:
I did intall my spare and it clears fine, but I didn't want to leave it on very long 'cause it's only tacked!:
As you can see, I'll need to gusset some things:
But at least it's actually on the truck again!! LOL!
Next, I need to wrangle up some 1/8" plate to began cutting and fitting support pieces. I also picked up some shock mount tabs so I can relocate my shocks after I install my ubolt flip kit.
09-18-2009, 05:59 PM
#33
Contributing Member
Thread Starter
iTrader: (3)
lol sometimes it seems as if your alone out here huh..
Hey my body mounts were black , you got red ones , same brand.
What will you do about the shocks ? When I did my ubolt flip kit , I totally forgot about the shocks and then had to order some mounts to weld to my axle .
other than that , notching the brackets was a good Idea ..
Hey my body mounts were black , you got red ones , same brand.
What will you do about the shocks ? When I did my ubolt flip kit , I totally forgot about the shocks and then had to order some mounts to weld to my axle .
other than that , notching the brackets was a good Idea ..
Man, I ordered those mounts back in '06! I vaguely remember them asking me if I wanted red or black. I figured since I had RANCHO shocks I'd stick with the red! They'll be black soon enough! LOL!!!
I had to notch those brackets and I should have done that in the beginning, but I got a little ahead of myself!! Those brackets have to be removable, for me any ways, to get them finish welded and I'm not a big fan of just welding straight to the frame(unless it's just a pure trail rig). Plus I'm using what I have in a budget garage.
I have a bolt on shock relocate kit, but now that I have a welder I just went ahead and picked up the tabs. It'll look a little cleaner!
09-25-2009, 05:30 PM
#38
Contributing Member
Thread Starter
iTrader: (3)
Update, 25SEP09
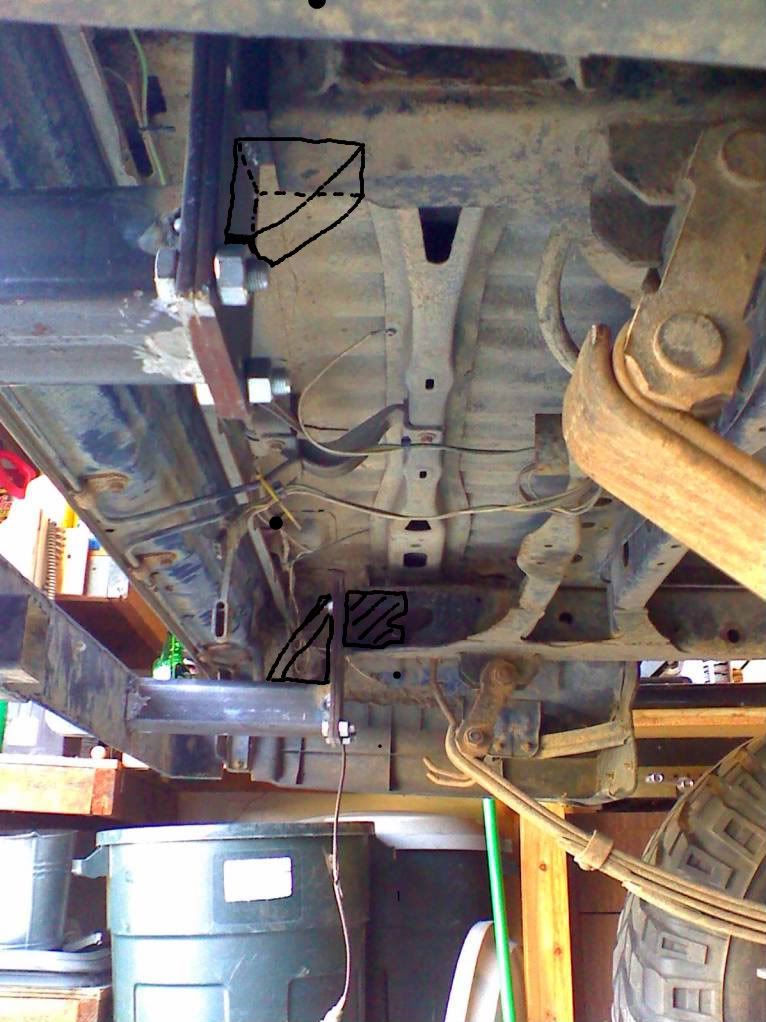
Today I didn't get much done except to take the mocked up bumper down. Before I did that I made templates for the gussets I'm going to make with the 3/16" plate I picked up.
I'm going to run two gussets on the bumper bracket side and box that in and then run some gussets on the frame side and box those in. I'm also going to box in the piece that slides into the frame as well to give more surface area to weld the plate to.
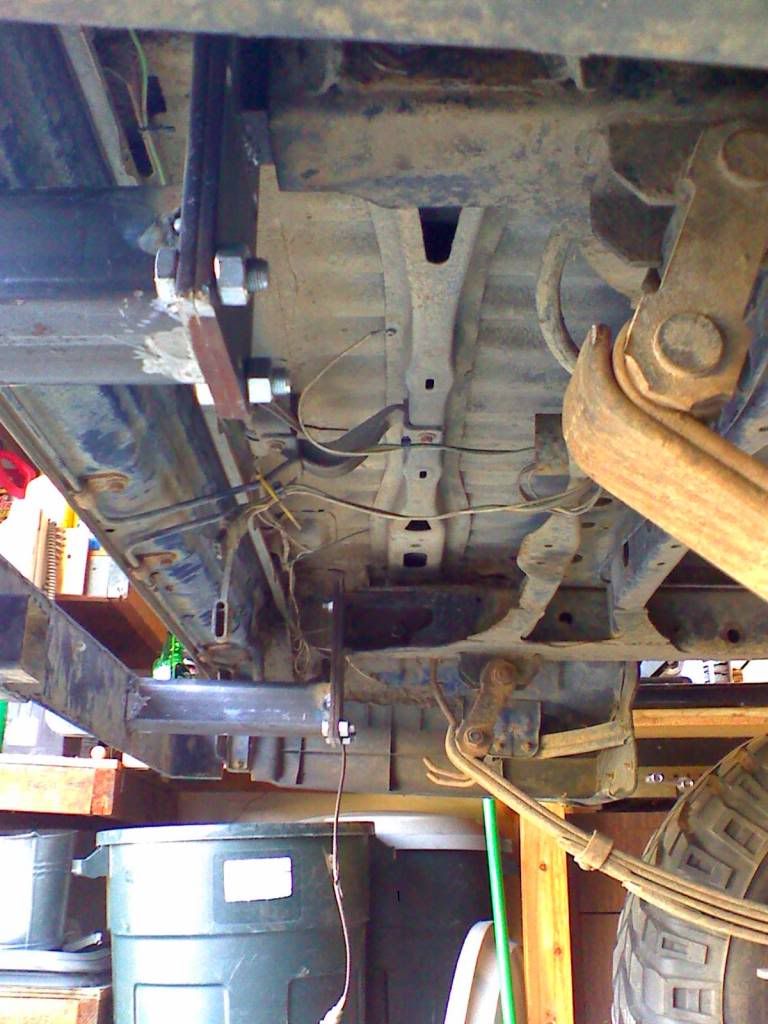
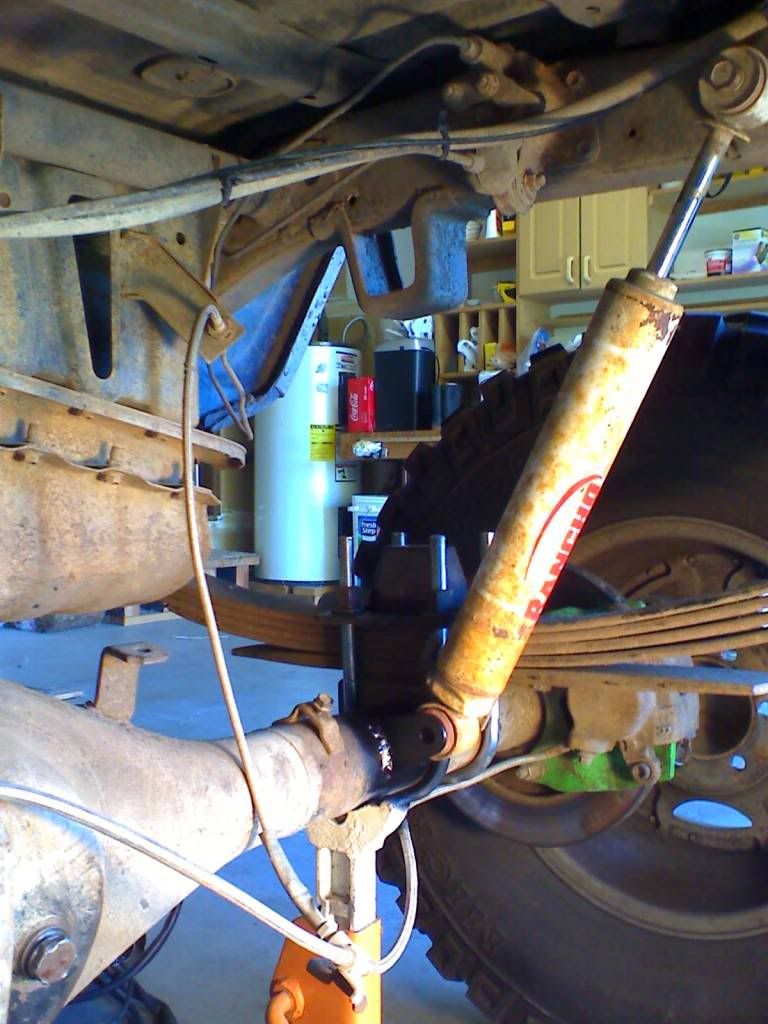
I also installed my ubolt flip kit/bumpstops and then planned where I was going to mount my new shock mounts.
Where the shock sits is about where I'm going to mount the tabs. I was going to angle them like this: /\ but thats just not going to work for me.
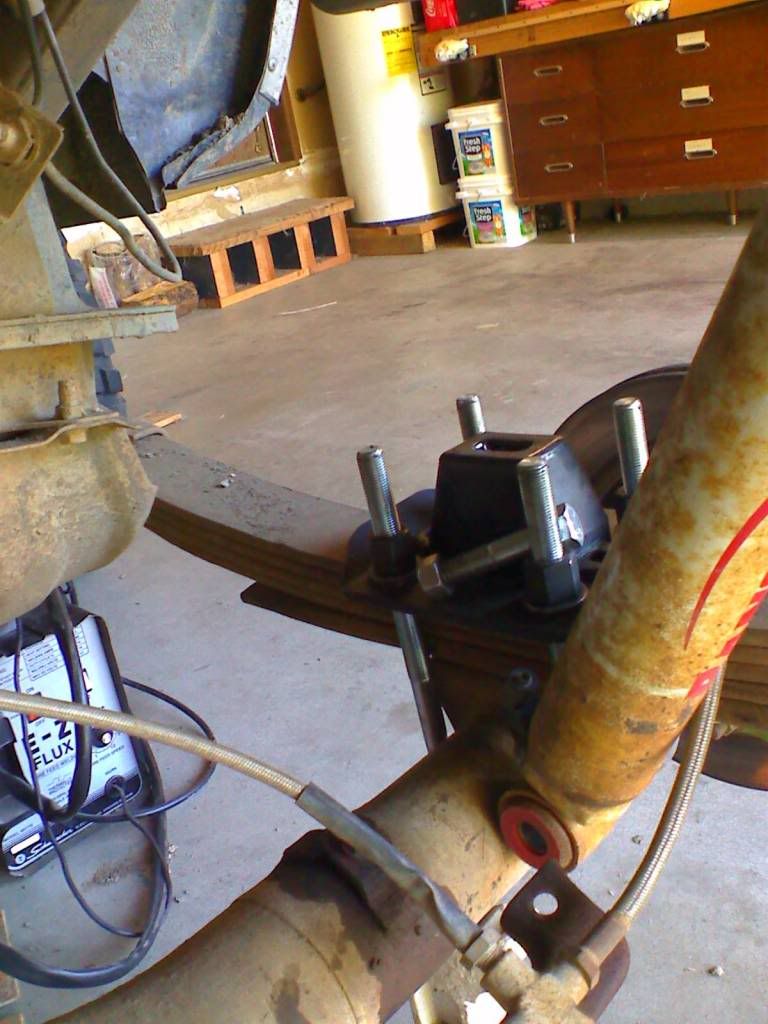
I'm going to run two gussets on the bumper bracket side and box that in and then run some gussets on the frame side and box those in. I'm also going to box in the piece that slides into the frame as well to give more surface area to weld the plate to.
I also installed my ubolt flip kit/bumpstops and then planned where I was going to mount my new shock mounts.
Where the shock sits is about where I'm going to mount the tabs. I was going to angle them like this: /\ but thats just not going to work for me.
Last edited by BigBluePile; 09-25-2009 at 05:32 PM.
09-27-2009, 06:20 PM
#39
Contributing Member
Thread Starter
iTrader: (3)
Update, 27SEP09
Ok, well I got ONE shock mount installed and then realized I still needed to bore the holes out to 5/8"...grrrrrrrrrr. Got the one hole done just need to go pick up a drill bit that size. Ace Hardware didn't have one, surprisingly.
Back to the bumper, tomorrow I'll be dropping it off to get burned in and then when I get it back I'll put all the gussets on and then paint it all. I'm also swapping my battery and Supra AFM intake in the engine bay using a custom fiberglass filter box and fender intake...should be interesting. Maybe I'll do a thread on that...
Back to the bumper, tomorrow I'll be dropping it off to get burned in and then when I get it back I'll put all the gussets on and then paint it all. I'm also swapping my battery and Supra AFM intake in the engine bay using a custom fiberglass filter box and fender intake...should be interesting. Maybe I'll do a thread on that...


