Project: Save The Yota!
 06-08-2009, 01:00 PM
#1
Registered User
Thread Starter
Join Date: Jun 2009
Location: spokane, wa
Posts: 124
Likes: 0
Received 0 Likes
on
0 Posts
Project: Save The Yota!
heres my trucks current specs and my project at hand: (click thumbnails to enlarge)
95 4runner
Sas 85 runner front axle
5.29 gears
Longfields
ARB Air Lockers
4" marlin Crawler front leafs
1" rear superlift with 3" poly Spacers
3" body lift
8000lb winch
my rear axle is cracking where the link mounts are welded on
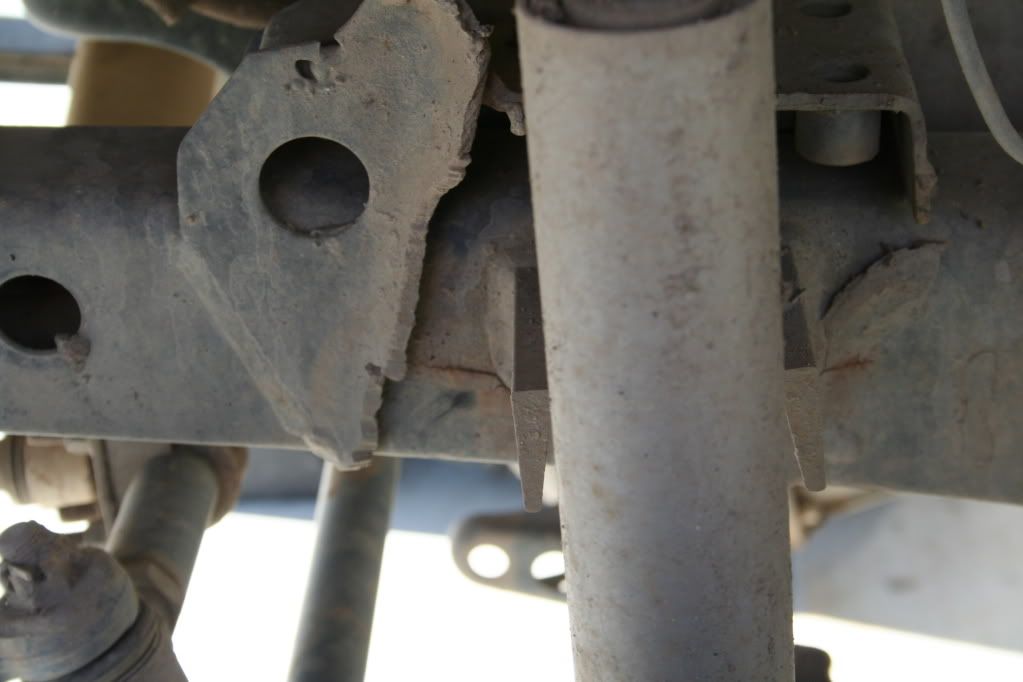
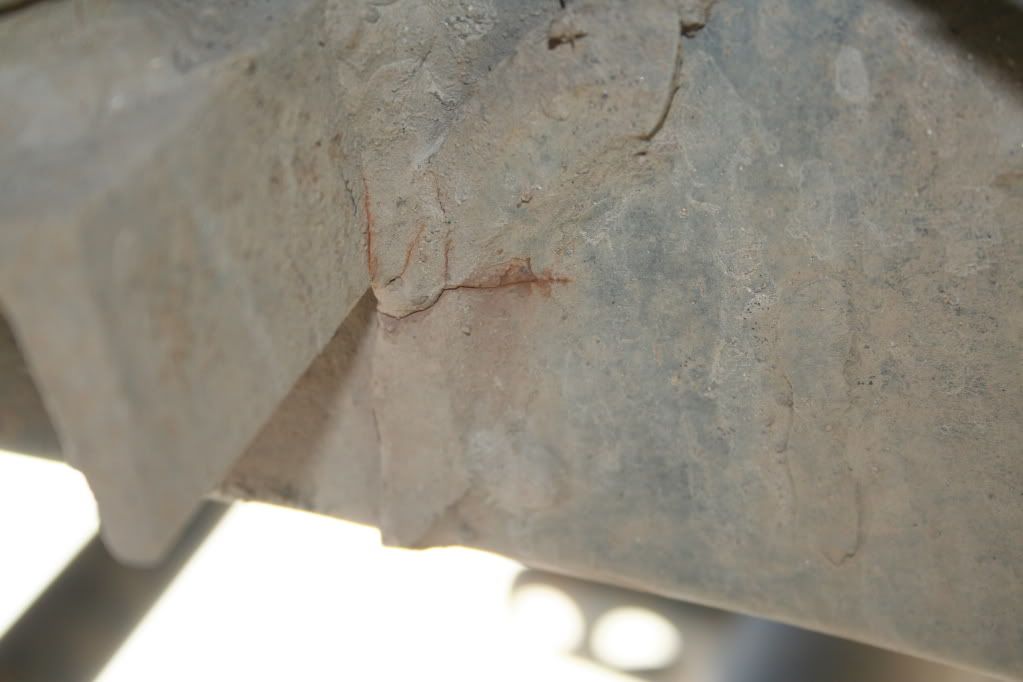
my front shock mount is cracking where its welded along the frame
my cheap ass superlift springs are sagging
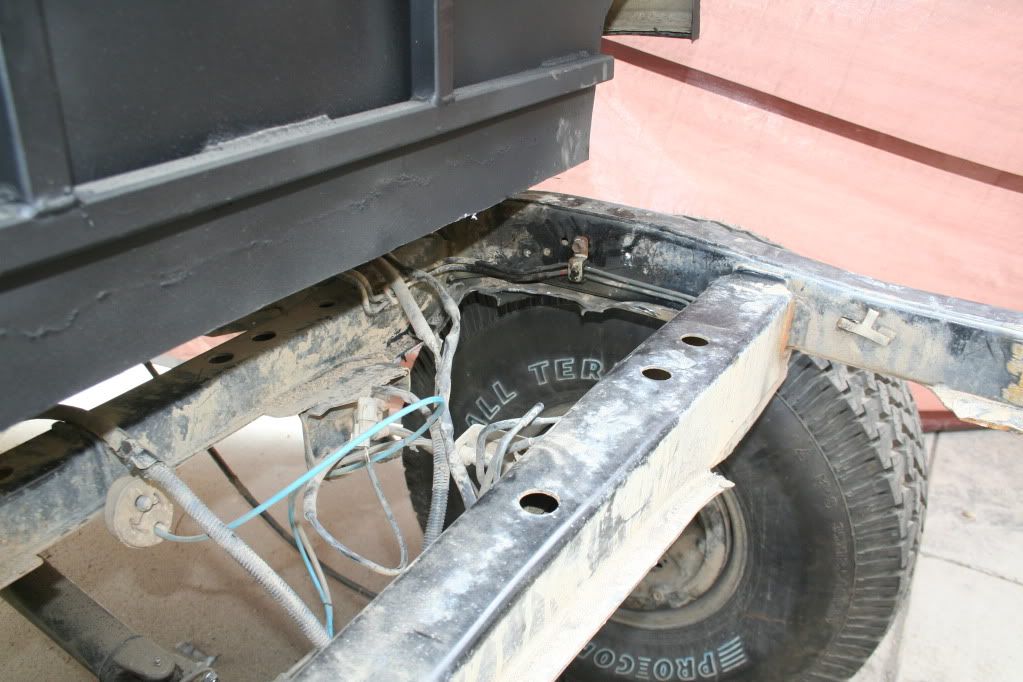
my superlift link bracket extensions are hanging down so far that obstacles taller than 16" will hit the brackets instead of my rear tire
So here is what im doing to fix all that crap:
taking off the 3" body lift (this truck is waaay too high and tippy)
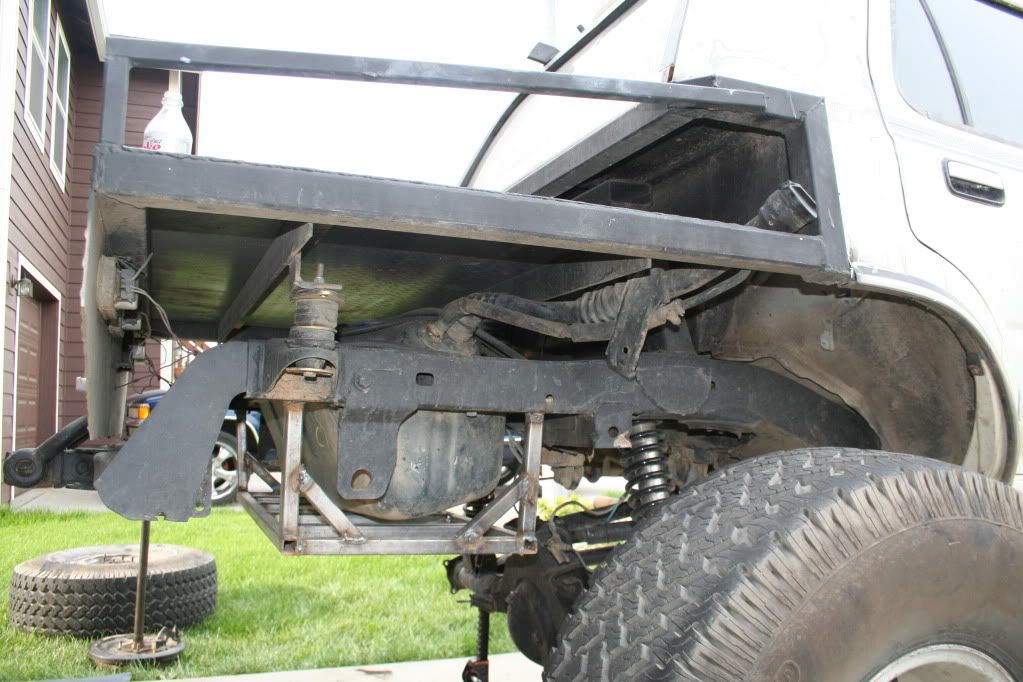
Im cutting off the rear of the body and turning it into a quad cab flatbed
relocating the fuel cell to the spare tire mount area
cutting off the stock 4link and using trail gears rear axle link mounts
fabbing up a custom crossmember for my links to mount on
fabbing up custom longarms with johnny joints
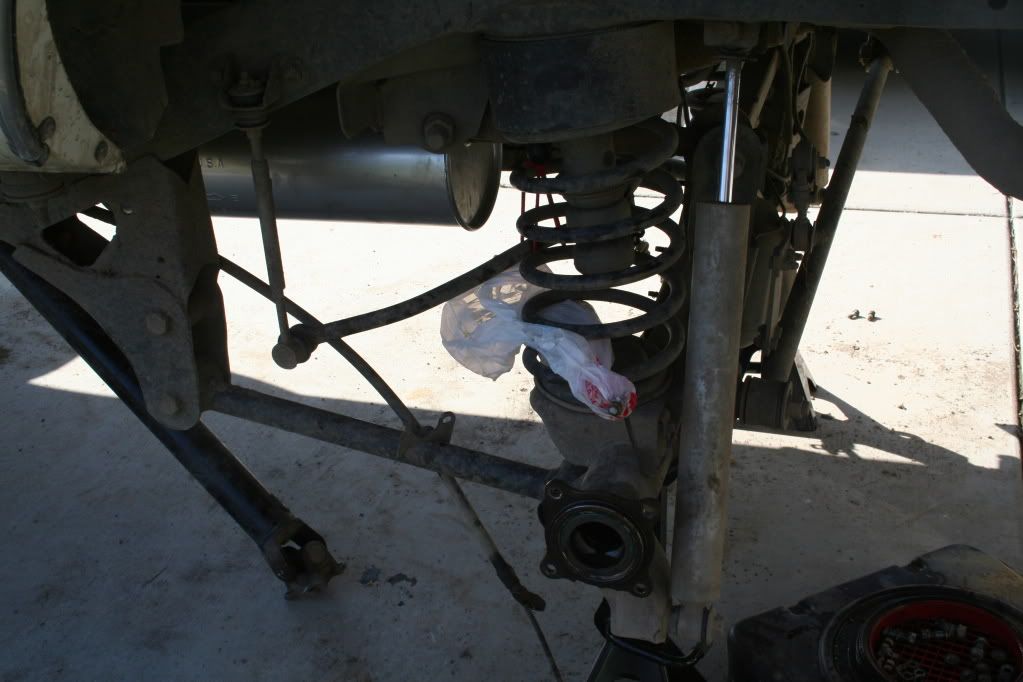
putting in aisin hubs and rebuilding my front knuckles / replacing the wheel bearings
fixing the cracked frame and turning my shock tower into shock hoops
putting yukon gears in my rear axle
taking off superlift crap and putting 6" custom progressive coils
bend and weld myself a nice rollcage
Heres some pics:
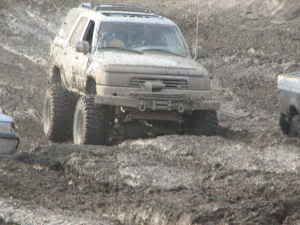
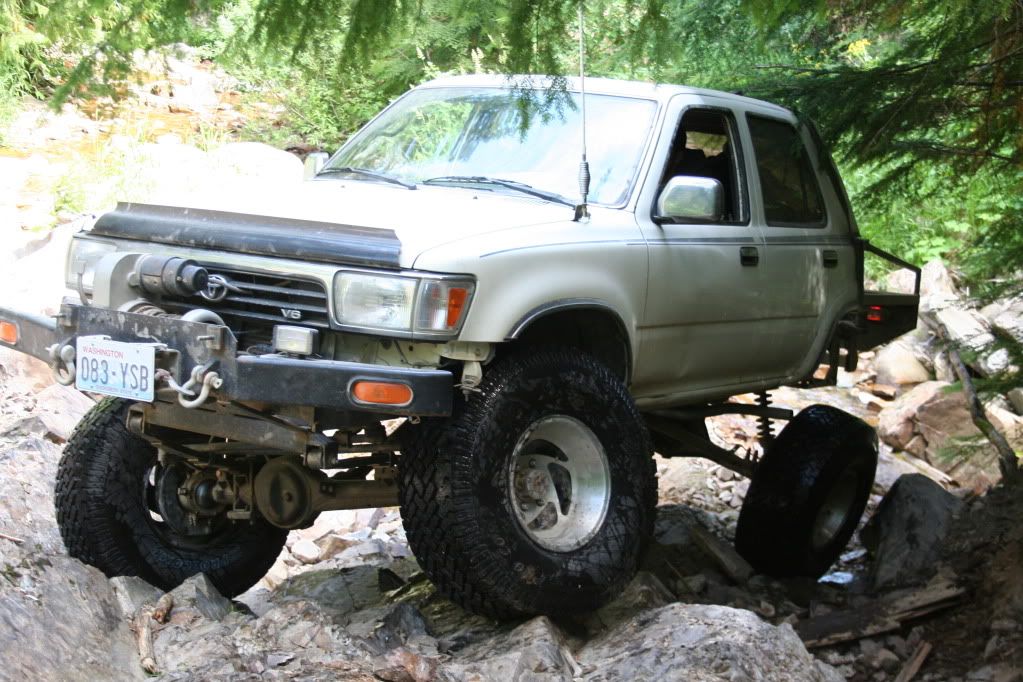
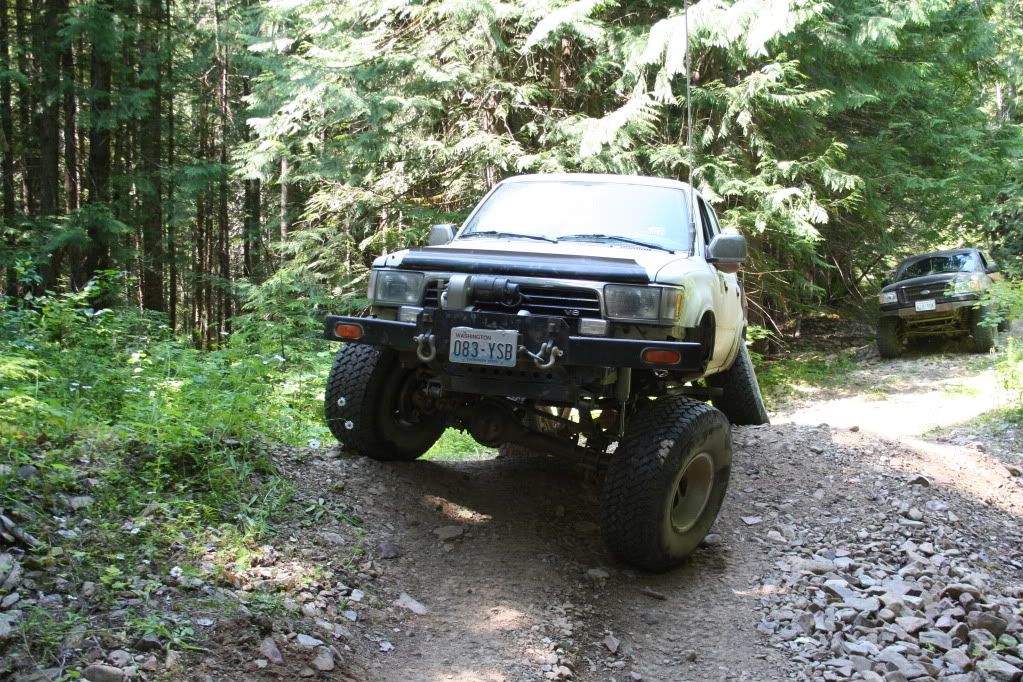
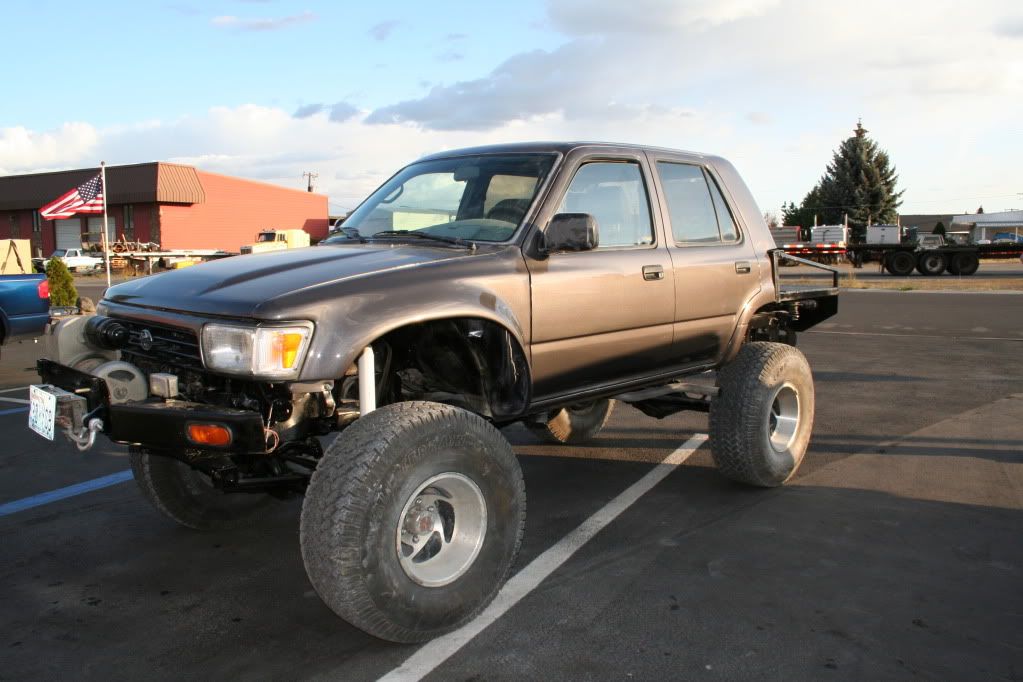
Heres a pic of my truck (before pic)
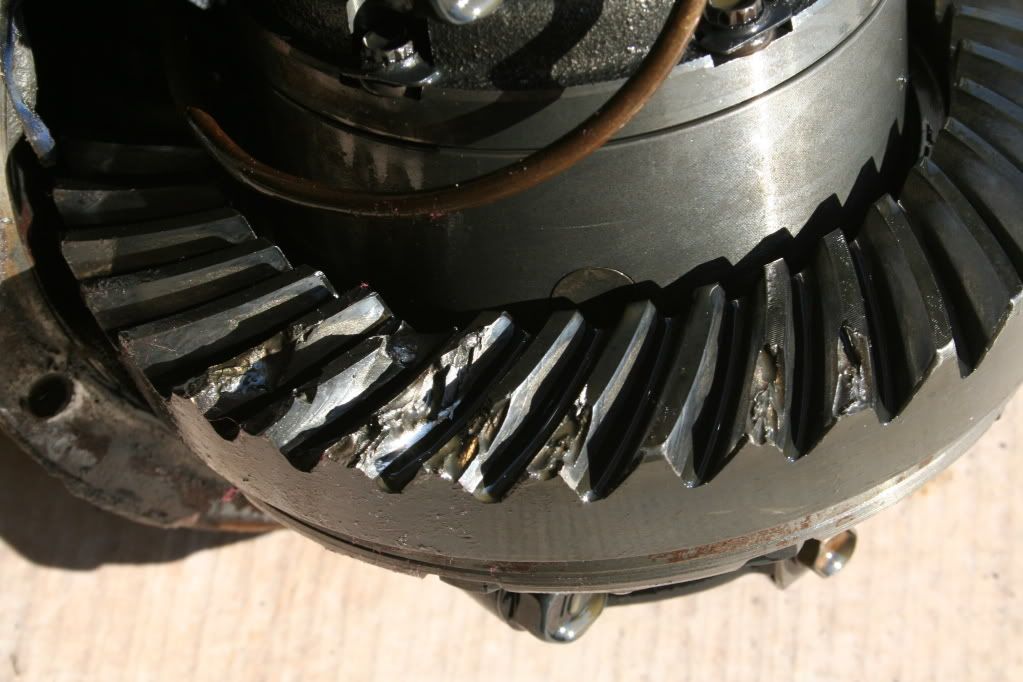
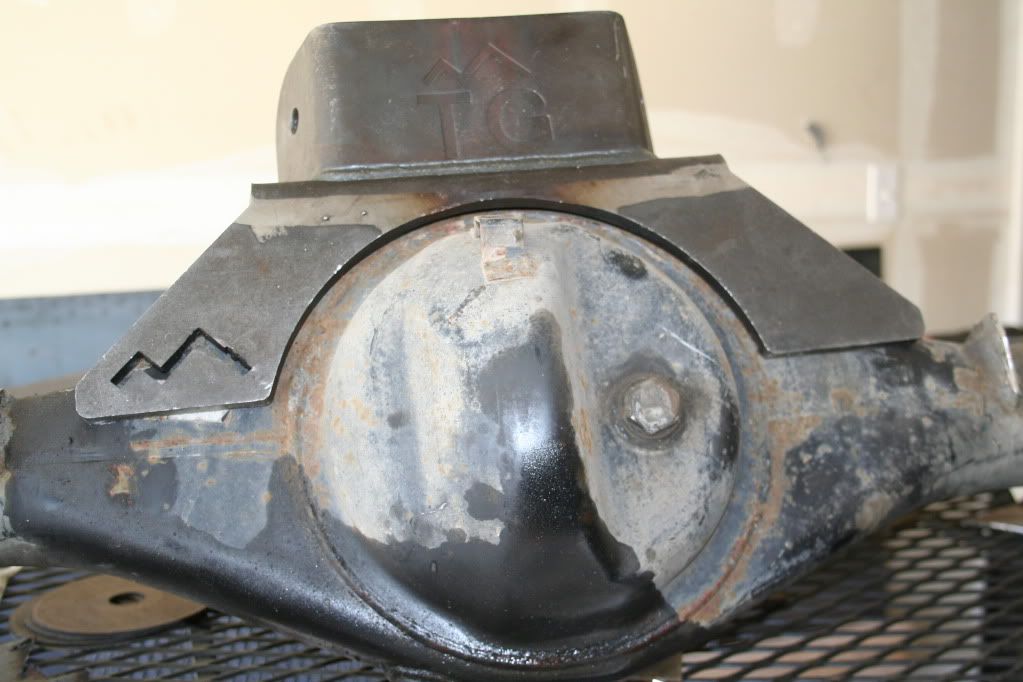
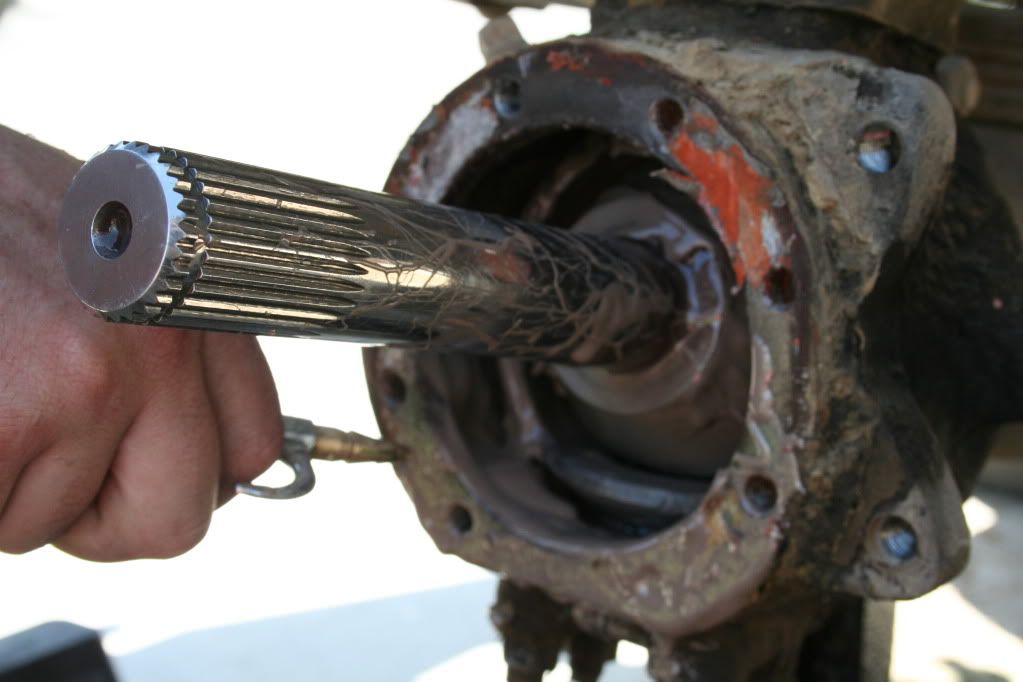
Trashed Pinion
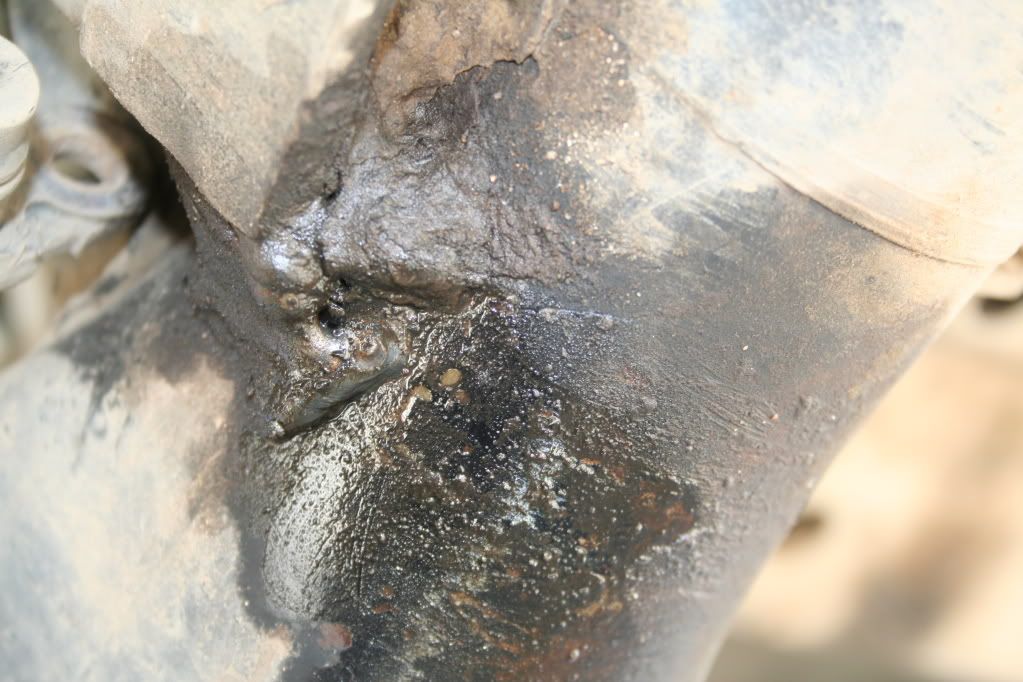
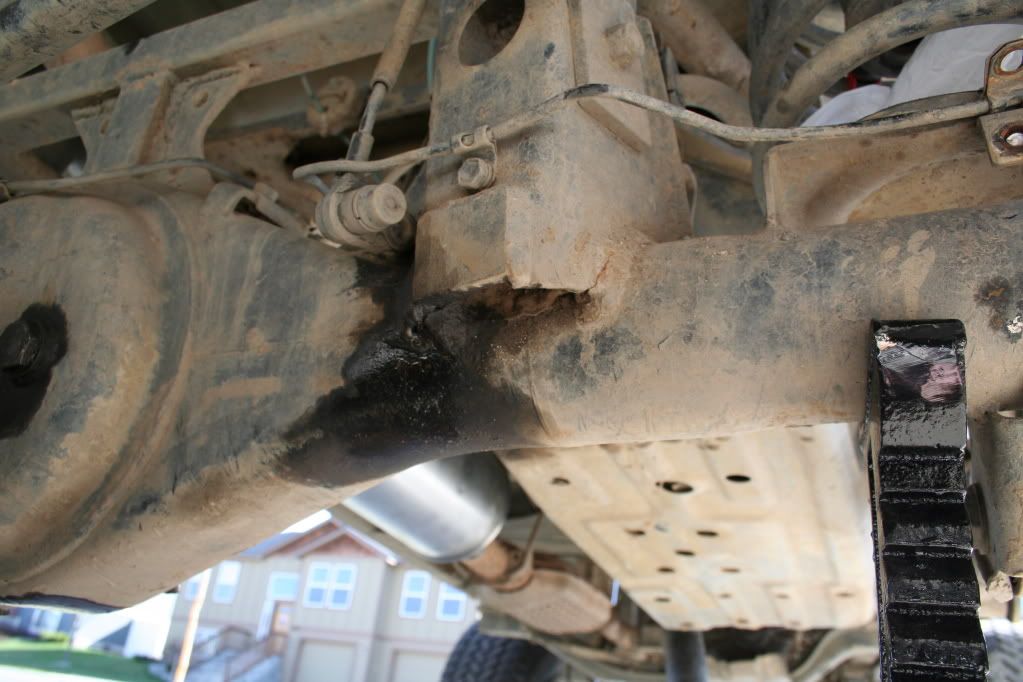
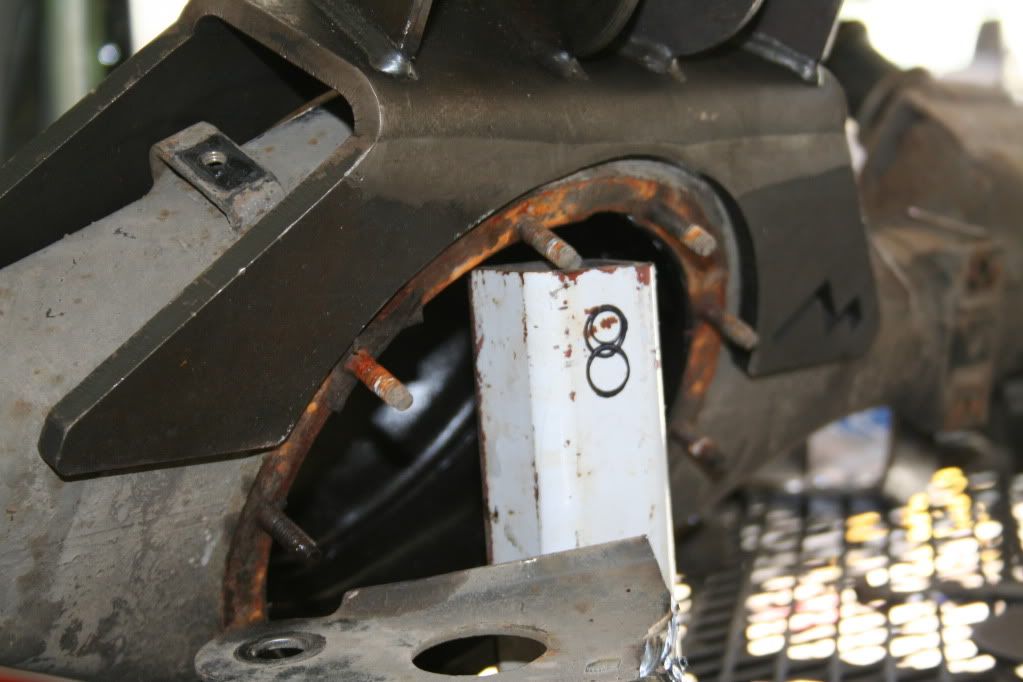
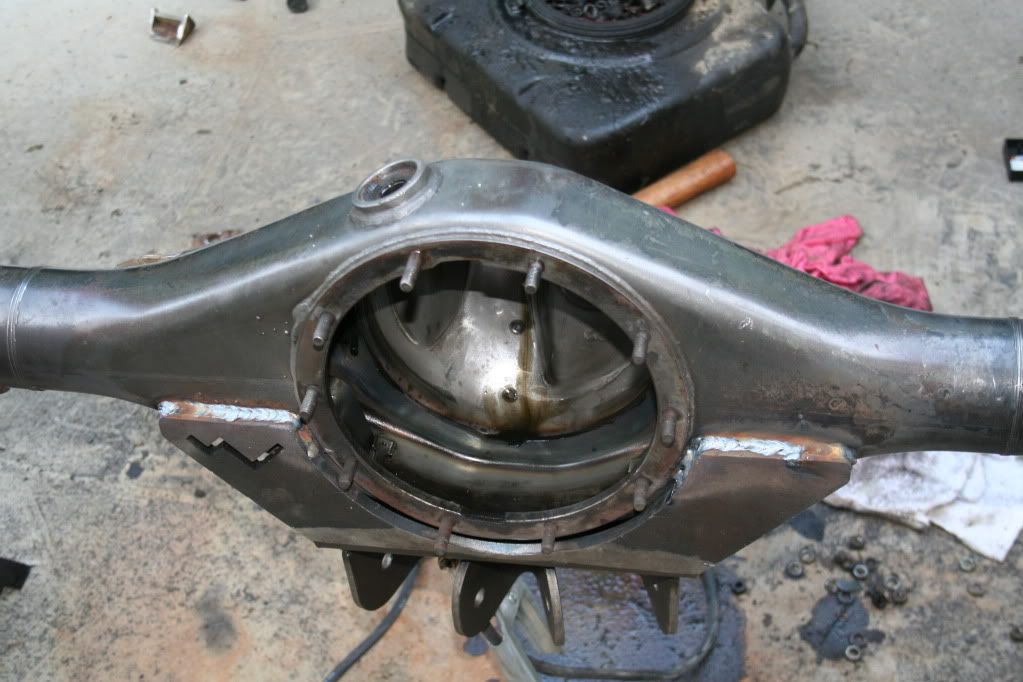
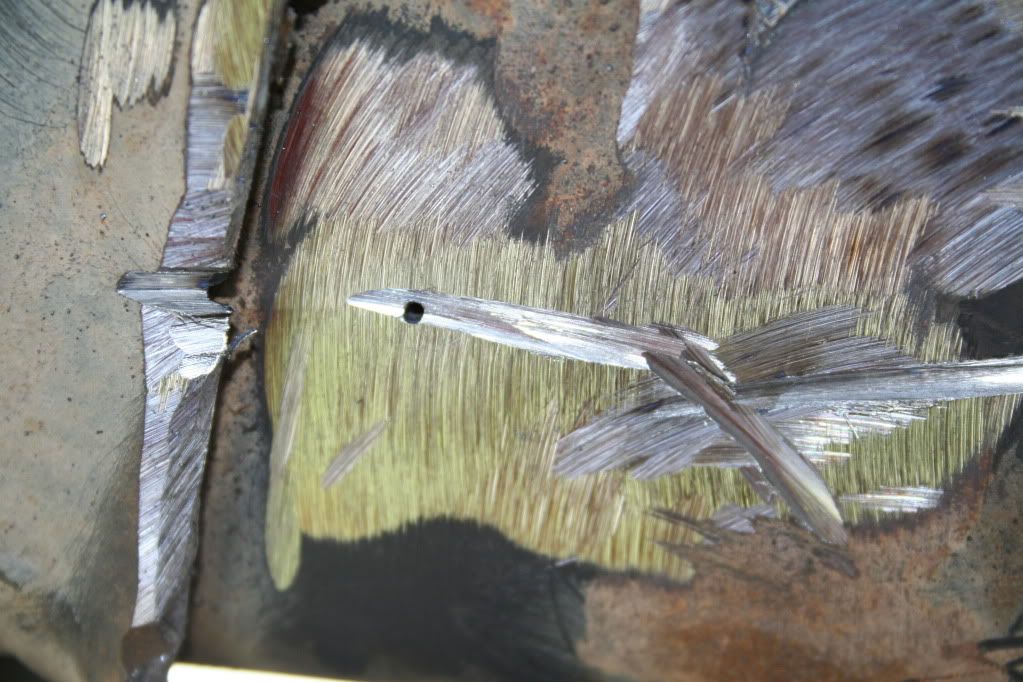
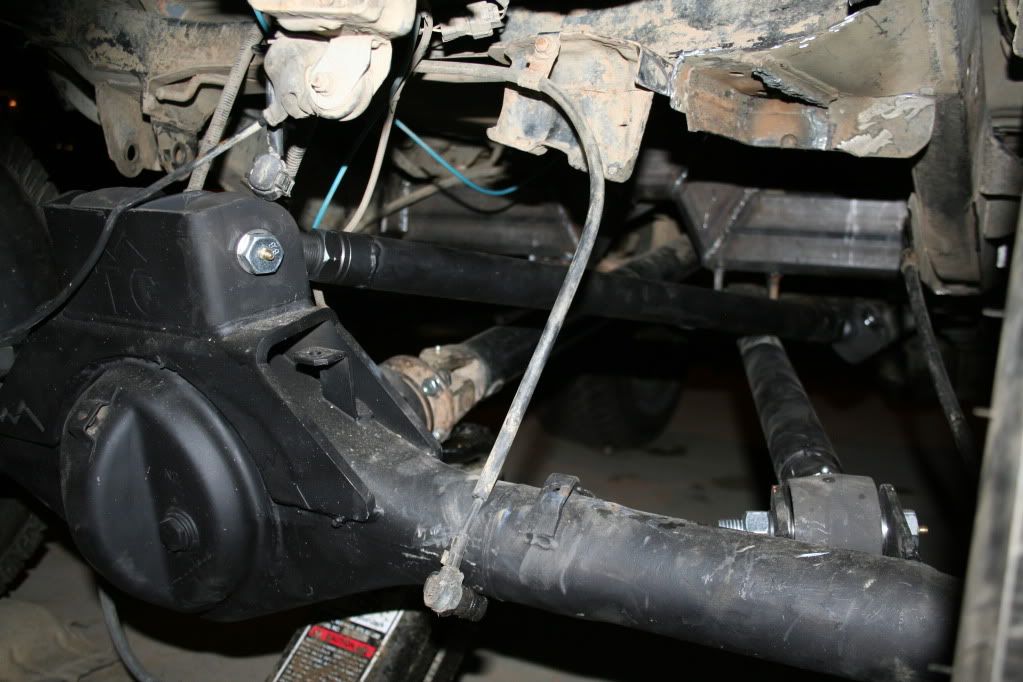
Cracked axle housing
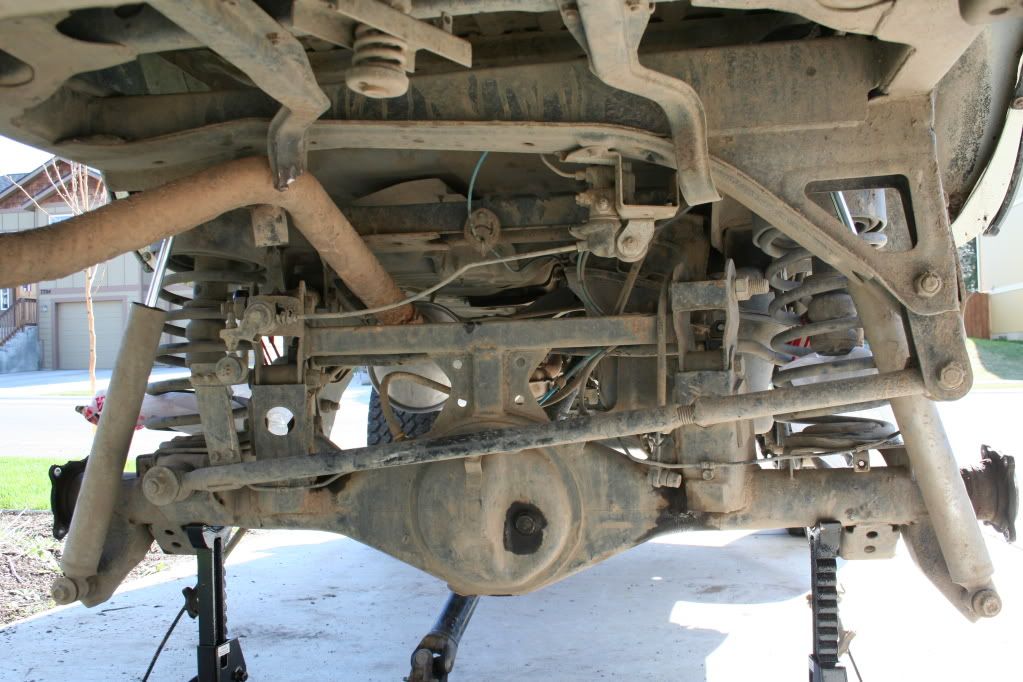
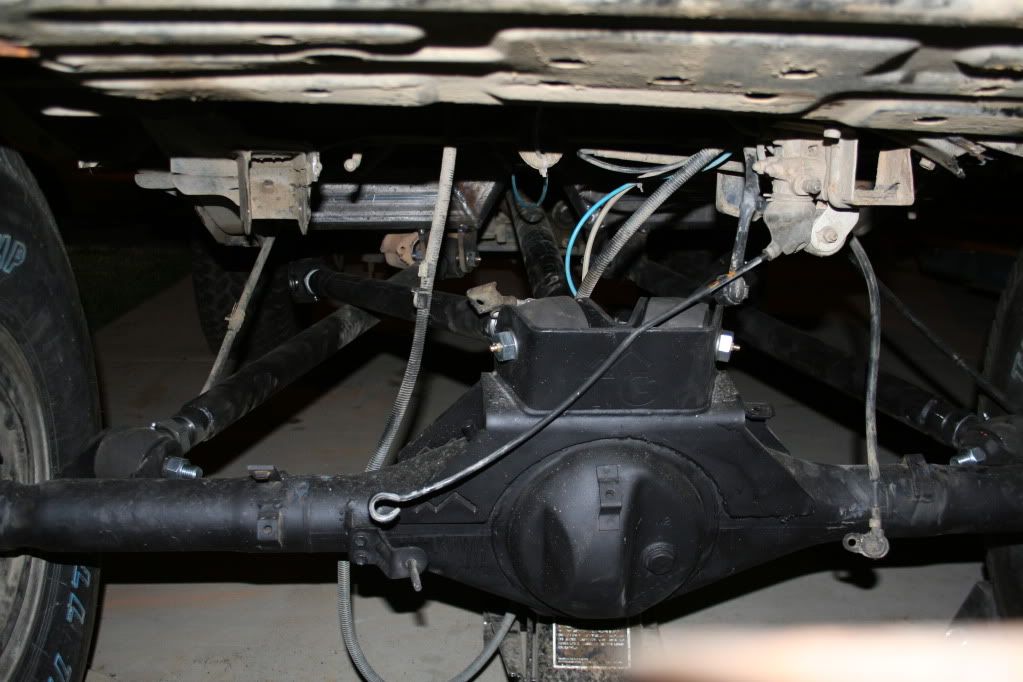
Superlift 4link lift (note the long bracket extension hanging down like 16")
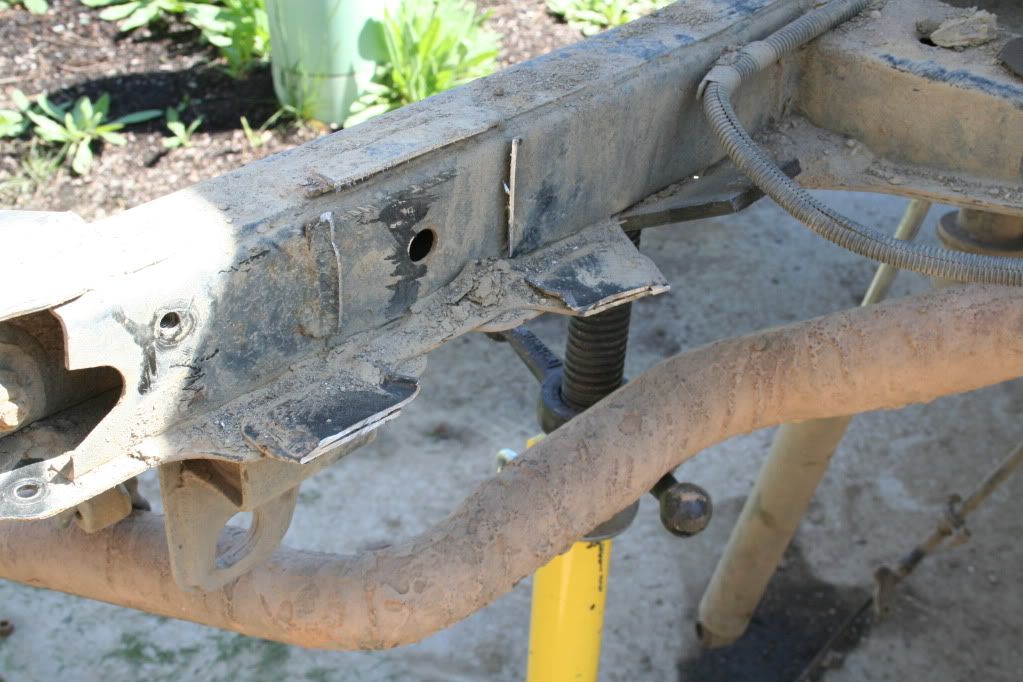
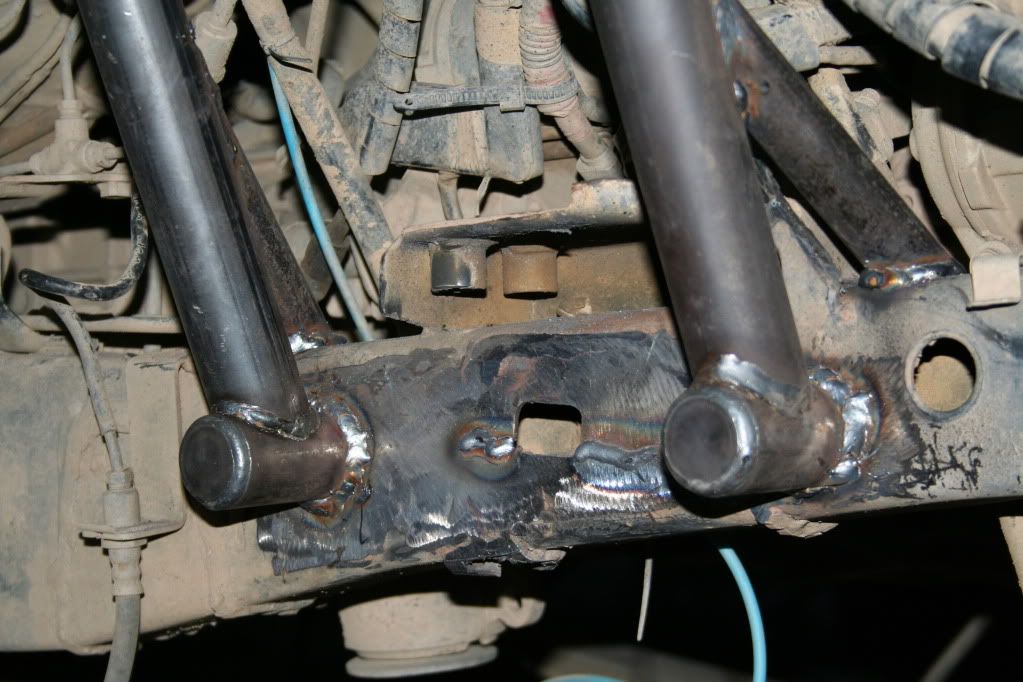
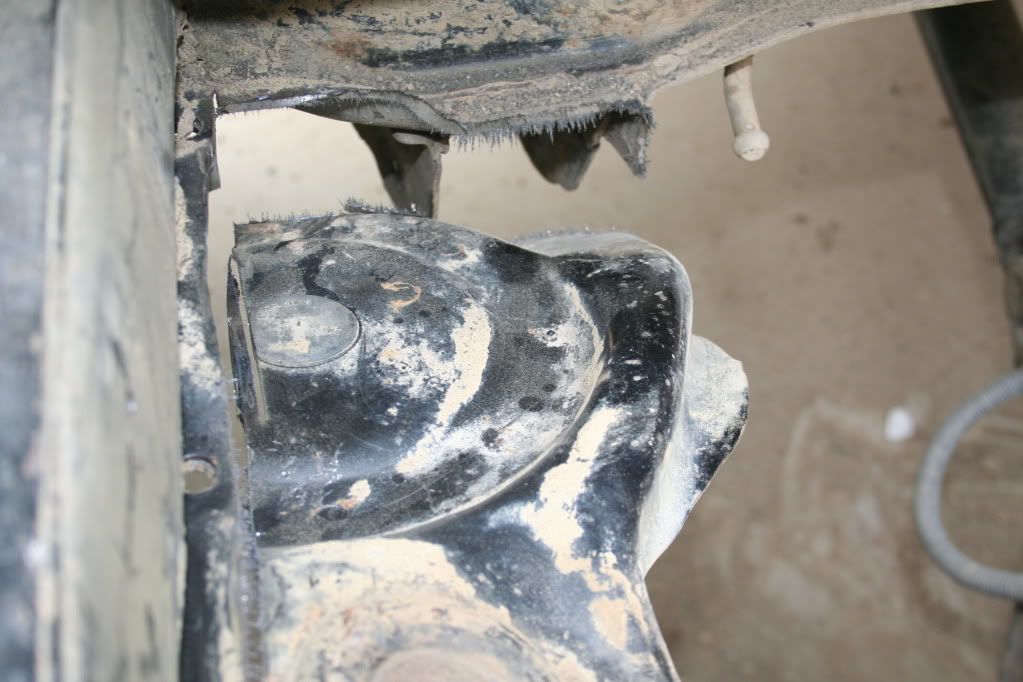
Cracked frame (front shock mount weld failure)

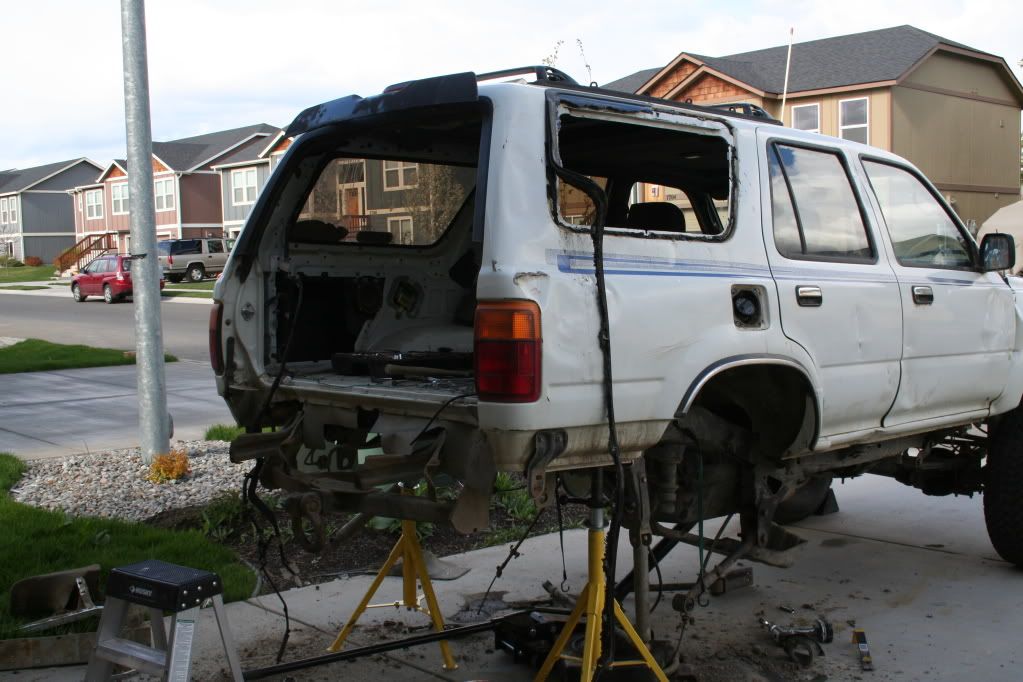
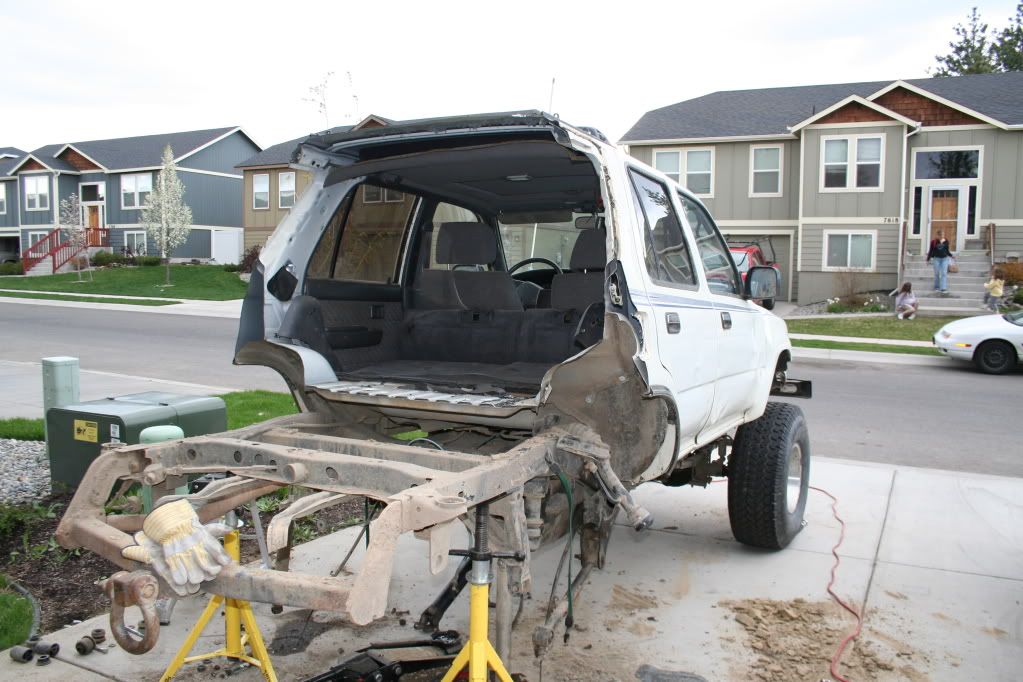
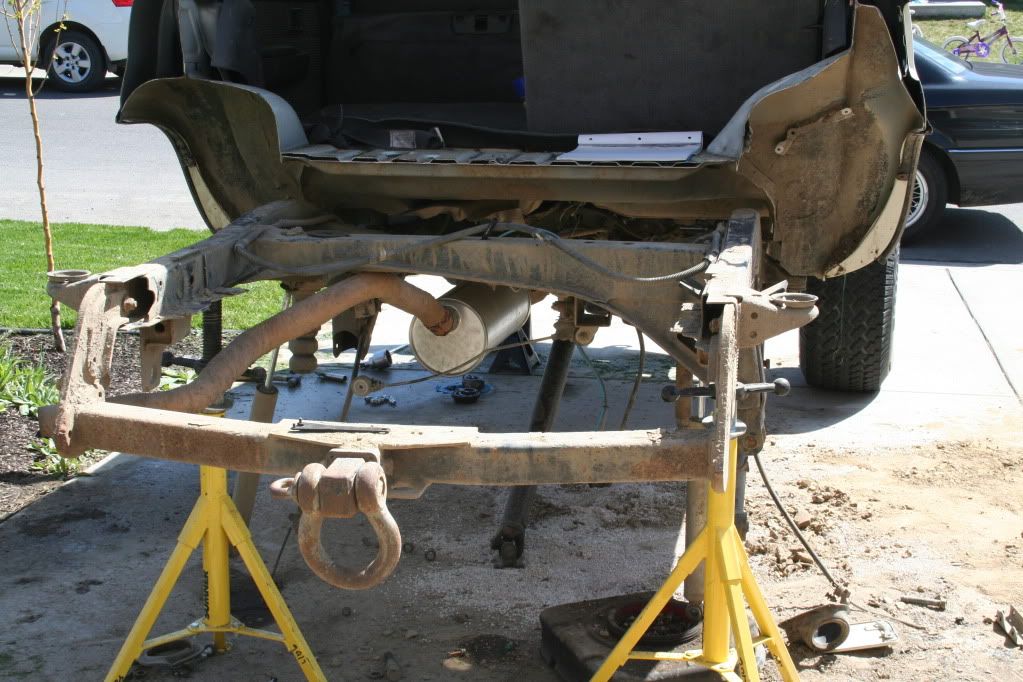
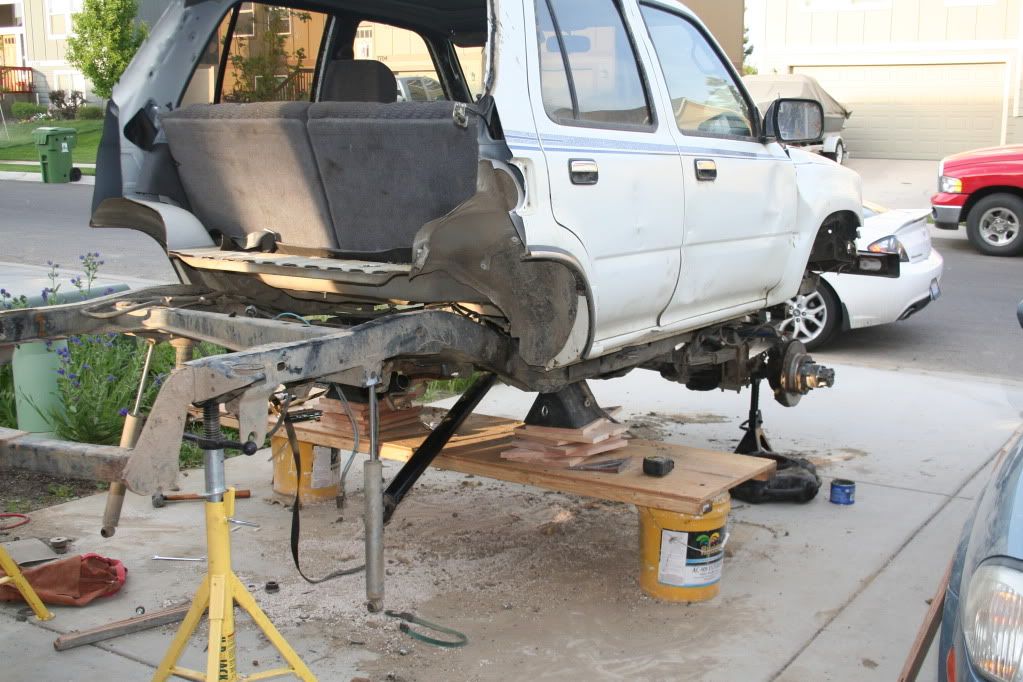
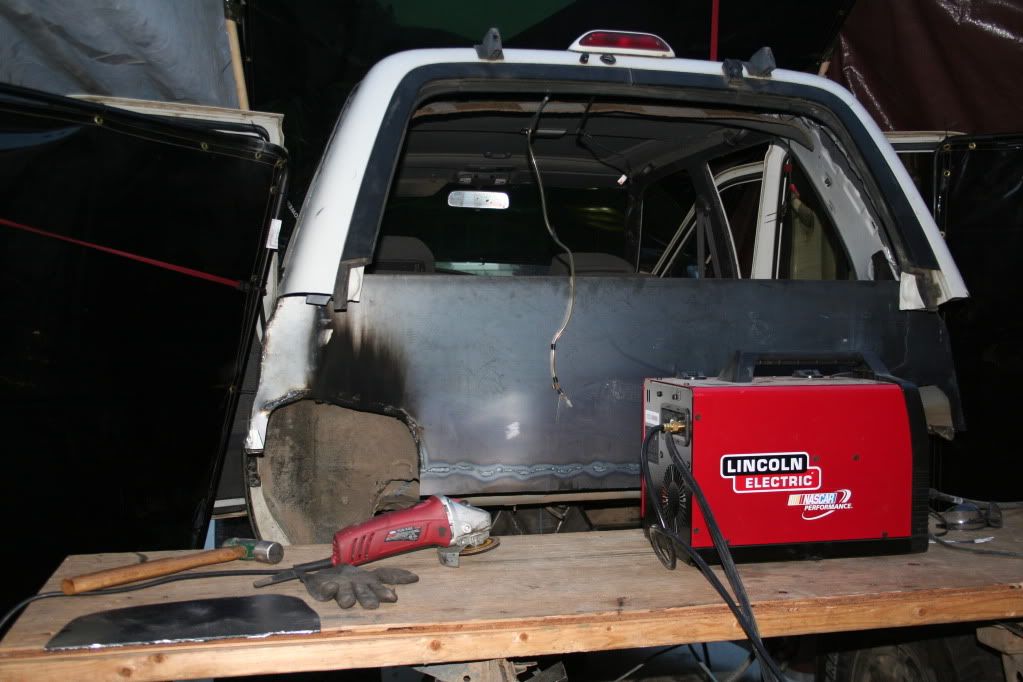
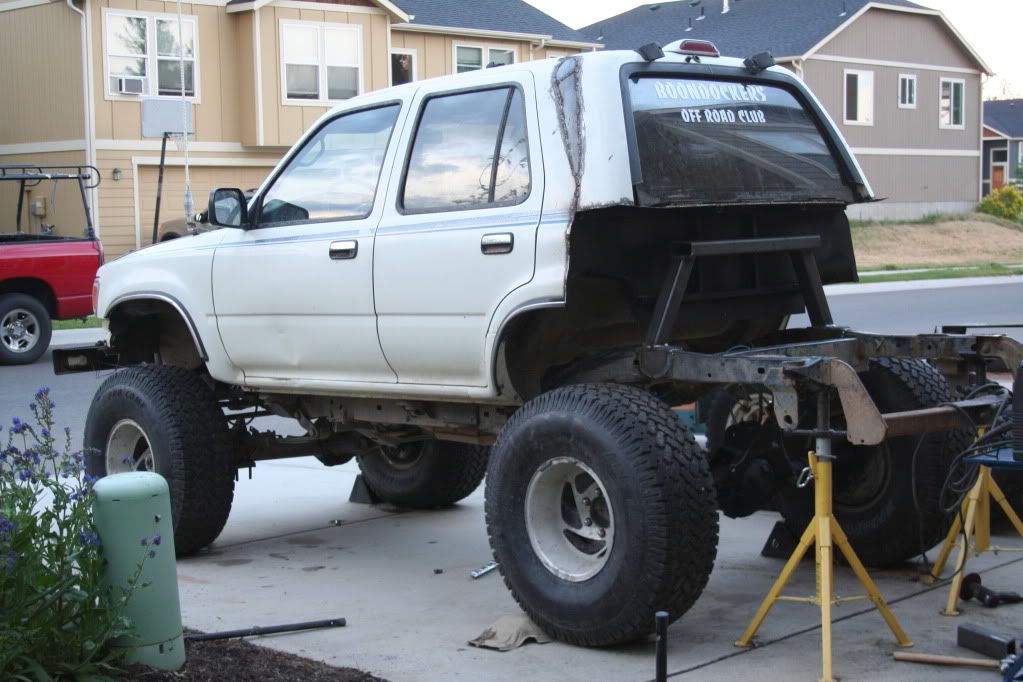
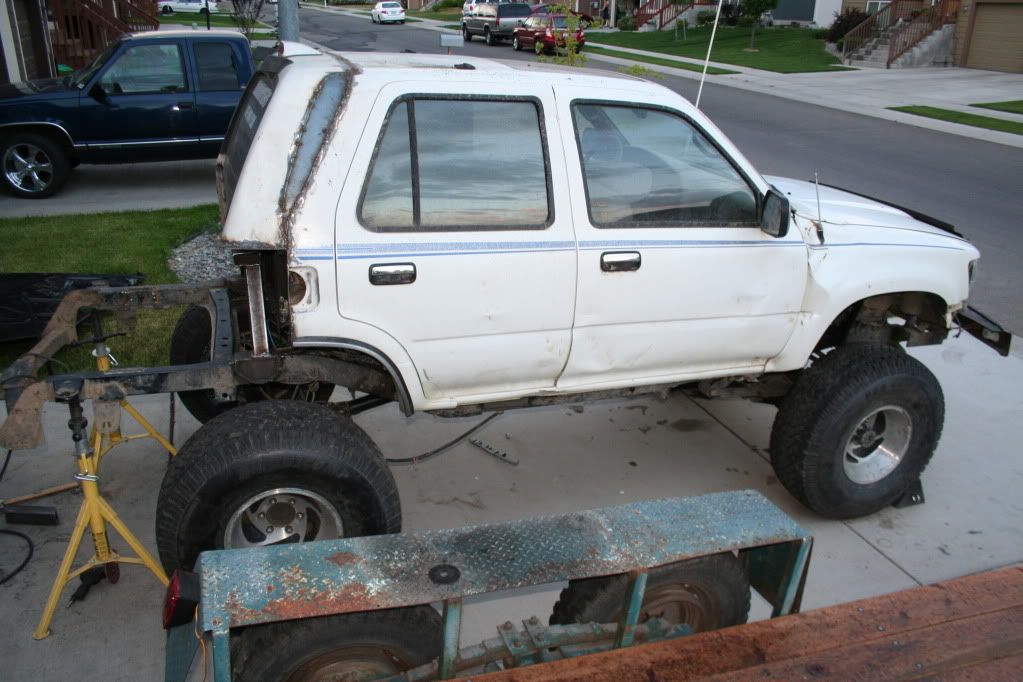
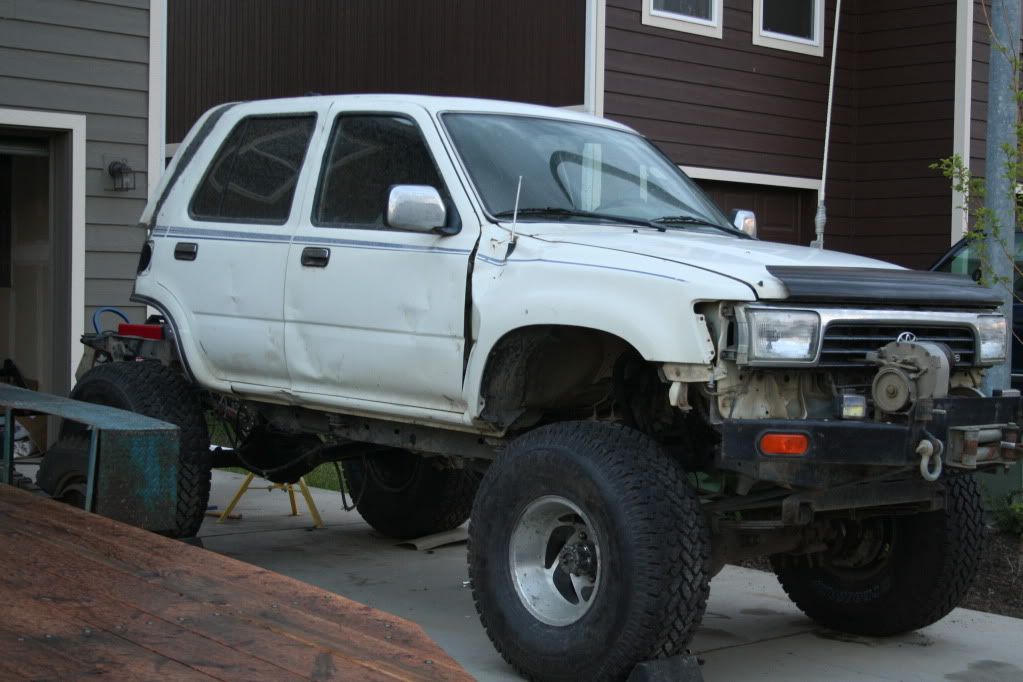
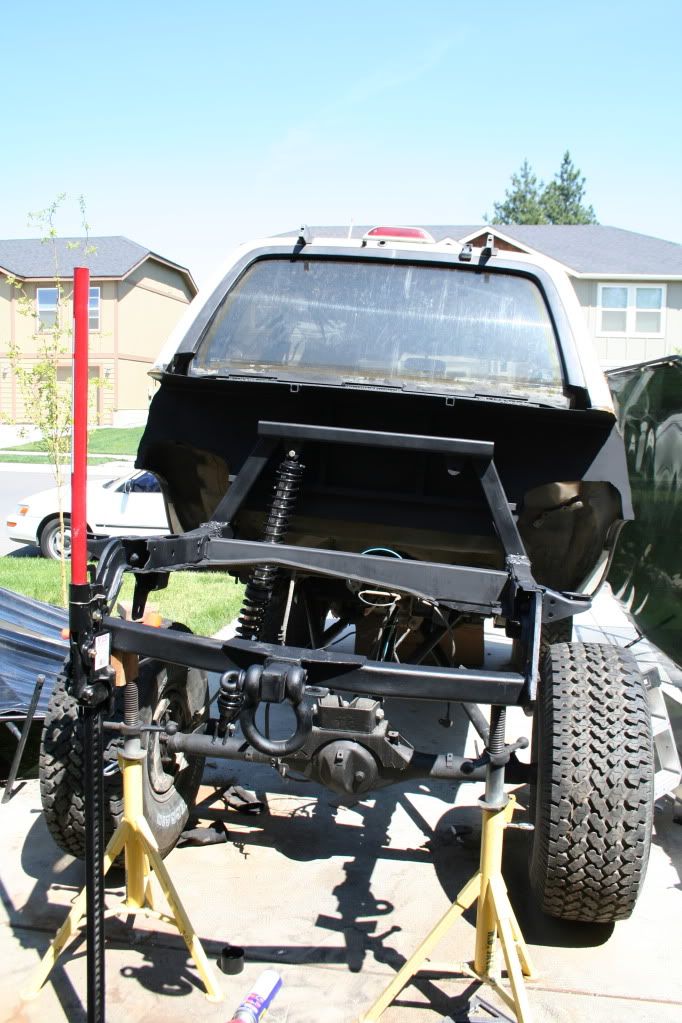
In these pics, Ive taken the axle off, I have my dropout complete and gears are all set (Thanks Wayne!), Ive ripped out the interior, and chopped the rear side of it off. Tomarrow I will drain the gas tank and take it off to be relocated after Im done with the cab fabrication and rear suspension. I was planning on fabbing up the new crossmember this weekend but it will have to wait until Thursday, the shipment on my new plasma cutter was delayed. I think Ill start working on the front side until it gets here, Ill try to have the knuckles rebuilt, the aisin hubs put in, shock tower mounts ground off, and the cracks in the frame fixed.
........... BTW I think all my neighbors hate me now.... 8)
got my gas tank removed and cut out the spare tire crossmember, ill need to cap that off with a new cross member on the end to reinforce it.
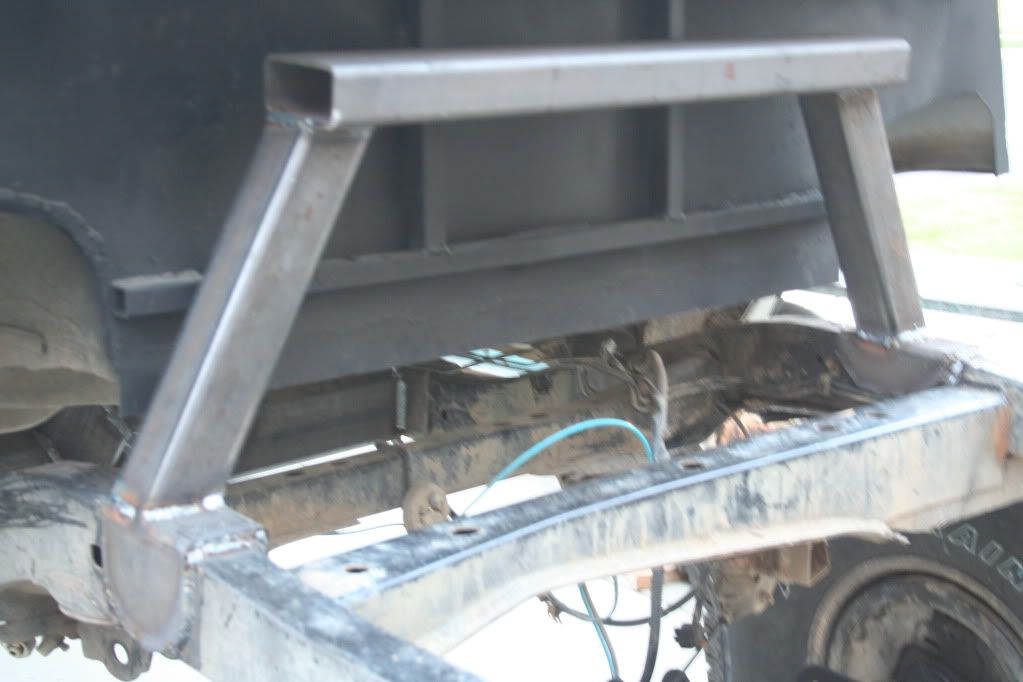
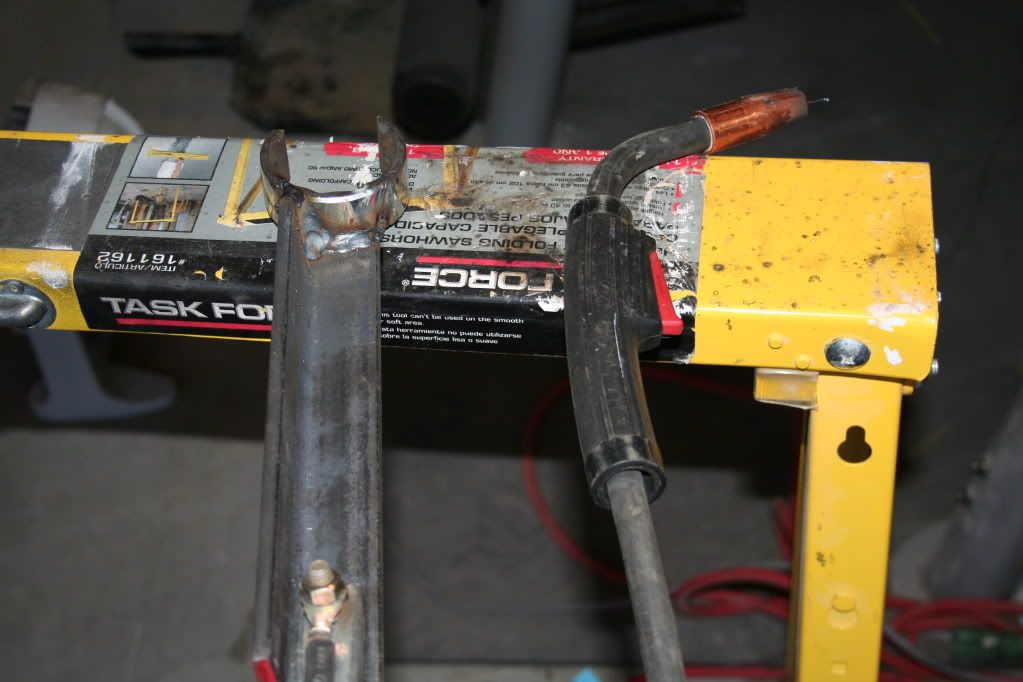
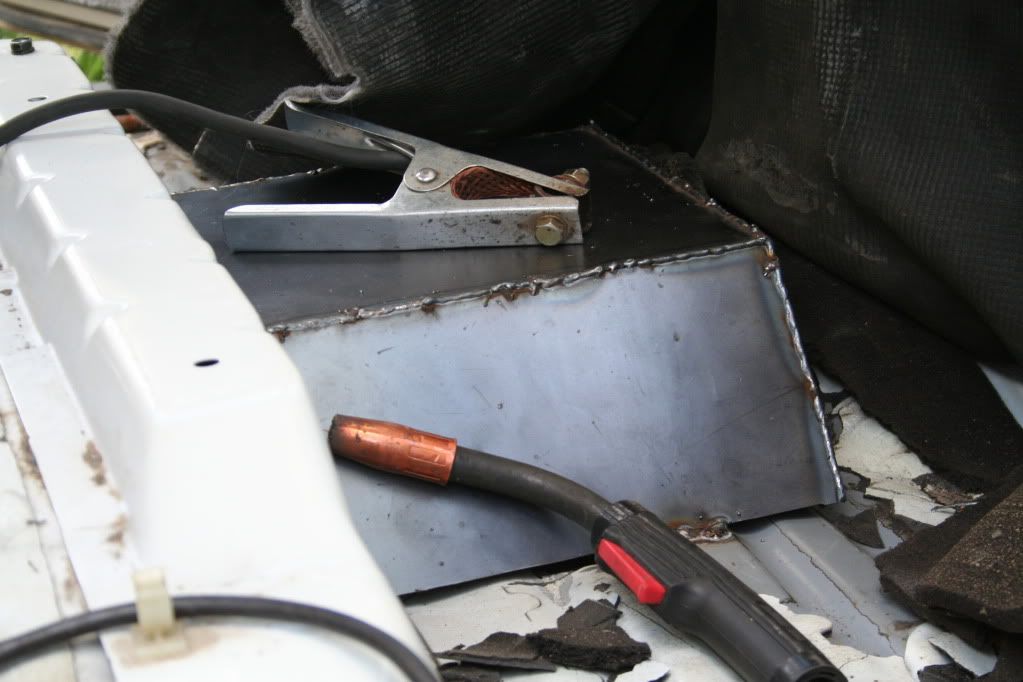
mocked the new mount in place, welded it in- only tacked the lower link mounts incase they need adjusted
I decided to start doing my knuckle rebuild
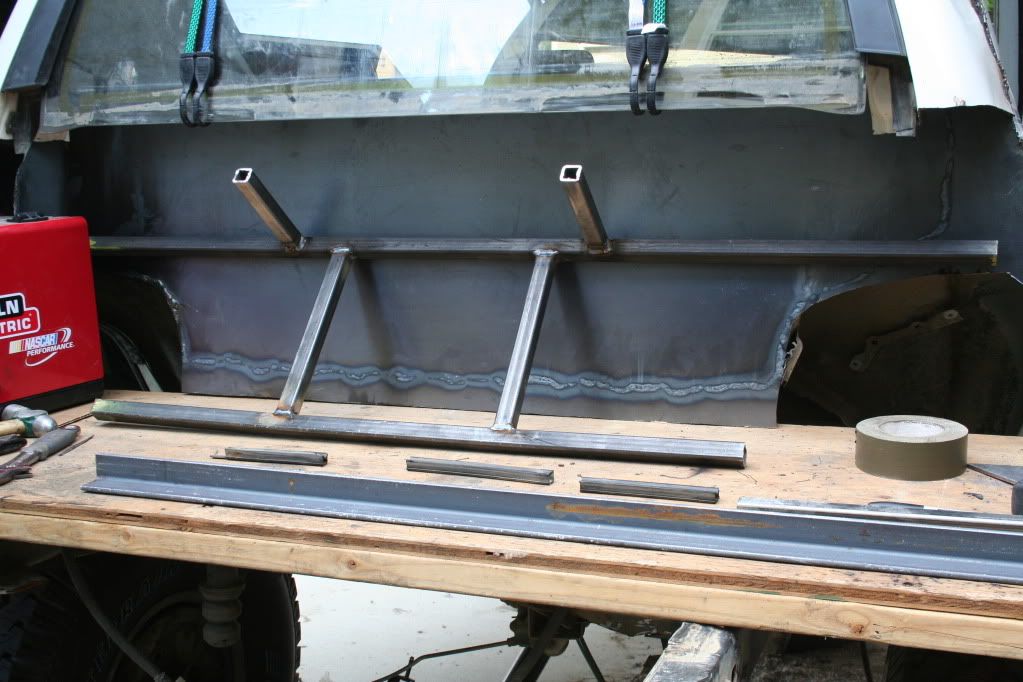
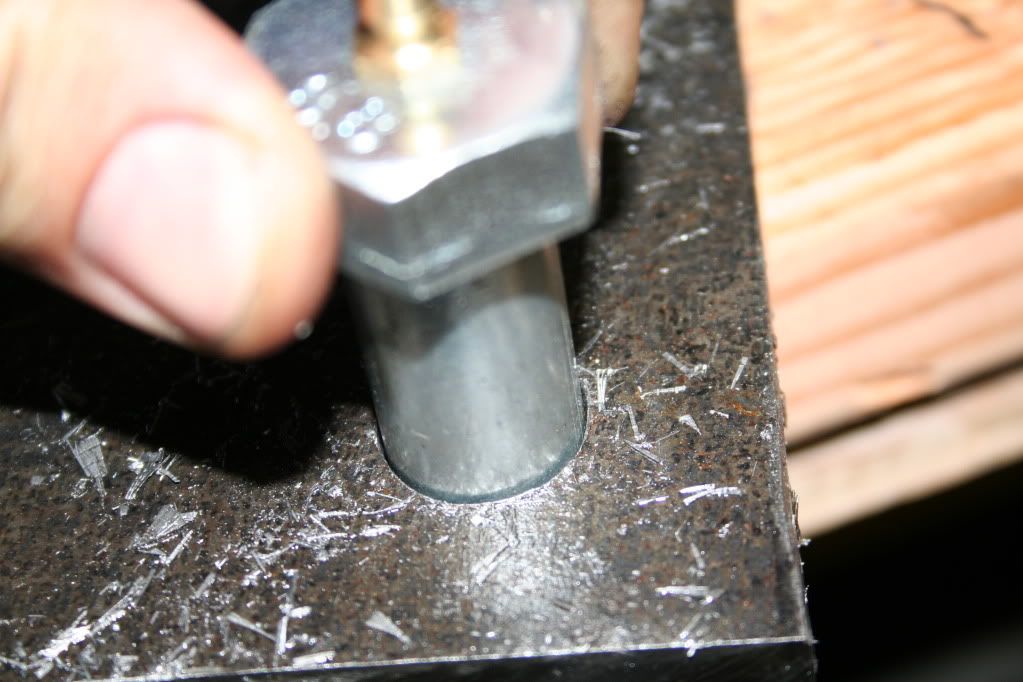
I put blocks up so that we could put in the crossmember
had to massage it with my hammer a little so it would fit under the body
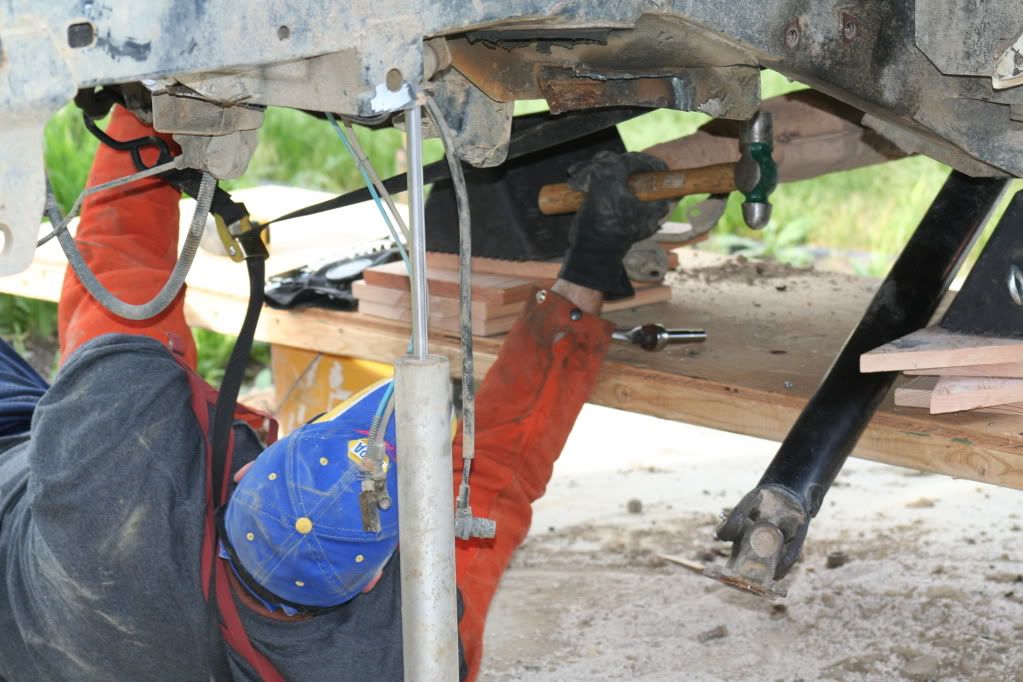
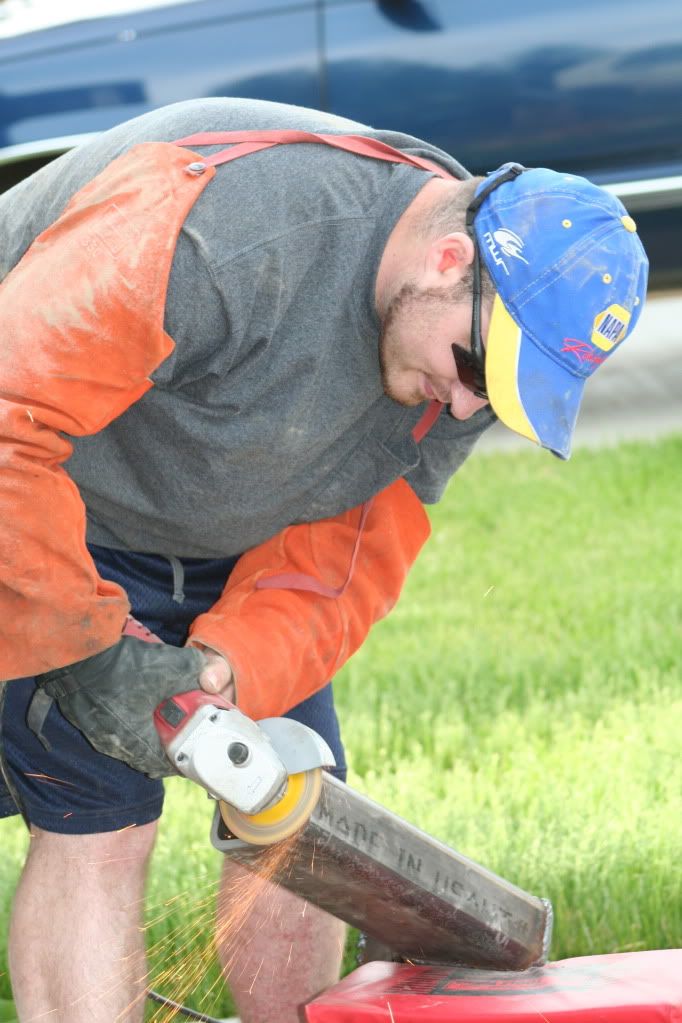
a smidge too long on one corner, had to grind it down
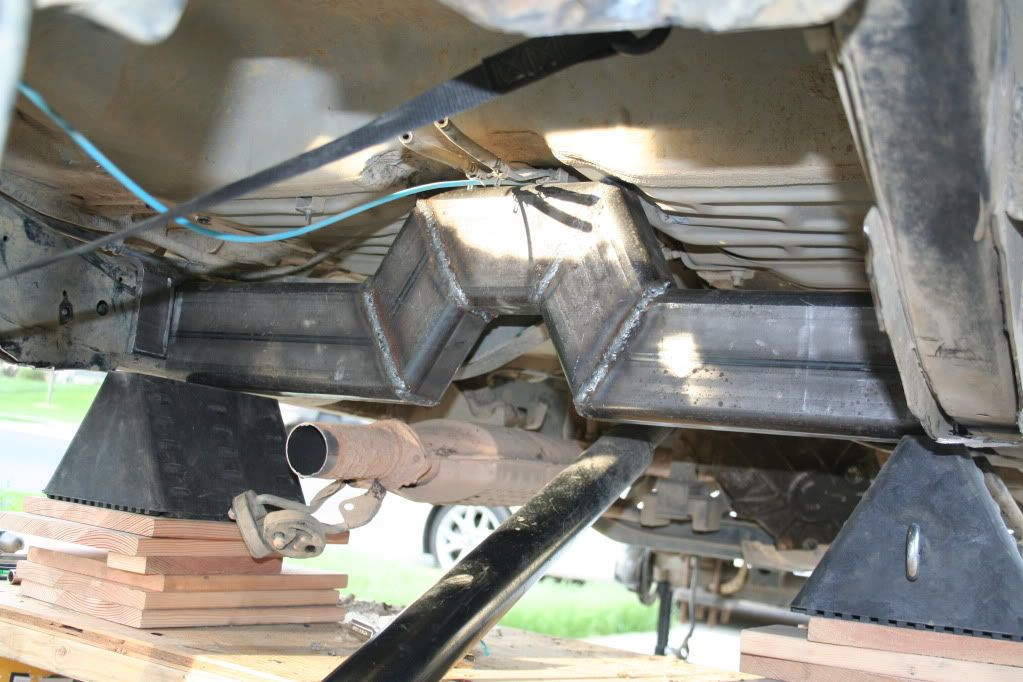
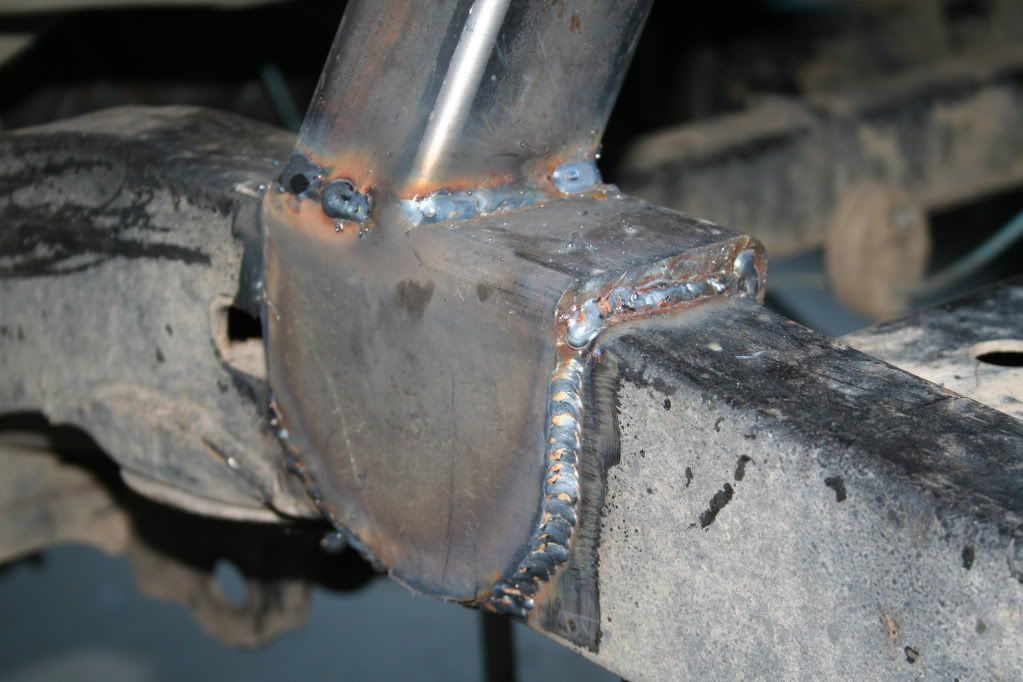
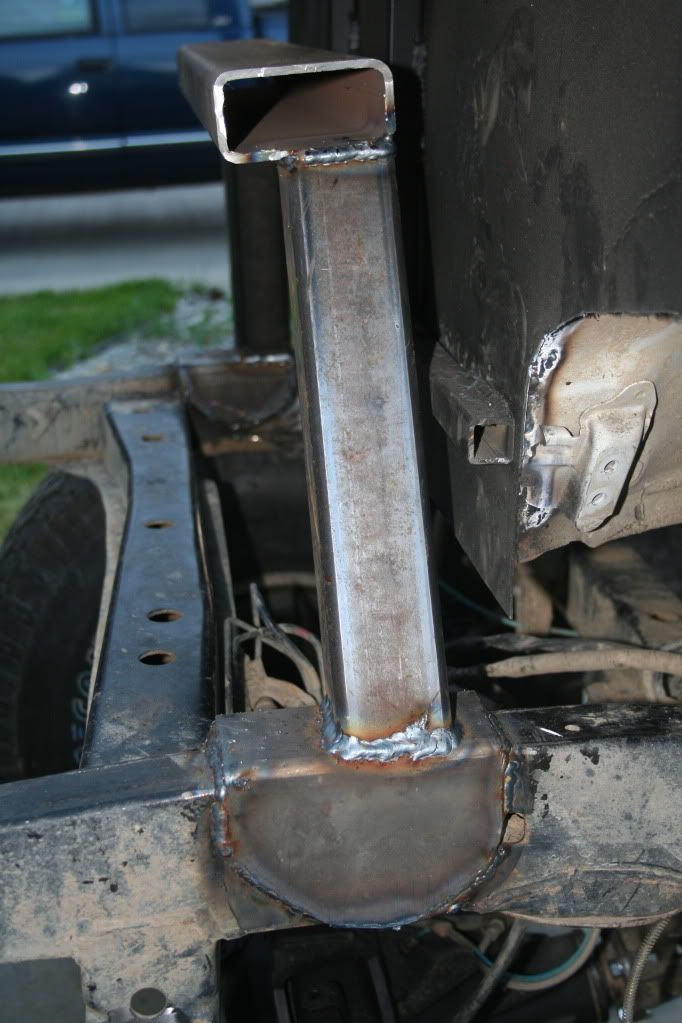
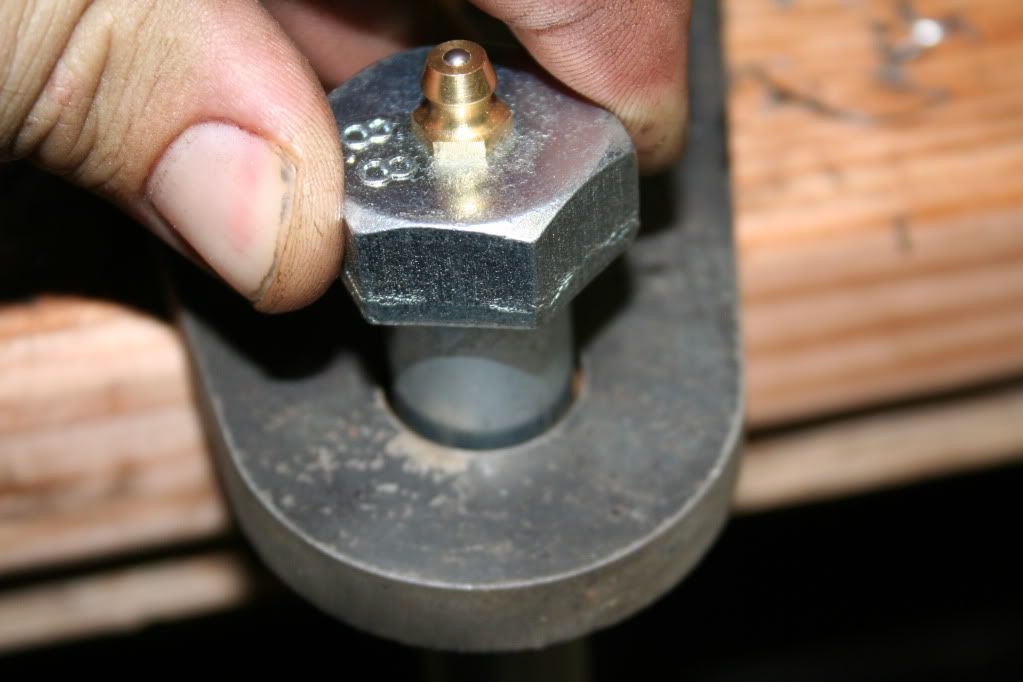
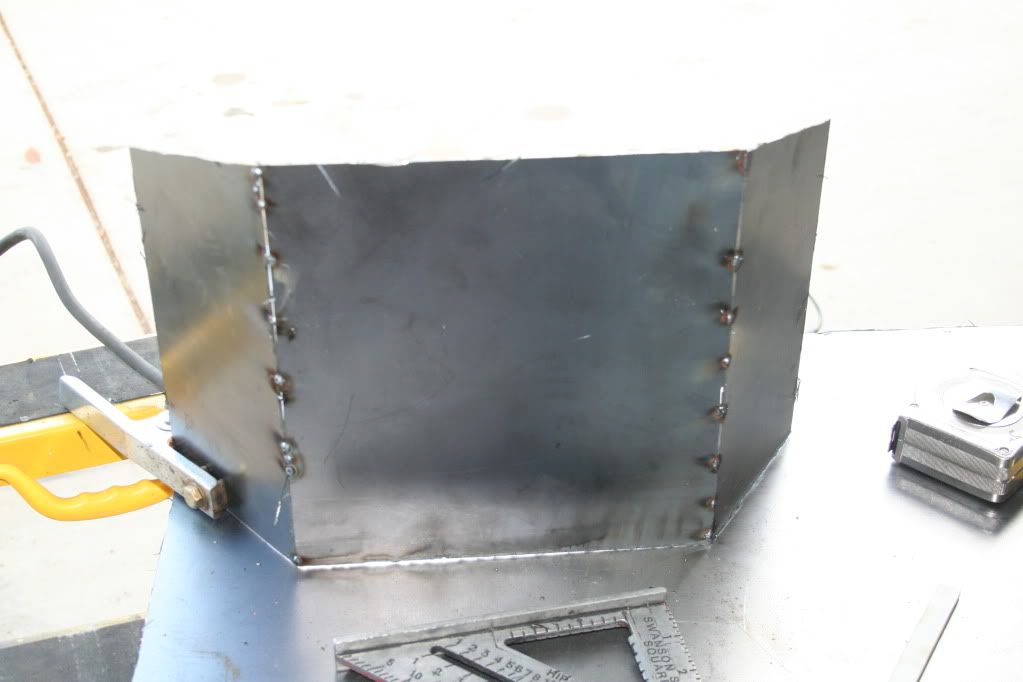
tadaaa! crossmember is welded in place on the collars, just need to drill holes and bolt it in
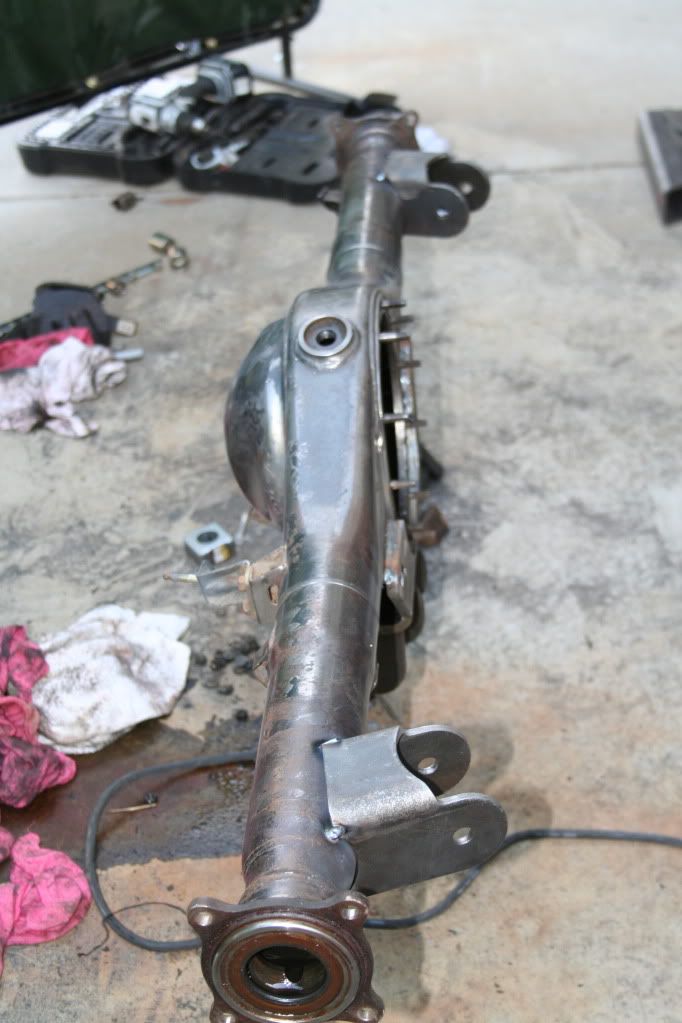
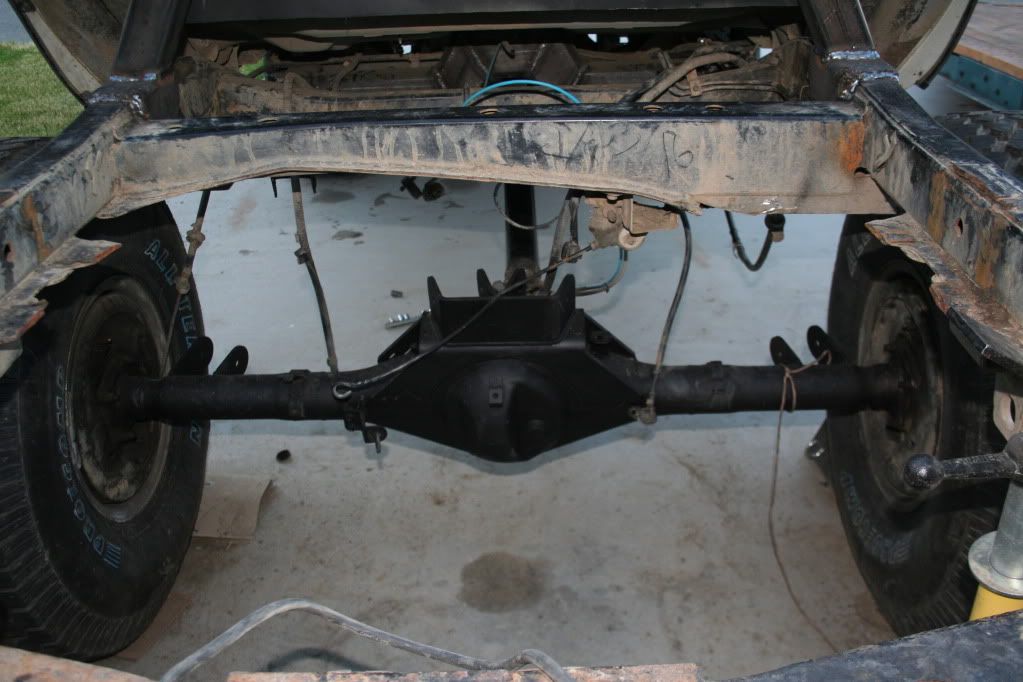
Got the rear axle together with wheels on, slid it under the truck so we can mock it up soon

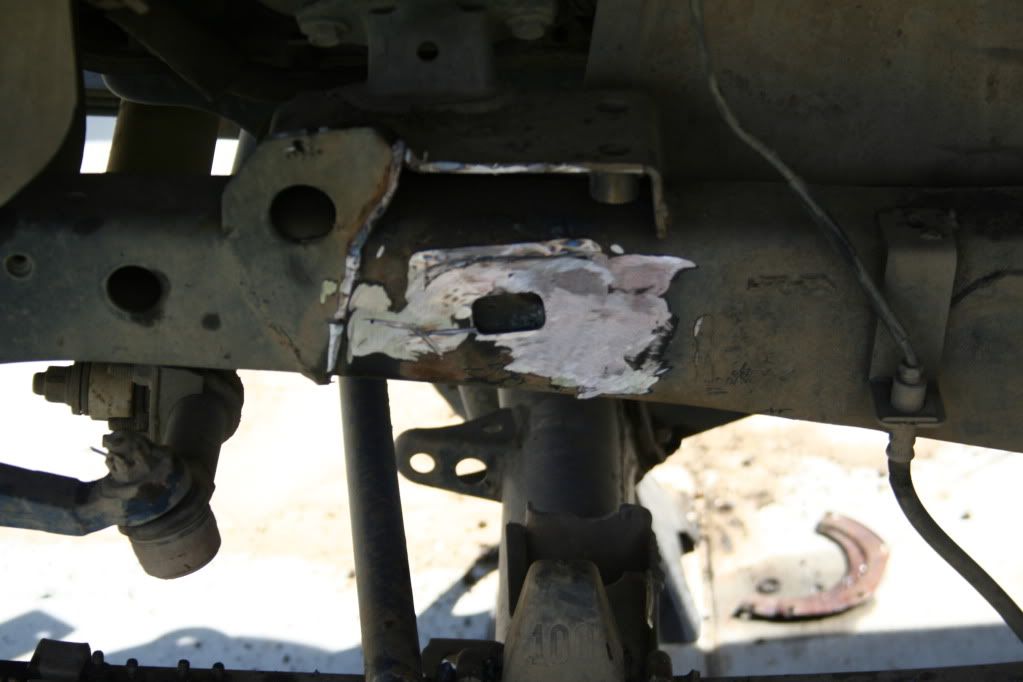
Heres a pic of my repaired cracks and shock hoops
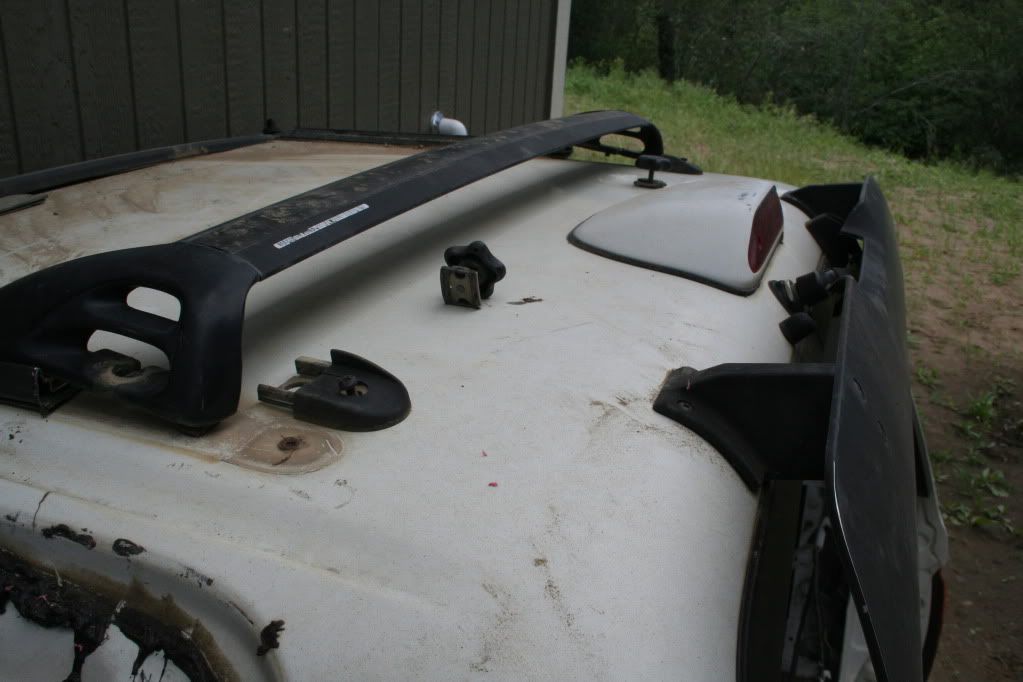
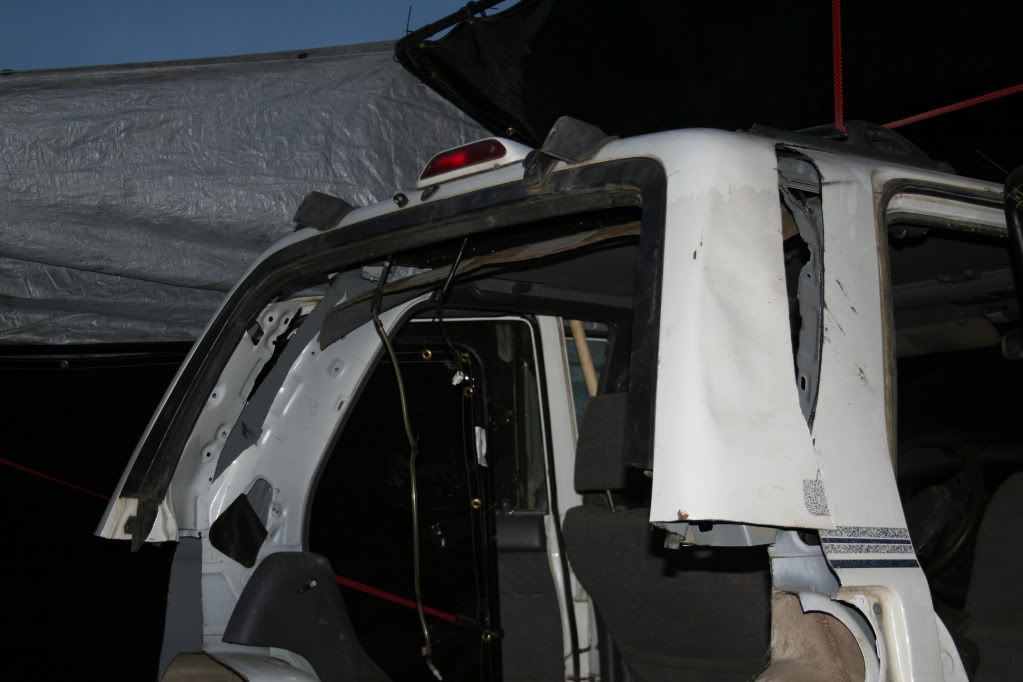
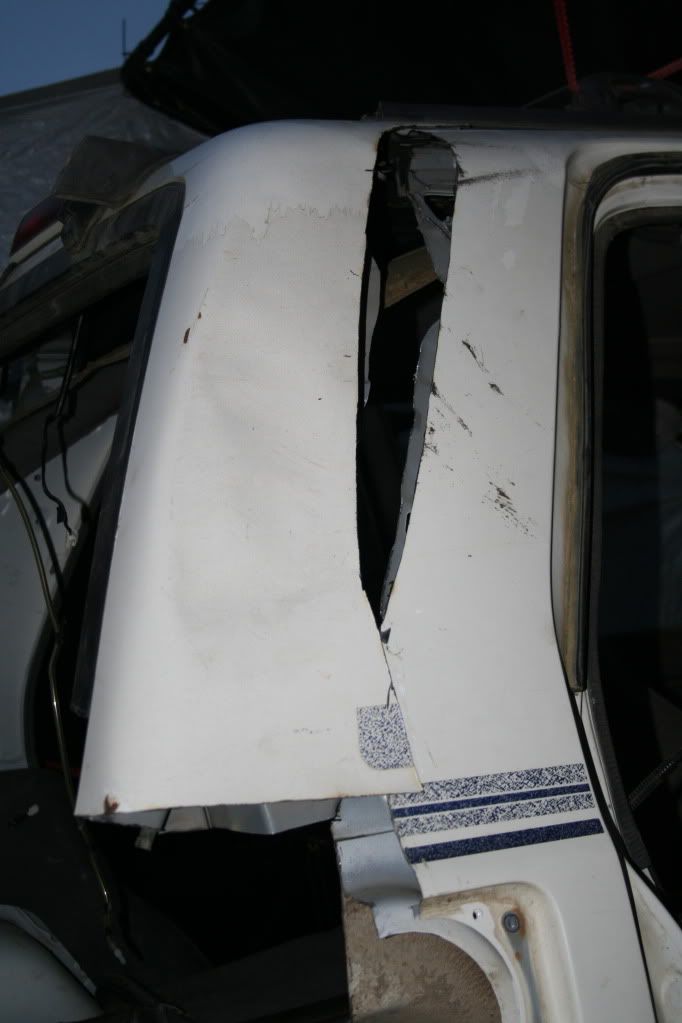
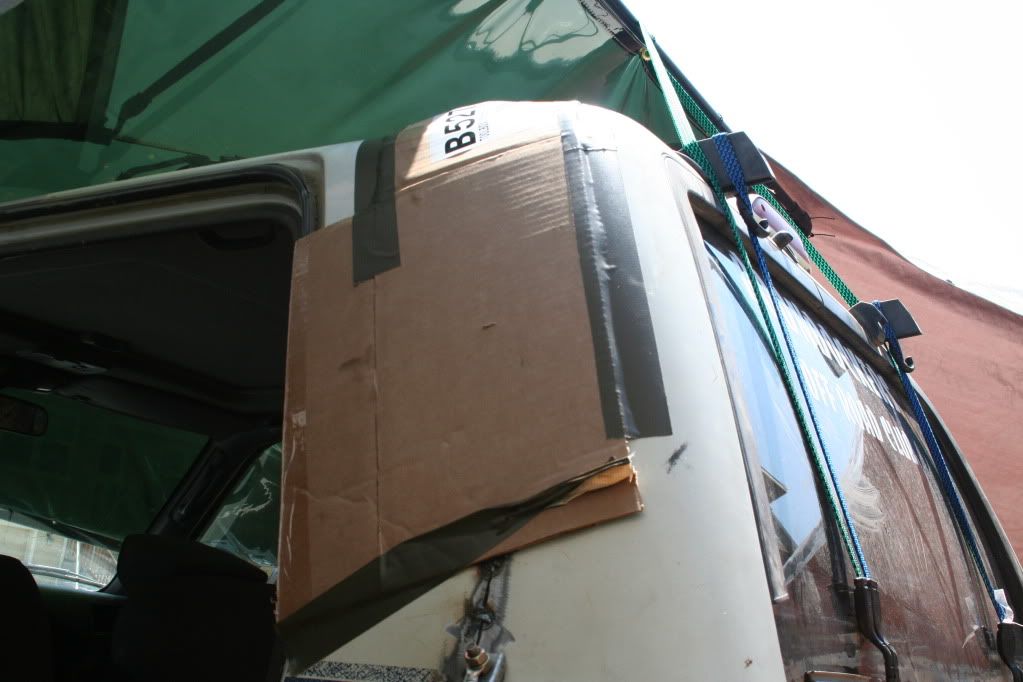
I was getting ready to cut the parts for the cab and i figured out that I could make the luggage rack on top work, just make it shorter
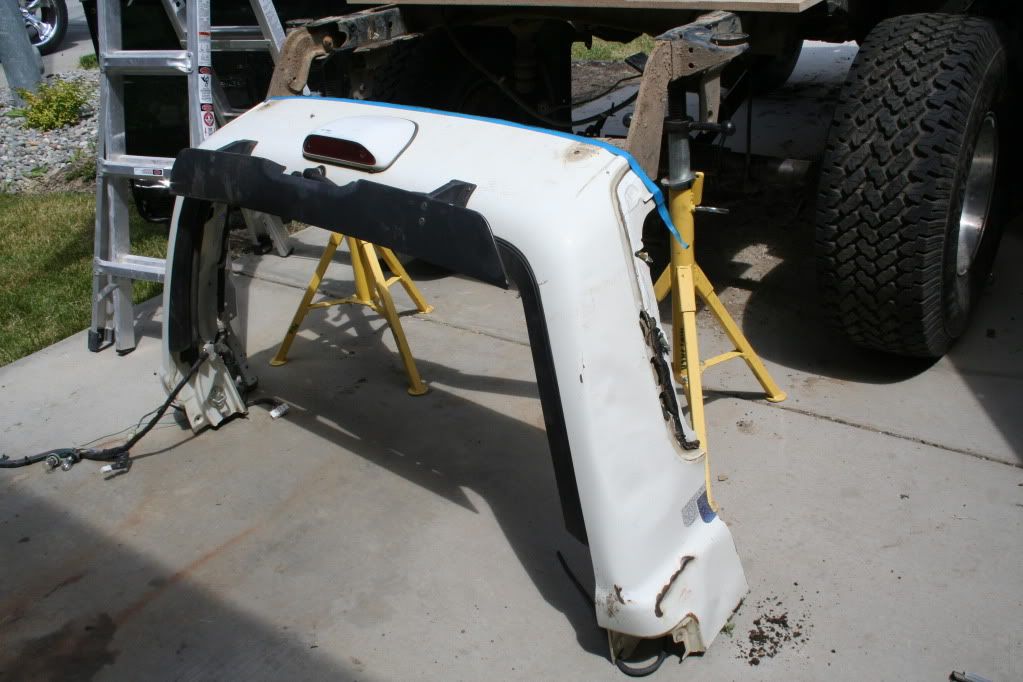
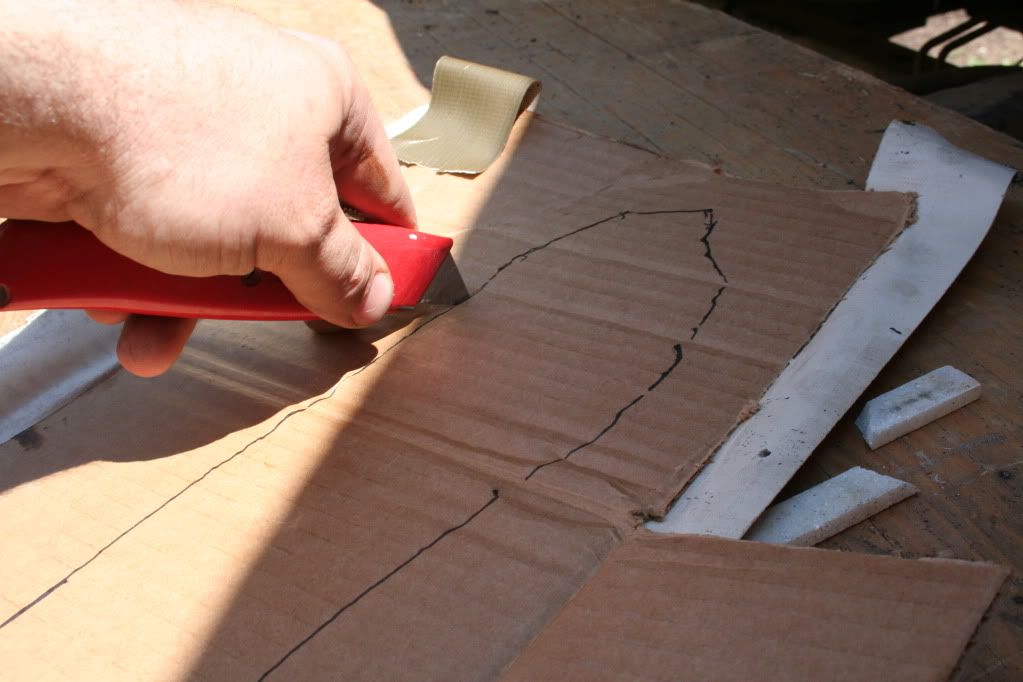
Here it is cut off, getting ready to mock it in place
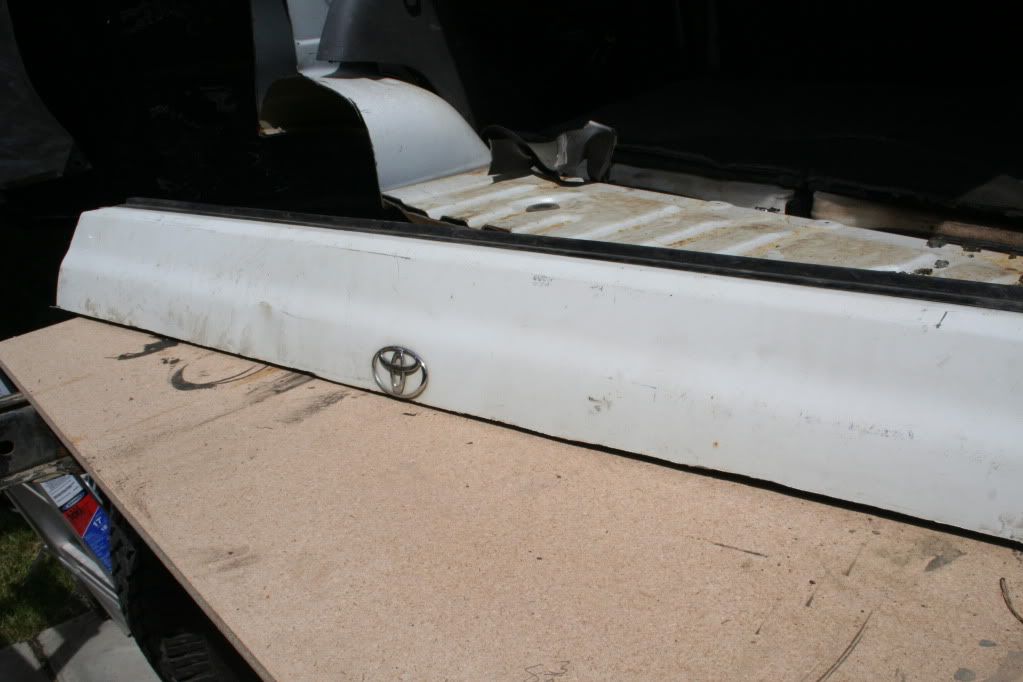
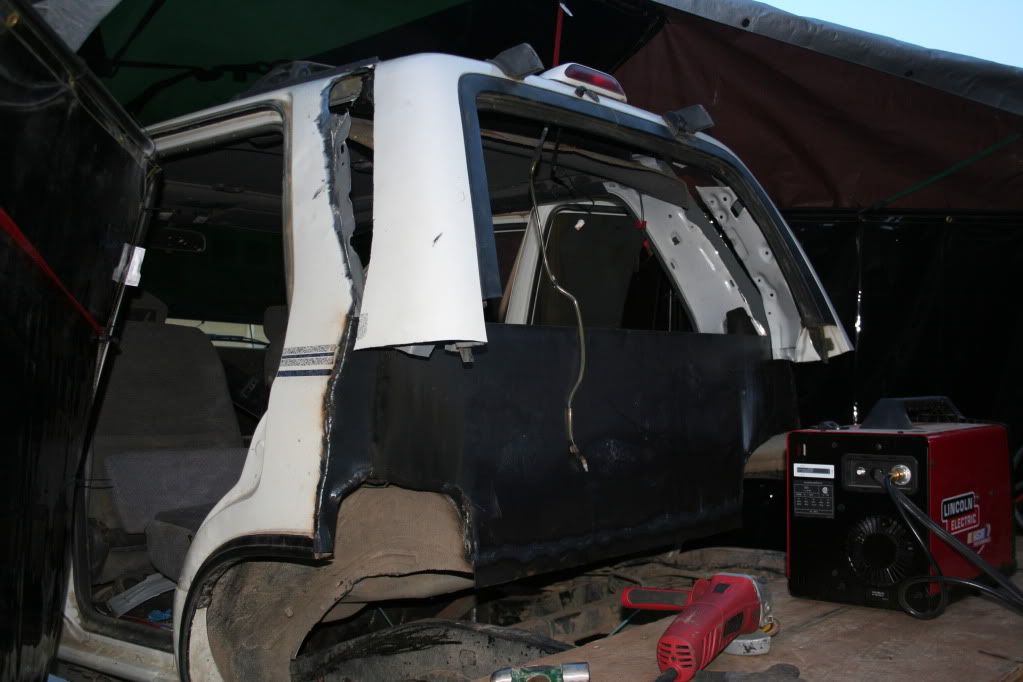
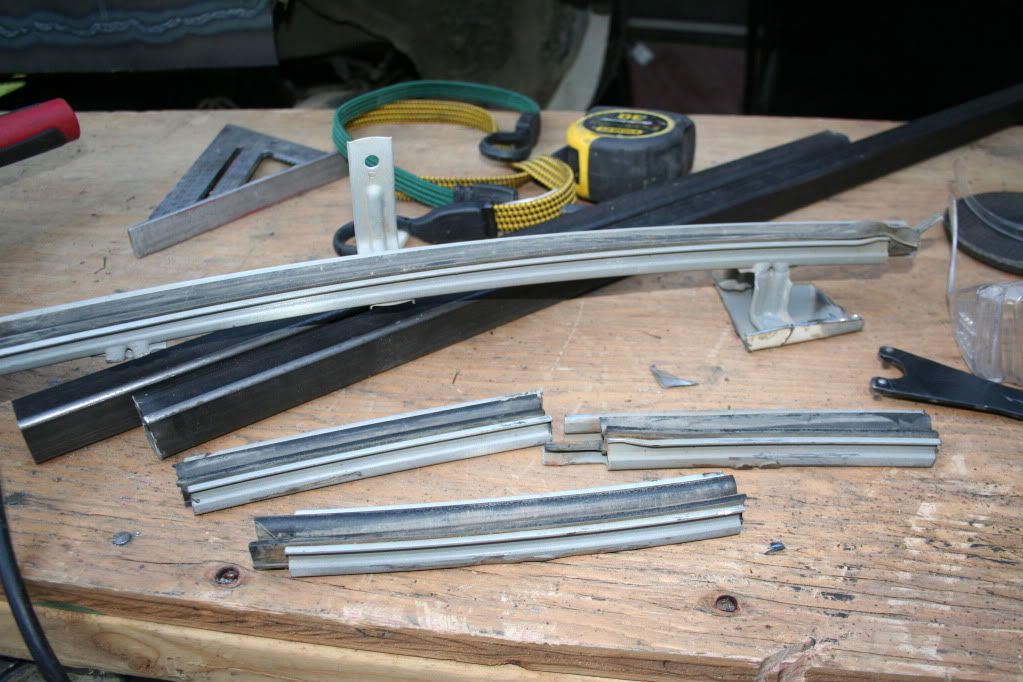
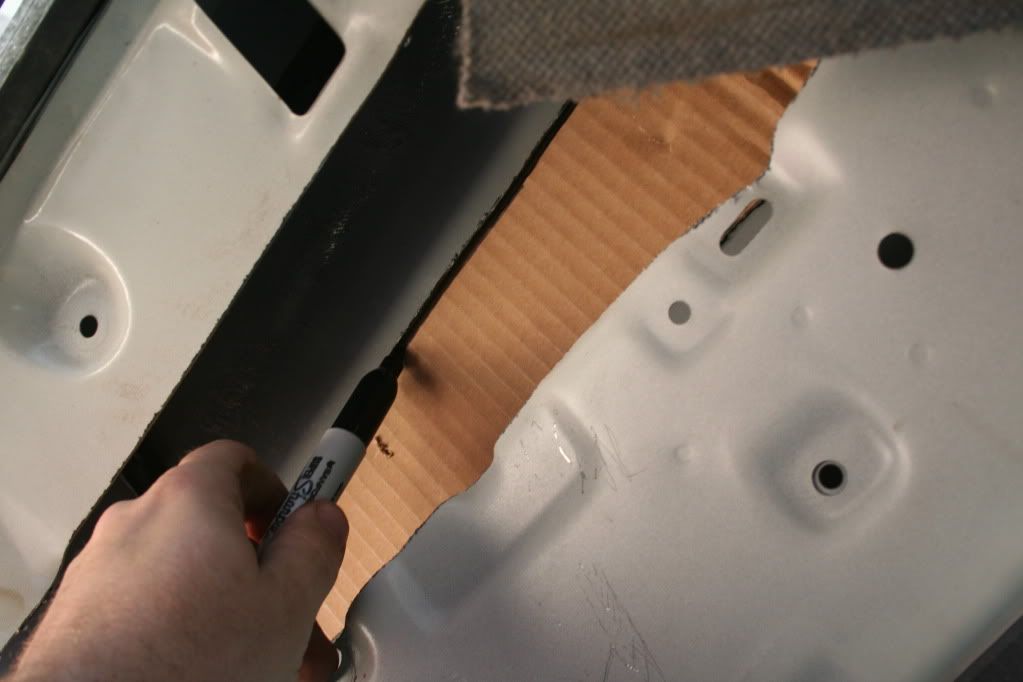
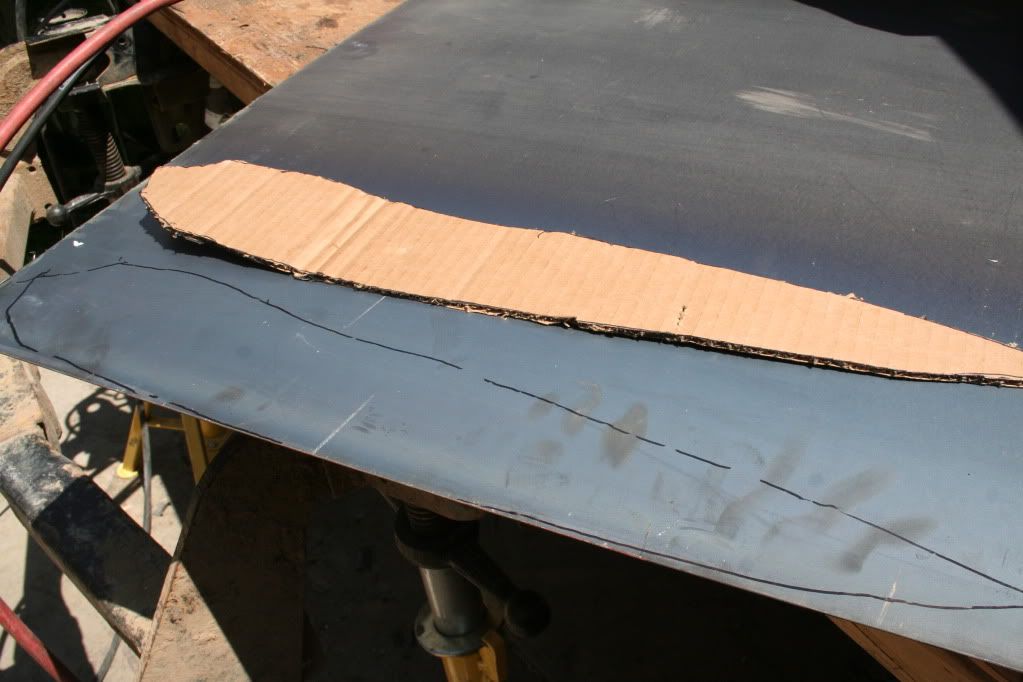
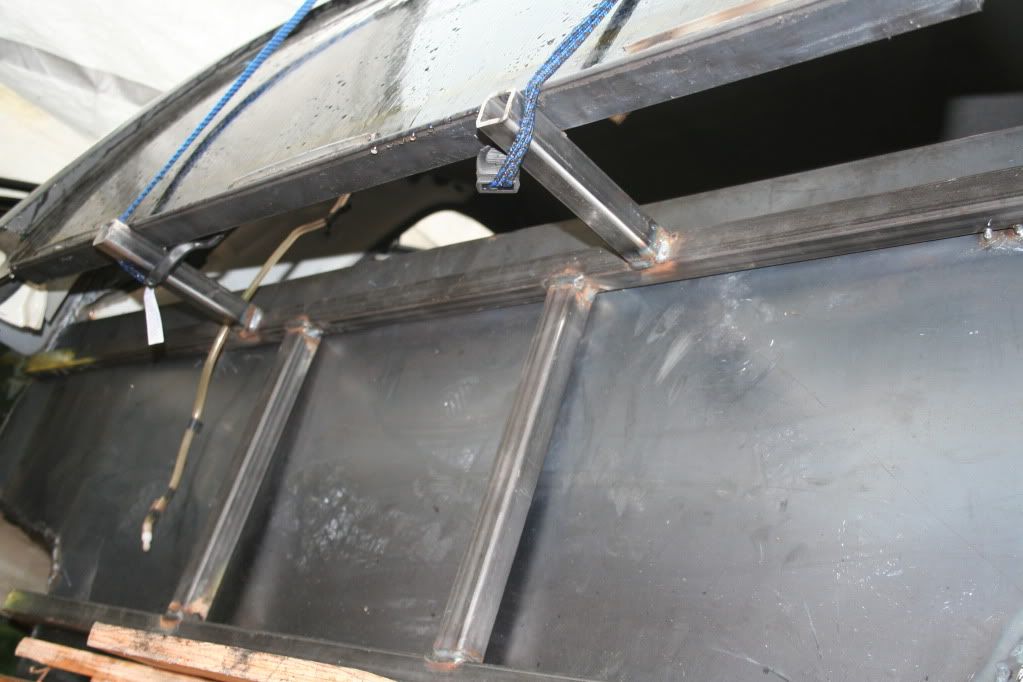
I cut the top of the bed off and I will use it to seal the window
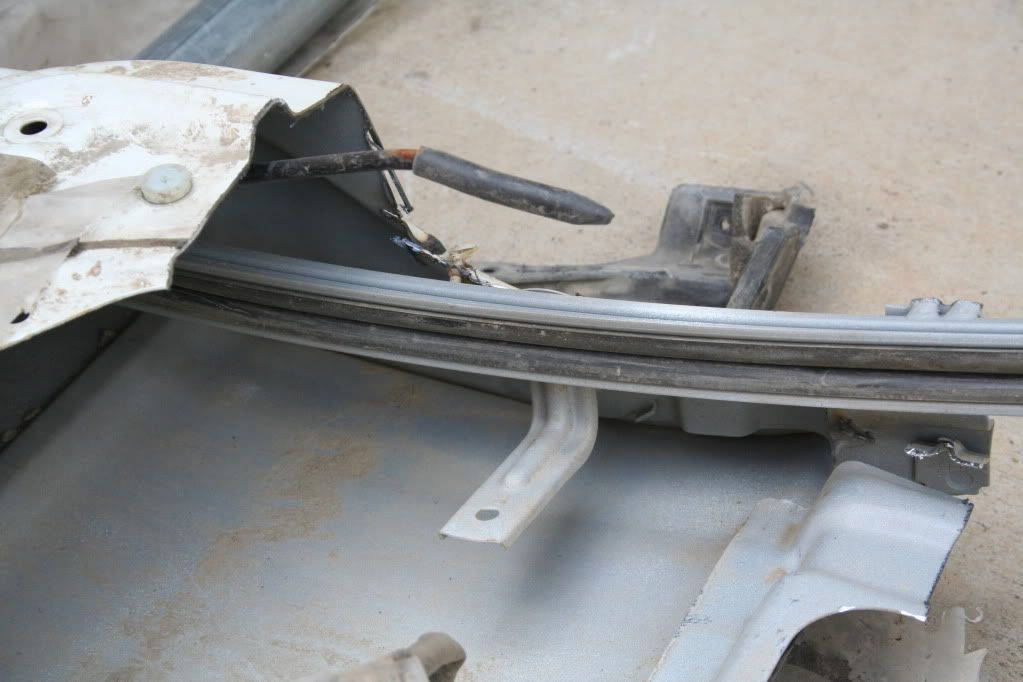
Here is the track the window used for going up and down... Im going to cut it into 1/2 and use it for the bottom window supports
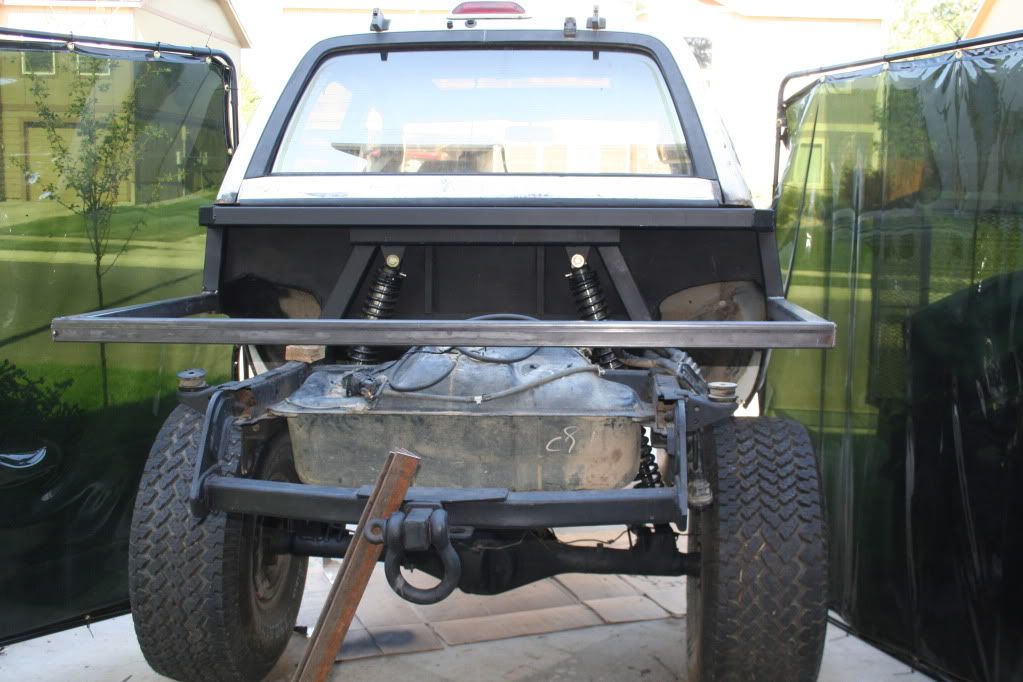
Finally got it mocked in place, almost ready to weld
Here in the next week Im going to be blasting out as much as I can, the association of homeowners has been informed of my vehicles state and has informed me of my infraction lol! 8P
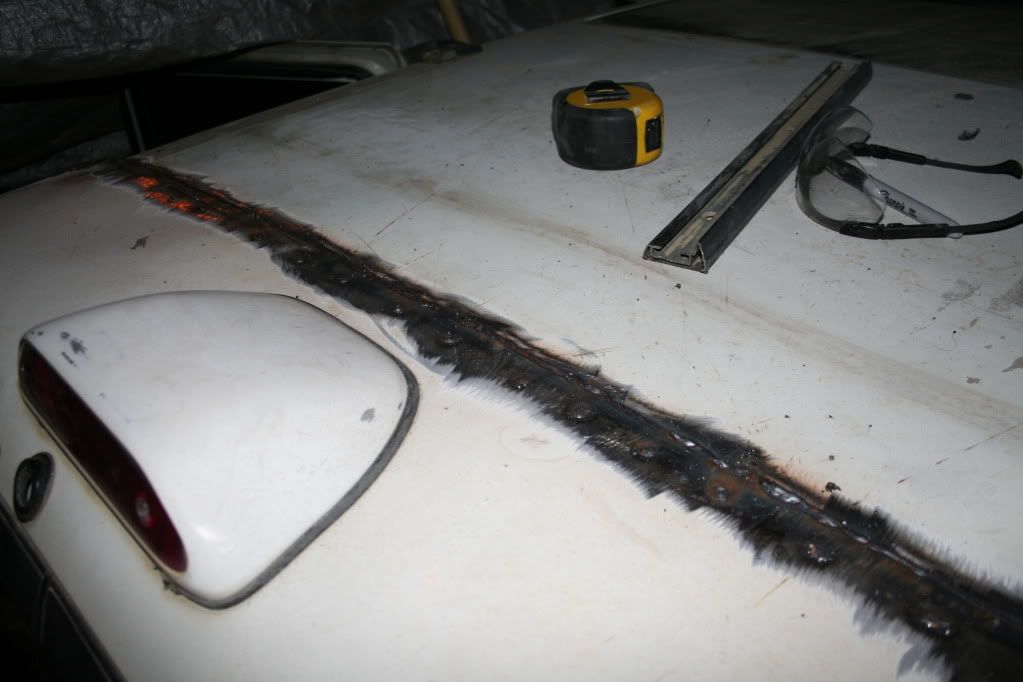
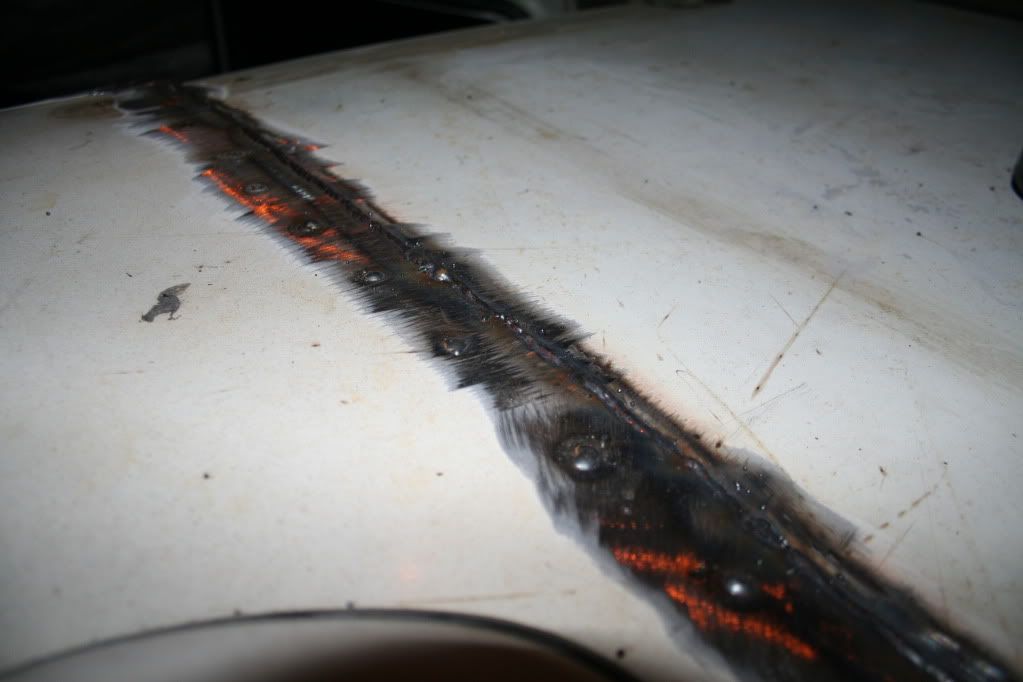
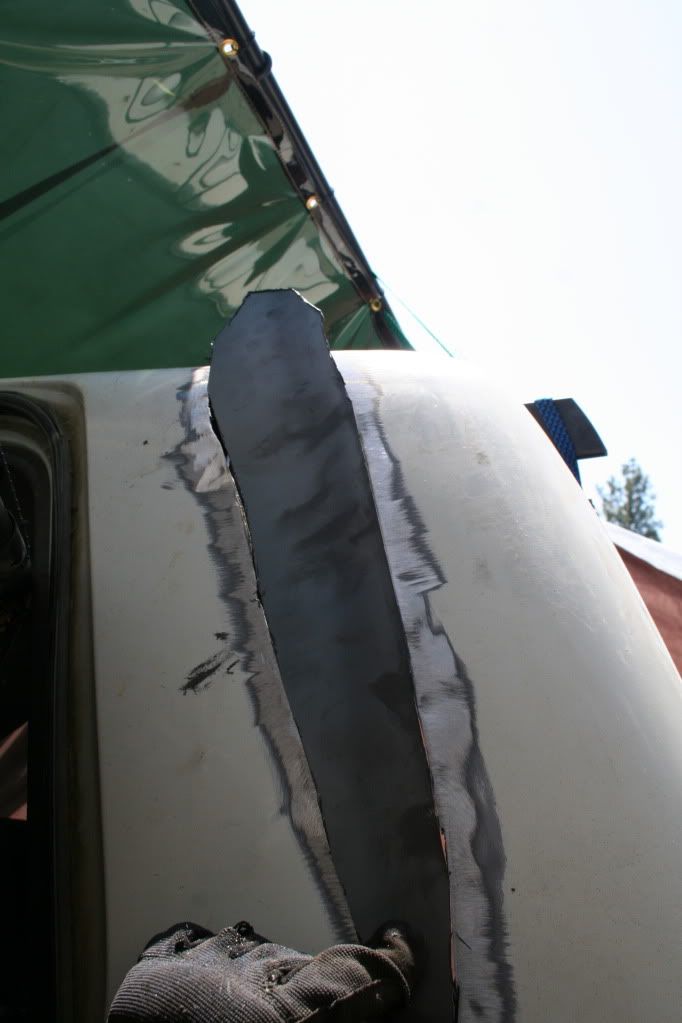
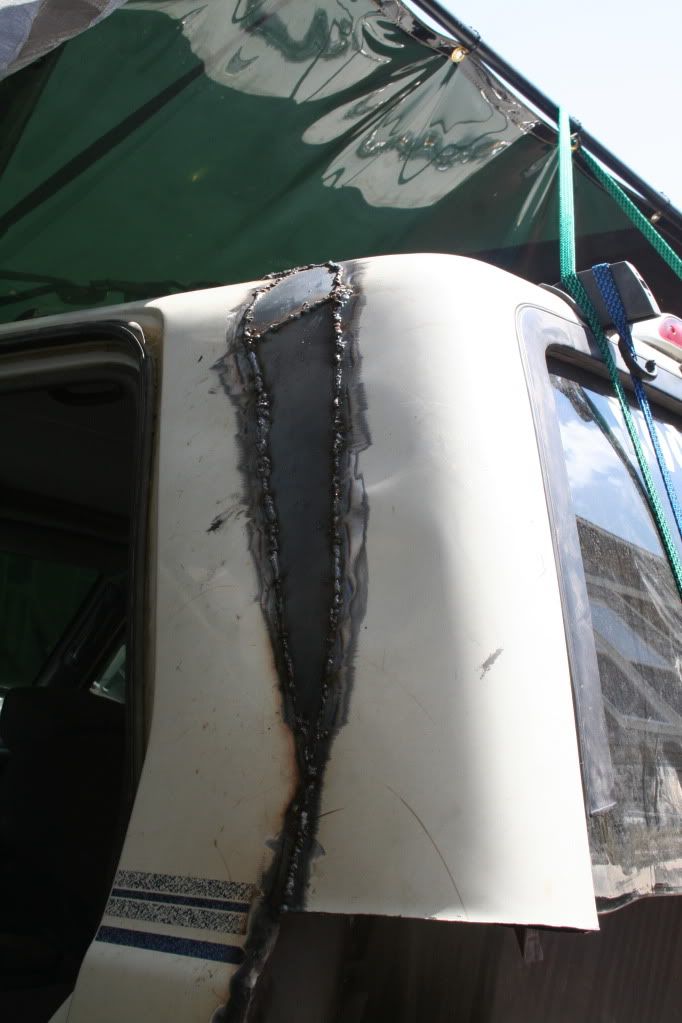
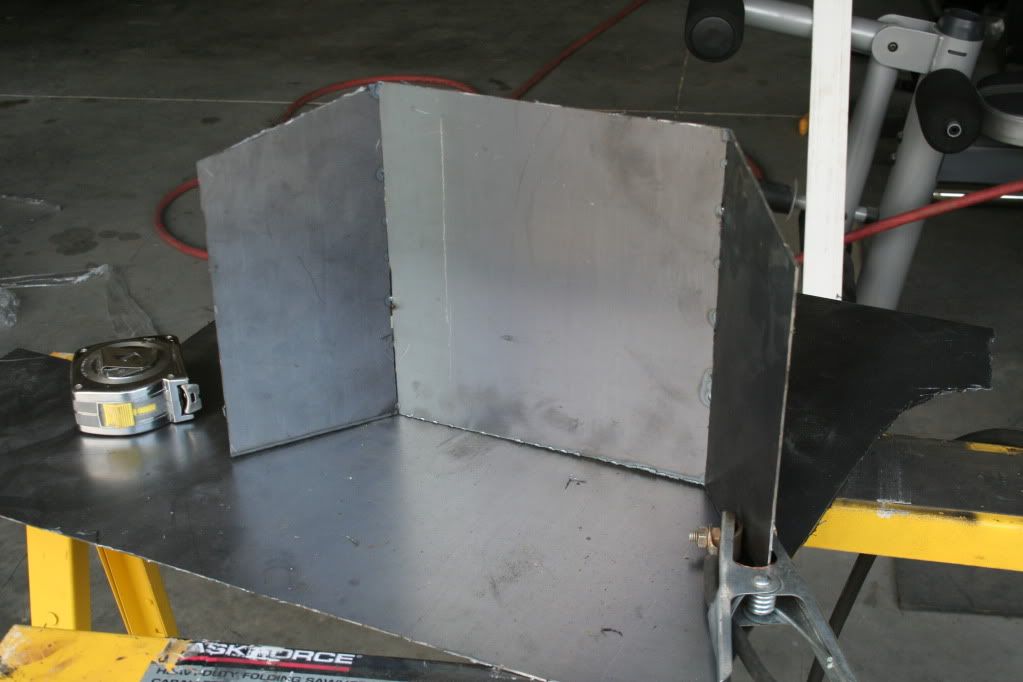
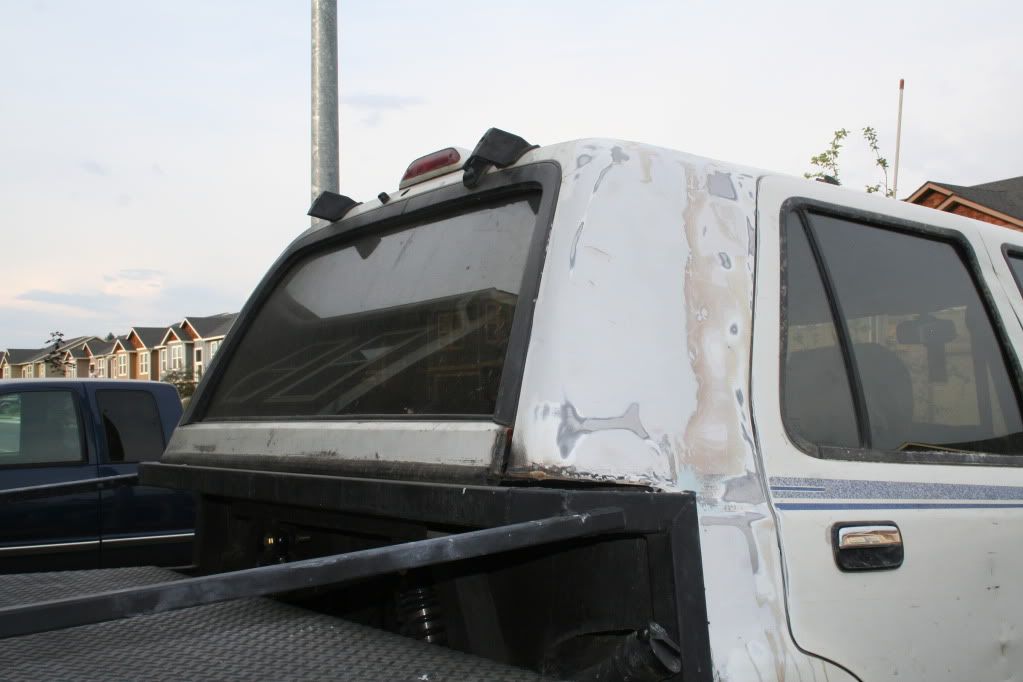
OK here it is, I have the back wall welded in place pretty well.. welds are ugly as hell, I guess there is some kind of learning curve to welding on sheet metal- I definately would rather not in the future! I also have the roof portion welded up. Tomarrow Ill be going to buy some metal tubing for supports and filling in the rest / reinforcing everything.
Here I have the back welded in finally... I tried out the back of the taco cab but it didnt work out so well, I was like a half inch short, so heres my new cab end.
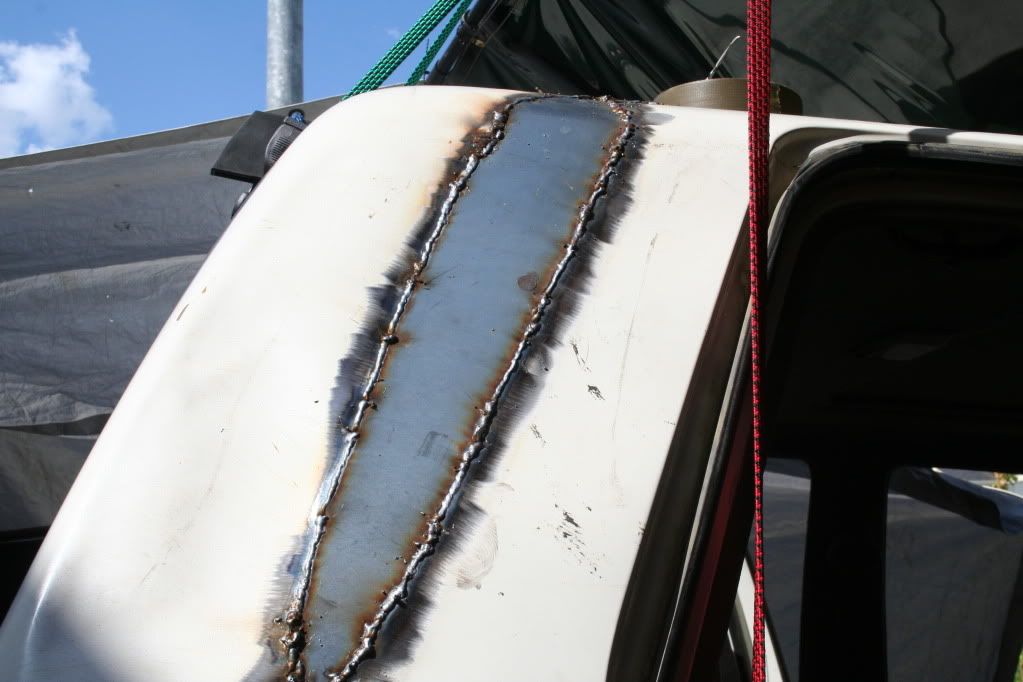
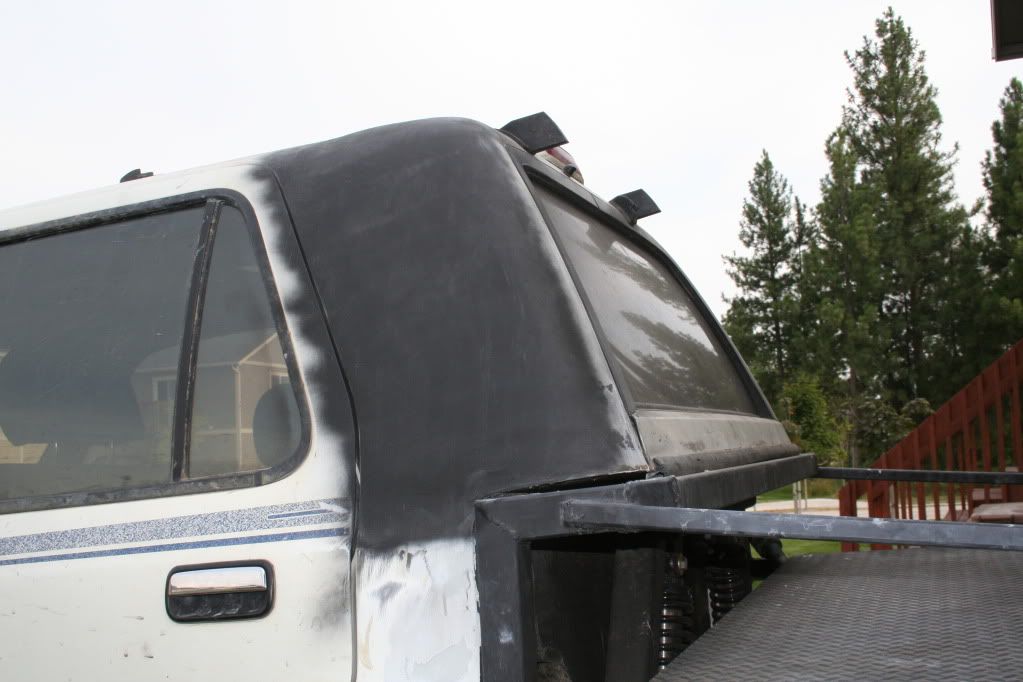
Next i cleaned up the top portion and drilled some holes in it, measured to make sure it was centered and symetrical, then welded it up.. please heh dont laugh at these welds- this is harder than it seems before you do it!
Heres that track, I decided to cut one of them into 3
I paid attention in art class!
Welded them into place- I tried tacking the top in first then working my way down, bending it along the contour of the roof as it curved into the wall but it didnt work too well, I had to cut it and reposition it.
This side I started on the bottom and rolled it over on top with a hammer- had to grind a little here and there but it worked out alot better than the other side.
Welded up the support structure for the rear area and window
Blocked it up with wood. You can see I welded those window track onto a piece of 1.5" angle and welded it to the support square tube.
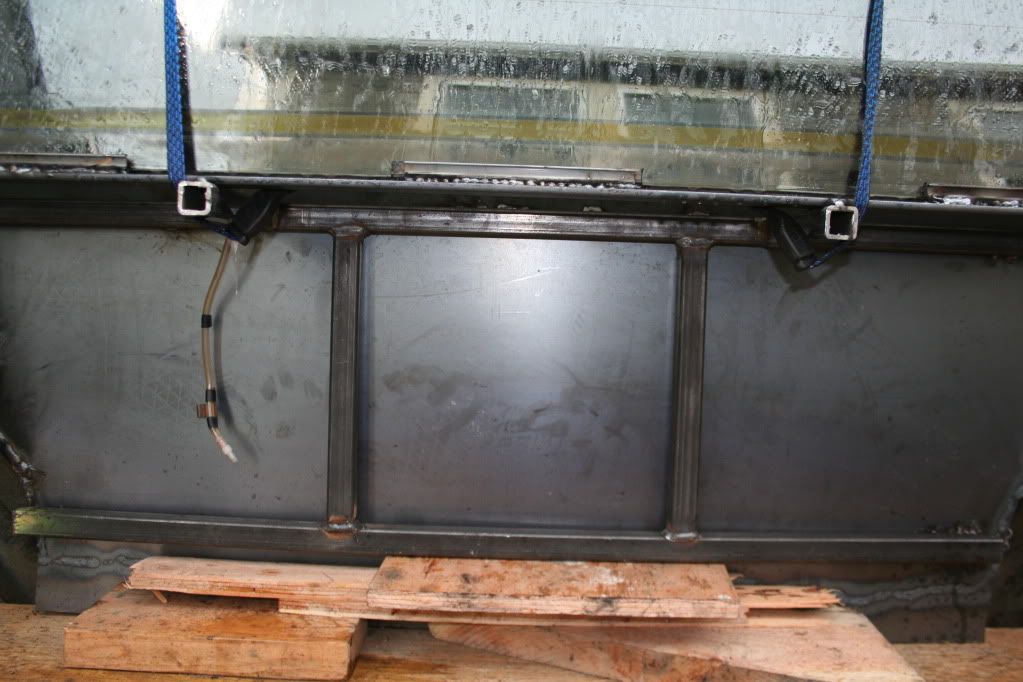
Welded everything together
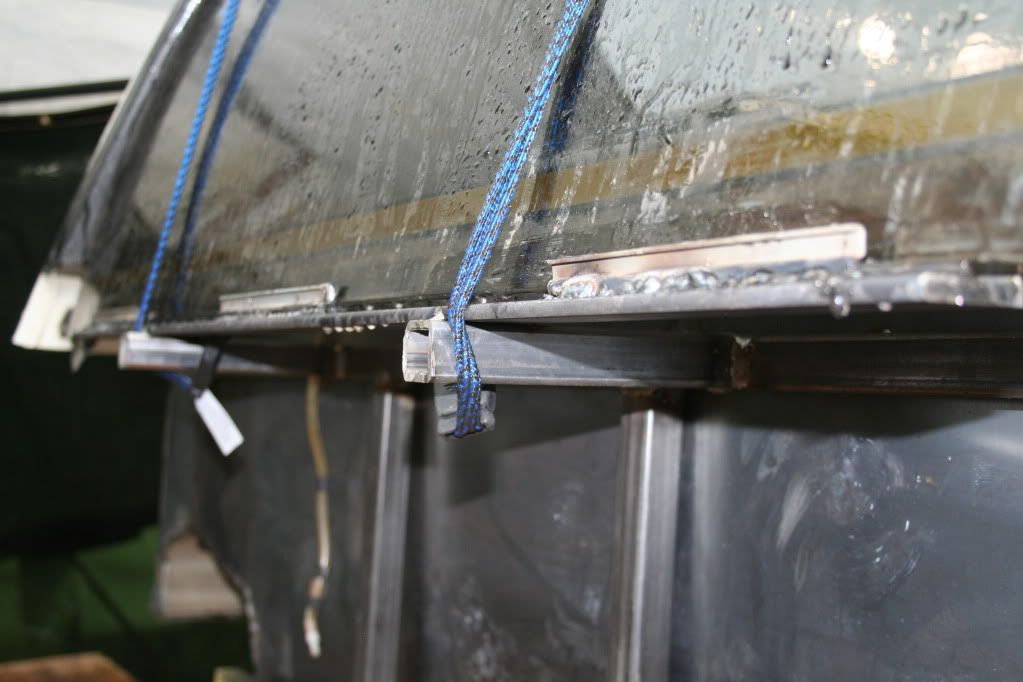
I am working on welding the bottom in, designing how to make it look finished- I have an idea that may look amazing- and welding that weather strip on the bottom.
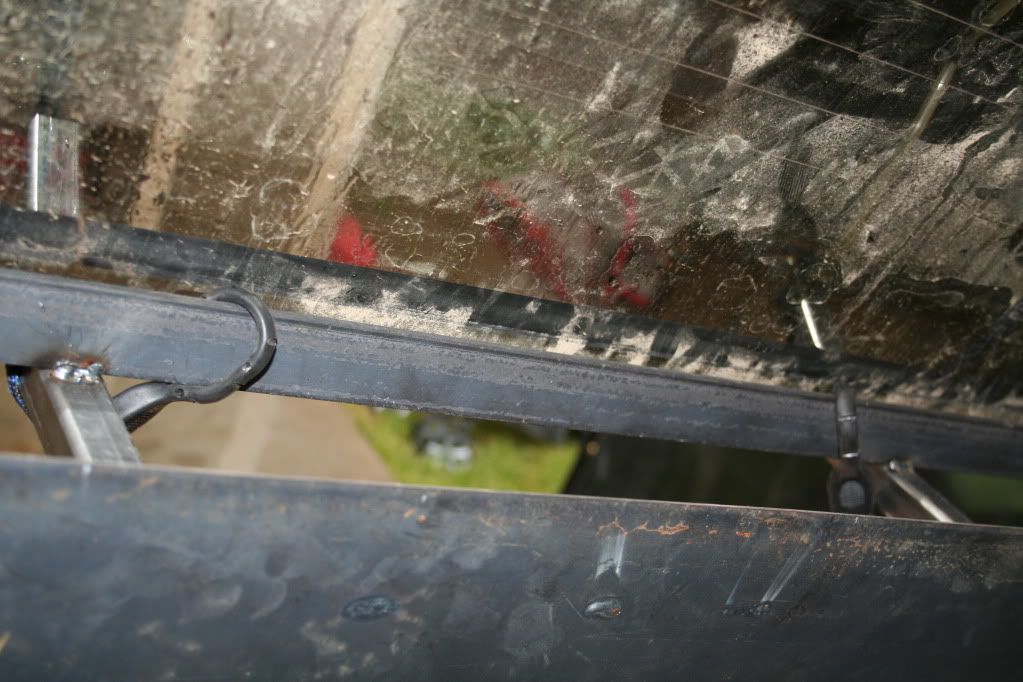
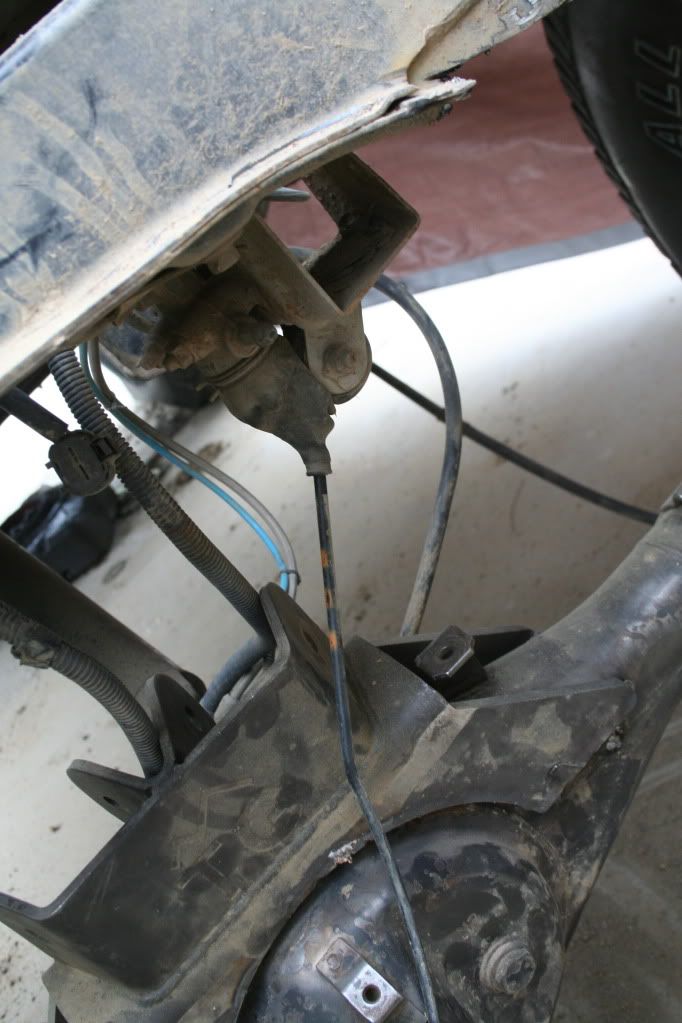
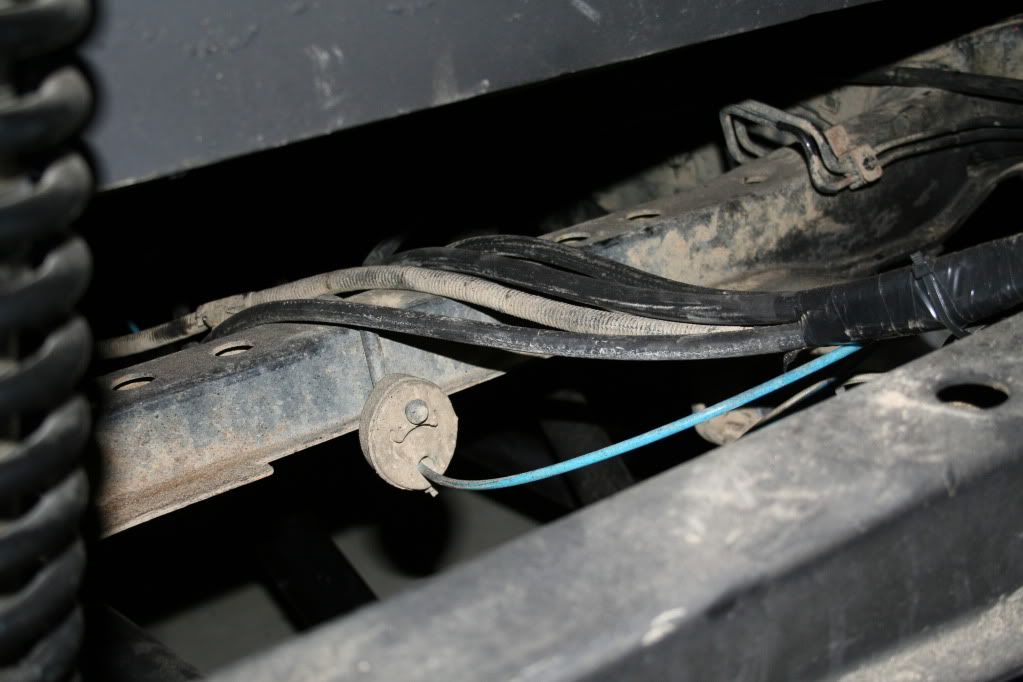
Anyone know what this thingy does? Its some kind of hook that went on my track bar and is mounted to my brakes...
Cut these old bump stop mounts off
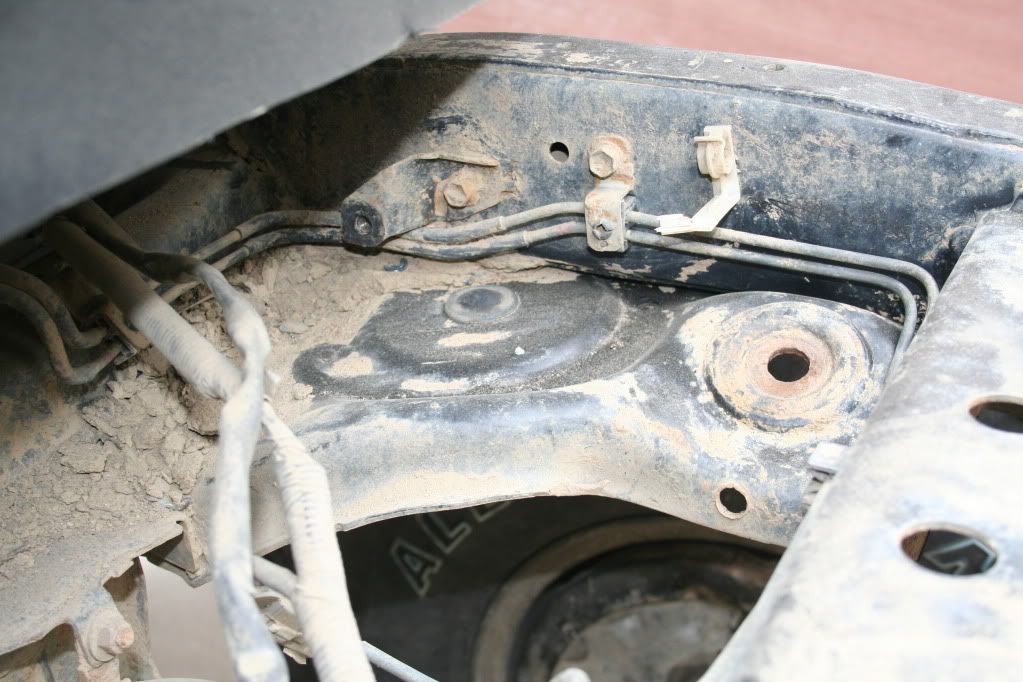
Here you can see my paint on the cab back and the cut out bump stop panels
Painted my axle
Building new upper arm mounts
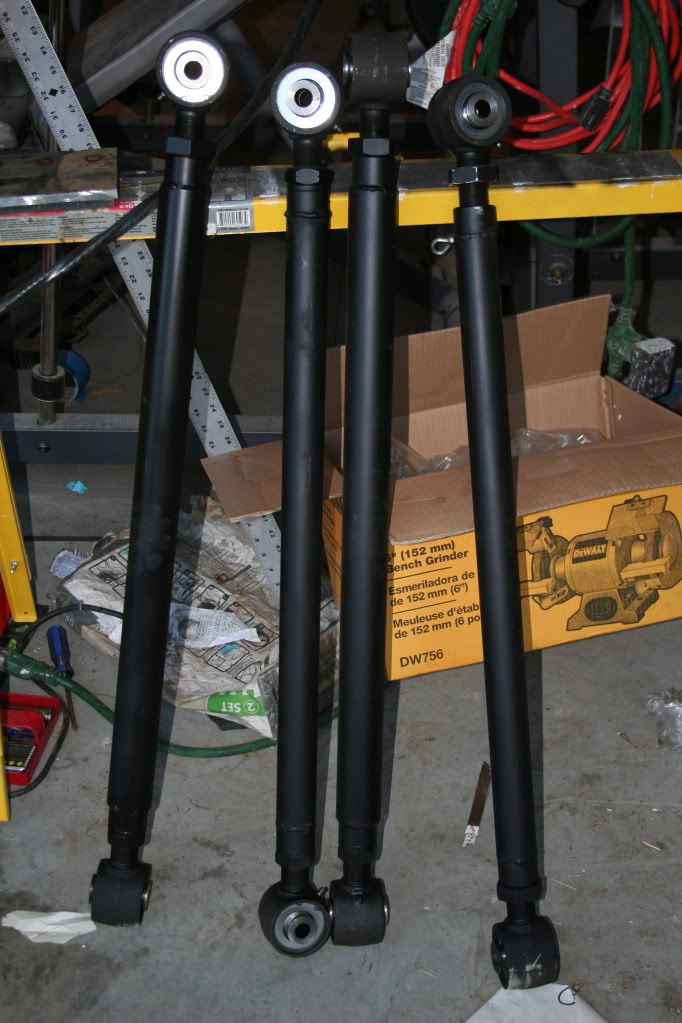
Built my links
Built my suspension mount- thinking im going to either make another arm that goes back for more support, or gusset it..
Put my hybrids together - BOOYA! Trying to imagine how they will move with bump and droop
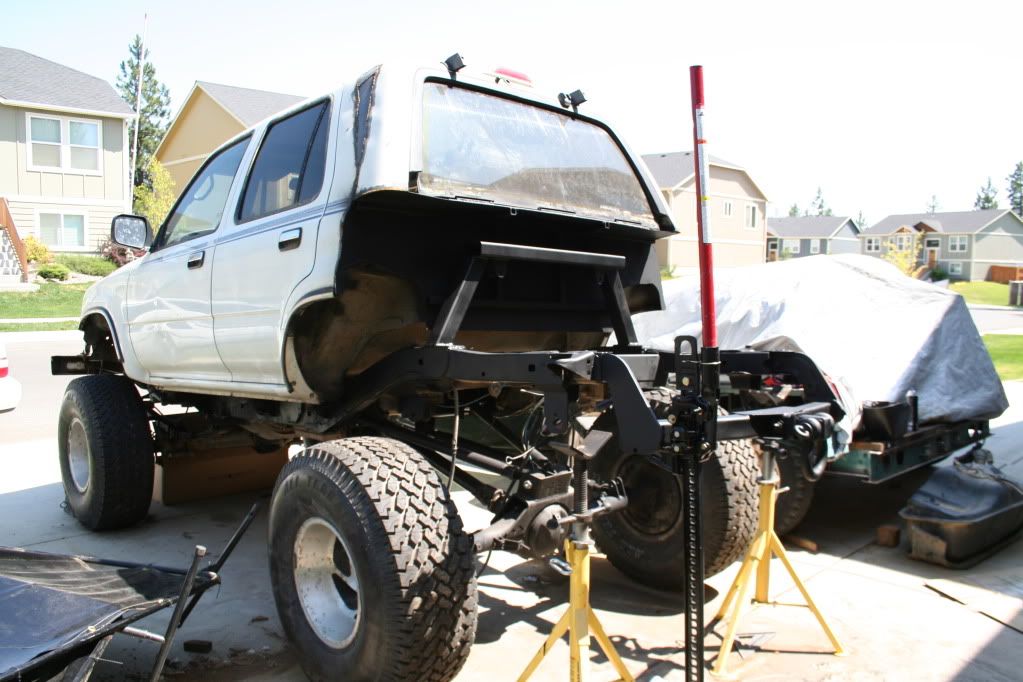
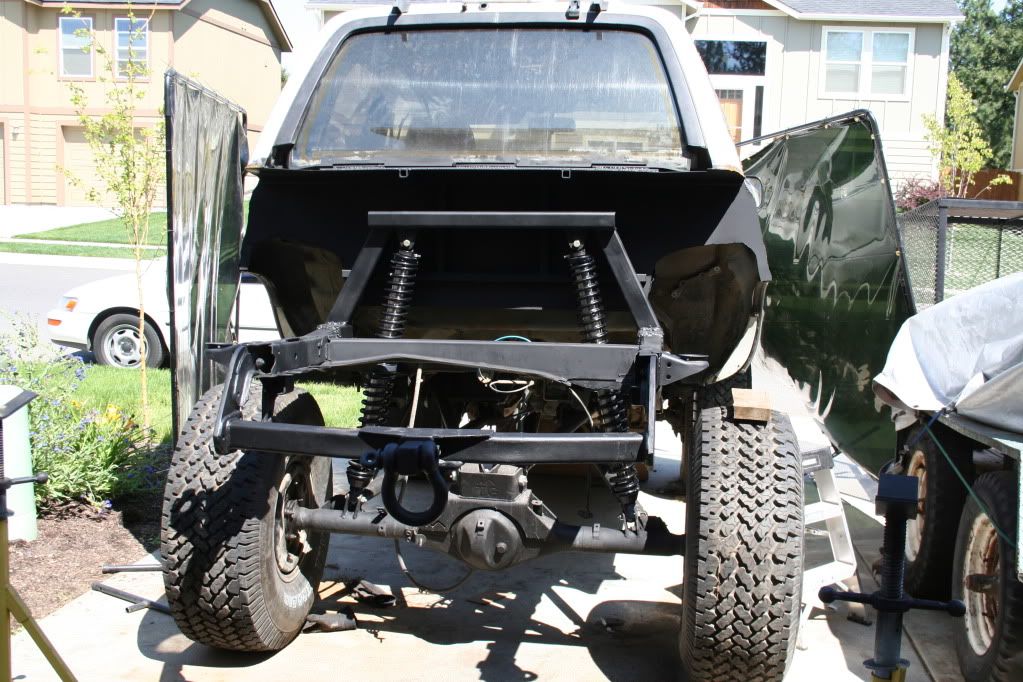
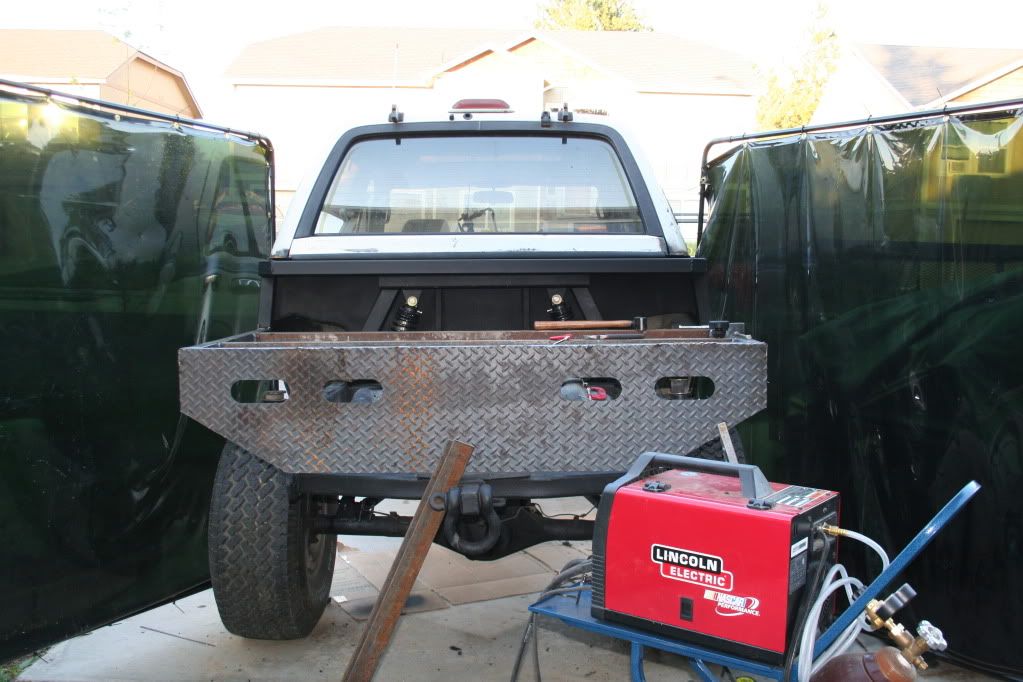
Heres some pics of the truck without all those tarps and welding screens around it

ok all updated... Im stuck right now waiting for bolts to come in the mail and Im still trying to find an 18mm drill bit...
/rant on
To all who decide to do this DO NOT BUY 18MM CREEPER JOINTS!!!!!
I called over 50 stores, apparently nobody in the US makes or sells 18mm, they go from 16 straight to 20, machine shops charge 100 bucks per to make them since they have to harden each one and machine each one 2x, fasteners can get them but the shoulder is about an inch too short, and finding an 18mm drill bit is just as rediculous.... Why trail gear would sell me an 18mm creeper joint without mentioning these issues is beyond me... maybe they hate repeat customers? /rant off...
Once I get these things the links will go right in, my coilovers are all set and ready to go in, and I will get started on the gas tank.
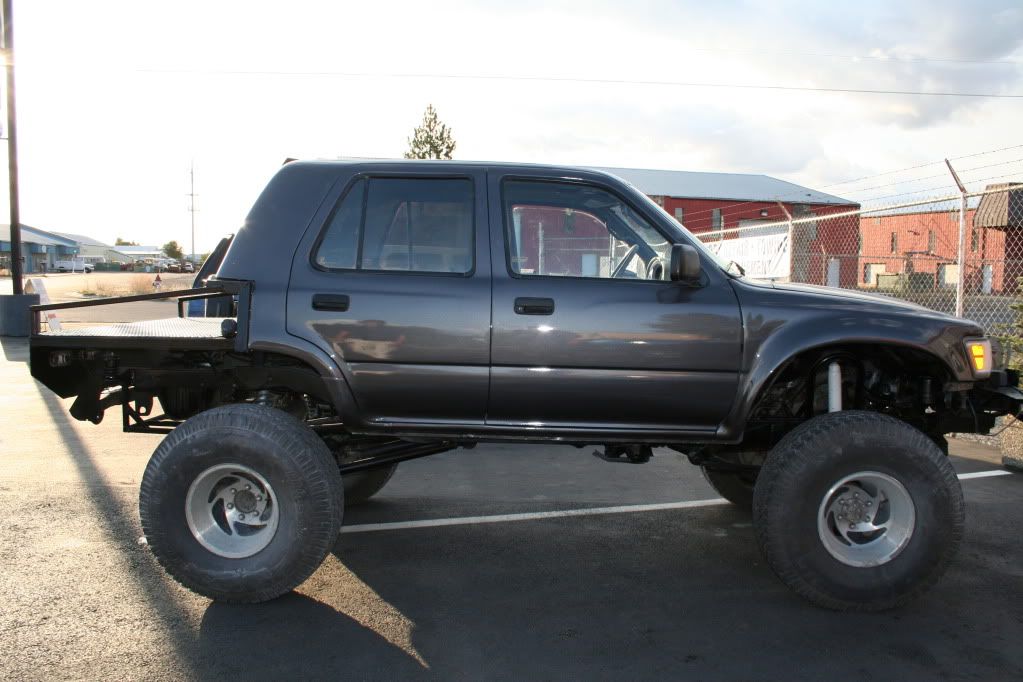
Im debating on letting someone else do the bodywork so it actually looks decent, Im going trade of all the chrome for black, and I think Im going to take it down to the local maaco and get a $300 dark grey paint job before I build my exo.
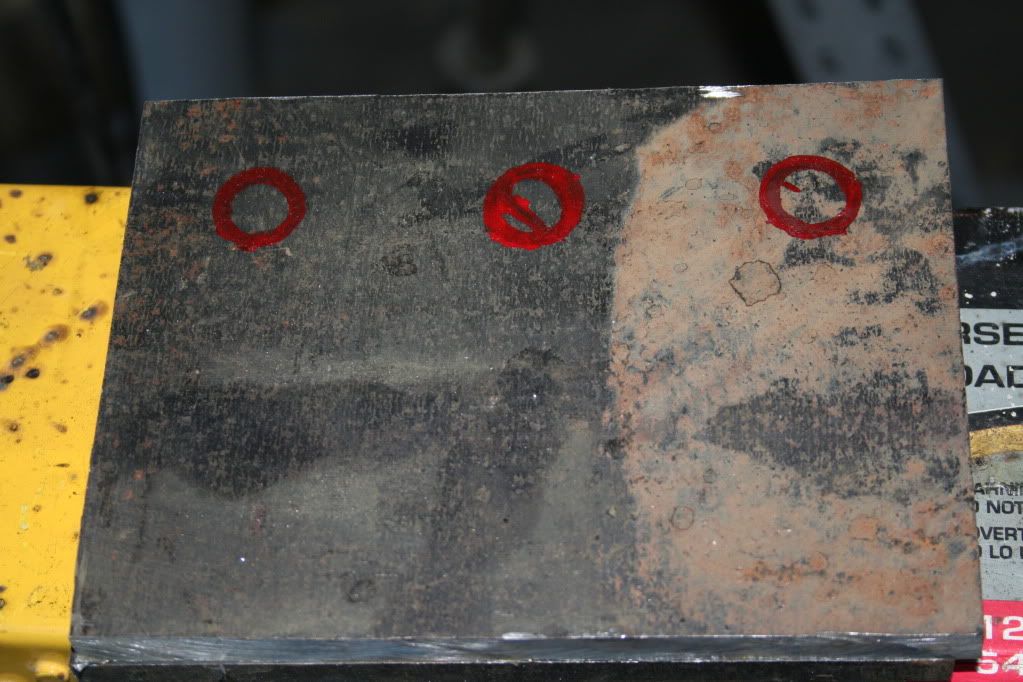
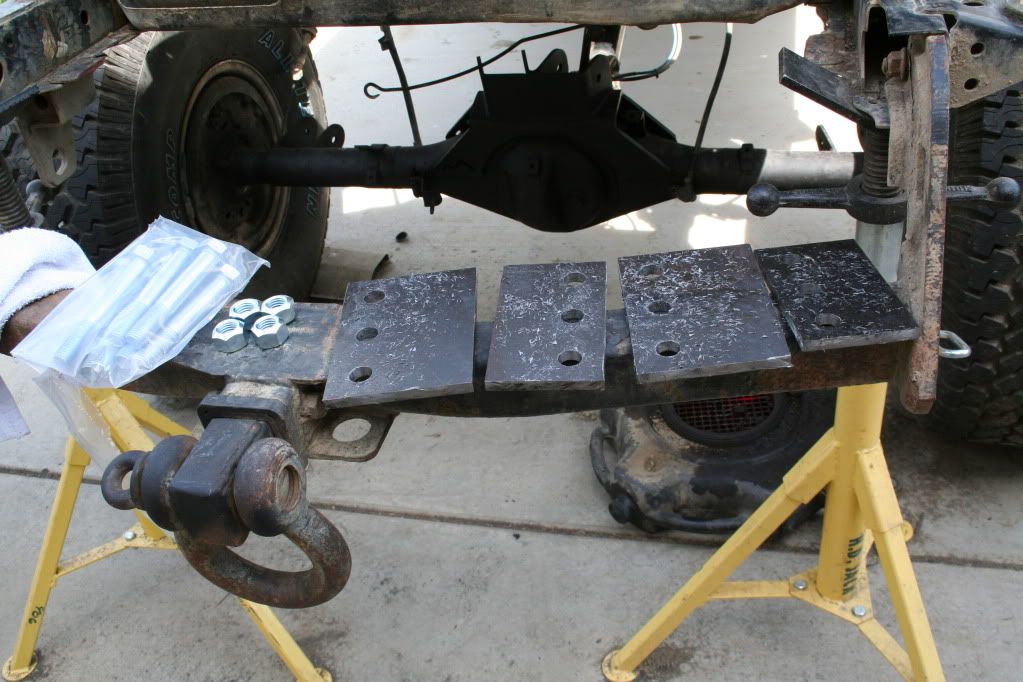
Here I am trying to fab some new link mounts with multiple adjusting points, wewt I got to use my drill press!
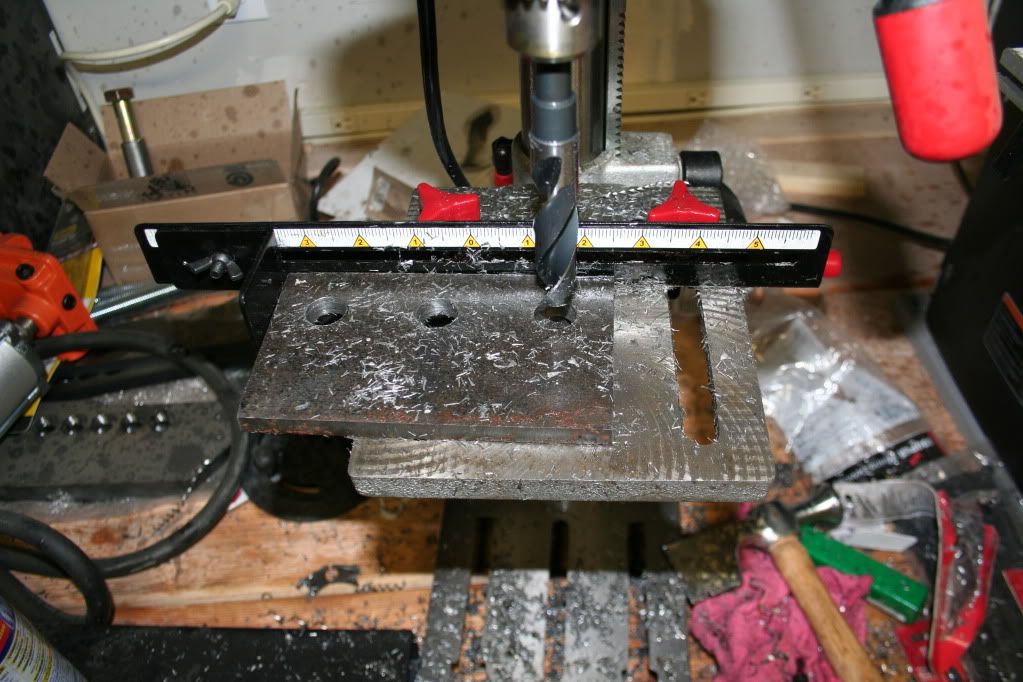
Using the old mounts I had fabbed for comparison I checked to see if my 45/64 drill bit would work well or if I would have to step it up to a 23/32 bit
Heres the new mount, it works!!! It was a better fit than the original one.
Got these all drilled ready to go in
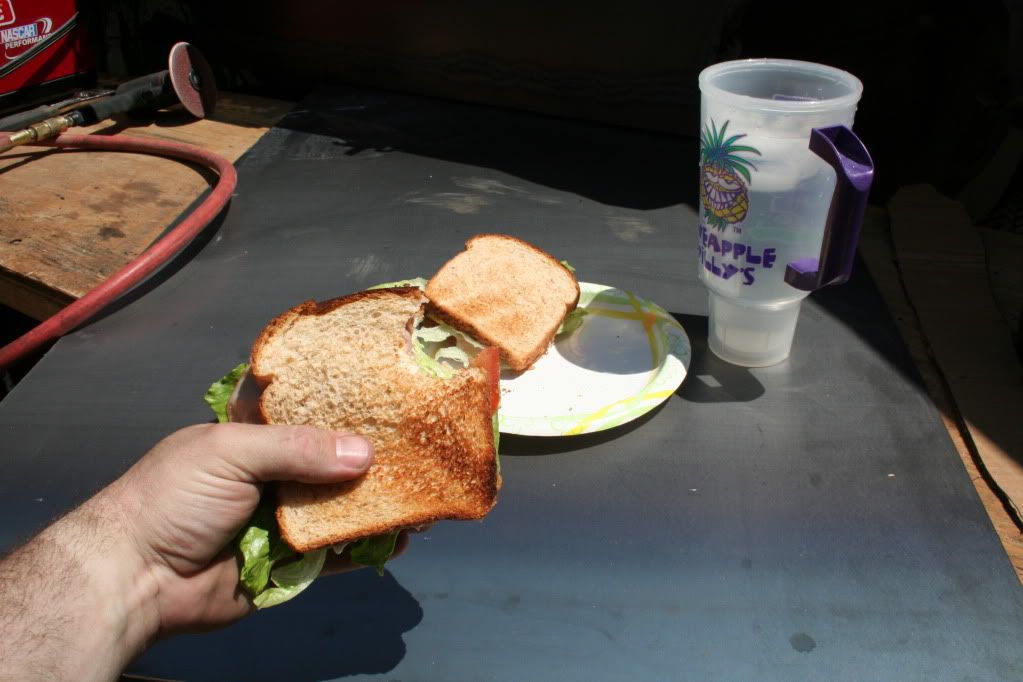
OMNOMNOMNOMNOM! LUNCH BREAK!
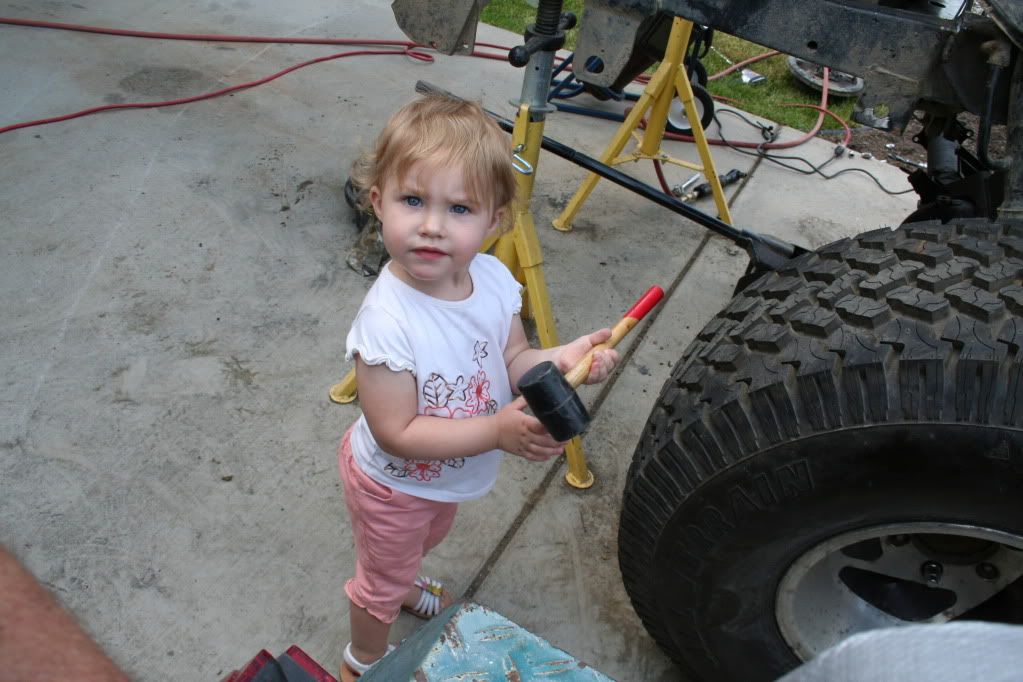
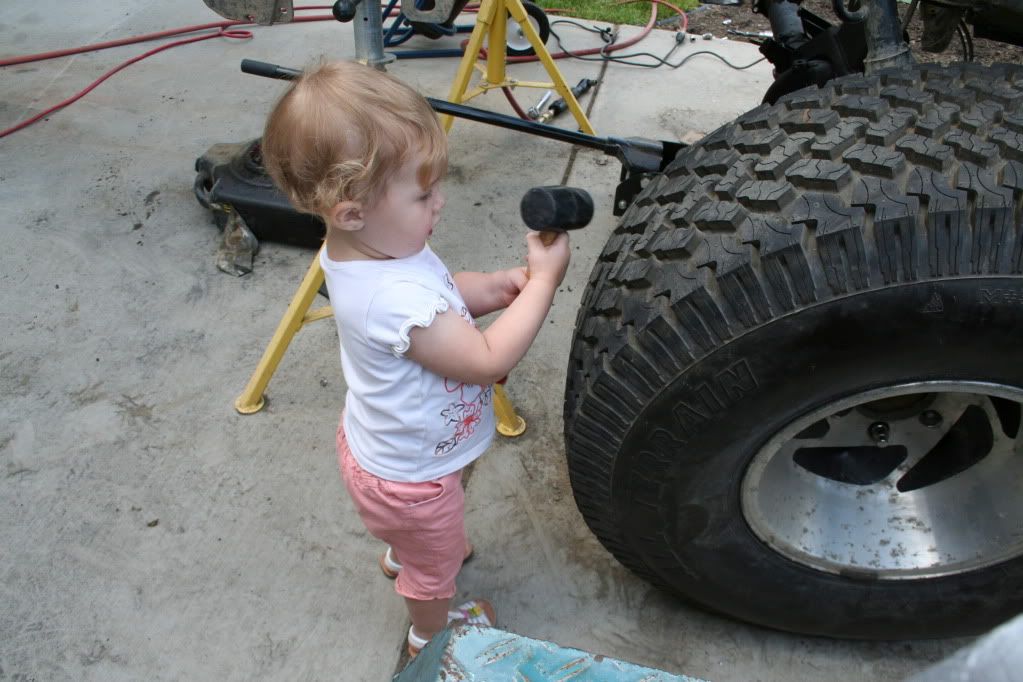
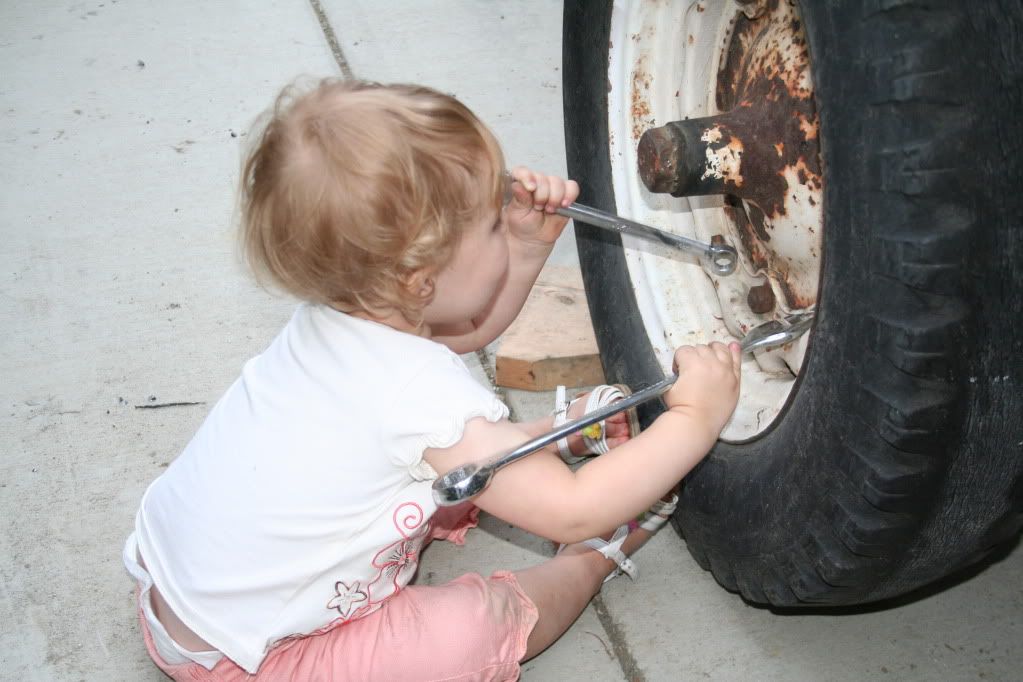
After lunch I hired some help- She works for cookies! and apparently shes an expert in the field of tires?
Got one link in... had to pull the axle to drill out the holes (they were 9/16 holes)
Links in! Just need to weld up the upper frame mounts tomarrow, I decided to wait until I could see to do it.
So tomarrow Ill see about making brackets for the coilovers and putting in the gas tank.
I went to tighten all my links and I didnt have the right size wrenches- It was Sunday and nobody that was open sold it, so I decided to open my own line of tools!
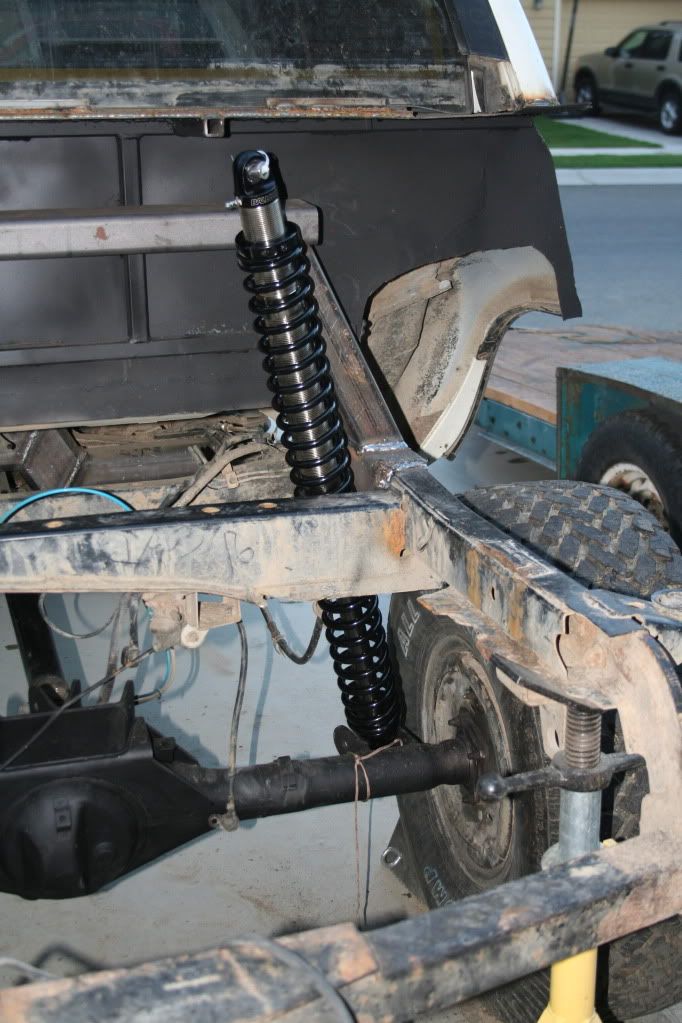
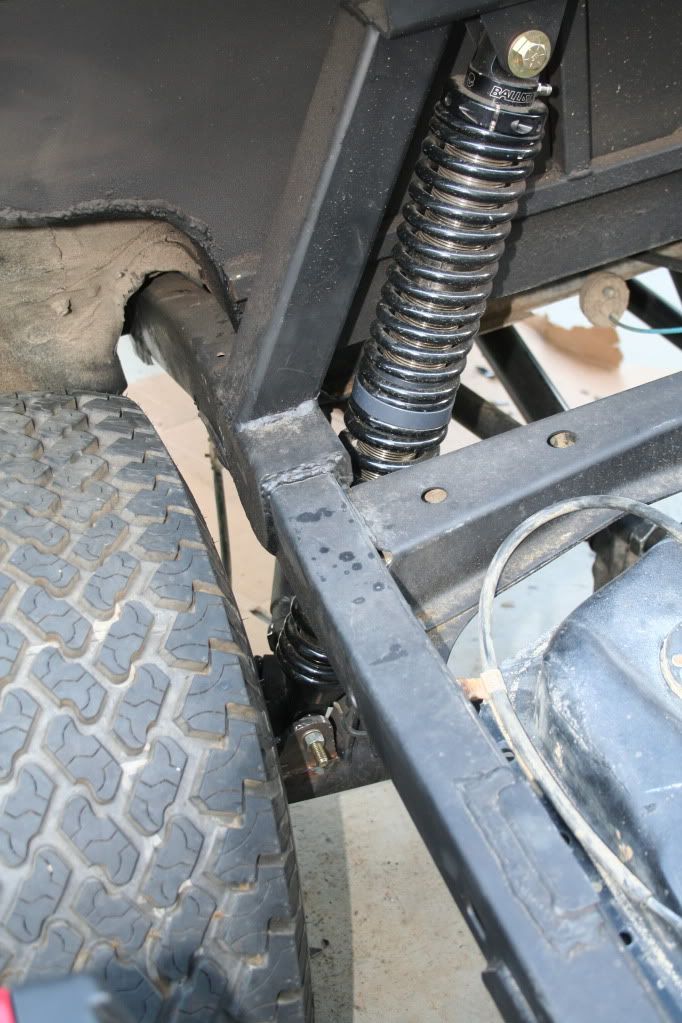
Got my brackets made and jacked it up to put the hybrids on
I had to put blocks on the jack and my high stands didnt go high enough to touch it- and i still had to fight the coilovers by fircing the springs in place because theyre so damn long
Got em all set, just need to take em down to altons tire to get some nitrogen
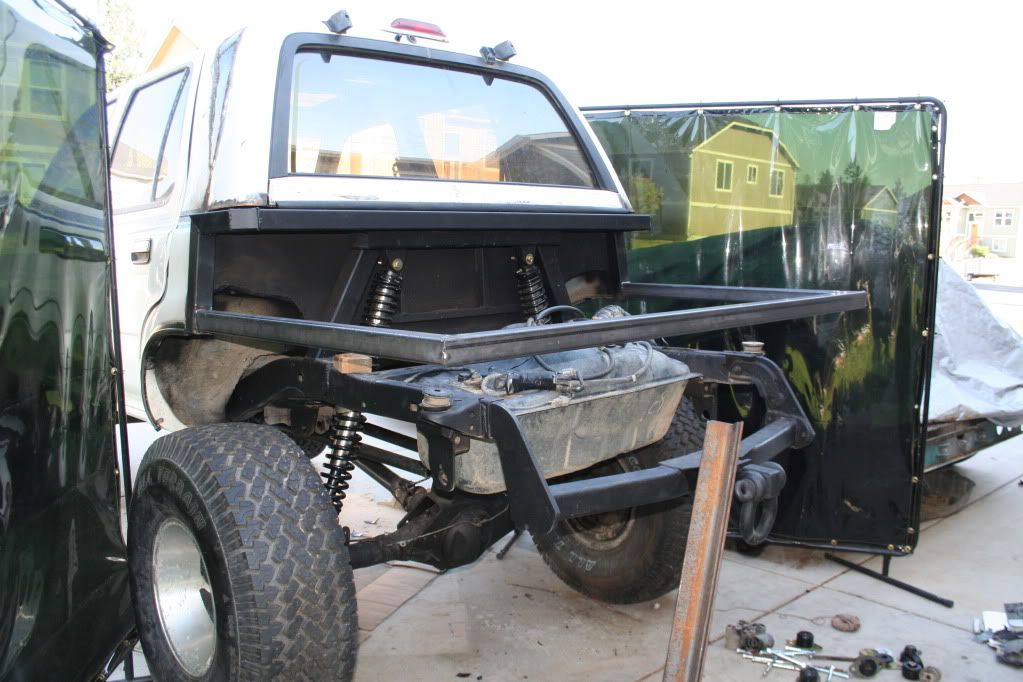
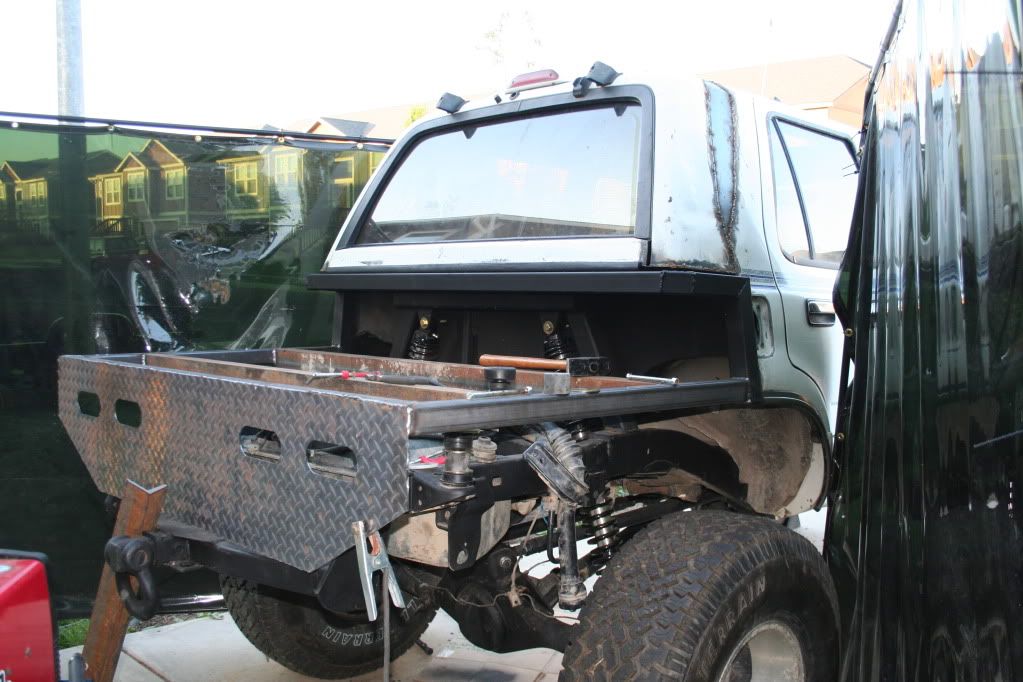
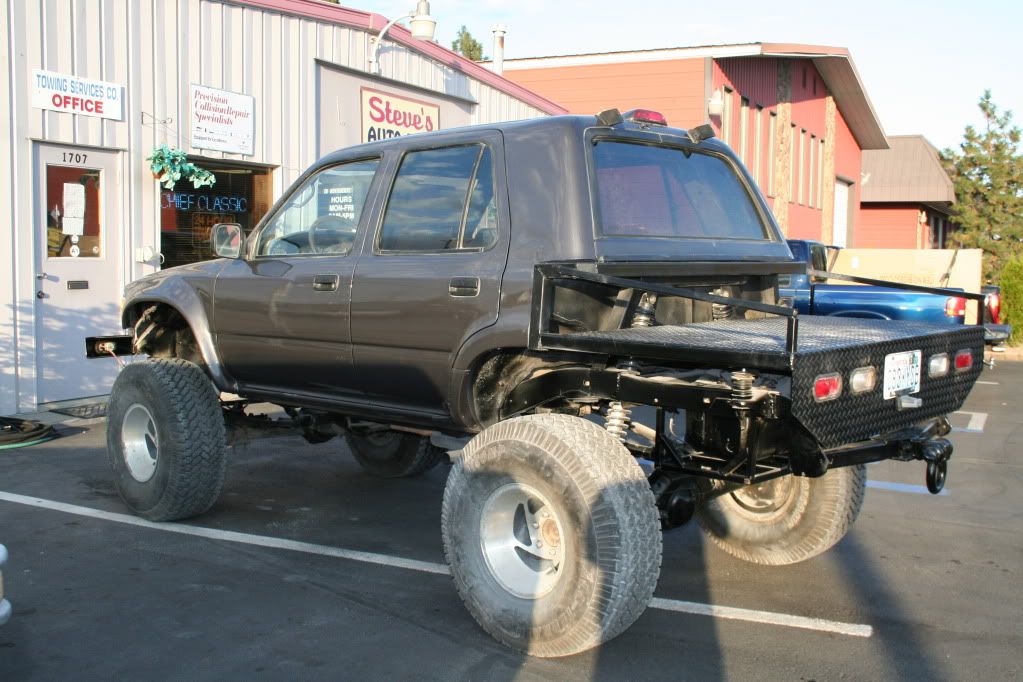
side view... stance is a little high in the back but it will settle when i build the flatbed tomarrow.

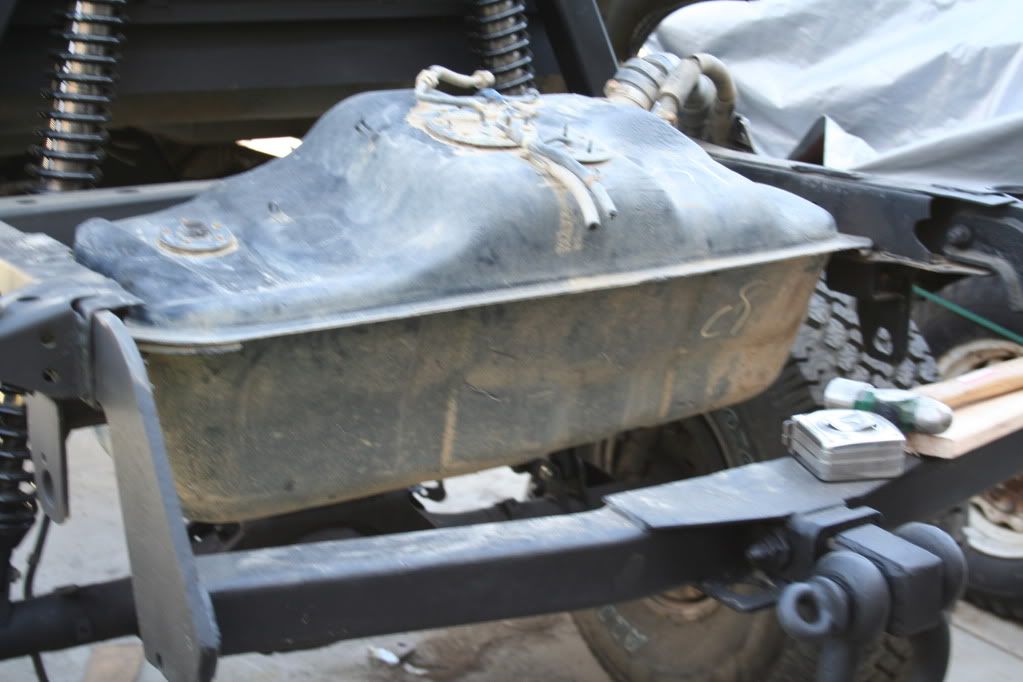
Had to trim one side of the gas tank lip to get it to fit but its in!
got the gas tank all hooked up, poured gas into it, and she fired right up!
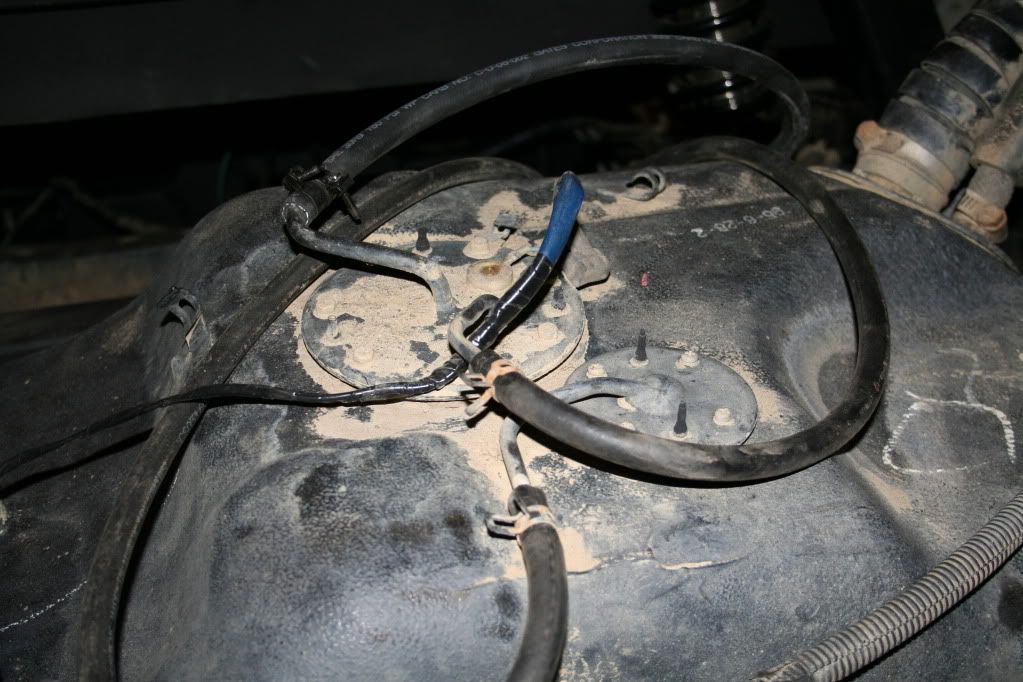
cleaned up the wires and lines so they dont get smashed
My gas tank's drain plug was leaking like a trailer park mobile home, I struggled with it all day- I ended up getting some heat resistant thread sealant- sets in 4 hours, completly set in 3 days. I am going to leave the gas tank empty until its fully dry while I complete all my welding on the flatbed and bottom of the rear window. I went through the rest of the truck finishing up maintenance stuff, bled the brakes, gave it a good lube order, double checked every bolt I put into the rear end for tightness, put some sealant on my welds, and hooked up my one remaining brake light- it worked! In 3 days I should have my flatbed finished and it will go away to the body shop where it will get some new front fenders, some body work omn the rear chopped up portion, all chrome will be replaced with black body parts (grill trim ect.) and some new paint- dark grey. When I get it back Ill build my front bumper, fill in that gap from the body lift, and start planning my roll cage. Im considering going down to the local car audio store and letting them put a big sticker on my back window in exchange for tunes and installing my cb somewhere on the dash instead of my floorboard. Ill keep you guys updated- after I put 500 miles on the new gears in the rear end Ill post some test run pics for sure.
ok sorry for the long wait on updates but college has been keepin me busy. After fixing the leak on my gas tank I moved the lower coilover mounts further out and crossed my fingers that it wouyld still clear on full stuff...

It worked! I have like a quarter inch clearance still, just barely made it!
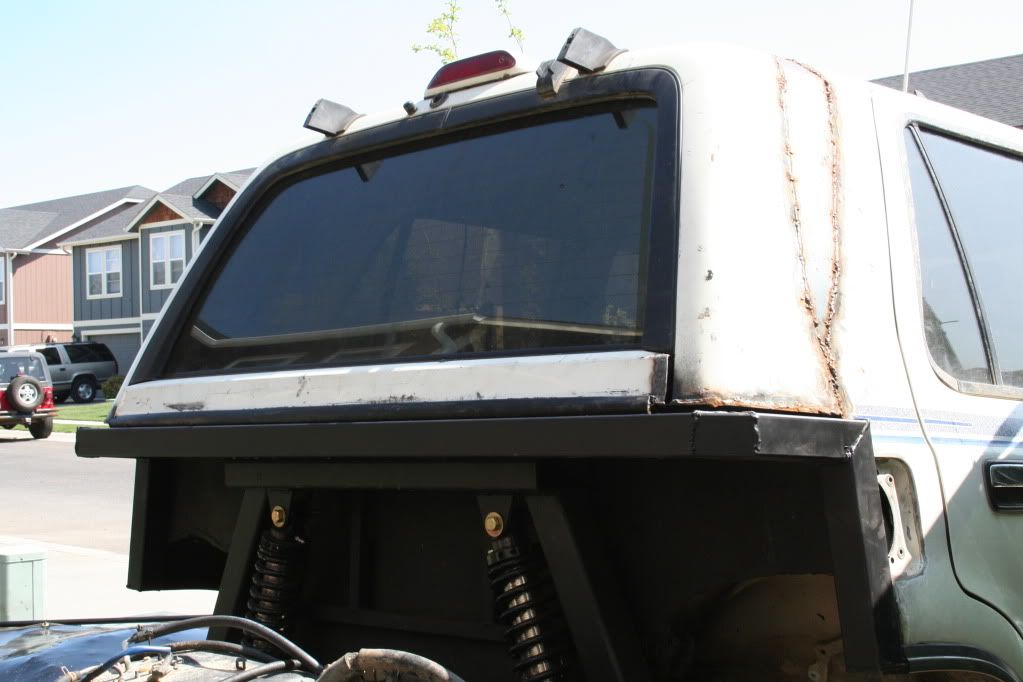
Then i framed out the bottom portion of the rear window and put a gasket on tjhe lower portion to make it look finished.
next I framed out the flatbed
Then I put in some cross members to support the bed and put on the rear of the flatbed
Next I cut a hole in the floor to make room for the crossmember i built on my links so that I could take off the 3" body lift- I accidentally cut through my arb air lines and had to get a union from granger to repair it


I fabbed up a cover for the hole which I will later fiberglass in (when I tare out the carpet in preperation for lining the tub with bed liner)
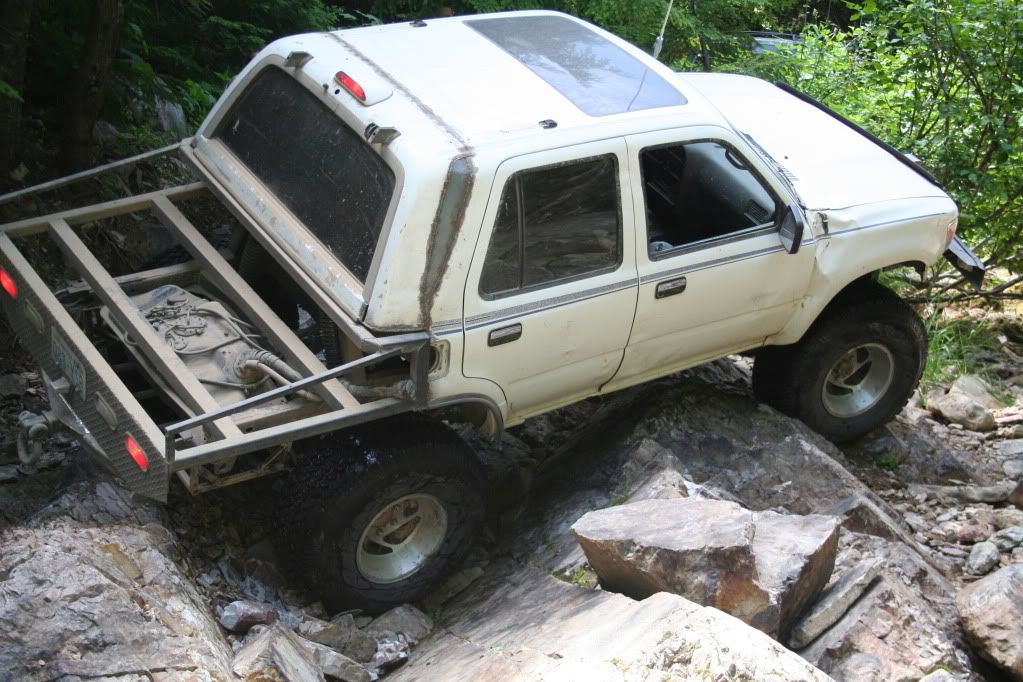
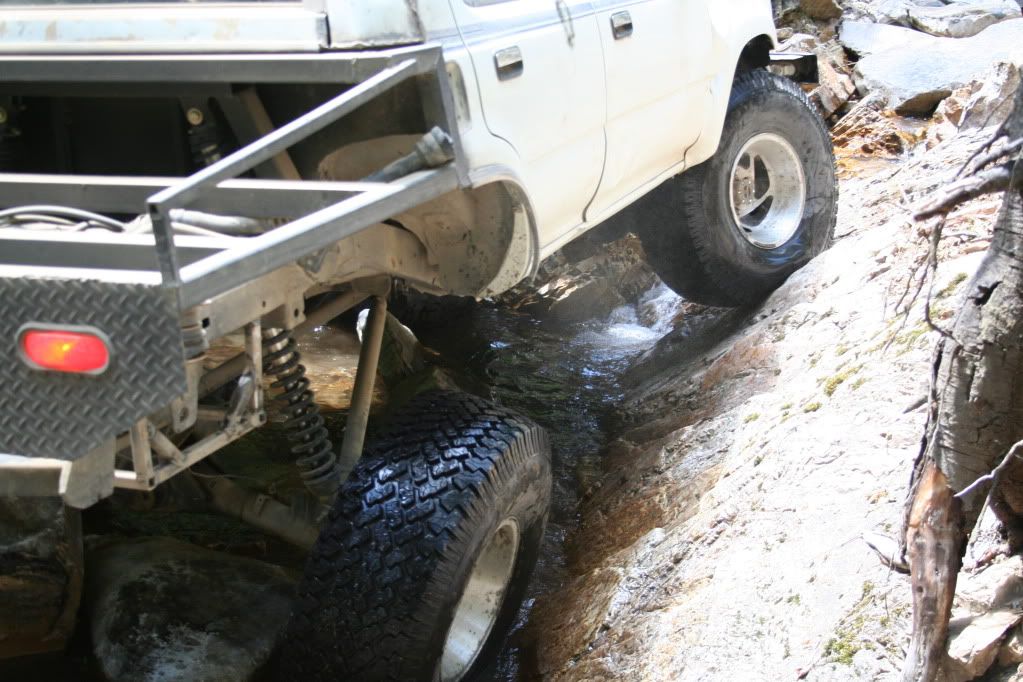
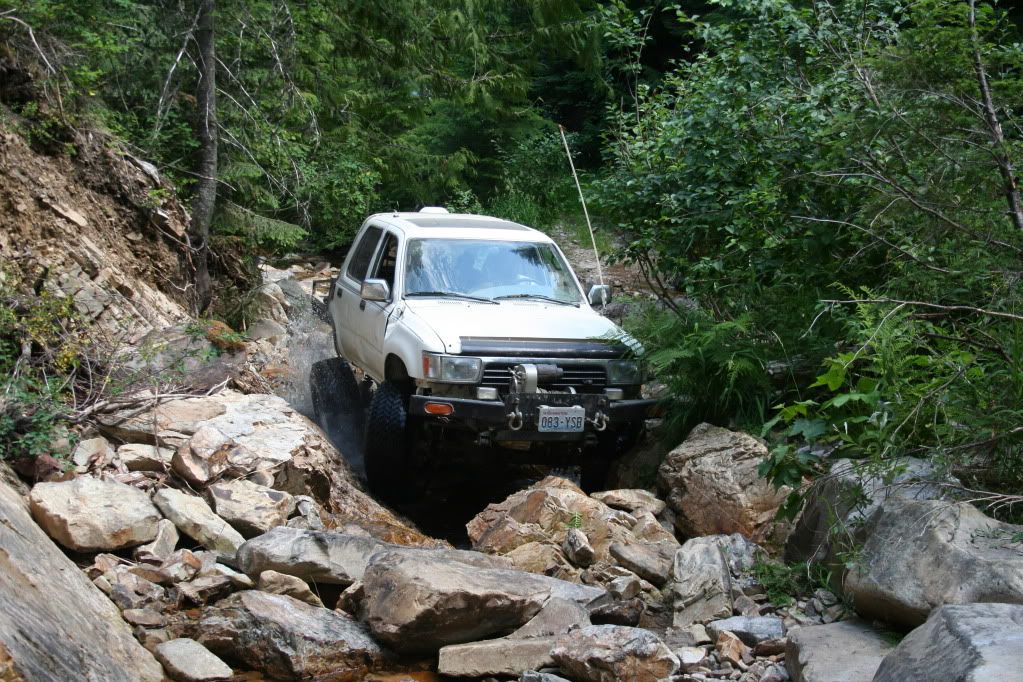
At this point I decided it was time for a test run!
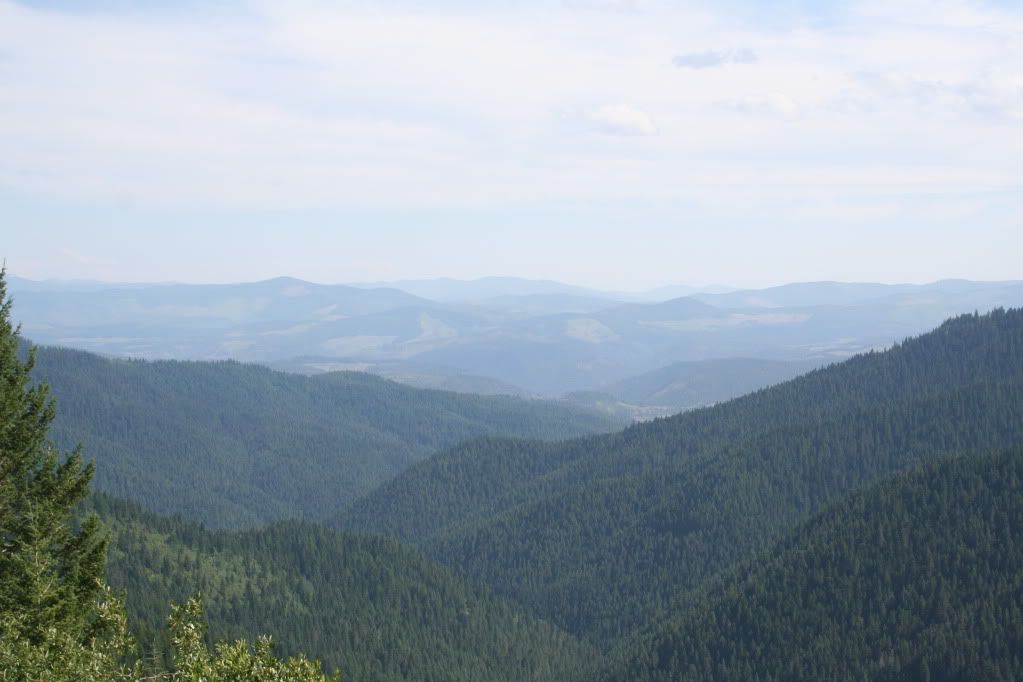
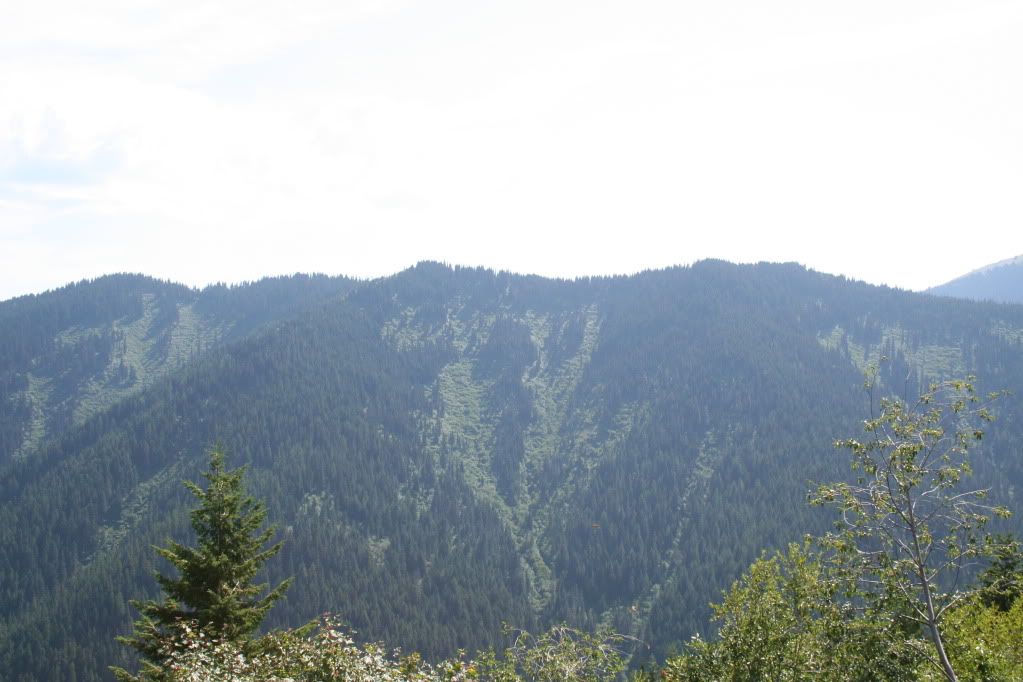
This is where we visited
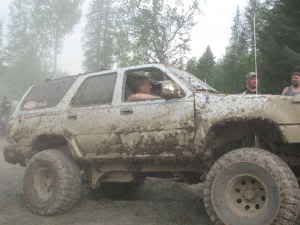
Here is my truck in action!

!@#$%^&*()!@#$%^&*()!@#$%^&*()!@#$%^&*()_!@#$%^&*( )!@#$%^&*()!@#$%^&*()_!@#$%^&*()
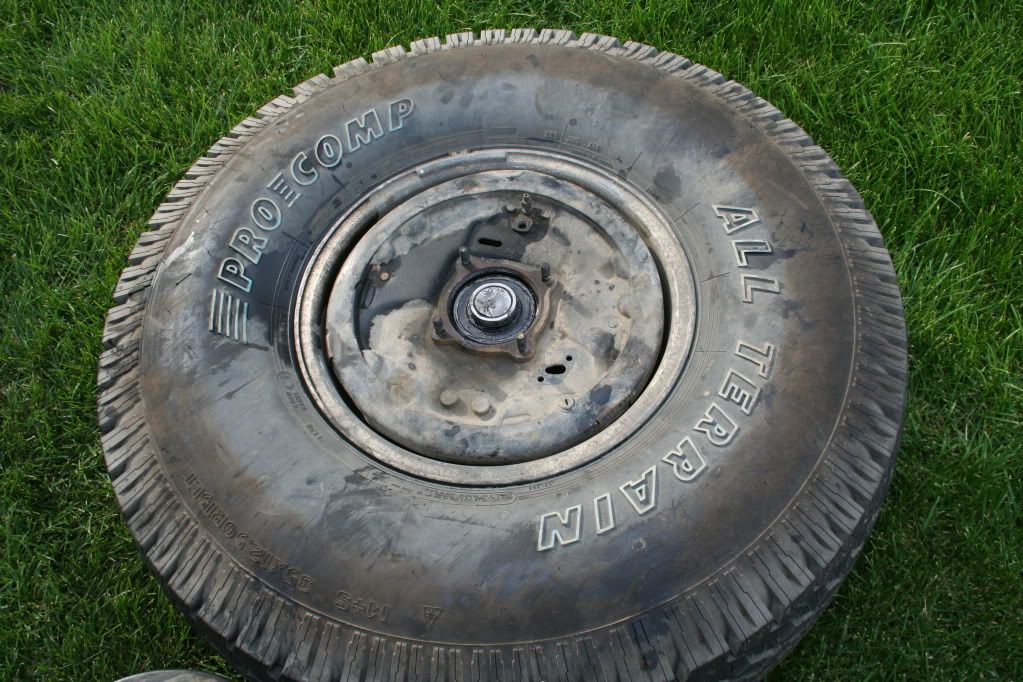
Here is a video (keep in mind when I did this my rear lockers were inop and my fronts were working intermittantly, and I was using my lame pro comp street tires instead of my pitbull rockers because I havent put on my new fenders yet
http://www.youtube.com/watch?v=vafRihDFJIk
!@#$%^&*()!@#$%^&*()@#$%^&*()!@#$%^&*()_!@#$%^&@#$ %^&*()@#$%^&*()@#$%^&*()@#$%
I have finished most of the flatbed here, I wanted to show how I tied it in to make a wheel well

Started the body work
yesterday I broke my axle driving on pavement... wth?

Almost finished! Ill keep you guys up to date here and there, be patient and stick it out!
I finally did it, all finsihed guys. Heres the final pics, hope you guys like it as much as I do!
95 4runner
Sas 85 runner front axle
5.29 gears
Longfields
ARB Air Lockers
4" marlin Crawler front leafs
1" rear superlift with 3" poly Spacers
3" body lift
8000lb winch
my rear axle is cracking where the link mounts are welded on
my front shock mount is cracking where its welded along the frame
my cheap ass superlift springs are sagging
my superlift link bracket extensions are hanging down so far that obstacles taller than 16" will hit the brackets instead of my rear tire
So here is what im doing to fix all that crap:
taking off the 3" body lift (this truck is waaay too high and tippy)
Im cutting off the rear of the body and turning it into a quad cab flatbed
relocating the fuel cell to the spare tire mount area
cutting off the stock 4link and using trail gears rear axle link mounts
fabbing up a custom crossmember for my links to mount on
fabbing up custom longarms with johnny joints
putting in aisin hubs and rebuilding my front knuckles / replacing the wheel bearings
fixing the cracked frame and turning my shock tower into shock hoops
putting yukon gears in my rear axle
taking off superlift crap and putting 6" custom progressive coils
bend and weld myself a nice rollcage
Heres some pics:
Heres a pic of my truck (before pic)
Trashed Pinion
Cracked axle housing
Superlift 4link lift (note the long bracket extension hanging down like 16")
Cracked frame (front shock mount weld failure)
In these pics, Ive taken the axle off, I have my dropout complete and gears are all set (Thanks Wayne!), Ive ripped out the interior, and chopped the rear side of it off. Tomarrow I will drain the gas tank and take it off to be relocated after Im done with the cab fabrication and rear suspension. I was planning on fabbing up the new crossmember this weekend but it will have to wait until Thursday, the shipment on my new plasma cutter was delayed. I think Ill start working on the front side until it gets here, Ill try to have the knuckles rebuilt, the aisin hubs put in, shock tower mounts ground off, and the cracks in the frame fixed.
........... BTW I think all my neighbors hate me now.... 8)
got my gas tank removed and cut out the spare tire crossmember, ill need to cap that off with a new cross member on the end to reinforce it.
mocked the new mount in place, welded it in- only tacked the lower link mounts incase they need adjusted
I decided to start doing my knuckle rebuild
I put blocks up so that we could put in the crossmember
had to massage it with my hammer a little so it would fit under the body
a smidge too long on one corner, had to grind it down
tadaaa! crossmember is welded in place on the collars, just need to drill holes and bolt it in
Got the rear axle together with wheels on, slid it under the truck so we can mock it up soon
Heres a pic of my repaired cracks and shock hoops
I was getting ready to cut the parts for the cab and i figured out that I could make the luggage rack on top work, just make it shorter
Here it is cut off, getting ready to mock it in place
I cut the top of the bed off and I will use it to seal the window
Here is the track the window used for going up and down... Im going to cut it into 1/2 and use it for the bottom window supports
Finally got it mocked in place, almost ready to weld
Here in the next week Im going to be blasting out as much as I can, the association of homeowners has been informed of my vehicles state and has informed me of my infraction lol! 8P
OK here it is, I have the back wall welded in place pretty well.. welds are ugly as hell, I guess there is some kind of learning curve to welding on sheet metal- I definately would rather not in the future! I also have the roof portion welded up. Tomarrow Ill be going to buy some metal tubing for supports and filling in the rest / reinforcing everything.
Here I have the back welded in finally... I tried out the back of the taco cab but it didnt work out so well, I was like a half inch short, so heres my new cab end.
Next i cleaned up the top portion and drilled some holes in it, measured to make sure it was centered and symetrical, then welded it up.. please heh dont laugh at these welds- this is harder than it seems before you do it!
Heres that track, I decided to cut one of them into 3
I paid attention in art class!
Welded them into place- I tried tacking the top in first then working my way down, bending it along the contour of the roof as it curved into the wall but it didnt work too well, I had to cut it and reposition it.
This side I started on the bottom and rolled it over on top with a hammer- had to grind a little here and there but it worked out alot better than the other side.
Welded up the support structure for the rear area and window
Blocked it up with wood. You can see I welded those window track onto a piece of 1.5" angle and welded it to the support square tube.
Welded everything together
I am working on welding the bottom in, designing how to make it look finished- I have an idea that may look amazing- and welding that weather strip on the bottom.
Anyone know what this thingy does? Its some kind of hook that went on my track bar and is mounted to my brakes...
Cut these old bump stop mounts off
Here you can see my paint on the cab back and the cut out bump stop panels
Painted my axle
Building new upper arm mounts
Built my links
Built my suspension mount- thinking im going to either make another arm that goes back for more support, or gusset it..
Put my hybrids together - BOOYA! Trying to imagine how they will move with bump and droop
Heres some pics of the truck without all those tarps and welding screens around it
ok all updated... Im stuck right now waiting for bolts to come in the mail and Im still trying to find an 18mm drill bit...
/rant on
To all who decide to do this DO NOT BUY 18MM CREEPER JOINTS!!!!!
I called over 50 stores, apparently nobody in the US makes or sells 18mm, they go from 16 straight to 20, machine shops charge 100 bucks per to make them since they have to harden each one and machine each one 2x, fasteners can get them but the shoulder is about an inch too short, and finding an 18mm drill bit is just as rediculous.... Why trail gear would sell me an 18mm creeper joint without mentioning these issues is beyond me... maybe they hate repeat customers? /rant off...
Once I get these things the links will go right in, my coilovers are all set and ready to go in, and I will get started on the gas tank.
Im debating on letting someone else do the bodywork so it actually looks decent, Im going trade of all the chrome for black, and I think Im going to take it down to the local maaco and get a $300 dark grey paint job before I build my exo.
Here I am trying to fab some new link mounts with multiple adjusting points, wewt I got to use my drill press!
Using the old mounts I had fabbed for comparison I checked to see if my 45/64 drill bit would work well or if I would have to step it up to a 23/32 bit
Heres the new mount, it works!!! It was a better fit than the original one.
Got these all drilled ready to go in
OMNOMNOMNOMNOM! LUNCH BREAK!
After lunch I hired some help- She works for cookies! and apparently shes an expert in the field of tires?
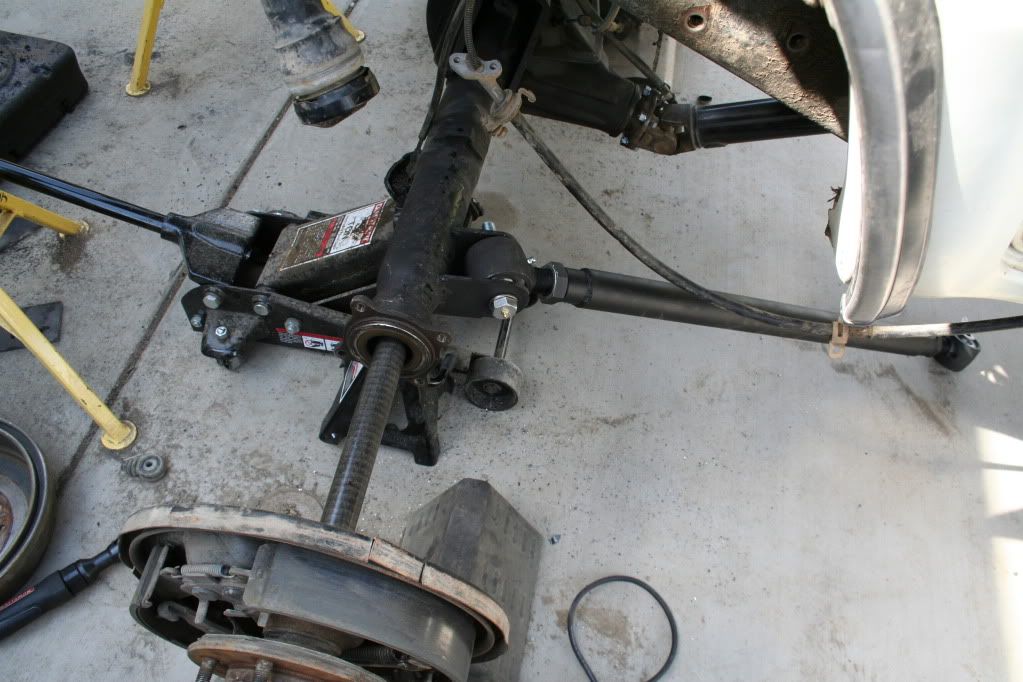
Got one link in... had to pull the axle to drill out the holes (they were 9/16 holes)
Links in! Just need to weld up the upper frame mounts tomarrow, I decided to wait until I could see to do it.
So tomarrow Ill see about making brackets for the coilovers and putting in the gas tank.
I went to tighten all my links and I didnt have the right size wrenches- It was Sunday and nobody that was open sold it, so I decided to open my own line of tools!
Got my brackets made and jacked it up to put the hybrids on
I had to put blocks on the jack and my high stands didnt go high enough to touch it- and i still had to fight the coilovers by fircing the springs in place because theyre so damn long
Got em all set, just need to take em down to altons tire to get some nitrogen
side view... stance is a little high in the back but it will settle when i build the flatbed tomarrow.
Had to trim one side of the gas tank lip to get it to fit but its in!
got the gas tank all hooked up, poured gas into it, and she fired right up!
cleaned up the wires and lines so they dont get smashed
My gas tank's drain plug was leaking like a trailer park mobile home, I struggled with it all day- I ended up getting some heat resistant thread sealant- sets in 4 hours, completly set in 3 days. I am going to leave the gas tank empty until its fully dry while I complete all my welding on the flatbed and bottom of the rear window. I went through the rest of the truck finishing up maintenance stuff, bled the brakes, gave it a good lube order, double checked every bolt I put into the rear end for tightness, put some sealant on my welds, and hooked up my one remaining brake light- it worked! In 3 days I should have my flatbed finished and it will go away to the body shop where it will get some new front fenders, some body work omn the rear chopped up portion, all chrome will be replaced with black body parts (grill trim ect.) and some new paint- dark grey. When I get it back Ill build my front bumper, fill in that gap from the body lift, and start planning my roll cage. Im considering going down to the local car audio store and letting them put a big sticker on my back window in exchange for tunes and installing my cb somewhere on the dash instead of my floorboard. Ill keep you guys updated- after I put 500 miles on the new gears in the rear end Ill post some test run pics for sure.
ok sorry for the long wait on updates but college has been keepin me busy. After fixing the leak on my gas tank I moved the lower coilover mounts further out and crossed my fingers that it wouyld still clear on full stuff...
It worked! I have like a quarter inch clearance still, just barely made it!
Then i framed out the bottom portion of the rear window and put a gasket on tjhe lower portion to make it look finished.
next I framed out the flatbed
Then I put in some cross members to support the bed and put on the rear of the flatbed
Next I cut a hole in the floor to make room for the crossmember i built on my links so that I could take off the 3" body lift- I accidentally cut through my arb air lines and had to get a union from granger to repair it
I fabbed up a cover for the hole which I will later fiberglass in (when I tare out the carpet in preperation for lining the tub with bed liner)
At this point I decided it was time for a test run!
This is where we visited
Here is my truck in action!
!@#$%^&*()!@#$%^&*()!@#$%^&*()!@#$%^&*()_!@#$%^&*( )!@#$%^&*()!@#$%^&*()_!@#$%^&*()
Here is a video (keep in mind when I did this my rear lockers were inop and my fronts were working intermittantly, and I was using my lame pro comp street tires instead of my pitbull rockers because I havent put on my new fenders yet
http://www.youtube.com/watch?v=vafRihDFJIk
!@#$%^&*()!@#$%^&*()@#$%^&*()!@#$%^&*()_!@#$%^&@#$ %^&*()@#$%^&*()@#$%^&*()@#$%
I have finished most of the flatbed here, I wanted to show how I tied it in to make a wheel well
Started the body work
yesterday I broke my axle driving on pavement... wth?
Almost finished! Ill keep you guys up to date here and there, be patient and stick it out!
I finally did it, all finsihed guys. Heres the final pics, hope you guys like it as much as I do!
Last edited by Hardstripe; 10-07-2009 at 01:53 PM.
 06-09-2009, 12:57 PM
#2
Contributing Member
Join Date: Apr 2008
Location: Colorado Springs, Colorado
Posts: 654
Likes: 0
Received 1 Like
on
1 Post
My goodness talk about starting 20 projects at once! Glad to see you are saving it though. It's unfortunate about the association where you live. I live in an apartment complex and my garage faces no less then 50 apartments so I know they hate me. And Welcome to YotaTech!
 06-09-2009, 04:16 PM
#4
Registered User
Thread Starter
Join Date: Jun 2009
Location: spokane, wa
Posts: 124
Likes: 0
Received 0 Likes
on
0 Posts
lol those are only holding up my crossmember while I get ready to weld it in place, I made the damn thing out of 3/8"x3"x5" rectangular tube, it probably weighed 60lbs!
06-09-2009, 05:09 PM
#6
Registered User
Join Date: Nov 2007
Location: chippawa niagara falls ontario
Posts: 3,278
Likes: 0
Received 2 Likes
on
2 Posts
this makes me glad i live in a cresent with half old people and half young dudes wrench on stuff after work.. o and i live in canada with none of this home owners unions bull ish
Trending Topics


 06-13-2009, 09:14 PM
#18
Registered User
looking great so far.
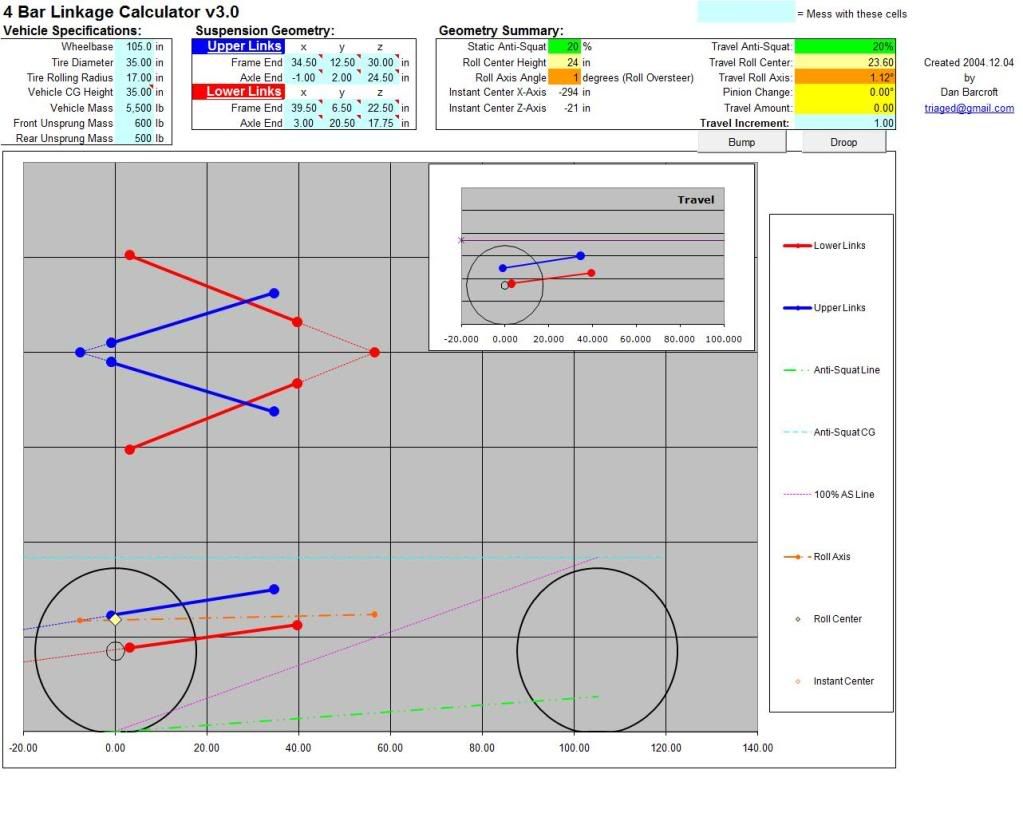
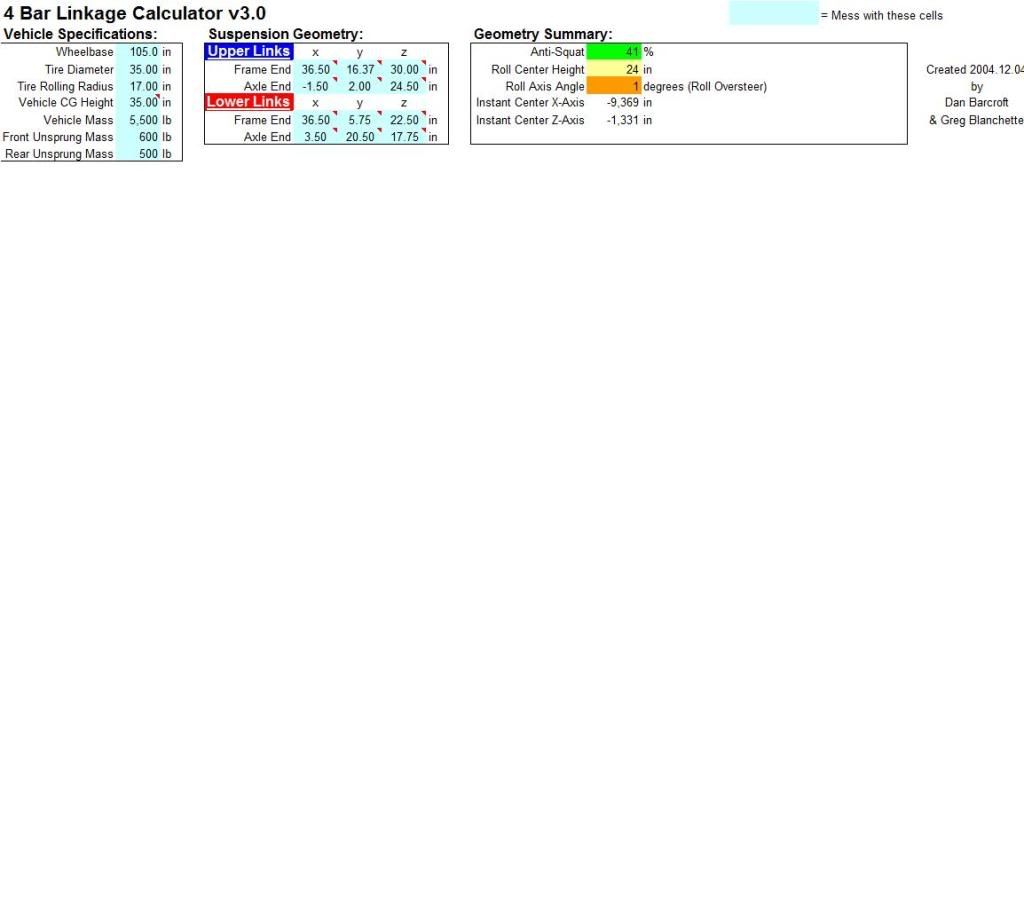
If TC gets in here, he will def be able to help you out with the numbers, he designed his own custom 4 link in his 4Runner.
Keep it up!
If TC gets in here, he will def be able to help you out with the numbers, he designed his own custom 4 link in his 4Runner.
Keep it up!
06-14-2009, 12:48 PM
#20
Registered User
Thread Starter
Join Date: Jun 2009
Location: spokane, wa
Posts: 124
Likes: 0
Received 0 Likes
on
0 Posts
Ive been measuring this all morning, im so scared of messin this up I dont think Ive ever measured anything this much in my life! Here are some more accurate numbers, and Im pretty sure im going to roll with it- looks like a solid design, and I found a version of this calc that has a geometry program for bump and droop, doesnt look like it will bind, pinion angles look good ect.