Pics from 3rd gen 4runner rear bumper build
 09-12-2005, 07:05 PM
#1
Contributing Member
Thread Starter
Join Date: Feb 2003
Location: CT
Posts: 613
Likes: 0
Received 0 Likes
on
0 Posts
Pics from 3rd gen 4runner rear bumper build
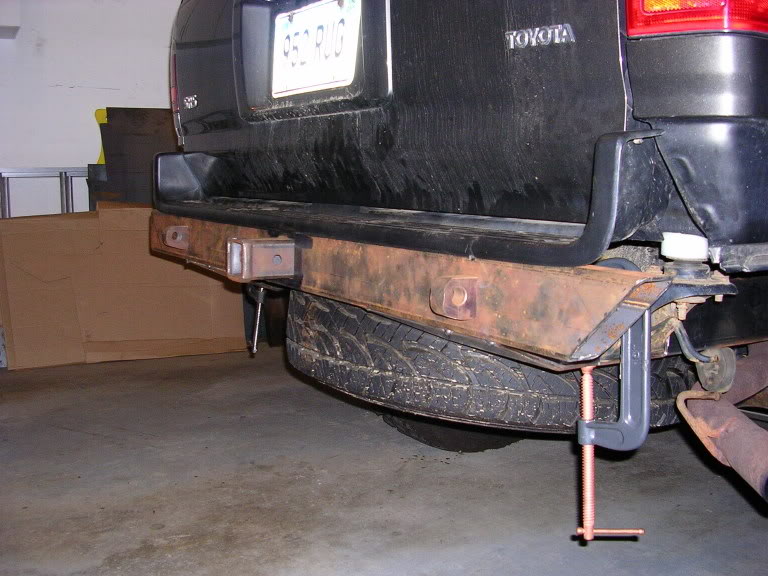
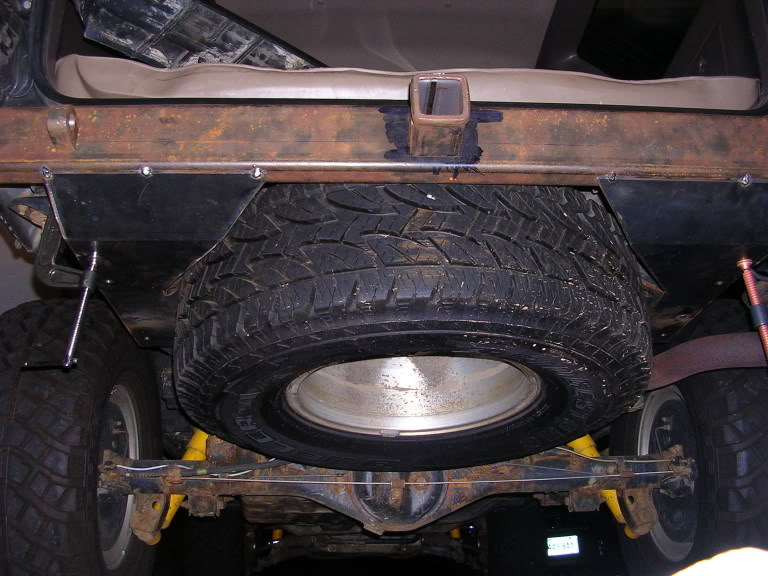
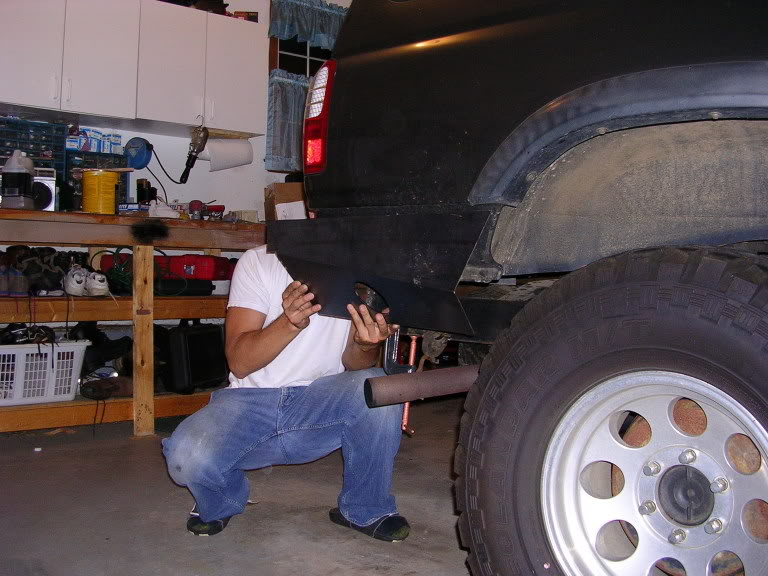
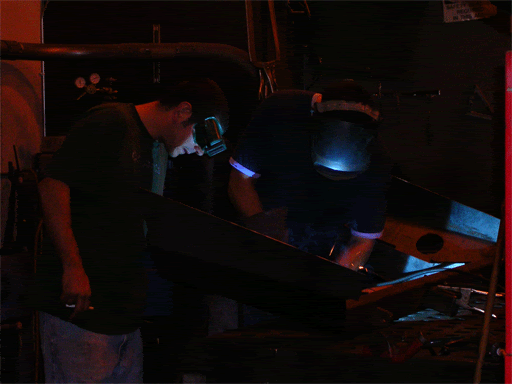
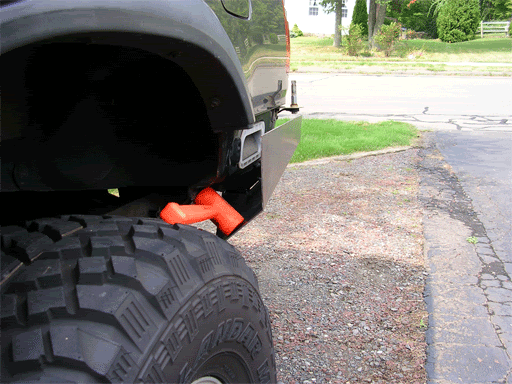
I started working on my BruceTS inspired rear bumper about 3 weeks ago. I've only been able to do a couple hours a week here and there but things are moving along fairly smoothly for being my first fabrication project.
Right now, pieces are just tacked together.
Luckily my buddy, who is helping me out, has a machine shop at his disposal. He also had someone make the bends for me.
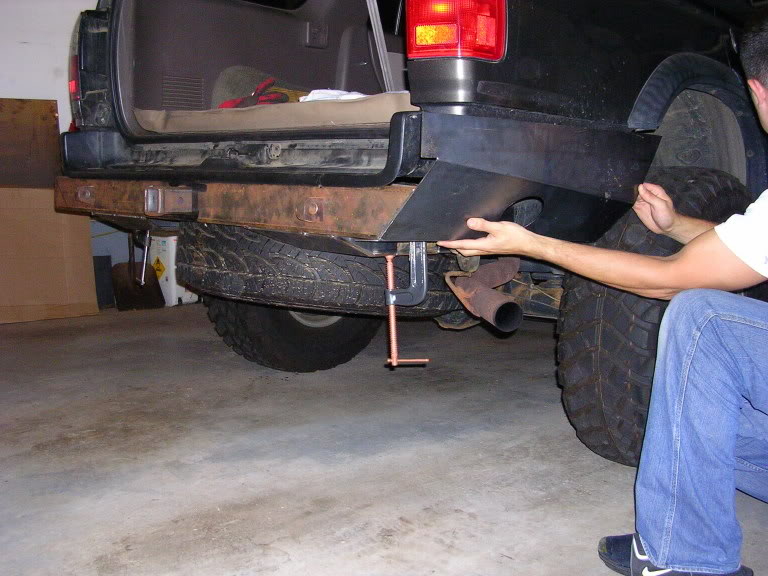
Here are some pics in case anyone wants to take a look at the work in progress.
Right now, pieces are just tacked together.
Luckily my buddy, who is helping me out, has a machine shop at his disposal.
He also had someone make the bends for me.Here are some pics in case anyone wants to take a look at the work in progress.

 09-12-2005, 08:31 PM
#6
Contributing Member

Join Date: Nov 2003
Posts: 2,315
Likes: 0
Received 0 Likes
on
0 Posts
TStango, very good job so far, I hope my webpage help you out, but here's a few tips that aren't on there;
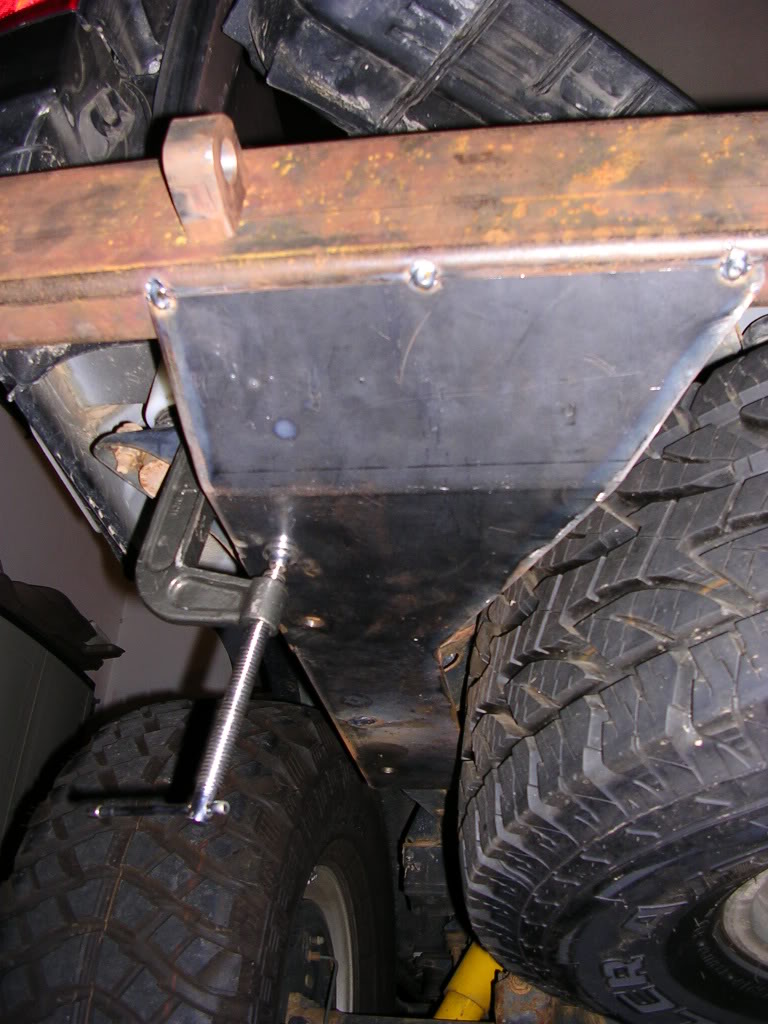
As for mounting, I took a 1" piece of flat stock, drilled a few holes and welded 2 nuts to it, then you simply slide it inside the frame rails and run the bolts up from the underside.
My wings are tapered out a 1/2" beyond the SR5 flares
As for the spare tire underneath, I had plans on scribing a circle, then cutting out the excess, but since then my plans changed, to install a fuel tank back there instead.
To make the radius corners, weld the back plate on then a top plate with the radius already done, but don't weld past where the projected curve will be. You'll need to cut a slot about 2" back on the side plates you already made at the angle point and trim some from the end pieces to allow them to come together when you start the curve, then simply take a body hammer and pounding away.
I guess I should update the site to show more....

Trending Topics
09-13-2005, 04:06 AM
#8
Contributing Member
Join Date: Jun 2004
Location: Richmond, Va
Posts: 4,218
Likes: 0
Received 0 Likes
on
0 Posts
Make sure the exhaust cut out is at least 4". This way you won't have any issues when the tail pipe flexes.
Make sure you have adequate clearance from the top of the bumper to the bottom of the body.
Lookin' good
Make sure you have adequate clearance from the top of the bumper to the bottom of the body.
Lookin' good
09-13-2005, 04:38 AM
#9
Contributing Member
Thread Starter
Join Date: Feb 2003
Location: CT
Posts: 613
Likes: 0
Received 0 Likes
on
0 Posts
Thanks for all the compliments.  I'll definitely keep the pictures coming.
Bruce,
Your website was a huge help and I referenced it quite a bit. We are lucky to have people like you on this forum that are willing to share their knowledge and experience to inspire people like me. This build is a good learning experience and my buddy and I are having a good time with it.
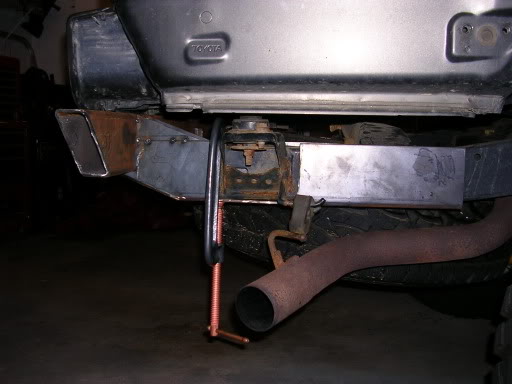
Last week I started to make new nut strips from the ones that held the hitch on and plan to only use 4 bolts through the bottom of the frame rails. I'd like to attach at two more points through the side of the frame just behind the body mount bracket (towards the back of the truck). This may me overkill but it makes me feel better.
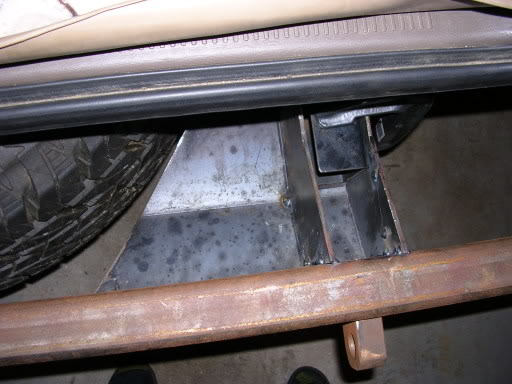
As far as the rounded corners, I wasn't sure how that was going to work so I left some extra material on the side pieces to turn the corner with, just in case. It sounds like you used material from the back piece - I may do that instead. Either way, thanks for the additional info.
I wanted to ask you about that piece of angle iron you used to mount the plastic factory sill plate. Did you weld that to the face of the 2x4 and blend it or is it flush with the face of the 2x4 somehow?
Thanks,
-Tim
I'll definitely keep the pictures coming.Bruce,
Your website was a huge help and I referenced it quite a bit. We are lucky to have people like you on this forum that are willing to share their knowledge and experience to inspire people like me. This build is a good learning experience and my buddy and I are having a good time with it.
Last week I started to make new nut strips from the ones that held the hitch on and plan to only use 4 bolts through the bottom of the frame rails. I'd like to attach at two more points through the side of the frame just behind the body mount bracket (towards the back of the truck). This may me overkill but it makes me feel better.
As far as the rounded corners, I wasn't sure how that was going to work so I left some extra material on the side pieces to turn the corner with, just in case. It sounds like you used material from the back piece - I may do that instead. Either way, thanks for the additional info.
I wanted to ask you about that piece of angle iron you used to mount the plastic factory sill plate. Did you weld that to the face of the 2x4 and blend it or is it flush with the face of the 2x4 somehow?
Thanks,
-Tim
09-13-2005, 04:43 AM
#10
Contributing Member
Thread Starter
Join Date: Feb 2003
Location: CT
Posts: 613
Likes: 0
Received 0 Likes
on
0 Posts
Originally Posted by FilthyRich
Make sure the exhaust cut out is at least 4". This way you won't have any issues when the tail pipe flexes.
Make sure you have adequate clearance from the top of the bumper to the bottom of the body.
Lookin' good
Make sure you have adequate clearance from the top of the bumper to the bottom of the body.
Lookin' good
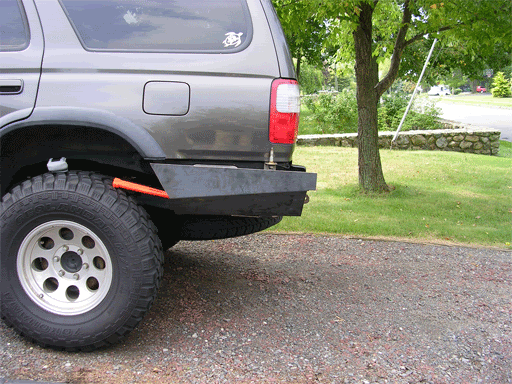
The exhaust hole is a 4"er and so far I've got a 1" minimum gap between the body and the bumper
 09-13-2005, 06:04 PM
#13
Contributing Member
Join Date: Nov 2003
Posts: 2,315
Likes: 0
Received 0 Likes
on
0 Posts
Originally Posted by TStango
I'd like to attach at two more points through the side of the frame just behind the body mount bracket (towards the back of the truck). This may me overkill but it makes me feel better.
I wanted to ask you about that piece of angle iron you used to mount the plastic factory sill plate. Did you weld that to the face of the 2x4 and blend it or is it flush with the face of the 2x4 somehow?
Thanks,
-Tim
I wanted to ask you about that piece of angle iron you used to mount the plastic factory sill plate. Did you weld that to the face of the 2x4 and blend it or is it flush with the face of the 2x4 somehow?
Thanks,
-Tim
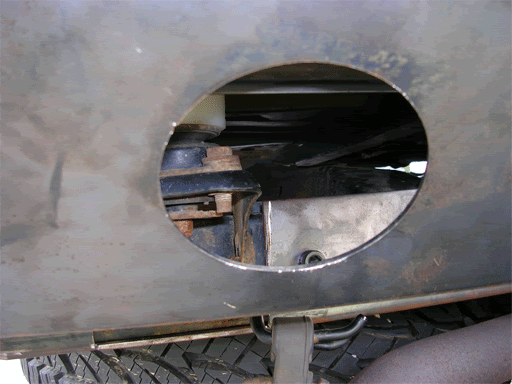
As for the square holes, I measured the spacing from the stock bumper drilled, then took a file to square them off. I made them the same size as the stock bumper, but didn't add the curve. The plastic will flex enough to take the slight curve out.
I used a piece of 1" angle iron and welded it flush with the face of the 2 x 4, this gives me a gap behind the bumper to slip the cotter pins in place to hold the plastic shroud on. If you need a few photo's for reference, I can supply them to you. I'll also look for a few photos showing some of the other stages of my build-up.
09-14-2005, 04:06 AM
#14
Contributing Member
Thread Starter
Join Date: Feb 2003
Location: CT
Posts: 613
Likes: 0
Received 0 Likes
on
0 Posts
Originally Posted by BruceTS
I used a piece of 1" angle iron and welded it flush with the face of the 2 x 4, this gives me a gap behind the bumper to slip the cotter pins in place to hold the plastic shroud on. If you need a few photo's for reference, I can supply them to you. I'll also look for a few photos showing some of the other stages of my build-up.
09-14-2005, 08:02 PM
#16
Just thinking out loud here but why plate up by the spare tire?  Seems like plating up the sides by the spare tire would just make a big enclosed "pit" for crap to gunk up in underneath and rot the tire and rust the metal?
It looks good so far!

Seems like plating up the sides by the spare tire would just make a big enclosed "pit" for crap to gunk up in underneath and rot the tire and rust the metal? It looks good so far!
09-14-2005, 11:07 PM
#17
Contributing Member
Join Date: Nov 2003
Posts: 2,315
Likes: 0
Received 0 Likes
on
0 Posts
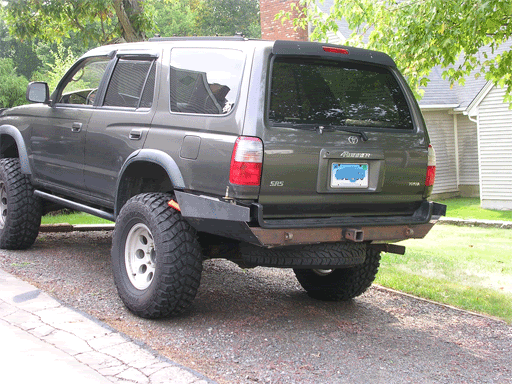
waskillywabbit it makes a great skid plate, but mostly to give strength, since I use mine to tow a boat. I don't have any problem with gunk clogging up on the plate, but I usually hose off things after a run. I have a 1" hole drilled in the channel to drain any water from the inside of the frame rails. If you powder coat or use the spray on bedliner paint, rust isn't an issue. TStango, I'll post some photo's next week, I heading for the Rubicon friday morning, so I've been busy getting ready.
As for how strong the bumper is, here's a shot after bouncing off the rocks. The damage just below the tail light lens has a clear coat of paint on it. That happend last year going up sledge hammer. All the new scrapes was from claw hammer this year. I've banged it hard against the rocks and zero body damage has occured due to the bumper flexing into the body. There's a 1" gap that is hidden by the weatherstripping that also cushions the impact....

As for how strong the bumper is, here's a shot after bouncing off the rocks. The damage just below the tail light lens has a clear coat of paint on it. That happend last year going up sledge hammer. All the new scrapes was from claw hammer this year. I've banged it hard against the rocks and zero body damage has occured due to the bumper flexing into the body. There's a 1" gap that is hidden by the weatherstripping that also cushions the impact....
09-17-2005, 04:10 PM
#19
Contributing Member
Thread Starter
Join Date: Feb 2003
Location: CT
Posts: 613
Likes: 0
Received 0 Likes
on
0 Posts
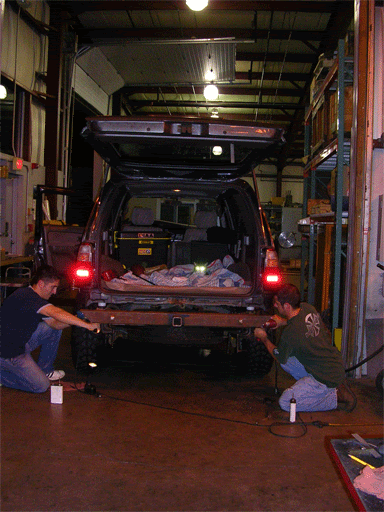
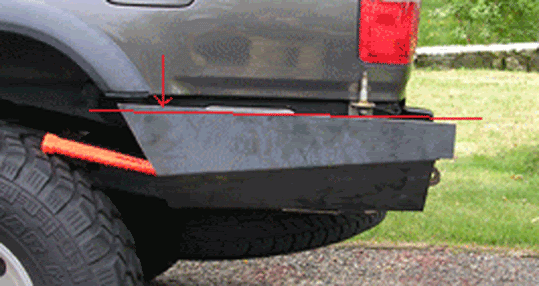
Here are some more pictures...
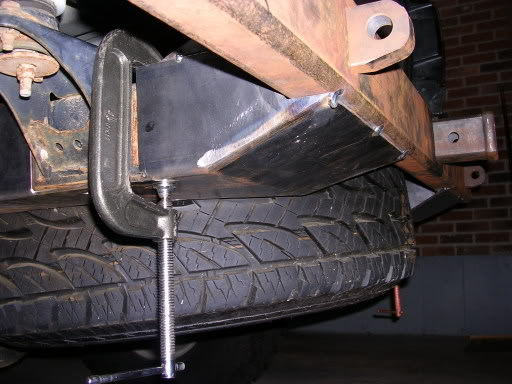
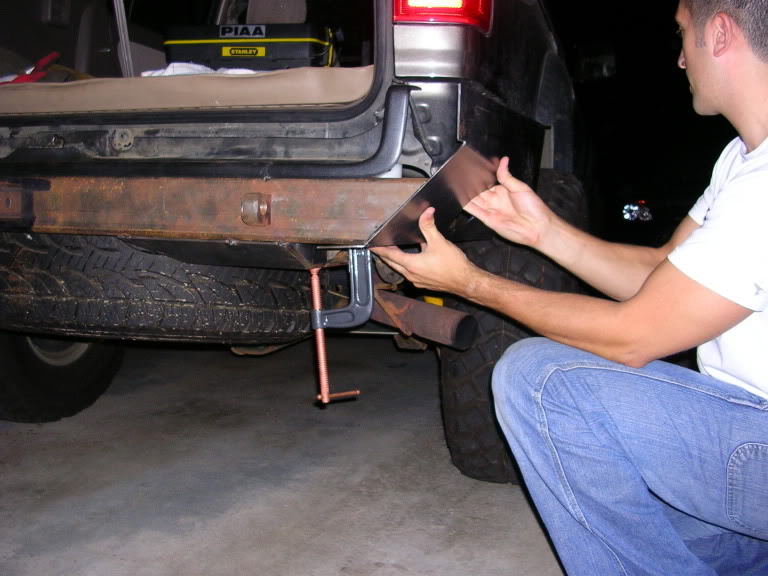
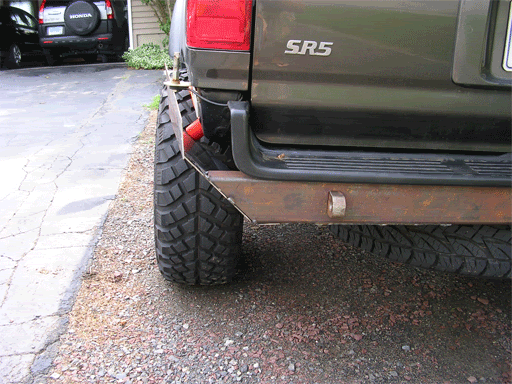
We tacked on the side pieces the other night and things are starting to take shape.
I also found that some adjustments are needed. The hole for the exhaust was not planned very carefully and seems to be too close to the body and the body mount. I think I'm going to have to patch it up and come up with another plan. I'm wondering if Bruce had to trim the body seam for clearance.
I could possibly move it forward but I don't know if it can be done cleanly and I still don't know if there's enough clearance.
The other adjustment that is needed is to the top edge of the side pieces. The spacing between it and the body is pitched at an angle. I should be able to trim it down as shown in the picture.
I also want to form a piece to allow room to mount the firestick to the bumper. I'm thinking something shaped like this \|_|/ at the top edge of the driverside side piece.


