Mikeys bumper build-off
 12-29-2004, 03:28 PM
#1
Registered User
Thread Starter
Join Date: Nov 2003
Location: Wilmington, NC
Posts: 105
Likes: 0
Received 0 Likes
on
0 Posts
Took a week off of work to concentrate on making a couple of custom bumpers. This is one for the 3rd gen PU
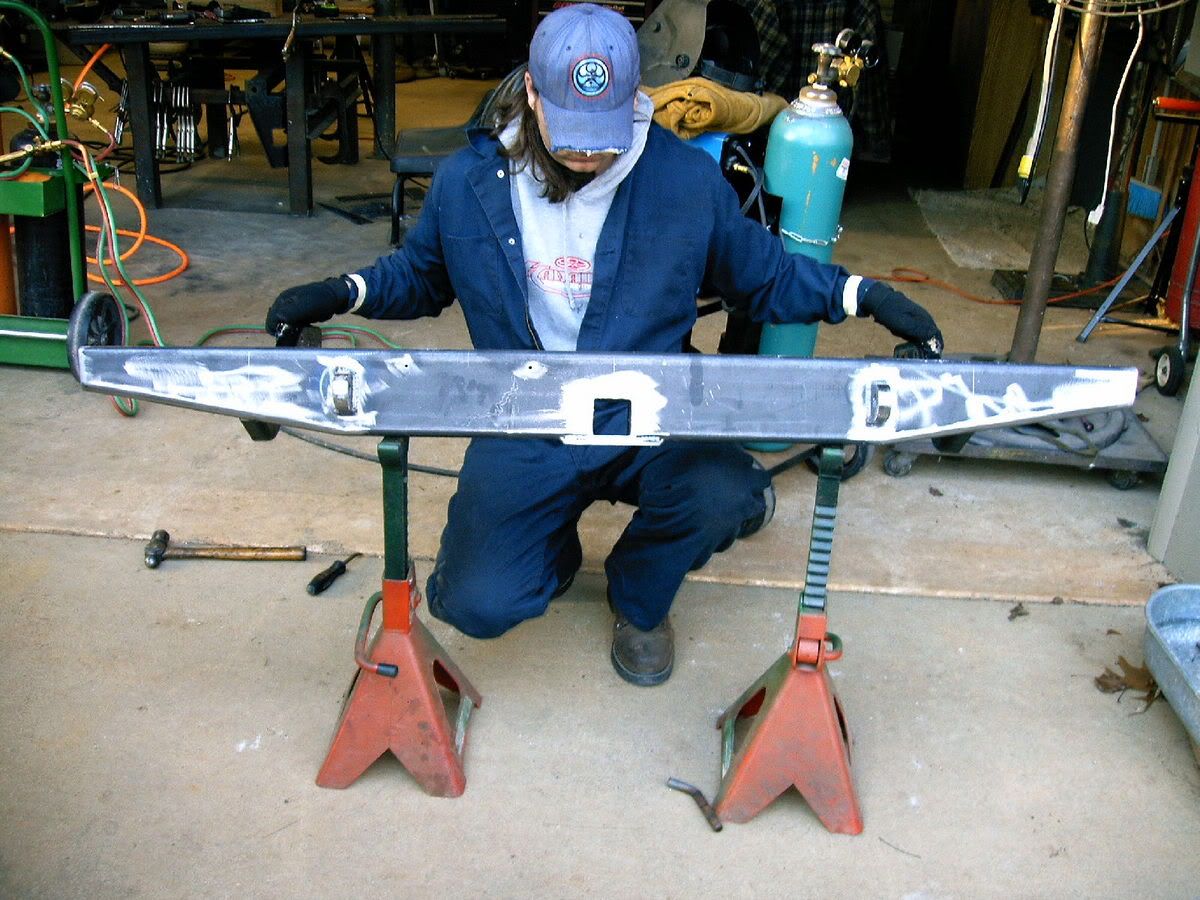
What do you think?
What do you think?
 12-29-2004, 03:31 PM
#2
Contributing Member
Join Date: Apr 2004
Location: Parker, CO
Posts: 942
Likes: 0
Received 0 Likes
on
0 Posts
nice but would probably look better with some paint, J/K. simple and practicle i like it. the only Q i have is license plat location are you going to move it or is there a bracket on the bumper?
edit: just saw it that big silver light threw me off and the two holes. :pat:
edit: just saw it that big silver light threw me off and the two holes. :pat:
Last edited by RED 85; 12-29-2004 at 03:33 PM.
12-29-2004, 03:35 PM
#3
Registered User
Thread Starter
Join Date: Nov 2003
Location: Wilmington, NC
Posts: 105
Likes: 0
Received 0 Likes
on
0 Posts
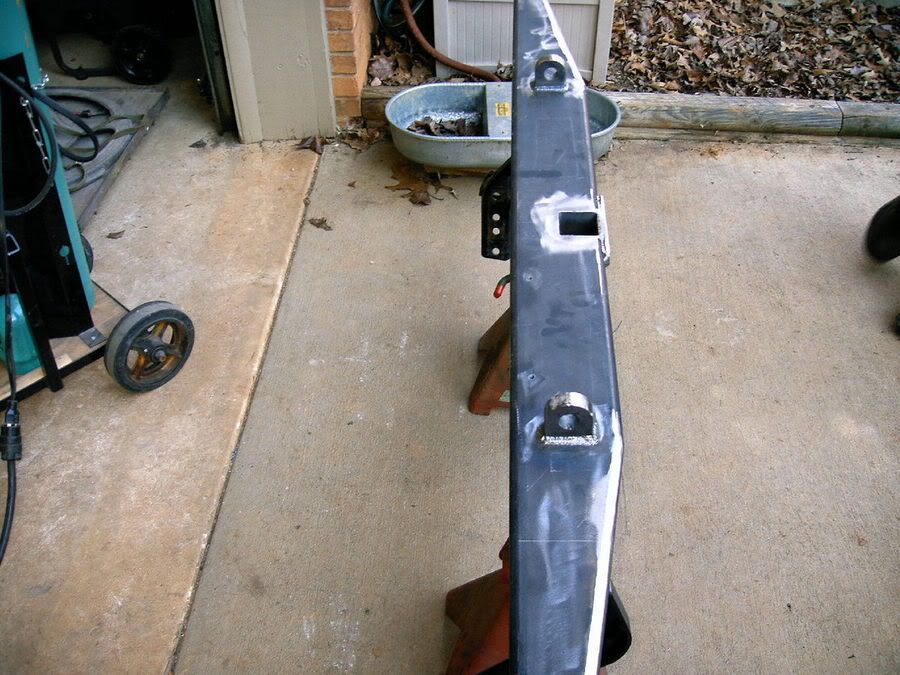
And here is the one for a First Gen 4runner
This is actually Seafleas new rear bumper
Well, the beginning of it at least!
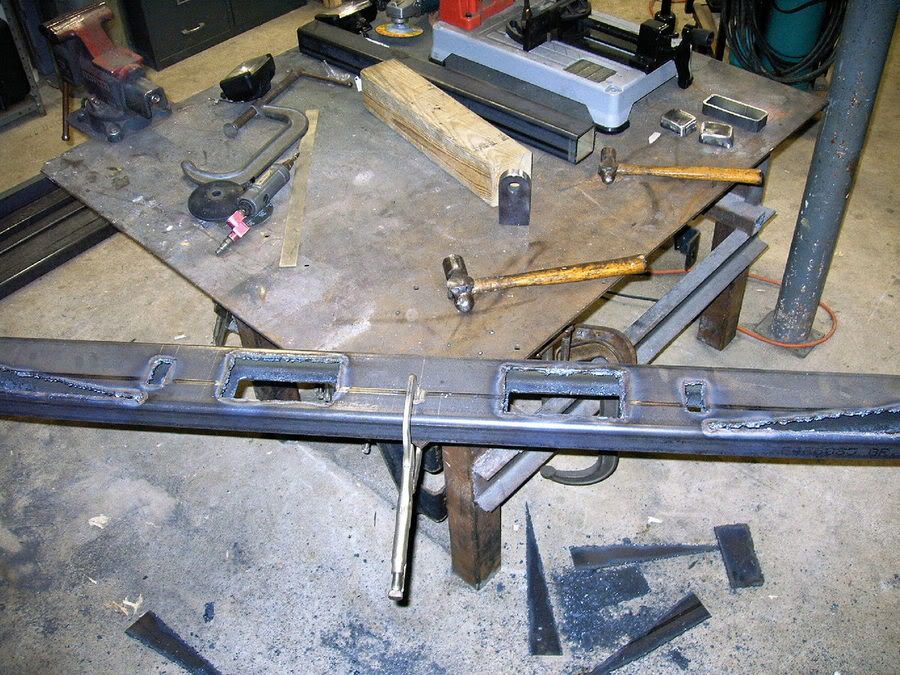
He still has a lot of grinding to do before it is ready to be welded.
the 2 large holes in there are for the high output backup blinders!
On the table you can see the Clevise mounts that we are welding Through the the bumper to add more strength
I will post more pics tomorrow when the bumper is closer to being finished.
Well, the beginning of it at least!
He still has a lot of grinding to do before it is ready to be welded.
the 2 large holes in there are for the high output backup blinders!
On the table you can see the Clevise mounts that we are welding Through the the bumper to add more strength
I will post more pics tomorrow when the bumper is closer to being finished.
12-29-2004, 03:41 PM
#4
Registered User
Thread Starter
Join Date: Nov 2003
Location: Wilmington, NC
Posts: 105
Likes: 0
Received 0 Likes
on
0 Posts
Originally Posted by RED 85
nice but would probably look better with some paint, J/K. simple and practicle i like it. the only Q i have is license plat location are you going to move it or is there a bracket on the bumper?
edit: just saw it that big silver light threw me off and the two holes. :pat:
edit: just saw it that big silver light threw me off and the two holes. :pat:
A $1.50 can of krylon is to expensive at this point with floating the metal for 4 bumpers.
12-29-2004, 03:46 PM
#5
Contributing Member
Join Date: Apr 2004
Location: Parker, CO
Posts: 942
Likes: 0
Received 0 Likes
on
0 Posts
Originally Posted by Mikeys87
The price of the metal broke me, so i'll just have to redneck it for a bit till i can get it powered coated. A $1.50 can of krylon is to expensive at this point with floating the metal for 4 bumpers.
A $1.50 can of krylon is to expensive at this point with floating the metal for 4 bumpers.
Trending Topics
12-29-2004, 04:11 PM
#8
Registered User
Join Date: Jul 2003
Location: Concord, NC
Posts: 500
Likes: 0
Received 0 Likes
on
0 Posts
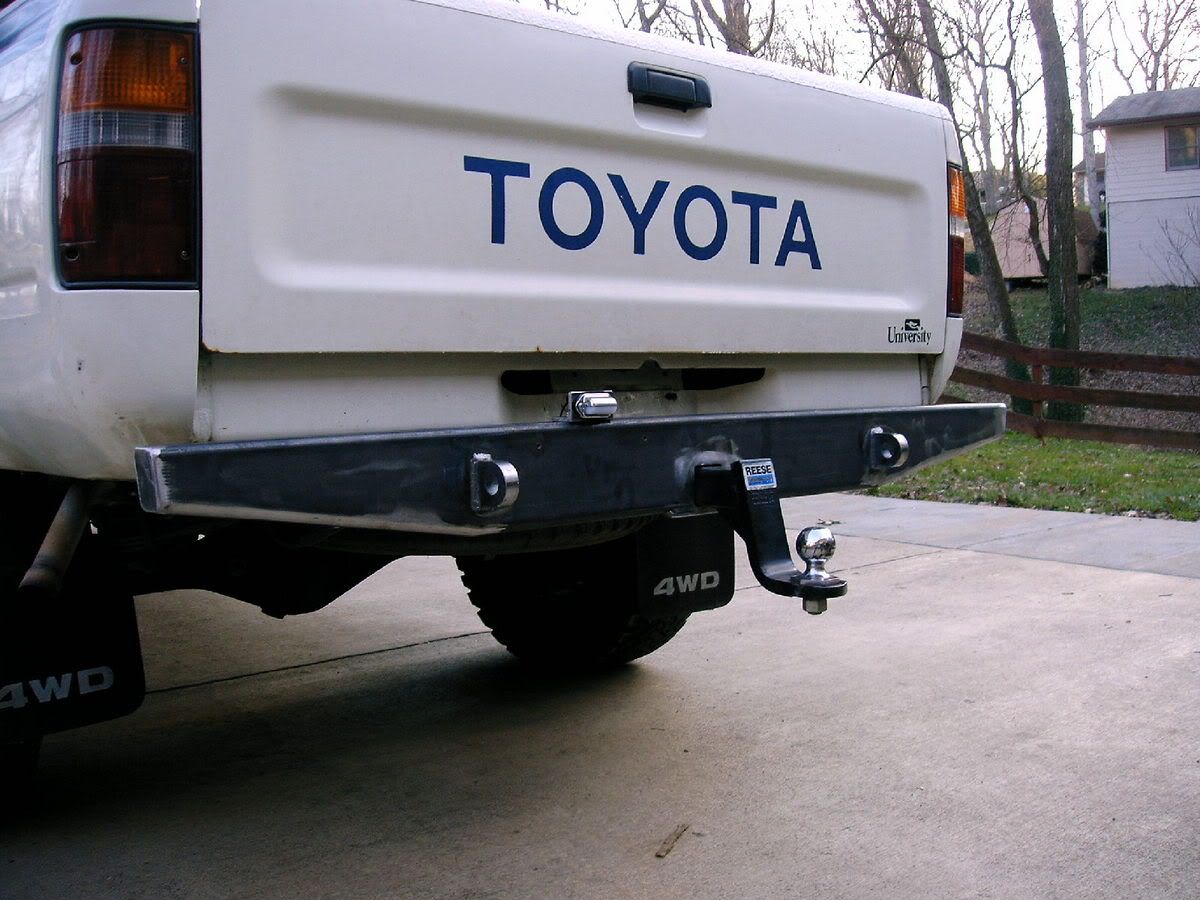
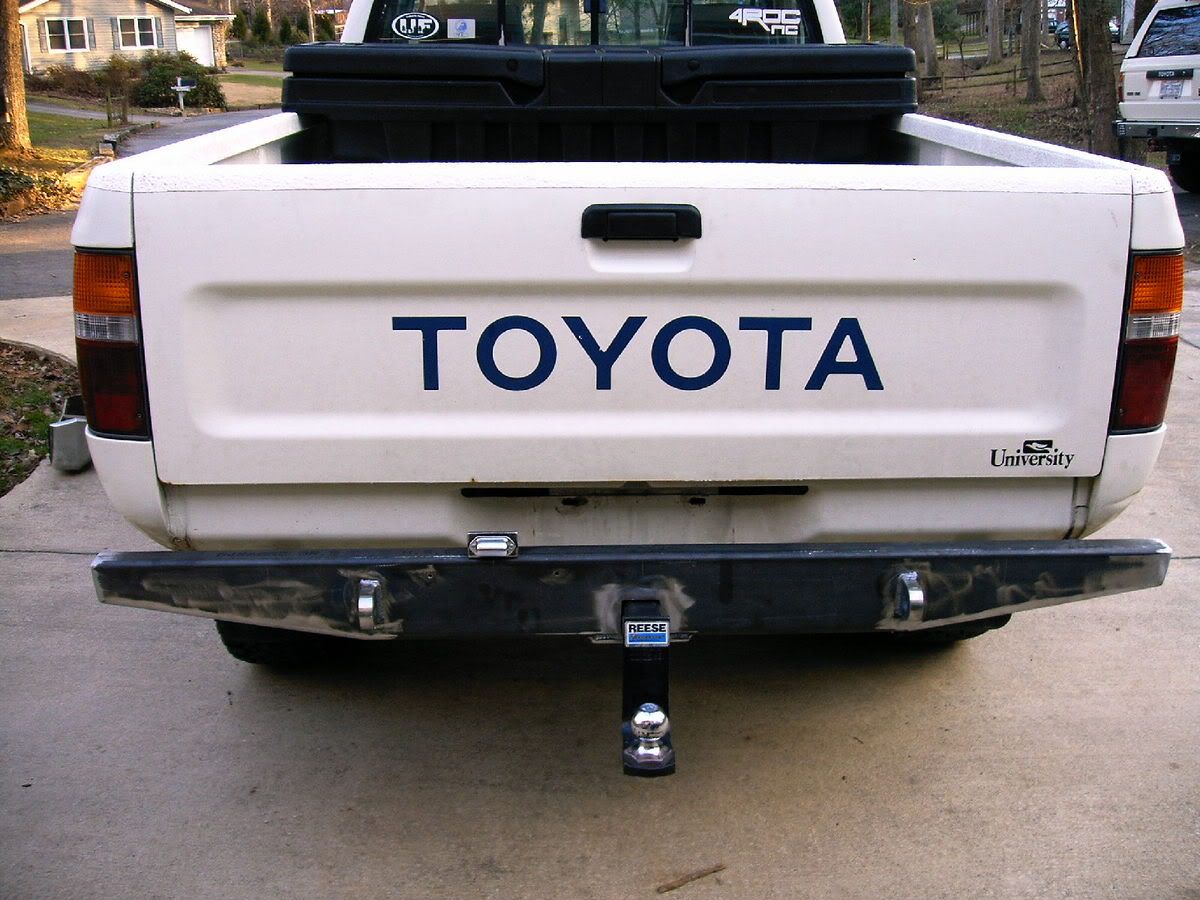
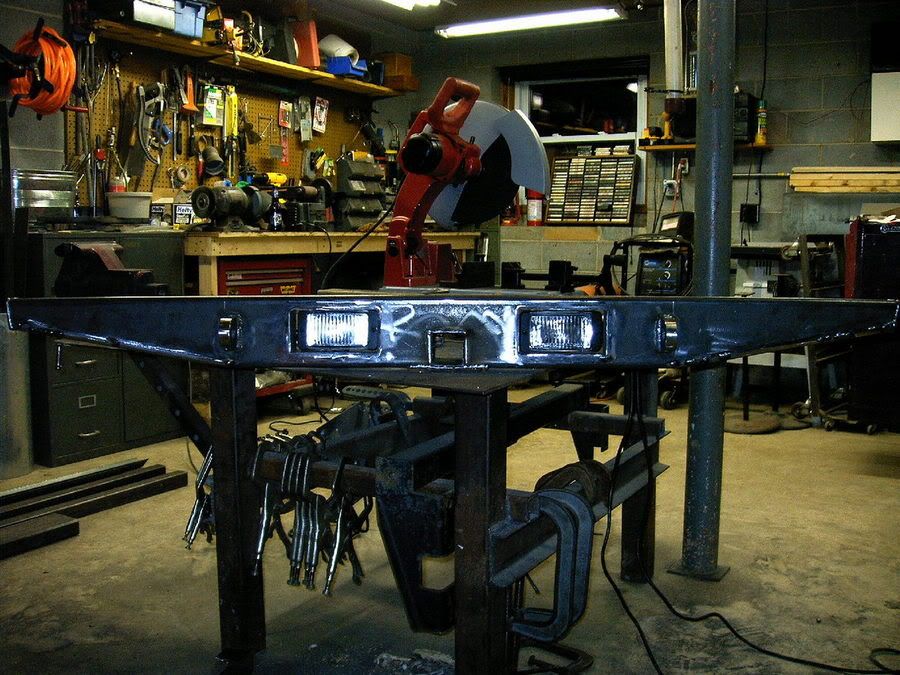
Looks great! Thats exactly what I had in mind. Did you use the original bumper brackets?
I like seaflea's backup blinders, but wont that make the bumper weak? Great work guys.
I like seaflea's backup blinders, but wont that make the bumper weak? Great work guys.
12-30-2004, 09:30 AM
#11
Registered User
Join Date: Nov 2004
Location: mission b.c.
Posts: 81
Likes: 0
Received 0 Likes
on
0 Posts
looks good..just curious why not s shape new brackets and lift the bumper up like 2.5-3"close up the gap between the gate and bumper,and gain for departure angle with it higher...
12-30-2004, 05:29 PM
#12
Banned
Join Date: Sep 2004
Location: JC, TN
Posts: 260
Likes: 0
Received 0 Likes
on
0 Posts
mikey i know where to get the metal to do bumpers dirt cheap get intouch with me and ill get the details to you, its not too far down the road for you its in erwin,tn about 30 min or so from asheville, but i spent like $10 for the peice to make my front
12-30-2004, 05:51 PM
#14
Registered User
Thread Starter
Join Date: Nov 2003
Location: Wilmington, NC
Posts: 105
Likes: 0
Received 0 Likes
on
0 Posts
will post some more pics in a min. Had a power glitch today and it screwed up my system and the mouse wouldnt work. Just got it going again.
12-30-2004, 06:08 PM
#15
Registered User
Thread Starter
Join Date: Nov 2003
Location: Wilmington, NC
Posts: 105
Likes: 0
Received 0 Likes
on
0 Posts
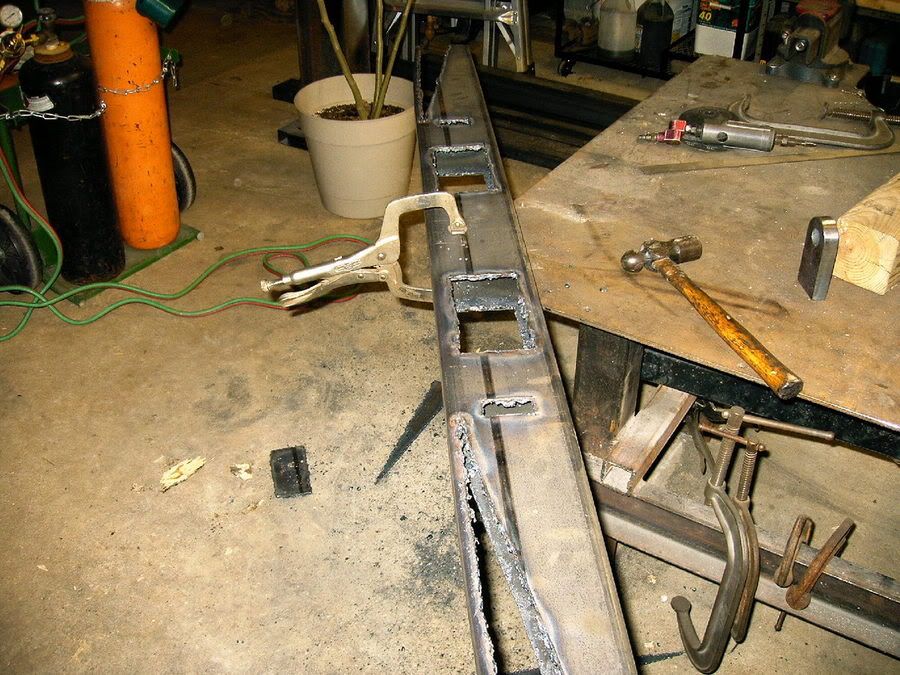
All boxed in and tacked togeghter, ready to be welded up soild. 
Backup lights from hell
This is just the main body of his bumper. Didnt have time to do the side pieces today, had to repalce all the coolant line on my runner after blowing a heater hose.
Backup lights from hell
This is just the main body of his bumper. Didnt have time to do the side pieces today, had to repalce all the coolant line on my runner after blowing a heater hose.
12-30-2004, 06:11 PM
#16
Registered User
Thread Starter
Join Date: Nov 2003
Location: Wilmington, NC
Posts: 105
Likes: 0
Received 0 Likes
on
0 Posts
Originally Posted by yeaitsme
looks good..just curious why not s shape new brackets and lift the bumper up like 2.5-3"close up the gap between the gate and bumper,and gain for departure angle with it higher...
Not enough room for s brackets, would have pushed the bumper out more away from the truck. The roll pan gets in the way, besides, it the wifes truck and this one doesnt see the hard off roading like my runner.
Just measured, the top of the bumper is 3.5 inchs below the bottom of the tailgate.
Last edited by Mikeys87; 12-30-2004 at 06:17 PM.
12-30-2004, 06:22 PM
#18
Contributing Member
Like Mike said there really was no concern for ground clearance with this bumper, so we mounted it in the same basic location as the stock bumper.
Mine, on the other hand will be tucked up nice and clean to the body
It may be a while before I get any pics of the final product on the rig as theree is a lot left to do and I have to go back to Wilmington tomorrow. Mike is going to finish it for me and either send it to me or bring it next time he come down.
12-30-2004, 06:28 PM
#19
Contributing Member
Lol
Originally Posted by waskillywabbit
Forget whether or not you can make nice bumpers...
I WANT YOUR SHOP and ALL THOSE FAB TOYS!

I WANT YOUR SHOP and ALL THOSE FAB TOYS!
NO
this shop is only half the size of his beach shop. He had to downsize!
 12-30-2004, 06:47 PM
#20
Originally Posted by seaflea
to Quote Mike:
NO
this shop is only half the size of his beach shop. He had to downsize!
NO
this shop is only half the size of his beach shop. He had to downsize!
Mike has a nice shop with lots of nice toys from the looks of all I see in those pics.
I'll post some pics of my friend Scott's shop where we are workking on my 85. It is pretty fab too.


