Manual to auto swap
 07-25-2008, 10:44 AM
#1
Registered User
Thread Starter
Join Date: Jul 2004
Location: Barcelona (Spain)
Posts: 917
Likes: 0
Received 0 Likes
on
0 Posts
Manual to auto swap
Hello,
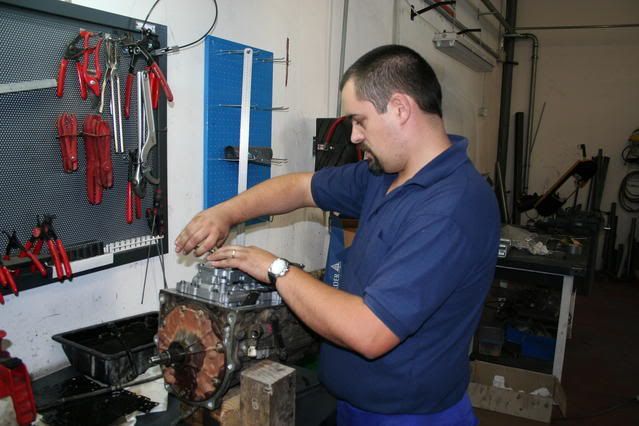
Just wanted to show you how we're working in the manual to auto swap.
Why auto? Because as my truck is not EFI I need a standalone computer to control the tranny, so I can configure it to my taste. Because if a 3.0 intercooled turbo diesel is cool, an auto 3.0 intercooled turbo diesel is way cooler!
I'm going to use a SupraStick computer to control the tranny, being able to choose between two automatic modes and a full manual mode with overrev protection.
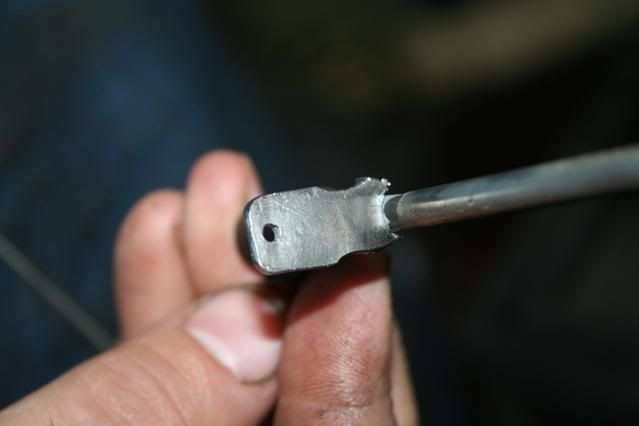
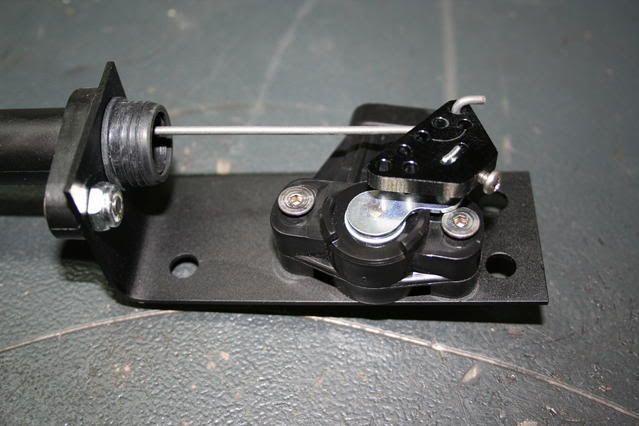
As I've a Momo steering wheel I'm going to buy a thing like this to have shift controls in the steering wheel:


Also I can put a simple 16x4 display and monitor the speed, the RPM, the TPS and gear engaged.

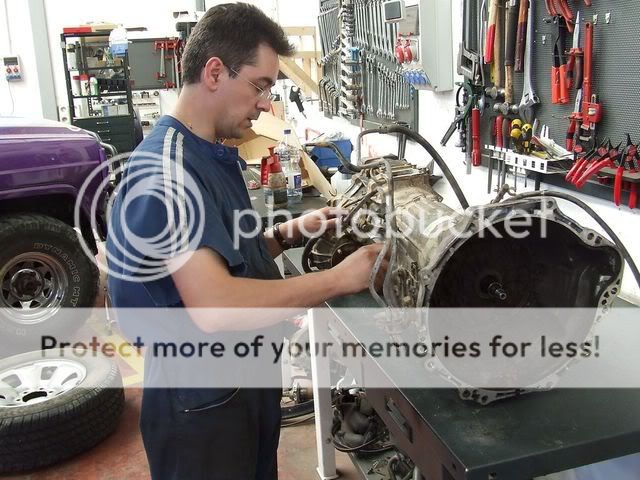
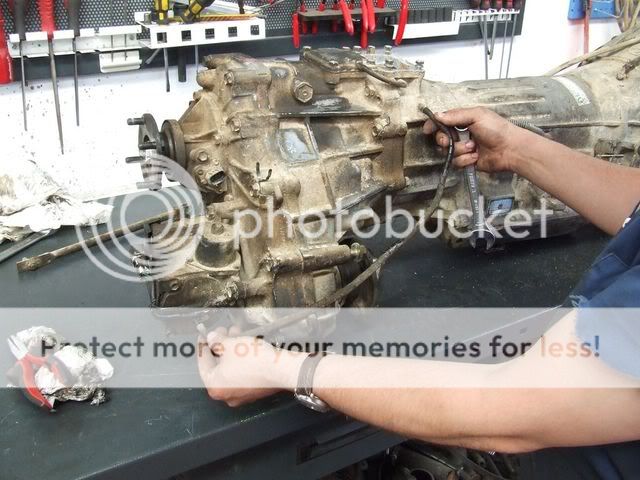
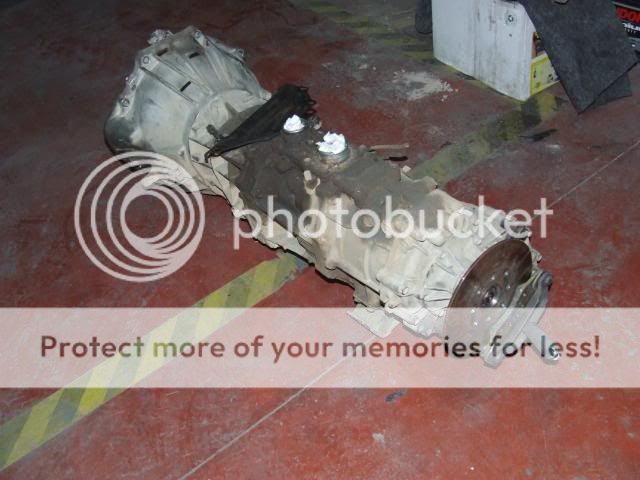
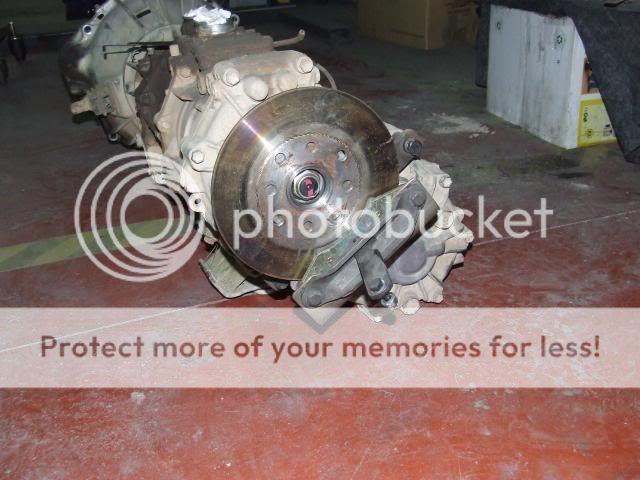
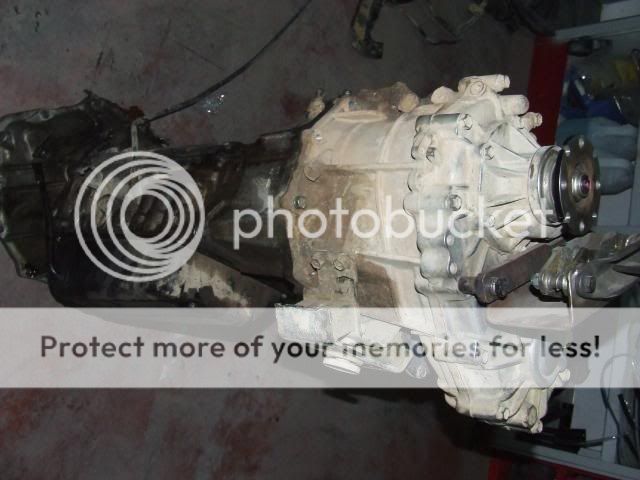
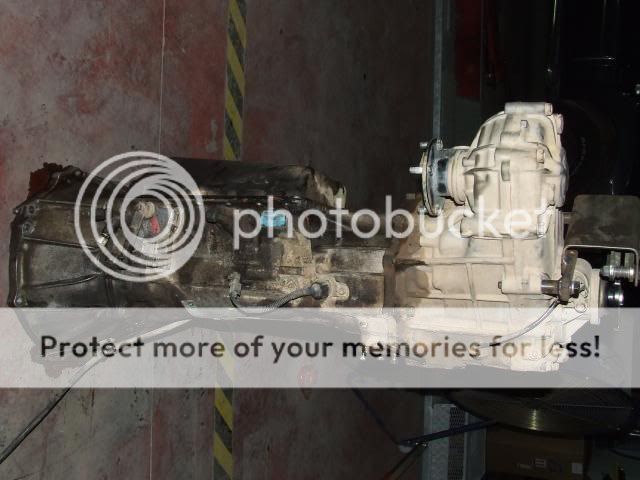
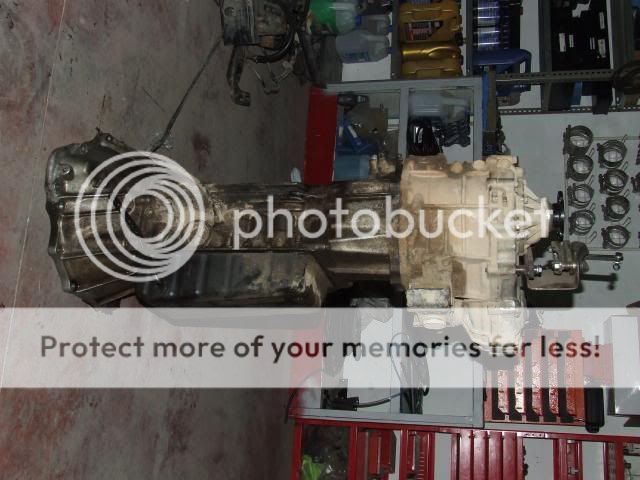
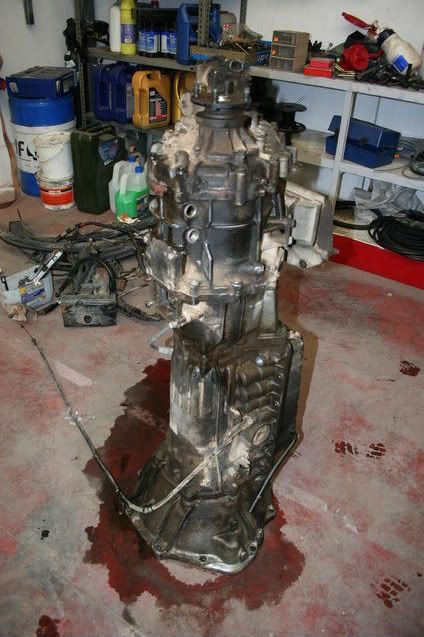
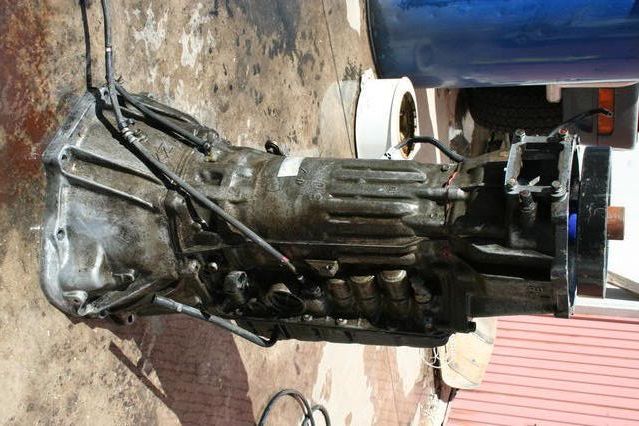
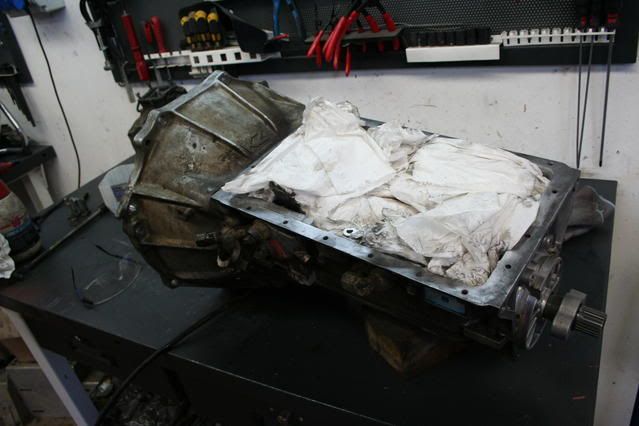
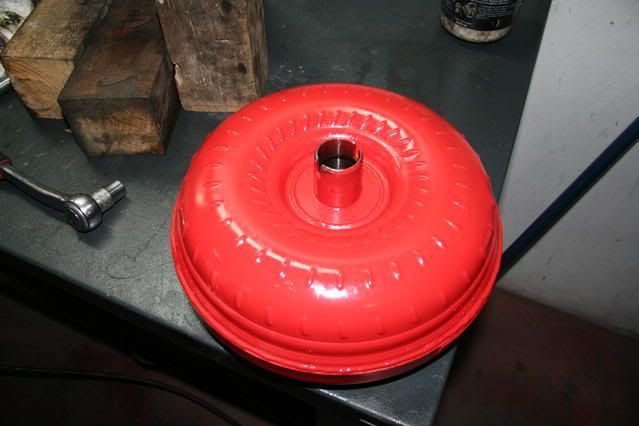
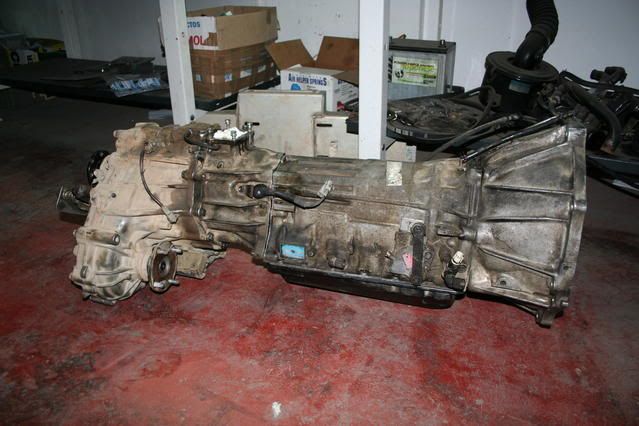
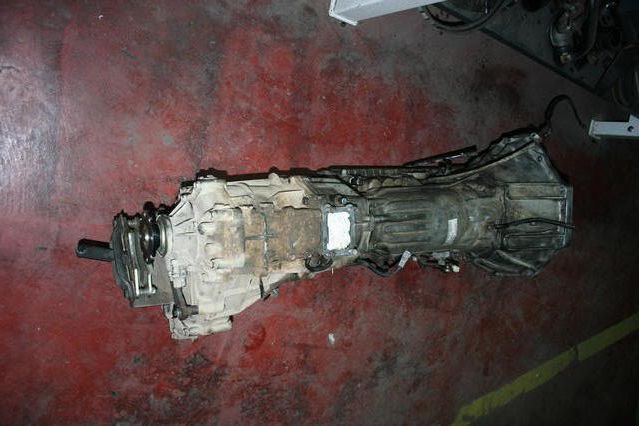
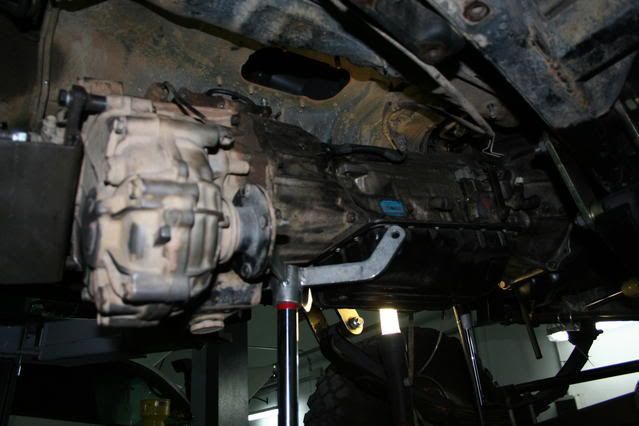
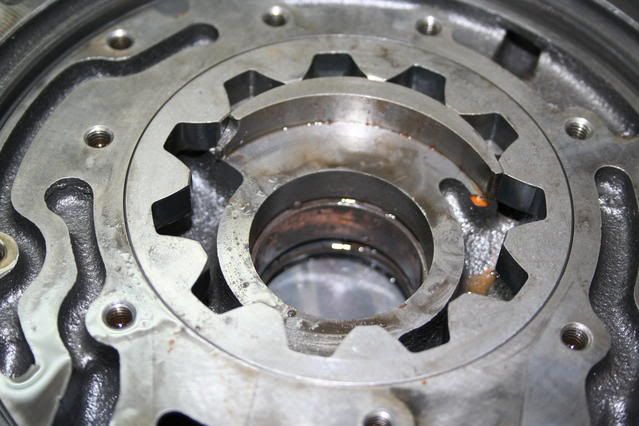
This is an A343F auto tranny out from a 3.0TD Hilux Surf. Also got the TC, flywheel, bellhousing and shifter.
The A343F it's almost identical to the A340F, I think the only difference is some gear ratio.
Nice thing of being a "F" series is that the tranny isn't a part of the tranny like in the A340H's you've in the States. This means it has a standard V6 pattern so I can put my chain driven T-Case or put duals in a future.
Have you seen the fancy customized short sleeve coveralls my friend has?
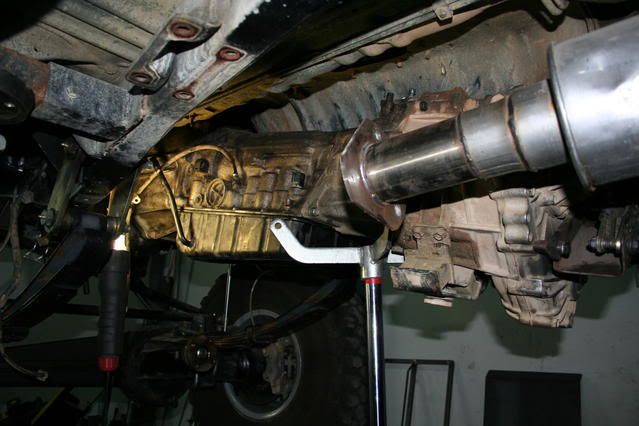
The T-Case it's almost identical to the chain driven ones on the R150F manual trucks, but we're going to use mine instead of this because this is an electric actuated one and the motor would interfer with my parking disc brake. Also less electrics, less problems. Nice thing of those electric transfers is that you can have a "dual shifter" with only a switch.
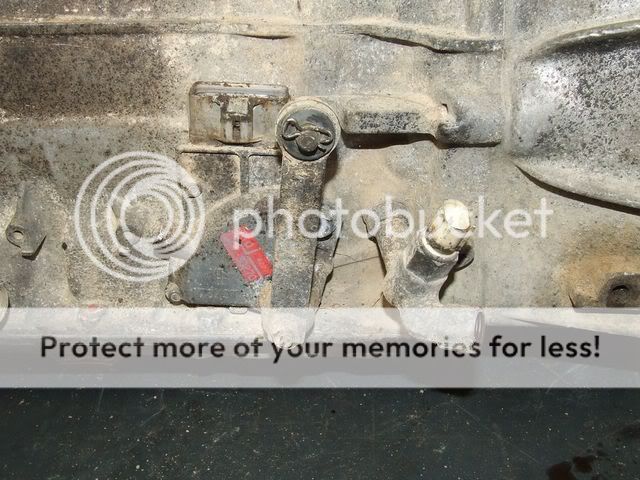
This is the shifter linkage
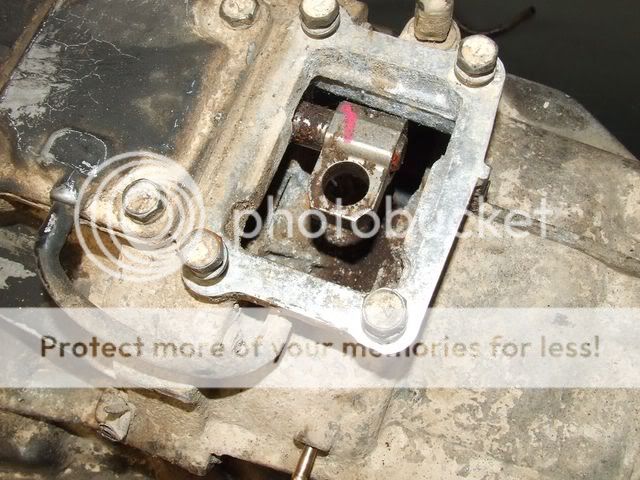
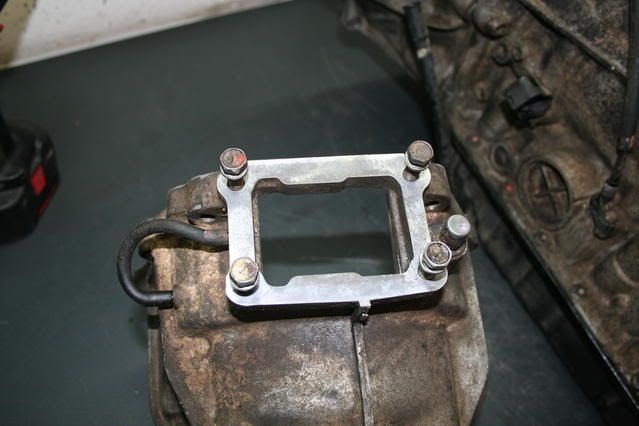
T-Case actuator. Only has one rail for controlling the ratio.
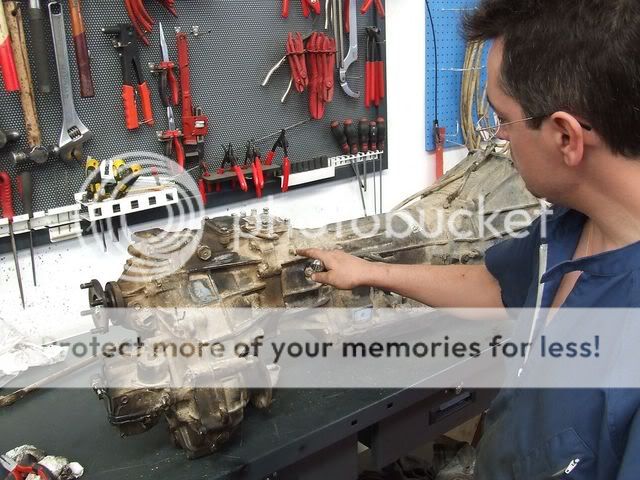
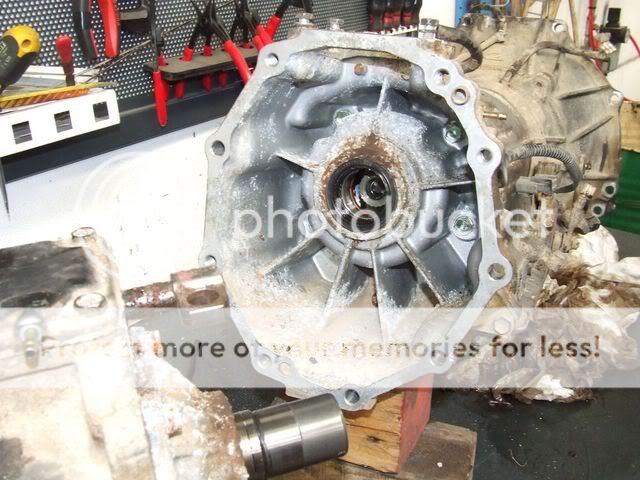
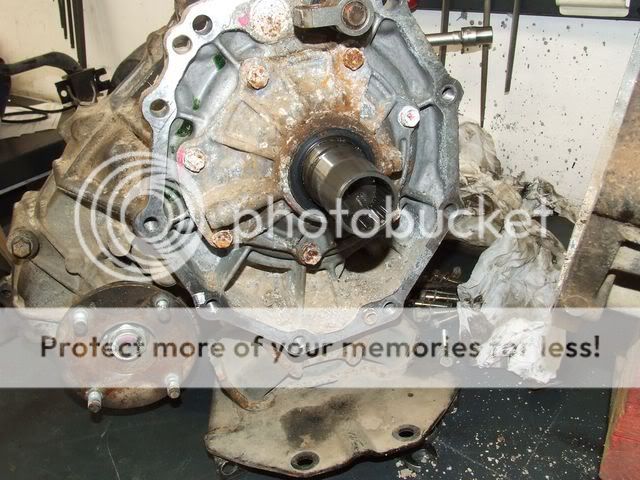
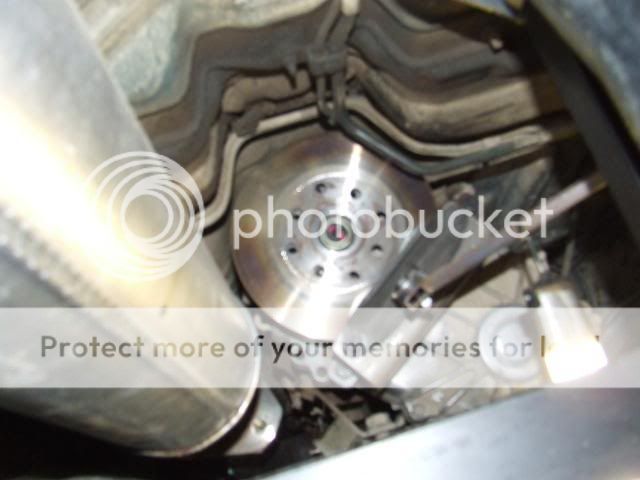
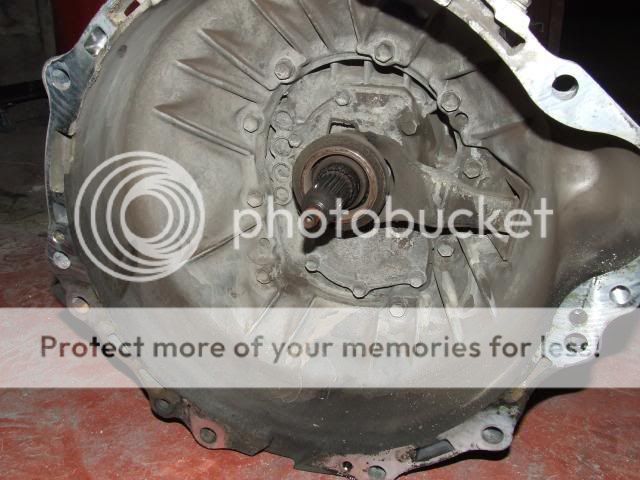
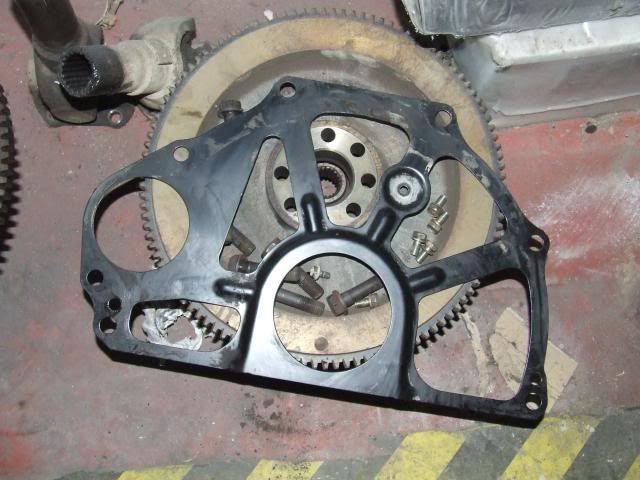
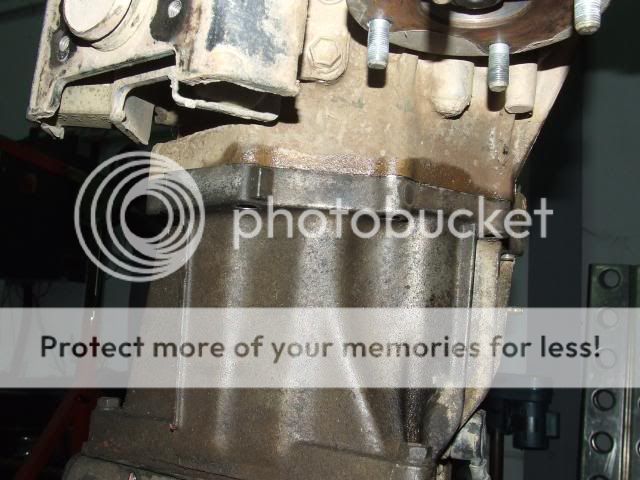
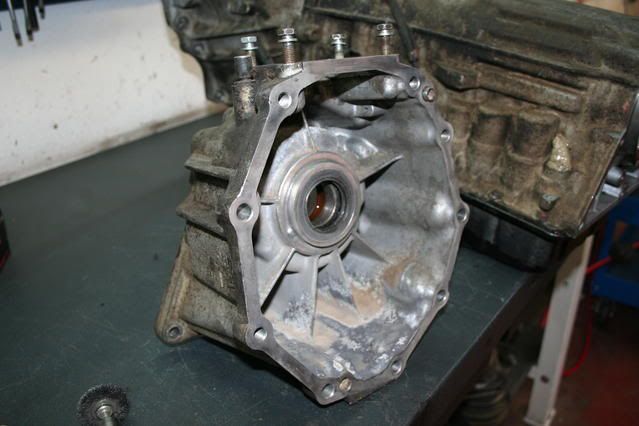
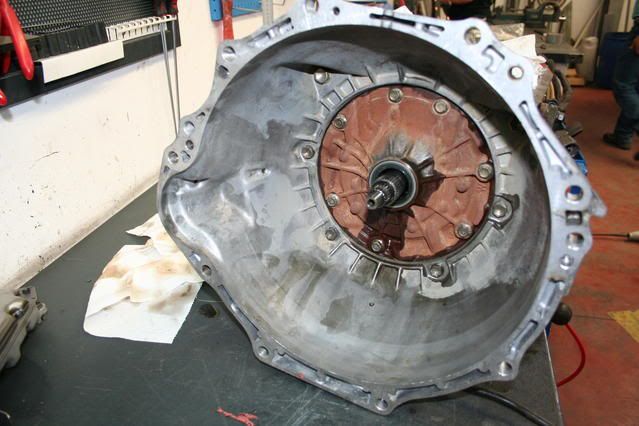
Bellhousing

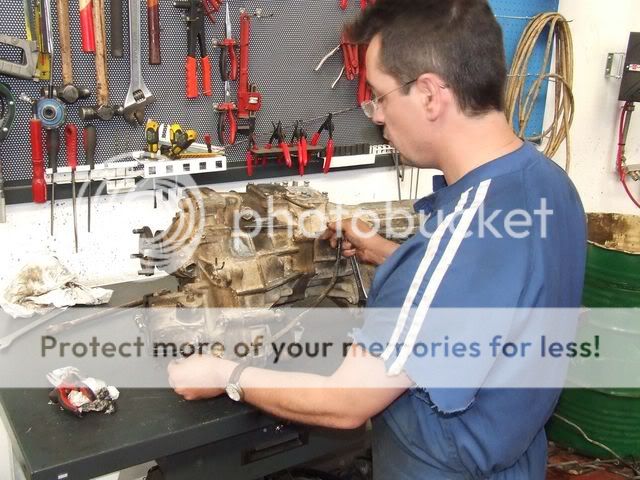
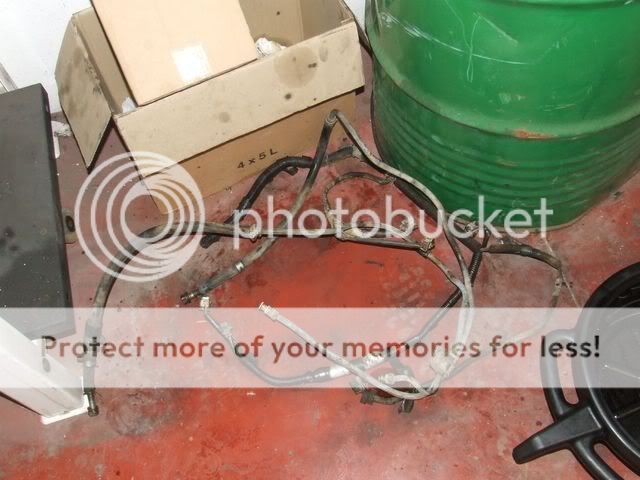
Parts we are not using. The throttle cable and cooler tubes. I'll use a big cooler in front of the radiator and will be blocking the throttle cable in WOT position to have the tranny pressure always high. Will make a little noise when idling and will require a bit more brake pedal in the red lights but will make quickier shifts (Cooler ATF, more reliable tranny).
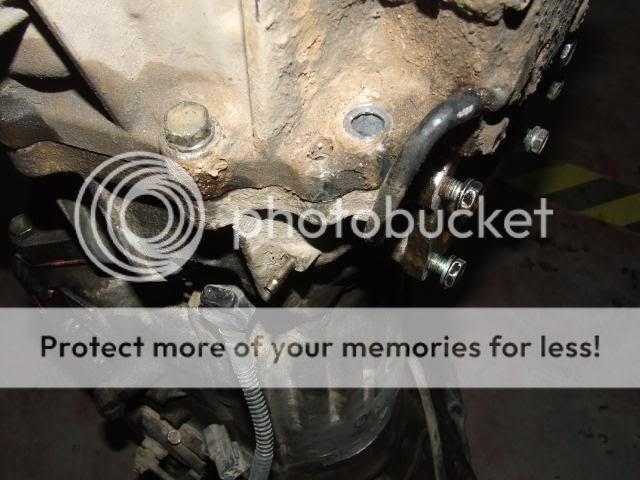
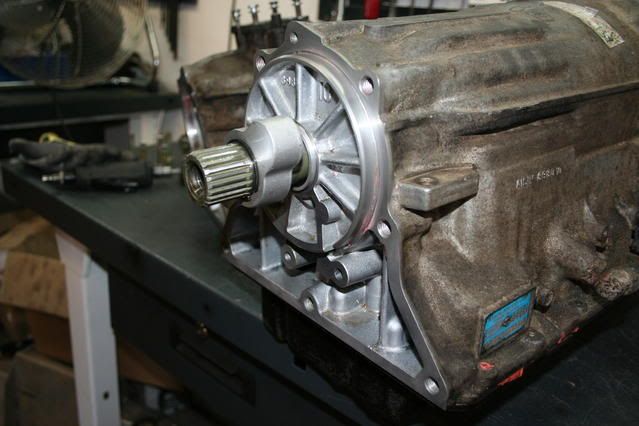
T-Case and tranny coupling
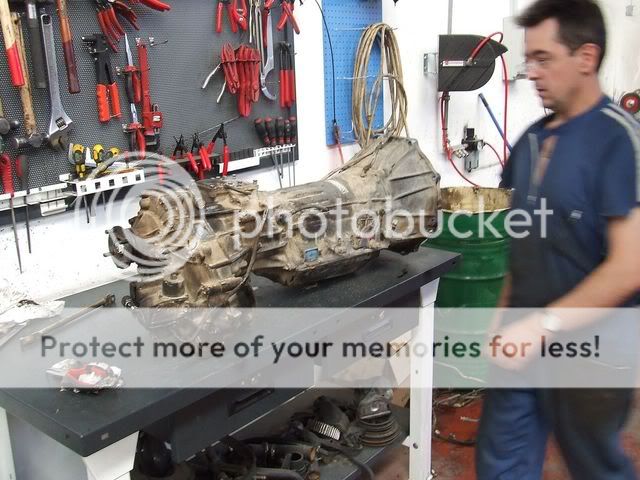
The electric tranny we're discarting
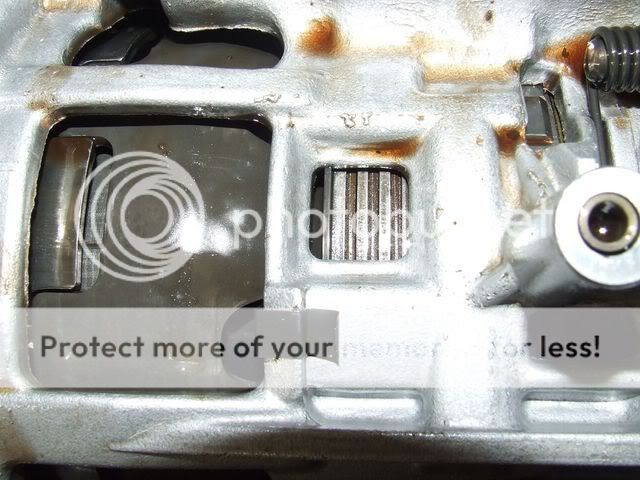
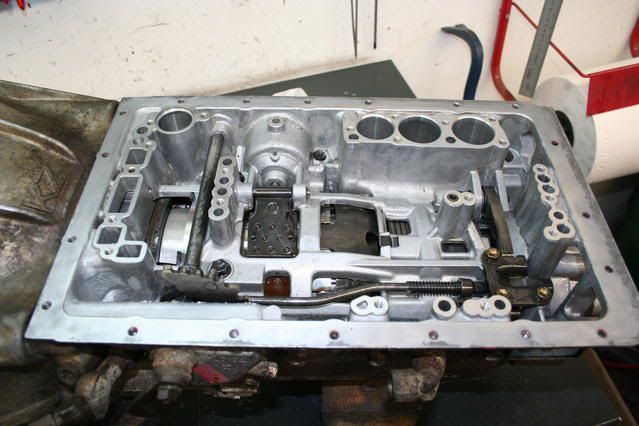
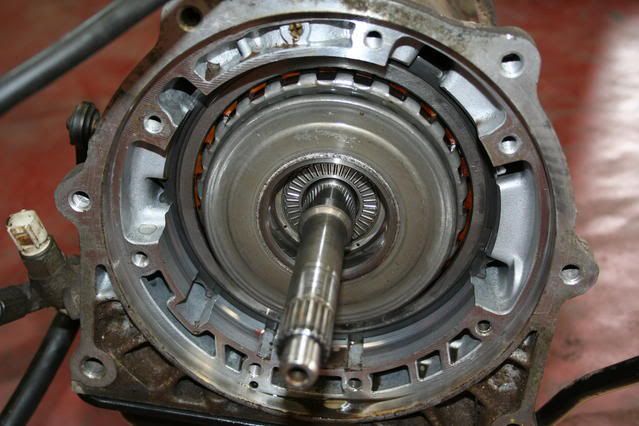
Pulling the tranny pan you find the filter
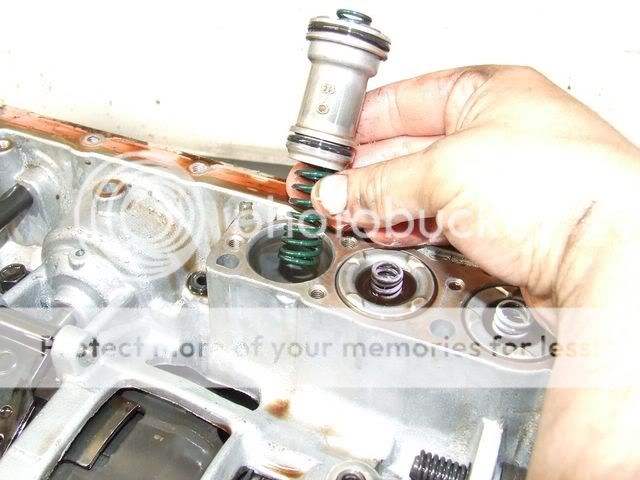
Pulling the filter you can see the valve body and the solenoids. Two for the shifts and one for the TC lock-up.
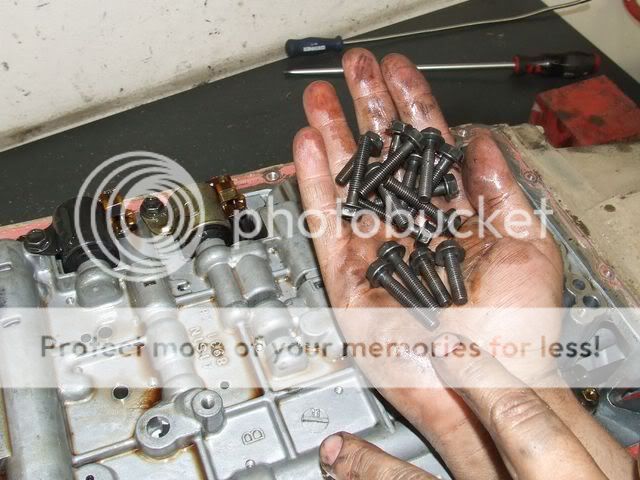
Lots of bolts!
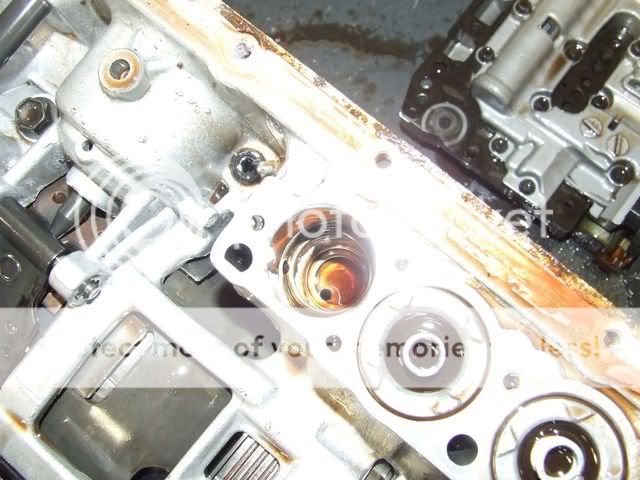
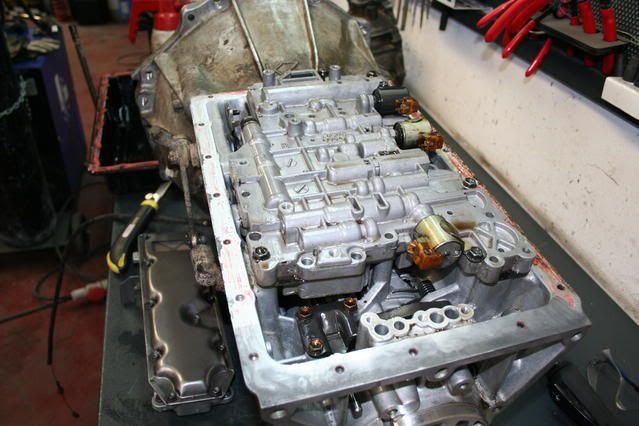
This is the valve controlling the tranny pressure IIRC.

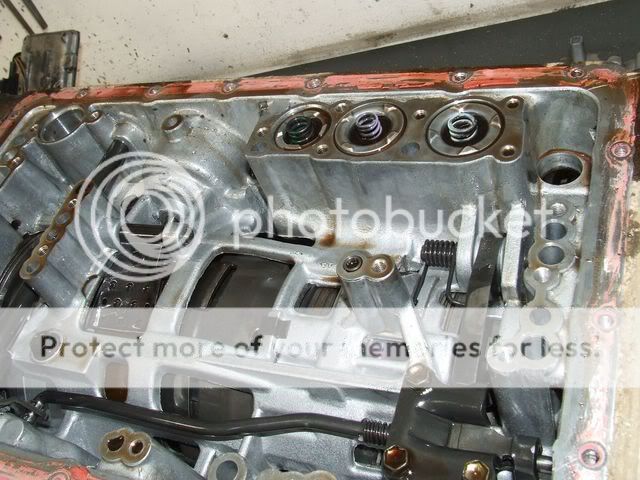
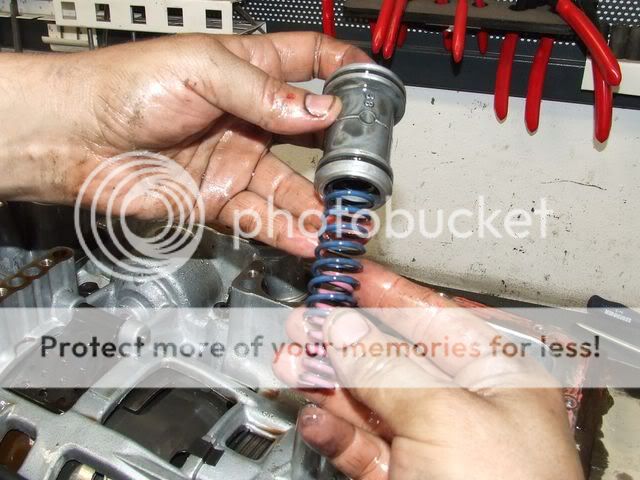
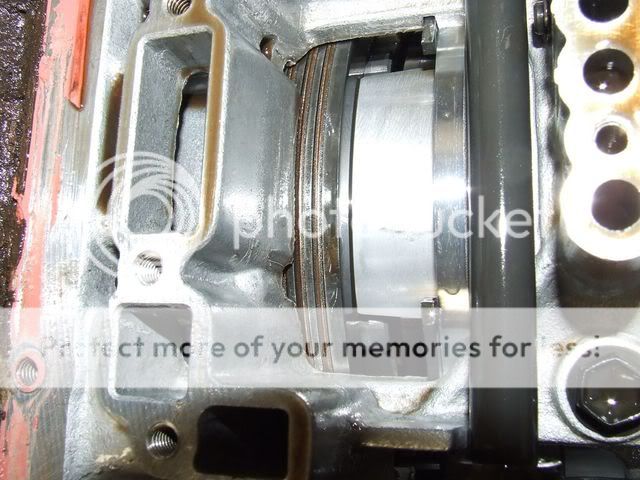
Those are the shifting accumulators. From left to right the 1-2, the 2-3 and the 3-O/D.
In the 1-2 and 2-3 accumulators we're going to do a mod the Supra guys developed. It consists of shimming the little springs so more pressure is achieved. This makes the shifting quickier and harder. The Supra guys had excelent results with this mod and they've engines developing +450HP...
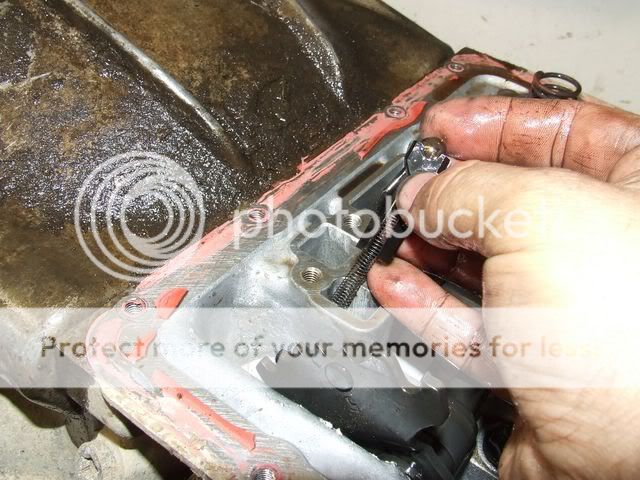
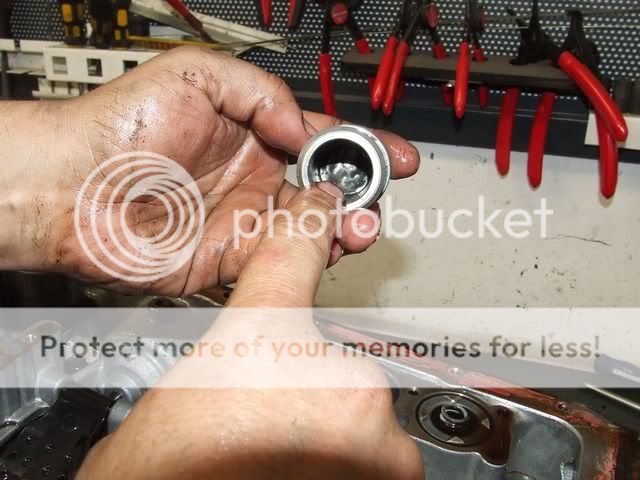
Here is where the shim goes
This accumulator will remain stock as the shifts you want quicker and more used are the 1-2 and 2-3.
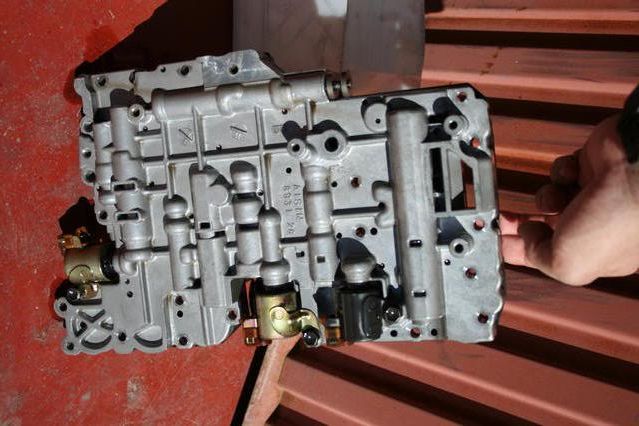
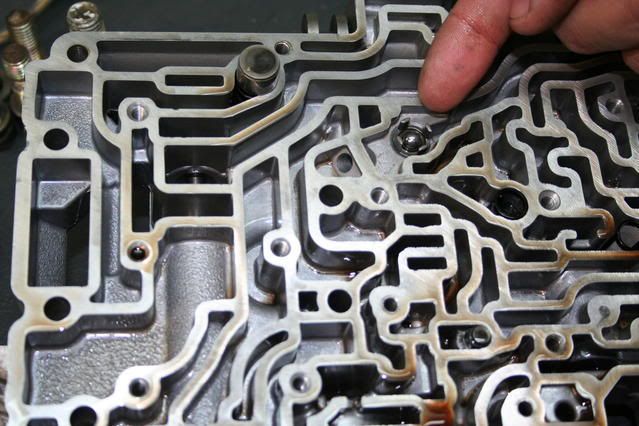
Valve body detail.
This is the shifter rail
Hope you like it.
I'm going to order the tranny cooler and the SupraStick.
David
Just wanted to show you how we're working in the manual to auto swap.
Why auto? Because as my truck is not EFI I need a standalone computer to control the tranny, so I can configure it to my taste. Because if a 3.0 intercooled turbo diesel is cool, an auto 3.0 intercooled turbo diesel is way cooler!
I'm going to use a SupraStick computer to control the tranny, being able to choose between two automatic modes and a full manual mode with overrev protection.
As I've a Momo steering wheel I'm going to buy a thing like this to have shift controls in the steering wheel:
Also I can put a simple 16x4 display and monitor the speed, the RPM, the TPS and gear engaged.
This is an A343F auto tranny out from a 3.0TD Hilux Surf. Also got the TC, flywheel, bellhousing and shifter.
The A343F it's almost identical to the A340F, I think the only difference is some gear ratio.
Nice thing of being a "F" series is that the tranny isn't a part of the tranny like in the A340H's you've in the States. This means it has a standard V6 pattern so I can put my chain driven T-Case or put duals in a future.
Have you seen the fancy customized short sleeve coveralls my friend has?
The T-Case it's almost identical to the chain driven ones on the R150F manual trucks, but we're going to use mine instead of this because this is an electric actuated one and the motor would interfer with my parking disc brake. Also less electrics, less problems. Nice thing of those electric transfers is that you can have a "dual shifter" with only a switch.
This is the shifter linkage
T-Case actuator. Only has one rail for controlling the ratio.
Bellhousing
Parts we are not using. The throttle cable and cooler tubes. I'll use a big cooler in front of the radiator and will be blocking the throttle cable in WOT position to have the tranny pressure always high. Will make a little noise when idling and will require a bit more brake pedal in the red lights but will make quickier shifts (Cooler ATF, more reliable tranny).
T-Case and tranny coupling
The electric tranny we're discarting
Pulling the tranny pan you find the filter
Pulling the filter you can see the valve body and the solenoids. Two for the shifts and one for the TC lock-up.
Lots of bolts!
This is the valve controlling the tranny pressure IIRC.
Those are the shifting accumulators. From left to right the 1-2, the 2-3 and the 3-O/D.
In the 1-2 and 2-3 accumulators we're going to do a mod the Supra guys developed. It consists of shimming the little springs so more pressure is achieved. This makes the shifting quickier and harder. The Supra guys had excelent results with this mod and they've engines developing +450HP...
Here is where the shim goes
This accumulator will remain stock as the shifts you want quicker and more used are the 1-2 and 2-3.
Valve body detail.
This is the shifter rail
Hope you like it.
I'm going to order the tranny cooler and the SupraStick.
David
 07-25-2008, 02:58 PM
#4
Registered User
Join Date: Aug 2004
Location: SLO, CA
Posts: 1,028
Likes: 0
Received 0 Likes
on
0 Posts
glad to see you finally started this David, looks like a pretty intense project... the lazy people like me go the other way. 
best of luck with the swap, i'll definitely be checking back.
best of luck with the swap, i'll definitely be checking back.
07-26-2008, 12:18 AM
#5
Registered User
Thread Starter
Join Date: Jul 2004
Location: Barcelona (Spain)
Posts: 917
Likes: 0
Received 0 Likes
on
0 Posts
Thanks 
ROCK HOUND, scuba, I was a complete auto tranny ignorant since two weeks ago... But I searched and read a lot here on YT, Google and also on HowStuffWorks.com
In that last site they've a very very nice explanations about the TC and trannys.
Tonight I ordered the SupraStick and the remote mount TPS.
David
08-11-2008, 10:55 AM
#7
Registered User
Thread Starter
Join Date: Jul 2004
Location: Barcelona (Spain)
Posts: 917
Likes: 0
Received 0 Likes
on
0 Posts
We're waiting for some seals and gaskets from Toyota. As we are there it's better to change them. Also the truck was at the body shop for the hood scoop so we couldn't work on it.
I received the universal mount TPS and expect to receive the SupraStick soon.
As soon as I've more updates I'll post them.
David
I received the universal mount TPS and expect to receive the SupraStick soon.
As soon as I've more updates I'll post them.
David
Trending Topics
09-07-2008, 01:42 AM
#8
Registered User
Thread Starter
Join Date: Jul 2004
Location: Barcelona (Spain)
Posts: 917
Likes: 0
Received 0 Likes
on
0 Posts
Time for an update hehe
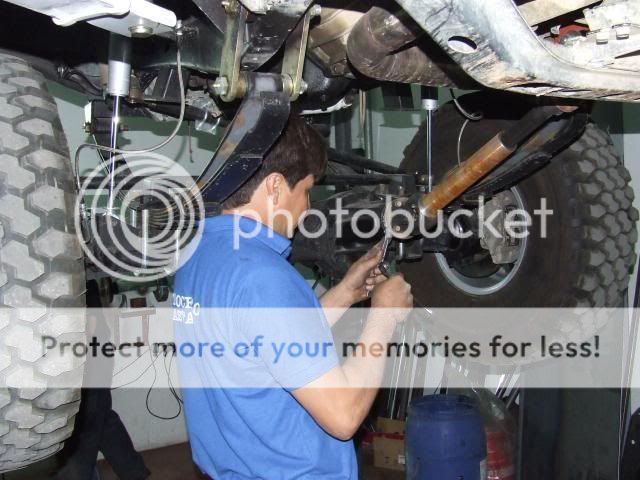
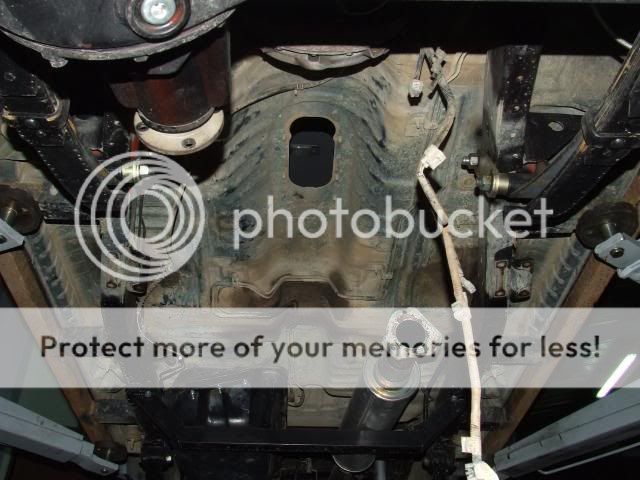
Taking off the drive shafts
T-Case parking brake
The R-150F goes to the ground
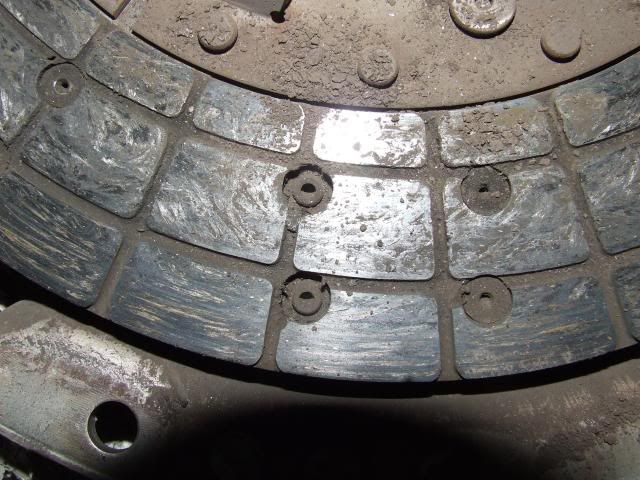
Clutch showing up
I really want to see how is the clutch disc after 14 years and 199000mi...

We ordered the rear main seal and later we saw it was needed hehehe

Soon I'll have more pics.
David
Taking off the drive shafts
T-Case parking brake
The R-150F goes to the ground
Clutch showing up
I really want to see how is the clutch disc after 14 years and 199000mi...
We ordered the rear main seal and later we saw it was needed hehehe
Soon I'll have more pics.
David
Last edited by Blizzard; 09-07-2008 at 01:44 AM.
09-07-2008, 01:47 AM
#9
Registered User
Thread Starter
Join Date: Jul 2004
Location: Barcelona (Spain)
Posts: 917
Likes: 0
Received 0 Likes
on
0 Posts
I forgot I had some misc pics too...
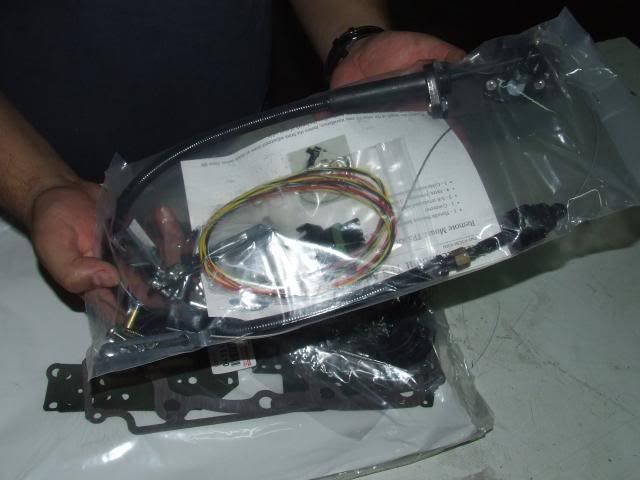
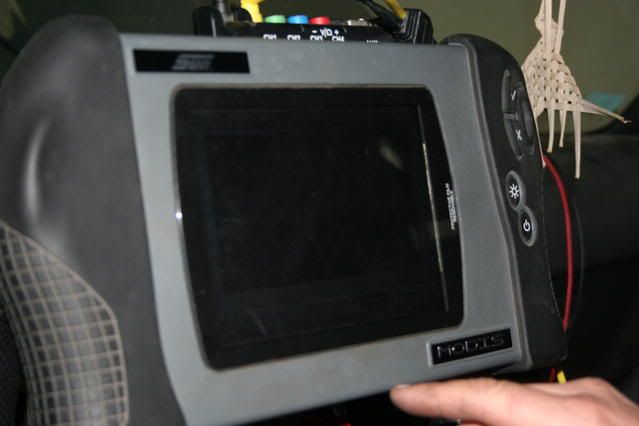
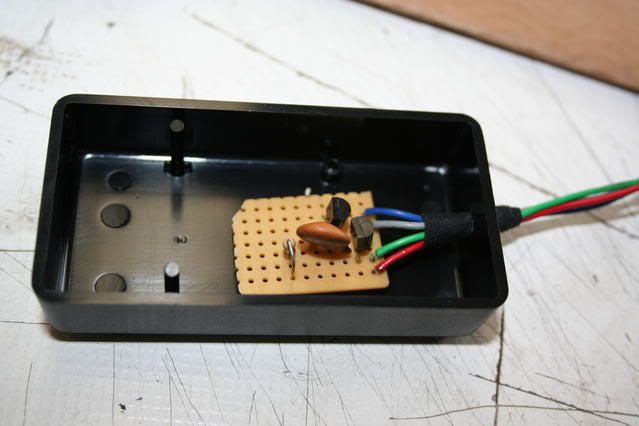
This is the SupraStick as we received it from Latent Solutions:

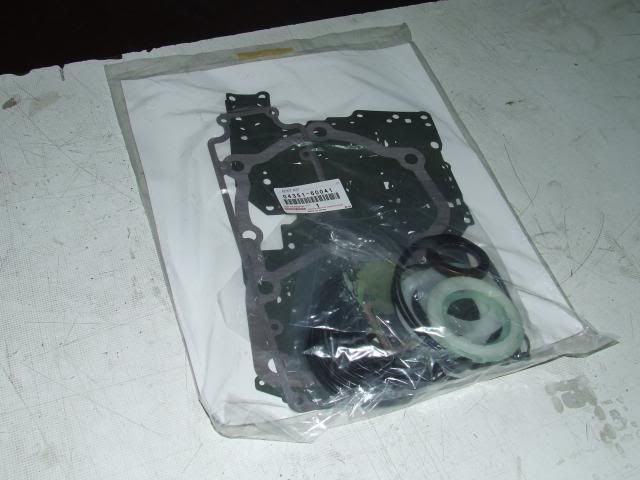
Seal and gasket kit for the A343F
Universal TPS from Powertrain Control Solutions

David
This is the SupraStick as we received it from Latent Solutions:
Seal and gasket kit for the A343F
Universal TPS from Powertrain Control Solutions
David
09-10-2008, 10:51 AM
#10
Registered User
Thread Starter
Join Date: Jul 2004
Location: Barcelona (Spain)
Posts: 917
Likes: 0
Received 0 Likes
on
0 Posts
Hello,
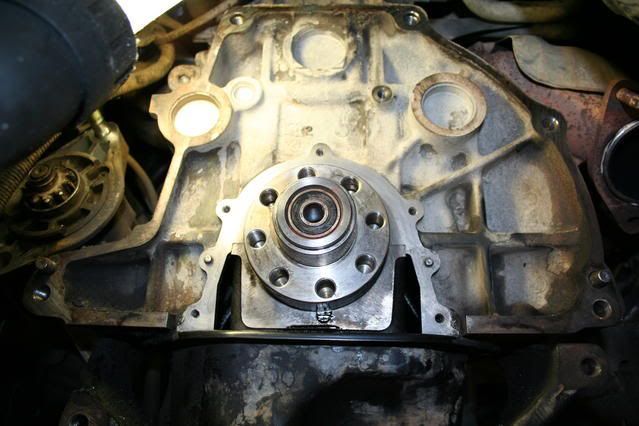
Some updates, we took out the clutch and replaced the rear main seal.
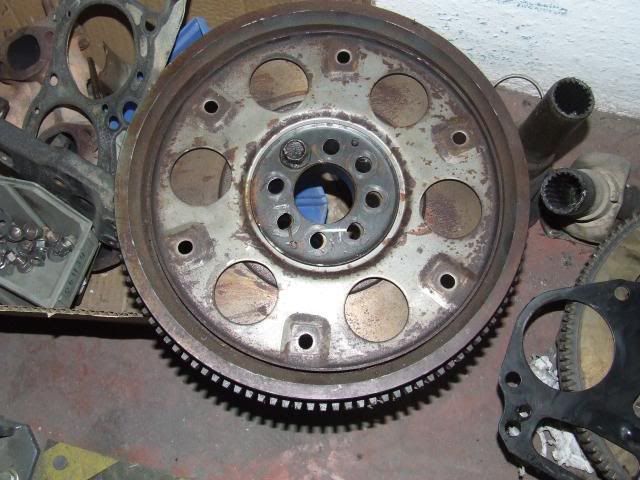
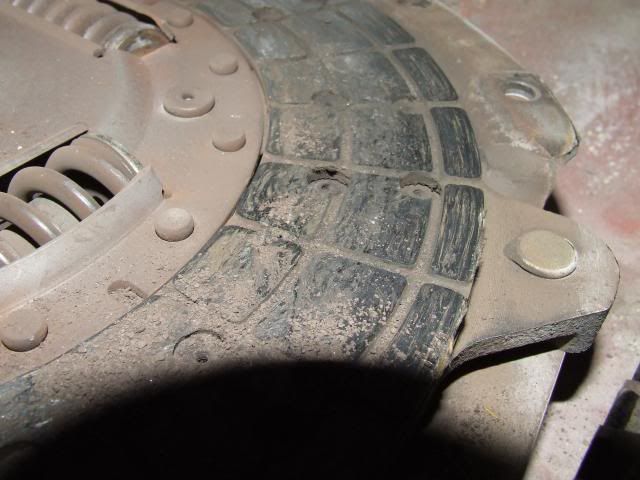
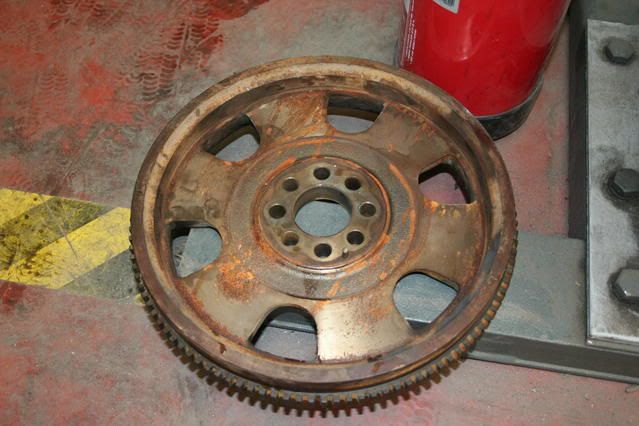
This is the manual flywheel:
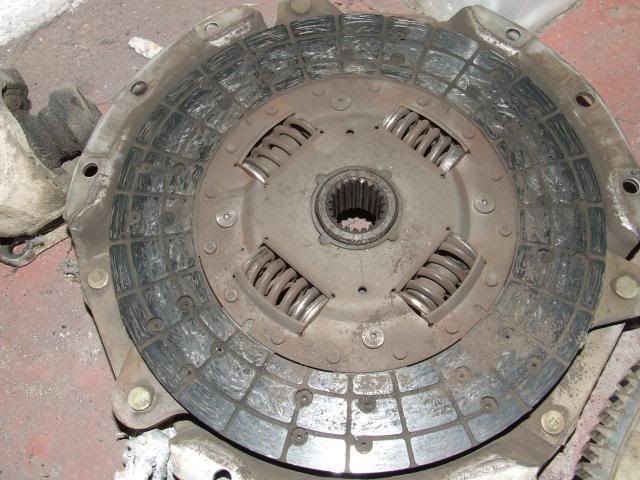
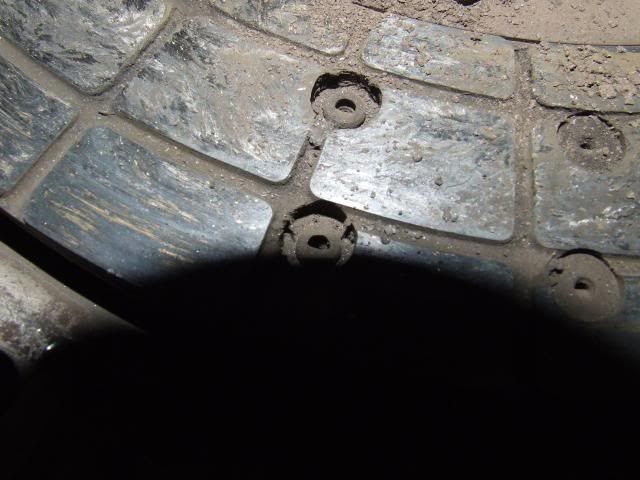
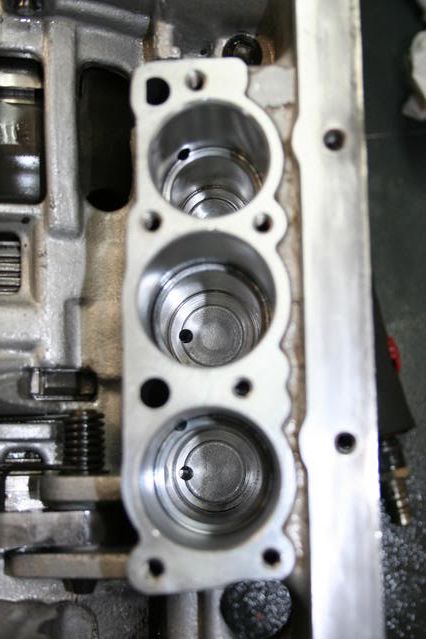
And my beloved stock clutch... 14 years of use and 199k miles and still the same that the factory put in my 4Runner. It's still at 3/4 life.
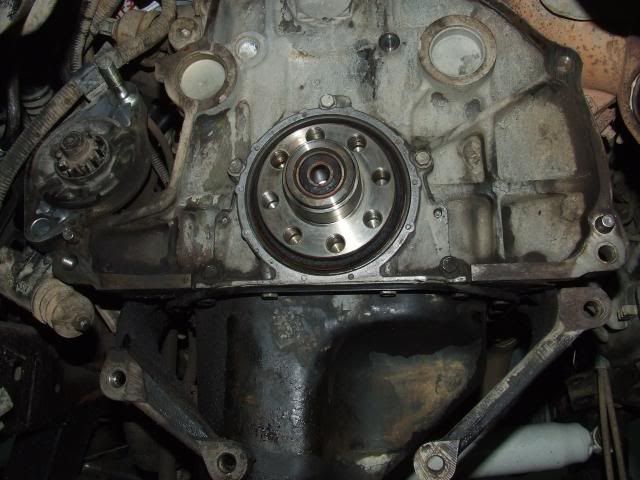
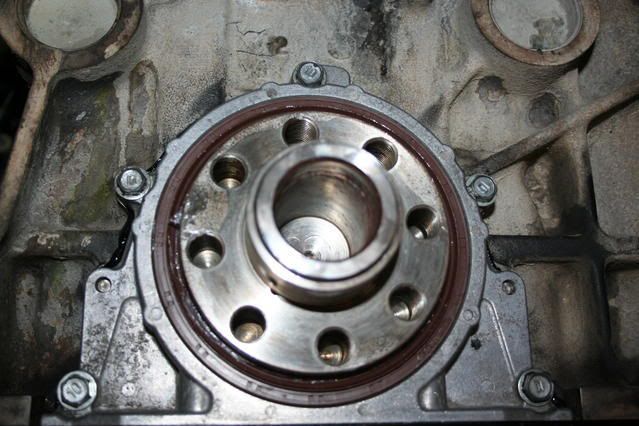
The rear main seal that leaked
This weekend I'm travelling where my truck is for two weeks so I'll have more updates.
David
David
Some updates, we took out the clutch and replaced the rear main seal.
This is the manual flywheel:
And my beloved stock clutch... 14 years of use and 199k miles and still the same that the factory put in my 4Runner. It's still at 3/4 life.
The rear main seal that leaked
This weekend I'm travelling where my truck is for two weeks so I'll have more updates.
David
David
09-11-2008, 02:25 AM
#11
Registered User
Thread Starter
Join Date: Jul 2004
Location: Barcelona (Spain)
Posts: 917
Likes: 0
Received 0 Likes
on
0 Posts
Seems that here this is not a very interesting swap but... I've new pics so here they are.
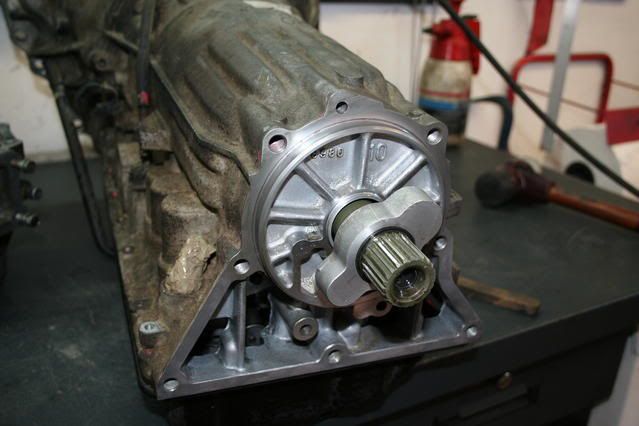
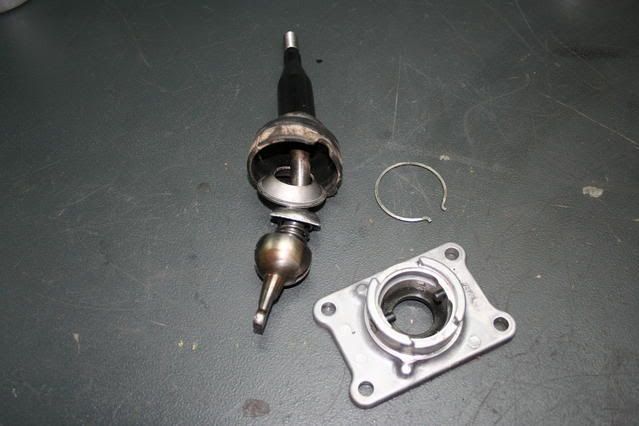
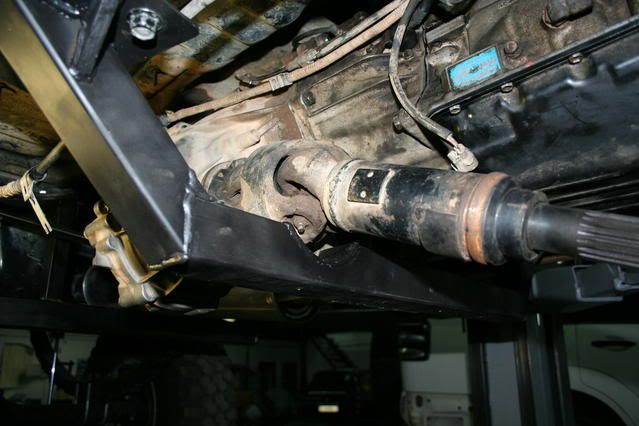
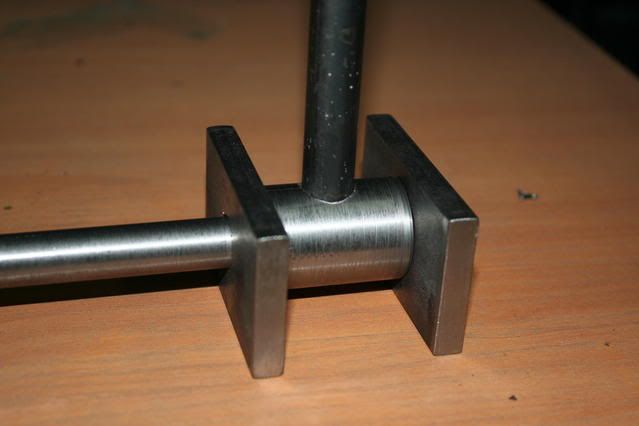
The mechanical T-Case that came with my manual R150F bolts with no problems to the A343F tranny.

No problems either with the two rods that came from the T-Case, one for the traction and another for the ratio. The electric T-Case of the A343F only have one for the ratio.
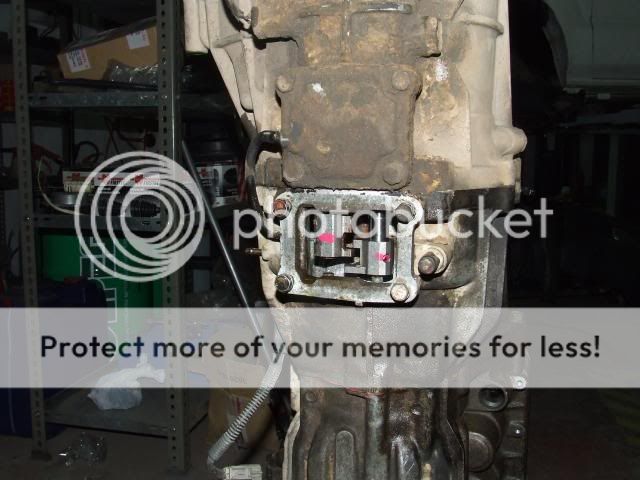
We've only to clean the boxes and shim the accumulators.
Electric T-Case (Left), that came from the A343F and the mechanical T-Case (Right) that came with the R150F.
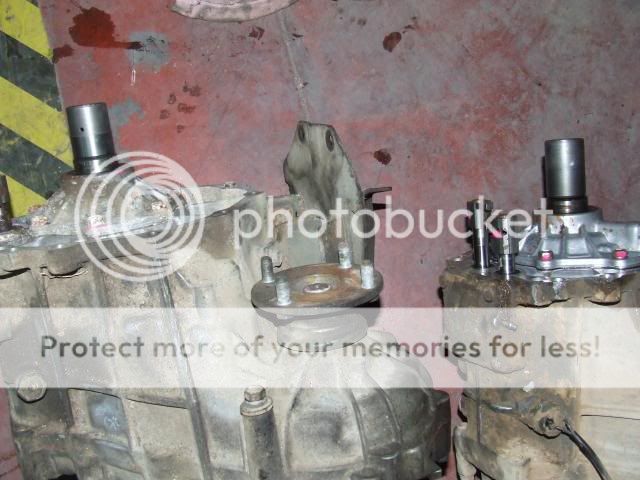
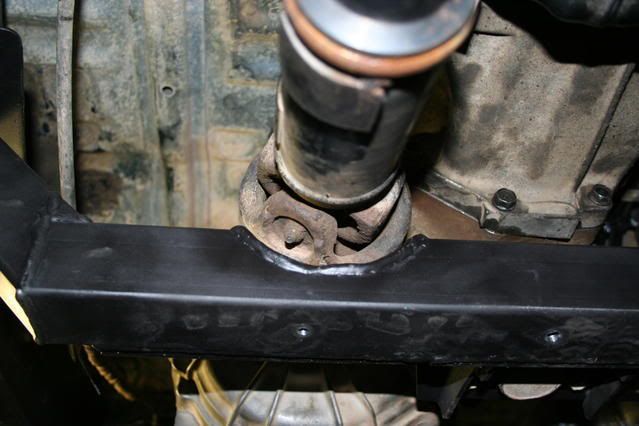
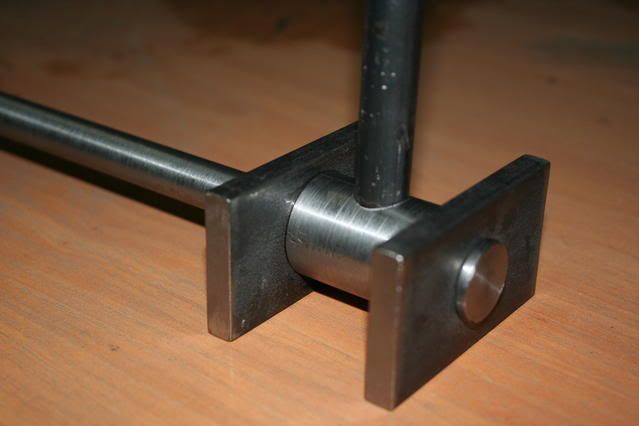
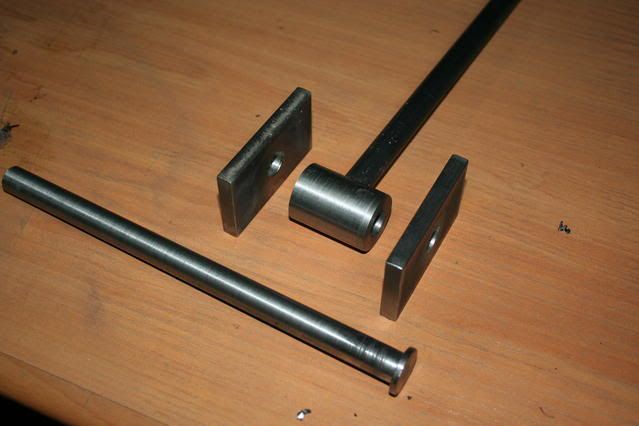
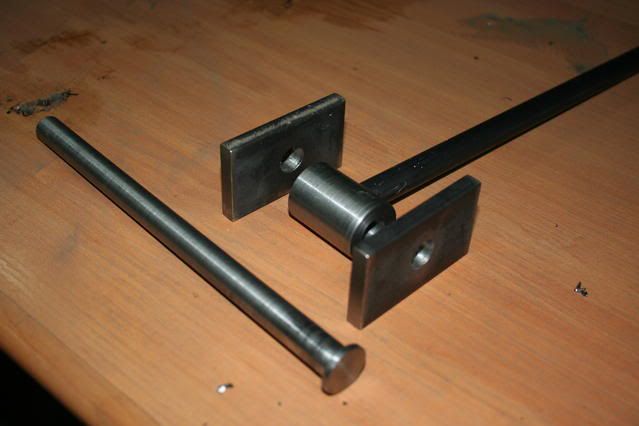
This coupler has different sizes in each T-Case but it doesn't suppose any problem because the clearance is perfect and it's the same spline count.
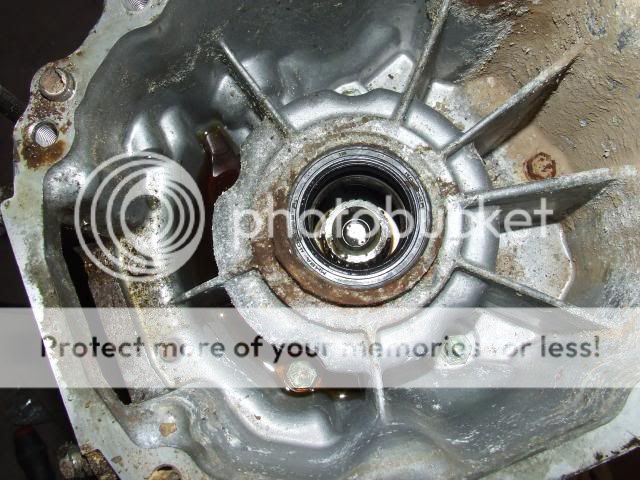
This is the coupler from the electric T-Case
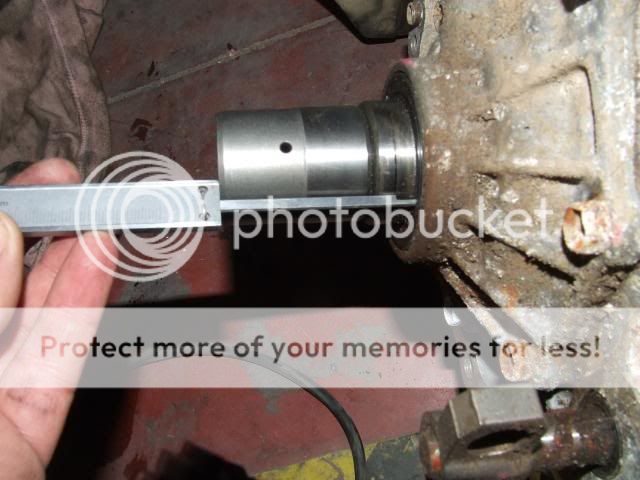
Coupler interior
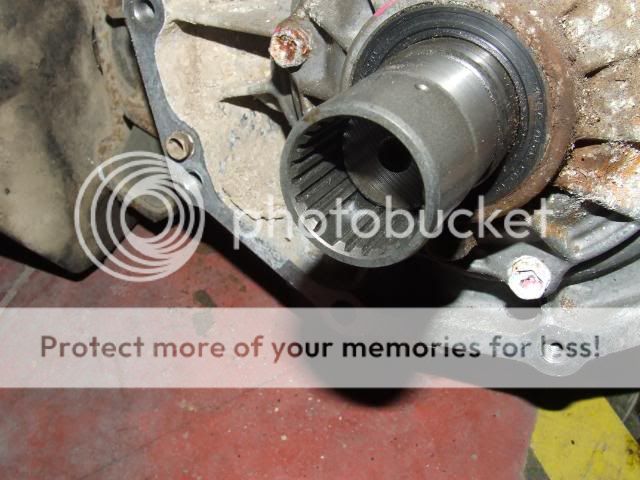
Mech T-Case coupler
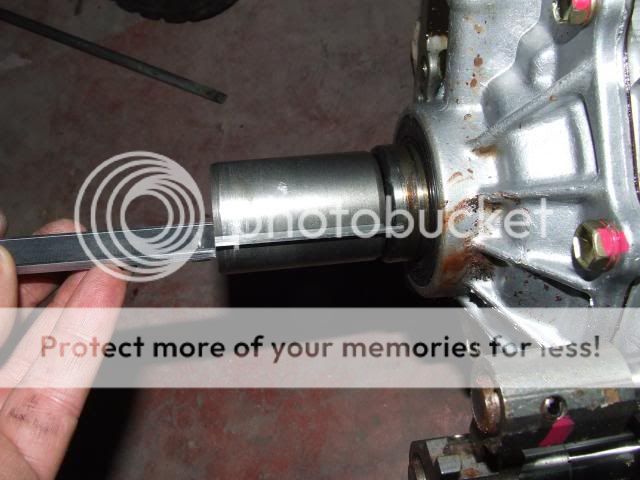
A343F coupling with the T-Case
Cheers,
David
The mechanical T-Case that came with my manual R150F bolts with no problems to the A343F tranny.
No problems either with the two rods that came from the T-Case, one for the traction and another for the ratio. The electric T-Case of the A343F only have one for the ratio.
We've only to clean the boxes and shim the accumulators.
Electric T-Case (Left), that came from the A343F and the mechanical T-Case (Right) that came with the R150F.
This coupler has different sizes in each T-Case but it doesn't suppose any problem because the clearance is perfect and it's the same spline count.
This is the coupler from the electric T-Case
Coupler interior
Mech T-Case coupler
A343F coupling with the T-Case
Cheers,
David
09-30-2008, 09:08 AM
#12
Registered User
Thread Starter
Join Date: Jul 2004
Location: Barcelona (Spain)
Posts: 917
Likes: 0
Received 0 Likes
on
0 Posts
Time for updates hehe
Hello,
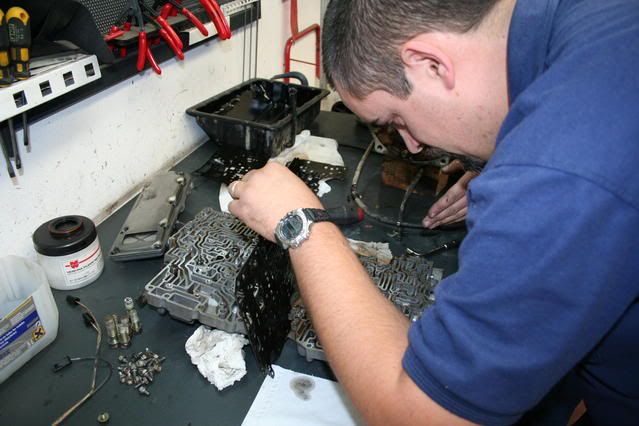
We cleaned a little the tranny
Begin cleaning...
During
Looks like something's missing... :scratchch :scratchch :scratchch
This is one of the shims machined in alu to increase the pressure in the shifting accumulators. They're being installed in the 1-2 accumulator and 2-3 one. They add 6mm to the springs.

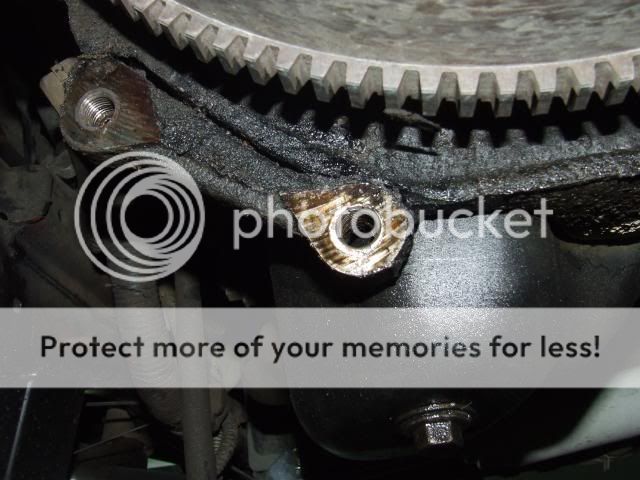
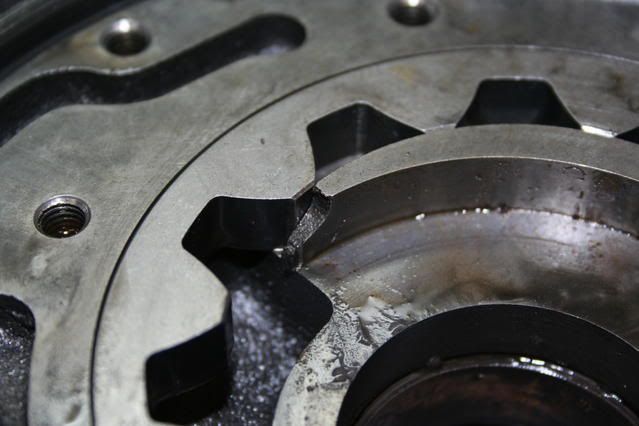
Changed all the case seals except for the gears ones. Clutch discs were in excellent condition so no need for rebuilding the whole tranny. That thing in the splines is for the speed sensor of the tranny
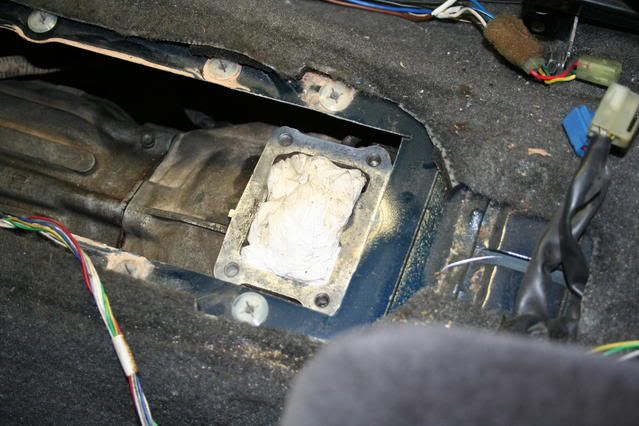
Where the T-Case stick bolts
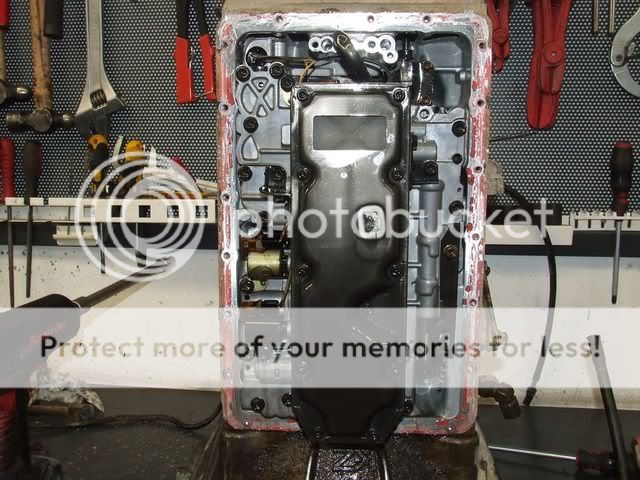
The filter
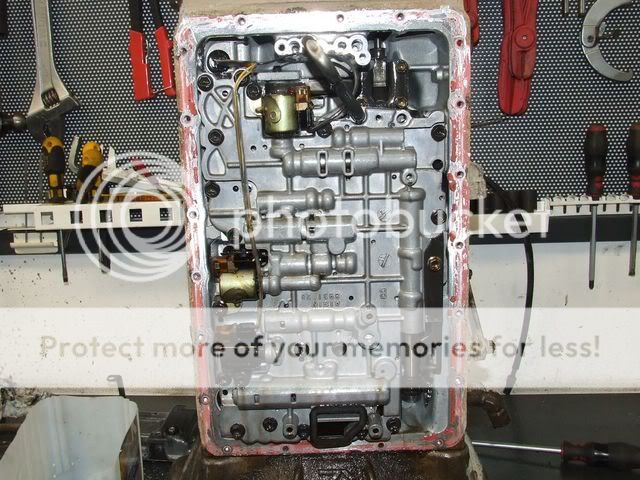
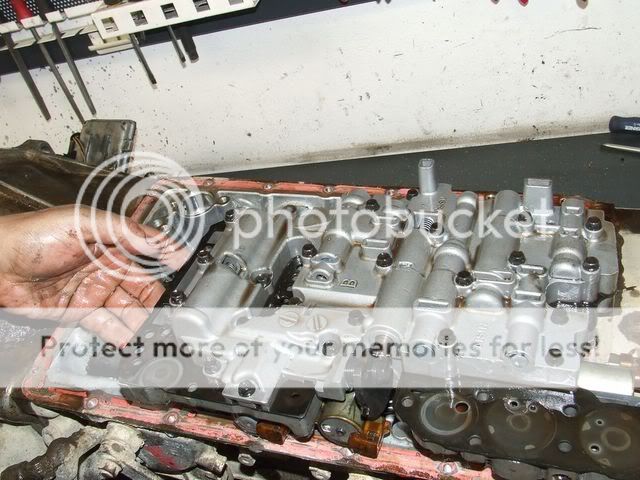
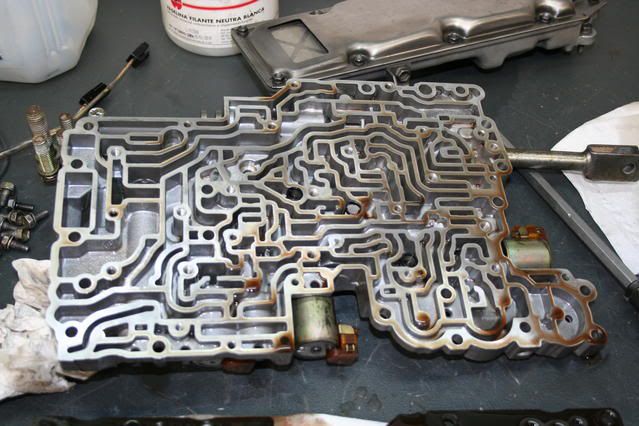
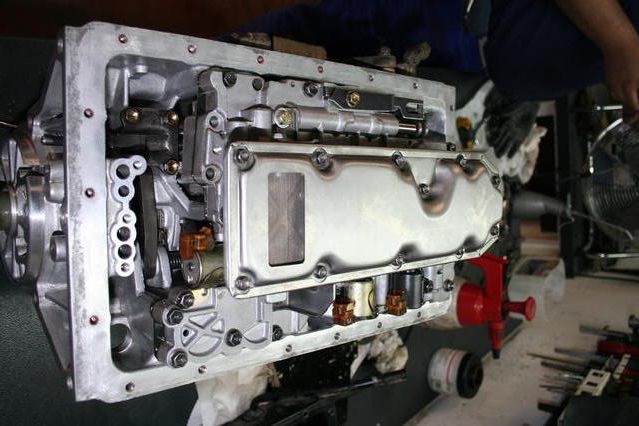
Valve body
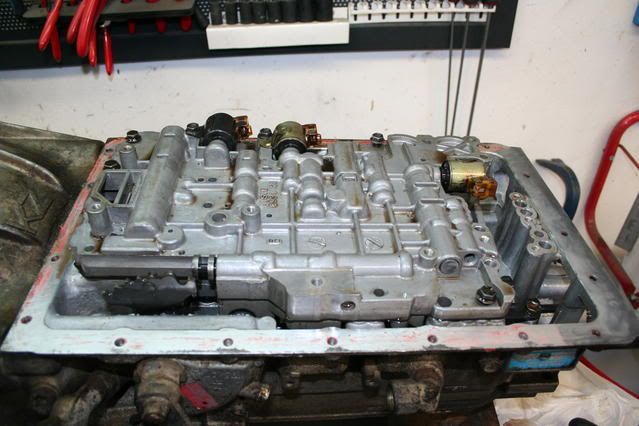
The solenoids. The nearer is for the TC lockup and the other two are for the shifts
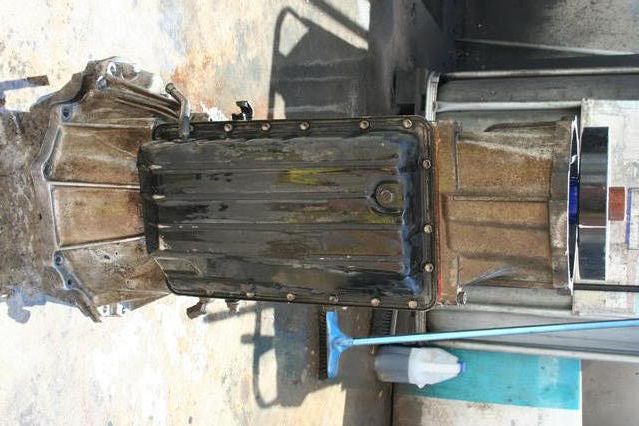
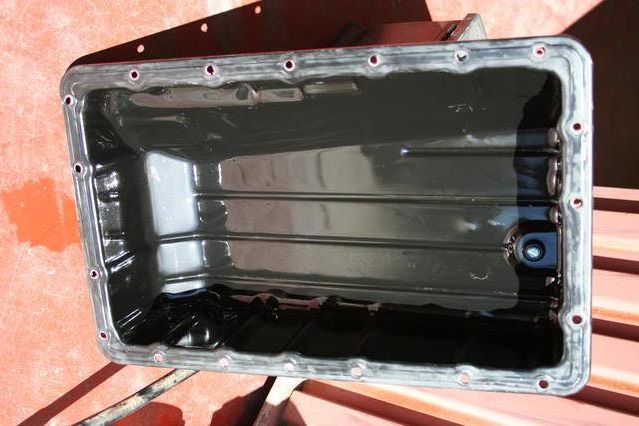
Cleaned the oil pan. It has some magnets to collect small metal shavings
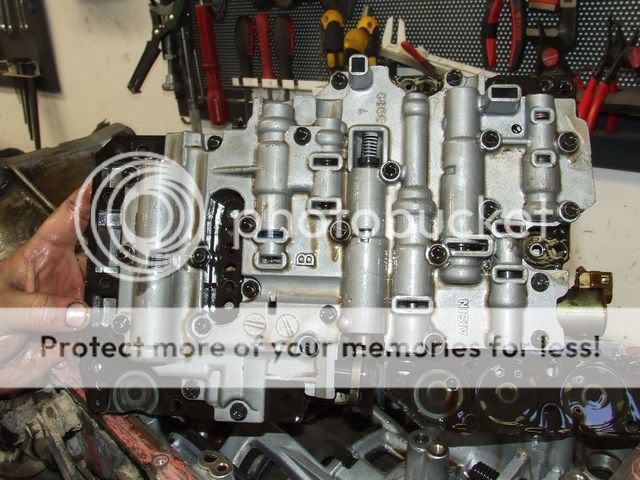
Valve body

Cleaned the oil pan joint
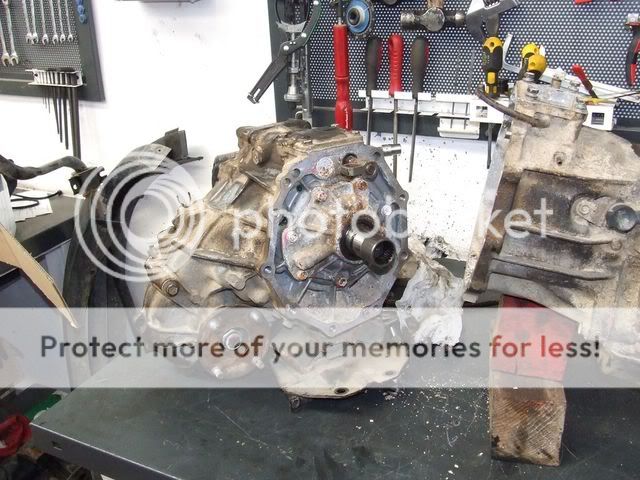
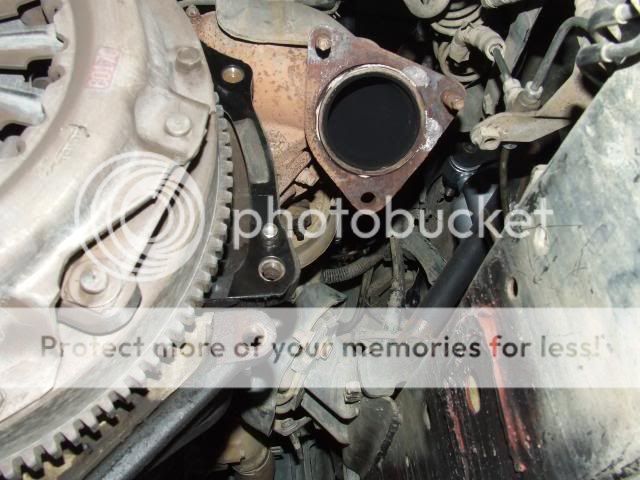
Bellhousing
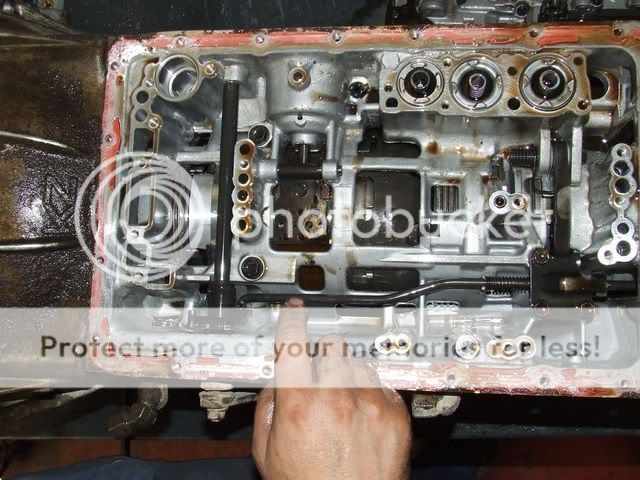
Tranny interior
Accumulators. Ones being shimmed are the right ones
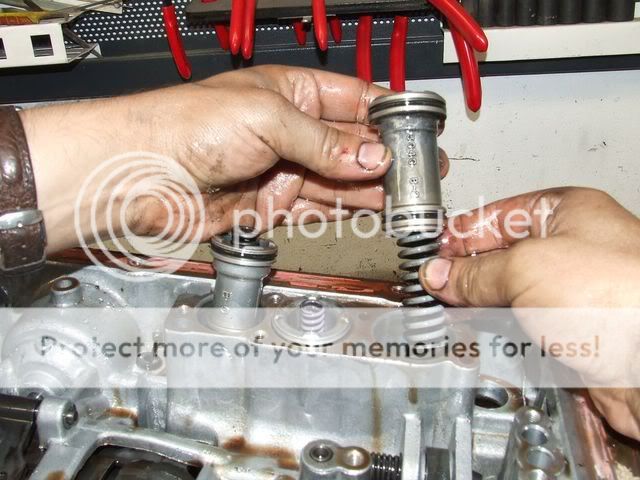
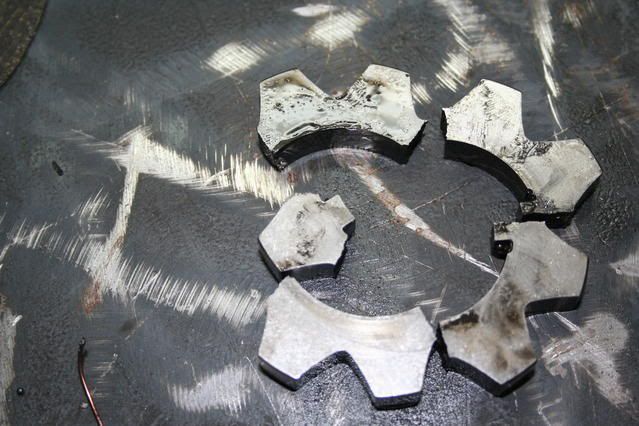
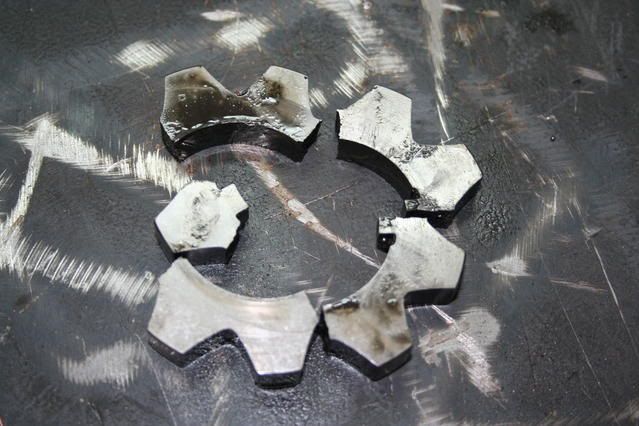
Opened the valve body to change the gaskets. You've to be careful with the metal balls and a small spring
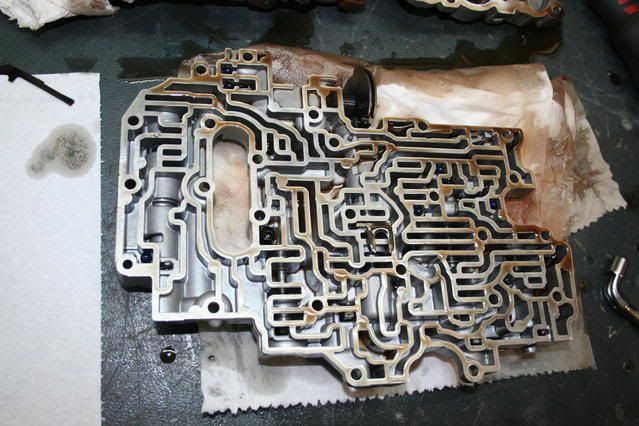
All cleaned and ready to assemble
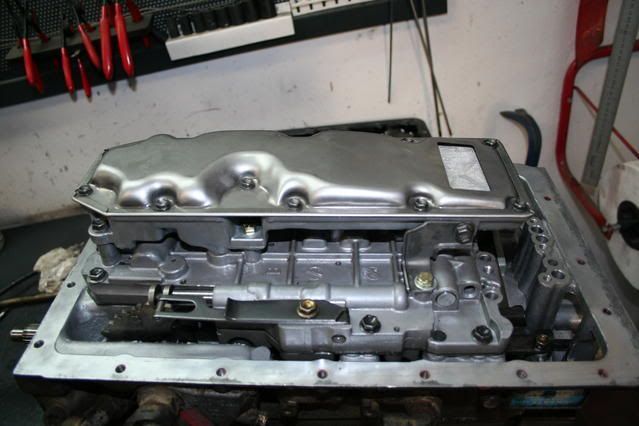
A bit of bling
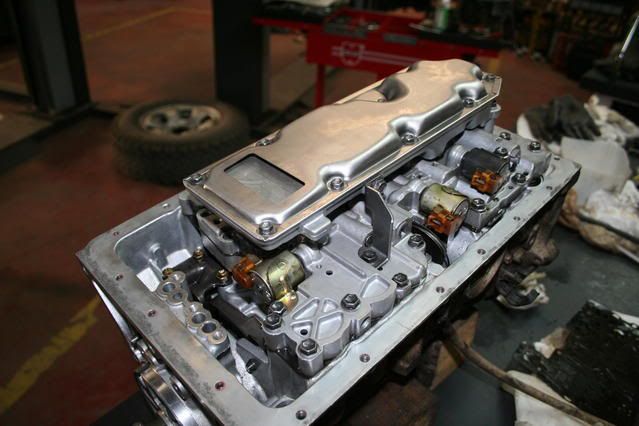
Assembly ready to lift
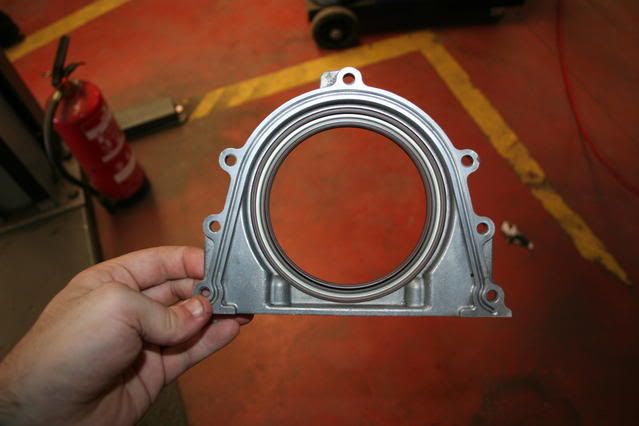
Clanged the rear main seal (The crackshaft one)
Auto flywheel before cleaning
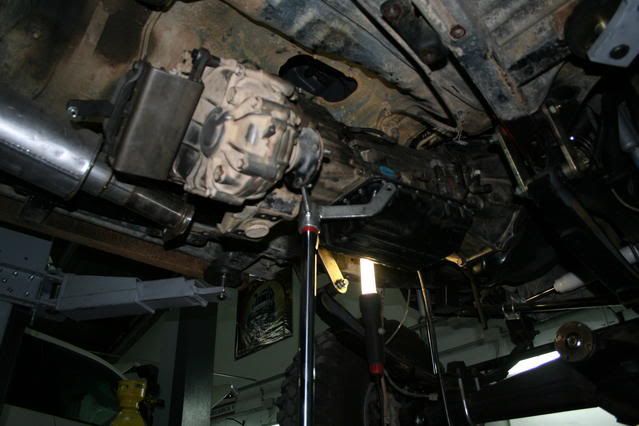
Lifting the tranny
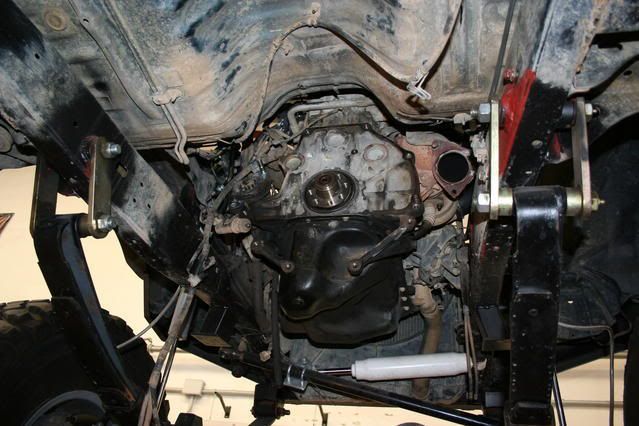
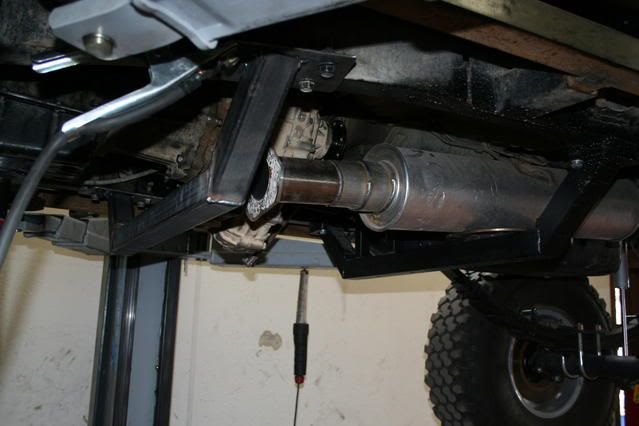
Had to enlarge the floor hole 8cm
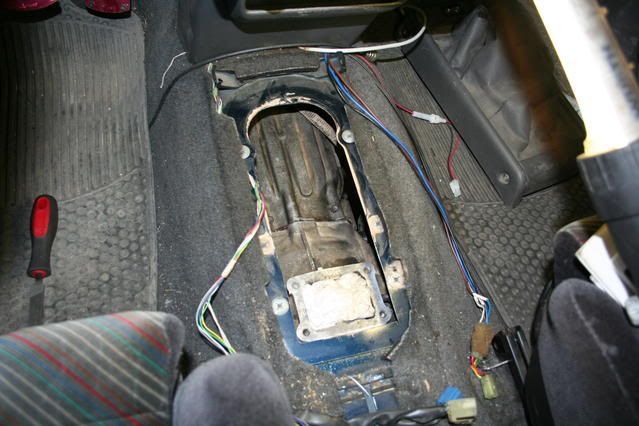
Cleaned the T-Case stick
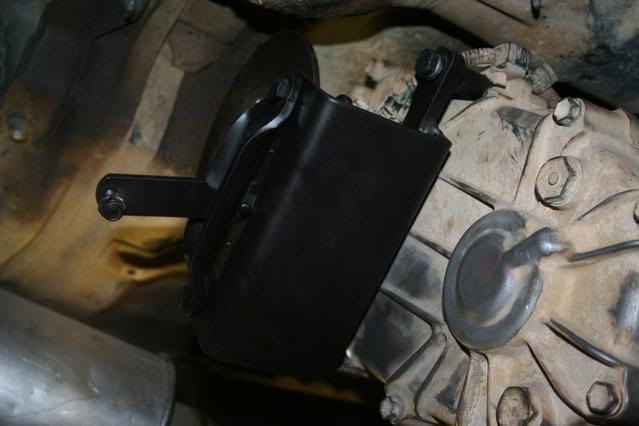
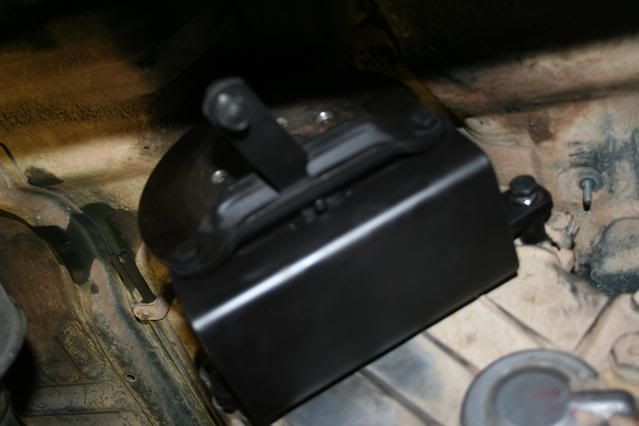
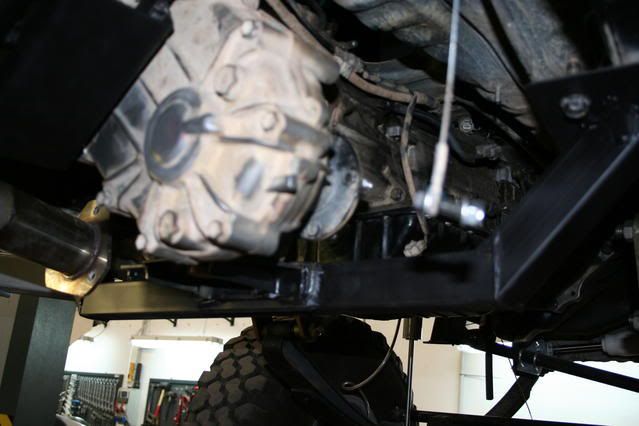
Fabbed a new crossmember to support the tranny
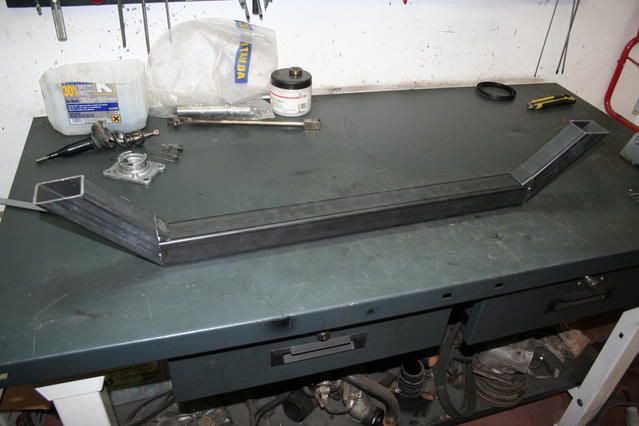
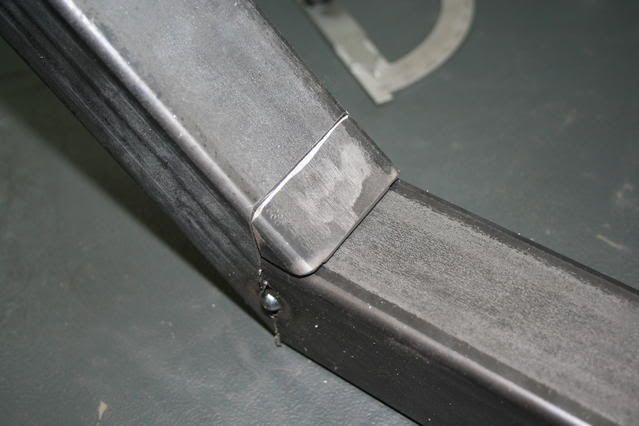
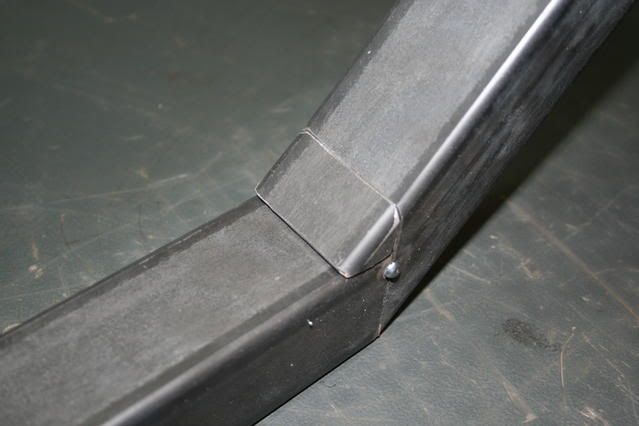
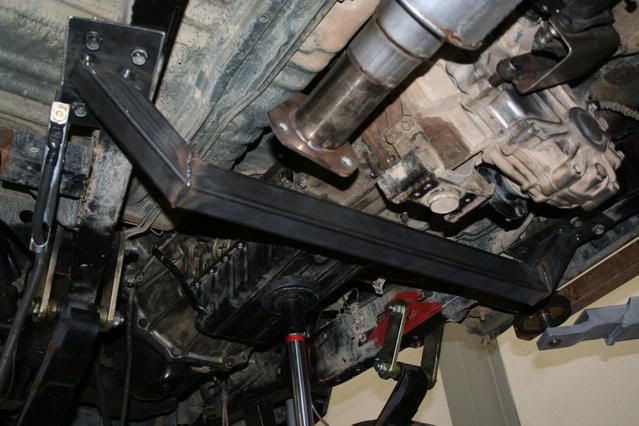

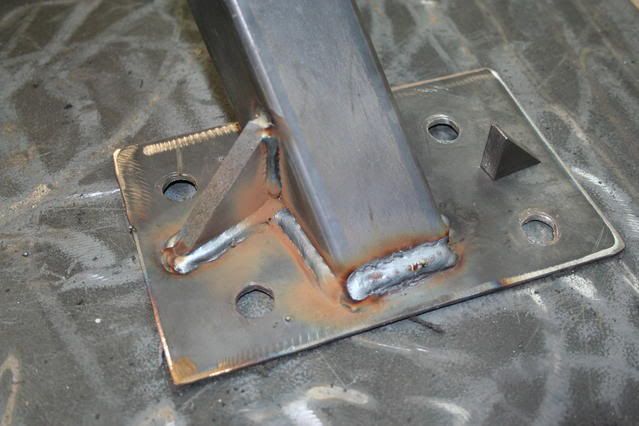
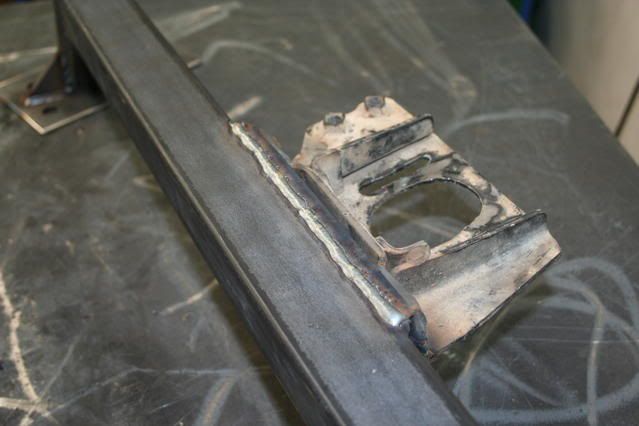
Gusseted supports
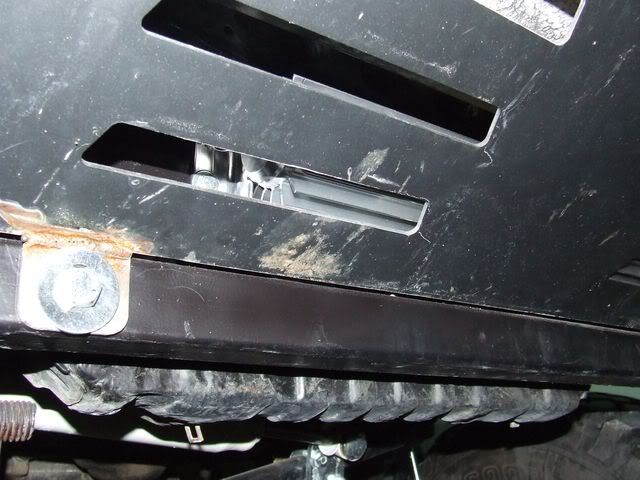
Parking brake

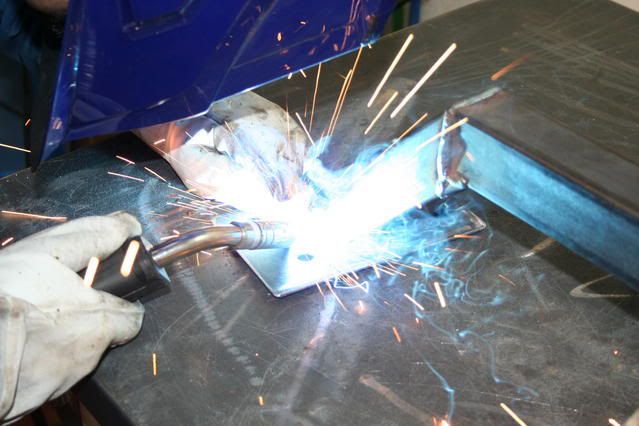
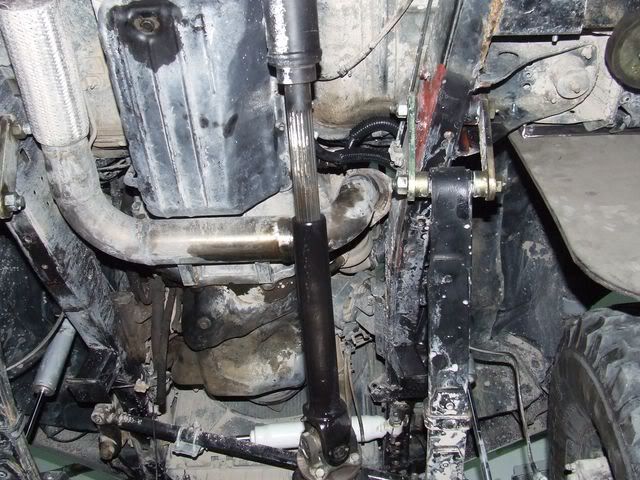
Then noticed the front driveshaft would hit, so a plasma touch and a piece of tube solved it
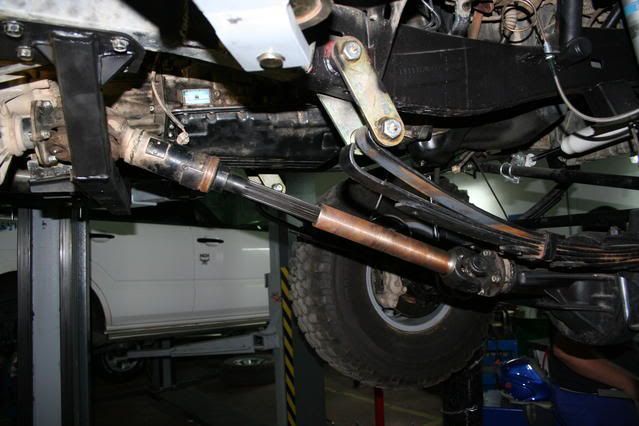
Cut some rigid diesel pipes that interfered with the parking brake disc and swapped with rubber ones
When I started the truck I was very dissapointed, the wheels didn't move. We checked the pressure of the tranny and was 0, so we've to spend some time in taking it off again. Removed the oil pump and found this
Luckily that part it's like 45$ from Toyota and we had it in three days
I replaced the gear, put the tranny up and filled with ATF and voila! It works perfect.
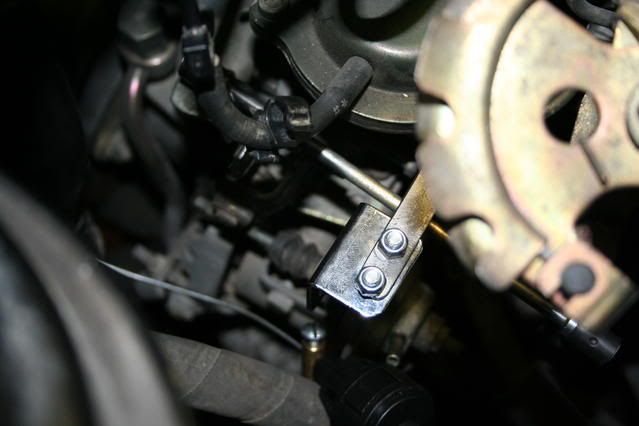
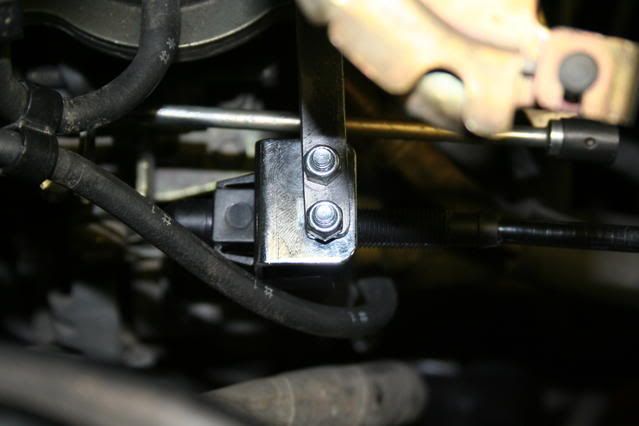
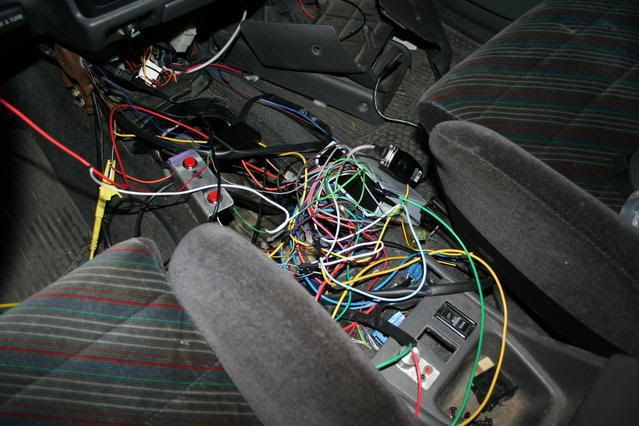
Then begin with the electronics... Fabbed a support for the TPS in the injection pump (My truck it's a 1KZ-T without ECU)

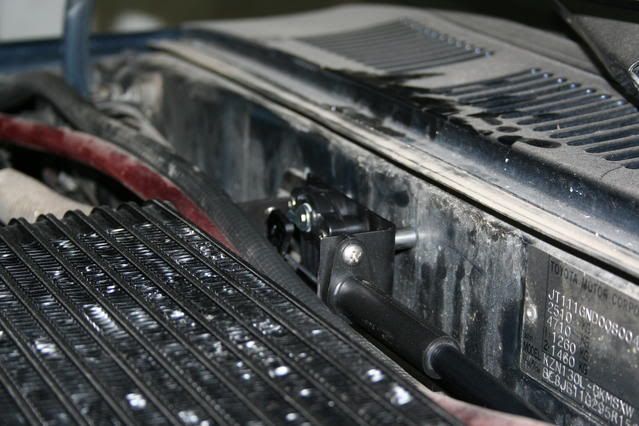
Universal TPS
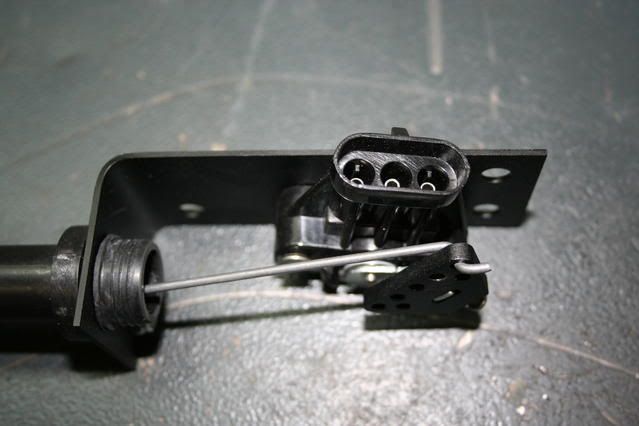
Mounted it on the firewall behind the intercooler
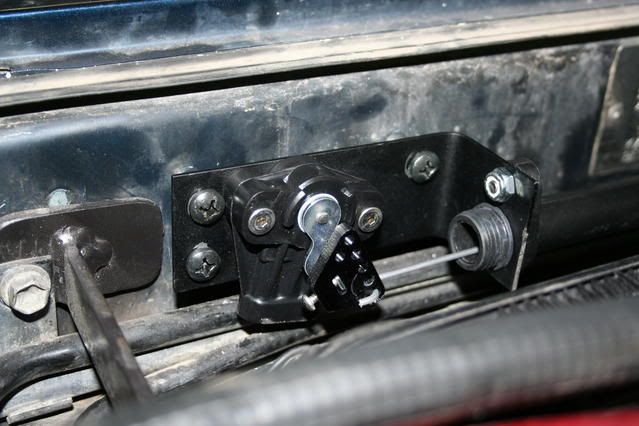
TPS mounted
Then begin with the osciloscope searching for the RPM signal...
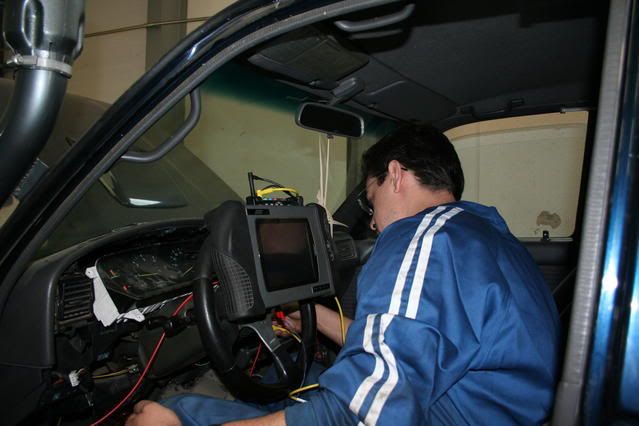
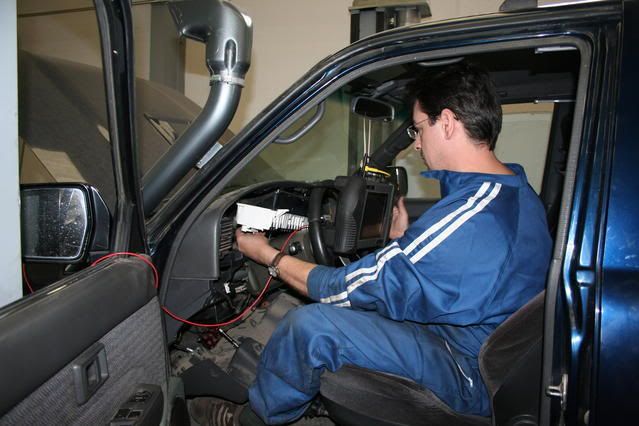
Found it but it was only 0.5V idling and 1.5V accelerating and had quite noise. So we desoldered a condenser and two transistors from an old PC power supply and made a filter/amplifier for the RPM signal
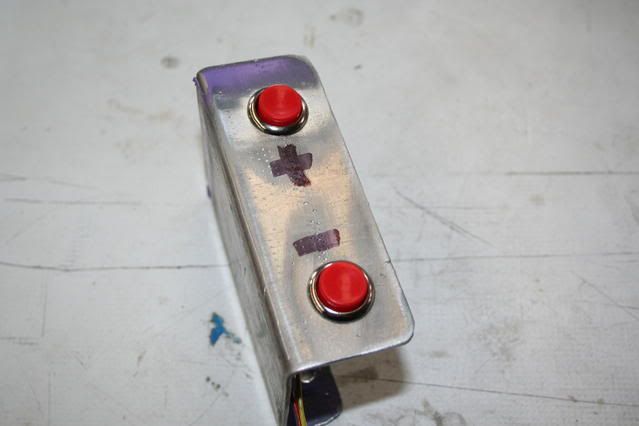
And made testing paddle buttons for sequential modes
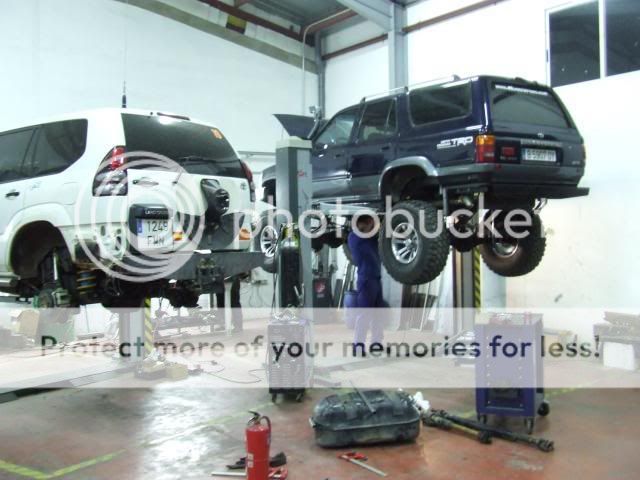
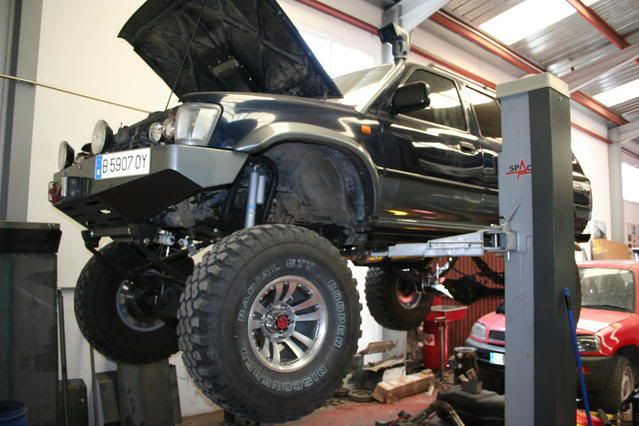
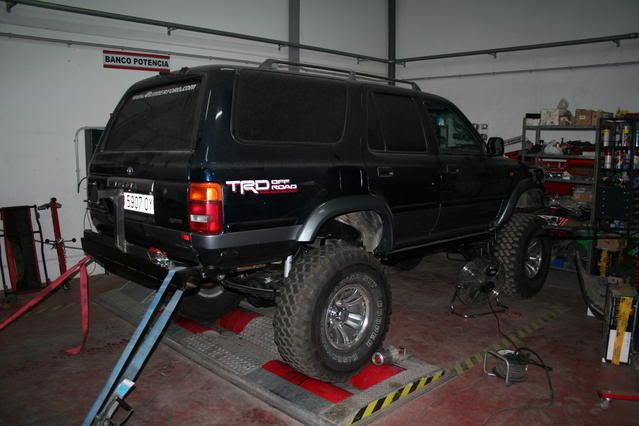
Put the truck in the dyno to make it run
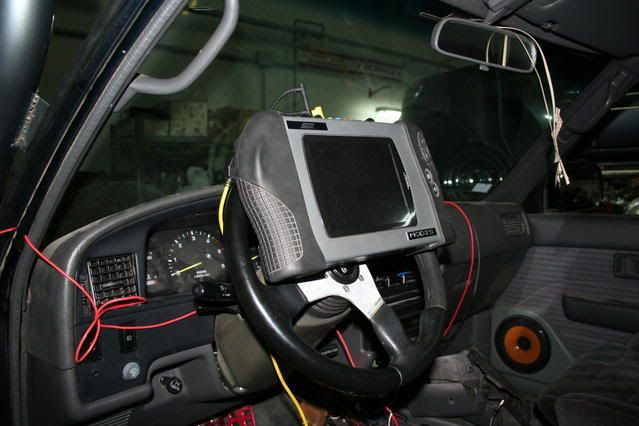
As I'm testing no wires are still well situated hahaha
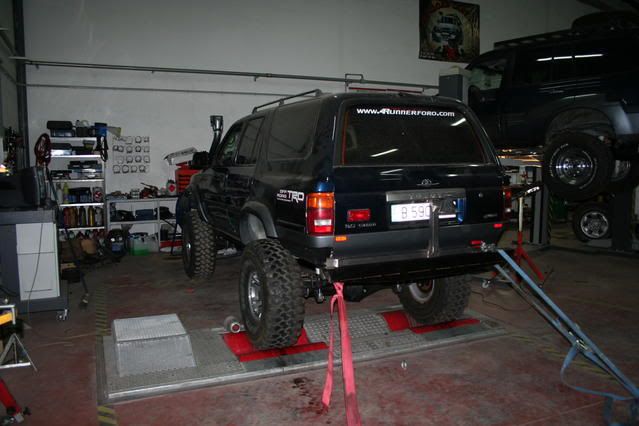
Tested the truck on the dyno and all was fine in sequential mode. I took a notepad and wrote the speeds at 2000 and 3000rpm in each gear so I could calculate certain speeds at X rpm in each gear. Then made a big calc sheet with the speeds at 1500 and at 3700rpm. Used the 1500rpm speed for the 5% TPS value and the 3700rpm for the 100% (WOT) value, then I searched the "intermediate" values for each 5% more throttle.
This was for upshifts and was quite intuitive. The problem was the downshifts. Took the Supra downshift table and used the same proportions applied on my truck (It's a diesel so I cannot (And don't need to) take it to the 6000rpm).
Tested it on the dyno and it was fine. Accelerating lightly the truck upshifts quick and at low rpm, then floor it and I'll downshift and let the engine scream hehe
In the dyno rollers it made 180kph (112mph) and stopped because the needle don't read more. Also made 0-60 on 5.22 seconds.
I know in the street it's not the same (You don't have aerodinamic resistance in the dyno and so) but since the intercooler install the truck it's super fast and powerful.
Went to the street to test it and it was very nice, now I've a shift table to start to work on. I can easily change the shifting points at any time.
Hope you like it
David
Hello,
We cleaned a little the tranny
Begin cleaning...
During
Looks like something's missing... :scratchch :scratchch :scratchch
This is one of the shims machined in alu to increase the pressure in the shifting accumulators. They're being installed in the 1-2 accumulator and 2-3 one. They add 6mm to the springs.
Changed all the case seals except for the gears ones. Clutch discs were in excellent condition so no need for rebuilding the whole tranny. That thing in the splines is for the speed sensor of the tranny
Where the T-Case stick bolts
The filter
Valve body
The solenoids. The nearer is for the TC lockup and the other two are for the shifts
Cleaned the oil pan. It has some magnets to collect small metal shavings
Valve body
Cleaned the oil pan joint
Bellhousing
Tranny interior
Accumulators. Ones being shimmed are the right ones
Opened the valve body to change the gaskets. You've to be careful with the metal balls and a small spring
All cleaned and ready to assemble
A bit of bling
Assembly ready to lift
Clanged the rear main seal (The crackshaft one)
Auto flywheel before cleaning
Lifting the tranny
Had to enlarge the floor hole 8cm
Cleaned the T-Case stick
Fabbed a new crossmember to support the tranny
Gusseted supports
Parking brake
Then noticed the front driveshaft would hit, so a plasma touch and a piece of tube solved it
Cut some rigid diesel pipes that interfered with the parking brake disc and swapped with rubber ones
When I started the truck I was very dissapointed, the wheels didn't move. We checked the pressure of the tranny and was 0, so we've to spend some time in taking it off again. Removed the oil pump and found this
Luckily that part it's like 45$ from Toyota and we had it in three days
I replaced the gear, put the tranny up and filled with ATF and voila! It works perfect.
Then begin with the electronics... Fabbed a support for the TPS in the injection pump (My truck it's a 1KZ-T without ECU)
Universal TPS
Mounted it on the firewall behind the intercooler
TPS mounted
Then begin with the osciloscope searching for the RPM signal...
Found it but it was only 0.5V idling and 1.5V accelerating and had quite noise. So we desoldered a condenser and two transistors from an old PC power supply and made a filter/amplifier for the RPM signal
And made testing paddle buttons for sequential modes
Put the truck in the dyno to make it run
As I'm testing no wires are still well situated hahaha
Tested the truck on the dyno and all was fine in sequential mode. I took a notepad and wrote the speeds at 2000 and 3000rpm in each gear so I could calculate certain speeds at X rpm in each gear. Then made a big calc sheet with the speeds at 1500 and at 3700rpm. Used the 1500rpm speed for the 5% TPS value and the 3700rpm for the 100% (WOT) value, then I searched the "intermediate" values for each 5% more throttle.
This was for upshifts and was quite intuitive. The problem was the downshifts. Took the Supra downshift table and used the same proportions applied on my truck (It's a diesel so I cannot (And don't need to) take it to the 6000rpm).
Tested it on the dyno and it was fine. Accelerating lightly the truck upshifts quick and at low rpm, then floor it and I'll downshift and let the engine scream hehe
In the dyno rollers it made 180kph (112mph) and stopped because the needle don't read more. Also made 0-60 on 5.22 seconds.
I know in the street it's not the same (You don't have aerodinamic resistance in the dyno and so) but since the intercooler install the truck it's super fast and powerful.
Went to the street to test it and it was very nice, now I've a shift table to start to work on. I can easily change the shifting points at any time.
Hope you like it
David
 09-30-2008, 09:25 AM
#14
Registered User
Join Date: Jan 2007
Location: Chico Republic, NOR*CAL
Posts: 1,987
Likes: 0
Received 0 Likes
on
0 Posts
wow david.....speachless here.......great work!!! i'm soooo impressed with everything you post. i feel like you have become a very skilled mechanic/fabricator.
12-06-2008, 12:23 PM
#16
Registered User
Thread Starter
Join Date: Jul 2004
Location: Barcelona (Spain)
Posts: 917
Likes: 0
Received 0 Likes
on
0 Posts
Hello,
Time for an update hehe
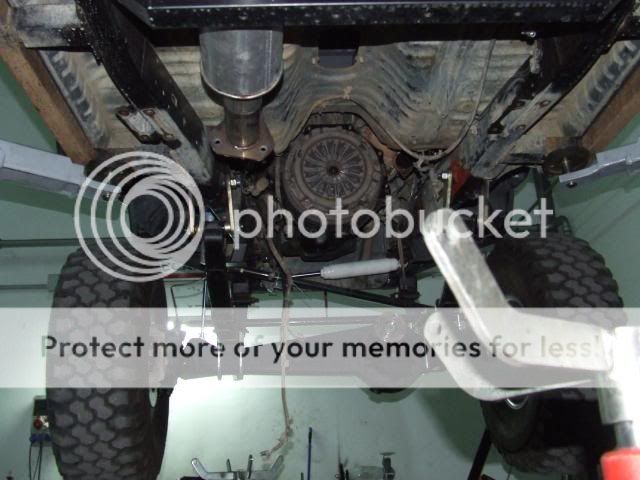
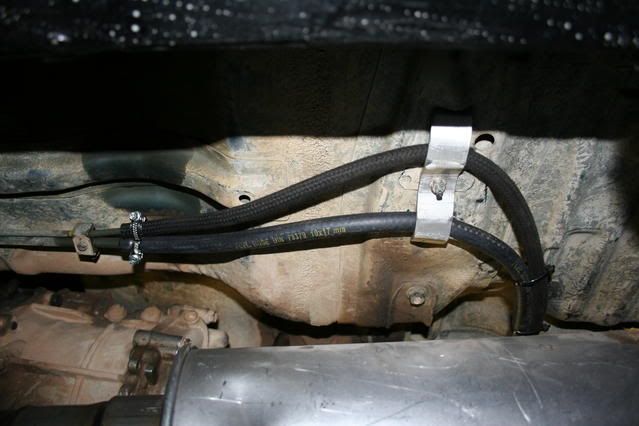
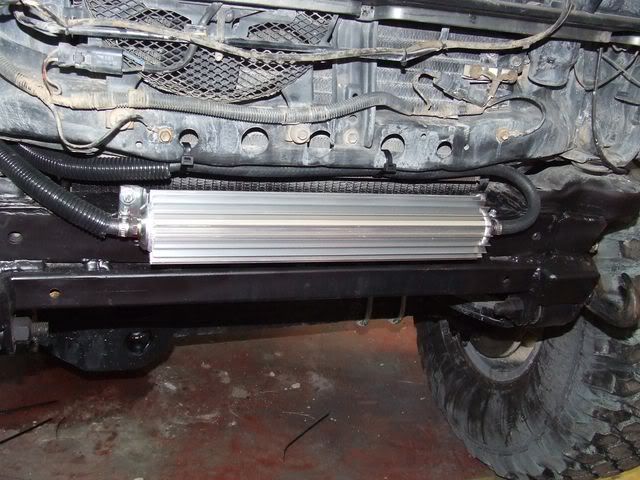
Installed an ATF cooler behind the front bumper. Chose this place because running it has cool air flow and it will have some flow in low speed due to the engine fan pulling air.
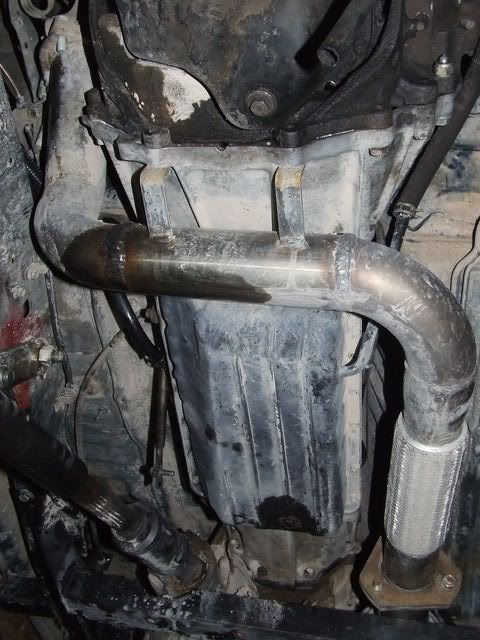
Re-routed the custom exhaust
I wanted to make a custom gear stick beause wanted it to be nearer to the T-Case stick and it being shorter. Then I'll be able to make a custom center console with space to put switches, the 2nd tank gauge, and so... Then began fabbing
Made the transfer stick hole

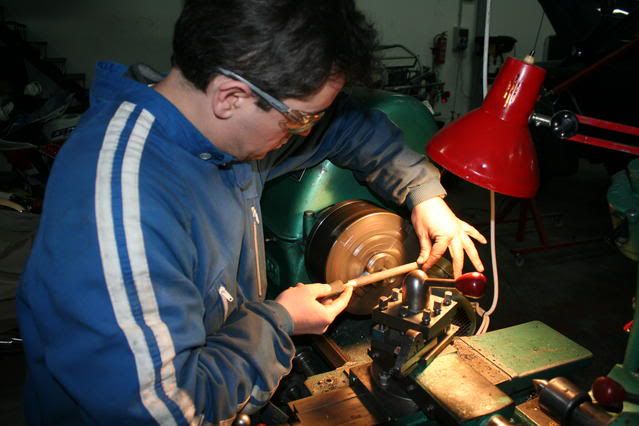
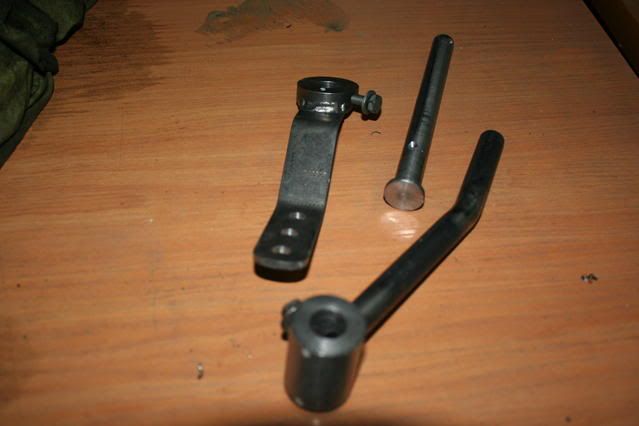
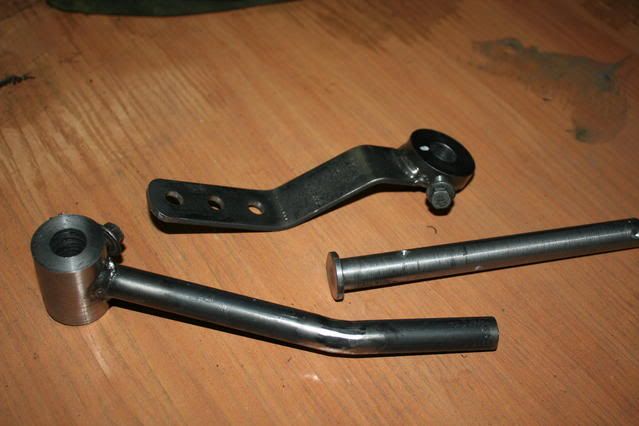
Then used the lathe to make some parts...
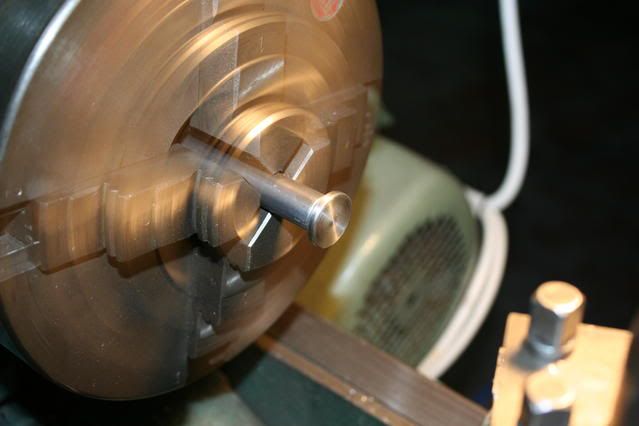
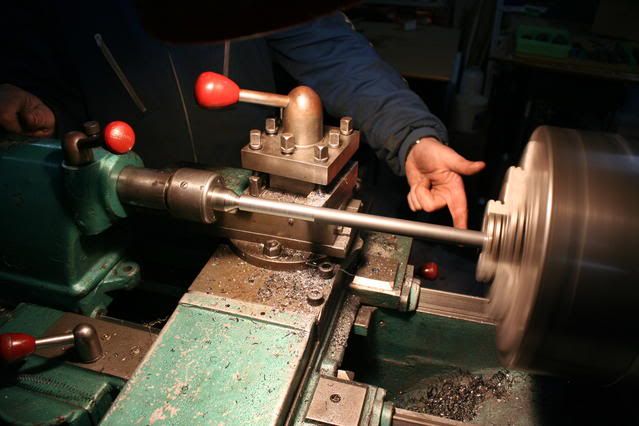

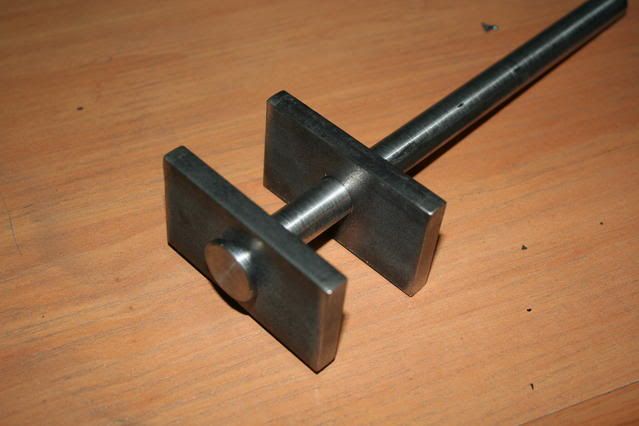
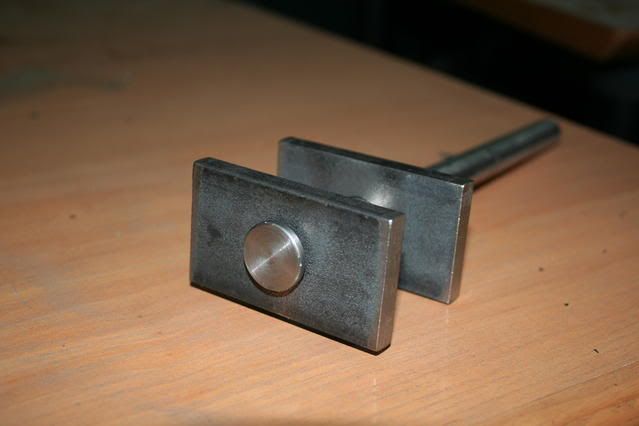
Taking shape
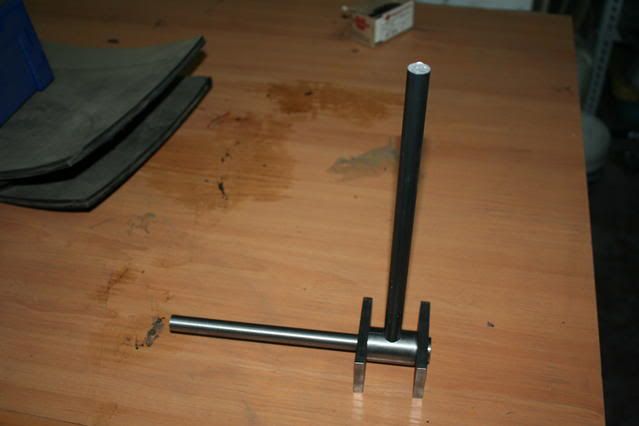
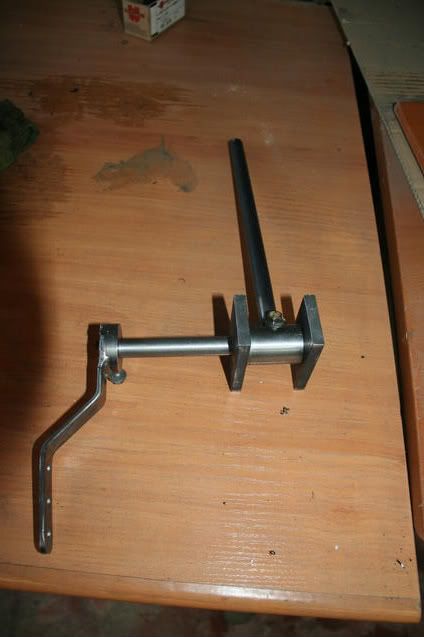
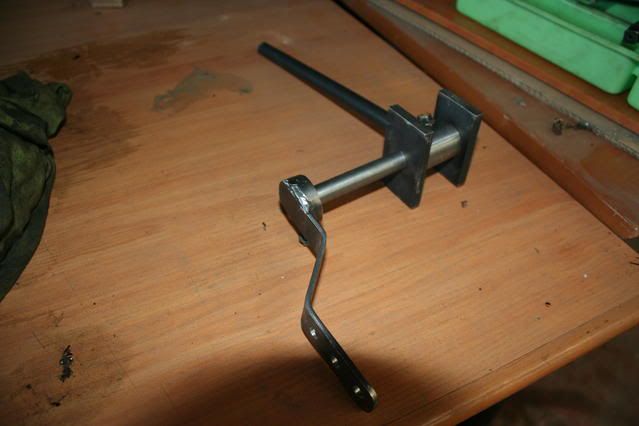
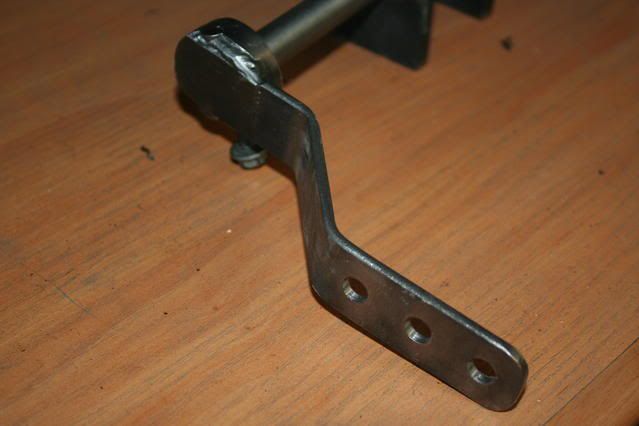
I made all the parts adjustable and unmountable
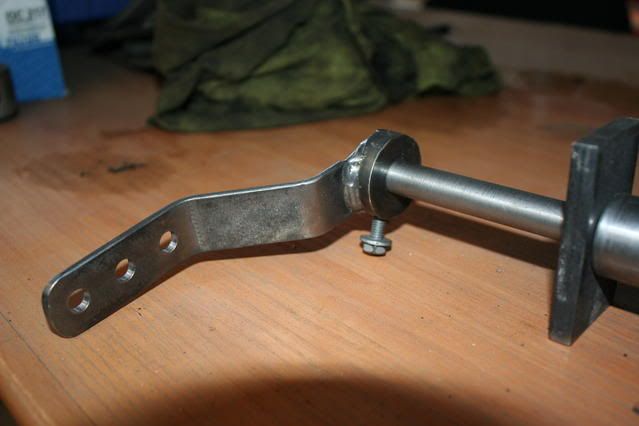
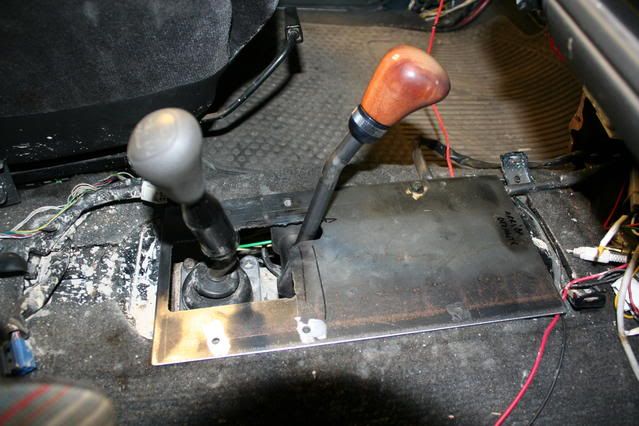
First tests. P position
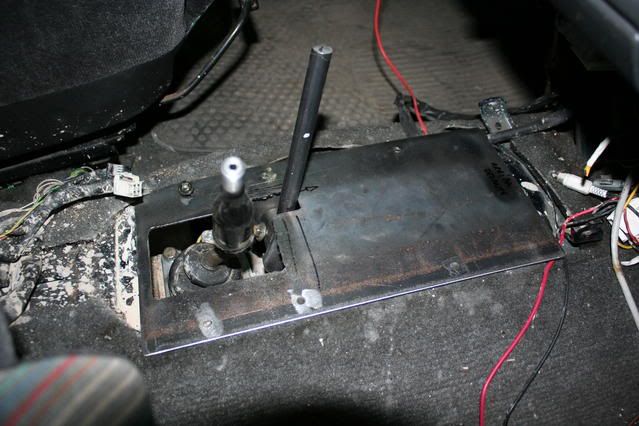
L position
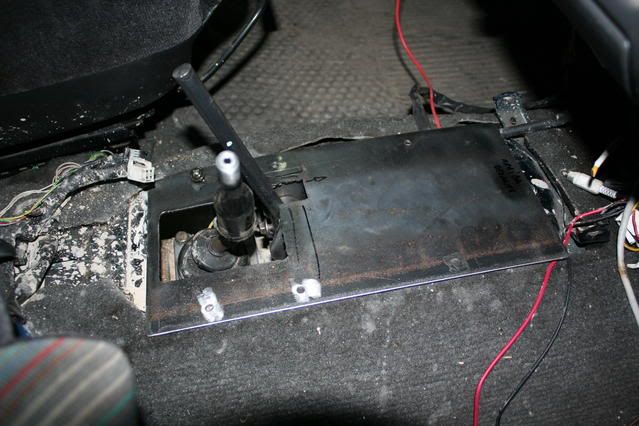
Made a 15� bend in the stick so in D position the stick is straight
Found an old wood knob in the shop. This is N position
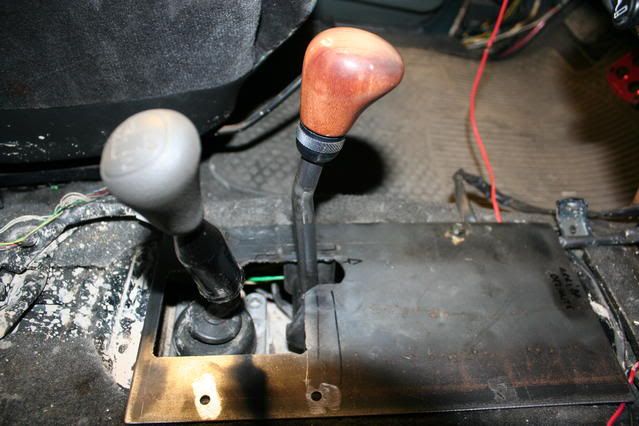
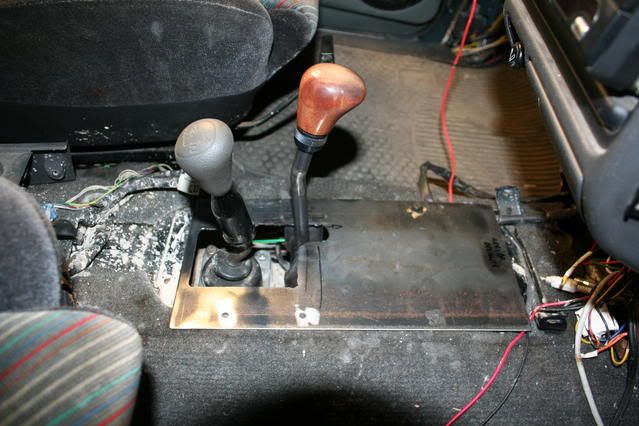
P position
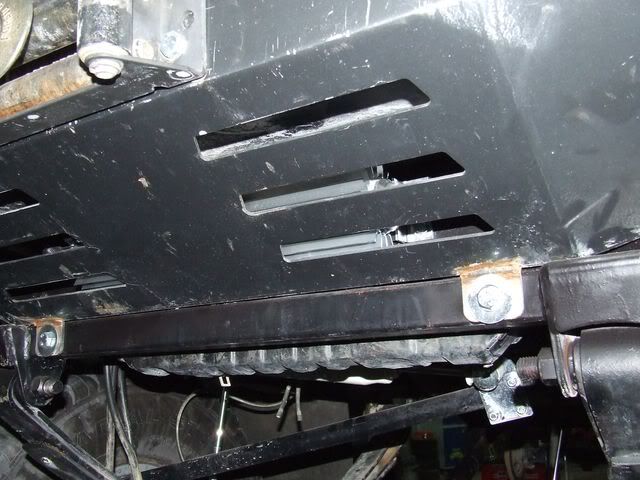
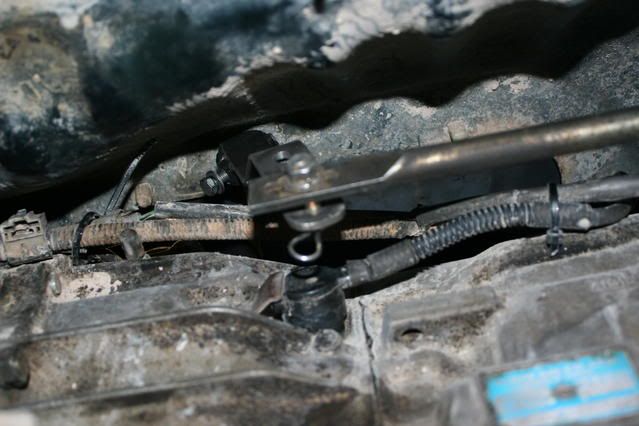
Underbody linking. I made a little spacer after the pic
Cut the old brake pedal and welded the auto pedal pad
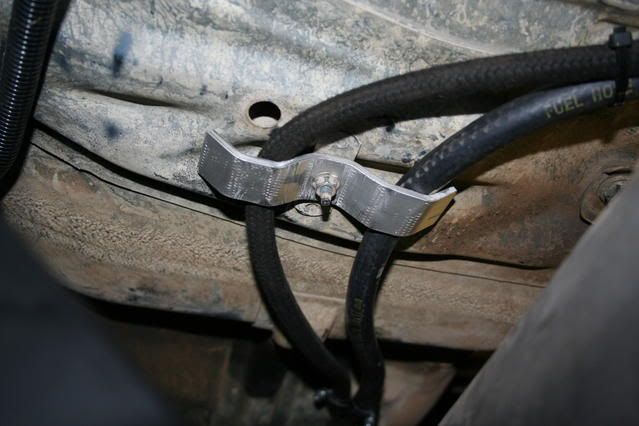
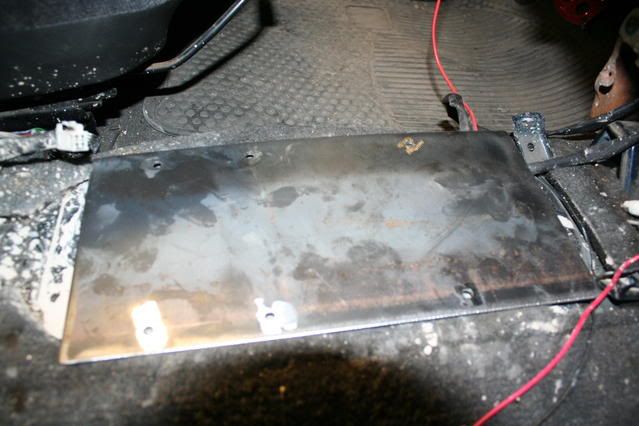
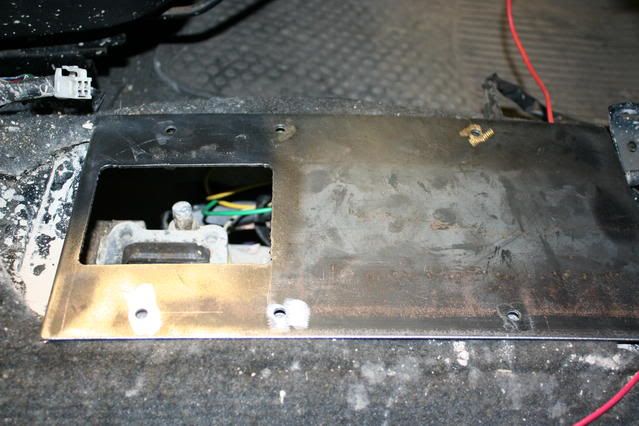
Then I began cleaning the electrical installation. Used those nice plugs

Now I've to build a custom center console with space for switches and so.
Cheers,
David
Time for an update hehe
Installed an ATF cooler behind the front bumper. Chose this place because running it has cool air flow and it will have some flow in low speed due to the engine fan pulling air.
Re-routed the custom exhaust
I wanted to make a custom gear stick beause wanted it to be nearer to the T-Case stick and it being shorter. Then I'll be able to make a custom center console with space to put switches, the 2nd tank gauge, and so... Then began fabbing
Made the transfer stick hole
Then used the lathe to make some parts...
Taking shape
I made all the parts adjustable and unmountable
First tests. P position
L position
Made a 15� bend in the stick so in D position the stick is straight
Found an old wood knob in the shop. This is N position
P position
Underbody linking. I made a little spacer after the pic
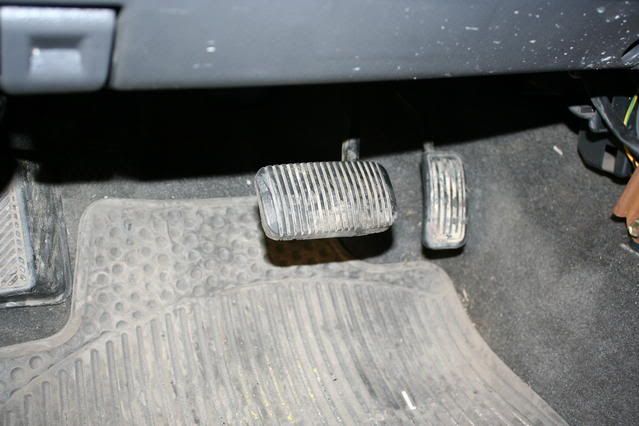
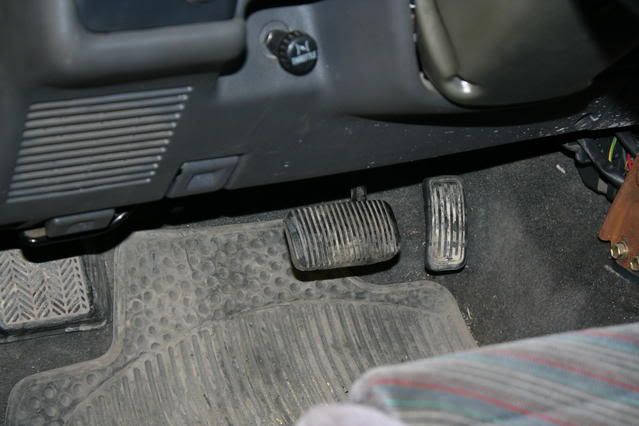
Cut the old brake pedal and welded the auto pedal pad
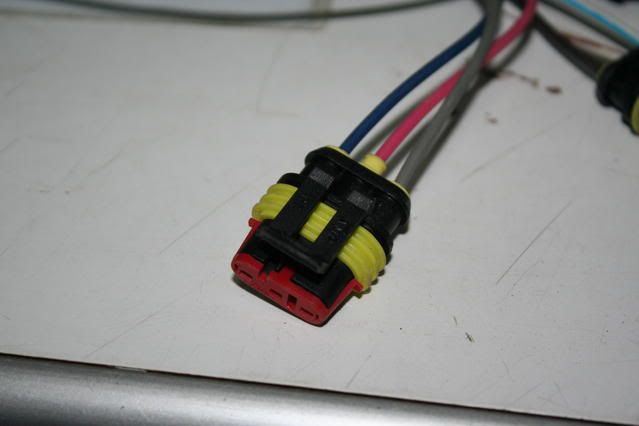
Then I began cleaning the electrical installation. Used those nice plugs
Now I've to build a custom center console with space for switches and so.
Cheers,
David
10-04-2010, 10:25 PM
#19
Banned

Join Date: Feb 2008
Location: Camarillo, California
Posts: 47
Likes: 0
Received 0 Likes
on
0 Posts
Back from the dead, Great job man.
Just put a 1kzte into an 85 toyota pickup and got to thinking about this VERY idea. Turns out you already did it on a 1kzt, I would love to ask you a couple questions on performance gains, where you set shift points, etc.
Great idea by the way.
Just put a 1kzte into an 85 toyota pickup and got to thinking about this VERY idea. Turns out you already did it on a 1kzt, I would love to ask you a couple questions on performance gains, where you set shift points, etc.
Great idea by the way.
10-05-2010, 09:17 AM
#20
Registered User
Thread Starter
Join Date: Jul 2004
Location: Barcelona (Spain)
Posts: 917
Likes: 0
Received 0 Likes
on
0 Posts
I'm here hehe
As for performance, my truck w/o increasing the fuel delivery (I prefer reliability and mpg) is giving 155HP, that's 30HP more than stock.
That's with rebuilt pump and injectors, intercooler, 3'' mandrel bent exhaust and turbo blowing at 1bar (14.5psi).
Cheers,
David
As for performance, my truck w/o increasing the fuel delivery (I prefer reliability and mpg) is giving 155HP, that's 30HP more than stock.
That's with rebuilt pump and injectors, intercooler, 3'' mandrel bent exhaust and turbo blowing at 1bar (14.5psi).
Cheers,
David


