custom rear bumper build..pics!
 02-19-2009, 05:52 PM
#1
Registered User
Thread Starter
custom rear bumper build..pics!
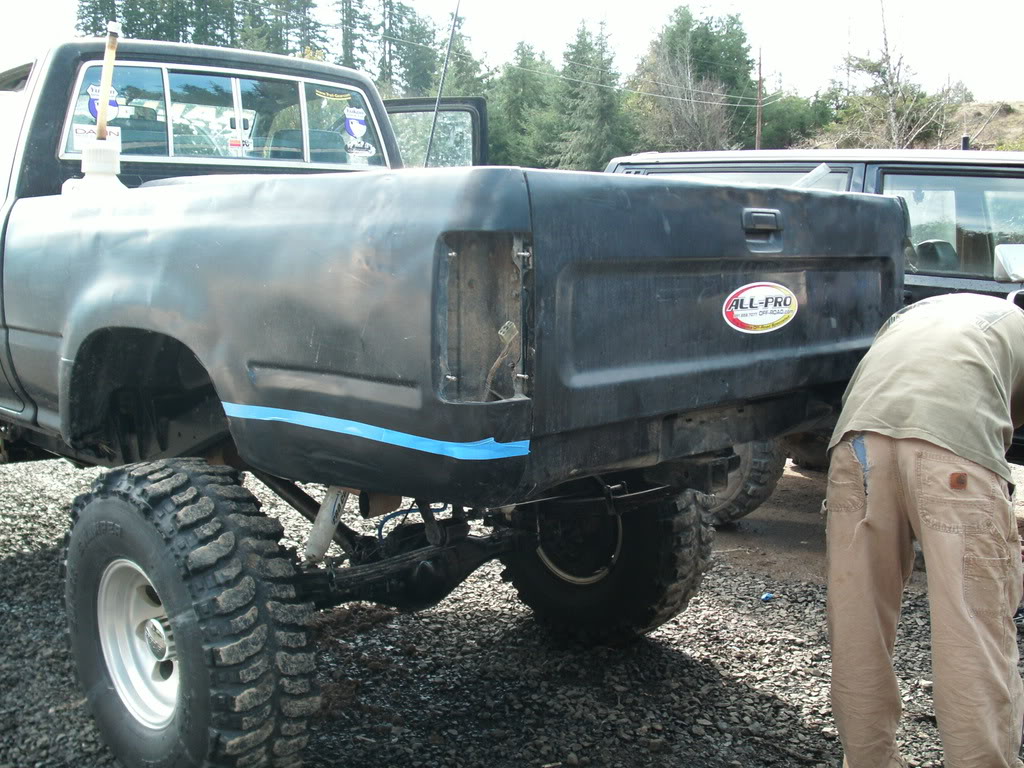
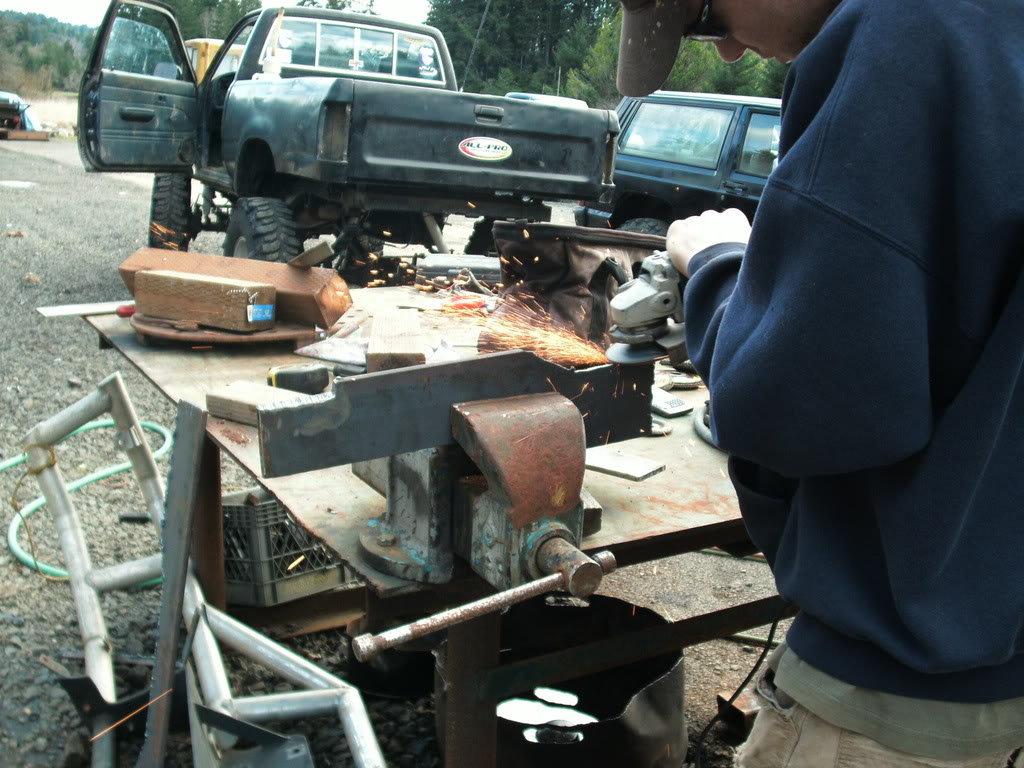
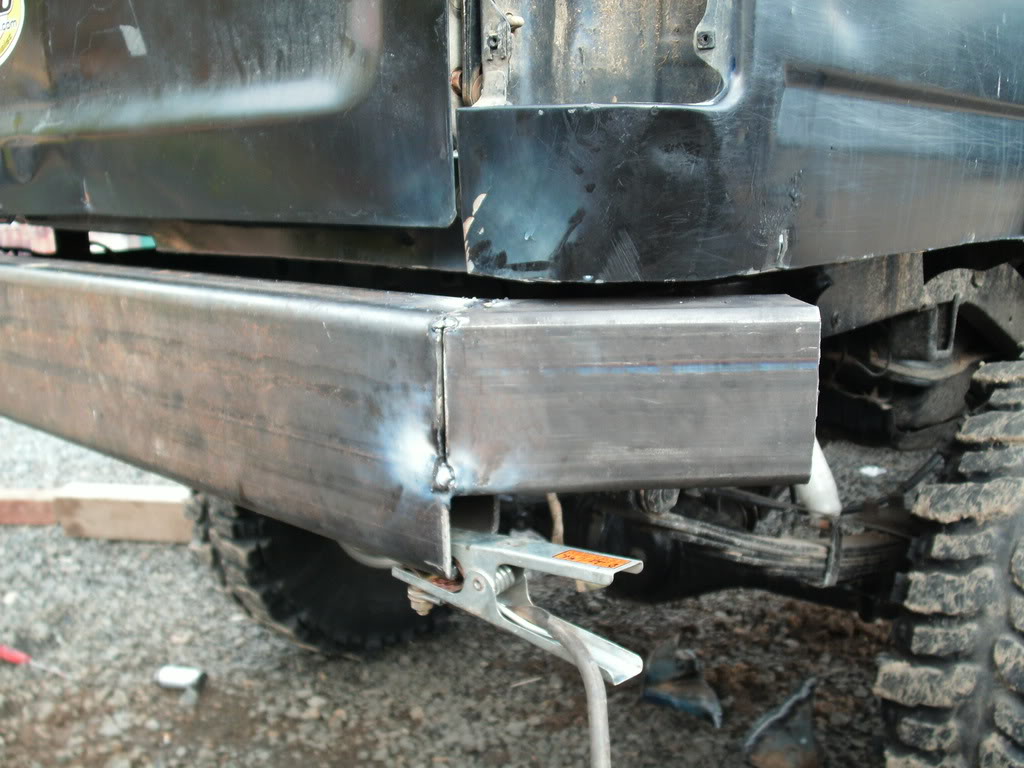
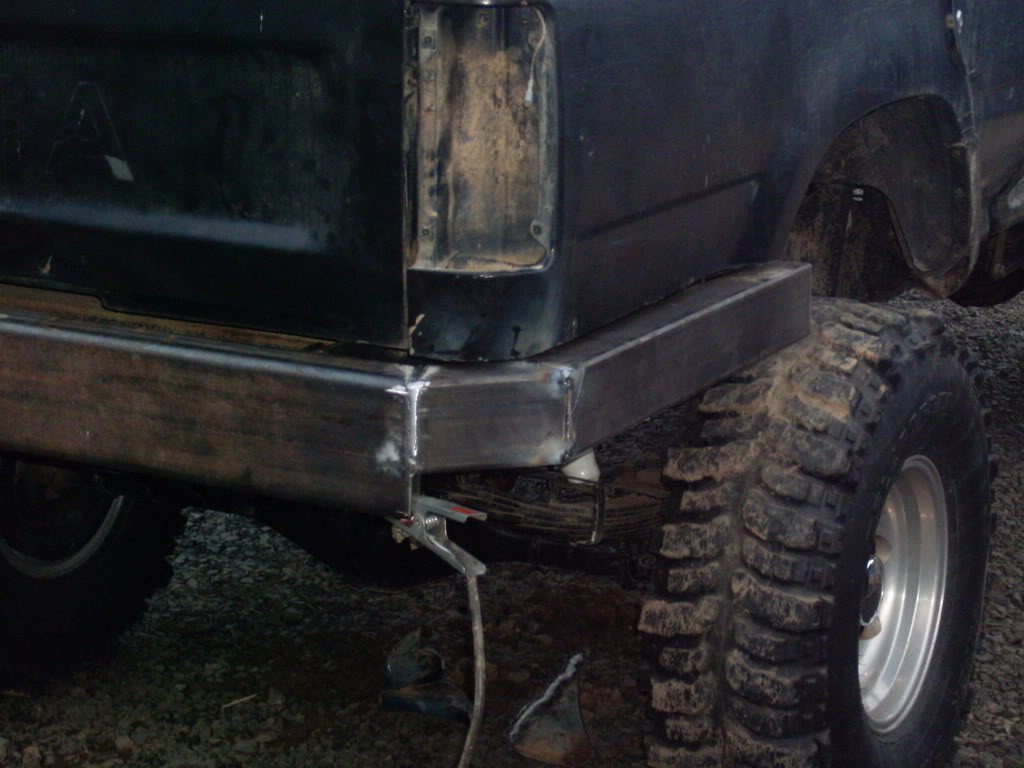
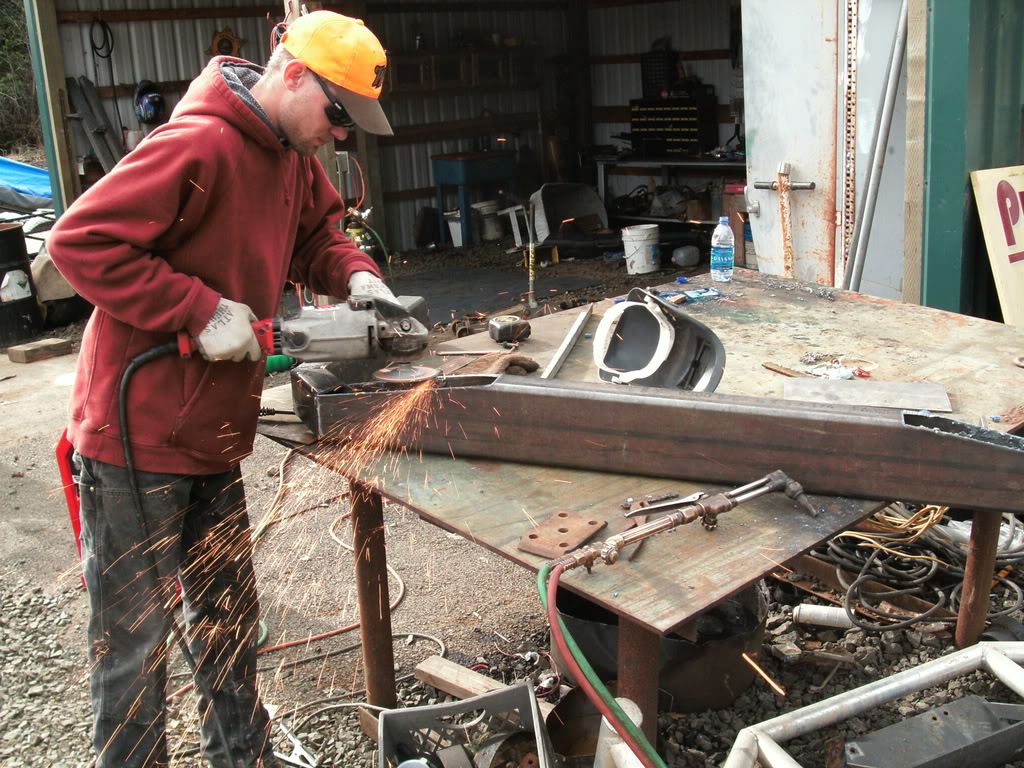
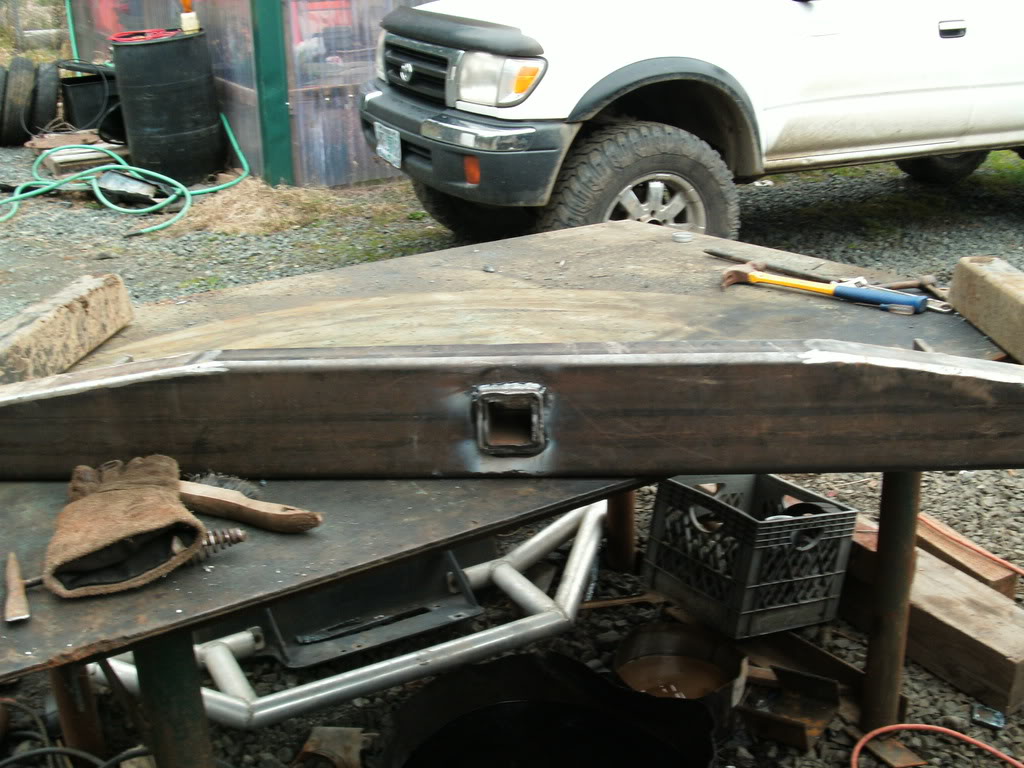
hey guys, just wanted to share some pics of the rear bumper that ricky and i have been working on. its pretty stout, i used 3"x6" and 3"x4" rec tubing that is a 1/4" thick. i still have some stuff to do. some touch up welding(because I'm sorta of a newbie welder  ) , a few gussets, couple shackle tabs, etc... anyway here are some pics, don't be to harsh
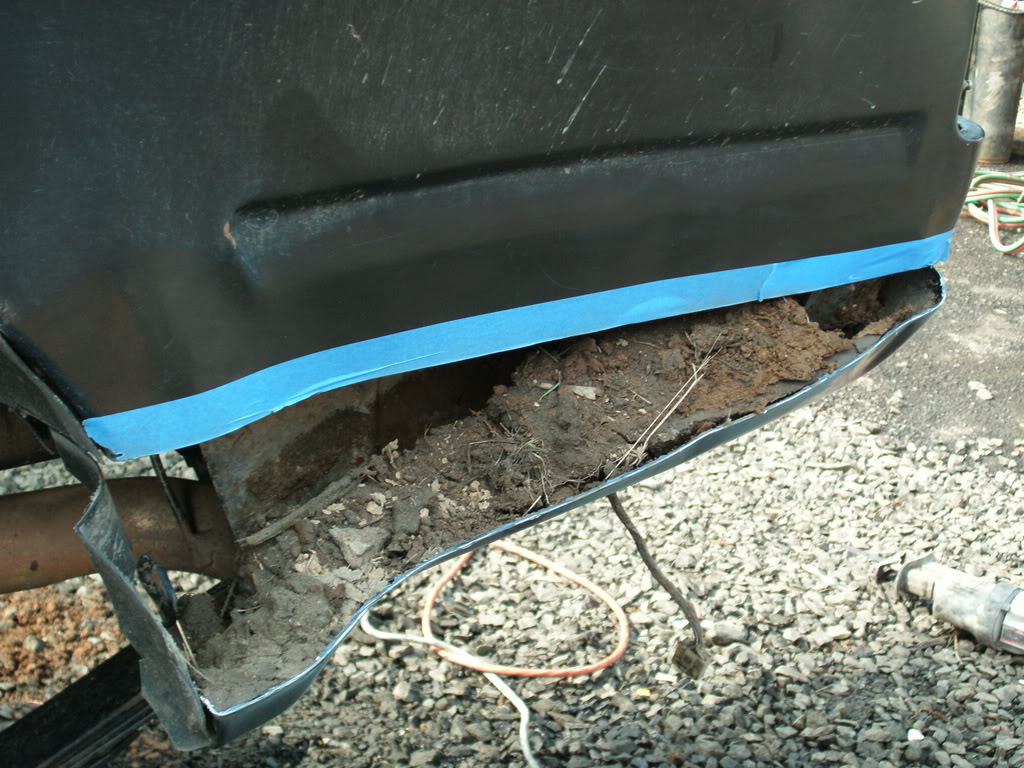
used some tape as a cutting guide when we cut off the roll pan, dented corners, etc..
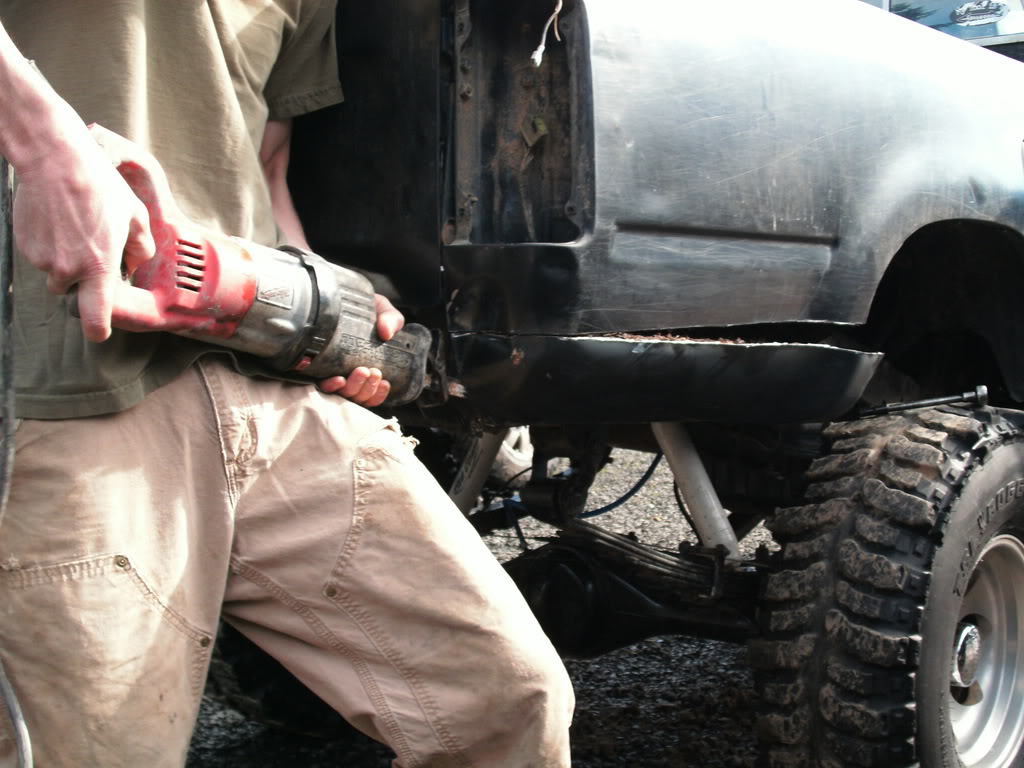
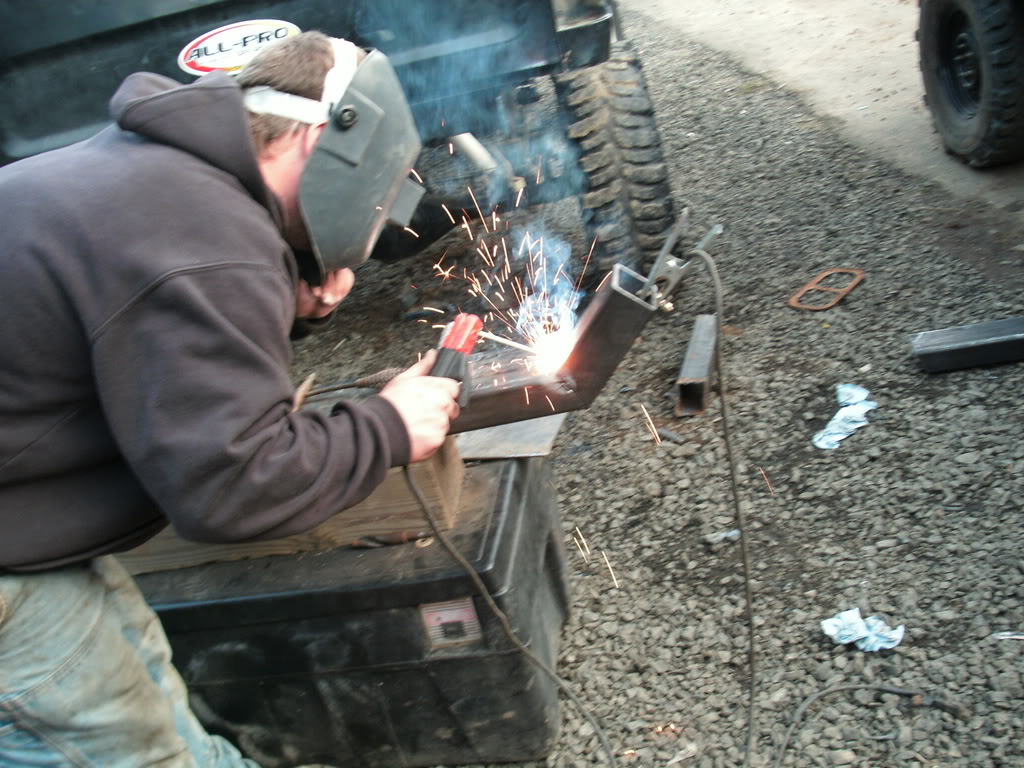
ricky doing a lil
got mud?
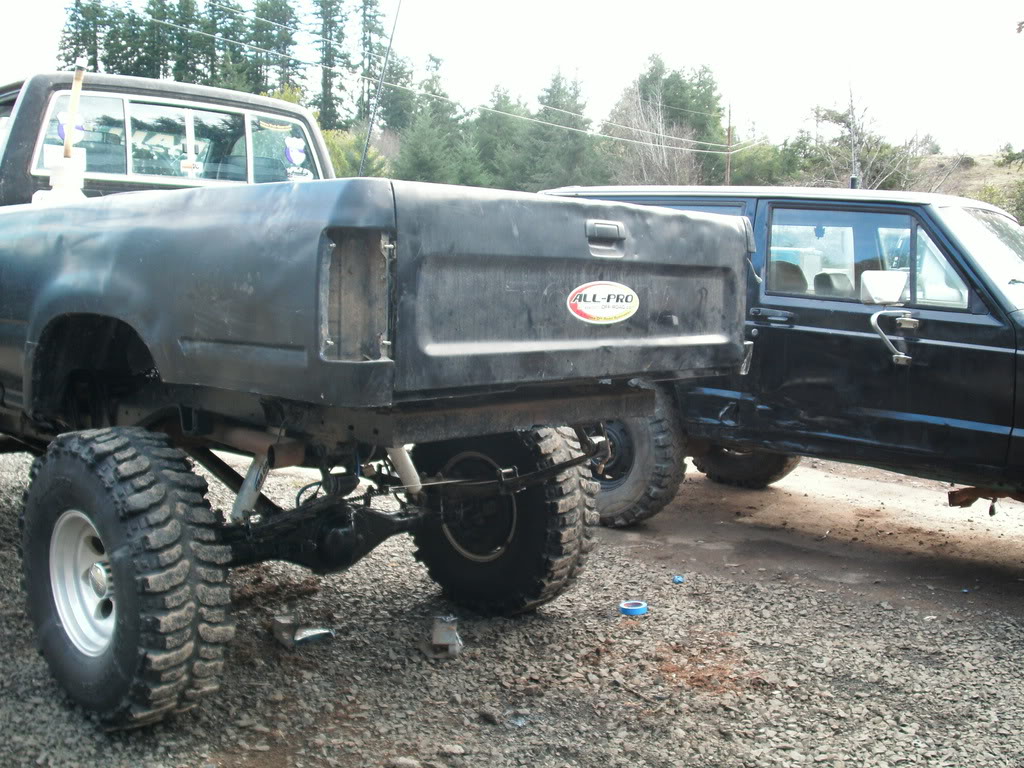
done hacking the bed up!
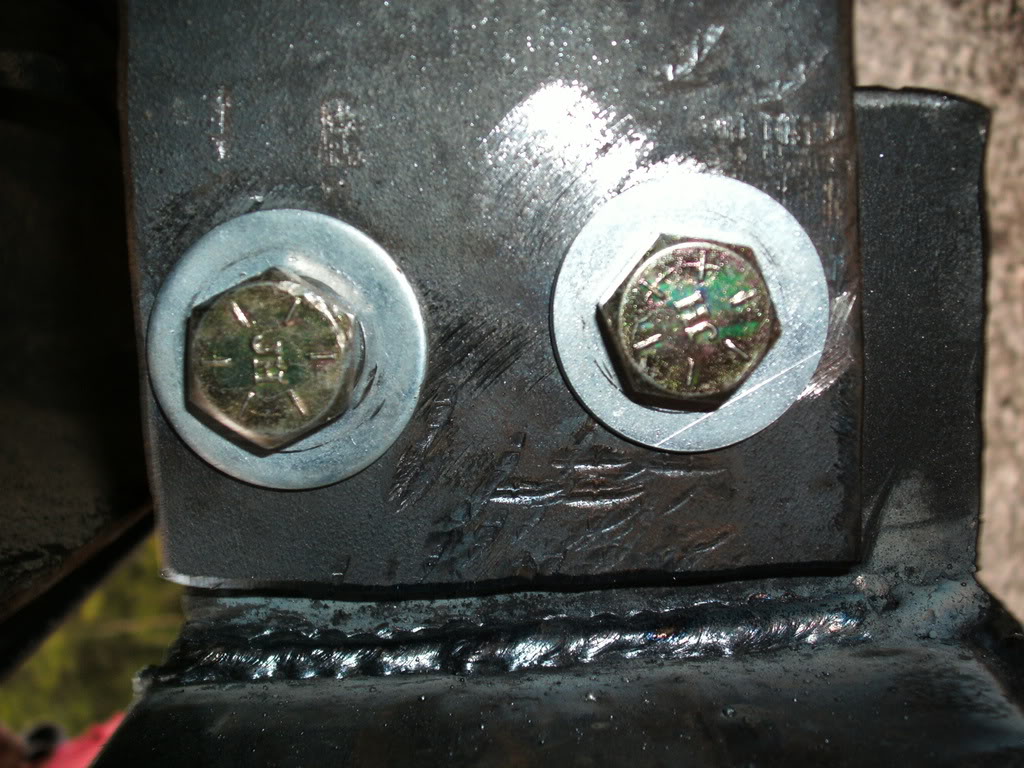
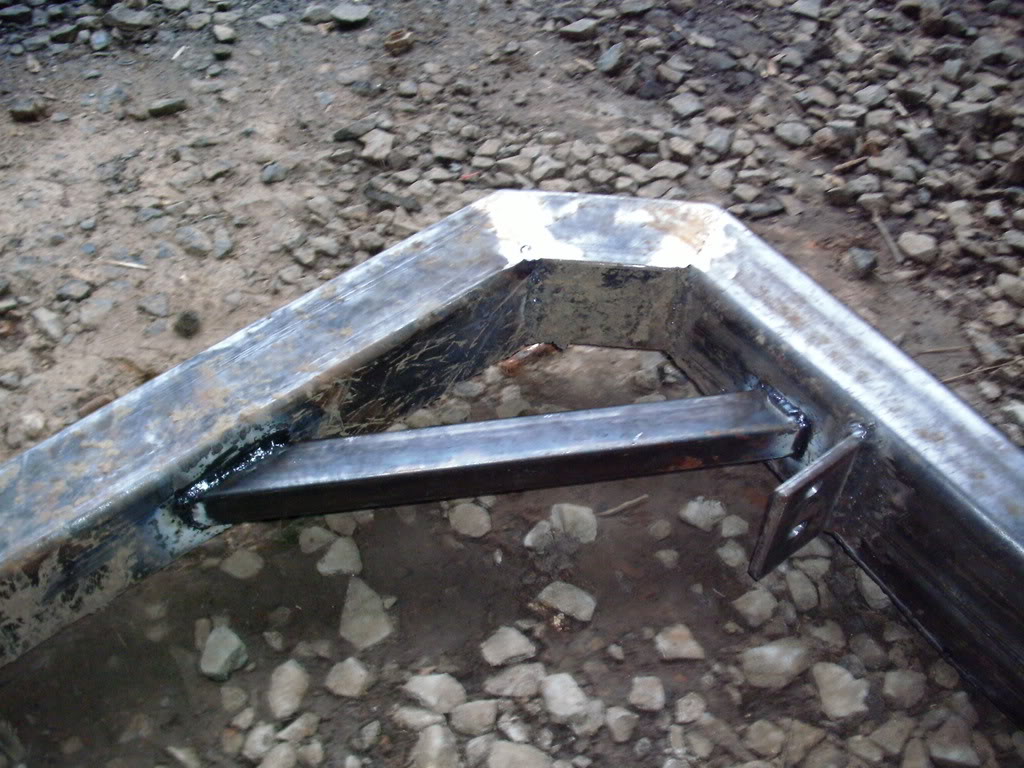
built some frame brackets, (3/8" plate)
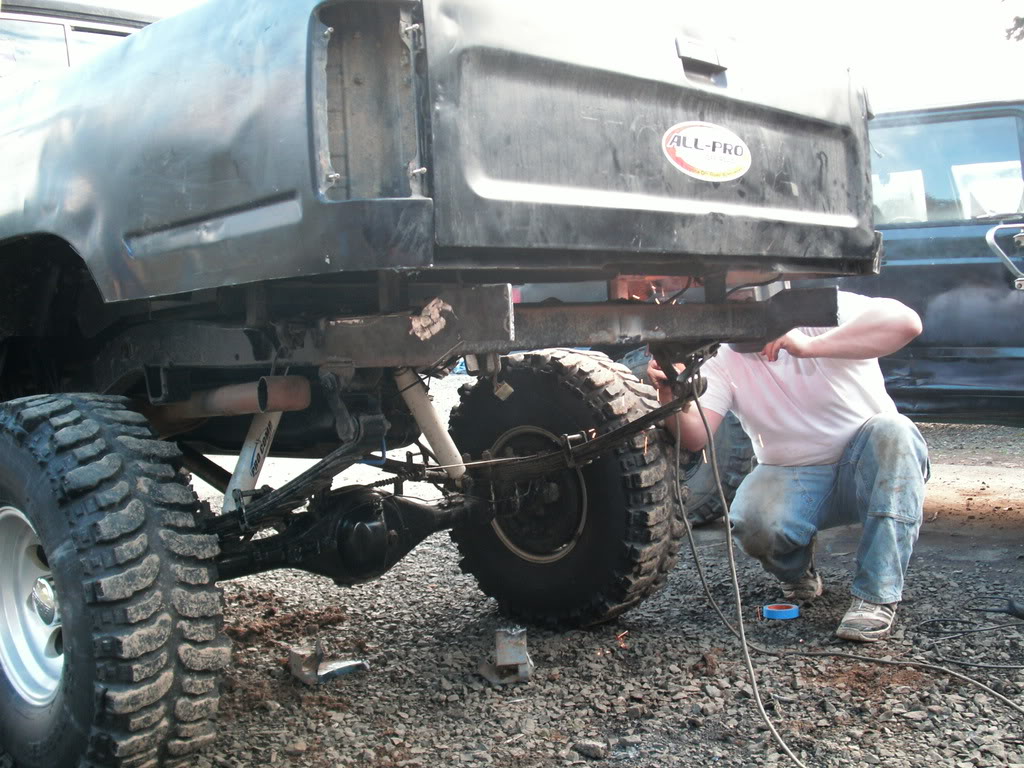
^still need to gusset them.
heres what i started with.
then made some 22.5 degree cuts
then we cut some angles to meet up with the smaller side pieces, and the wheel well.
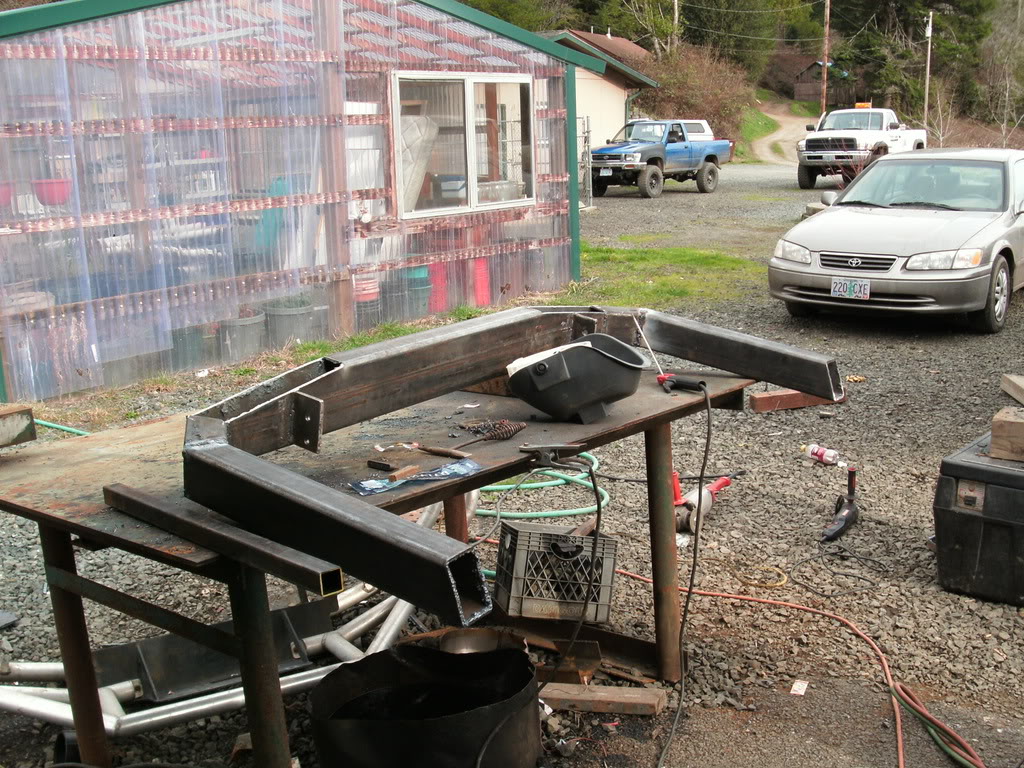
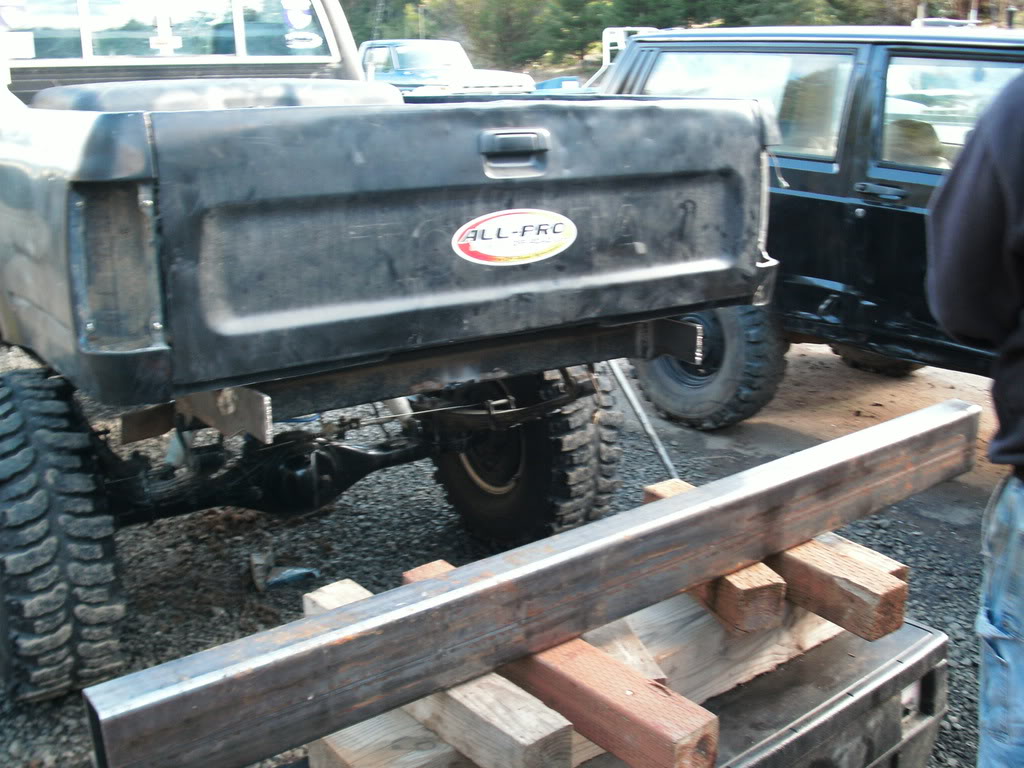
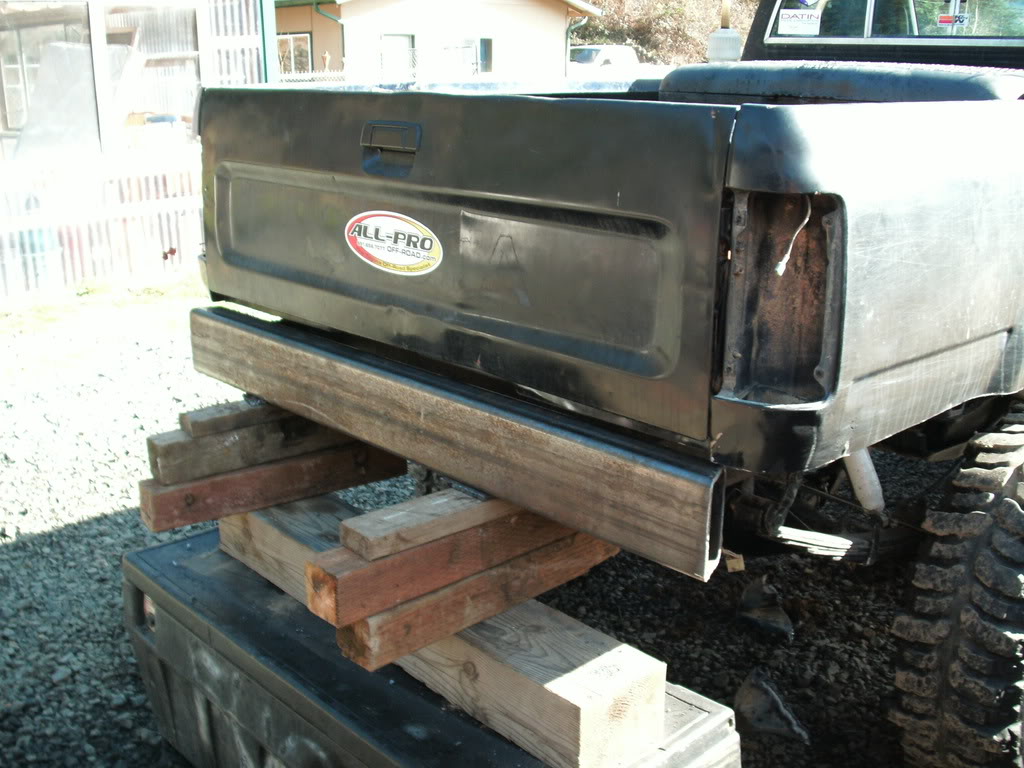
heres how it sits now.
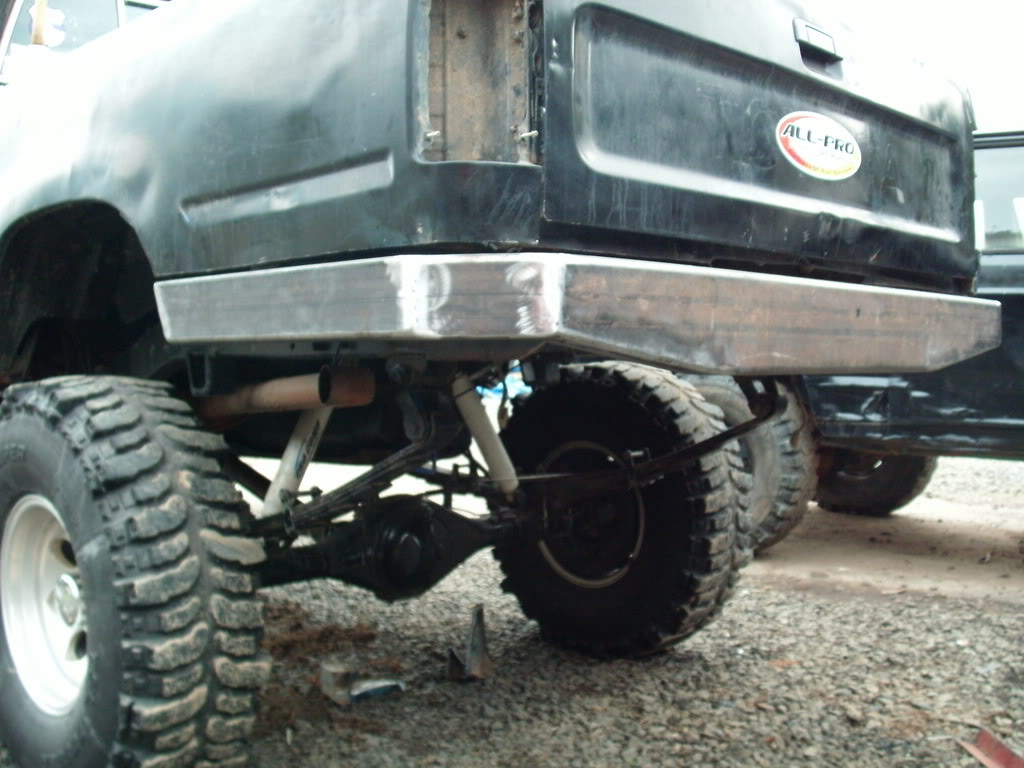
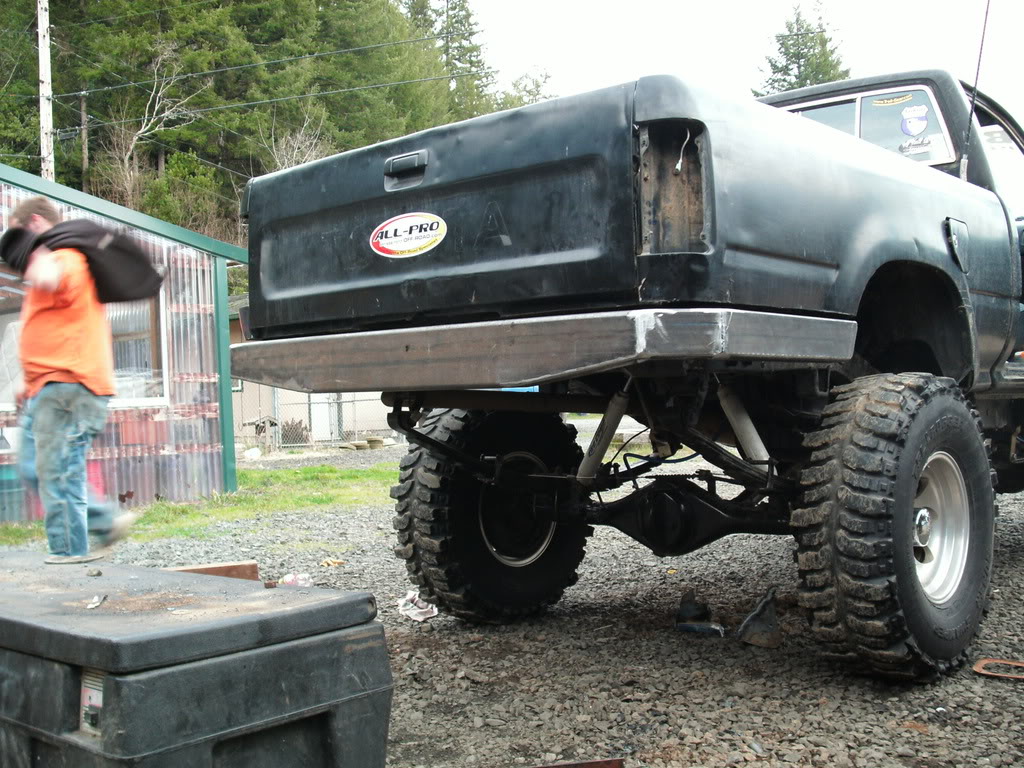
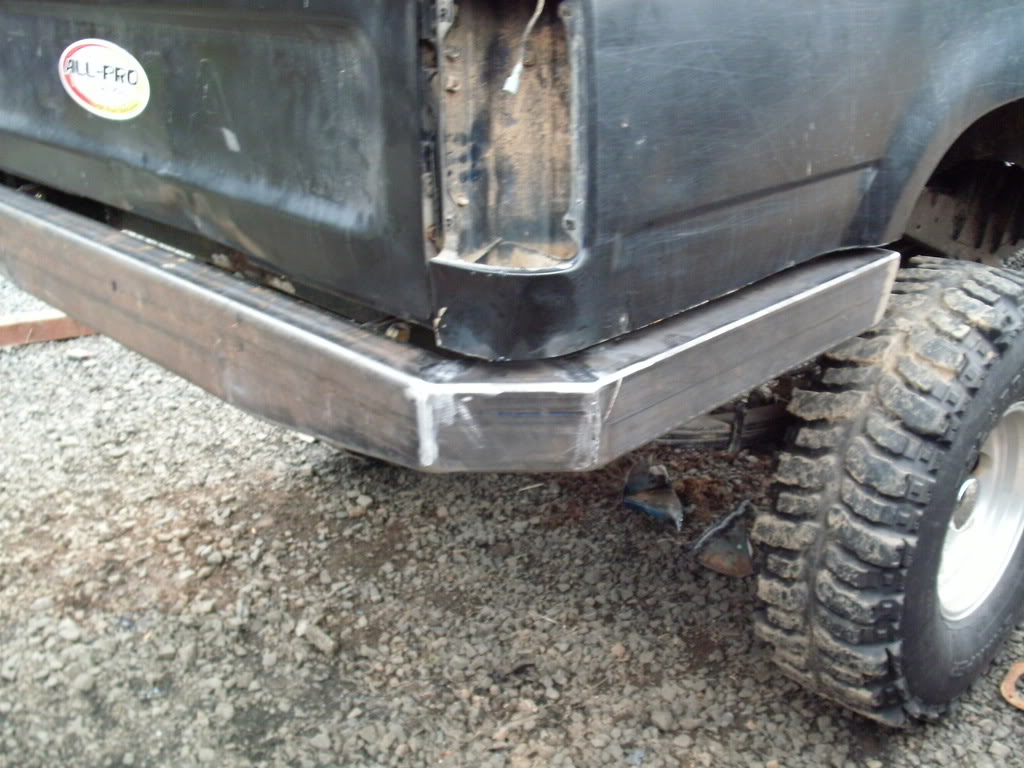
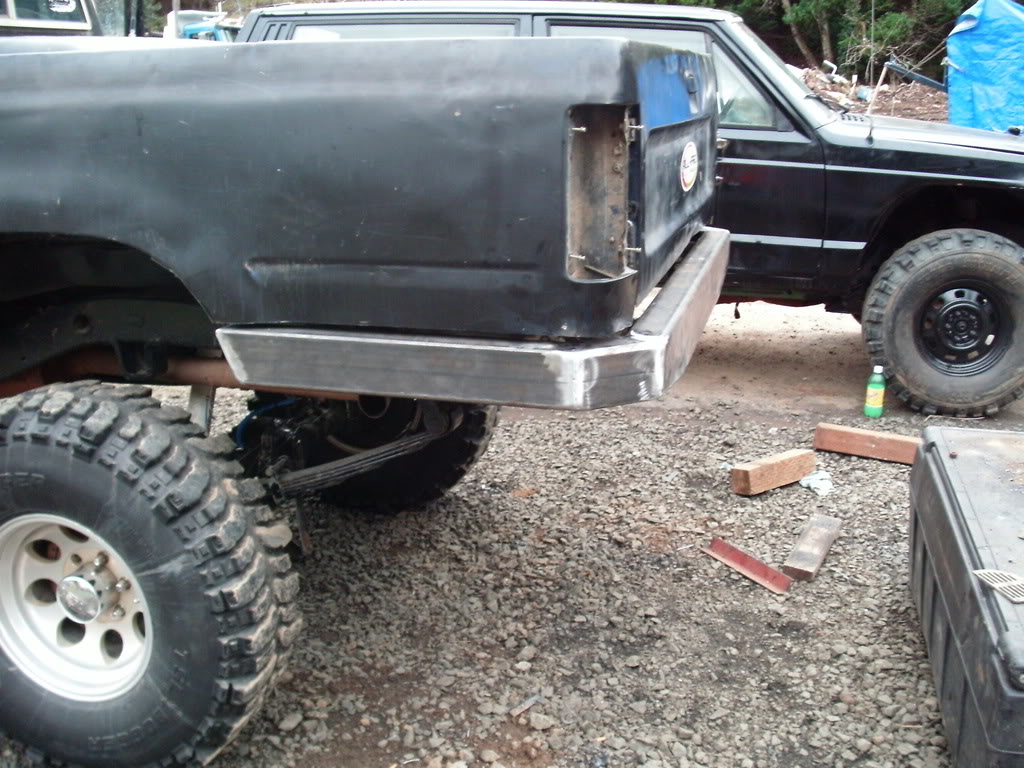
not perfect but I'm happy
) , a few gussets, couple shackle tabs, etc... anyway here are some pics, don't be to harshused some tape as a cutting guide when we cut off the roll pan, dented corners, etc..
ricky doing a lil
got mud?
done hacking the bed up!
built some frame brackets, (3/8" plate)
^still need to gusset them.
heres what i started with.
then made some 22.5 degree cuts
then we cut some angles to meet up with the smaller side pieces, and the wheel well.
heres how it sits now.
not perfect but I'm happy
 02-19-2009, 05:55 PM
#2
1. Repair the wind tunnel of a hole in your pants. Get a welding spark in there and you'll be doing the gay leprechaun dance.
2. Oh the joys of welding with a stick machine.
3. Looks beef but I'd reinforce it from the sides to the frame as well.
4. Take it back off and cut a hole in the middle and mount a hitch receiver in it for a recovery point after you do #3.
5. Nice work thus far.
You never get to walk on the water if you don't first step out of the boat.
Last edited by waskillywabbit; 02-19-2009 at 06:03 PM.
02-19-2009, 06:02 PM
#4
Registered User
Thread Starter
1. Repair the wind tunnel of a hole in your pants. Get a welding spark in there and you'll be doing the gay leprechaun dance.
2. Oh the joys of welding with a stick machine.
3. Looks beef but I'd reinforce it from the sides to the frame as well.
You never get to walk on the water if you don't first step out of the boat.
2. Oh the joys of welding with a stick machine.
3. Looks beef but I'd reinforce it from the sides to the frame as well.
You never get to walk on the water if you don't first step out of the boat.
... and i have already decided to put one in there lol. but good lookin out there wabbit!
Last edited by TOYOTA 1; 02-19-2009 at 06:25 PM.
Trending Topics
02-19-2009, 06:56 PM
#8
Registered User
Thread Starter
thanks!!
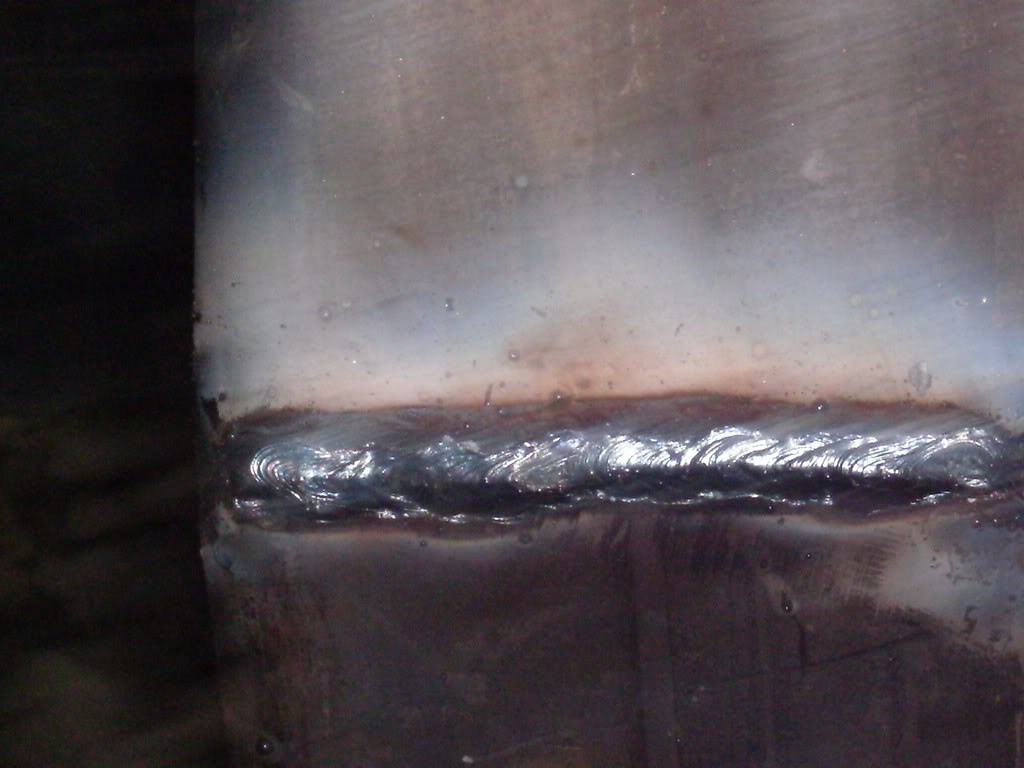
thanks! i dont mind stick welding, it gets good penitration
thanks. i cant wait to get it done!
thanks! i dont mind stick welding, it gets good penitration
thanks. i cant wait to get it done!
02-21-2009, 06:56 AM
#9
Registered User
Join Date: Feb 2008
Location: Mesa AZ
Posts: 17
Likes: 0
Received 0 Likes
on
0 Posts
I like the bumper man! I also have the steel sitting at home but I'm in Africa for a couple months. I appreciate the pictures. IT heps me finalize what I am doing. Any advice for me?
02-21-2009, 07:43 AM
#11
Registered User
Thread Starter
also for grinding use the flapper discs, they leave a smoother more finished look.
thanks yoder! im going to try to finish it up today. ill post some pics of the progress.
02-21-2009, 05:31 PM
#12
Registered User
Thread Starter
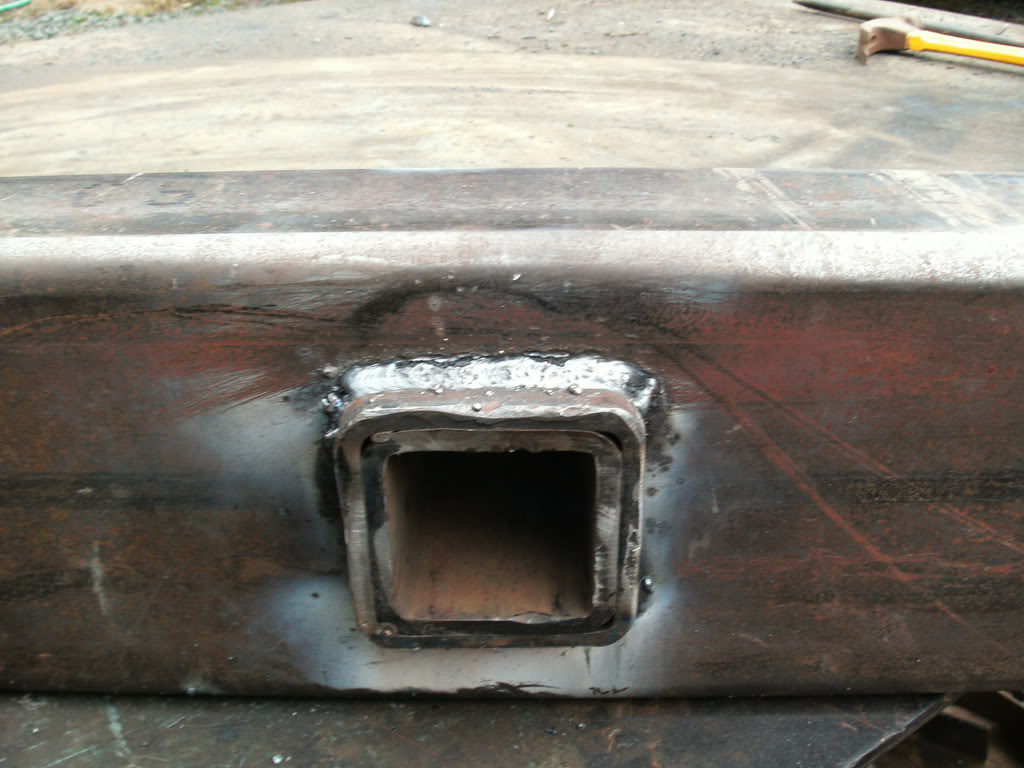
i got some more work done on the bumper today. got a reviever in there, and some shackel tabs that i made from some 1/2" plate. heres a few pics.
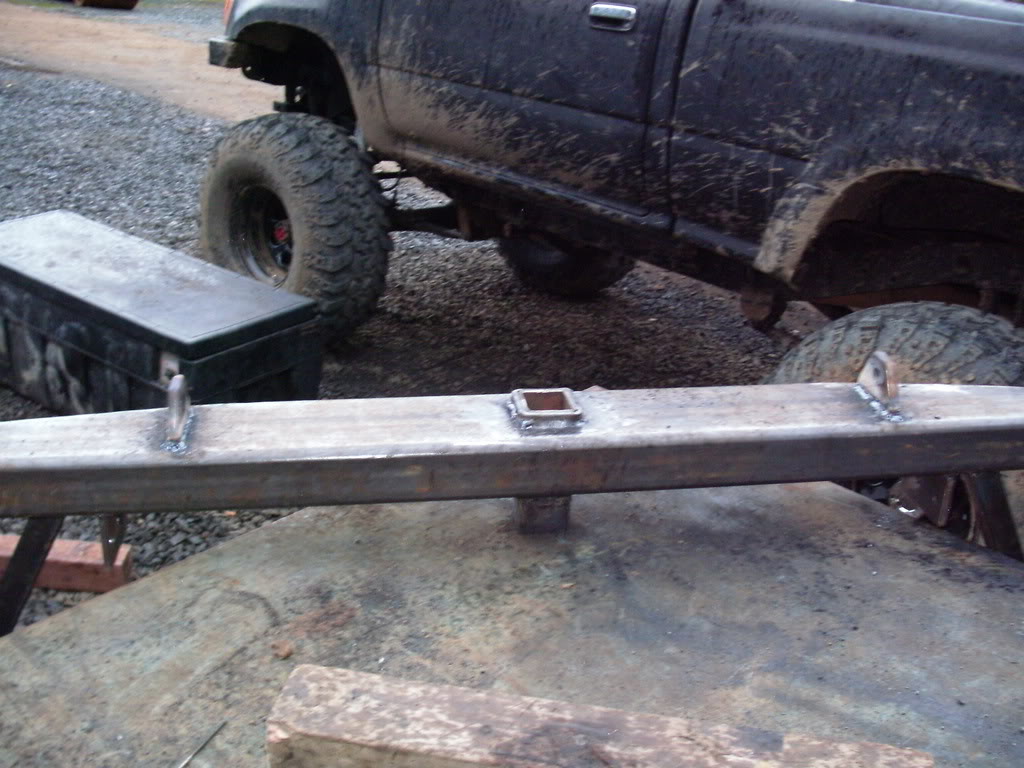
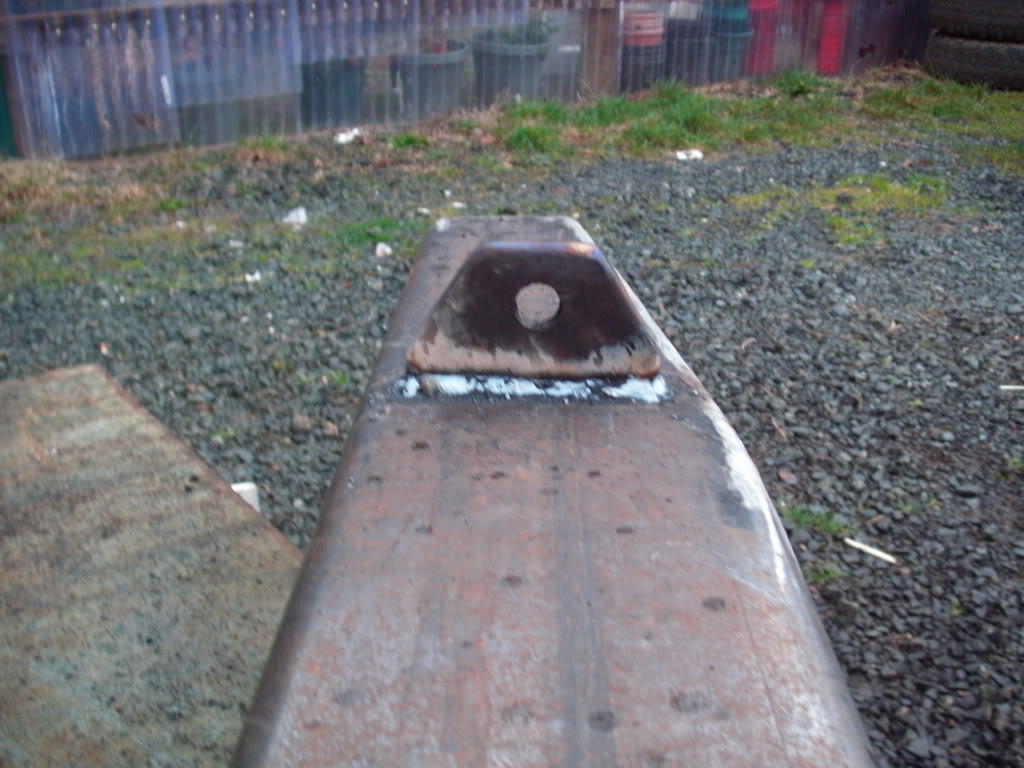
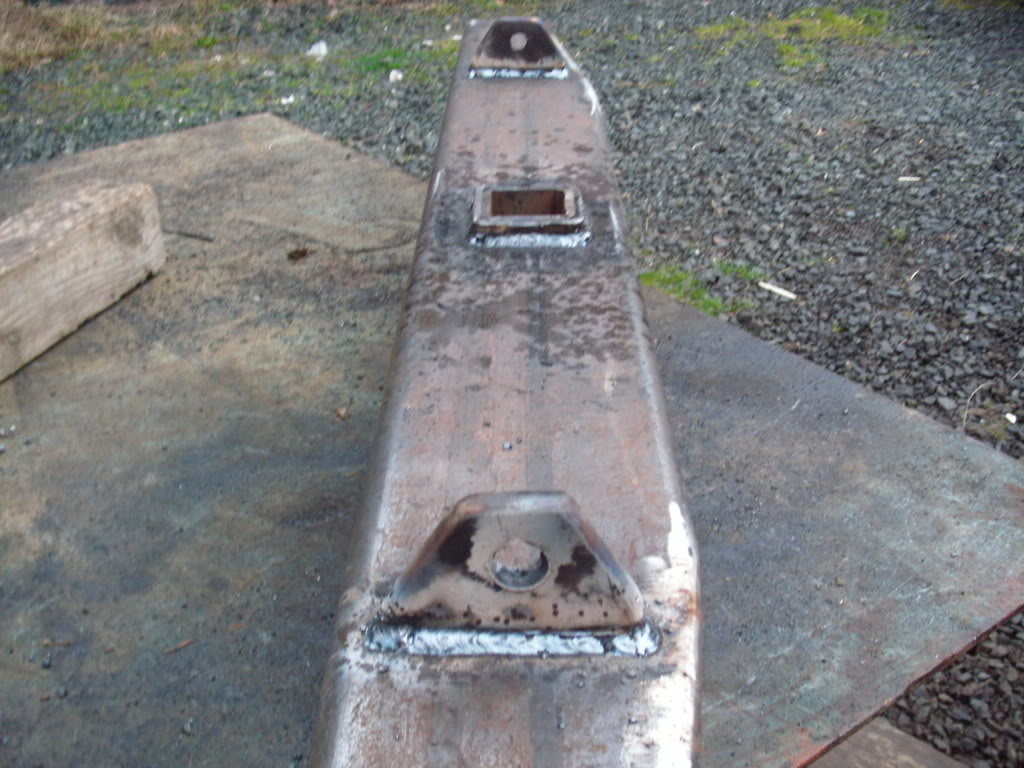
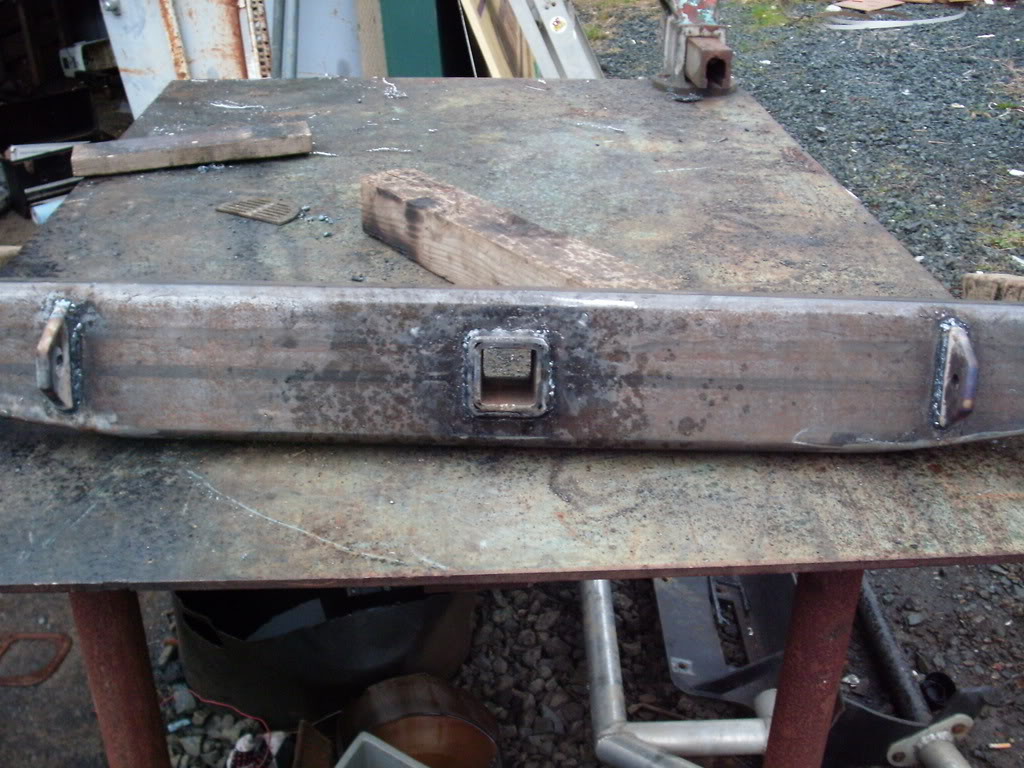
i also made some bracing for the side pieces out of some 1.5" square tubing.
i know its not the best angle for support but thats all i had to work with becouse my frame mounts were in the way. but its plenty stout, i doubt i even needed it.
i also made some bracing for the side pieces out of some 1.5" square tubing.
i know its not the best angle for support but thats all i had to work with becouse my frame mounts were in the way. but its plenty stout, i doubt i even needed it.
02-21-2009, 06:35 PM
#14
Registered User
Thread Starter
 02-21-2009, 09:02 PM
#18
Registered User
Ah im guessing thats your taco in the backround of one of those shots..? Back on topic, Bumper looks great, i think i just talked myself into getting a stick welder...So whens the prime and paint ?? 
02-22-2009, 09:23 AM
#19
Registered User
Thread Starter
thanks scuba, yea stick isnt all that bad. dont get me wrong a bad a** wire feed would be nice. i think im going to paint it today. although its gonna take forever to dry becouse its cold and raining like a mofo lol.
02-22-2009, 09:28 AM
#20
Registered User
Ive done stick and mig, I'd love a mig but maybe I can get a nice stick for a good price...hha, I want to finish my wheels today, but idk if its gonna rain of not..


