1988 Pickup 2x4 Restore

 07-20-2011, 02:04 AM
#22
Super Moderator
Staff
iTrader: (1)
Join Date: Aug 2008
Location: Anderson Missouri
Posts: 11,788
Likes: 0
Received 21 Likes
on
19 Posts
Welcome to YT. This is mostly a 4WD site, but there are some of us 2 wheelers on here. Me being one of them. I recognize them rims, I got Fords on mine too. I like the ride of a 2WD personally.
Adding Power Steering is pretty easy. Mine was bone stock, I have to add AC myself. I got everything, just need to get it done. I will be watching you and looking for tips.
I didnt see if yours had the 4 or 5 speed. Mine was 4 speed and I added a 5 speed out of an 83 Celica. A direct bolt in if you want to go that route. Welcome again and looking forward to your restore. I like restores the best.
07-20-2011, 04:58 AM
#23
Registered User
Join Date: Oct 2009
Location: Downtown Heckronto, Ontario, Soviet Canuckistan
Posts: 1,499
Likes: 0
Received 1 Like
on
1 Post
Terry, 3 posts above my last one he says he has a 4spd, tis by why like us, he has an 8" rear.
Heh, now that I think about it, you, this guy, and myself make up a trio of '88 2wds that came with 4spds. We just need to convince him to go flatbed and you to stuff on 31s. We'd be the 2wd triplets, in red, white, and blue of all colours.
Heh, now that I think about it, you, this guy, and myself make up a trio of '88 2wds that came with 4spds. We just need to convince him to go flatbed and you to stuff on 31s. We'd be the 2wd triplets, in red, white, and blue of all colours.
Last edited by Magnusian; 07-20-2011 at 05:04 AM.
07-20-2011, 08:56 AM
#24
Registered User
Thread Starter

Join Date: Jul 2011
Location: Las Vegas
Posts: 23
Likes: 0
Received 0 Likes
on
0 Posts
Thanks for the welcome terry yes the rims are off of a Ranger lol. I do indeed have a 4spd its the w46 and i plan on goin with the 5speed w58 out of the late 80s non-turbo supra. I have researched it and even if i cant find it in a junk yard its not too expensive on ebay same thing with the 6cyl differential with the 4.10 gear ratio. I realize that this site is directed toward 4x4 so as stated by magnusian above we can be the 2wd trio lol. Since i have joined this site i have gained a lot of knowledge and love for my truck.
07-20-2011, 01:14 PM
#25
Registered User
Thread Starter
Join Date: Jul 2011
Location: Las Vegas
Posts: 23
Likes: 0
Received 0 Likes
on
0 Posts
So I started installing all the A/C parts. first off this diagram helped me out a lot
Just to be sure how everything goes b4 i started
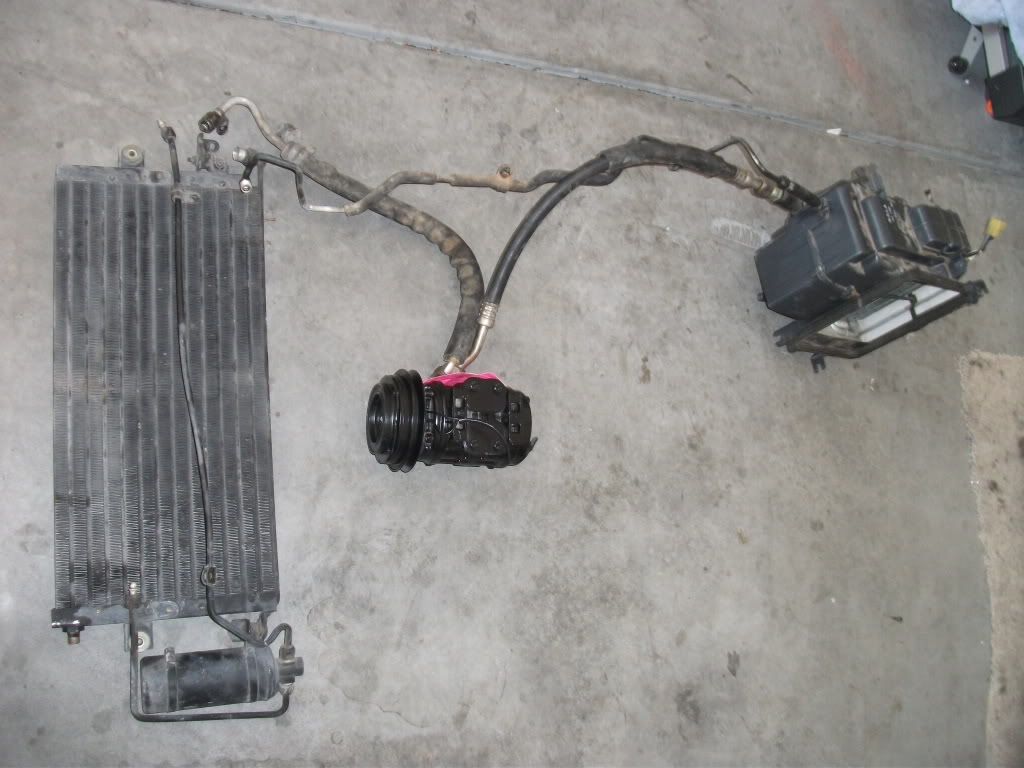
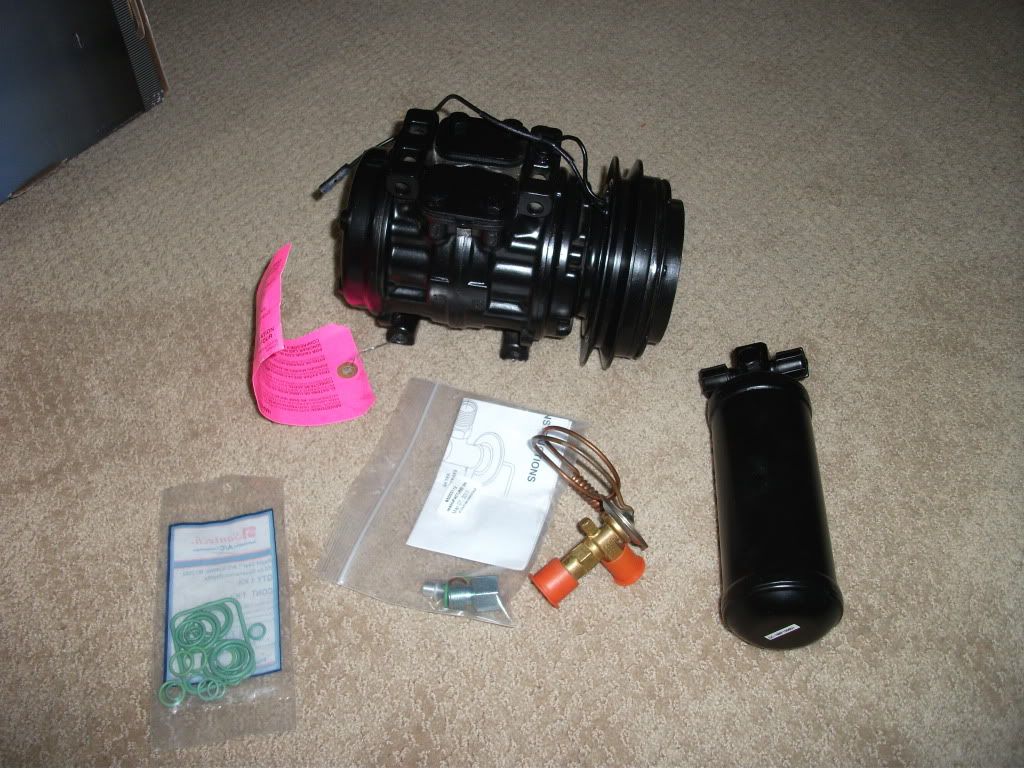
so the parts needed were:
A/C lines
condenser

evaporator
Compressor, drier/filter, and expansion valve
Just to be sure how everything goes b4 i started
so the parts needed were:
A/C lines
condenser
evaporator
Compressor, drier/filter, and expansion valve
07-20-2011, 01:28 PM
#26
Registered User
Thread Starter
Join Date: Jul 2011
Location: Las Vegas
Posts: 23
Likes: 0
Received 0 Likes
on
0 Posts
First thing i did was install the new expansion valve. To do this You need Your evaporator, a Philips screw driver, flat head screw driver, new expansion valve, 2 adjustable end wrenches, and a/c system oil.
-First thing to do is to take off the 4 philips head screws that hold the plastic casing of the evaporator together
-Next Using the flat head screw driver remove the 4 clips that hold the casing together.
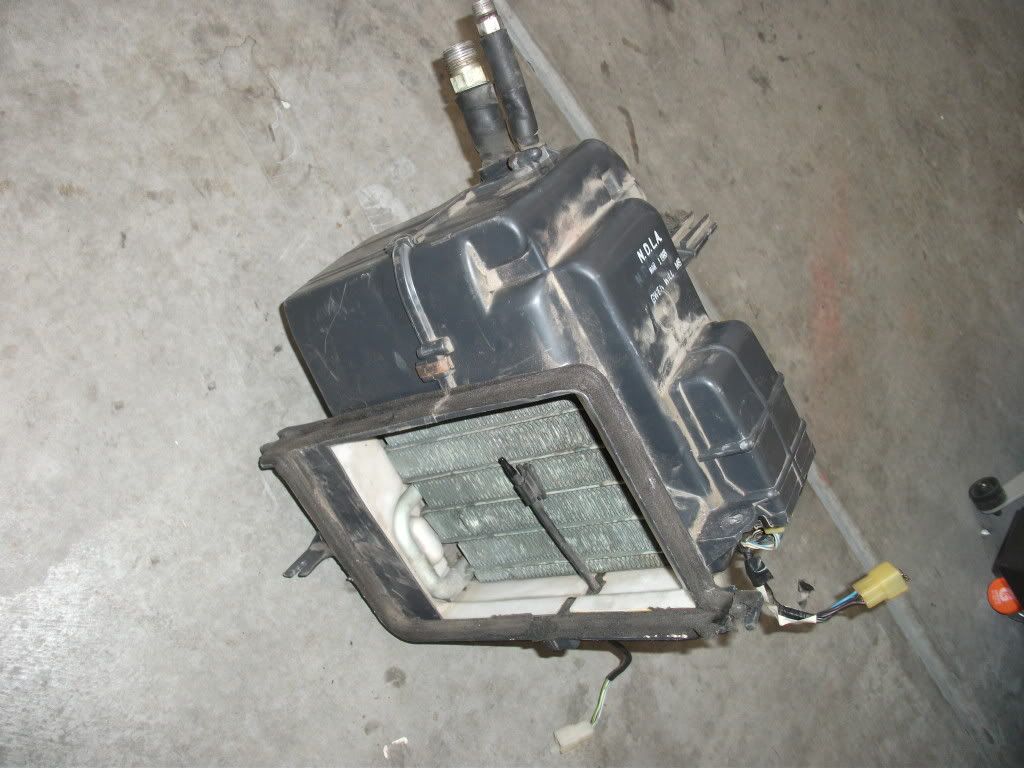
- now the casing should come apart exposing the evaporator core naked.
-this would be a good time to clean and blow out leaves and such
you should have Your evaporator exposed like so (this is with the new expansion valve installed)

-next, to install your expansion valve you must remove the old one using 2 adjustable end wrenches (when working with ac parts always use a back up wrench so you don't break things)
Old
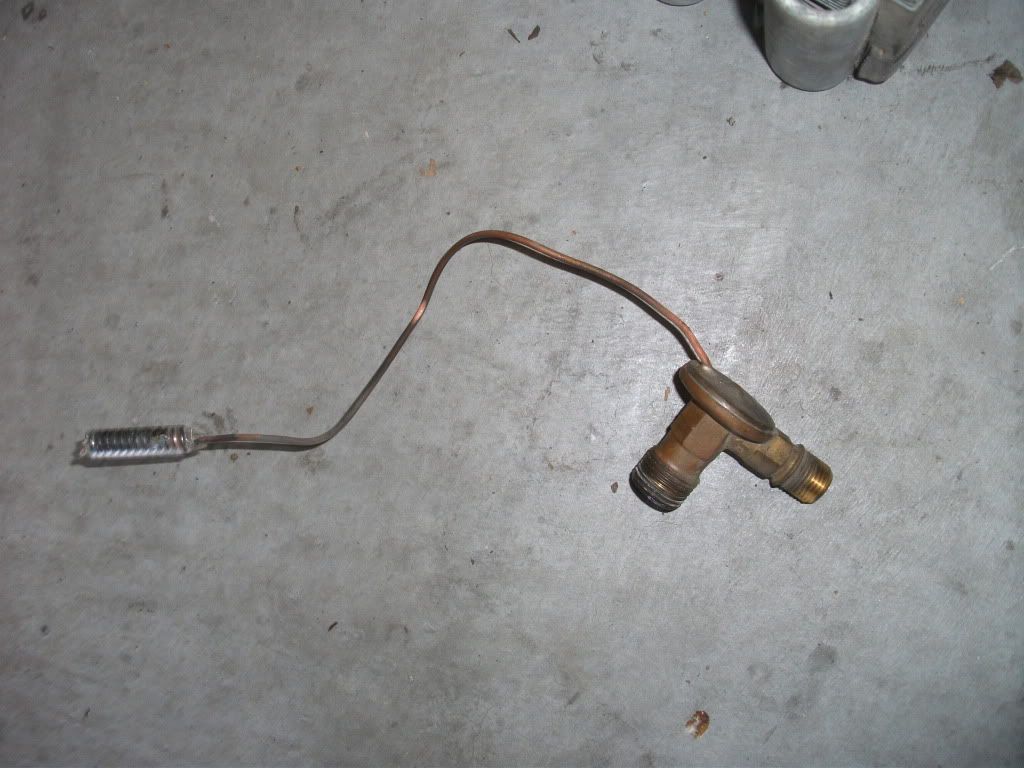
-now install the new expansion valve with new o-rings lubricated with ac oil
-once you've installed the new expansion valve you put your plastic casing back together.
-First thing to do is to take off the 4 philips head screws that hold the plastic casing of the evaporator together
-Next Using the flat head screw driver remove the 4 clips that hold the casing together.
- now the casing should come apart exposing the evaporator core naked.
-this would be a good time to clean and blow out leaves and such
you should have Your evaporator exposed like so (this is with the new expansion valve installed)
-next, to install your expansion valve you must remove the old one using 2 adjustable end wrenches (when working with ac parts always use a back up wrench so you don't break things)
Old
-now install the new expansion valve with new o-rings lubricated with ac oil
-once you've installed the new expansion valve you put your plastic casing back together.
Last edited by rockcs8588; 07-20-2011 at 01:33 PM.
07-20-2011, 01:49 PM
#27
Registered User
Thread Starter
Join Date: Jul 2011
Location: Las Vegas
Posts: 23
Likes: 0
Received 0 Likes
on
0 Posts
Next i installed the evaporator on the truck. To do this you need a drill, a 1 inch drill bit, a 1 1/2 inch drill bit, your evaporator, philips head screw driver, 10mm socket, a ratchet, and extension for the ratchet.
-1. You have to remove your glove box using your screw driver
-2. remove your glove box brace which is held on with 2 (10mm) bolts.
-3. now you should see a black plastic box connecting your blower motor to your vents this must come out since this is where your evaporator is gunna go. there are a couple of 10mm bolts holding it in place.
-4. once you've got the box out this should expose your firewall. you have to drill 3 holes in the firewall. don't worry there are indentations where these holes are suppose to be so its kinda hard to screw it up. The top and bottom holes need to be 1 inch in diameter. The middle hole needs to be 1 1/2 inches in diameter. this is where you use your drill and drill bits.
2 top holes

bottom hole
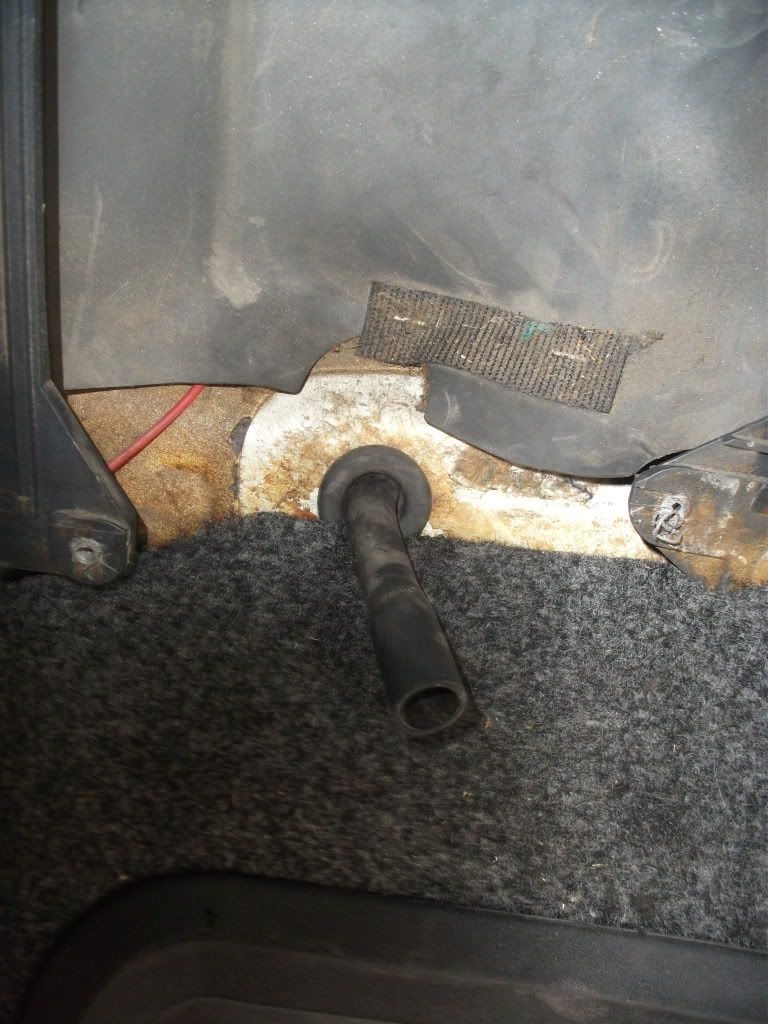
After your holes are drilled its time to mount your evaporator. This may take some persuasion and its held in place with 7 (10mm) bolts, 3 on top and 4 on bottom. make sure that you get the electrical connector for the evaporator from your donor truck b/c it is needed to plug into your truck. it is all plug and play no cutting wires of any sort unless your truck has been molested
bolted in place and plugged in
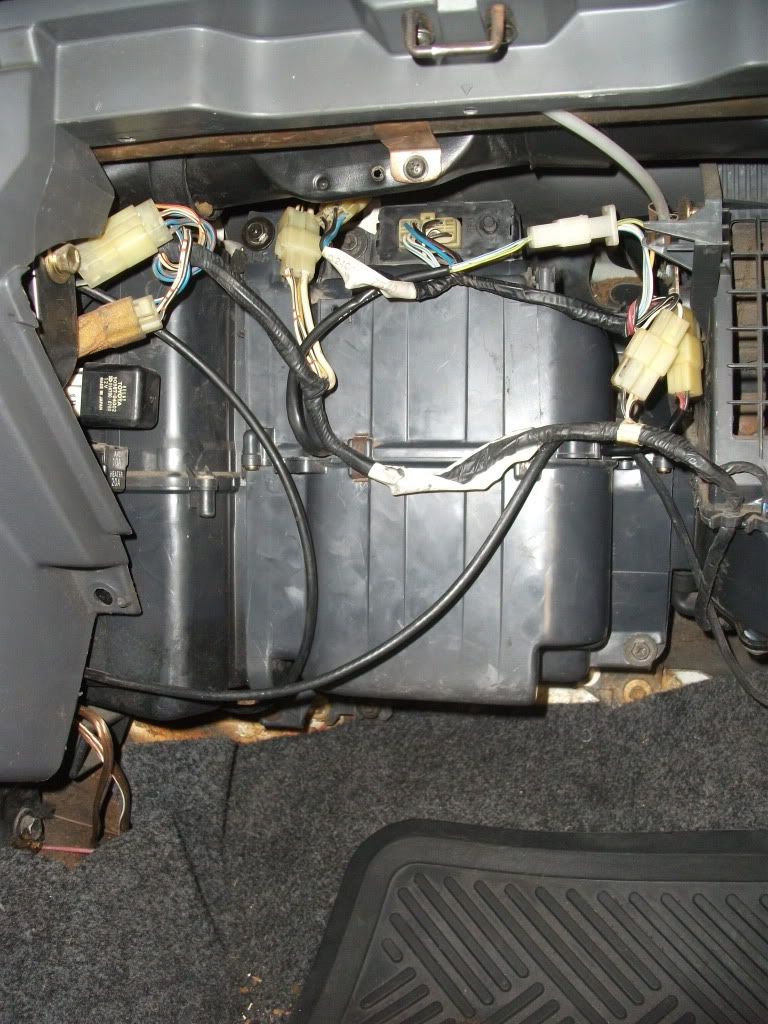
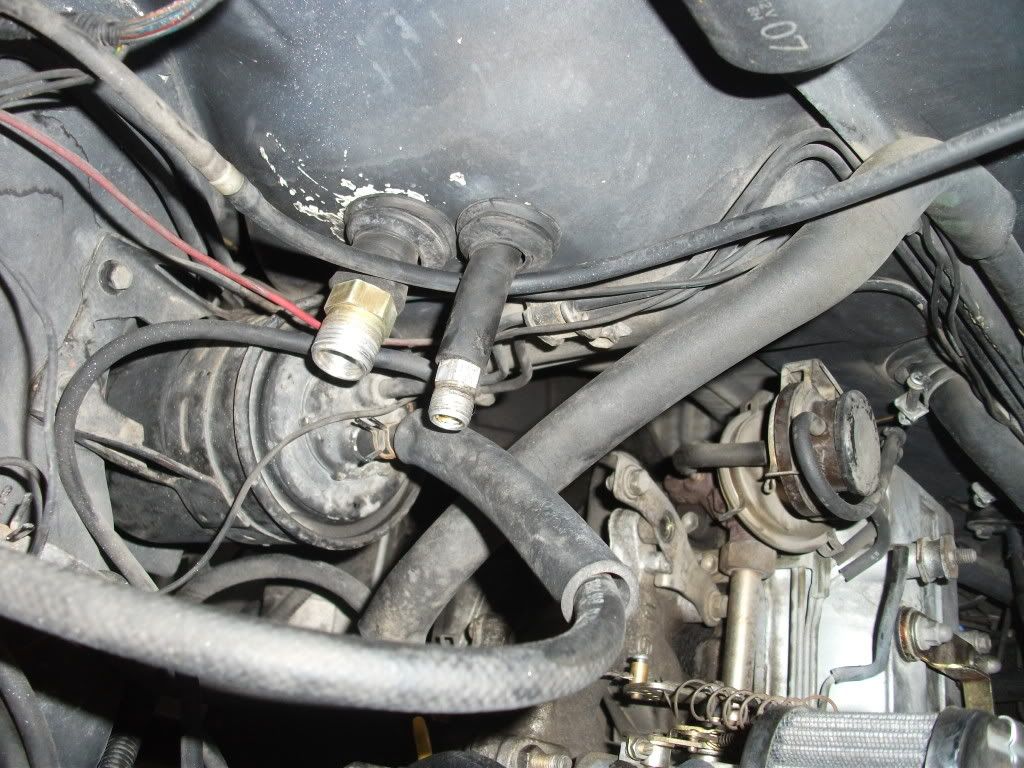
engine bay shot
-1. You have to remove your glove box using your screw driver
-2. remove your glove box brace which is held on with 2 (10mm) bolts.
-3. now you should see a black plastic box connecting your blower motor to your vents this must come out since this is where your evaporator is gunna go. there are a couple of 10mm bolts holding it in place.
-4. once you've got the box out this should expose your firewall. you have to drill 3 holes in the firewall. don't worry there are indentations where these holes are suppose to be so its kinda hard to screw it up. The top and bottom holes need to be 1 inch in diameter. The middle hole needs to be 1 1/2 inches in diameter. this is where you use your drill and drill bits.
2 top holes
bottom hole
After your holes are drilled its time to mount your evaporator. This may take some persuasion and its held in place with 7 (10mm) bolts, 3 on top and 4 on bottom. make sure that you get the electrical connector for the evaporator from your donor truck b/c it is needed to plug into your truck. it is all plug and play no cutting wires of any sort unless your truck has been molested
bolted in place and plugged in
engine bay shot
Last edited by rockcs8588; 07-20-2011 at 01:59 PM.
07-20-2011, 02:06 PM
#28
Registered User
Thread Starter
Join Date: Jul 2011
Location: Las Vegas
Posts: 23
Likes: 0
Received 0 Likes
on
0 Posts
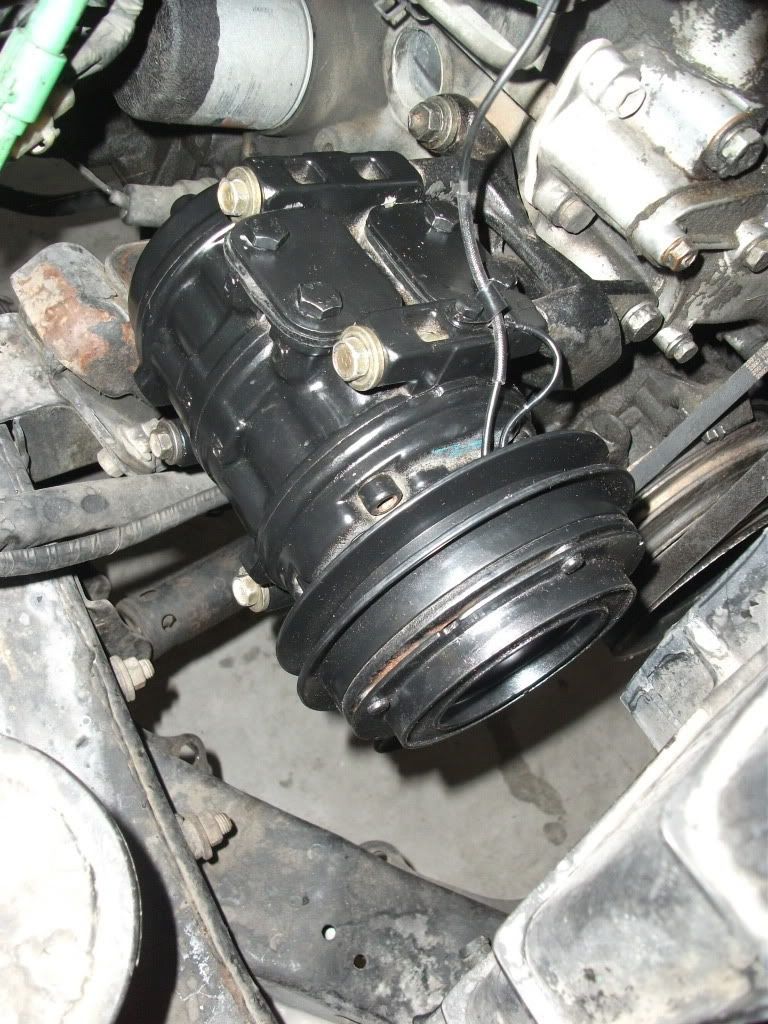
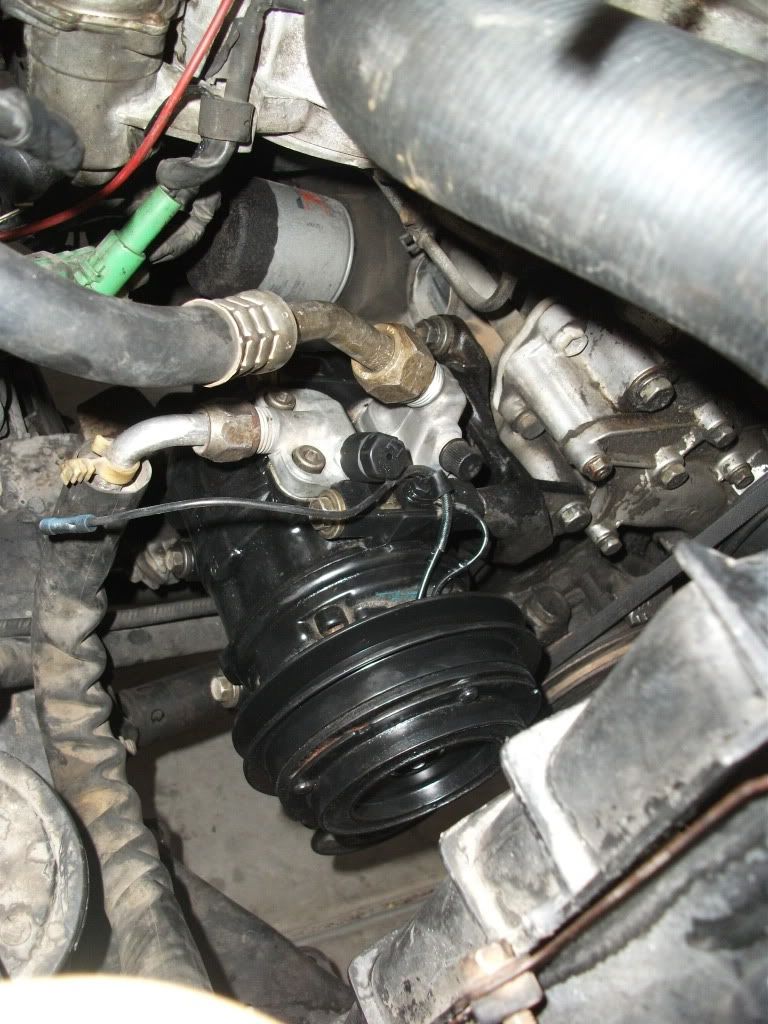
next i installed the compressor which is pretty self-explanatory its held to the bracket with 4 (12mm) bolts
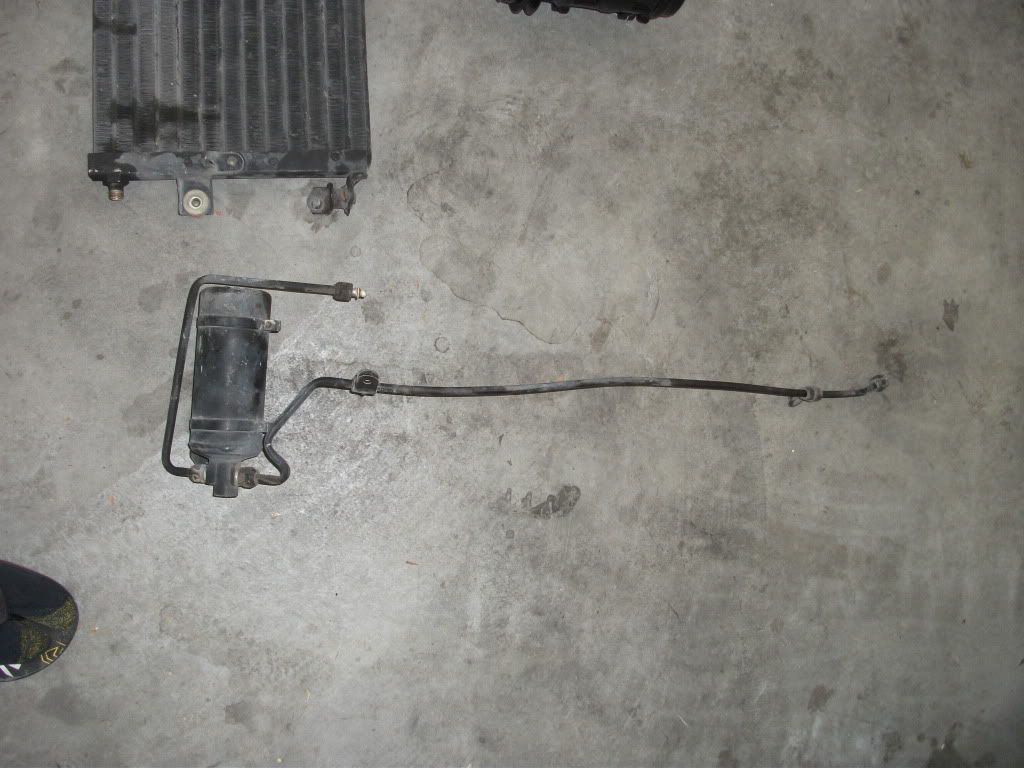
Then i mounted the condenser, its is necessary to remove the grill and bump to do this.
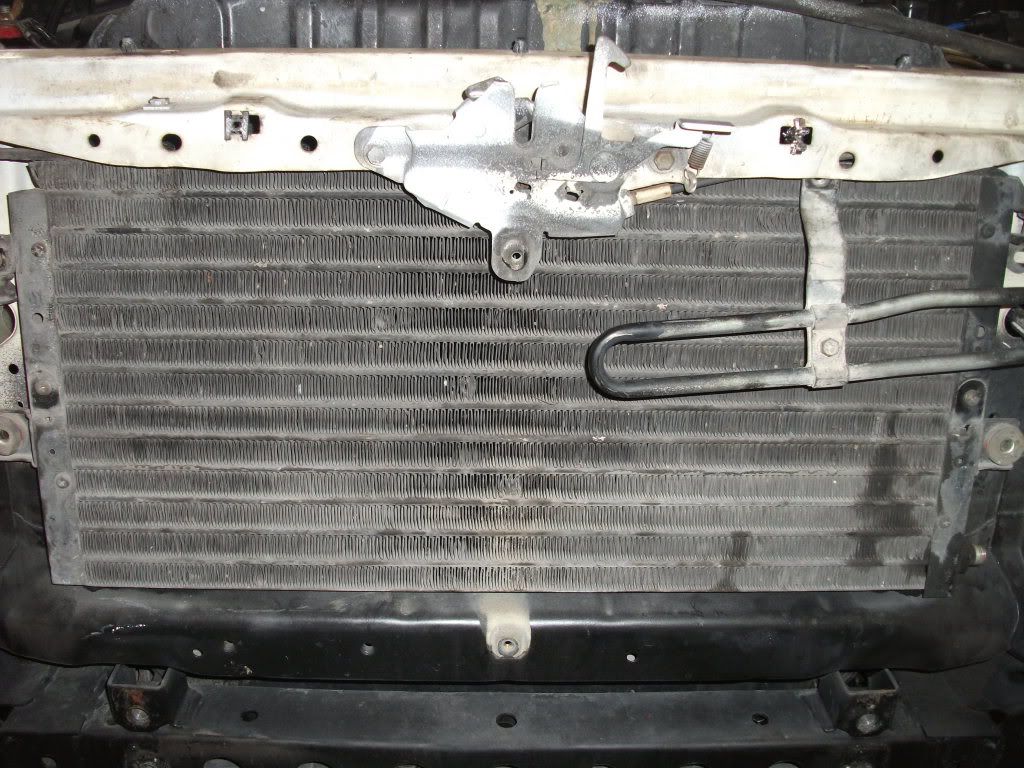
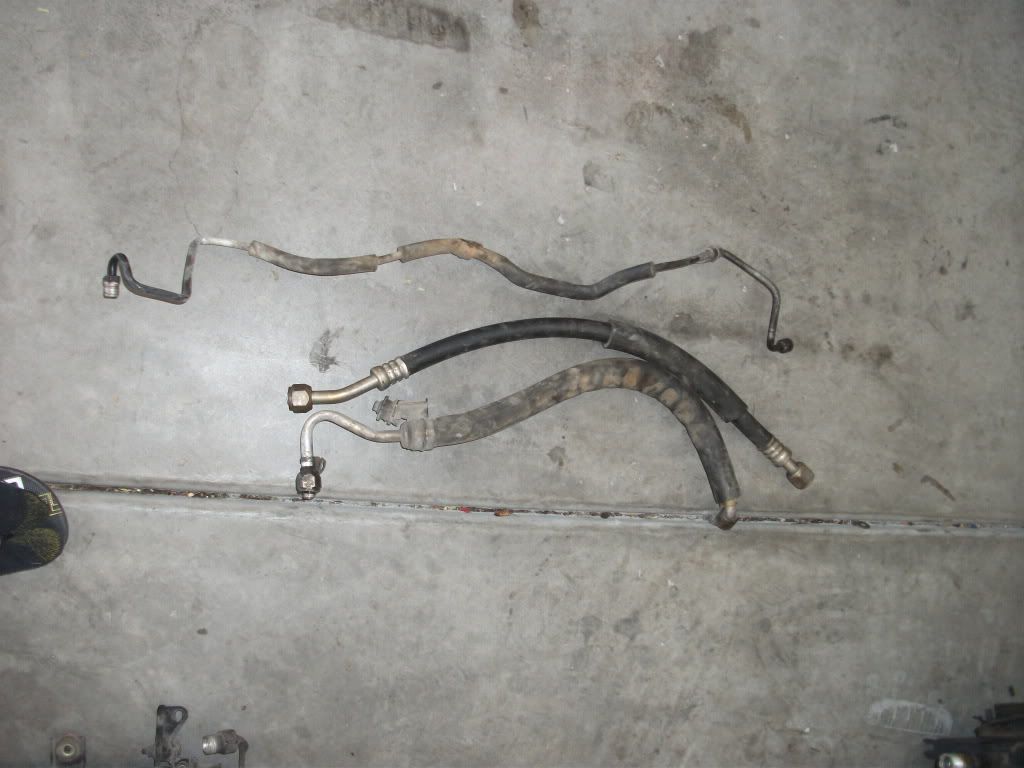
and now my lines are ready to be ran
Then i mounted the condenser, its is necessary to remove the grill and bump to do this.
and now my lines are ready to be ran
07-21-2011, 02:38 PM
#29
Registered User
Thread Starter
Join Date: Jul 2011
Location: Las Vegas
Posts: 23
Likes: 0
Received 0 Likes
on
0 Posts
lines ran and system ready to be charged
Converted system to r-134 installed belt, vacuumed, and charged with 24 oz. of r-134 freon
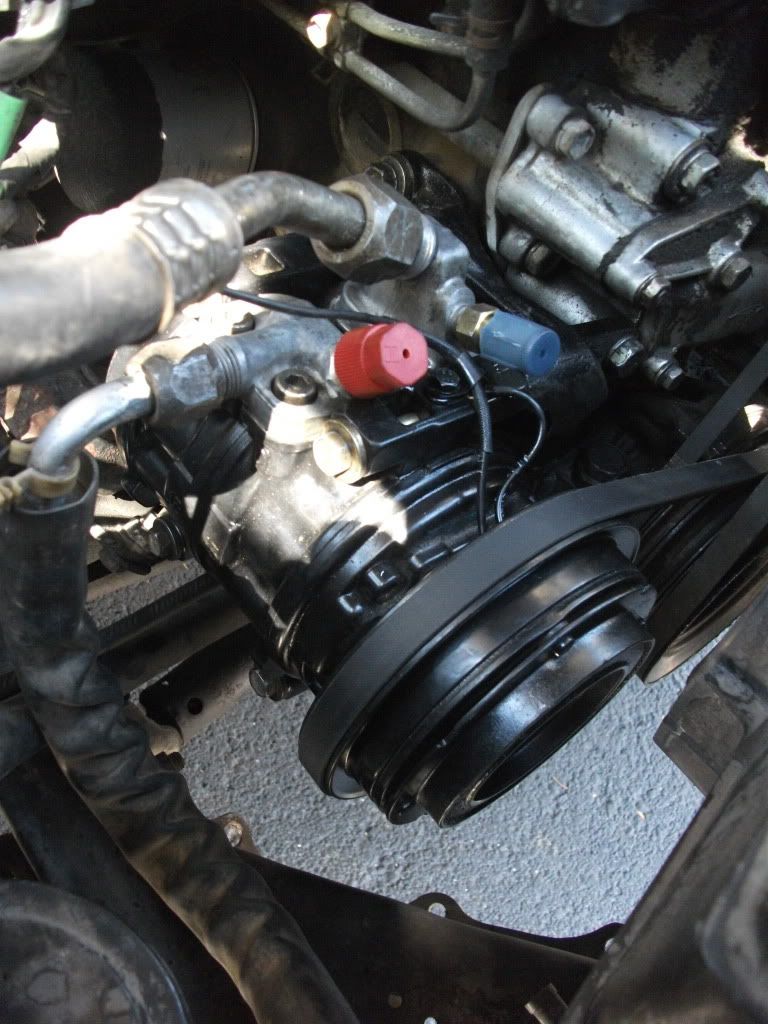
here is where the compressor was plugged in to bypass the ac vacuum switch

and i now have ice cold working A/C!!! time to focus on differential, gears, and lift.
Converted system to r-134 installed belt, vacuumed, and charged with 24 oz. of r-134 freon
here is where the compressor was plugged in to bypass the ac vacuum switch
and i now have ice cold working A/C!!! time to focus on differential, gears, and lift.
07-22-2011, 04:19 AM
#30
Registered User
Join Date: Oct 2009
Location: Downtown Heckronto, Ontario, Soviet Canuckistan
Posts: 1,499
Likes: 0
Received 1 Like
on
1 Post
Just be careful when upgrading your diff if you go the used diff route. I originally bought one that after a quick inspection was what I thought in decent shape, but when I had a friend who works for Toyota pick it up last week to button it up because when installing my locker I forgot to mark left and right sides (I marked everything, except for which side  ) he found a lot of problems I somehow overlooked. I'd been concerned the most about the pinion seal because the one on my diff went bad literally days before I ripped it out of my axle and this might have narrowed my focus while looking the thing over.
Here's some pictures of my "new" diff and what he found with it:
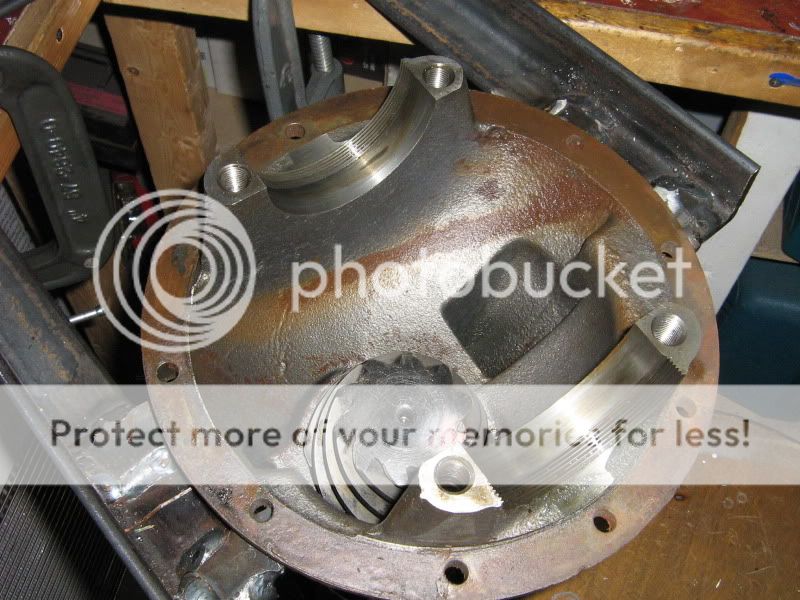
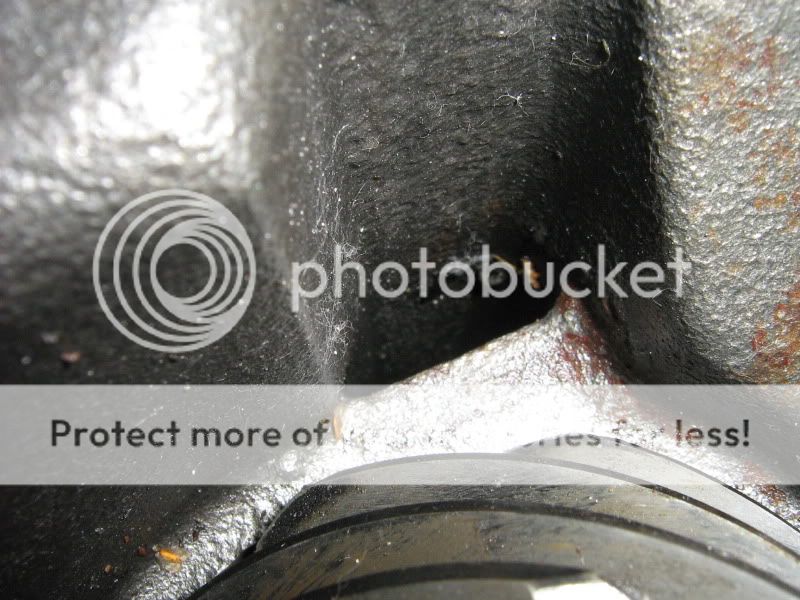


I don't even know what the heck he is pointing at in the second to last picture, it looks like part of a guitar pick or something, whatever it is it has no place being where it was.
I'm gonna pass on the advice he gave me while looking for another used one:
The diff I bought had no flange and a loosely screwed on nut on the pinion, it didn't turn nice at all but I thought it was the pinion binding from being loose. Also when I inspected the gears I looked at the wrong surface and completely missed the very obvious damage. This diff is basically a paperweight in this condition. Now if I want to go used route for a diff I've got to buy an entire 4wd rear axle as that is all I can find, still cheaper than a new gearset.
) he found a lot of problems I somehow overlooked. I'd been concerned the most about the pinion seal because the one on my diff went bad literally days before I ripped it out of my axle and this might have narrowed my focus while looking the thing over.Here's some pictures of my "new" diff and what he found with it:
I don't even know what the heck he is pointing at in the second to last picture, it looks like part of a guitar pick or something, whatever it is it has no place being where it was.
I'm gonna pass on the advice he gave me while looking for another used one:
make sure it stays clean, make sure it spins nicely, and there is no deflection in the pinion (up down in and out) and the backlash feels alright (by feel)
Last edited by Magnusian; 07-22-2011 at 04:28 AM.
07-23-2011, 07:52 AM
#32
Super Moderator
Staff
iTrader: (1)
Join Date: Aug 2008
Location: Anderson Missouri
Posts: 11,788
Likes: 0
Received 21 Likes
on
19 Posts
LOL.. That is a good one. Never thought about the colors. I checked your out before. I bought mine for saving gas when it was high a few years ago. But after having a flat bed, it comes in so handy. I wouldnt give it up. I always have a set of straps behind the seat.
07-30-2011, 07:10 PM
#33
Registered User
Thread Starter
Join Date: Jul 2011
Location: Las Vegas
Posts: 23
Likes: 0
Received 0 Likes
on
0 Posts
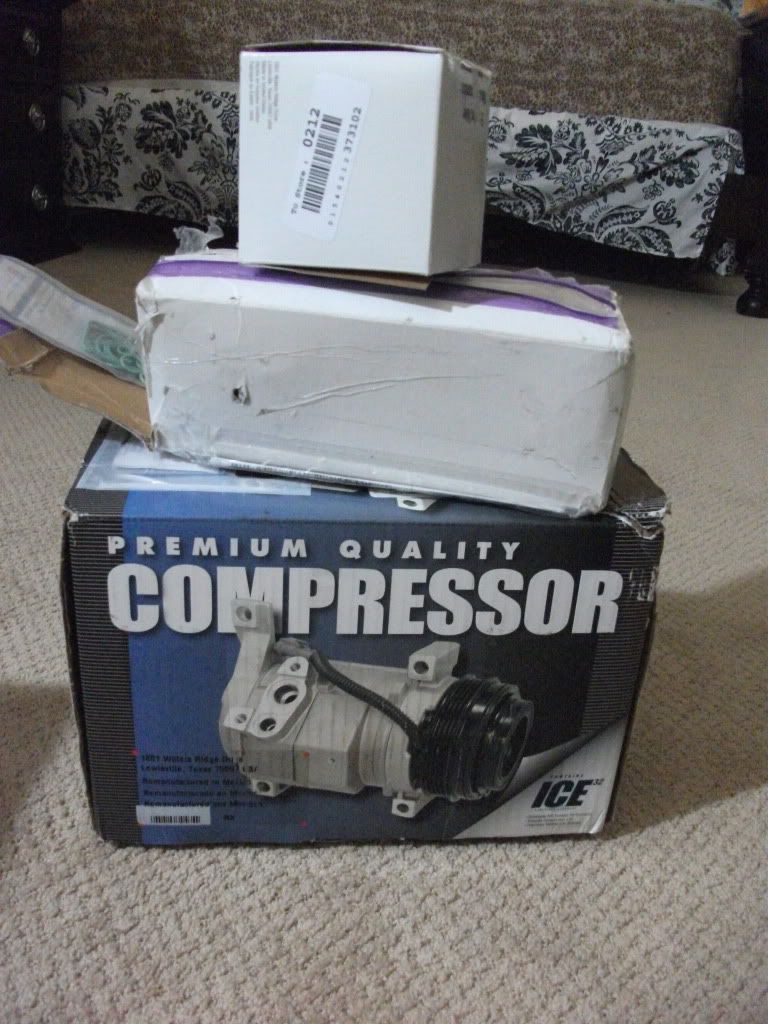
Well my ac has failed due to a faulty re-manufactured compressor that started leaking oil so i took that POS off and got my money back from autozone to buy a brand new one online.
10-02-2011, 02:56 PM
#34
Registered User

Join Date: Oct 2011
Location: Austin, TX
Posts: 1
Likes: 0
Received 0 Likes
on
0 Posts
Rocky - that looks nice! I got an '88 blue 2WD from my dad in March, he inherited from his dad in ~1992. It needs a LOT of work, but looking at your truck is an inspiration.
10-03-2011, 06:42 AM
#35
Super Moderator
Staff
iTrader: (1)
Join Date: Aug 2008
Location: Anderson Missouri
Posts: 11,788
Likes: 0
Received 21 Likes
on
19 Posts
Sorry to hear about the compressor failing. But after doing the install this ought to be an easy fix for you. Still having to redo it because of a faulty part is a downer. At least its under warrnaty and not out of your pocket.
03-12-2012, 05:48 PM
#36
Question about your ac install
Did you also have to install the vsv ac idle up adjusting valve ? I have a 88 base model efi and im currently adding ac to it. Was wondering if you installed that idle up piece that has air lines going to it
03-27-2012, 10:01 PM
#37
Registered User

Join Date: Feb 2012
Location: AZ
Posts: 44
Likes: 0
Received 0 Likes
on
0 Posts
Hey man nice thread. I have an 88 4runner and I ordered a compresser but it came with a pre cooler. Is there any lines that are made for this since it does not plug in to the bottom of the condenser from the drier? The plug in is on the top.

Thread
Thread Starter
Forum
Replies
Last Post
88yodabasket
86-95 Trucks & 4Runners
15
07-13-2015 01:32 PM


