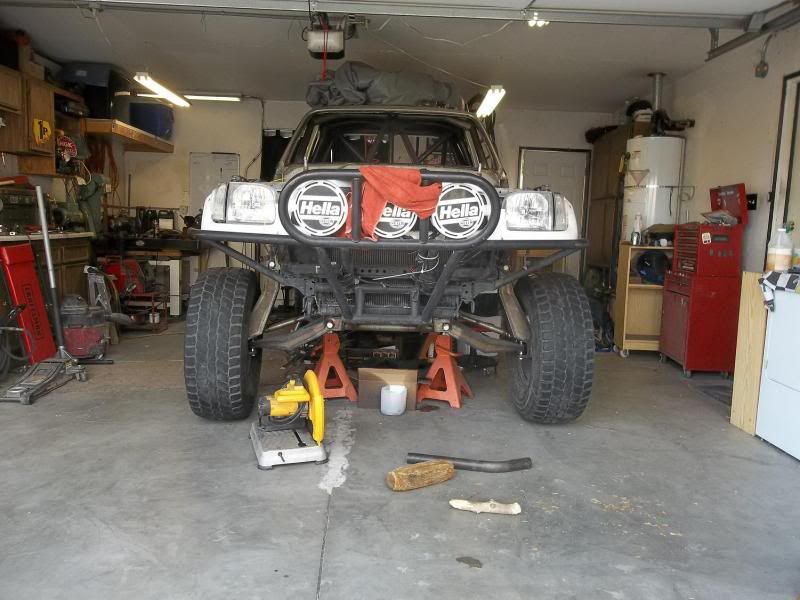
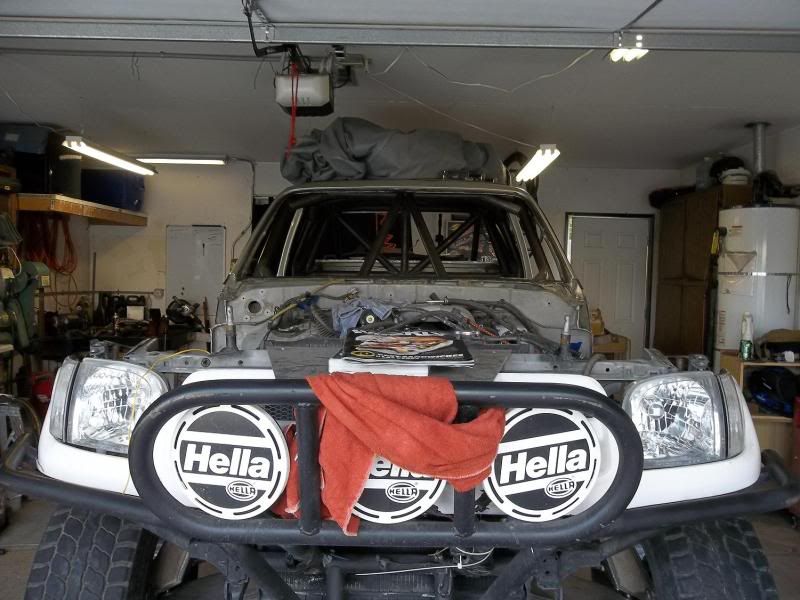
TPF racing's '04 tacoma build! Picture heavy!
#41
Registered User
Thread Starter
Join Date: Jun 2003
Location: Las Vegas
Posts: 342
Likes: 0
Received 0 Likes
on
0 Posts
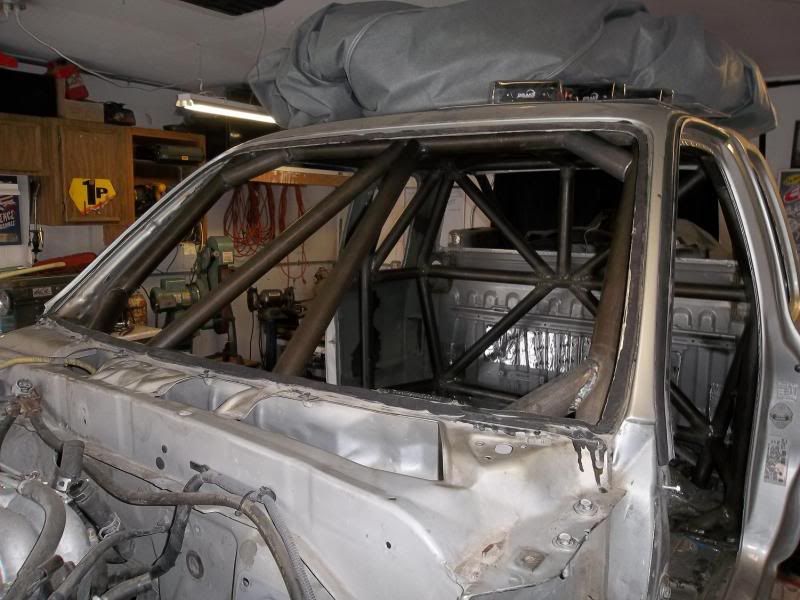
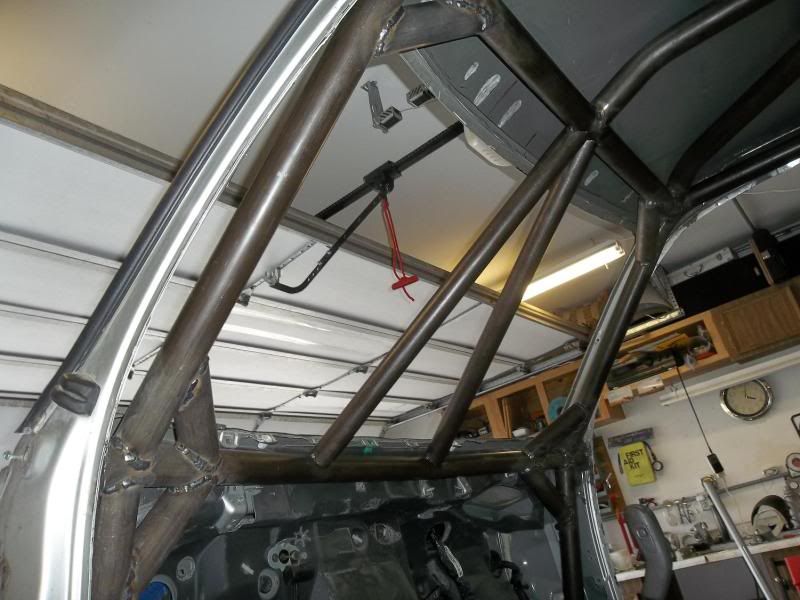
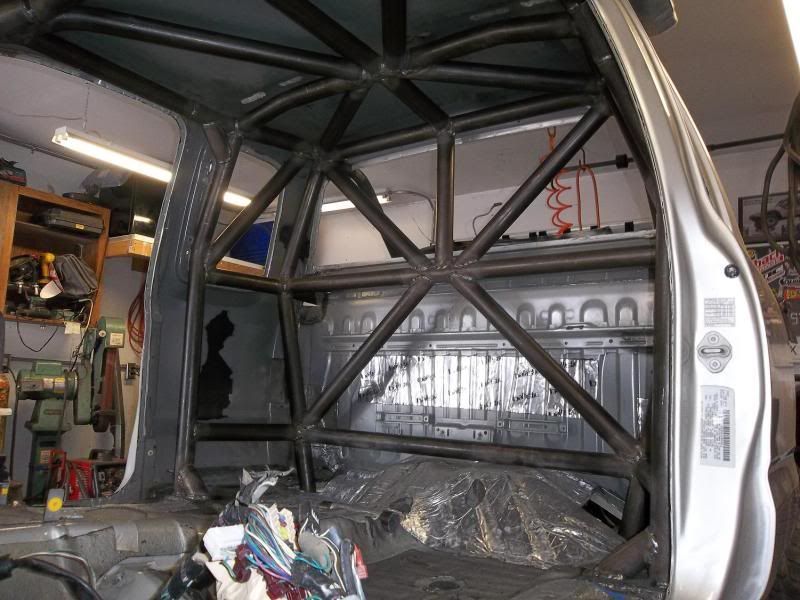
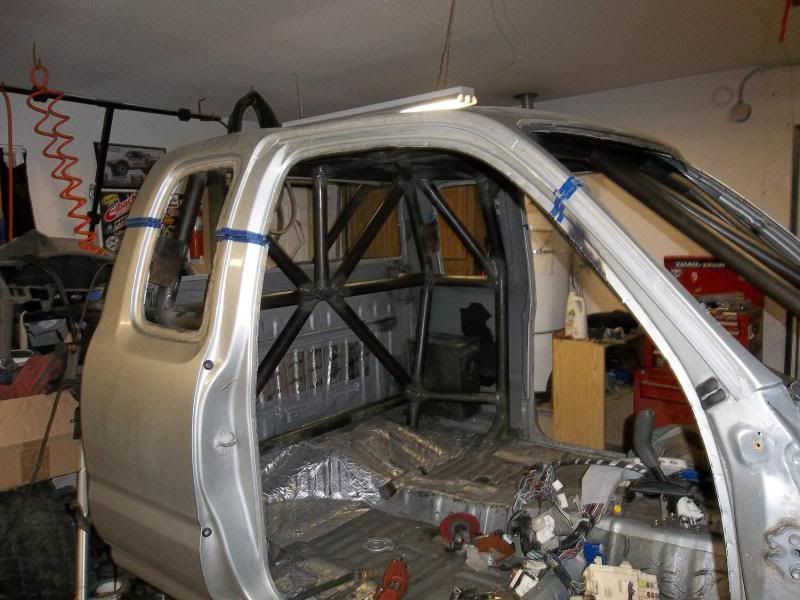
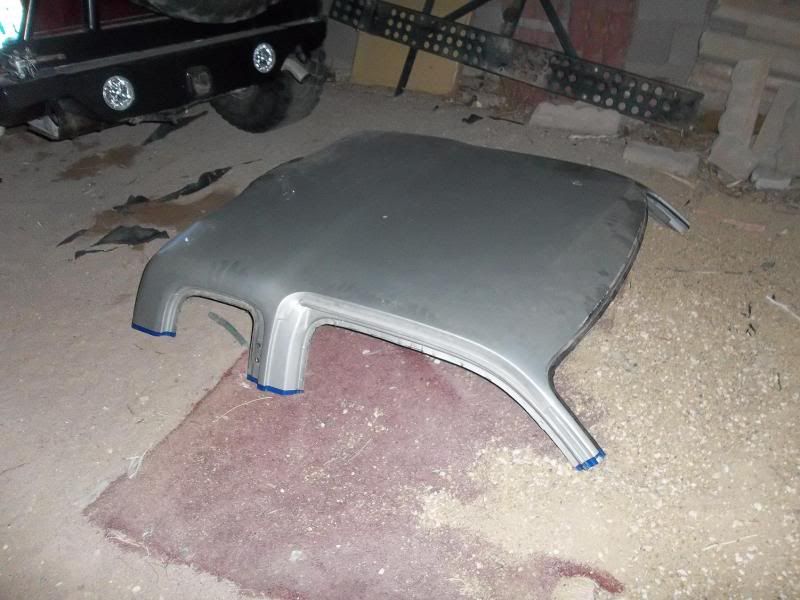
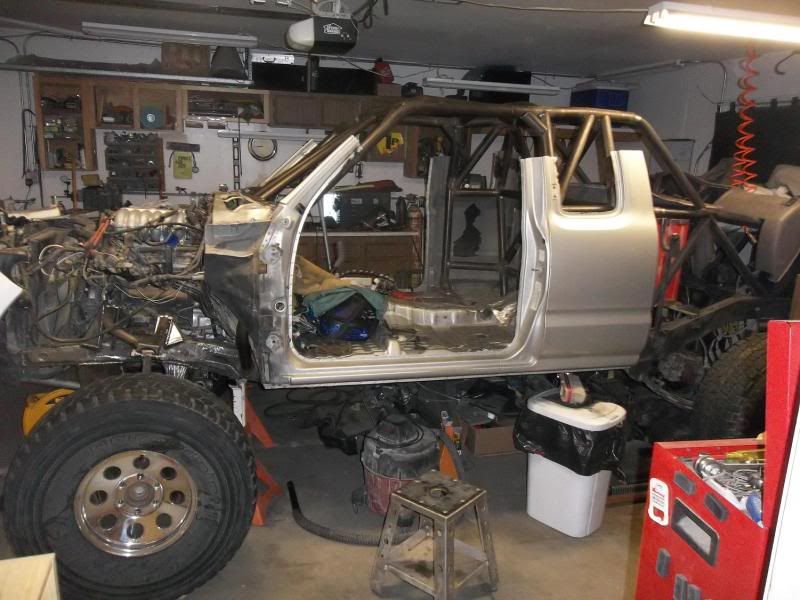
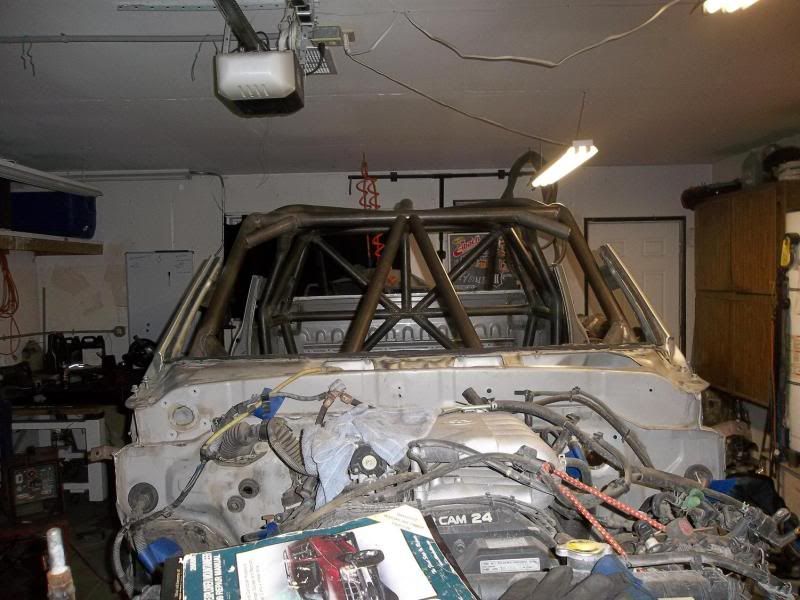
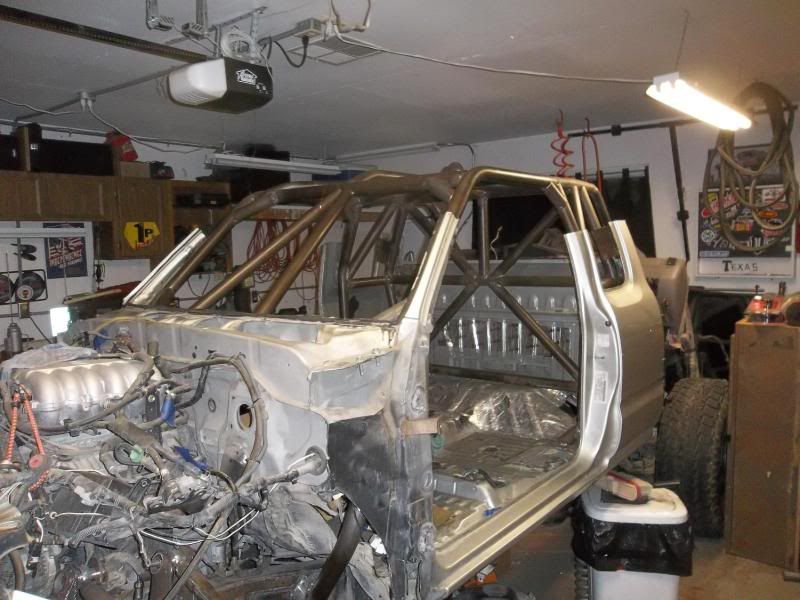
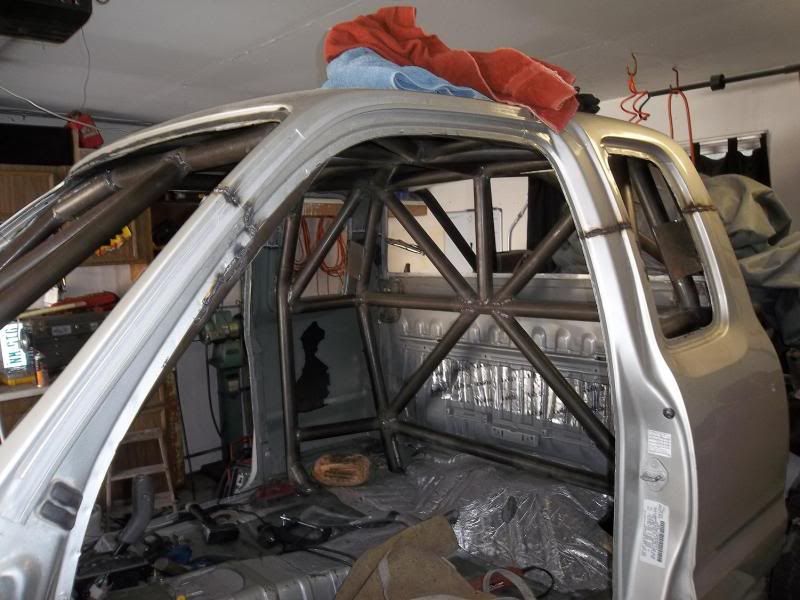
Don't ask why I'm going in the order that I am... LOL I just am... Should have the roof done tomorrow night and maybe even the extra cab area also. If not, Sat for sure. Then just need to get gussets in place and off wit da roof for welding! Good times, lol, no clue what I'm doing when I get to that point as that'll be a first but I definitely have it all planned out in my head, hope it goes as easy as it seems!!! I HATE welding sheet metal though!


#46
true. looks like you built an extreme cage compared to most i have seen. looks cool without the top if it doesnt go back on haha. the larger tubes make it look fuller. what size is that? is it commonly used for cages? i usually see the smaller ones, not sure the size, im not much a fabricator so i dont know all the terminology
#47
Registered User
Thread Starter
Join Date: Jun 2003
Location: Las Vegas
Posts: 342
Likes: 0
Received 0 Likes
on
0 Posts
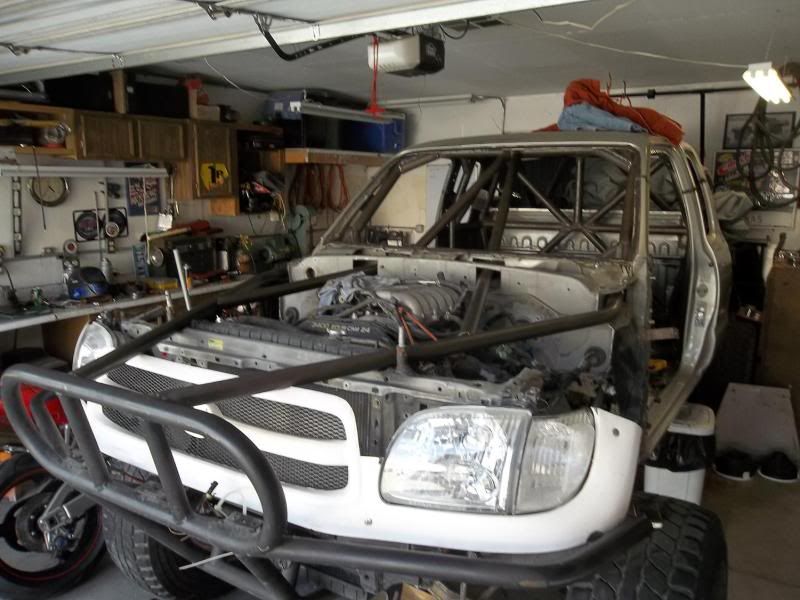
Most of what you typically see on play trucks is 1.5" or 1.75" diameter tubing. The whole back of the truck or everything that is painted black is 1.75". Everything inside the cab though is 2" because virtually every race org. these days dictates 2" for anything over 4000 lbs which typically is any fullsize or extended cab mini once fully built. The standard cab mini's usually can get away with 1.75".
As for the cab structure, this is actually a very very very common cage design for actually race trucks. This truck is going to get abused way beyond your average rig.
As for the cab structure, this is actually a very very very common cage design for actually race trucks. This truck is going to get abused way beyond your average rig.
#48
Registered User
Thread Starter
Join Date: Jun 2003
Location: Las Vegas
Posts: 342
Likes: 0
Received 0 Likes
on
0 Posts
#49
Registered User
Thread Starter
Join Date: Jun 2003
Location: Las Vegas
Posts: 342
Likes: 0
Received 0 Likes
on
0 Posts
Why? Because I can... And cause someday in the far future the truck might see a lot more rear suspension, a lot more engine and a lot more abuse so I'd rather build it once right from the get go... So with that said, I plated in the guessets.
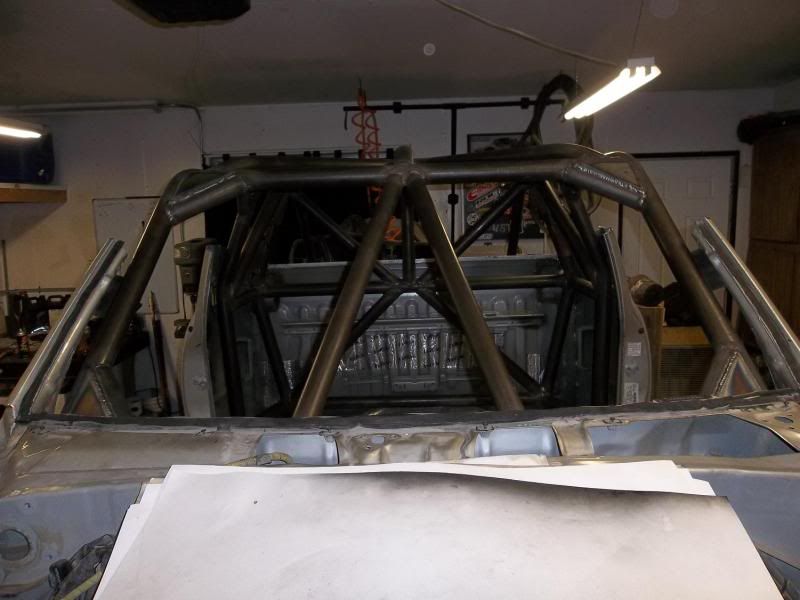
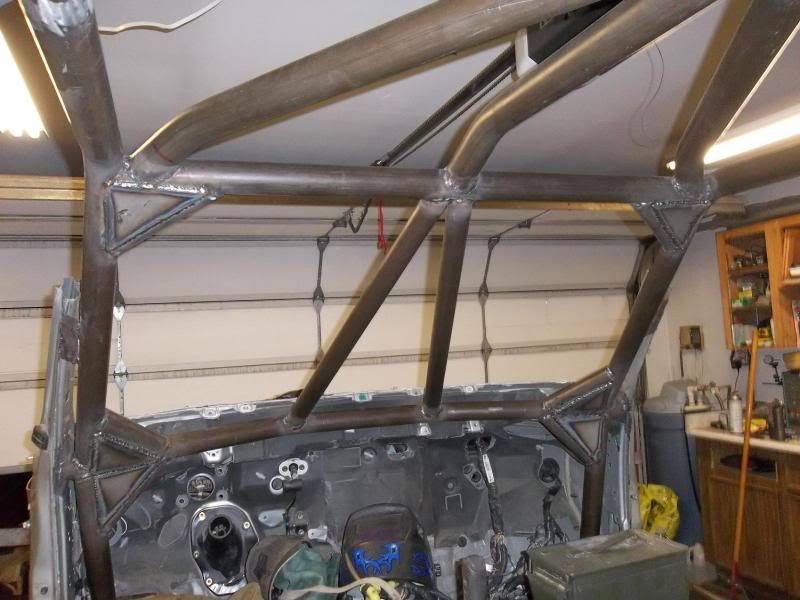
My welds are far from the best out there but also far from the worst in my opinion and will hold for sure!
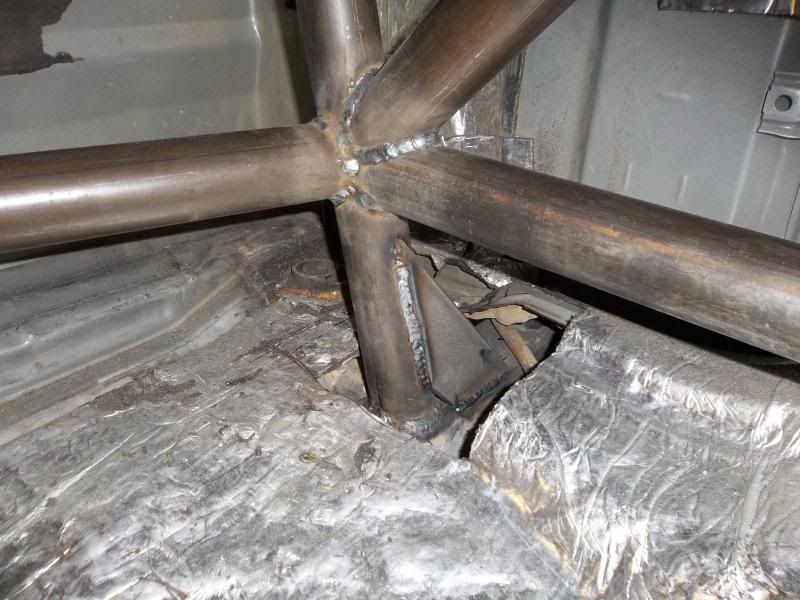
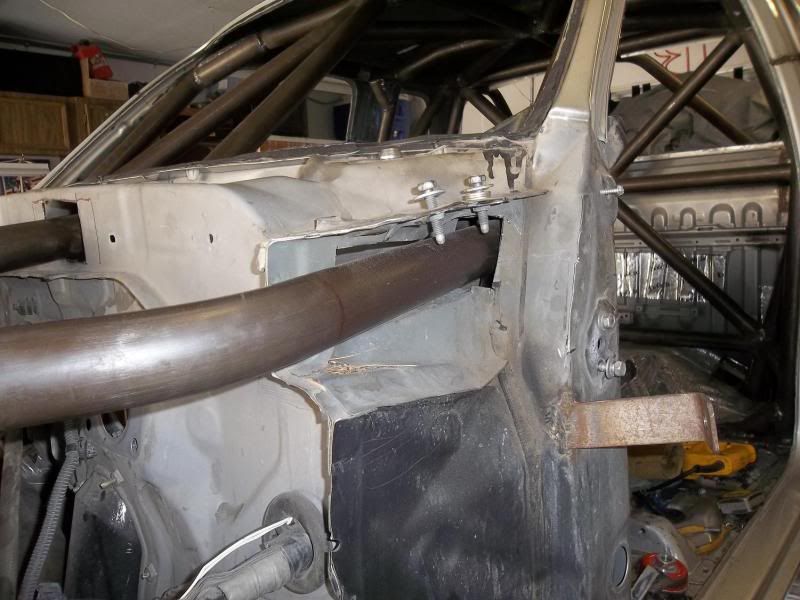
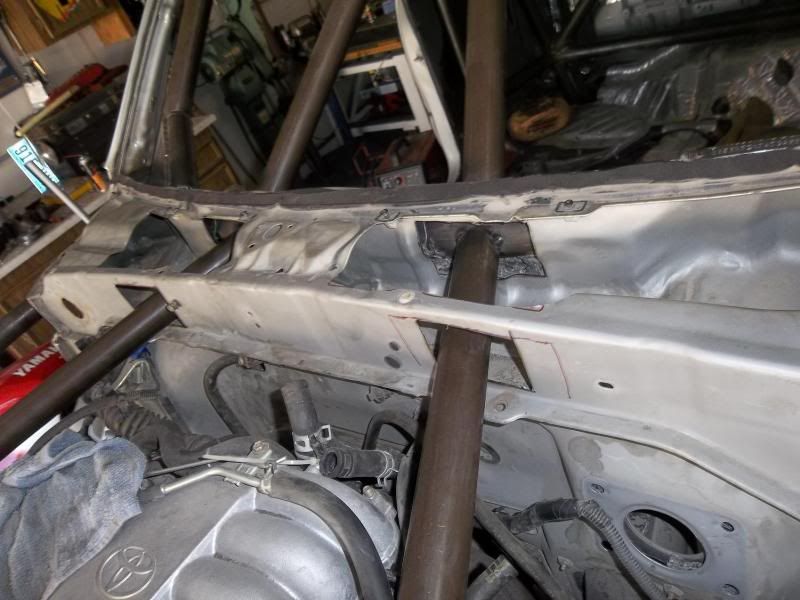
Race build rules dictate that everywhere the cab cage hits the frame it needs to be gusseted. Here's the c-pillar tubes...

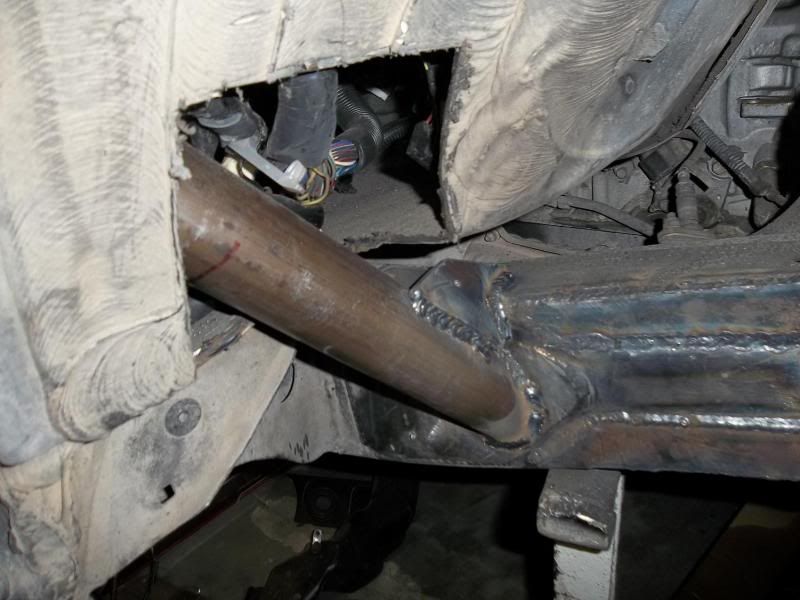
and the a-pillar tubes where they come down thru the floor/firewall area to the frame.
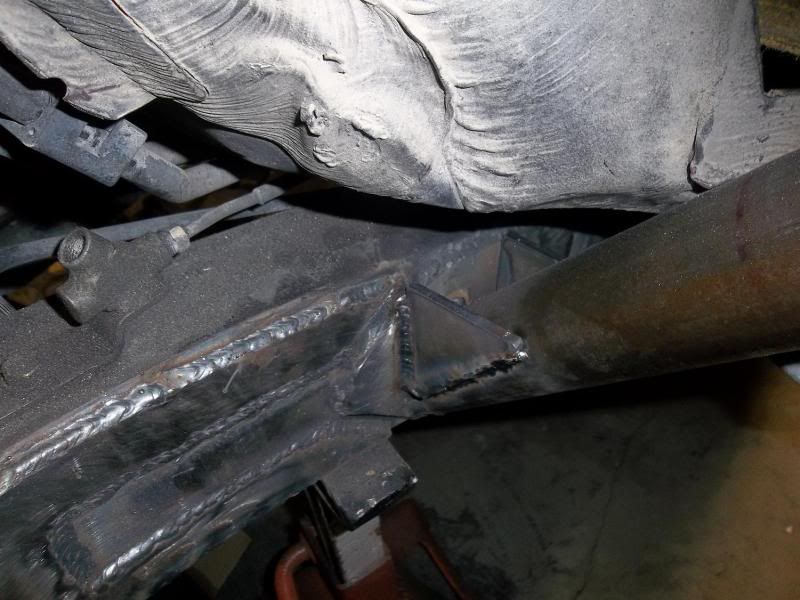
Hopefully these will be enough to make us legal.
Up in the air on these next plates. The diagonal tube placement is driving one friend of mine absolutely nuts and he hates it there! So I cut out some plates to maybe box in that area just to appease him. I'm waiting on feedback from the truck's owner though to see what he wants to do or which he likes better. Honestly, structural wise, I'm 100% confident in it even without the plate work and I'll trust my life in it!
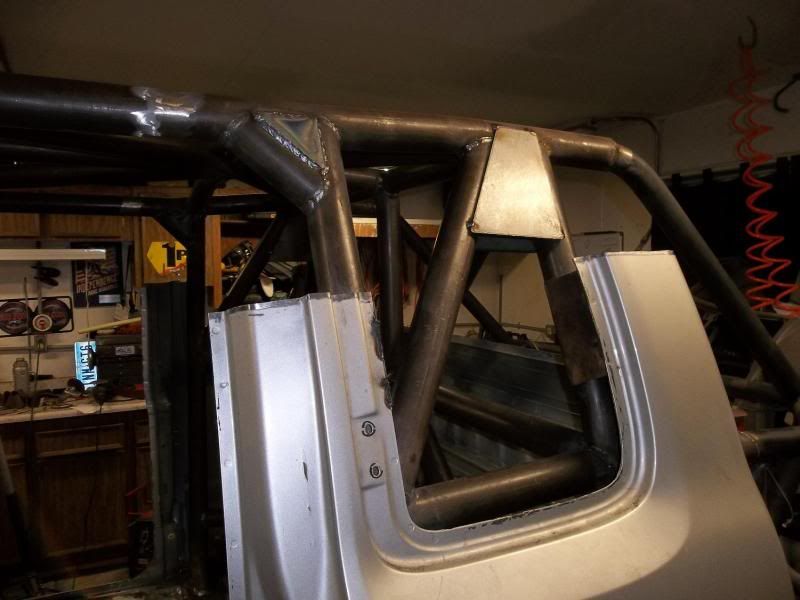
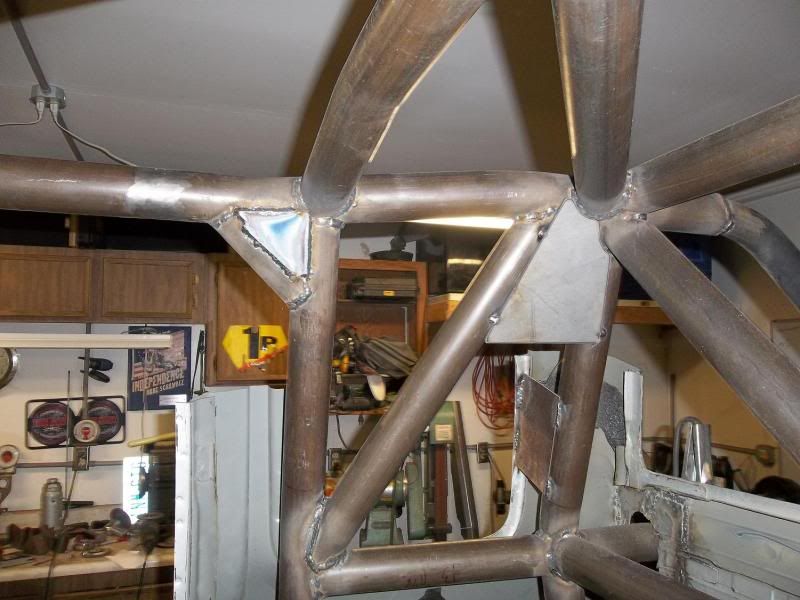


My welds are far from the best out there but also far from the worst in my opinion and will hold for sure!

Race build rules dictate that everywhere the cab cage hits the frame it needs to be gusseted. Here's the c-pillar tubes...

and the a-pillar tubes where they come down thru the floor/firewall area to the frame.

Hopefully these will be enough to make us legal.

Up in the air on these next plates. The diagonal tube placement is driving one friend of mine absolutely nuts and he hates it there! So I cut out some plates to maybe box in that area just to appease him. I'm waiting on feedback from the truck's owner though to see what he wants to do or which he likes better. Honestly, structural wise, I'm 100% confident in it even without the plate work and I'll trust my life in it!


#50
Registered User
Thread Starter
Join Date: Jun 2003
Location: Las Vegas
Posts: 342
Likes: 0
Received 0 Likes
on
0 Posts
We decided against the plates above in the previous 2 pictures so I popped those back off.
Been a little bit slow lately on progress, I was out of town this past weekend and have house guests this week so I'm not living in the garage. I'm not super thrilled with a couple things on this but I'll clean it up and make it good in the end before all said and done.
It's the angle that makes the tubes in the center look lower then the outter ones...
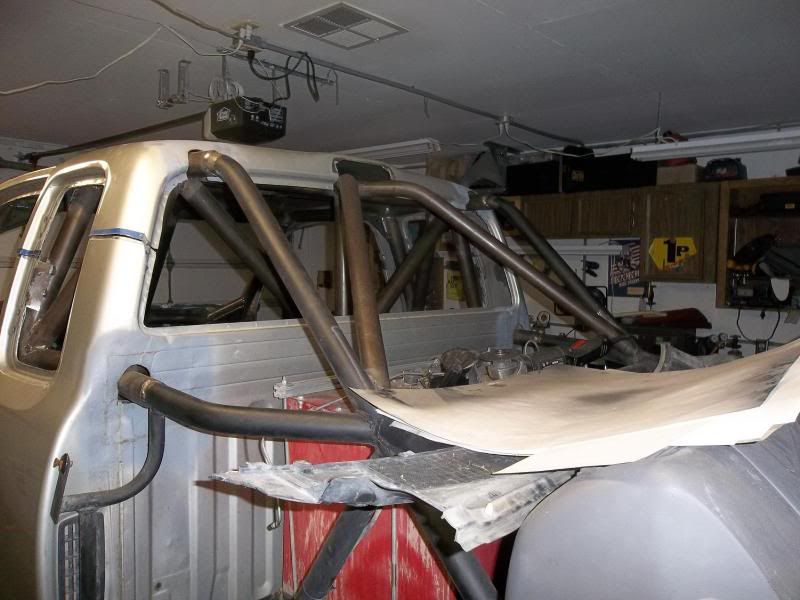
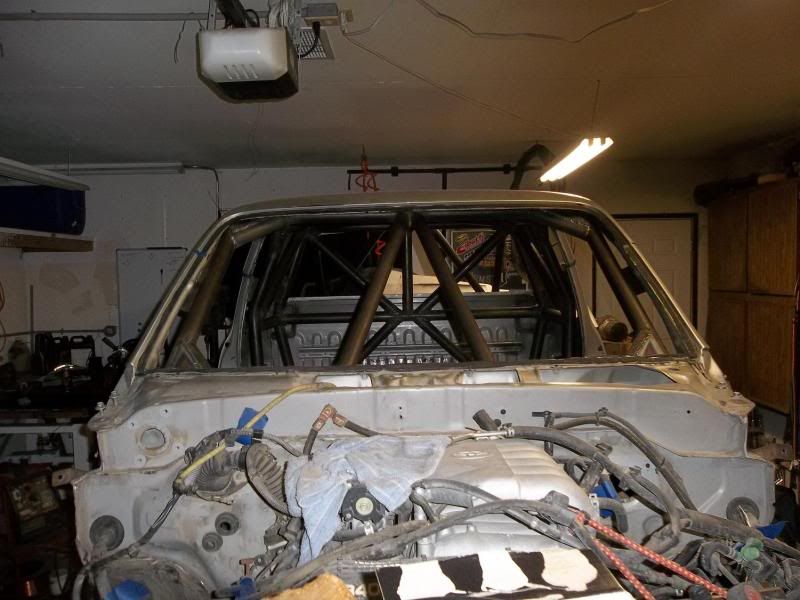
Gonna prep the cut edge next and get the roof tacked back into place.
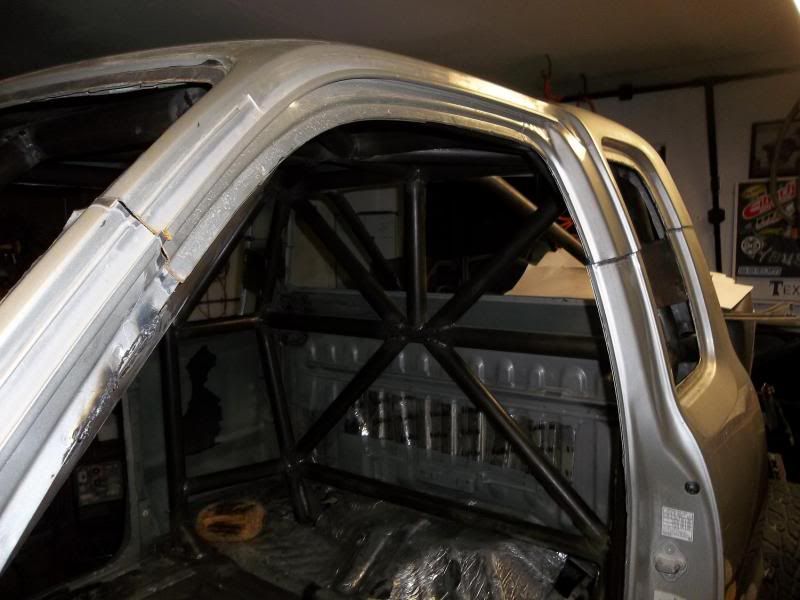
Been a little bit slow lately on progress, I was out of town this past weekend and have house guests this week so I'm not living in the garage. I'm not super thrilled with a couple things on this but I'll clean it up and make it good in the end before all said and done.
It's the angle that makes the tubes in the center look lower then the outter ones...


Gonna prep the cut edge next and get the roof tacked back into place.

#53
Registered User
Thread Starter
Join Date: Jun 2003
Location: Las Vegas
Posts: 342
Likes: 0
Received 0 Likes
on
0 Posts
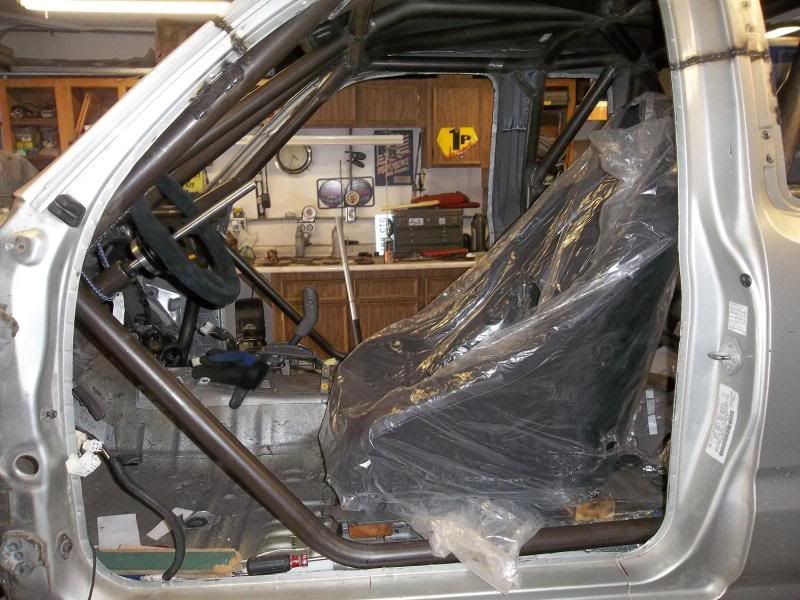
Movin up in the world, have room for 2 now...
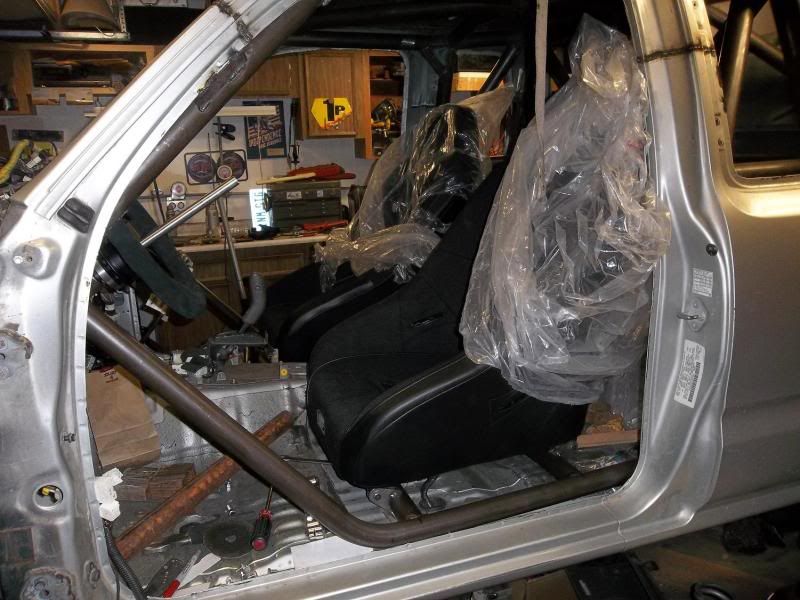
and a steering wheel to hold on to also!
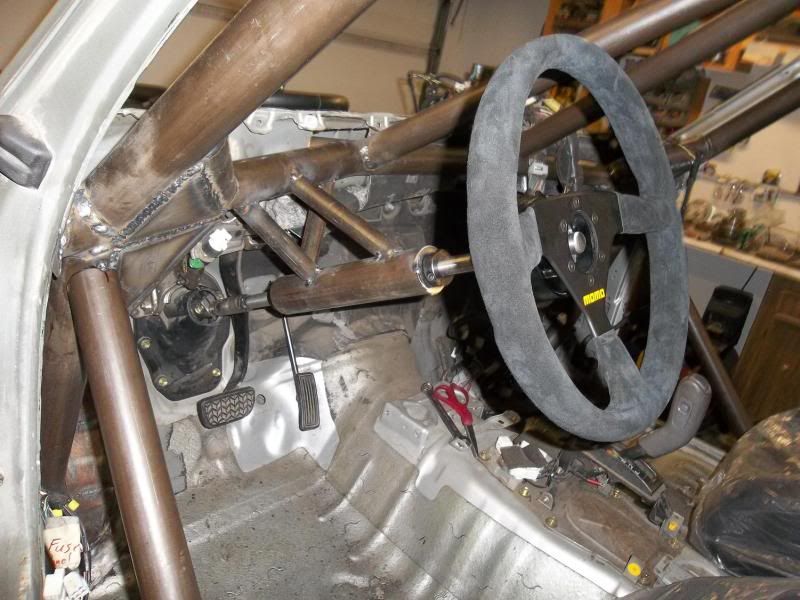
Everything is tacked in place and set where I like it but I'm not going to do any finish welding till the end in hopes that by chance Jason can get out here to sit in it and give the thumbs up. That way it'll be easy to move around if he doesn't like the feel of how it's laid out.
Moving onto the shocks next I think since we don't have the peddle assembly yet to install and I'm holding off on fitting the dash till those are in.

and a steering wheel to hold on to also!

Everything is tacked in place and set where I like it but I'm not going to do any finish welding till the end in hopes that by chance Jason can get out here to sit in it and give the thumbs up. That way it'll be easy to move around if he doesn't like the feel of how it's laid out.
Moving onto the shocks next I think since we don't have the peddle assembly yet to install and I'm holding off on fitting the dash till those are in.
#54
Registered User
Thread Starter
Join Date: Jun 2003
Location: Las Vegas
Posts: 342
Likes: 0
Received 0 Likes
on
0 Posts
Well, got these mocked up and in place. Cycles about 17.5" with them where they're at right now. At full bump the shocks are 90 degrees to the lower arm, they clear the frame rail all the way. Steering can go lock to lock at full bump and droop with out issue and the tire even clears in there also. I am going to move both shocks still just a hair from what's shown here with the final mounts but this is pretty much where and how they're going to live at this point.
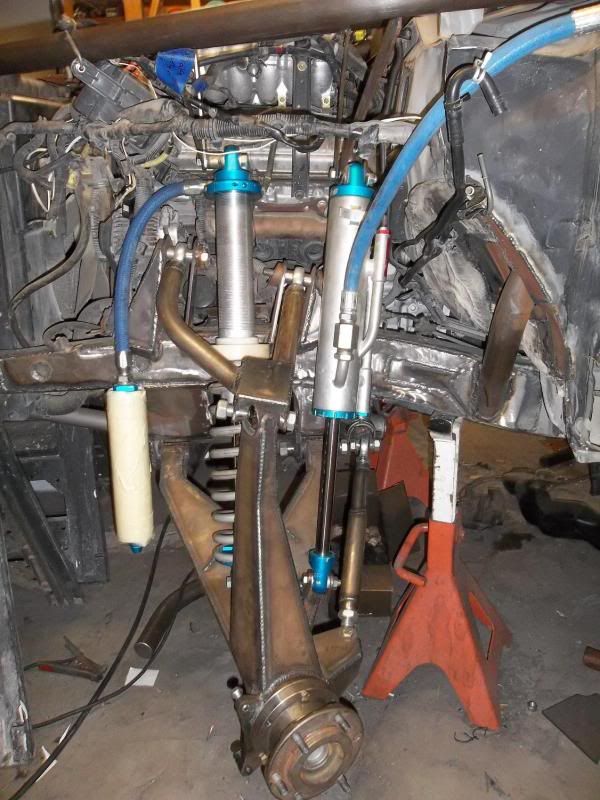
And I'm no hollywood actor but here's a quick clip showing the front end in more detail...
http://youtu.be/5T_doY905R8

And I'm no hollywood actor but here's a quick clip showing the front end in more detail...
http://youtu.be/5T_doY905R8
#55
Registered User
How close does the bypass get to the UCA? Just on my phone, but looks like it gets pretty close. Looks like it cycles pretty clean though. How's the bump steer?
What hub/bearing assembly is that?
What hub/bearing assembly is that?
#56
Registered User
Thread Starter
Join Date: Jun 2003
Location: Las Vegas
Posts: 342
Likes: 0
Received 0 Likes
on
0 Posts
It gets REALLY close to the upper arm at full bump. I'm going to space it over a little bit more to get about 1/4" of clearance though with the final upper mounting location. I don't have a whole lot of option for moving the bypass around though. At the bottom at full lock it's really close to the tie rod, at the top I've gotta squeeze past the upper arm and on the inside I've gotta make sure it's clear of the frame.
Bumpstop measured out at the end of the tire is so little it's actually hard to measure. I'd say about 1/8".
Factory tacoma prerunner hub and bearing assembly... A lot of people have asked us why... Have you seen the stock bearing unit? It's MASSIVE! Almost 4" diameter! The hub itself is a stout unit also so we're running it. Before it's done the wheel studs are getting swapped out but other then that we're running a complete factory hub, bearing, rotors and brake calipers.
Last edited by sirhk100; 08-24-2012 at 01:23 PM.
#57
Registered User
Just ask because I've only used the older pickup spindles, haven't seen a taco torn down, it looks similar to the Chevy I worked on. Those are run hard on a heavier truck, I doubt you'll have any problems.
Working out clearances through the cycle is fun stuff.
Only an 1/8th inch of bump steer through nearly 18 inches of travel? Very nice, how much time did you spend with the steering placement.
Forgot if you are using the older pickup style steering box or what? Maybe you can refresh my memory.
Working out clearances through the cycle is fun stuff.
Only an 1/8th inch of bump steer through nearly 18 inches of travel? Very nice, how much time did you spend with the steering placement.
Forgot if you are using the older pickup style steering box or what? Maybe you can refresh my memory.
#58
Registered User
Thread Starter
Join Date: Jun 2003
Location: Las Vegas
Posts: 342
Likes: 0
Received 0 Likes
on
0 Posts
I've gotta give the suspension geometry credit to Matt at MCM Fab. He did the steering placement and all that during the suspension design. I just tried my hardest to make sure I got the upper arm back in at the exact same location so that it still cycled clean. This kit is very impressive! Matt did an excellent job with only a few fairly minor hiccups to work thru considering it was a first attempt for the kit.
Steering we're using the stock rack for now. A lot of people ask us what we're doing about the steering cause the rack doesn't hold up yet we can't find the mysterious people who have these racks failing, it's always a friend of a friend. Talked to Bonzen and he's still running his original rack.
Steering we're using the stock rack for now. A lot of people ask us what we're doing about the steering cause the rack doesn't hold up yet we can't find the mysterious people who have these racks failing, it's always a friend of a friend. Talked to Bonzen and he's still running his original rack.
#59
Registered User
Thread Starter
Join Date: Jun 2003
Location: Las Vegas
Posts: 342
Likes: 0
Received 0 Likes
on
0 Posts
Here you go, this video was mostly meant for Jason to see since he's not able to see his truck in person thru this whole build but screw it, I'll post up here. You can watch the camber change and try to spot any bumpsteer... Ignore the monster dog mid way thru, crappy commentary and my fat ass in it! LOL
This was from 2 nights ago, bypass wasn't in place yet and I ended up moving the coilover a little bit too from where it's shown here. But the suspension obvioulsy still cycles the same and I gained a little more travel by changing up my shock mount just a hair.
http://www.youtube.com/watch?v=VdiF6zz4sqo
Last edited by sirhk100; 08-24-2012 at 02:02 PM.
#60
Registered User
Doesn't look like much at all, looks good.
The only thing I don't particularly like about the steering rack is the knuckles are on the rear of the spindle. If you take a good hit from a rock the force will want to compress the steering links, rather than stretch them. I could see it being easier to buckle a link than stretch it to a complete fail.
Whether this is a problem in reality I have no idea, but in my mind it's just seemed like a possibility.
Keep it up, Looks good. When I get some time to actually work on my own truck I'll start a build thread, right now I got all my time/energy into work.


