stockwell45's 97 4runner Build Up Thread
 02-21-2013, 10:44 PM
#341
Registered User
That doesn't seem like it would look too bad. On the old tent trailer I bought the PO's but bumper stickers from everywhere they've been. That is not a good idea. What you're thinking looks much better.
 03-19-2013, 01:32 PM
#344
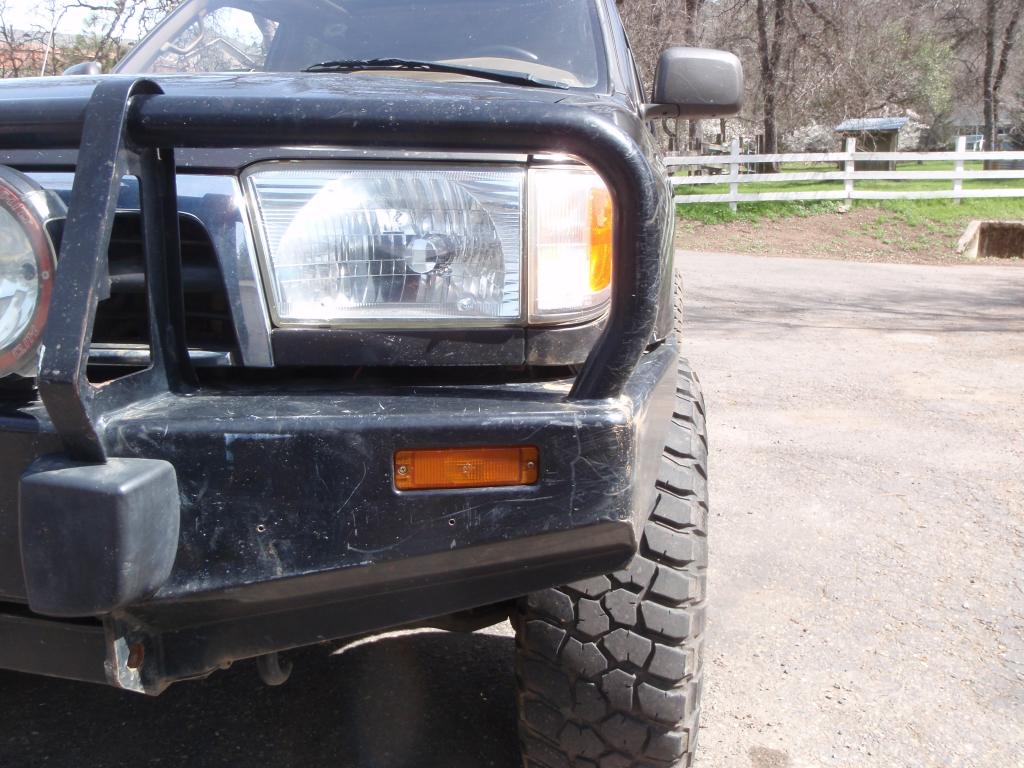
New headlights in from a 99. Looks so much better, light output is way better too
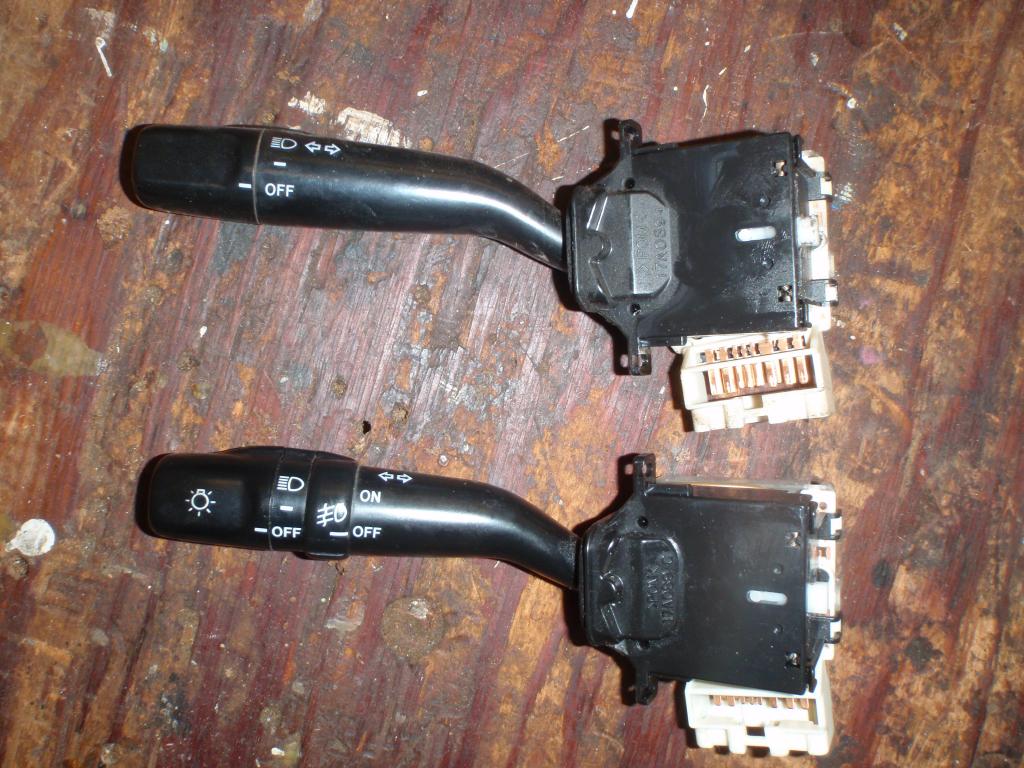
I also am trying to save up as much room as I can for switches on the dash to the left of the steering wheel. Eventually I'm going to have a front ARB switch there as well as a compressor switch, and maybe an LED lightbar switch down the road. So I got a new headlight/foglight combo switch from the same 99 that the headlights came from. Since my 4runner never had factory foglights, I just wired up my HID's on my bumper to this new factory switch on the stalk. It's got a nice factory look to it, and I just saved up some room for more switches later. It's a win win!
Heres the new switch and old switch next to eachother
Some OME 861 coils are coming soon for the rear, I'm just getting too much sag from my LC coils when the tent and all my gear is in the back.
Last edited by stockwell45; 03-19-2013 at 01:33 PM.
03-20-2013, 02:54 AM
#345
why not see if you could get someone to screen print it, matt? or maybe even have it embroidered. that would be a little spendy, but permanent and it would look sharp.
as for the stalk, how are you going to wire in that fog stalk? doesnt seem like it would be a direct bolt in.
as for the stalk, how are you going to wire in that fog stalk? doesnt seem like it would be a direct bolt in.
03-20-2013, 10:55 AM
#347
why not see if you could get someone to screen print it, matt? or maybe even have it embroidered. that would be a little spendy, but permanent and it would look sharp.
as for the stalk, how are you going to wire in that fog stalk? doesnt seem like it would be a direct bolt in.
as for the stalk, how are you going to wire in that fog stalk? doesnt seem like it would be a direct bolt in.
As for the stalk, already done! It's extremely easy, you could do it in your truck too. It mounts up exactly the same, and the plug for the harness is exactly the same too, it just has 2 more pins in the plug than the old one did for the foglight switch. I just unhooked my old switch wires, and stuck them into the back of the plug where the 2 switch wires are supposed to be, and done. Seriously only took 5 minutes.
Here are the empty pins on the plug, big pin is positive and small is negative.
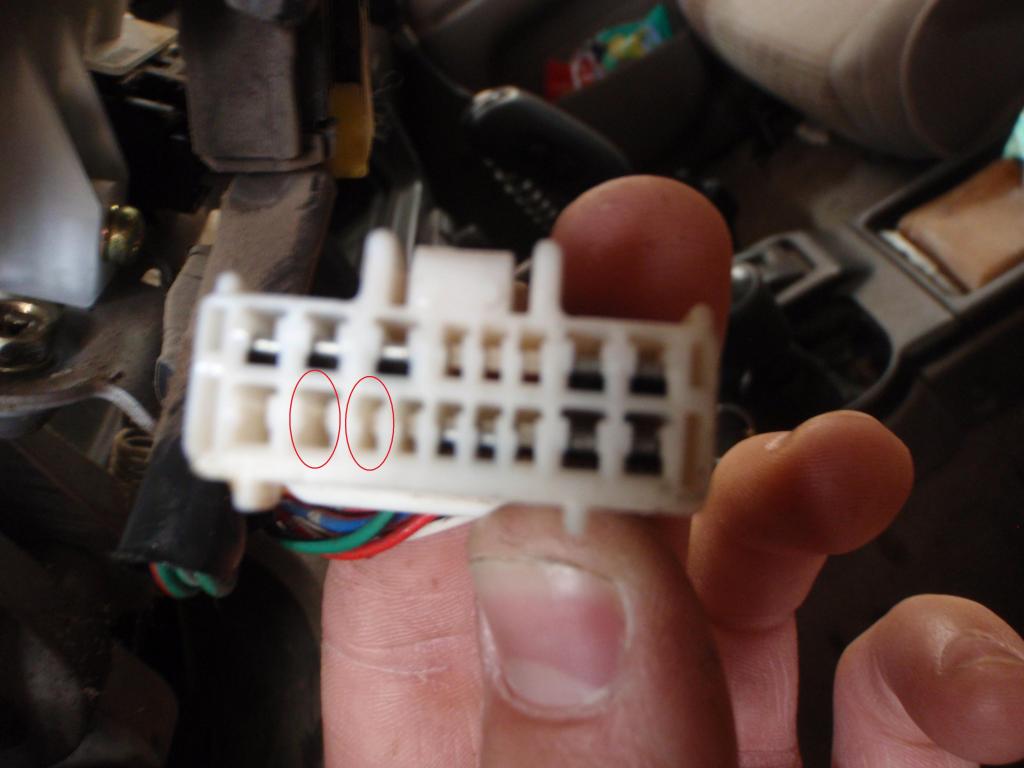
And the old switch was already connected to a relay, so just using the new switch will still utilize the old relay.
 haha
04-20-2013, 08:53 PM
haha
04-20-2013, 08:53 PM
#350
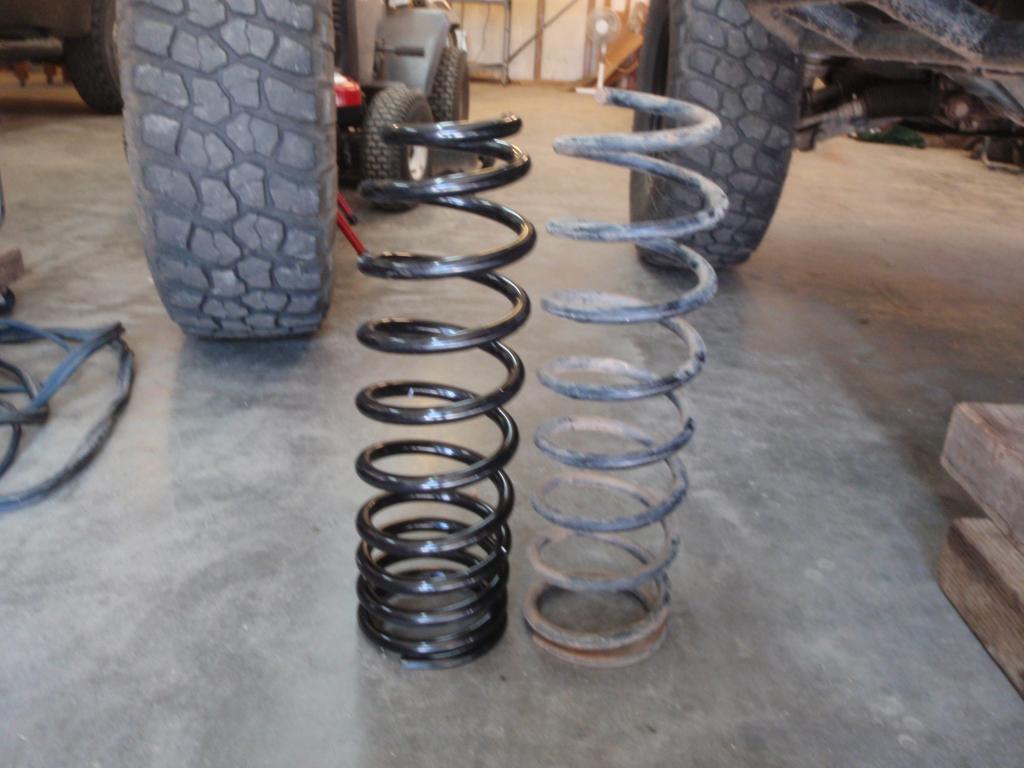
New OME 861 coils are in. Nothing wrong with my old LC 9 wraps, I just needed something that could withstand all the weight in the back. These should do great, and never sag when the tent and jerry cans are on the back.
861 and old LC 9 wrap side by side
Before
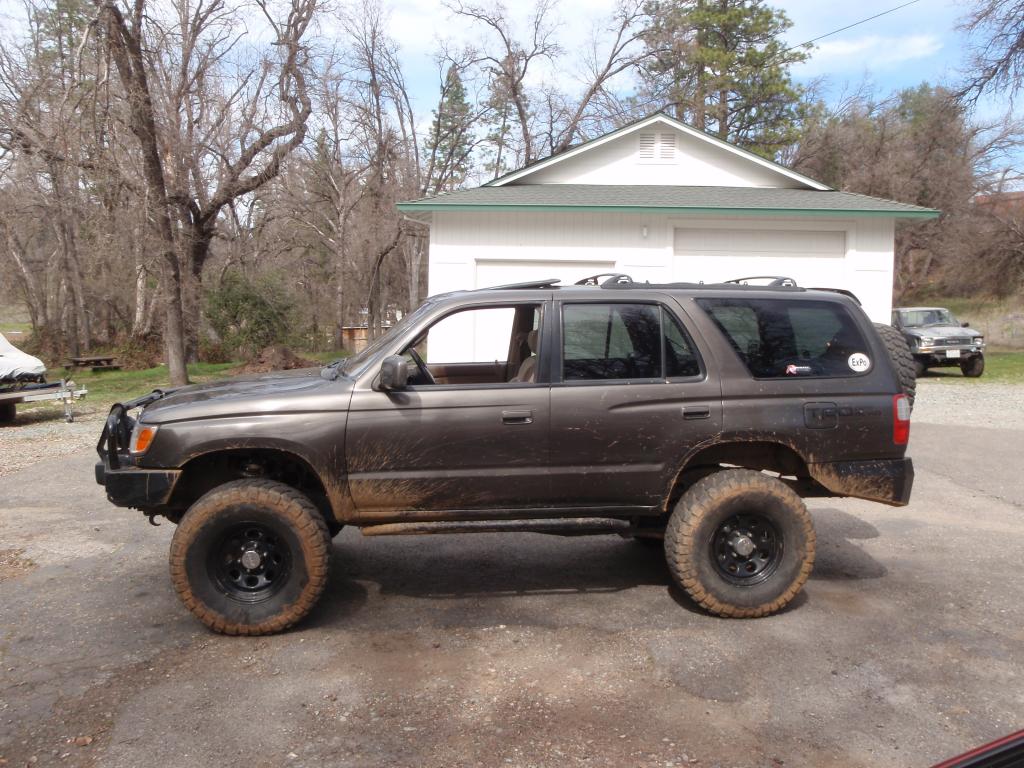
After

It's got a bit of rake, but the new shock bushings for the front should be here soon to replace the old blown out ones. That should give me another 1/2 inch or so in the front. I don't mind a bit of rake though, and it will be just about perfect with the tent on top and the full jerry cans on the back.
A few things to compare the 861's to the 9 wraps:
- First of all, I immediately noticed the rear end is much stiffer now. The 9 wraps made the rear end float around and bounce on bumps on the highway, that has been eliminated. The 861's absorb the bumps much better, and I don't get the floating feel anymore.
- I run no swaybars. I've always had quite a bit of body roll, but that has been reduced quite a bit. The whole rig seems to hug the road better now. With that being said, I've never been able to get a rear wheel off the ground on a sharp turn with the 9 wraps. Today I did it with the 861's, it was a bit scary and I wasn't expecting that lol. I guess since the new coils are much stiffer than the 9 wraps, the rig can't lean as much without pulling the axle with it. Now that I know what to expect, it wont be a problem.
-The 861's flex great, just like the 9 wraps. But I already knew that, thanks to the handful of you that run these coils and have talked about their wheeling ability. So thanks for that!
I'm really looking forward to loading these coils down with all my gear for the Overland Expo trip in less than a month, that will be the real test.
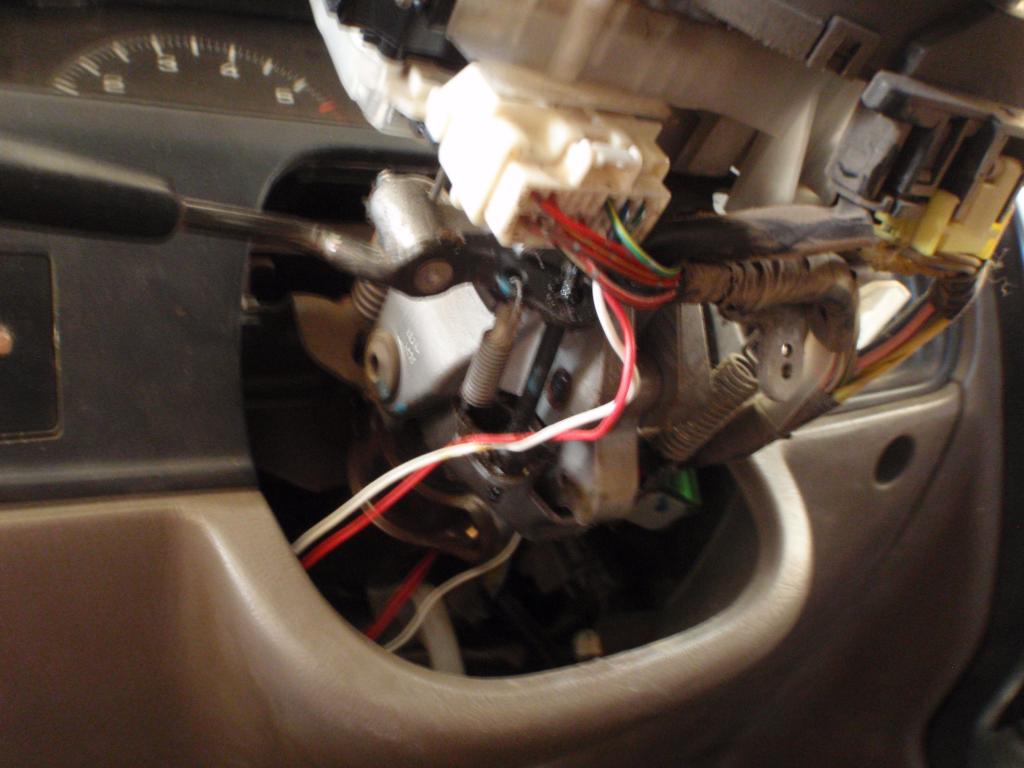
...In other news, my elocker is giving me problems again. I switched it on to help flex out the 861's, and I couldnt get it to switch off. I had to pull the actuator yet again and turn it off manually. When I was down there I found this broken wire
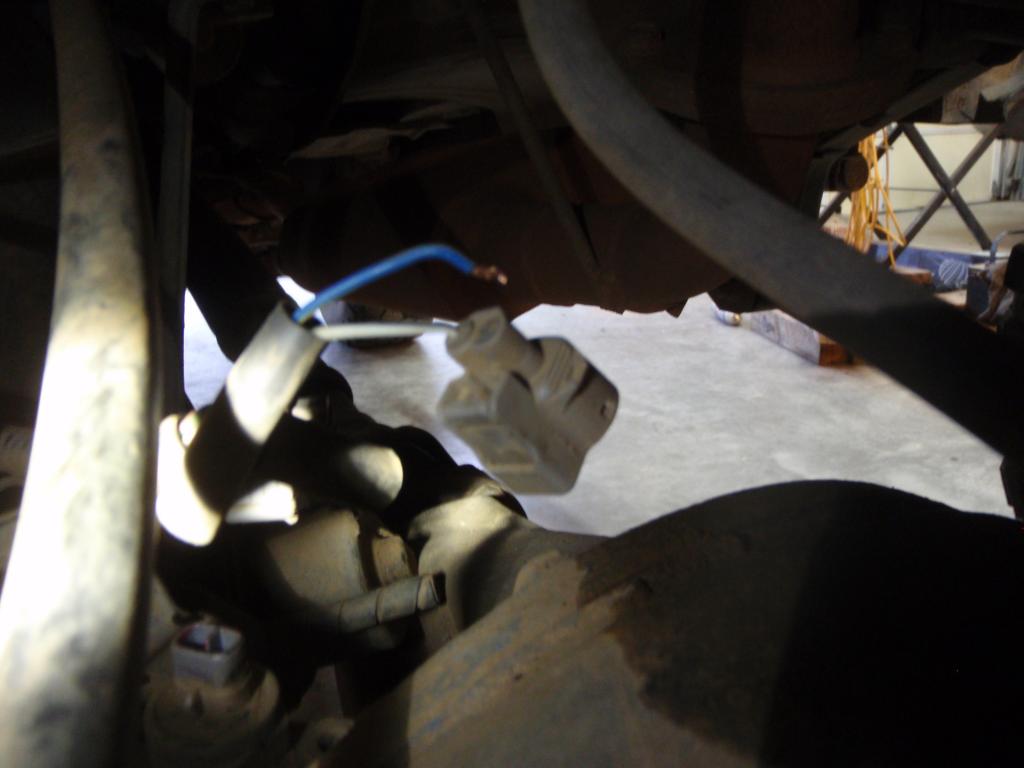
This is definitely not a good thing, but I'm pretty sure this connector only controls the lock sensor, and not the motor itself? This is the small connector BTW. I'll try to figure it out on my next day off, whenever that might be.
861 and old LC 9 wrap side by side

Before


After


It's got a bit of rake, but the new shock bushings for the front should be here soon to replace the old blown out ones. That should give me another 1/2 inch or so in the front. I don't mind a bit of rake though, and it will be just about perfect with the tent on top and the full jerry cans on the back.
A few things to compare the 861's to the 9 wraps:
- First of all, I immediately noticed the rear end is much stiffer now. The 9 wraps made the rear end float around and bounce on bumps on the highway, that has been eliminated. The 861's absorb the bumps much better, and I don't get the floating feel anymore.
- I run no swaybars. I've always had quite a bit of body roll, but that has been reduced quite a bit. The whole rig seems to hug the road better now. With that being said, I've never been able to get a rear wheel off the ground on a sharp turn with the 9 wraps. Today I did it with the 861's, it was a bit scary and I wasn't expecting that lol. I guess since the new coils are much stiffer than the 9 wraps, the rig can't lean as much without pulling the axle with it. Now that I know what to expect, it wont be a problem.
-The 861's flex great, just like the 9 wraps. But I already knew that, thanks to the handful of you that run these coils and have talked about their wheeling ability. So thanks for that!
I'm really looking forward to loading these coils down with all my gear for the Overland Expo trip in less than a month, that will be the real test.
...In other news, my elocker is giving me problems again. I switched it on to help flex out the 861's, and I couldnt get it to switch off. I had to pull the actuator yet again and turn it off manually. When I was down there I found this broken wire

This is definitely not a good thing, but I'm pretty sure this connector only controls the lock sensor, and not the motor itself? This is the small connector BTW. I'll try to figure it out on my next day off, whenever that might be.
04-21-2013, 08:41 PM
#352
not for the motor but it does tell the switch or ecu *if your running one* when to stop running the motor. you want the switch. i have locked or froze my motor because i manual made the motor run to see if it works. it can over turn the motor causing it not to work or even fry it. if you where closer i can fix the connector with no problems i have tons of pins and can solder and new one in and plug it back to the connector housing.
04-22-2013, 08:45 AM
#353
not for the motor but it does tell the switch or ecu *if your running one* when to stop running the motor. you want the switch. i have locked or froze my motor because i manual made the motor run to see if it works. it can over turn the motor causing it not to work or even fry it. if you where closer i can fix the connector with no problems i have tons of pins and can solder and new one in and plug it back to the connector housing.
That's the plan!
04-22-2013, 04:42 PM
#354
Contributing Member
 11-15-2014, 02:29 PM
#355
Registered User

This is an awesome thread and great looking ride man. I am new to Yotatech and just bought my first 4Runner. This build is one of the inspirations as I was making a purchasing decision as well as decided which direction to head with mine. As the majority of our family trips are out west your pics are really fantastic motivation as I would like to move us a little further than usual off the beaten path on our future trips. Other than the grill guard, muffler and radio on mine it's a one owner bone stock so I have a blank canvas. Looking forward to continued reading on your posts and possibly borrowing some ideas. I'm thinking of starting with the jerry can setup as I was looking for an alternative to the roof.

Thread
Thread Starter
Forum
Replies
Last Post
RedRunner_87
95.5-2004 Tacomas & 96-2002 4Runners (Build-Up Section)
84
06-01-2021 01:51 PM


