Siena's Toyota Hilux Gen 6 Make-Over & 3UZ-FE VVTi Swap
 06-07-2014, 10:07 AM
#41
Registered User
Thread Starter
Join Date: Dec 2013
Location: Aso Rock!
Posts: 214
Likes: 0
Received 0 Likes
on
0 Posts
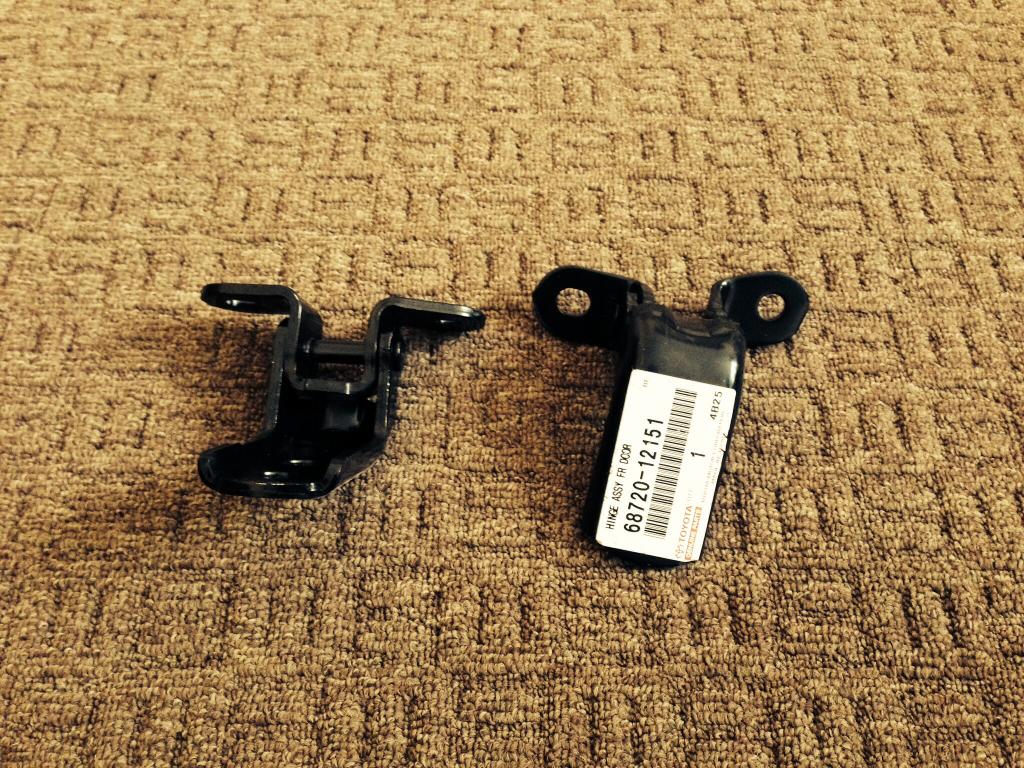
For the custom hydro-electric rear deck lid, I needed hinges. Of course, I could have used any hinges, after all they won't be visible. But I want this project to be perfect, or as close to perfect as it could ever be.
So I opted for genuine brand new Toyota Prius front door hinges. Keeping it Real, keeping it TOYOTA.
So I opted for genuine brand new Toyota Prius front door hinges. Keeping it Real, keeping it TOYOTA.

 06-25-2014, 12:50 PM
#44
Registered User
Thread Starter
Join Date: Dec 2013
Location: Aso Rock!
Posts: 214
Likes: 0
Received 0 Likes
on
0 Posts
Saturday the 28th June is D-Day!
My truck's going into the bodyshop. I'm going to spend the day stripping it in preparation. I'm losing the roof guttering / black trim, the channels either side of the roof are having steel welded in.
I'm still looking for a heated rear screen, anyone here got any leads on one? I believe the heated rear screen off a '99 Tacoma, or 3rd / 4th gen Hilux will be the same, as long as they're single cab models.
I'm willing to pay a fair price shipped. Must be green tinted though.
06-28-2014, 10:14 PM
#45
Registered User
Thread Starter
Join Date: Dec 2013
Location: Aso Rock!
Posts: 214
Likes: 0
Received 0 Likes
on
0 Posts
Saturday the 28th June is D-Day!
My truck's going into the bodyshop. I'm going to spend the day stripping it in preparation. I'm losing the roof guttering / black trim, the channels either side of the roof are having steel welded in.
I'm still looking for a heated rear screen.
My truck's going into the bodyshop. I'm going to spend the day stripping it in preparation. I'm losing the roof guttering / black trim, the channels either side of the roof are having steel welded in.
I'm still looking for a heated rear screen.
06-28-2014, 10:19 PM
#46
Registered User
Thread Starter
Join Date: Dec 2013
Location: Aso Rock!
Posts: 214
Likes: 0
Received 0 Likes
on
0 Posts
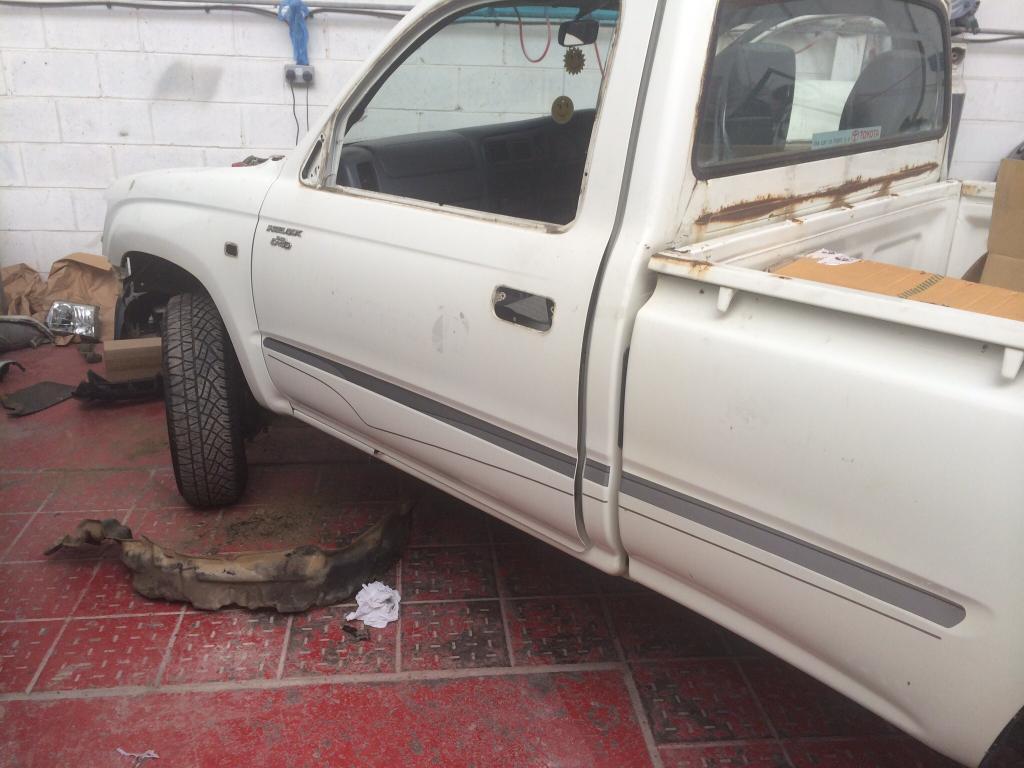
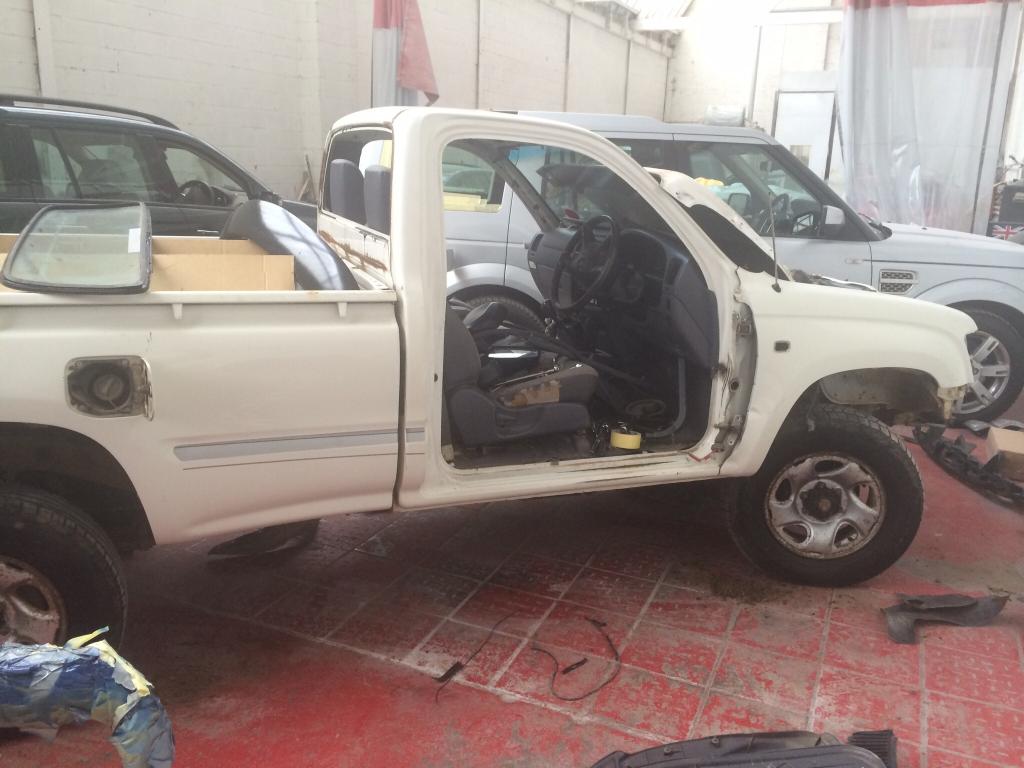
Saturday the 28th at 09:30 hrs, I loaded my truck with all the stockpiled parts, and drove off to the bodyshop. 6 hours later, she was stripped down, ready for prep work, then paint. My fender flares turned up yesterday, so just in time. What was accomplished today:
Front indicators / side lamps removed.
Headlamps removed.
Grille removed.
Headlamp lower trim removed.
Grille lower trim removed.
Front valence removed.
Front bumper removed.
Side repeaters in fenders removed.
Bonnet removed.
Door mirrors removed.
Door glass removed.
Door handles removed.
Door latch assemblies removed.
Door glass seals and runners removed.
Doors removed.
All wheel arch plastic liners removed.
Front mud flaps removed.
Rear windscreen removed.
Rear lamp clusters removed.
Roof rain channels removed.
Roof revolving beacon removed (and not going back on).
Tailgate removed.
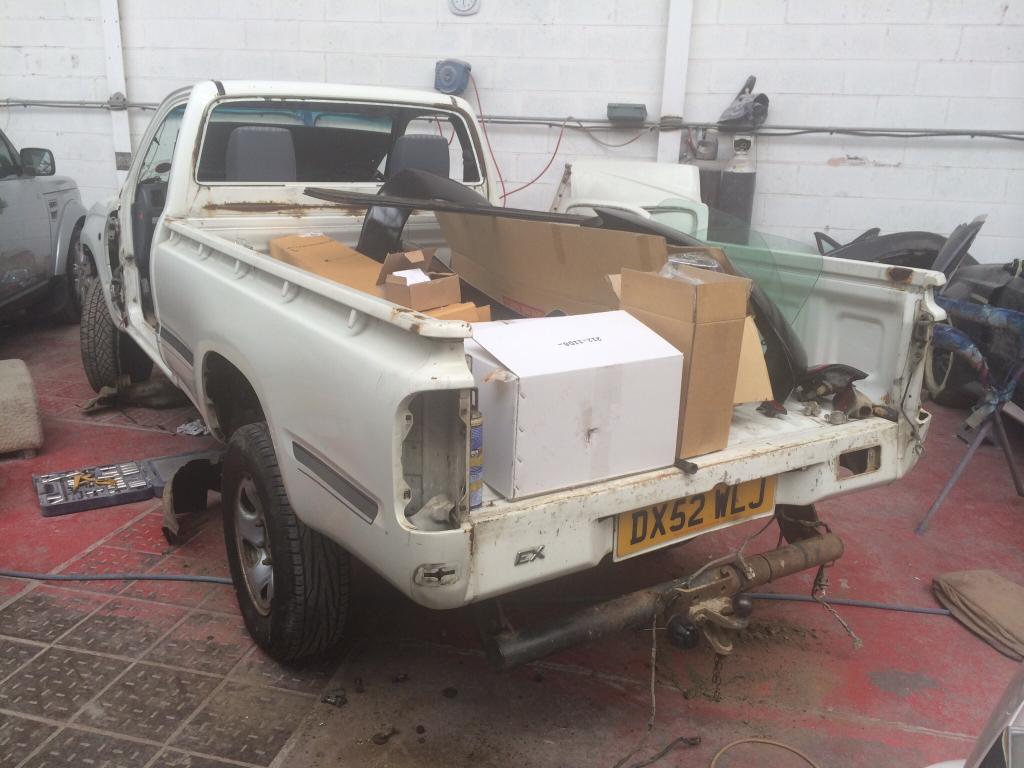
The front screen is bonded, so it needs to be removed by a professional. I managed to remove the rear tub (load area) from the chassis. It is bolted to the chassis frame by 8 bolts - 4 on each side. This was a pig of a job, as mud and the elements had taken their toll on the bolts and nuts.
I'm installing a 4" body lift kit, so the old and rusty bolts and nuts will be junked.
Front indicators / side lamps removed.
Headlamps removed.
Grille removed.
Headlamp lower trim removed.
Grille lower trim removed.
Front valence removed.
Front bumper removed.
Side repeaters in fenders removed.
Bonnet removed.
Door mirrors removed.
Door glass removed.
Door handles removed.
Door latch assemblies removed.
Door glass seals and runners removed.
Doors removed.
All wheel arch plastic liners removed.
Front mud flaps removed.
Rear windscreen removed.
Rear lamp clusters removed.
Roof rain channels removed.
Roof revolving beacon removed (and not going back on).
Tailgate removed.
The front screen is bonded, so it needs to be removed by a professional. I managed to remove the rear tub (load area) from the chassis. It is bolted to the chassis frame by 8 bolts - 4 on each side. This was a pig of a job, as mud and the elements had taken their toll on the bolts and nuts.
I'm installing a 4" body lift kit, so the old and rusty bolts and nuts will be junked.
06-28-2014, 10:21 PM
#47
Registered User
Thread Starter
Join Date: Dec 2013
Location: Aso Rock!
Posts: 214
Likes: 0
Received 0 Likes
on
0 Posts
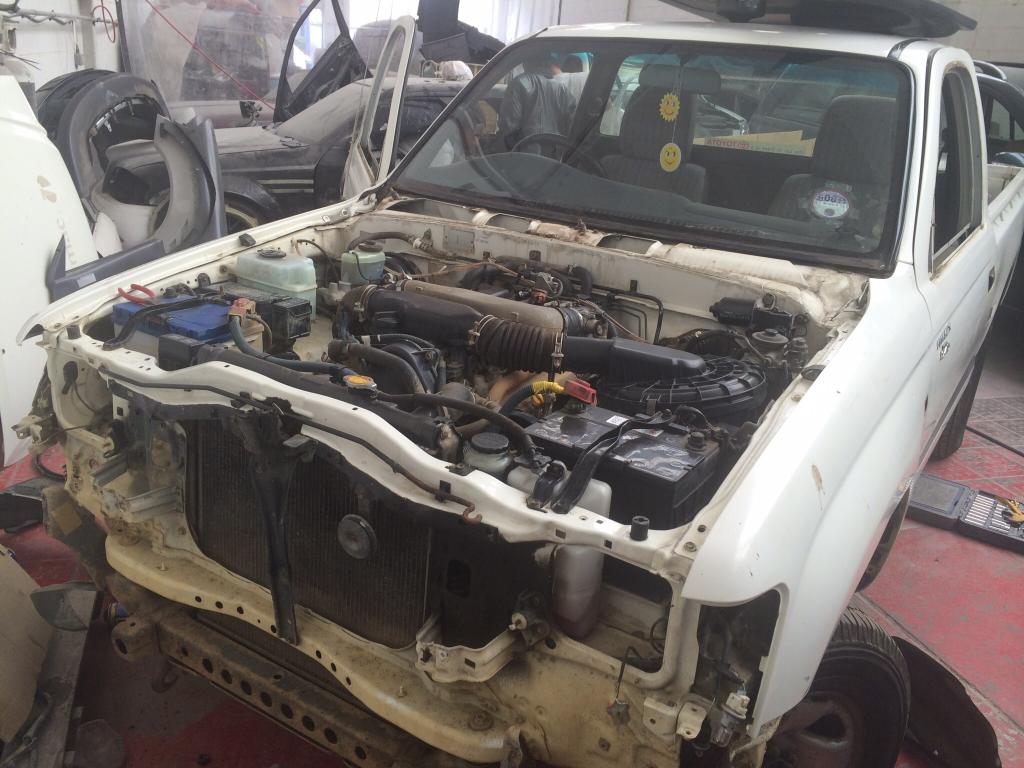
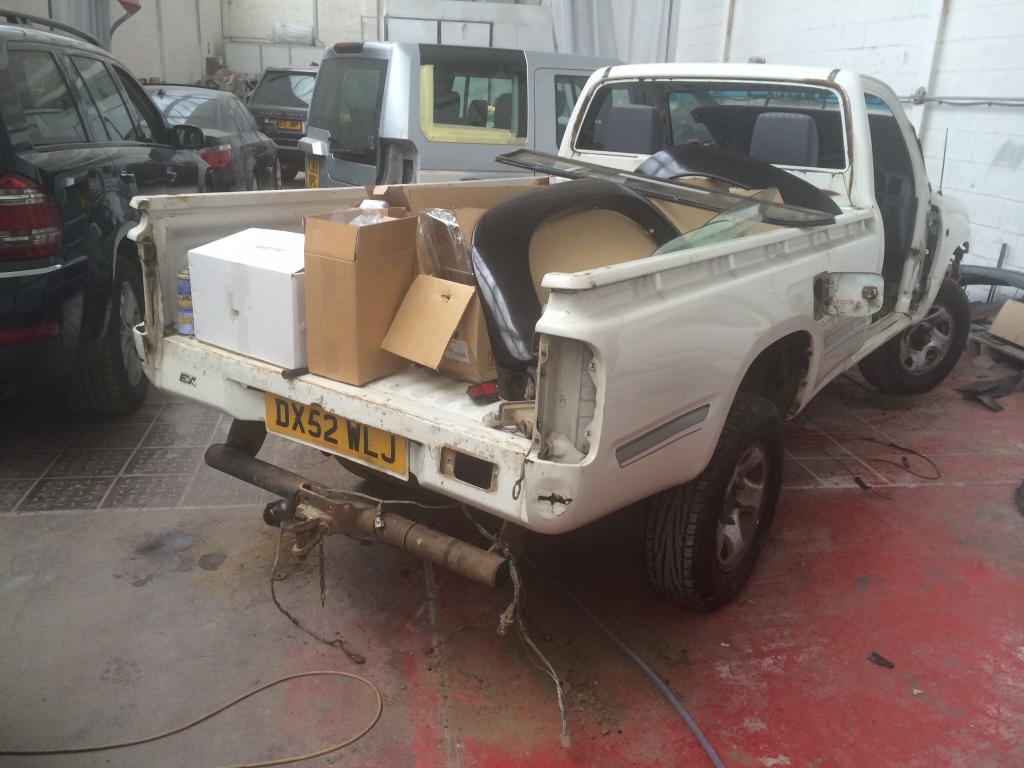
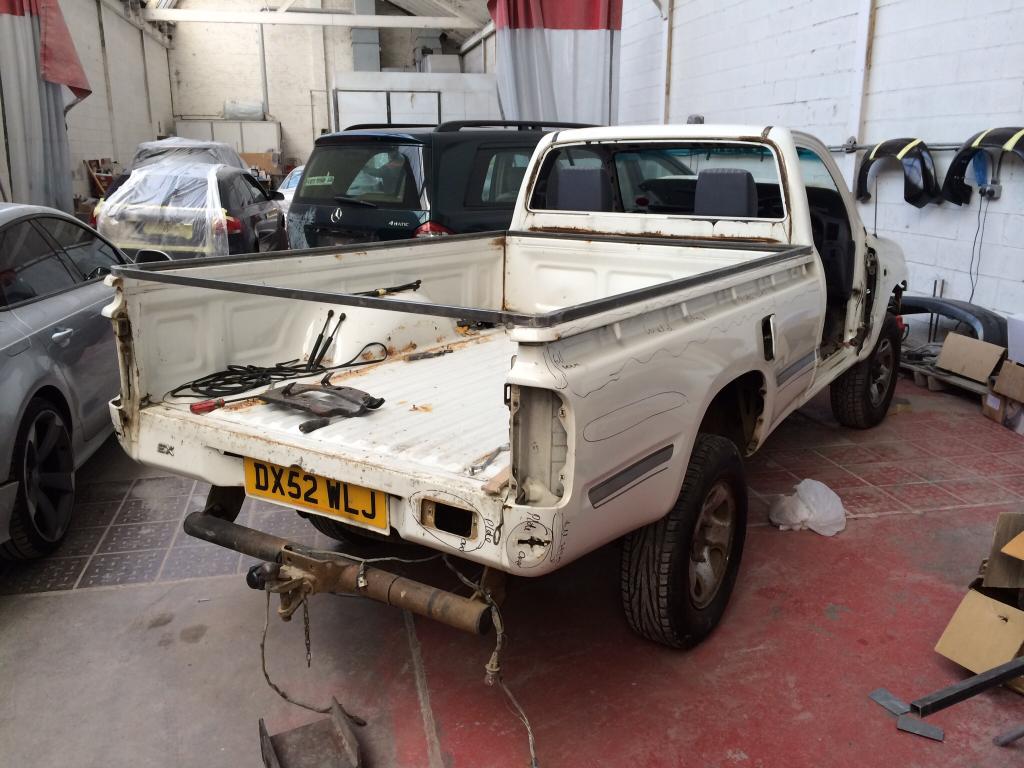
Some pictures of my truck as I left her yesterday. I'll be popping in during the week, between work and other obligations. And I'll definitely be there next Saturday.
07-01-2014, 01:36 PM
#48
Registered User
Thread Starter
Join Date: Dec 2013
Location: Aso Rock!
Posts: 214
Likes: 0
Received 0 Likes
on
0 Posts
Mini update!
I dropped into the bodyshop this arvo, to see how things were progressing. The base frame for the custom rear hydraulically-operated bed lid is pretty much done. Tomorrow it will have a couple of diagonal braces welded in, to give the sheet metal skin more support.
The Toyota door hinges turned out not man enough for the job. Besides being on the weak side, the opening angle was wrong, the deck lid would contact the rear of the bed when opened. A twin-trapezoid / pantograph design was called for, this would allow the lid to lift at the hinged end, and move rearwards when it was operated. This would prevent unwanted contact with the bed top rail.
I opted for Audi A4 Sedan B5 trunk hinges. Besides being immensely strong, they incorporate hydraulic rams, that will assist the main hydraulically-operated rams on the lid.
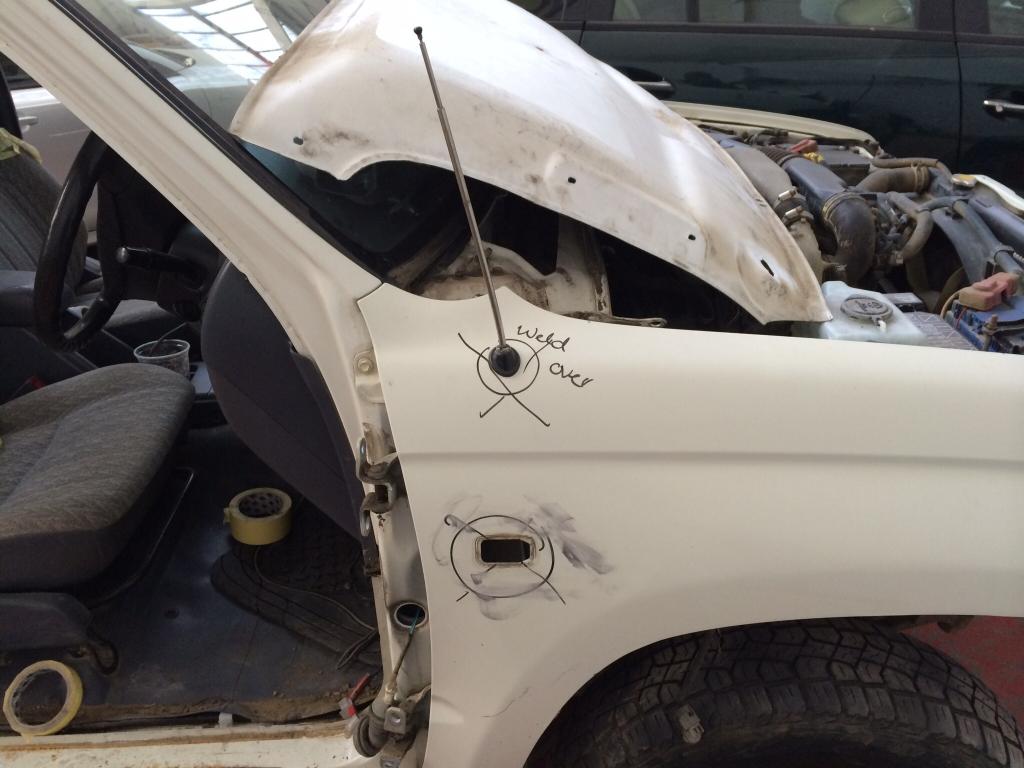
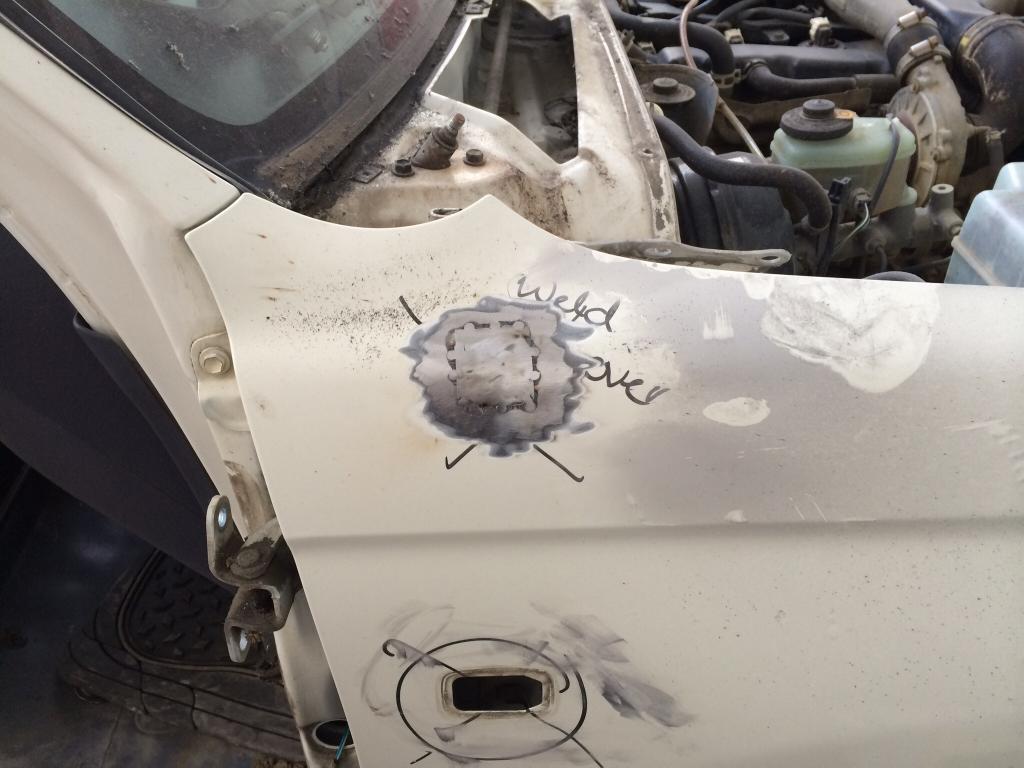
I also took the opportunity to mark the areas that I want welded over, and smoothed off. The deck lid will be test mounted tomorrow. Things are looking great.
I dropped into the bodyshop this arvo, to see how things were progressing. The base frame for the custom rear hydraulically-operated bed lid is pretty much done. Tomorrow it will have a couple of diagonal braces welded in, to give the sheet metal skin more support.
The Toyota door hinges turned out not man enough for the job. Besides being on the weak side, the opening angle was wrong, the deck lid would contact the rear of the bed when opened. A twin-trapezoid / pantograph design was called for, this would allow the lid to lift at the hinged end, and move rearwards when it was operated. This would prevent unwanted contact with the bed top rail.
I opted for Audi A4 Sedan B5 trunk hinges. Besides being immensely strong, they incorporate hydraulic rams, that will assist the main hydraulically-operated rams on the lid.
I also took the opportunity to mark the areas that I want welded over, and smoothed off. The deck lid will be test mounted tomorrow. Things are looking great.
 07-03-2014, 12:27 PM
#51
Registered User
Thread Starter
Join Date: Dec 2013
Location: Aso Rock!
Posts: 214
Likes: 0
Received 0 Likes
on
0 Posts
Sometimes, you learn hard lessons. Cheap is seldom good, especially when it comes to knock-offs. I got bitten by the very thing I warn others about.
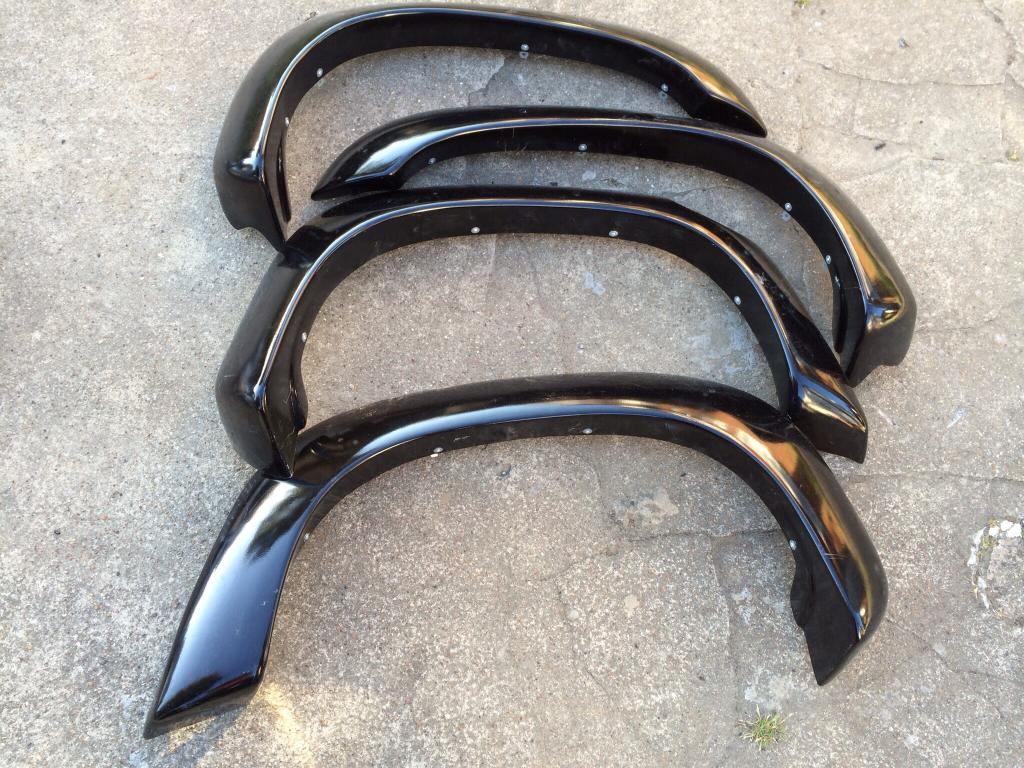
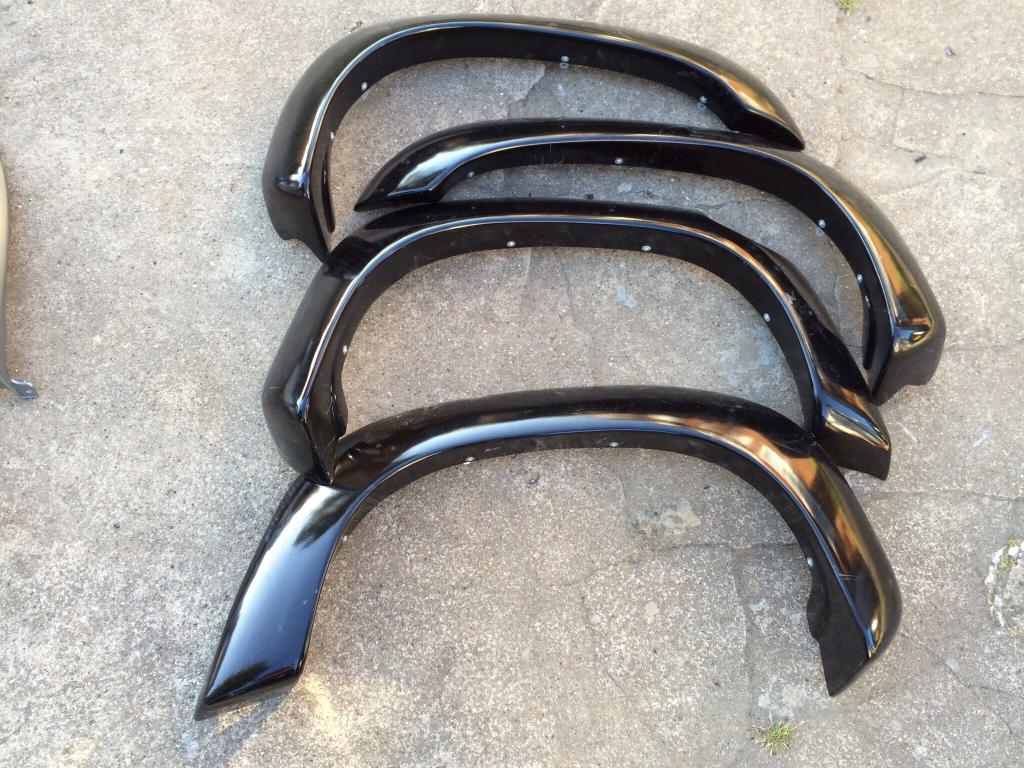
I'm talking Chinese knock-off! ;D
I ordered a set of fender flares for my truck, all the way from East Asia. Well they looked good in the pictures. Unfortunately, they're replicas, made out of fibre glass. While this is not necessarily a bad thing, the set I got will take some fettling to get them anywhere close to fitting. They might as well be made for a Range Rover, they are that much out, especially the rears. They can be reworked, but will take time, and that's something I don't have much of.
They are also much thicker than the OEM Toyota items, and the fronts don't taper towards the bumper. The result is a very sudden step from fender to bumper. Arrrrgh! >
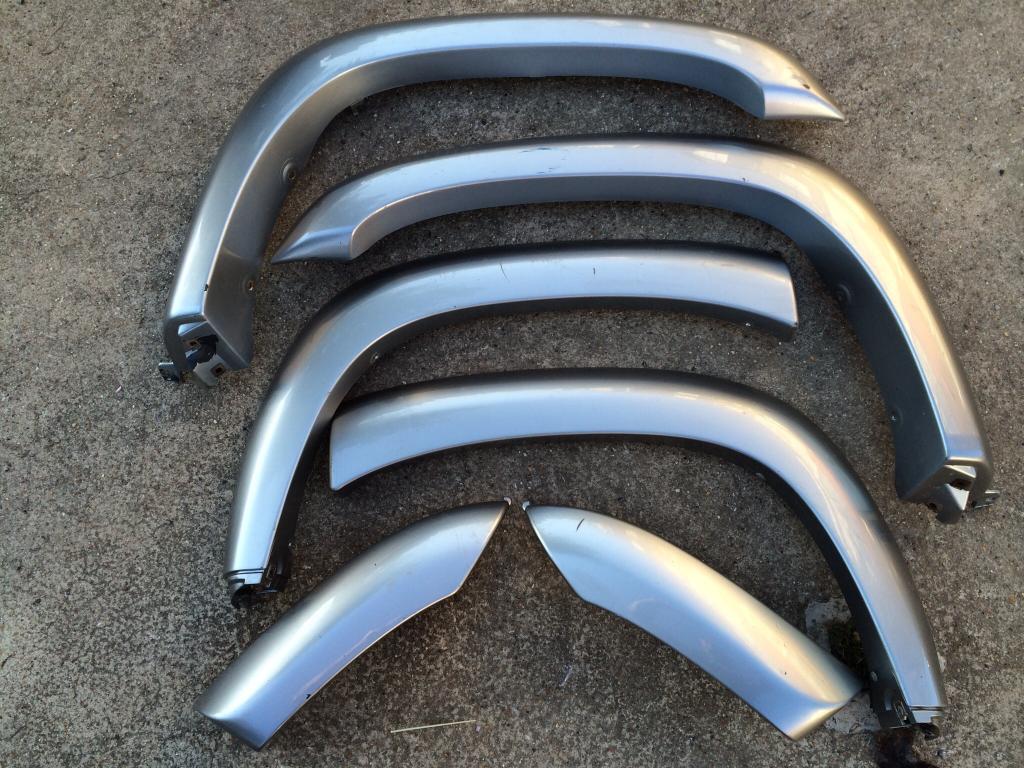
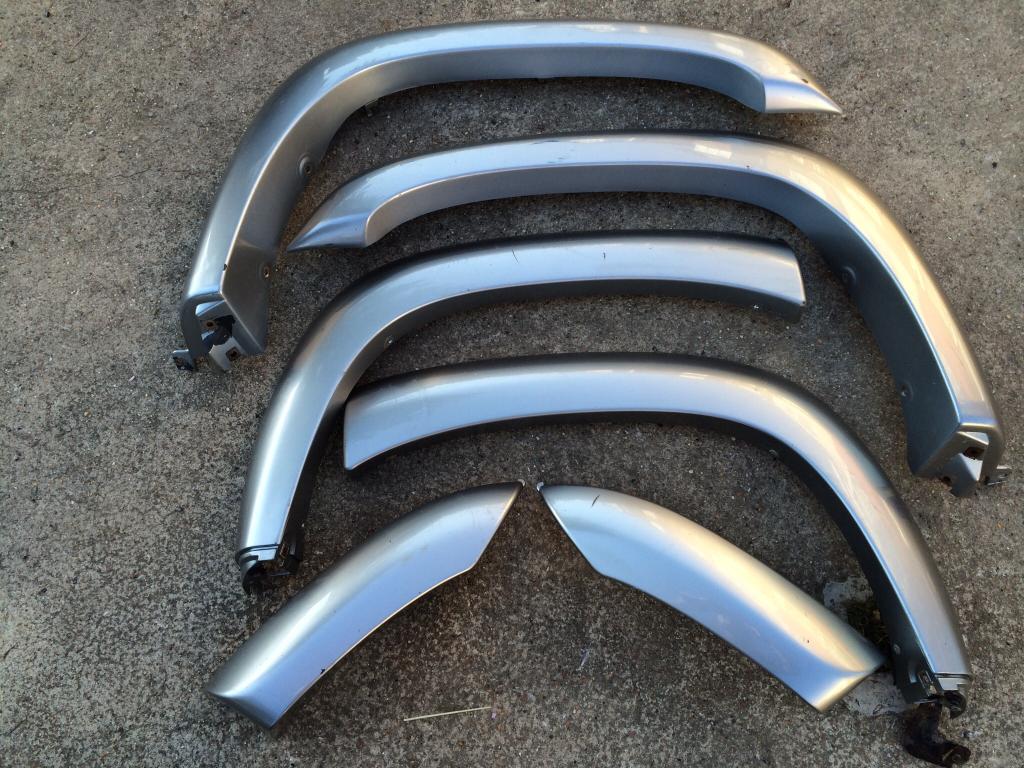
I ended up purchasing used but OEM Toyota items. They are of course for the double cabin model, the fronts are the same as on my single cabin truck, the rears however are different. A small section of the flares are on the cabin, just behind the rear doors, i.e the rear flares come in two sections. Still, I'm happy to work with those. Being ABS plastic, they are much more flexible, and durable. Glass fibre is brittle. Fine, until it gets struck, then it shatters.
I'm talking Chinese knock-off! ;D
I ordered a set of fender flares for my truck, all the way from East Asia. Well they looked good in the pictures. Unfortunately, they're replicas, made out of fibre glass. While this is not necessarily a bad thing, the set I got will take some fettling to get them anywhere close to fitting. They might as well be made for a Range Rover, they are that much out, especially the rears. They can be reworked, but will take time, and that's something I don't have much of.
They are also much thicker than the OEM Toyota items, and the fronts don't taper towards the bumper. The result is a very sudden step from fender to bumper. Arrrrgh! >
I ended up purchasing used but OEM Toyota items. They are of course for the double cabin model, the fronts are the same as on my single cabin truck, the rears however are different. A small section of the flares are on the cabin, just behind the rear doors, i.e the rear flares come in two sections. Still, I'm happy to work with those. Being ABS plastic, they are much more flexible, and durable. Glass fibre is brittle. Fine, until it gets struck, then it shatters.
Last edited by Siena; 07-03-2014 at 12:39 PM.
07-03-2014, 12:30 PM
#52
Registered User
Thread Starter
Join Date: Dec 2013
Location: Aso Rock!
Posts: 214
Likes: 0
Received 0 Likes
on
0 Posts
These are the glass fibre Chinese copies. Note the front flares at the top of the pictures, where it would meet the bumper. Very chunky, and abrupt:
Last edited by Siena; 07-03-2014 at 12:43 PM.
07-03-2014, 12:45 PM
#53
Registered User
Thread Starter
Join Date: Dec 2013
Location: Aso Rock!
Posts: 214
Likes: 0
Received 0 Likes
on
0 Posts
And compare with OEM Toyota items. Again, the flares at the top are for the front, nice finished ends. Note the flares for the rear are split, with the smaller sections normally fitted to the wheel arches on the truck's cabin. These will be reworked to fit my single cabin truck:
07-03-2014, 01:12 PM
#54
Registered User
Thread Starter
Join Date: Dec 2013
Location: Aso Rock!
Posts: 214
Likes: 0
Received 0 Likes
on
0 Posts
It wasn't all doom and gloom though - I've been on the hunt for a heated rear screen for my single cabin truck. As I stated earlier, UK-spec single cabin Hilux's were never available with heated rear screens, this being reserved for the top-spec double cabin, in VX trim.
I got one from the least likely of places, an automobile glass supplier to the aftermarket. It was delivered to me at work today.
The old glass was shot, all etched by the rear bed cap over the years. There was no way it was going back on my truck after paint.
The side windows have faint scratch marks. Not really noticeable, but I'm fussy. And as I intend to tint the glass 40% dark, I knew the scratches would become more prominent.
07-04-2014, 06:16 AM
#55
Registered User
Thread Starter
Join Date: Dec 2013
Location: Aso Rock!
Posts: 214
Likes: 0
Received 0 Likes
on
0 Posts
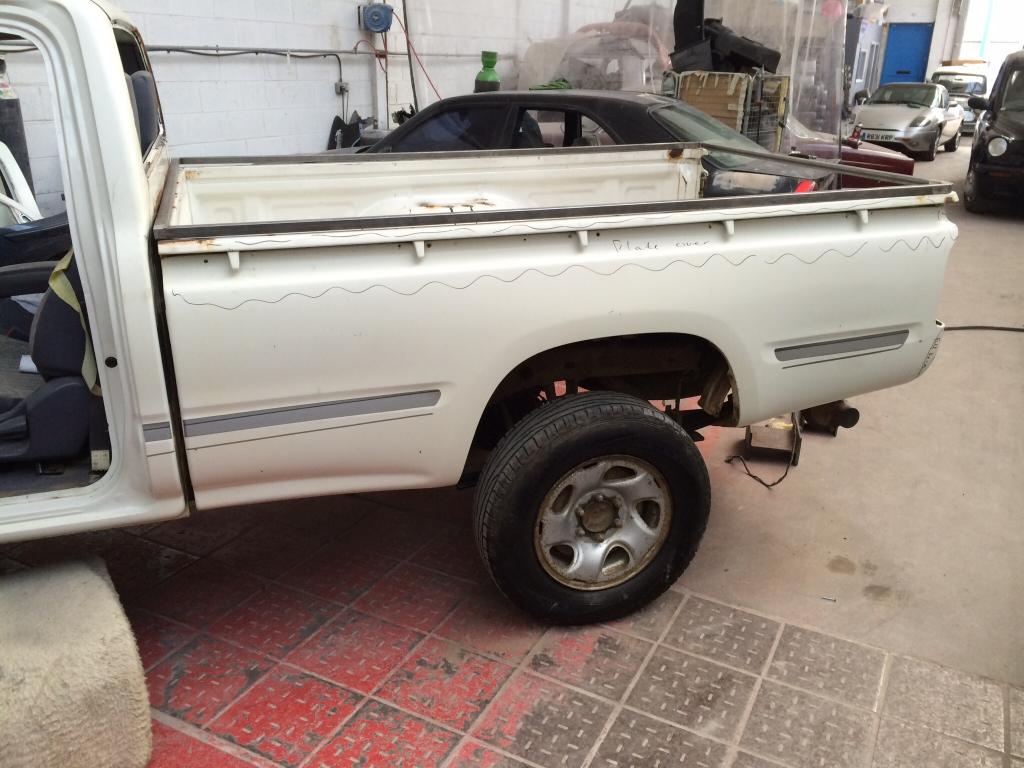
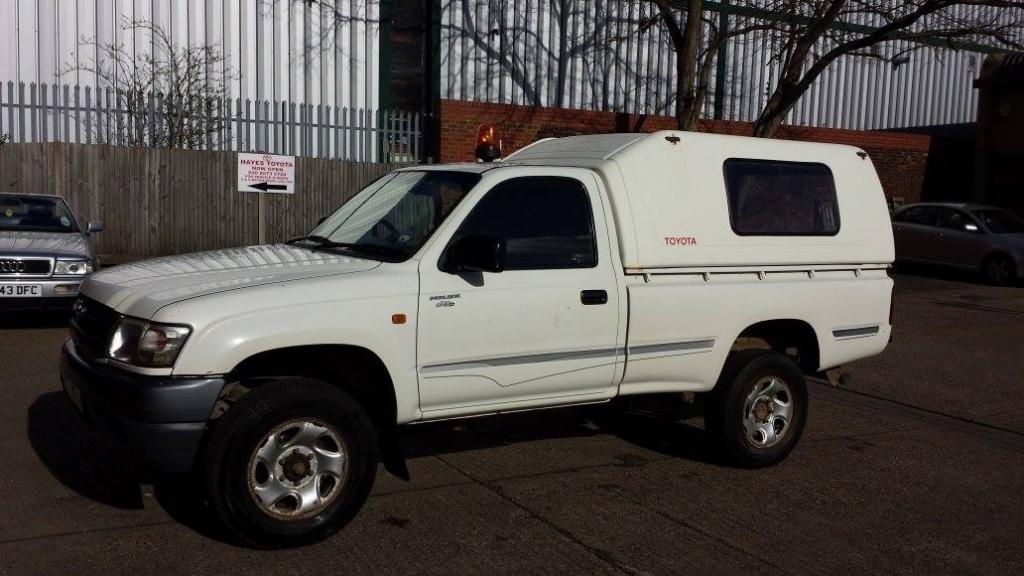
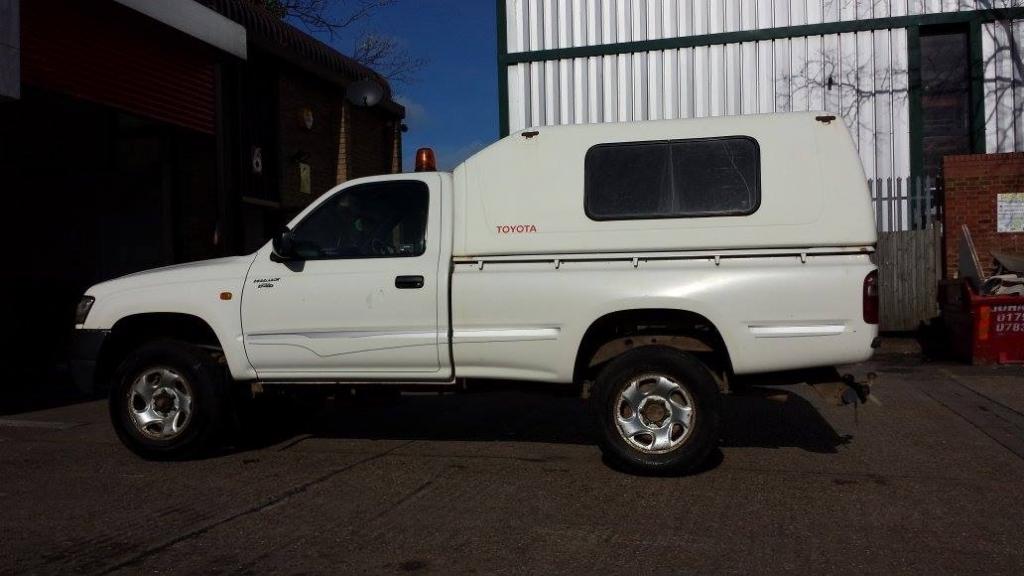
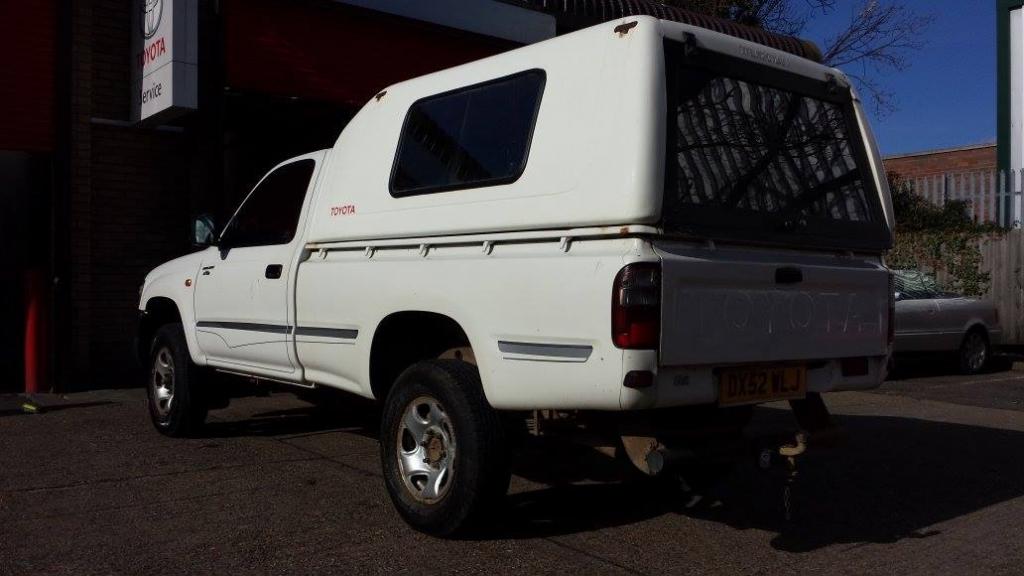
Bed caps can seriously scar your cabin, as I found out. The worn down paint at the rear of my cabin came from years of fitting and removing the cap.
Grit caught between the cap and cabin, as well as between the cabin rear screen and cap screen rubber, really messed things up. The cap is currently sitting in my garage, alongside the rear roll bar.
In her cap days:
Grit caught between the cap and cabin, as well as between the cabin rear screen and cap screen rubber, really messed things up. The cap is currently sitting in my garage, alongside the rear roll bar.
In her cap days:
07-05-2014, 03:31 PM
#56
Registered User
Thread Starter
Join Date: Dec 2013
Location: Aso Rock!
Posts: 214
Likes: 0
Received 0 Likes
on
0 Posts
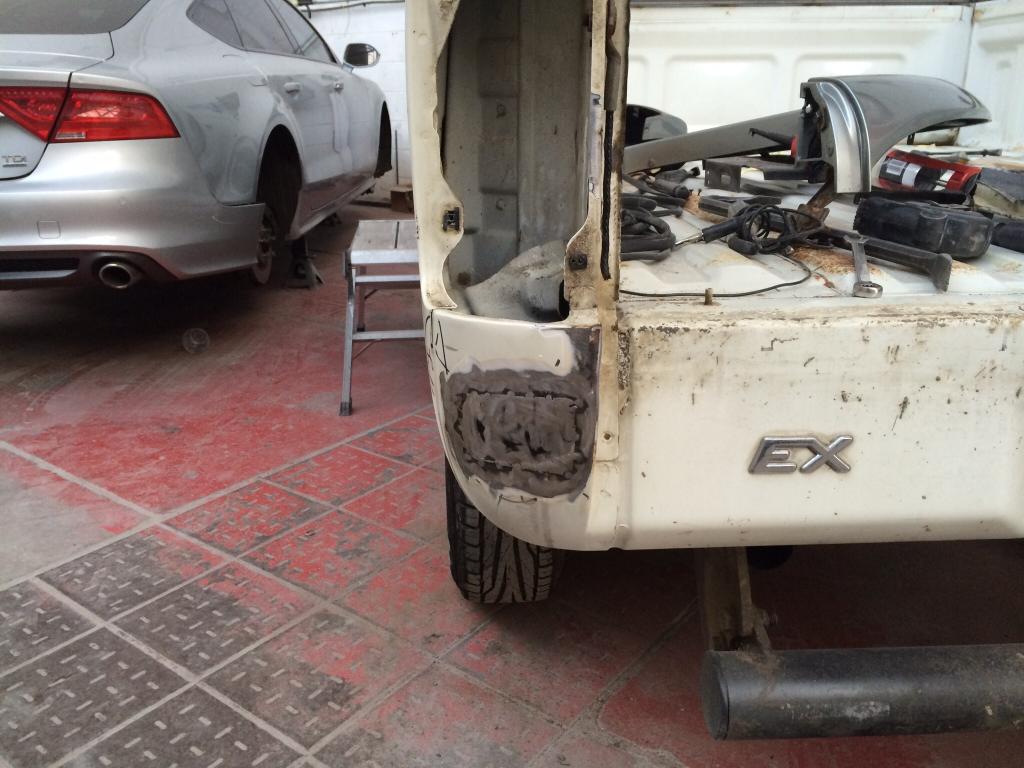
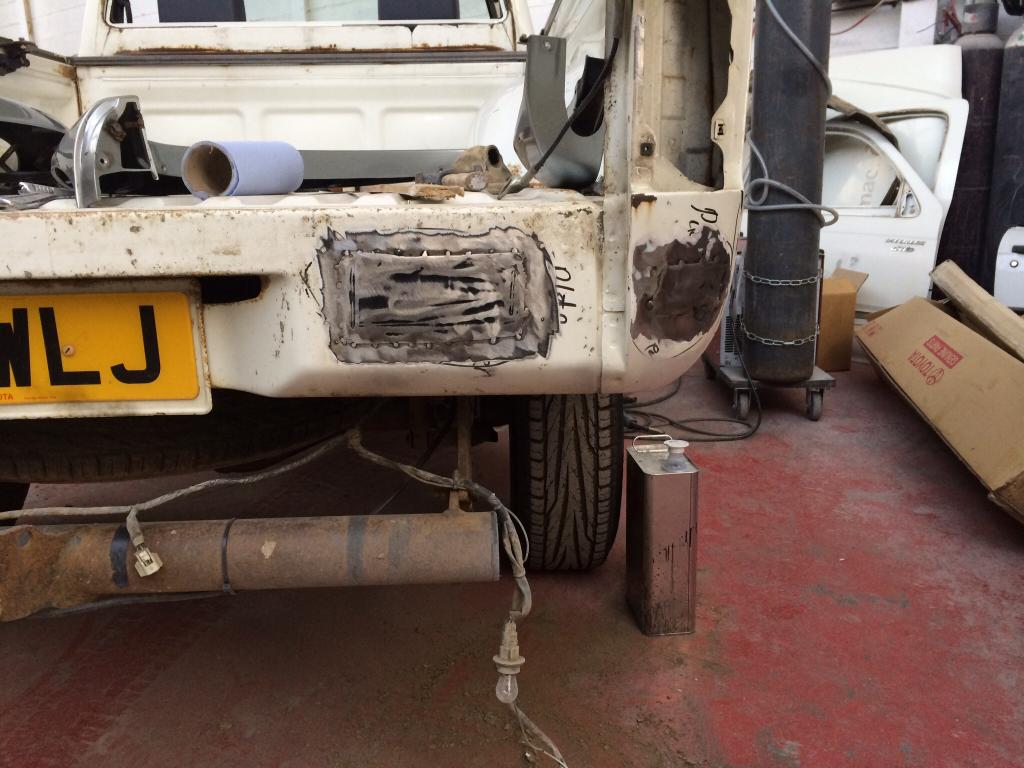
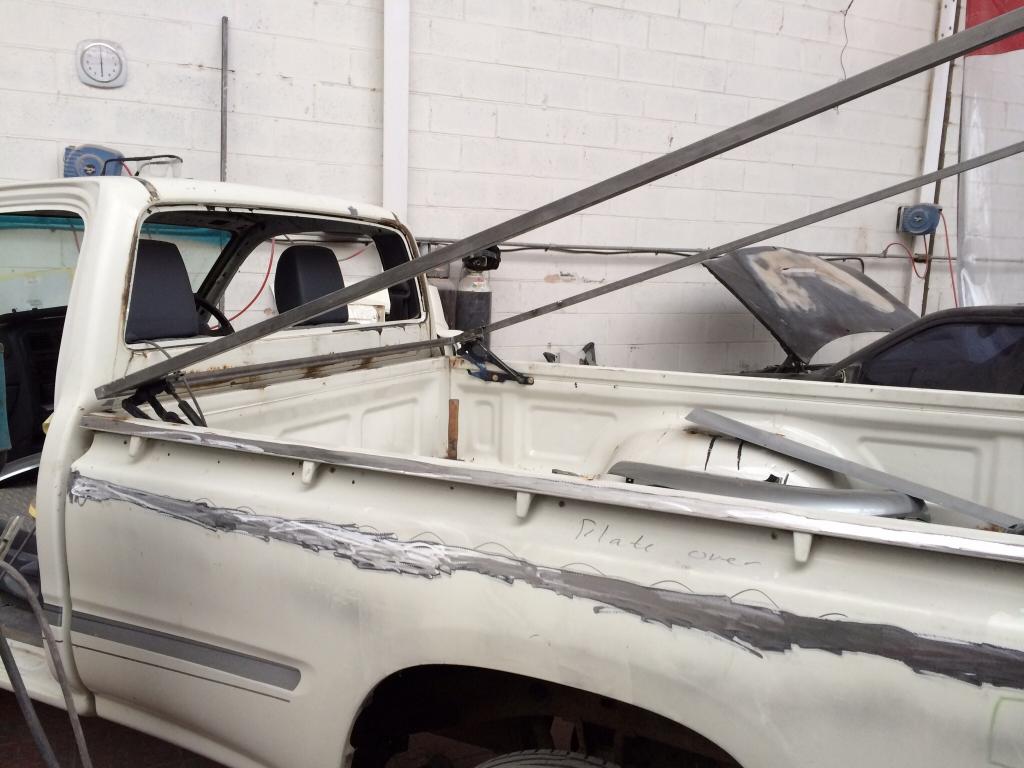
Some of the unwanted holes have had steel welded in place. I had a couple of larger pieces of steel stamped out. These are to weld into the bed grooves, where the tie-down hooks are, on both sides of the bed. These measure at 8' x 5.5" respectively.
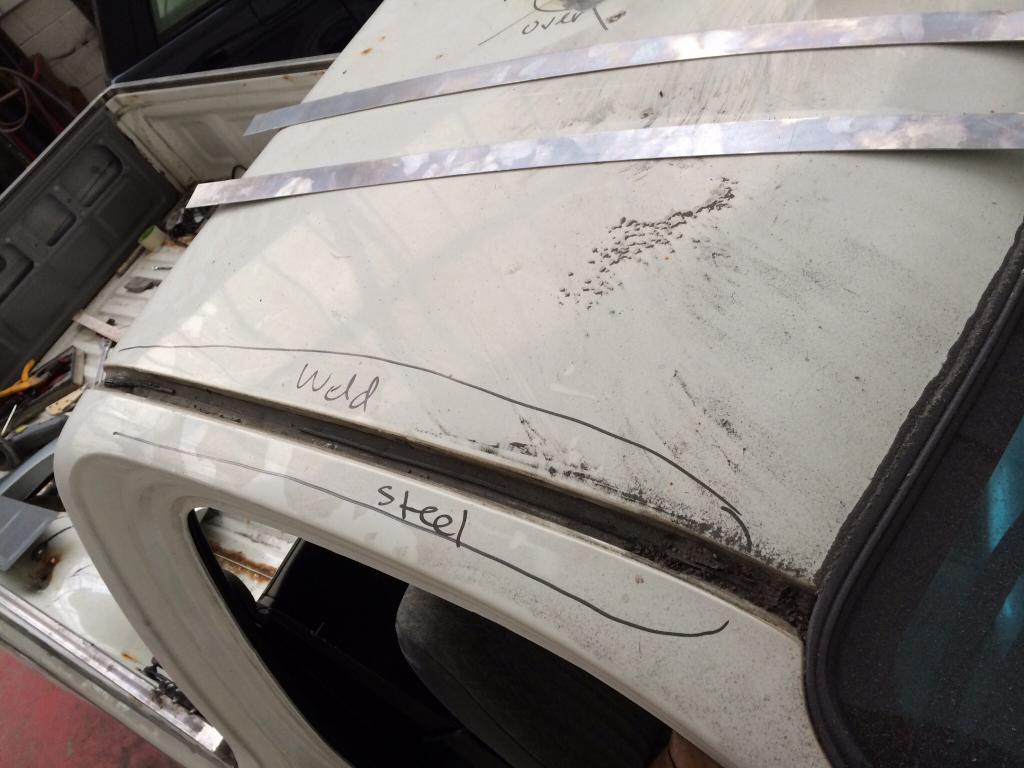
I'm getting two more strips cut out, to weld into the rain channels either side of the cabin roof.
Areas plated over so far:
Rear reflector holes.
Rear fog lamp hole.
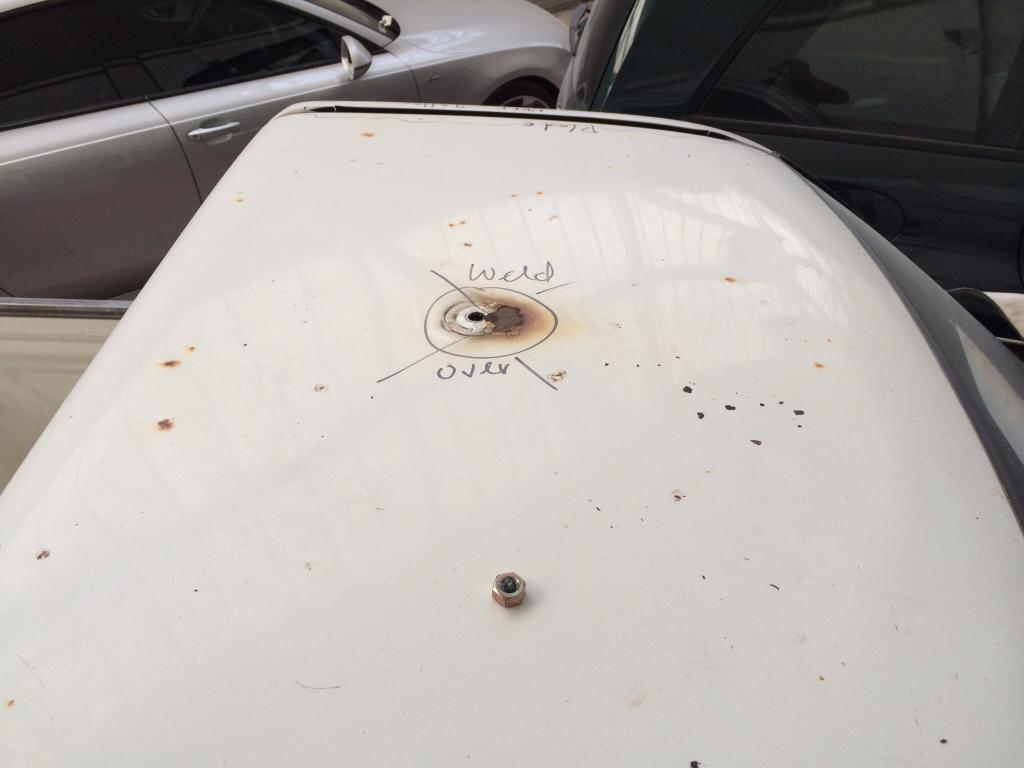
Cabin roof beacon hole.
Driver's fender aerial hole.
I'm getting two more strips cut out, to weld into the rain channels either side of the cabin roof.
Areas plated over so far:
Rear reflector holes.
Rear fog lamp hole.
Cabin roof beacon hole.
Driver's fender aerial hole.
07-05-2014, 03:48 PM
#57
Registered User
Thread Starter
Join Date: Dec 2013
Location: Aso Rock!
Posts: 214
Likes: 0
Received 0 Likes
on
0 Posts
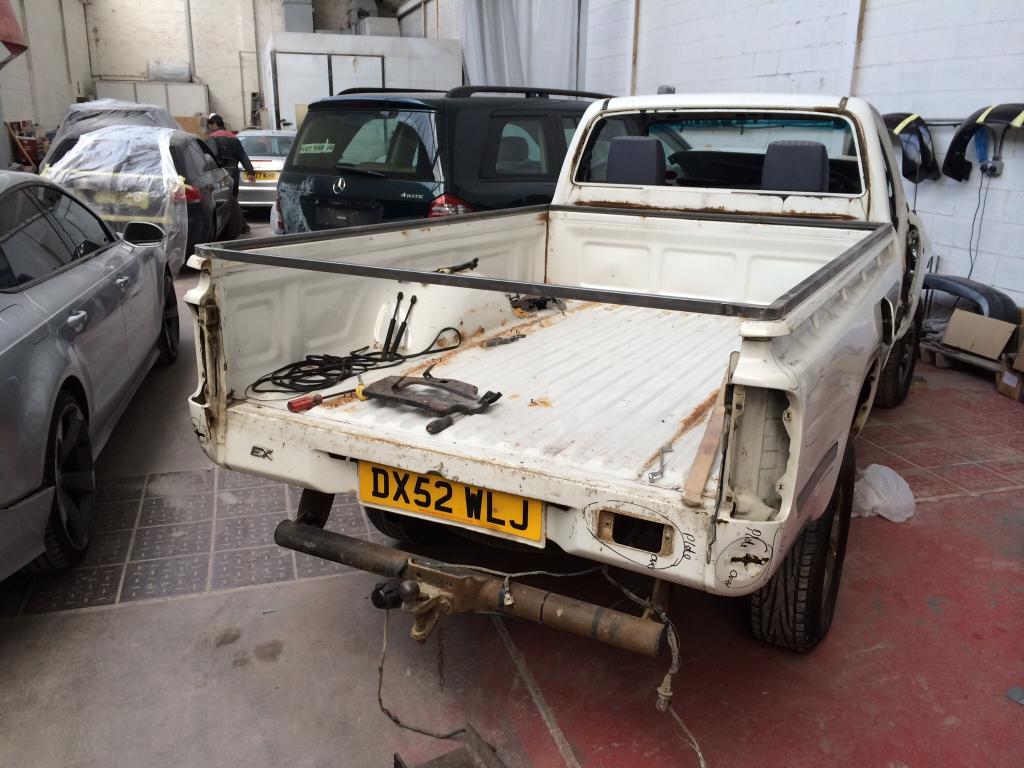
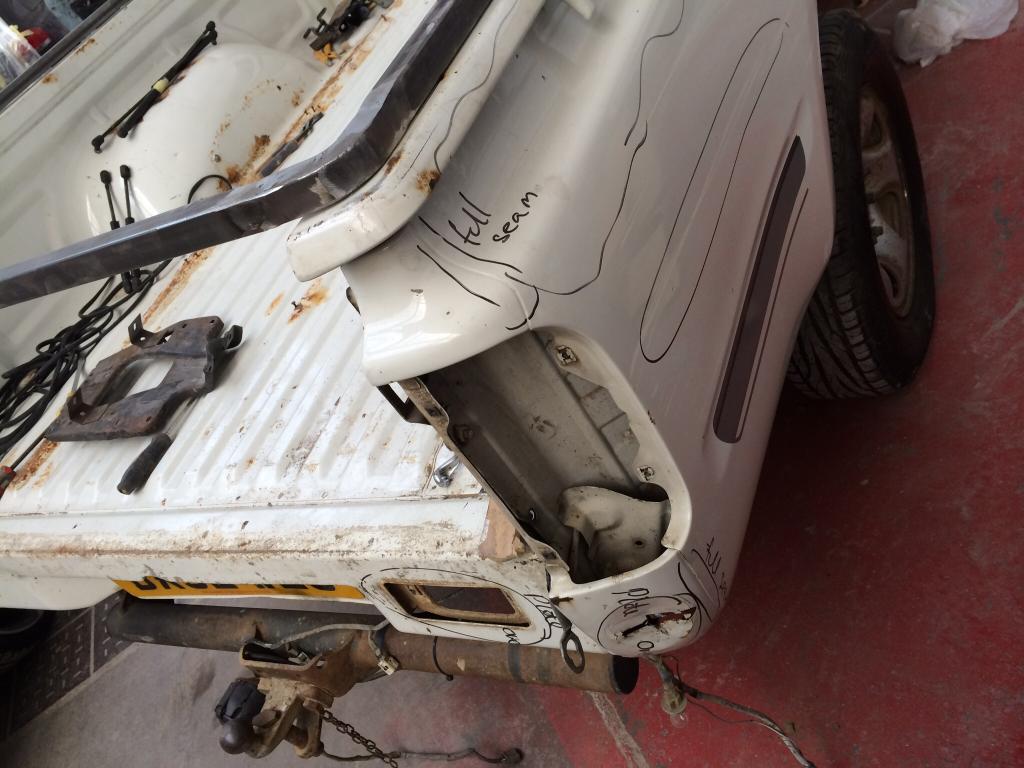
I have been sorely tempted to retain the tow hitch, but after offering up the rear bumper, I've decided to ditch it.
The bed is just sitting on the frame, all the bolts are off. The ones at the rear were a swine to get off. In the end, I roasted them off with an oxy acetylene torch. The U-shaped frame section at the rear meant it was not possible to get access to these bolts with a 17mm socket, 1/2" extension and impact gun.
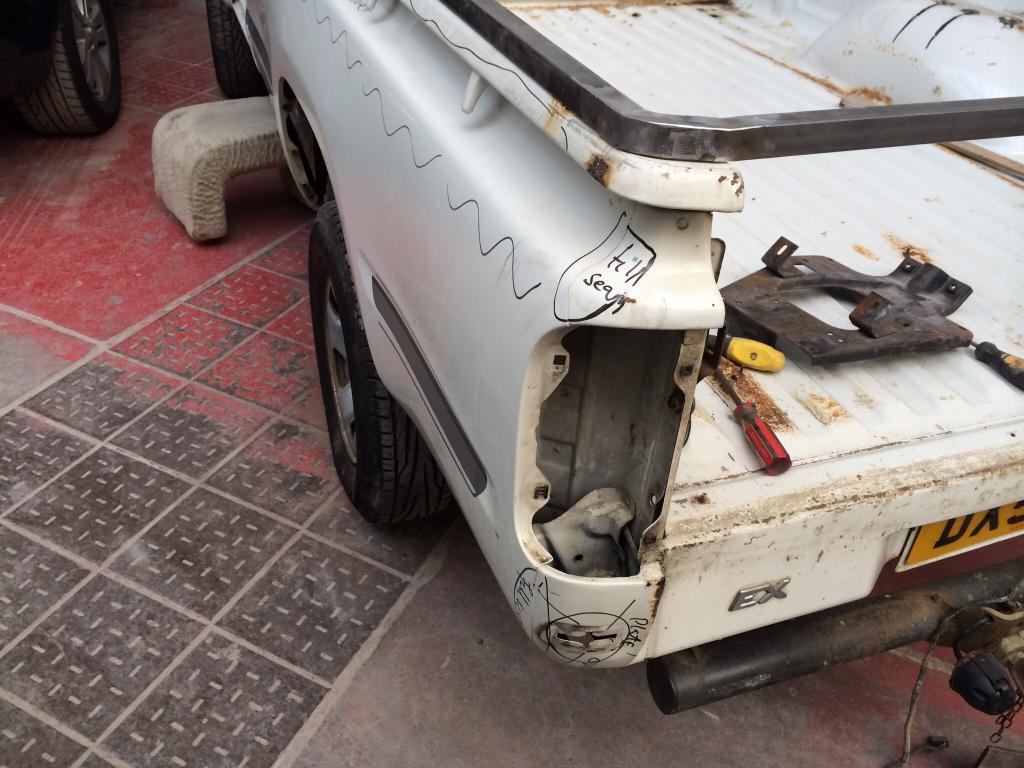
The fuel filler flap is in the way of the fender flare on the driver's side. I don't want the OEM Toyota ABS plastic fender flare cut round the flap. My options are to cut a section out of the fuel filler flap, or delete it altogether, relocating the fuel filler inside the bed, in the wheel well itself.
I'm going to sleep on this until Tuesday.
The bed is just sitting on the frame, all the bolts are off. The ones at the rear were a swine to get off. In the end, I roasted them off with an oxy acetylene torch. The U-shaped frame section at the rear meant it was not possible to get access to these bolts with a 17mm socket, 1/2" extension and impact gun.
The fuel filler flap is in the way of the fender flare on the driver's side. I don't want the OEM Toyota ABS plastic fender flare cut round the flap. My options are to cut a section out of the fuel filler flap, or delete it altogether, relocating the fuel filler inside the bed, in the wheel well itself.
I'm going to sleep on this until Tuesday.
07-06-2014, 03:26 AM
#58
Registered User
Thread Starter
Join Date: Dec 2013
Location: Aso Rock!
Posts: 214
Likes: 0
Received 0 Likes
on
0 Posts
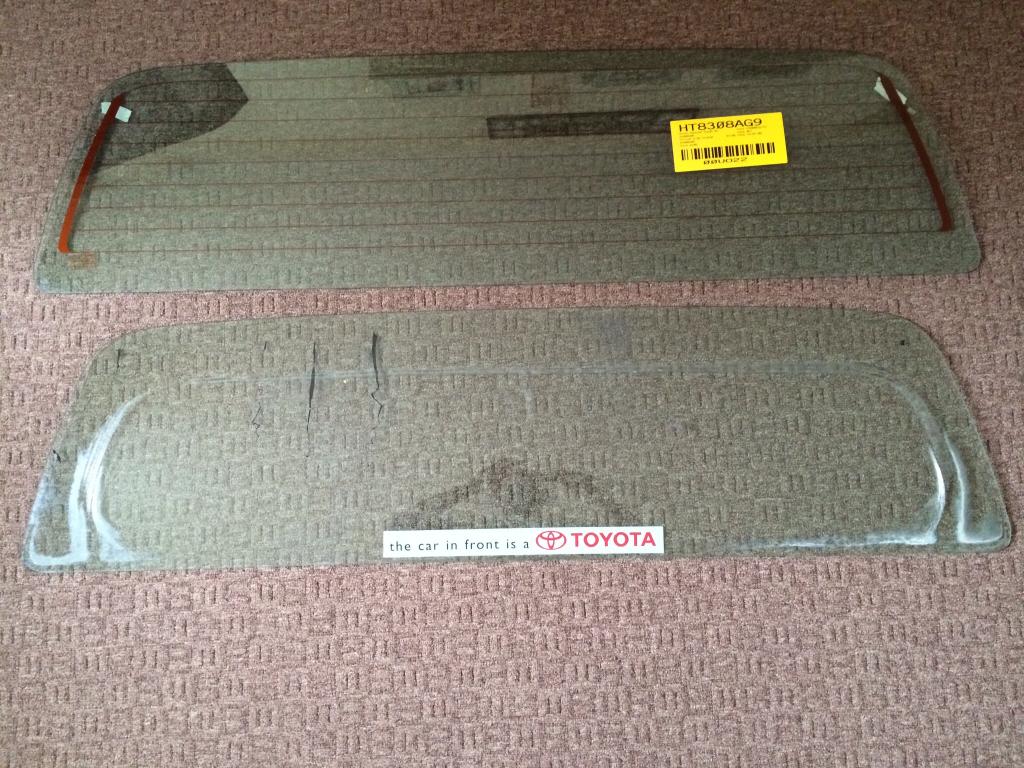
Picture of old and new rear screens. Note the deep etching on the old, non-heated glass. Well past it's best. It'll certainly keep the cabin dry if fitted, but that's about all it's good for:
07-07-2014, 10:39 AM
#59
Registered User
Thread Starter
Join Date: Dec 2013
Location: Aso Rock!
Posts: 214
Likes: 0
Received 0 Likes
on
0 Posts
I spent the day away from work, and the bodyshop, I had to have a stainless exhaust system made up for a friend's Old Skool Audi Cabriolet.
However, some progress has been made in my absence. I got a call letting me know my Audi A4 B5 Sedan trunk hinge system had been fitted, and could I come down to see if it was okay? The thing is, I was 73 miles away, in Basildon. So it would be a mad dash back to Hayes.
Still, I got back in good time. The hinges have been fitted, and the cantilever-like set up works just the way I thought it would. The hinges are currently secured to the sides of the bed by 10mm self-tappers. I'm going to drop down some bolts and nuts tomorrow. The idea is the nuts will be welded in as captives (on the outside, within the groove / hook area). Because once the hook area is plated over and smoothed, the won't be any access, should I wish to remove the lid.
Tomorrow, I'll pop into the bodyshop during my break, and show the fabricator exactly where I want the hydraulic ram retainers to be welded to the frame, and the tab for the catch. The rams on the hinges are not strong enough to hold the lid open. I'm also toying with the idea of having no lock on the new tailgate, (which has been temporarily fitted to ensure the plated-over hook recess on the bed sides matches the profile of the tailgate perfectly).
I also took the opportunity to have the roof rain channel steel plates cut out, and dropped off. These will be welded in place tomorrow.
Once the bed lid' frame's hydraulic ram tabs have been welded in place, along with the catch tab, I'm taking the frame back to my fabricator, who will then weld in the support trusses, followed by the skin itself. Then it's back to the bodyshop for finishing.
We're cooking on gas, well on track. Things are looking great.
07-07-2014, 11:13 AM
#60
Registered User
Thread Starter
Join Date: Dec 2013
Location: Aso Rock!
Posts: 214
Likes: 0
Received 0 Likes
on
0 Posts
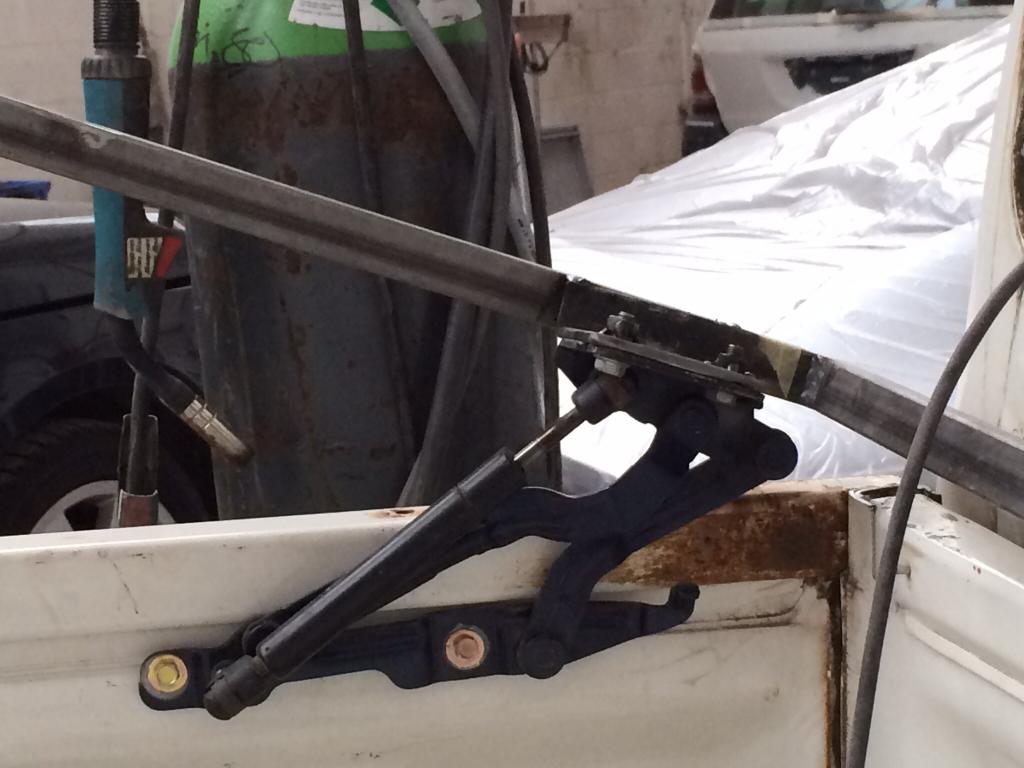
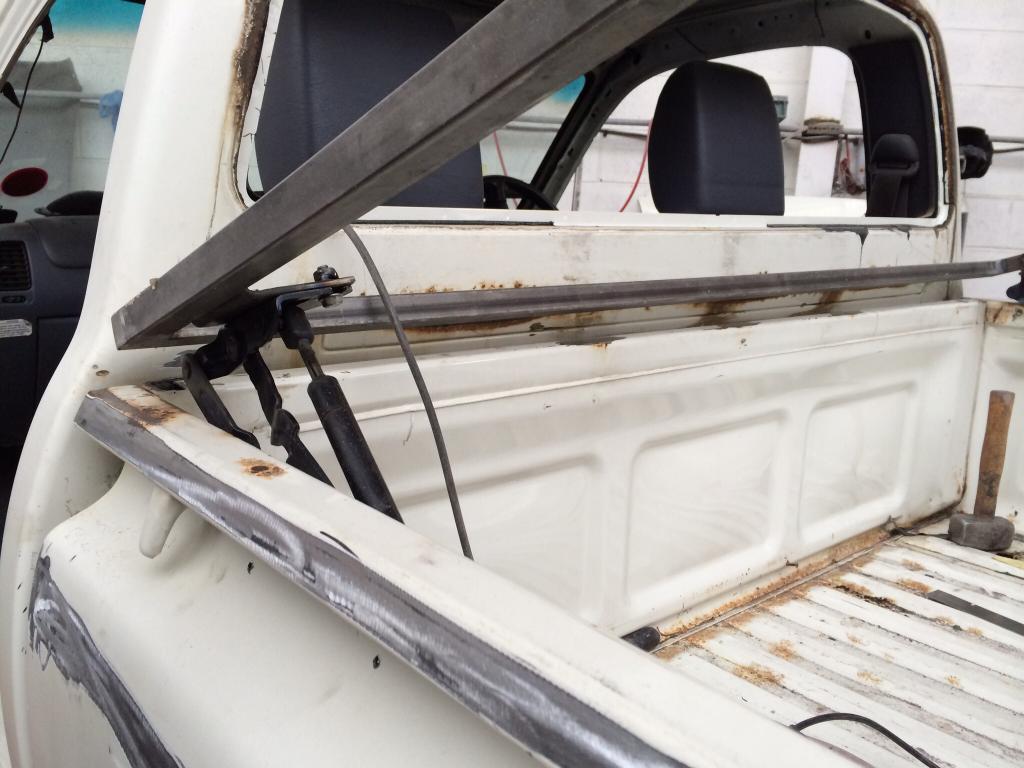
Some progress pictures - forgive the iPhone quality.
Close-up of the cantilever hinge set-up. It works perfectly - the lid moves upwards and rearwards, away from the bed, as it's lifted. Just the way I planned it:
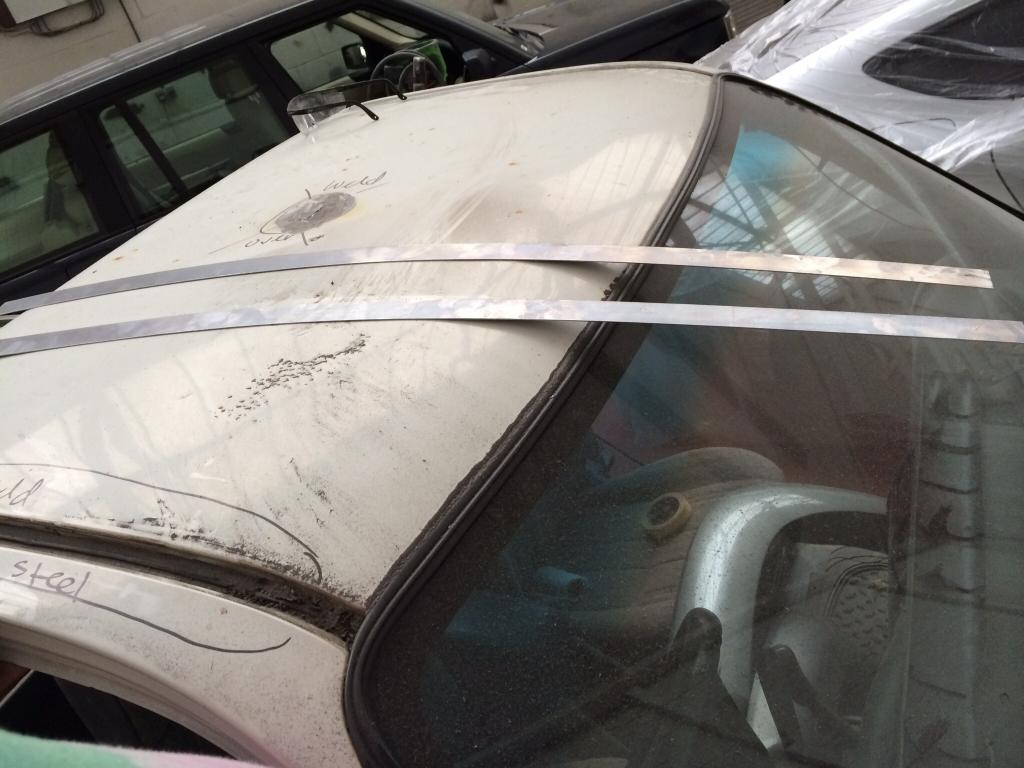
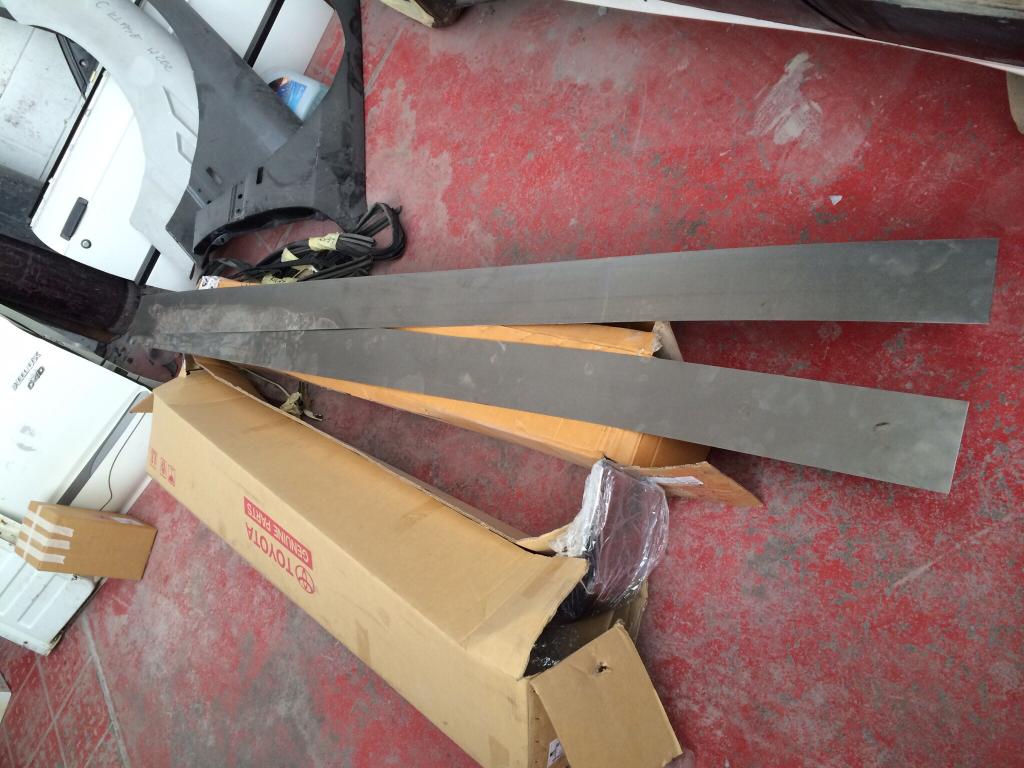
Cut steel strips, to plate over the roof rain channels:
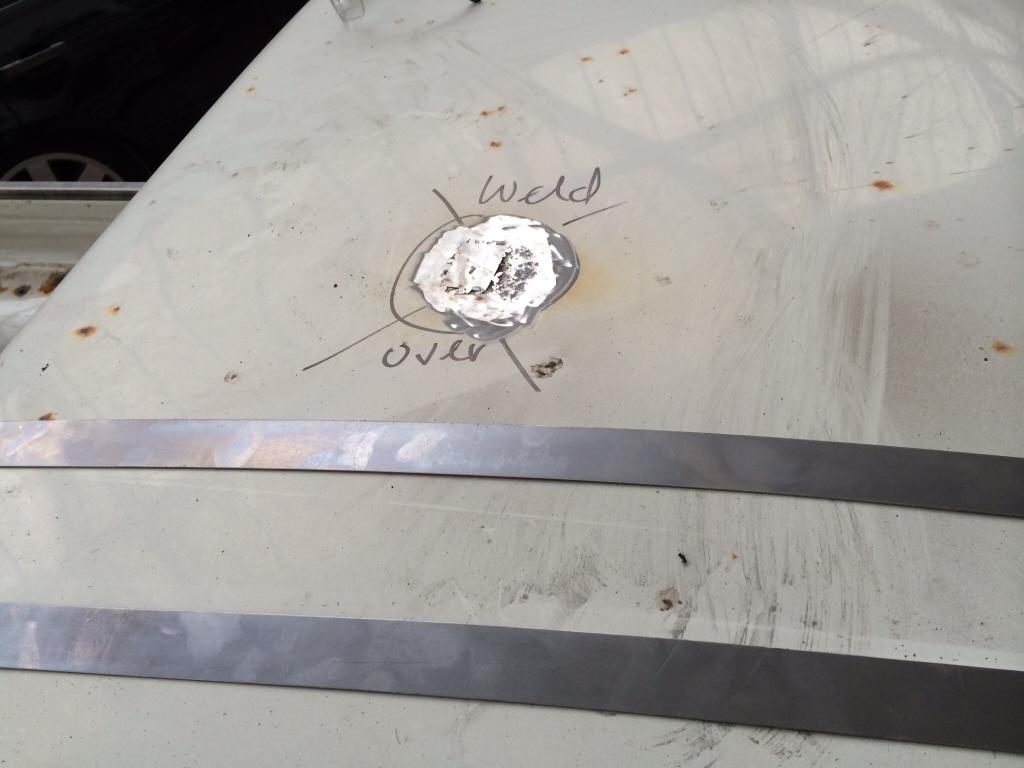
Cut steel plates, to weld over the hook recesses on both sides of the bed - these won't go on until the captive nuts for the hinge bolts are welded in place, and I'm happy with clearance:
Remember there will be a rubber seal all round the top of the bed rail, as the bed area MUST be water tight. I have decided not to go with a plastic bed liner - The floor and sides are going to be carpeted. The carpet won't be glued in place though, as I would want it removable for cleaning. The floor and side will have moulded expanding foam, but again, not glued to the bed. The carpet will then be bonded to the foam.
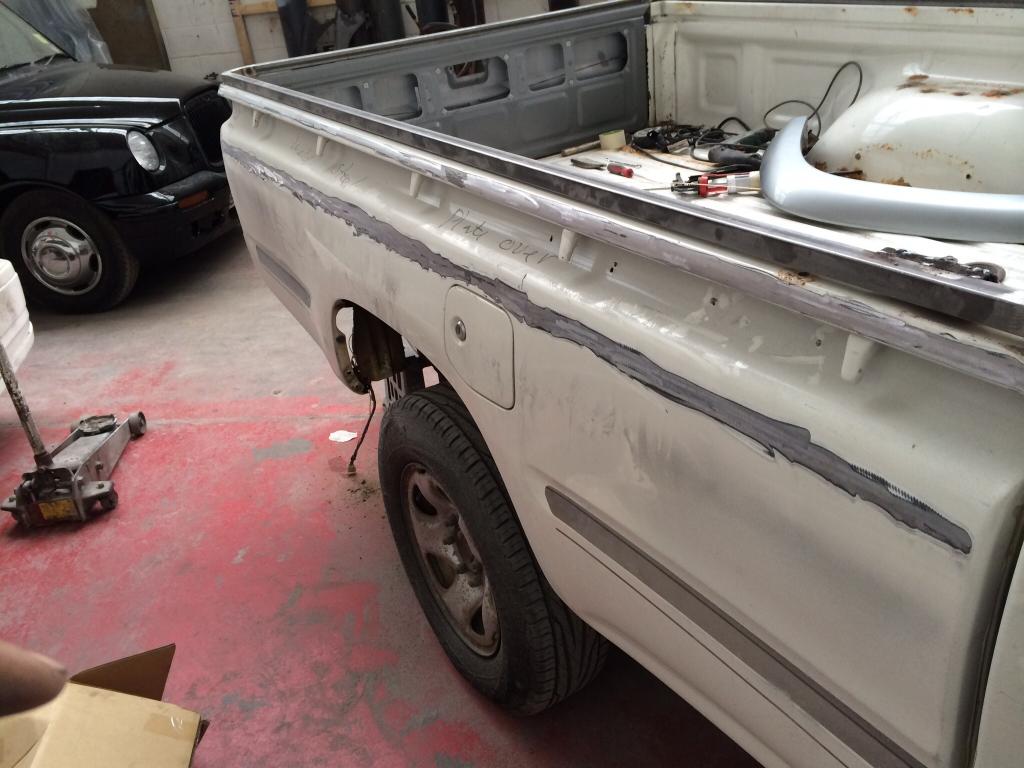
Bed hook recesses prepared for welding plates. I truly detest those recesses, and I can't wait to see them disappear for good:
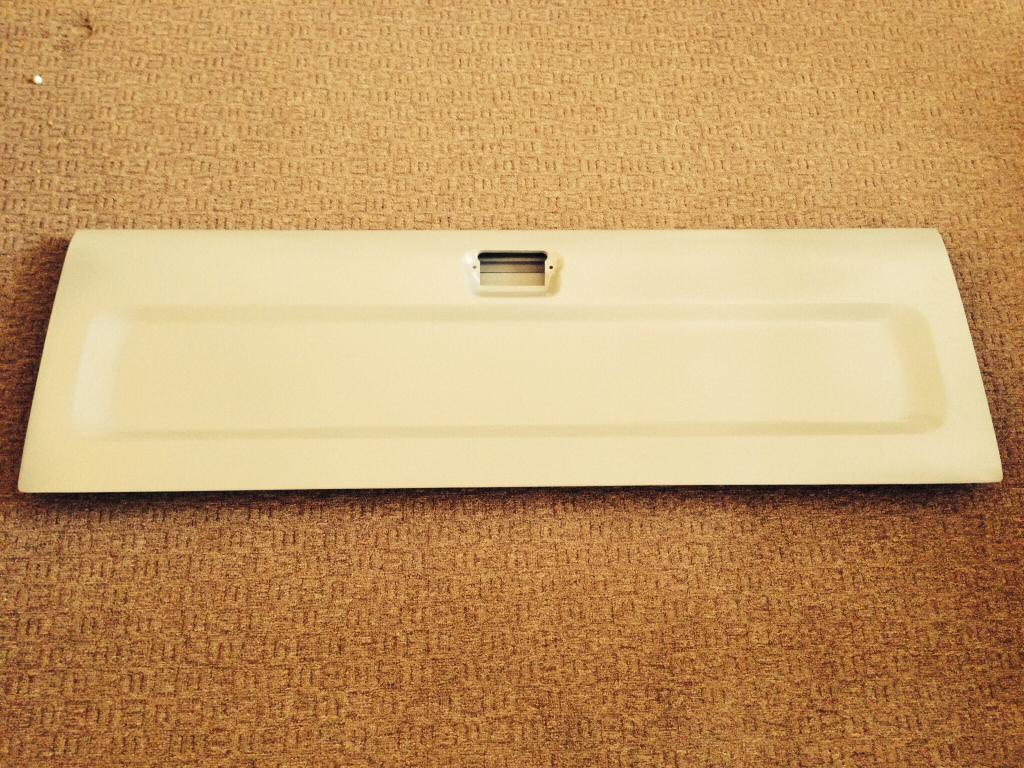
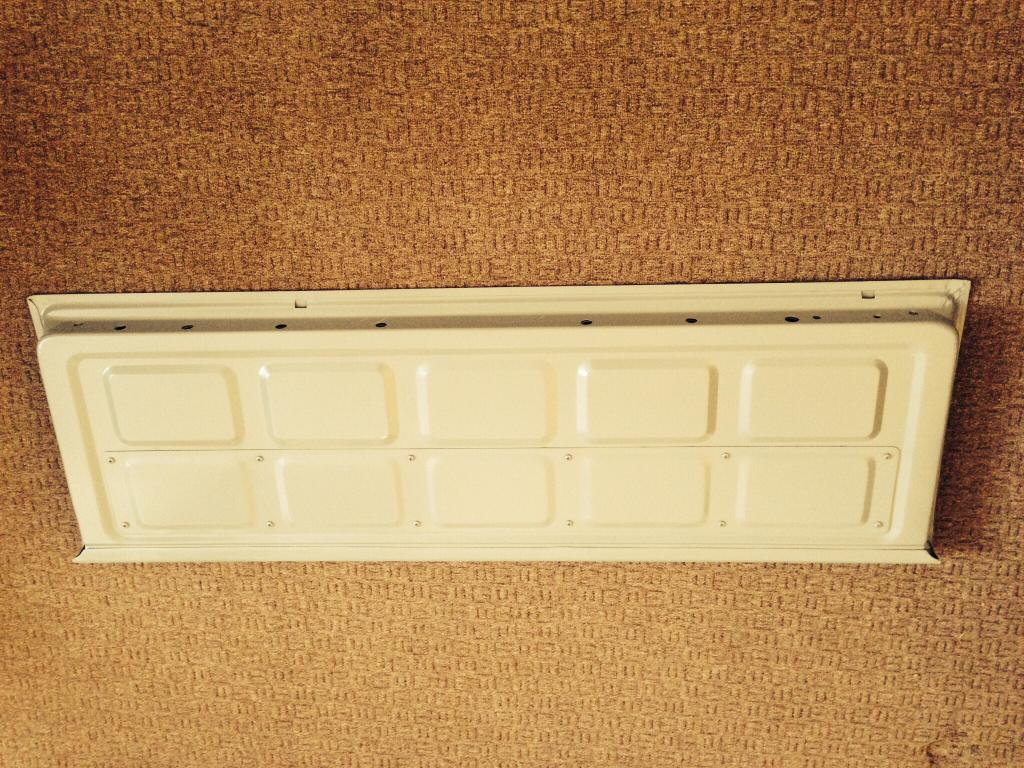
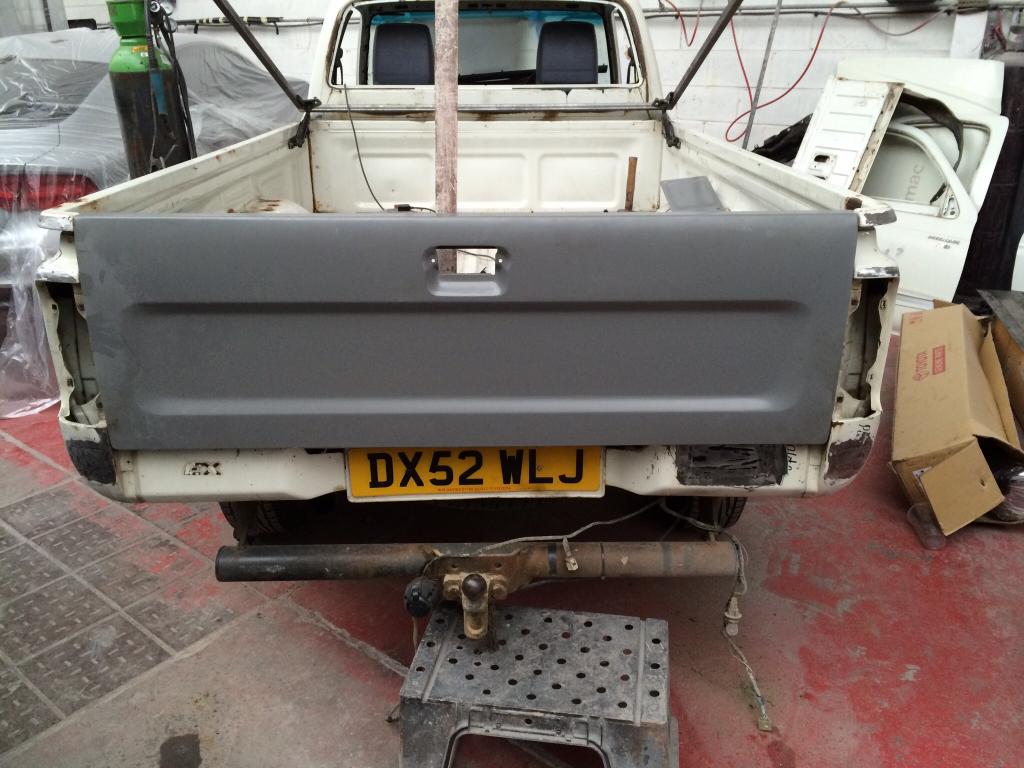
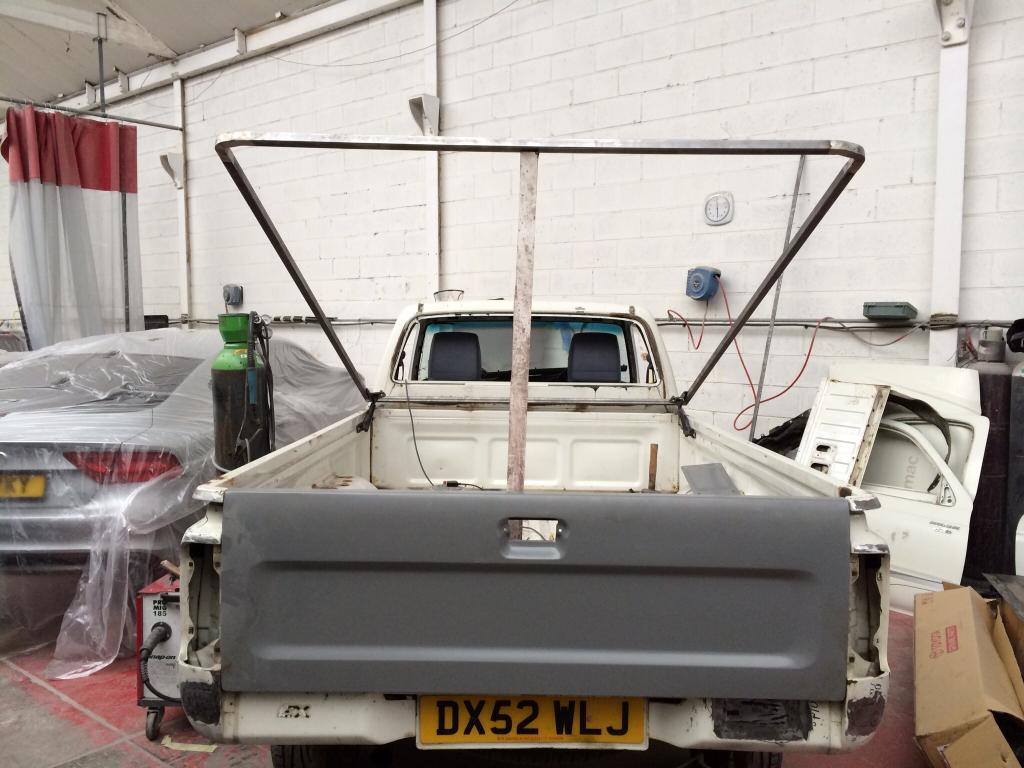
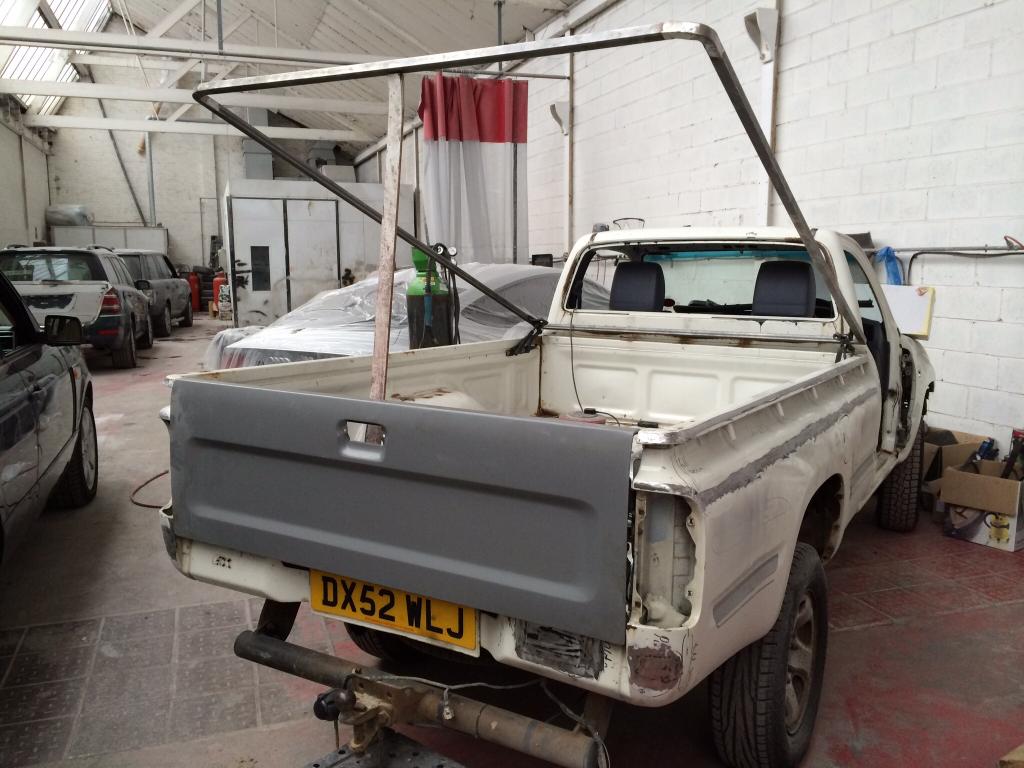
Pictures showing temporarily fitted bed lid frame, and new tailgate. The hinges actually allow the lid to lift at 90 degrees in relation to the bed! Obviously lift will be limited to a sensible height by the 2 active hydraulic ram's fully extended limits:
Close-up of the cantilever hinge set-up. It works perfectly - the lid moves upwards and rearwards, away from the bed, as it's lifted. Just the way I planned it:


Cut steel strips, to plate over the roof rain channels:


Cut steel plates, to weld over the hook recesses on both sides of the bed - these won't go on until the captive nuts for the hinge bolts are welded in place, and I'm happy with clearance:

Remember there will be a rubber seal all round the top of the bed rail, as the bed area MUST be water tight. I have decided not to go with a plastic bed liner - The floor and sides are going to be carpeted. The carpet won't be glued in place though, as I would want it removable for cleaning. The floor and side will have moulded expanding foam, but again, not glued to the bed. The carpet will then be bonded to the foam.
Bed hook recesses prepared for welding plates. I truly detest those recesses, and I can't wait to see them disappear for good:


Pictures showing temporarily fitted bed lid frame, and new tailgate. The hinges actually allow the lid to lift at 90 degrees in relation to the bed! Obviously lift will be limited to a sensible height by the 2 active hydraulic ram's fully extended limits:


