PismoJoe's 2002 Tacoma Build-Up

 06-13-2012, 07:05 AM
#82
Registered User
Join Date: Jun 2003
Location: Las Vegas
Posts: 342
Likes: 0
Received 0 Likes
on
0 Posts
Ah crap, you just have to show off your core support. I've been planning on taking the lazy route and just supporting the stock core with cage work by running a pair of my bumper tubes thru it and welding it to them and then also plating it in to some other tubes also.
But now seeing this... I'm curious to see what the results look like. When are you thinking you'll have it back together with some pictures?
I'm at a similar stage yet have gone a bit more extreme with my frame mods/suspension. LOL This is basically where I'm at on it. Well actually I'm working on the new UCA mounts right now but once that's done the basic cab cage structure will be next followed by the engine cage main tubes. That's the point that I have to decide if I'm going to pull the trigger on a whole new core support or just go the lazy route for now and address it later on. I'm just posting a link to a pic as I don't want to whore up your thread. (LOL, ignore the rear axle sitting in front!)
http://i67.photobucket.com/albums/h3...a/100_0359.jpg
Awesome truck/build by the way!!!! I like the fact you're keeping the 4WD!!!
06-13-2012, 08:36 AM
#84
Registered User
Thread Starter
Thanks for the compliments guys, it should turn out well!
Yeah this is the difference with my truck being 4WD. The truck wont be fully caged ever, but will have the front engine cage/tower support with a rear bedcage. This is always going to be a very roadworthy rig, as well as capable at high speeds and in 4WD on the trails. I enjoy driving it around, and am a firm believer that rigs aren't that fun to drive anymore if you go to far. If it was 2WD, I'd be more tempted to go all the way, but again this is a baller style prerunner
Sirhk, that looks like your already deep into that front end, I would ditch that factory core support. Tubing is way stronger and you won't want to tear into again after you build the cage around the stock core support. I wouldn't at least, I like to do things once how I want it. Looks good tho!
06-13-2012, 10:51 AM
#85
Registered User
Join Date: Jun 2003
Location: Las Vegas
Posts: 342
Likes: 0
Received 0 Likes
on
0 Posts
Thanks for the compliments guys, it should turn out well!
Yeah this is the difference with my truck being 4WD. The truck wont be fully caged ever, but will have the front engine cage/tower support with a rear bedcage.
LOL, that's what they all say!!!!
I enjoy driving it around, and am a firm believer that rigs aren't that fun to drive anymore if you go to far.
VERY TRUE!!!! My '89 snowballed into something that's a pain to drive on the street! This '04 is being built as a racer right from the get go.
Sirhk, that looks like your already deep into that front end, I would ditch that factory core support. Tubing is way stronger and you won't want to tear into again after you build the cage around the stock core support. I wouldn't at least, I like to do things once how I want it. Looks good tho!
That's how I've been attacking it so far. Knowing where the truck might end up years down the road I'm trying to take things like that into consideration so it's minimal redoing when the truck is possibly linked or V8 well into the future. Would like to build it now knowing those possibilities. The core support and remounting all the lights and front grill just seems like a major PITA but compared to what I've already done and where I'm going it's probably the least of my worries.
Looking forward to seeing the finished front cause I'm on the teeter totter right now as to if I'm going to do the same or not. I'm actually a little further ahead then that above picture but it was the only one that showed kind of an overall shot of everything. Hoping to have the UCA mounts finished up or close to done by the end of this weekend.
http://i67.photobucket.com/albums/h3...a/100_0389.jpg
Last edited by sirhk100; 06-13-2012 at 10:55 AM.
06-13-2012, 11:00 AM
#86
Registered User
Join Date: Jun 2003
Location: Las Vegas
Posts: 342
Likes: 0
Received 0 Likes
on
0 Posts
One other comment... I know you double sheered your UCA mounts in conjunction with the stock coil bucket. Any concerns even with that shock hoop support of the bucket ripping open over time? Did you plate that up any or add anything more then just the shock hoops? Are you going to tie engine cage into that or anything? The Tacoma I'm doing had the same shock hoop setup with a 8" SAW c/o and bypass in it with the bump hitting off the lower arm. I was always concerned that bucket was going to fail. I know Bonzen had his rip open years ago on him which is why on this tacoma I'm skipping it and going straight to a more stout upper control arm mount. That and I needed more room for shocks. We're running a 2.5"/10" c/o and a 3.0"/10" bypass up front. Granted, Bonzen's truck might have been seeing more abuse then yours will but just curious if you've put any thought into adding some support to that shock bucket?
06-14-2012, 08:07 PM
#87
Registered User
Thread Starter
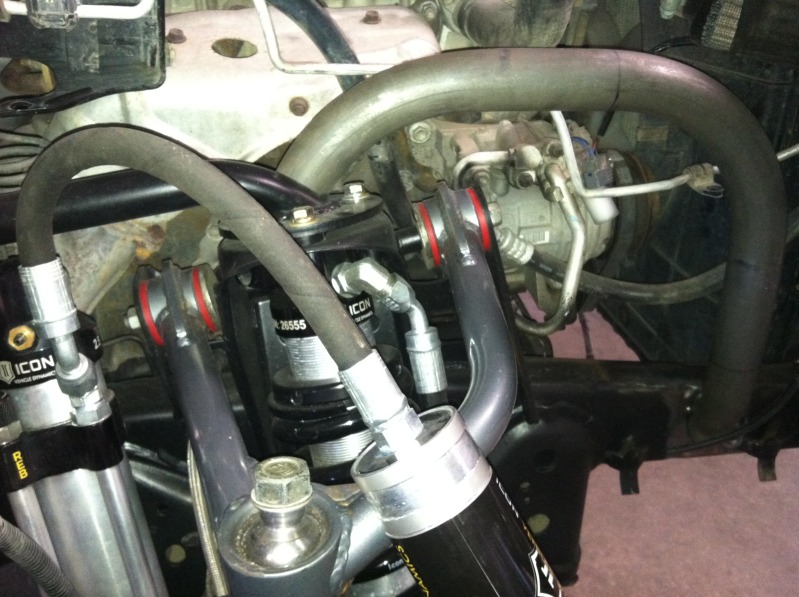
Sirhk, the buckets are stock except for the double sheer TC gussets, but the engine cage will come off of the secondary shock hoop over the coil buckets, so yes it will be tied into the heart of the engine cage. The plan is to cut the secondary tube off of the plate, build the tower support off of the secondary hoop plate platform, then tie back in the secondary mount to the new tower cage tubing. I don't know if that makes sense its hard to type out the plan but easy for me to picture.
If the Bonzen truck that I am thinking of is the linked silver one, then thats a completely different league of a build than this is. I'm confident that the engine cage/tower support will be plenty of reinforcement for the shock towers for what I'll be doing with the truck.
If the Bonzen truck that I am thinking of is the linked silver one, then thats a completely different league of a build than this is. I'm confident that the engine cage/tower support will be plenty of reinforcement for the shock towers for what I'll be doing with the truck.
06-14-2012, 08:07 PM
#88
Registered User
Thread Starter
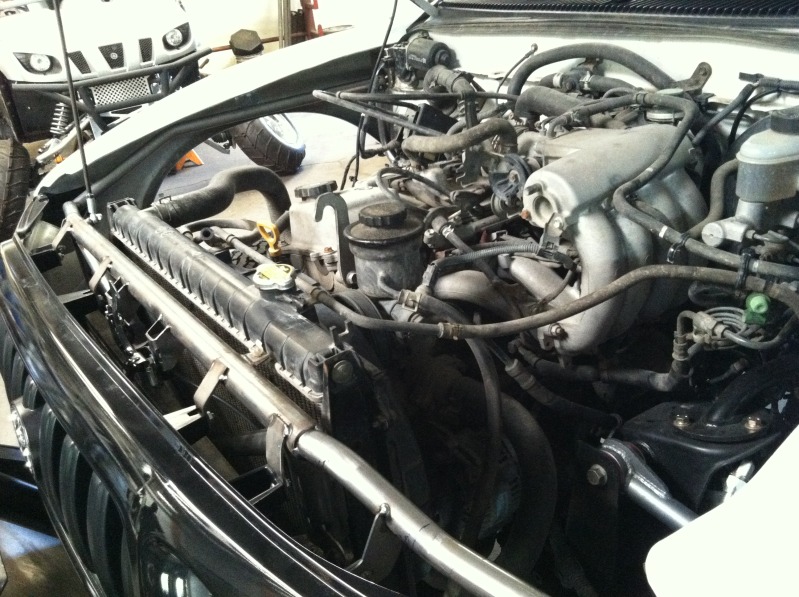
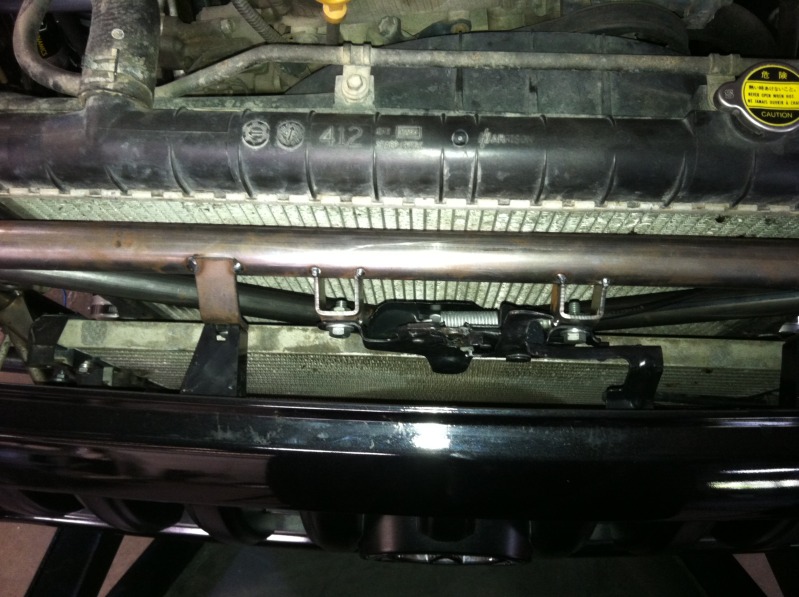
Leetle more progress, and got some goodies.
New radiator, hoses, and hood latch.
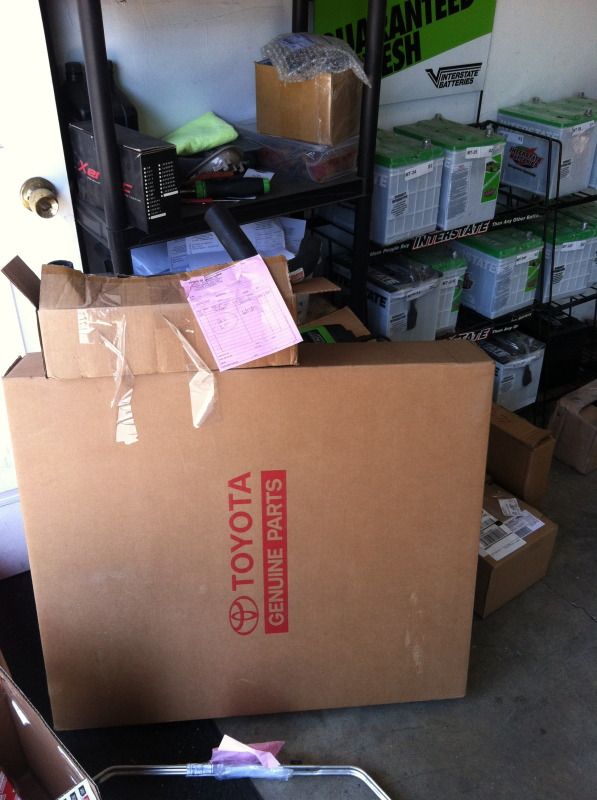
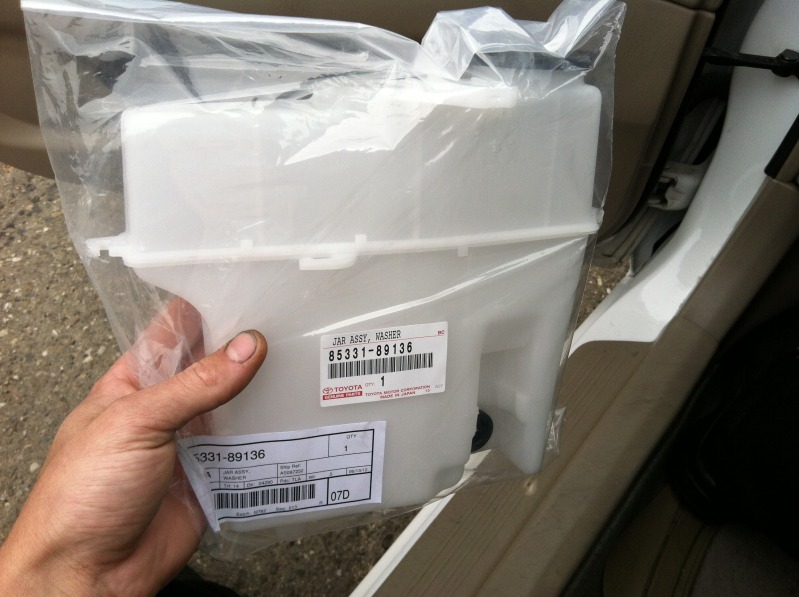
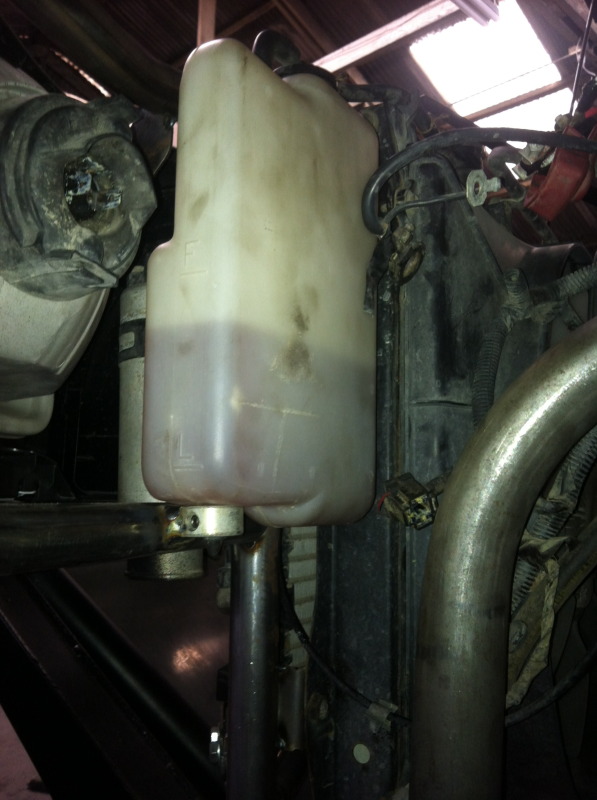
Also picked up a washer reservoir from a 90 Toyota 4WD. It has mounting tabs all over it, and is a much more reasonable size than the stock tacoma one that is part of the wheel well.
Mike is mocking up the front end. Cab was moved back to its original position (slid to the drivers side over time).
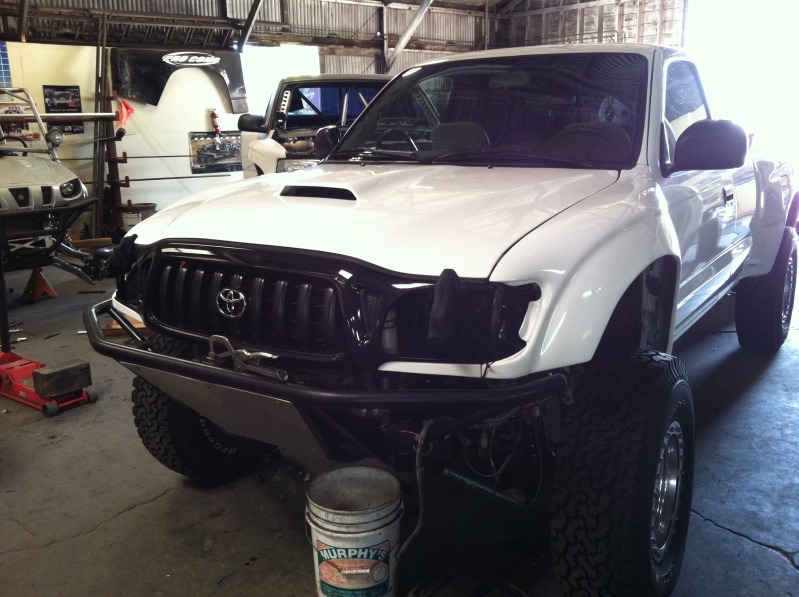
AC condenser and radiator mounts tacked into place
Factory hood latch is tacked into place but might need to be moved after we shifted the cab back over. Basic framework of the front should be completed by next week, then the wheel wells (aluminum plated) will be fabbed along with the tower support.
New radiator, hoses, and hood latch.
Also picked up a washer reservoir from a 90 Toyota 4WD. It has mounting tabs all over it, and is a much more reasonable size than the stock tacoma one that is part of the wheel well.
Mike is mocking up the front end. Cab was moved back to its original position (slid to the drivers side over time).
AC condenser and radiator mounts tacked into place
Factory hood latch is tacked into place but might need to be moved after we shifted the cab back over. Basic framework of the front should be completed by next week, then the wheel wells (aluminum plated) will be fabbed along with the tower support.
06-22-2012, 08:05 PM
#89
Registered User
Thread Starter
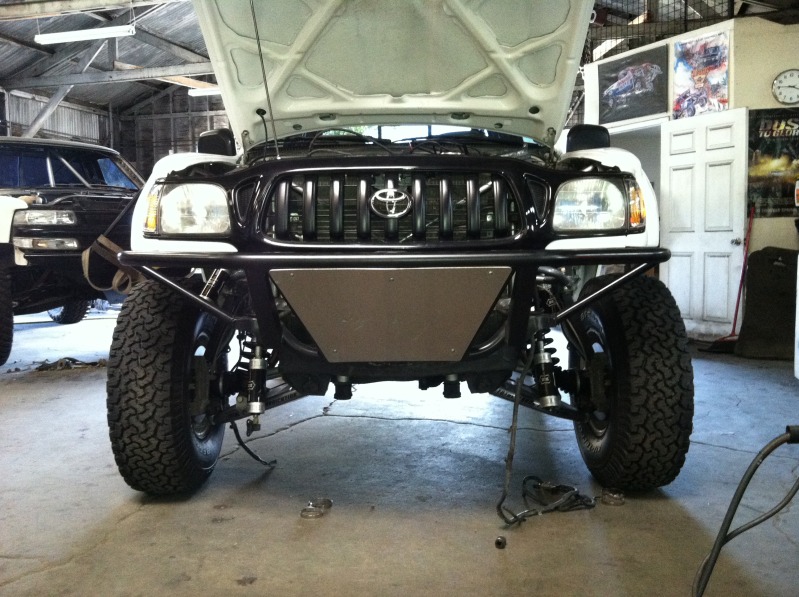
Progression!!
This is coming out so well I don't know what to do with myself. Mike at Central Coast Prerunners is THE MAN!
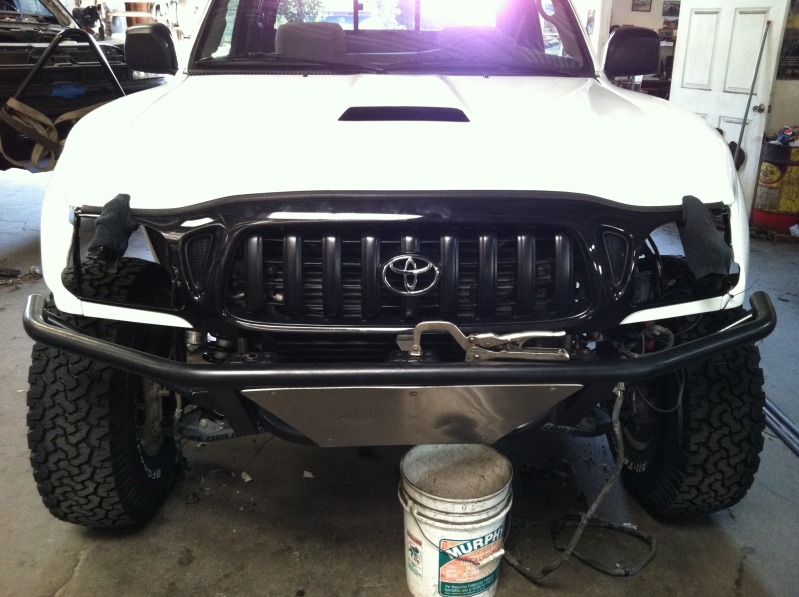
A few differences with this tube build, a lot more detail work is involved. Check out the body lines for instance! Yep, thats all fiberglass!


Factory hood latch and hood prop
Even my hood prop has a heim joint!
Adjustable Headlights Still!
Fenders remounted, ditched that hideous lip that used to fit to the factory fender support bracket
Off the cab (the beginning of the framework)
The front of the truck looks so much better with the core support out of the way!
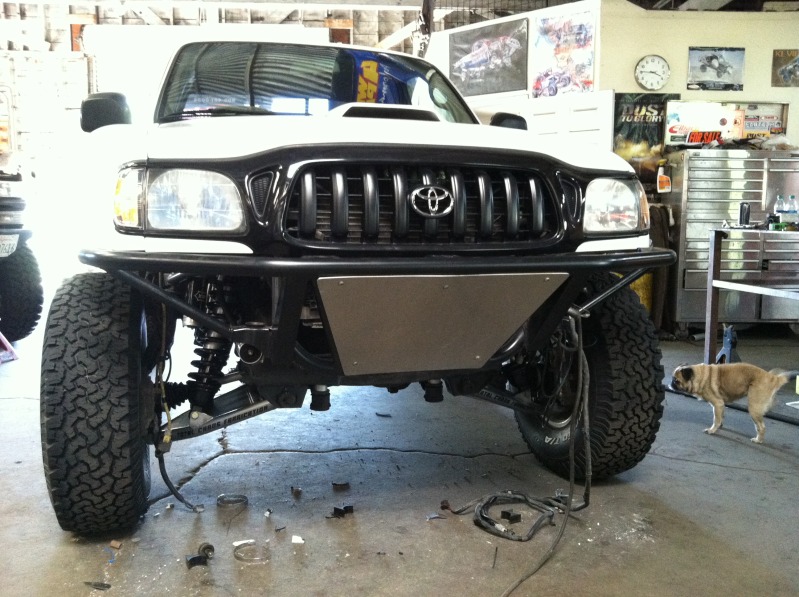
Next step will be to finish the framework, tower support, then wheel wells will be made and plated with aluminum paneling. The bumper support brackets will be remade, with tube going straight to the frame since there is no need for the core support mount. Should turn out purty nice!
This is coming out so well I don't know what to do with myself. Mike at Central Coast Prerunners is THE MAN!
A few differences with this tube build, a lot more detail work is involved. Check out the body lines for instance! Yep, thats all fiberglass!
Factory hood latch and hood prop
Even my hood prop has a heim joint!
Adjustable Headlights Still!
Fenders remounted, ditched that hideous lip that used to fit to the factory fender support bracket
Off the cab (the beginning of the framework)
The front of the truck looks so much better with the core support out of the way!
Next step will be to finish the framework, tower support, then wheel wells will be made and plated with aluminum paneling. The bumper support brackets will be remade, with tube going straight to the frame since there is no need for the core support mount. Should turn out purty nice!
06-23-2012, 10:04 AM
#92
Registered User
Thread Starter
Thanks! I gotta give it to mike for making everything work, I knew I wanted to keep the factory hood latch and prop, but he took that to a new level. The adjustable headlamps was a good surprise! Adds a little bit of wow factor that most people wouldn't take the time to figure out and fabricate.
Thanks man! Yeah, I switched to the black grille from the factory chrome one a few months back, and will be keeping it. It looks even better when the lights are on with all the black!
Thanks man! Yeah, I switched to the black grille from the factory chrome one a few months back, and will be keeping it. It looks even better when the lights are on with all the black!
06-23-2012, 11:29 AM
#93
Registered User
Loving this build, man. actually taking the time to put the icing on the cake with the prop rod and the adjustable headlamps. cant wait to see this thing in september!
06-25-2012, 11:53 AM
#95
Registered User
Thread Starter
Thanks for the compliments Mark, Michael!
Hoping I have some more progress to show by the end of this week, just giving Mike as much time as he needs to do it right!
Hoping I have some more progress to show by the end of this week, just giving Mike as much time as he needs to do it right!
06-27-2012, 07:33 PM
#97
Registered User
Thread Starter
Oh bro I loke you Tee hee!
Getting closer!
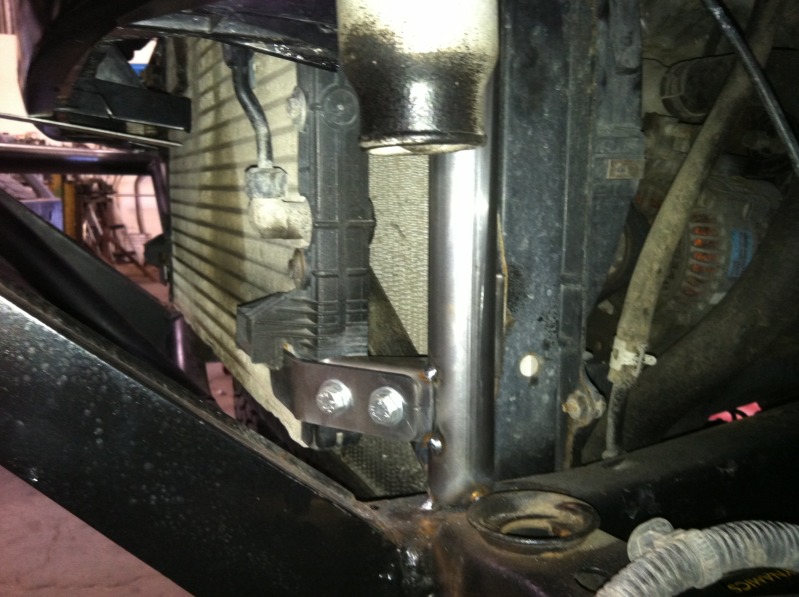
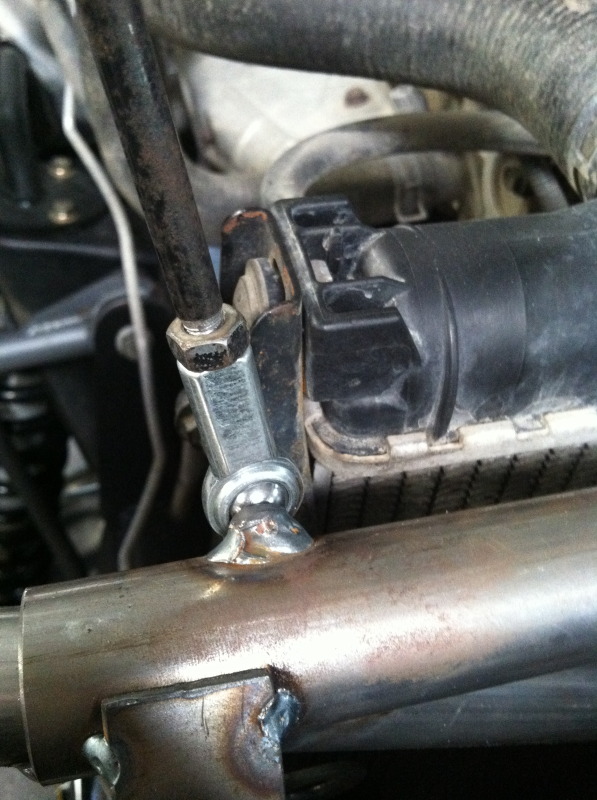
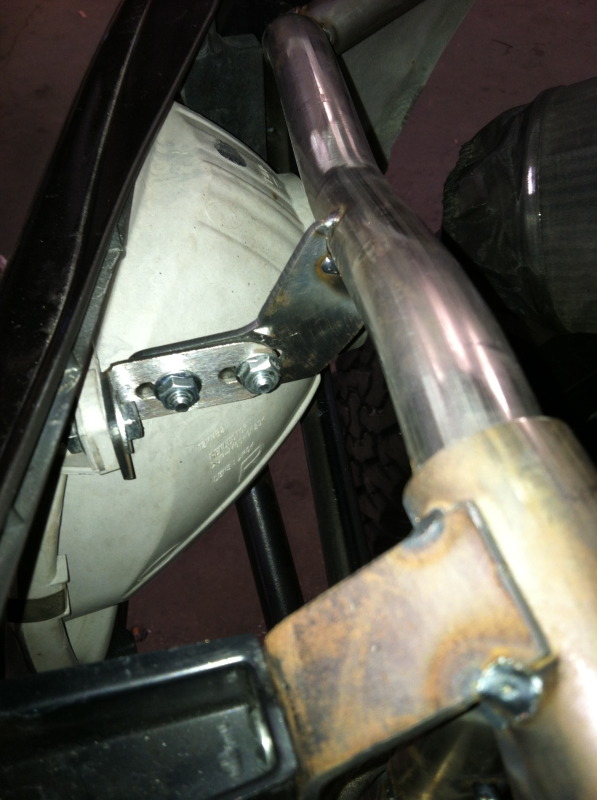
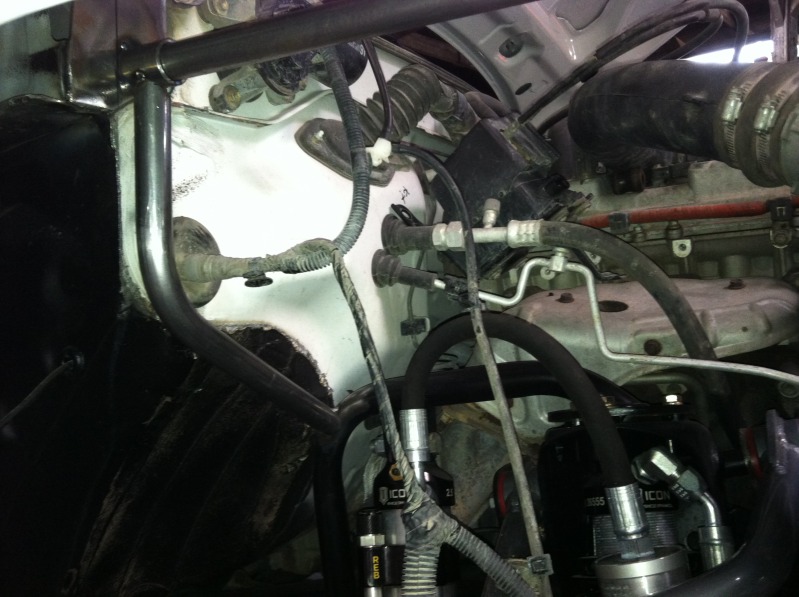
Mike got all the hoops figured out for the tower support. Here's the foundation:
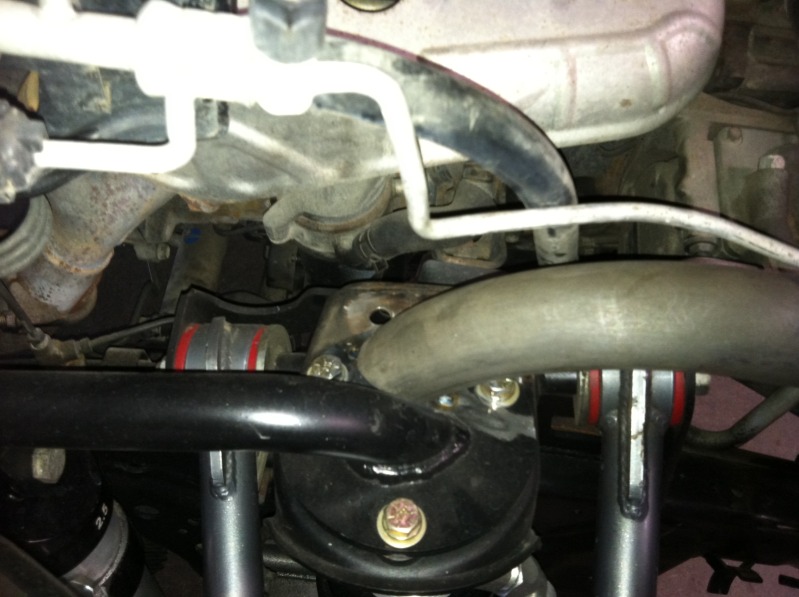
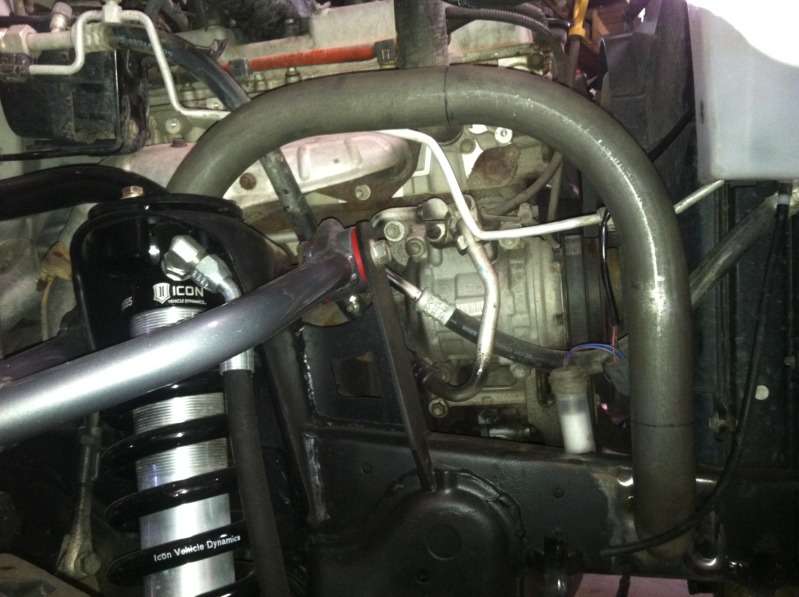
Definitely a tight fit with this thing, there will be a miter weld support of a single tube that will be able to fit perfectly between the oil cap and #1 coil, so I will only need to remove it to take the valve cover off. Tower support will have a raised 4 bolt flange off of that hoop that ties into the coil bucket tower.
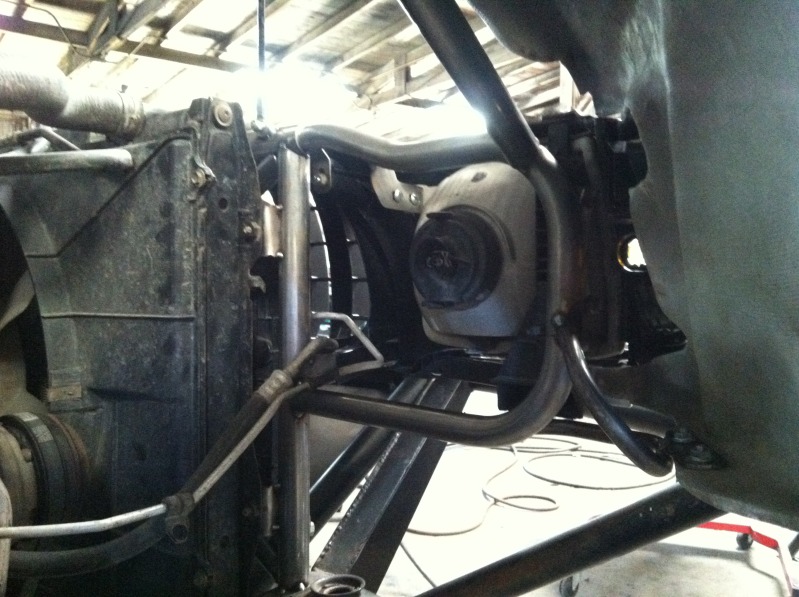
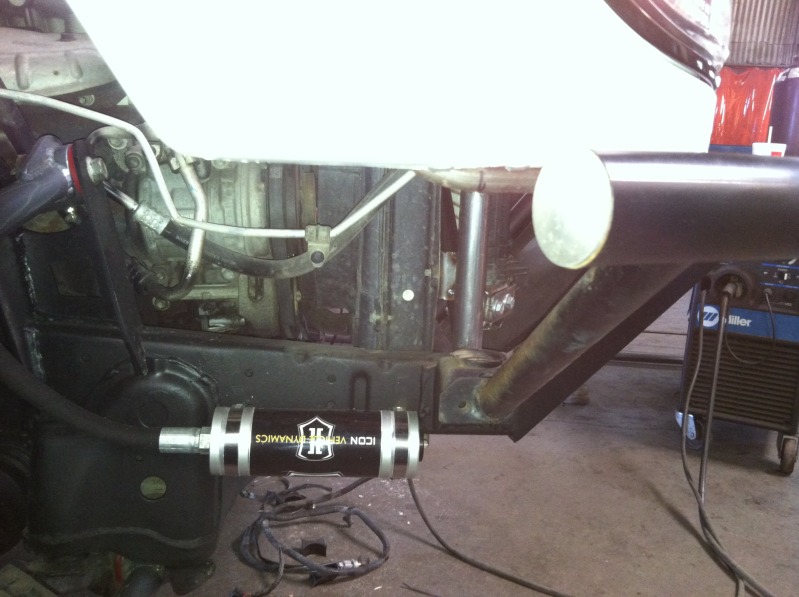
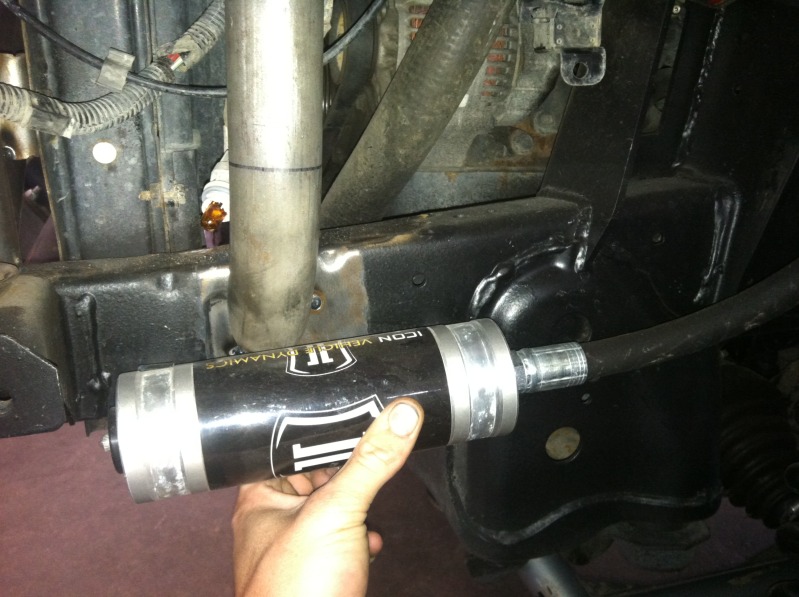
Front resi will still be located on the front edge of the frame rail
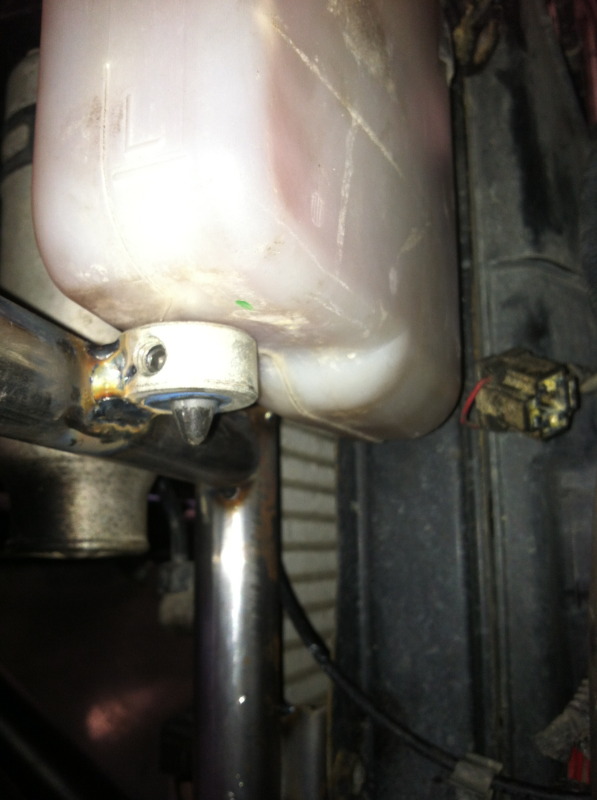
Coolant resi and washer resi mounted
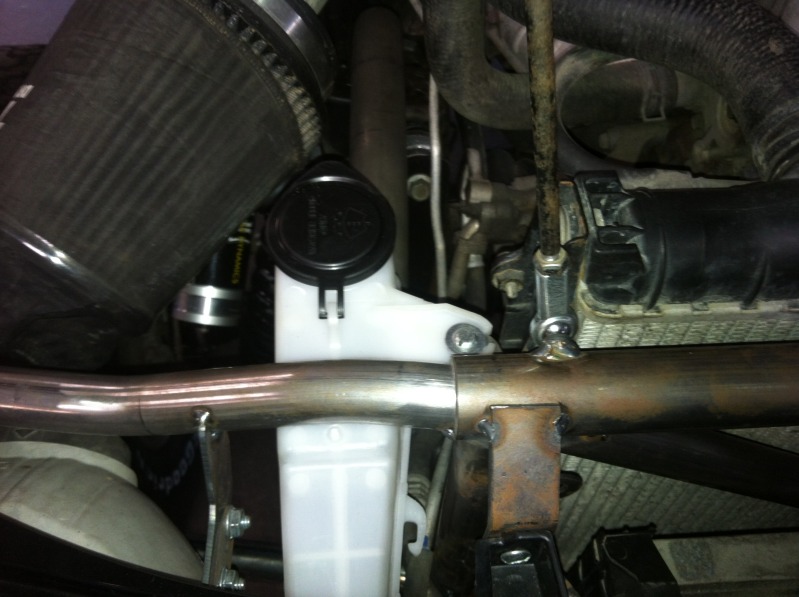
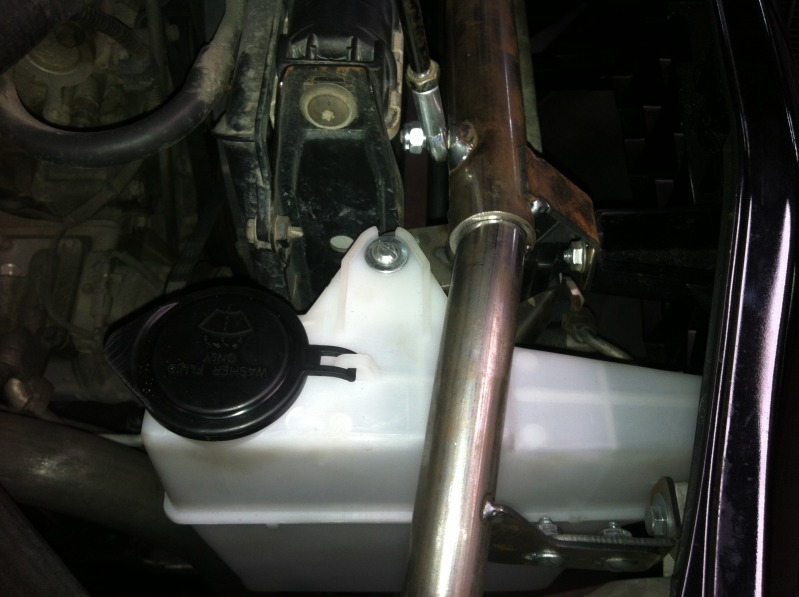
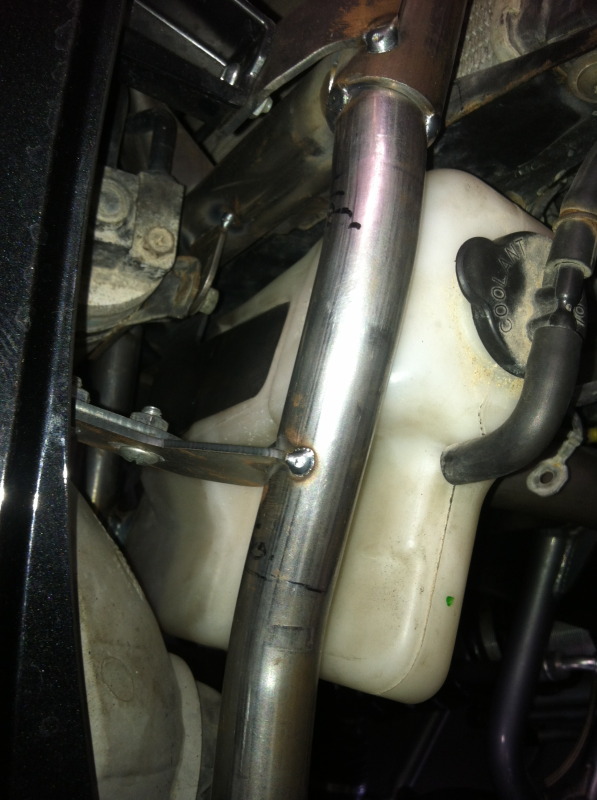
Bottom support has a tensioner screw to hold it tight!
Teaser
Thats all for now!
Tee hee!Getting closer!
Mike got all the hoops figured out for the tower support. Here's the foundation:
Definitely a tight fit with this thing, there will be a miter weld support of a single tube that will be able to fit perfectly between the oil cap and #1 coil, so I will only need to remove it to take the valve cover off. Tower support will have a raised 4 bolt flange off of that hoop that ties into the coil bucket tower.
Front resi will still be located on the front edge of the frame rail
Coolant resi and washer resi mounted
Bottom support has a tensioner screw to hold it tight!
Teaser
Thats all for now!
06-29-2012, 07:45 PM
#100
Registered User
Thread Starter
lolz
1) interesting point
2)
3) thanks Jerry!

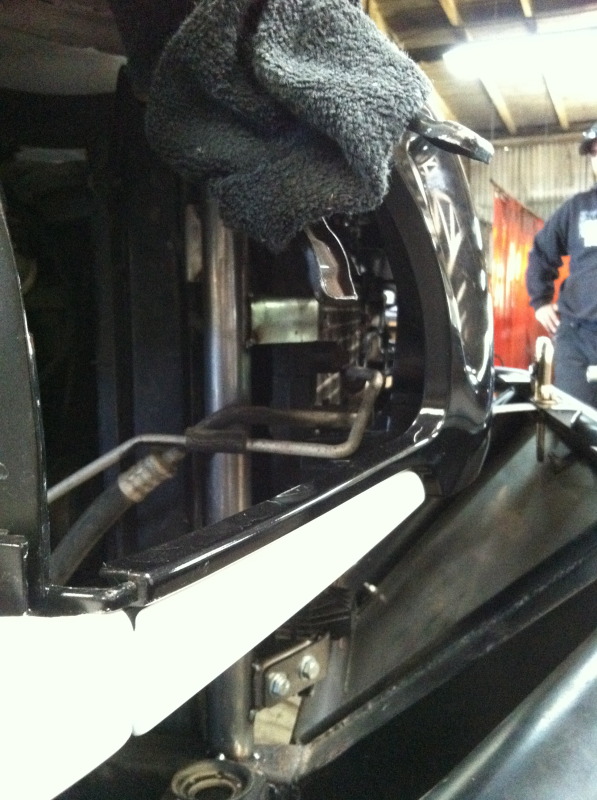
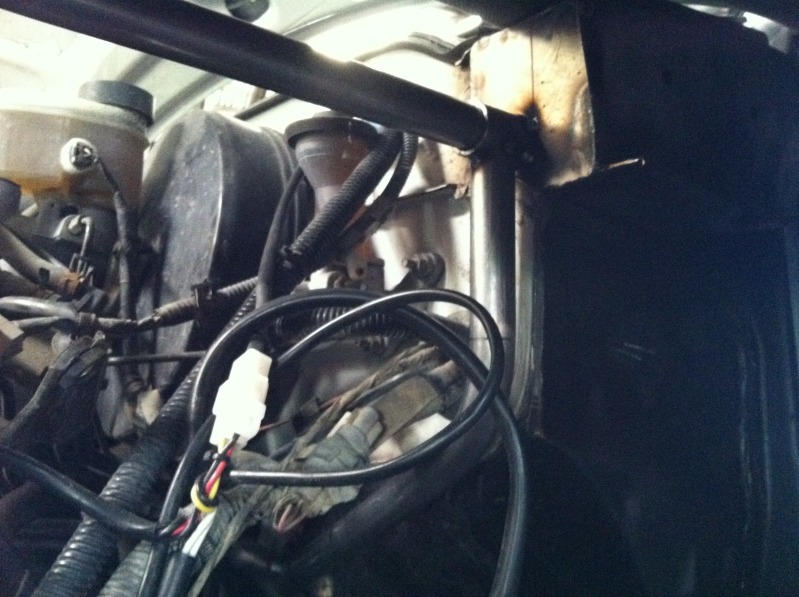
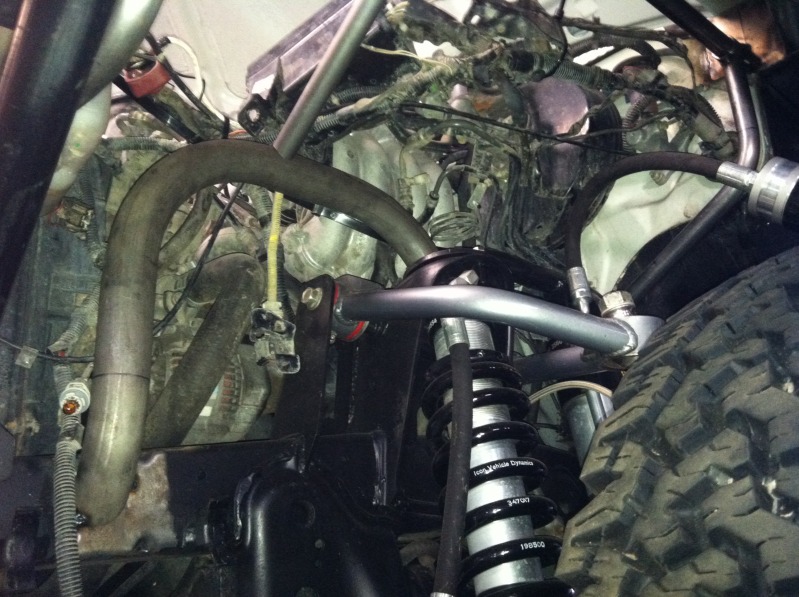
Aluminum paneling getting fitted! Brake booster was a little interesting to work around, but Mike made it happen!
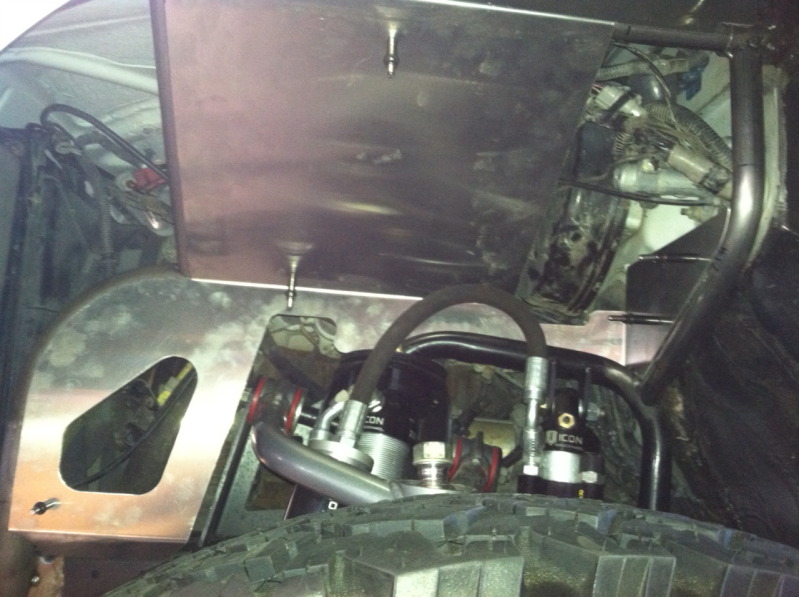
Getting closer! Perfect bends around the booster following the original wheel well line, came out clean!

2)
3) thanks Jerry!
Aluminum paneling getting fitted! Brake booster was a little interesting to work around, but Mike made it happen!
Getting closer! Perfect bends around the booster following the original wheel well line, came out clean!
Last edited by PismoJoe; 06-29-2012 at 08:41 PM.


