PismoJoe's 2002 Tacoma Build-Up
 01-04-2012, 08:09 AM
#21
Registered User
Thread Starter
Thanks guys!
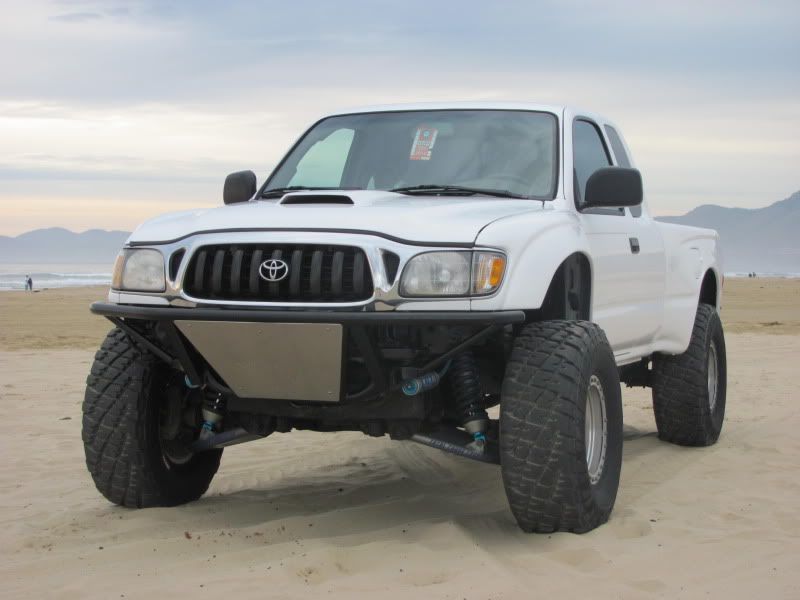
I was playing around at the Porter ranch this weekend, I think I had more cow poo on my truck than mud, but you would have been proud Jerry
I was playing around at the Porter ranch this weekend, I think I had more cow poo on my truck than mud, but you would have been proud Jerry

 01-06-2012, 08:36 PM
#24
Registered User
Thread Starter
Thanks Chef! I need to get a real camera and take some better pics!
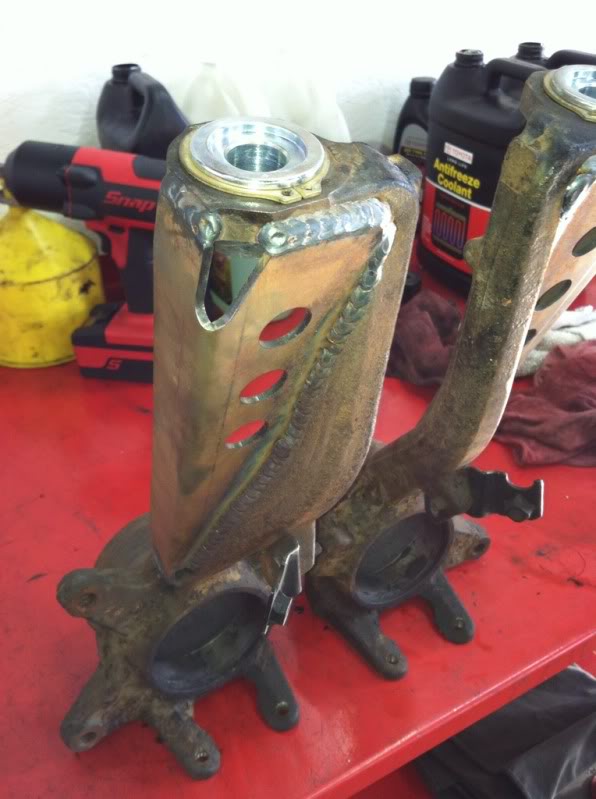
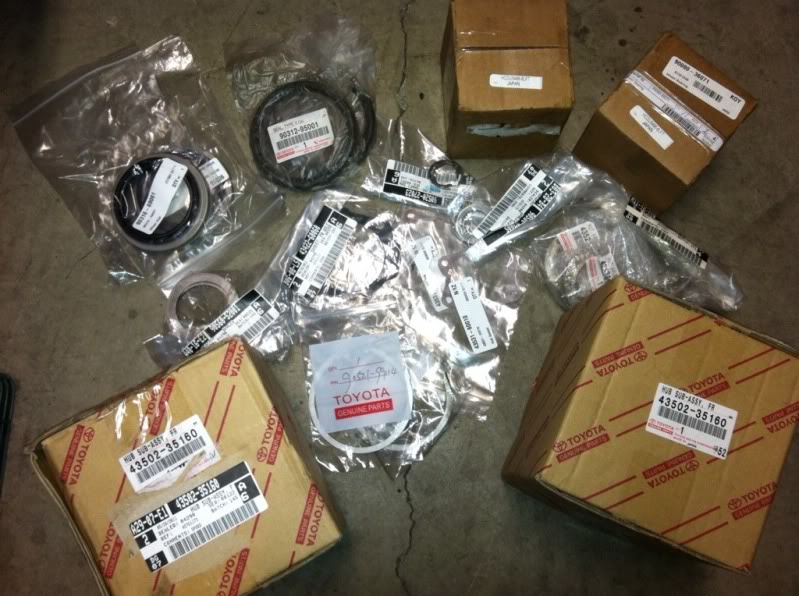
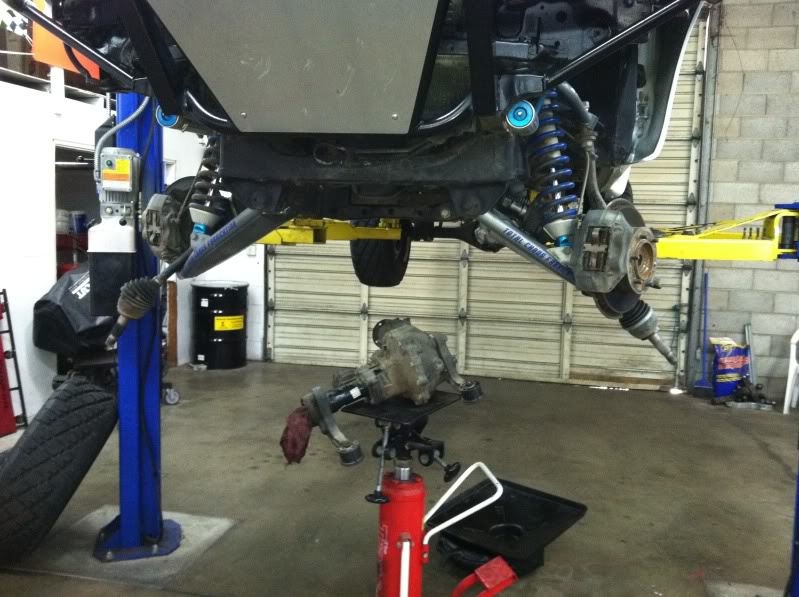
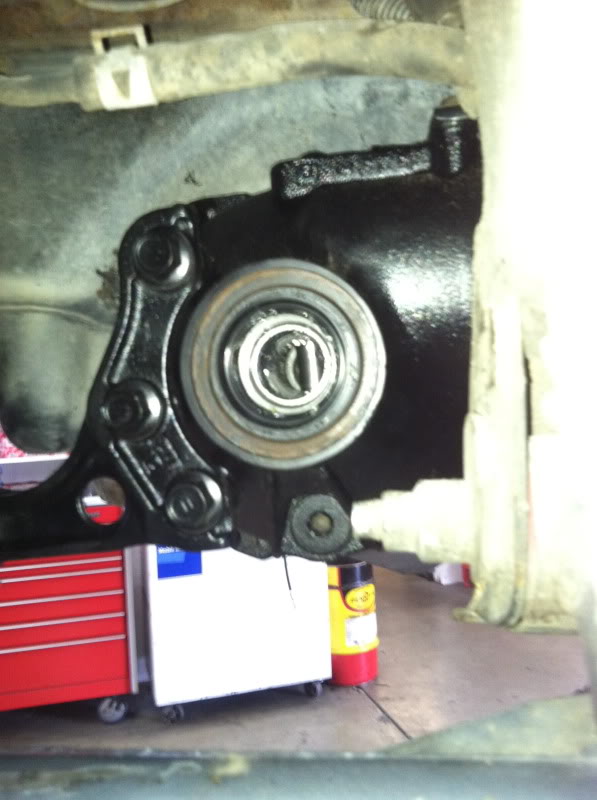
Finally got all the parts together for my manual hub conversion. I originally set out to buy a non-ADD complete spindle, but was sent an ADD spindle. They let me keep the parts for free though, so they came in handy to build while leaving my truck drivable.
Got the uniball slugs on and the total chaos spindle gussets on
Manual Hub Conversion Parts
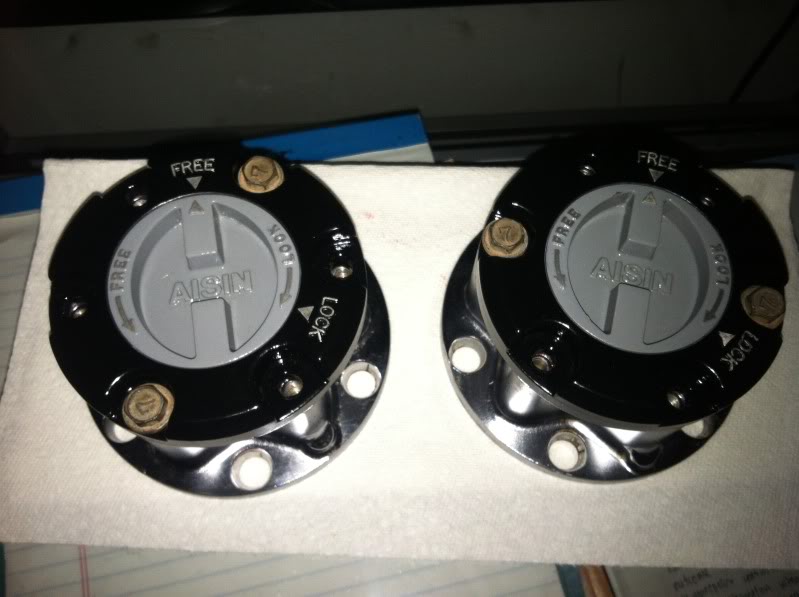
I couldn't get ahold of any Tacoma style lockouts, but these will do. Just need to repaint the dials.

Should be done next week!
Finally got all the parts together for my manual hub conversion. I originally set out to buy a non-ADD complete spindle, but was sent an ADD spindle. They let me keep the parts for free though, so they came in handy to build while leaving my truck drivable.
Got the uniball slugs on and the total chaos spindle gussets on
Manual Hub Conversion Parts
I couldn't get ahold of any Tacoma style lockouts, but these will do. Just need to repaint the dials.
Should be done next week!
01-08-2012, 06:44 PM
#26
Registered User
Join Date: Apr 2011
Location: El Dorado, CA
Posts: 84
Likes: 0
Received 0 Likes
on
0 Posts
Super cool rig man! Out of couriosity, why go from auto hubs (shifter in cab) to manual hubs? Duability? I can't imagin it would be for convenience since you have to get out and lock them up versus simply pressing the 4WD button from inside the cab.
01-08-2012, 07:02 PM
#27
Registered User
Thread Starter
Thanks! Actually, the vacuum A.D.D. unit will remain on the third member, and the "J" stick (4wd shifter) will still be in the cab.
The difference is that the axles will not spin when the hub is in the "free" position, thus improving the lifespan of my CV boots. Some argue that better gas mileage is also a result, but I haven't seen any proof. Mainly just for the CV boots.
Since I'm leaving that vacuum switch on the third member, I can lock the hubs and still have on the fly 4WD shifting while wheeling or on the beach, just as it is now
01-13-2012, 06:36 PM
#29
Registered User
Thread Starter
Yeah these are the newer style to where the auto hubs are actually just always locked, then when you lock the transfer case into 4WD the vacuum switch trips on the front third engaging the axles. Im mainly doing this for CV boot wear, I'm sick of rebooting the joints all the time with such a large lift. I also will doing a diff drop kit when everything goes back together 
Got the lockouts all rebuilt and painted to the Tacoma colors (yes I got new faceplate bolts, they will be shiny too)
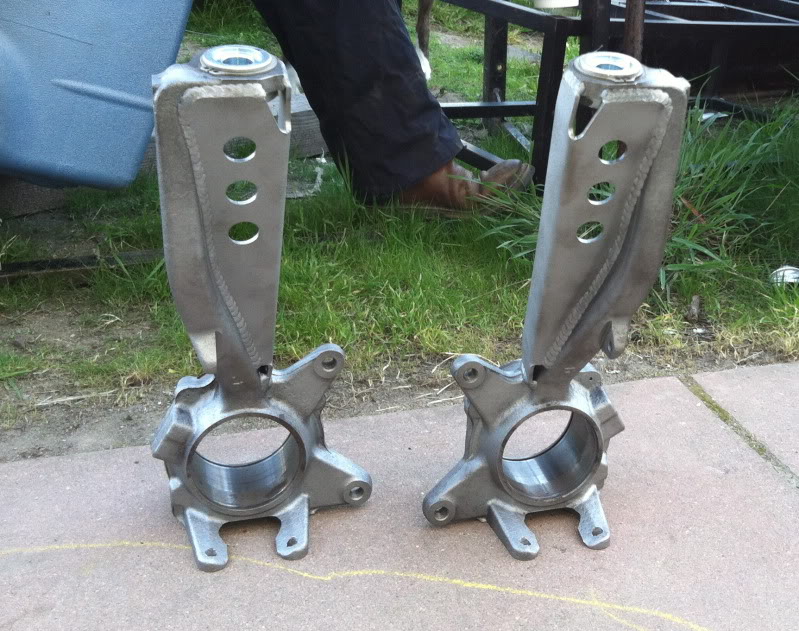
Spindles were sandblasted. Bye Bye east coast rust
And painted with this:
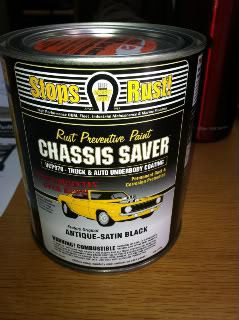
Ginger from C&S Industrial Coating in Grover Beach said that this stuff is where its at.
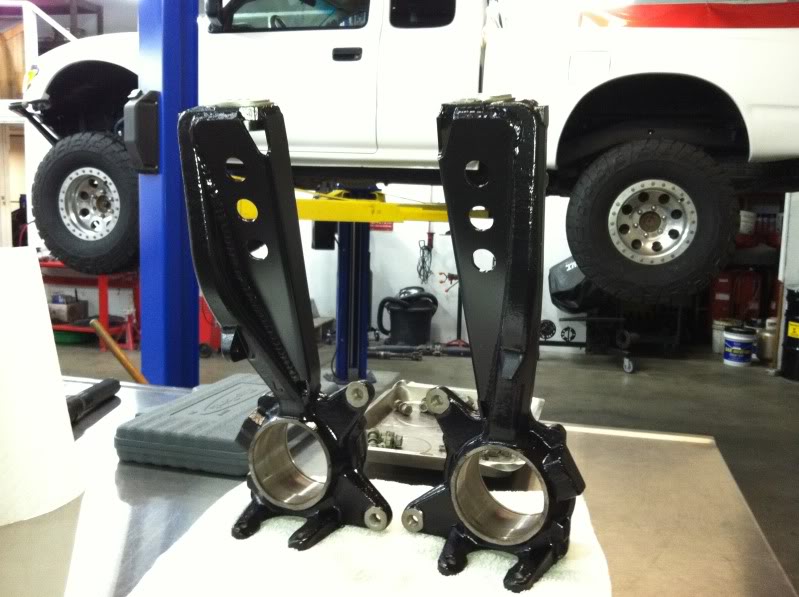
All painted. HMD!! they came out good
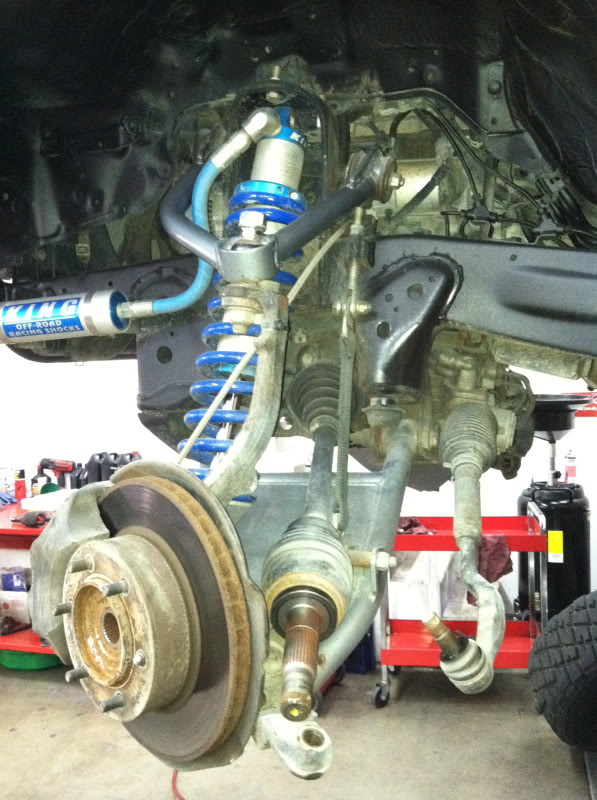
One axle is assembled and ready to go. Got the axle shafts powder coated metallic silver to match the Total Chaos control arms. Too far? I never know I still need to cut the collar off of the Tundra inner joint to make it "long travel" then a Porsche boot will placed over the inner like the one pictured above.

Point of no return. Not really but heres the start
Front and rear third members removed, they got dropped off at American Gear in San Luis Obispo to receive 4.88 Gears. Both complete setup kits. Ballliiiiinnnn
And thats all for meow.
Got the lockouts all rebuilt and painted to the Tacoma colors (yes I got new faceplate bolts, they will be shiny too)
Spindles were sandblasted. Bye Bye east coast rust
And painted with this:
Ginger from C&S Industrial Coating in Grover Beach said that this stuff is where its at.
All painted. HMD!! they came out good
One axle is assembled and ready to go. Got the axle shafts powder coated metallic silver to match the Total Chaos control arms. Too far? I never know
I still need to cut the collar off of the Tundra inner joint to make it "long travel" then a Porsche boot will placed over the inner like the one pictured above. Point of no return. Not really but heres the start
Front and rear third members removed, they got dropped off at American Gear in San Luis Obispo to receive 4.88 Gears. Both complete setup kits. Ballliiiiinnnn
And thats all for meow.
01-13-2012, 06:40 PM
#30
Hahahahah, ... just noticed that...... "Looky here, meow.... Meow know meow'all were speedin?".......... "are you saying MEOW?" lol...........
SICK, BRUDDA! That is really looking insane/showtruck/kicky'stylie to the hilt! lol.
Seriously... LOVE thou rig!
SICK, BRUDDA! That is really looking insane/showtruck/kicky'stylie to the hilt! lol.
Seriously... LOVE thou rig!
01-13-2012, 09:45 PM
#32
Registered User
Oh herro sunshine.
01-28-2012, 11:27 PM
#35
Registered User
Thread Starter
Got some solid updates! Got the truck off the 4 post and driving!
-Manual hub swap completed
-New front wheel bearings
-New front hubs
-New rear axle bearings
-New rear axle seals
-New front axle seals
-New front brakes
-New rear brakes
-4.88 Differentials installed
-New custom Tundra CV axles
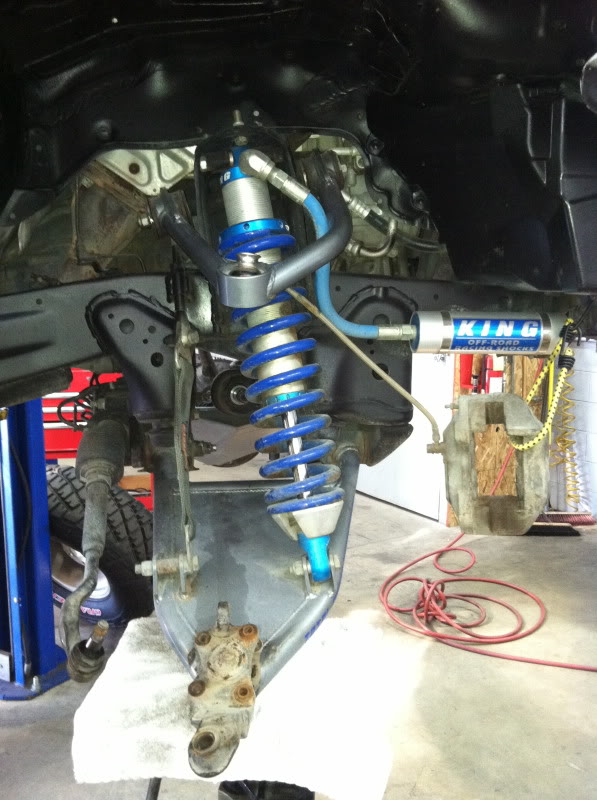
-Total Chaos diff drop kit installed
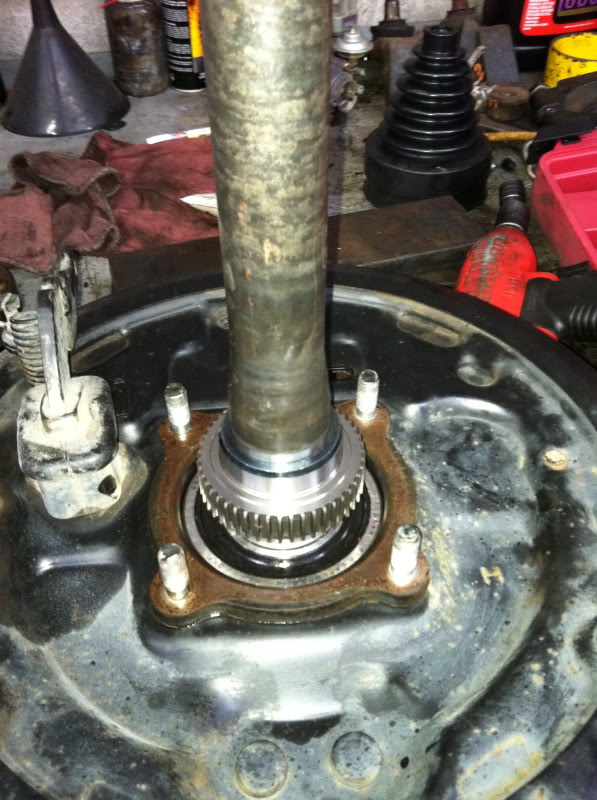
Axle rebuild time!
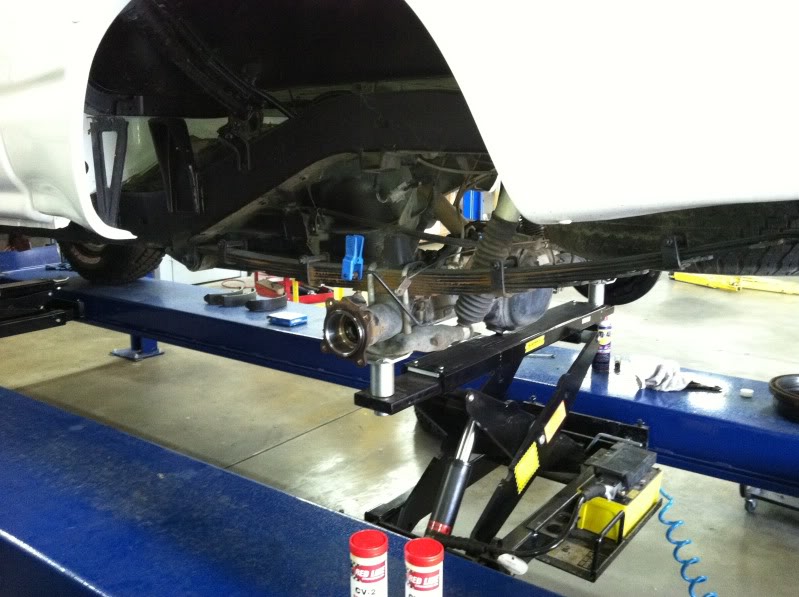
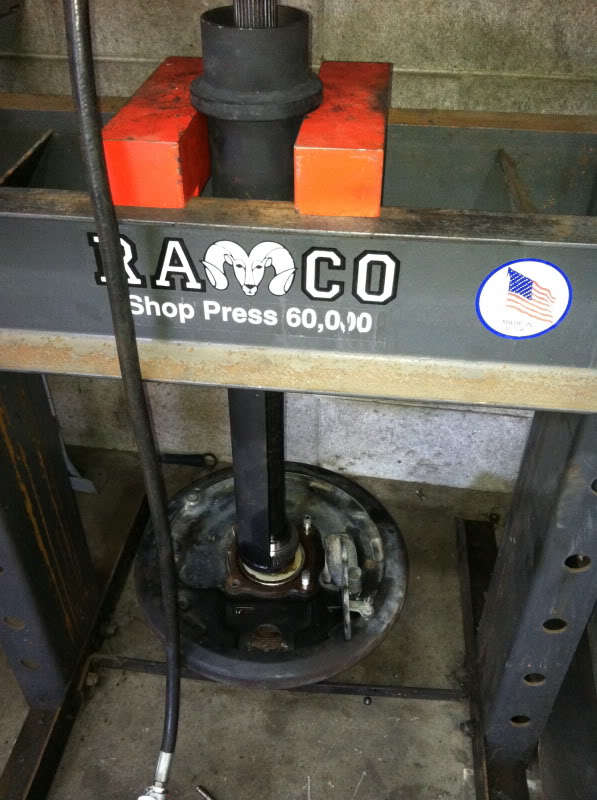
ABS ring and collar removed
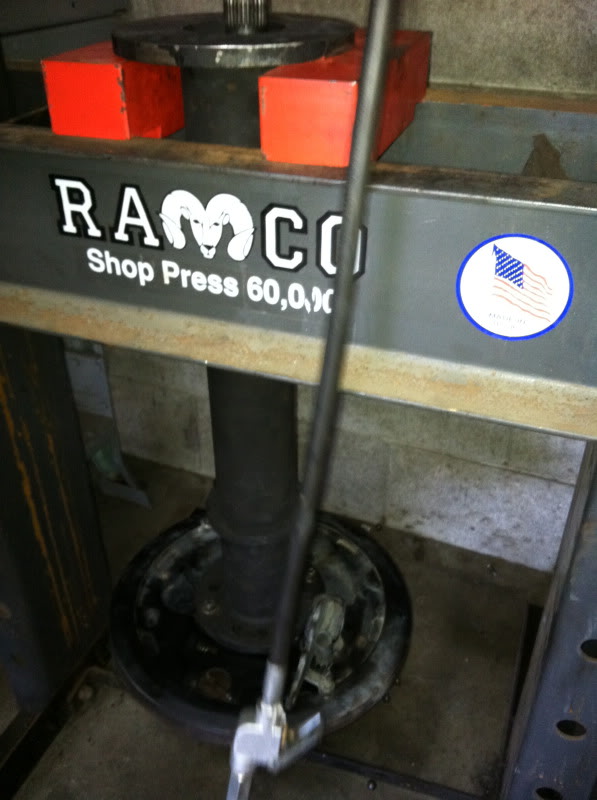
Axle removed
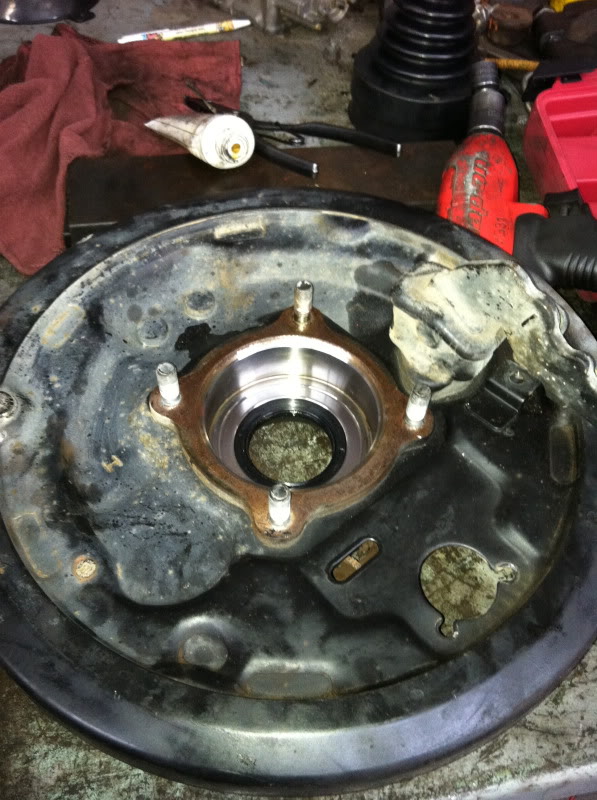
Starting fresh
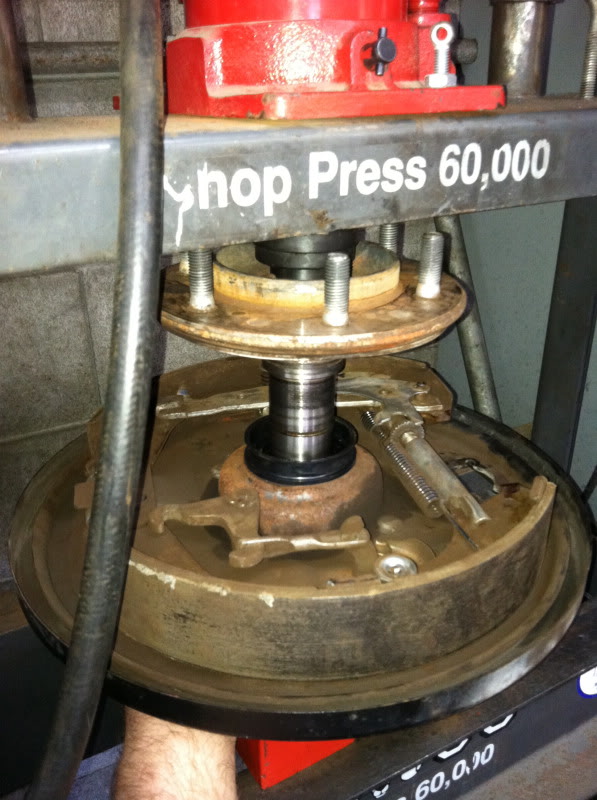
Axle going in
End result = this X2
Going back together

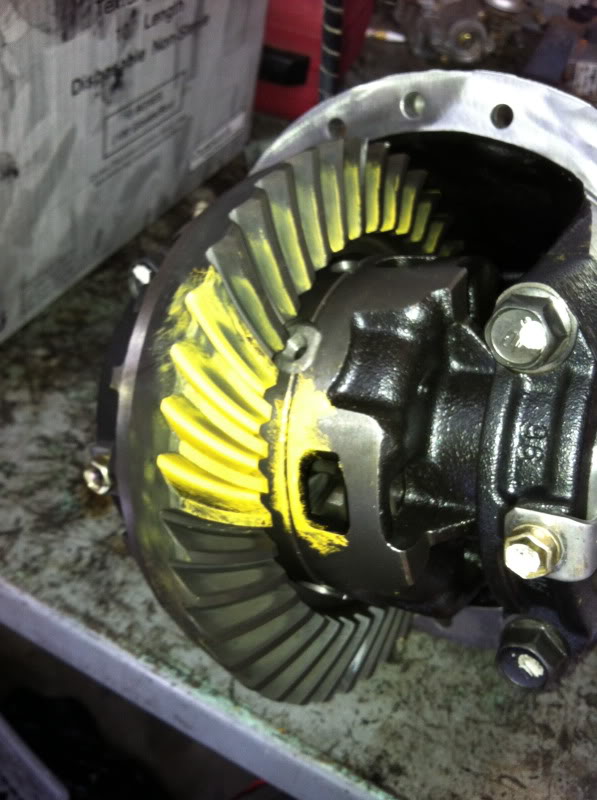
Nice deep pattern!
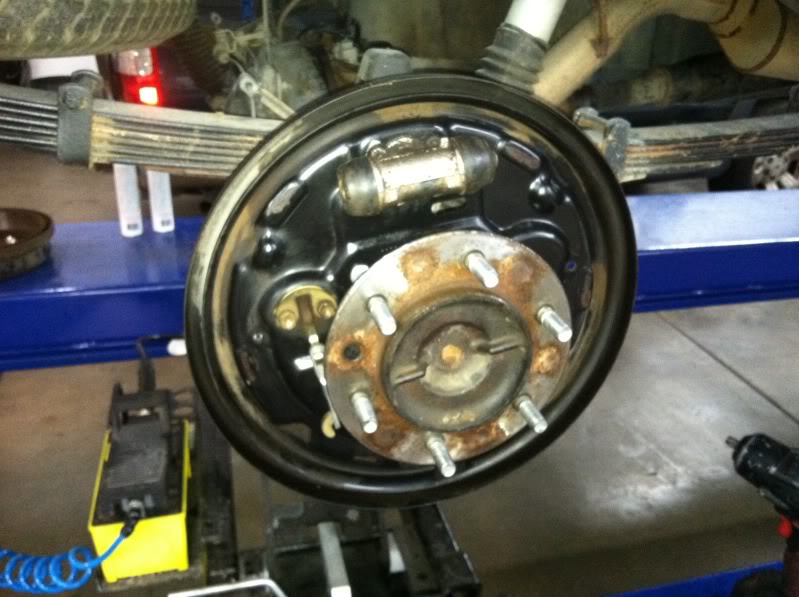
Front end
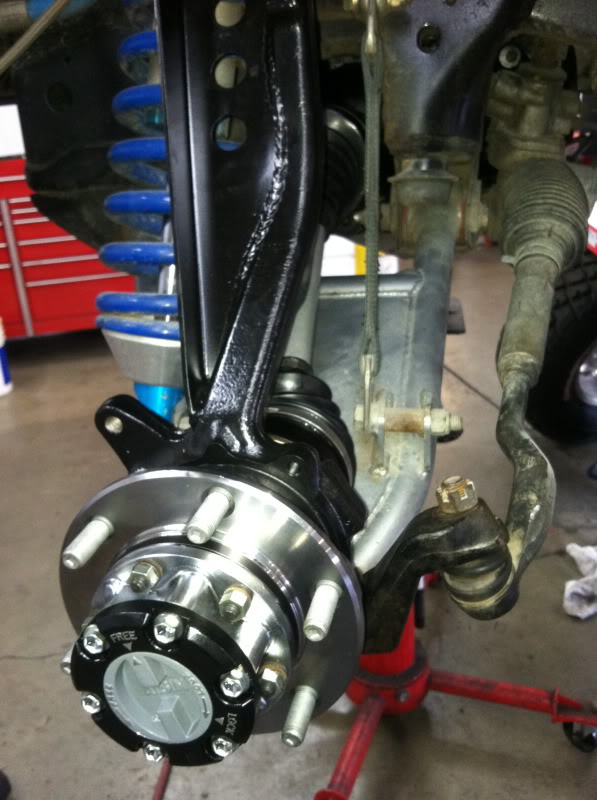
Very happy moment!
Regarding the Tacoma/86-95 IFS lockout compatibility, with the help of Scuba, discovered that the whole dial assembly is interchangeable. (Faceplate, spring, clutch) Had to order tacoma hub bodies.
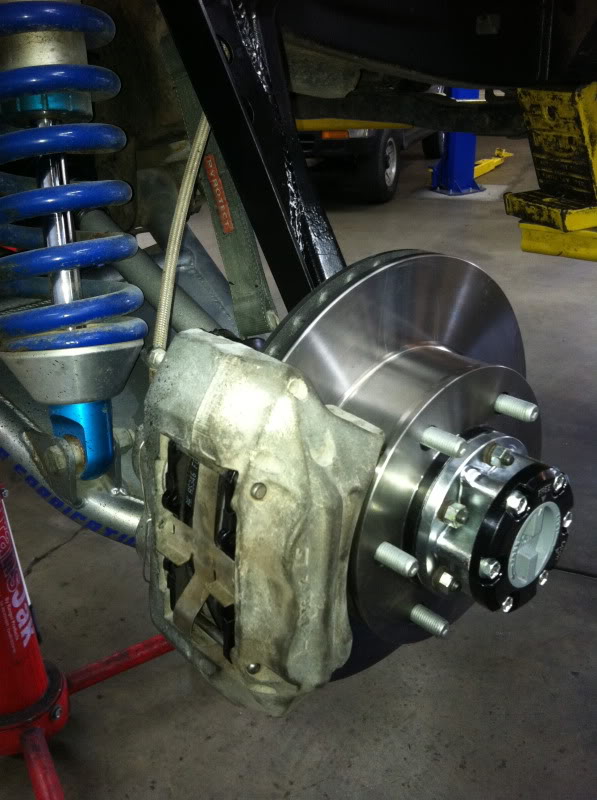
Ditched the backing plate
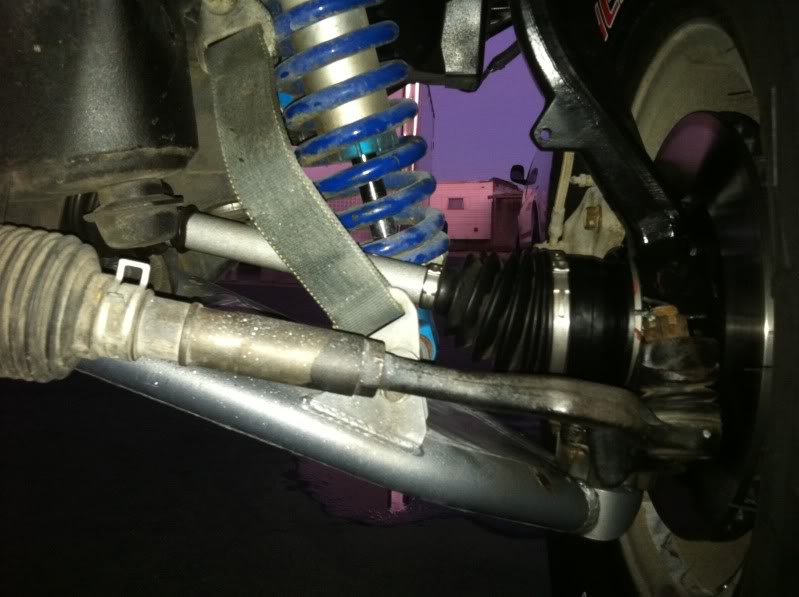
To whatever your opinion is on the diff drop, I'm running 4WD with a strapped 13" of travel. I need whatever the hell I can get to drop that CV angle
Angle of the diff looks great IMO, and with the spacer installed you lose 1/4" of clearance on the bracket. Beyond minor.
A big thanks to my friend Daniel for making this all possible!
-Manual hub swap completed
-New front wheel bearings
-New front hubs
-New rear axle bearings
-New rear axle seals
-New front axle seals
-New front brakes
-New rear brakes
-4.88 Differentials installed
-New custom Tundra CV axles
-Total Chaos diff drop kit installed
Axle rebuild time!
ABS ring and collar removed
Axle removed
Starting fresh
Axle going in
End result = this X2
Going back together
Nice deep pattern!
Front end
Very happy moment!
Regarding the Tacoma/86-95 IFS lockout compatibility, with the help of Scuba, discovered that the whole dial assembly is interchangeable. (Faceplate, spring, clutch) Had to order tacoma hub bodies.
Ditched the backing plate
To whatever your opinion is on the diff drop, I'm running 4WD with a strapped 13" of travel. I need whatever the hell I can get to drop that CV angle
Angle of the diff looks great IMO, and with the spacer installed you lose 1/4" of clearance on the bracket. Beyond minor.
A big thanks to my friend Daniel for making this all possible!
01-29-2012, 09:02 AM
#38
Registered User
Thread Starter
Far from done for this year. The best is yet to come
Thanks chef!
Well, sort of. To retain 4WD with a long travel set up, you must run Tundra CV's for the extended length of the control arms. In the pic of the axles, you'll notice that there is a brass colored lip on the inner cv joint. You cut that off, run a Porsche boot, and boot rides on the black part of the inner joint instead of on the collar that you cut off. It allows the axle to articulate more.
I have personally never seen anyone build manual hub conversion Tundra axles. You must replace the outer joints with manual locking hub joints. It is difficult to source out the needed parts since off road solutions is now closed.
03-09-2012, 07:31 PM
#39
Registered User
Thread Starter
Got a few updates, nothing too major but I will FINALLY have lights on the truck by next weekend!
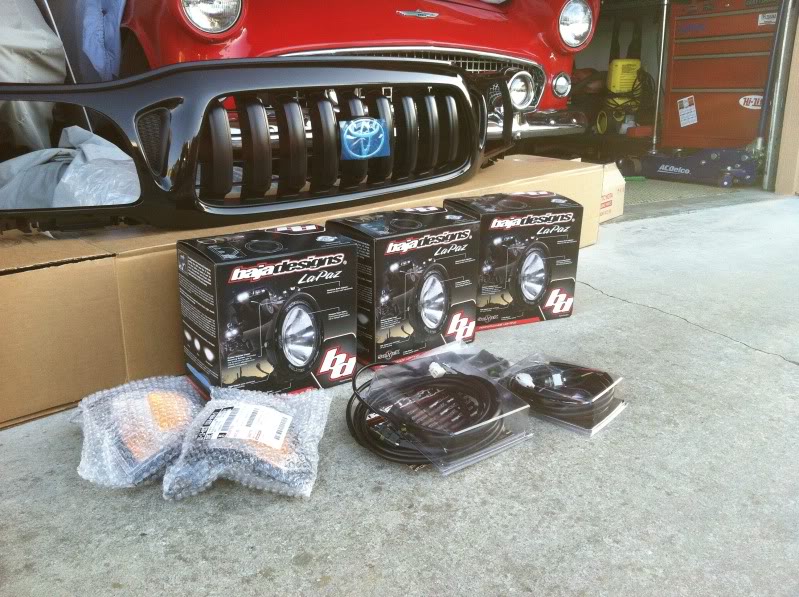
-OEM Painted Black Grille
-OEM Black Corner Marker Lights (Have them wired as blinkers currently)
-3 Baja Designs Soltek HID Lights (2 Driving, 1 Pencil)
-Baja Designs complete wiring kit
-Baja Designs 3rd light splitter kit
-Baja Designs Switch Kit
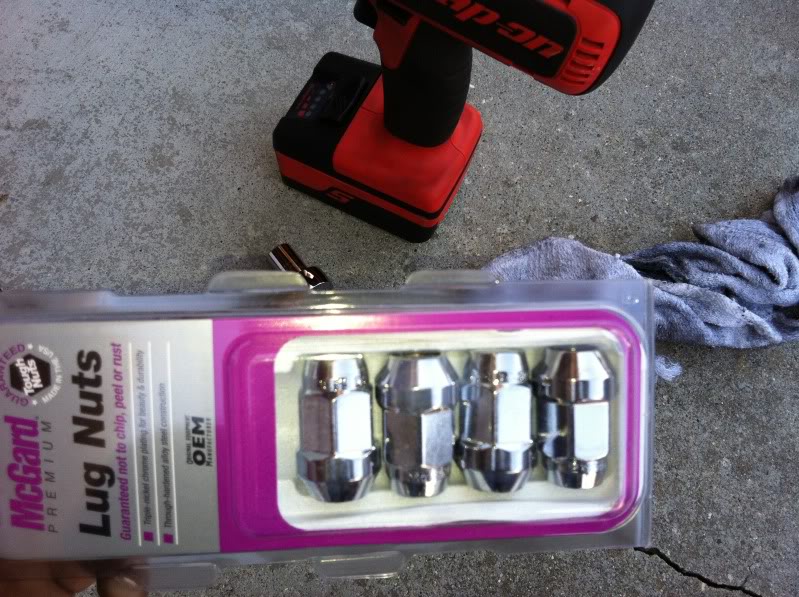
Cleaned up the rims and got new lug nuts. Supposedly these McGuards are lifetime warranty against rusting/chipping, good news for me since I'm on the beach all the time. 60 Degree Conical Seats w/ Bulge.
Before
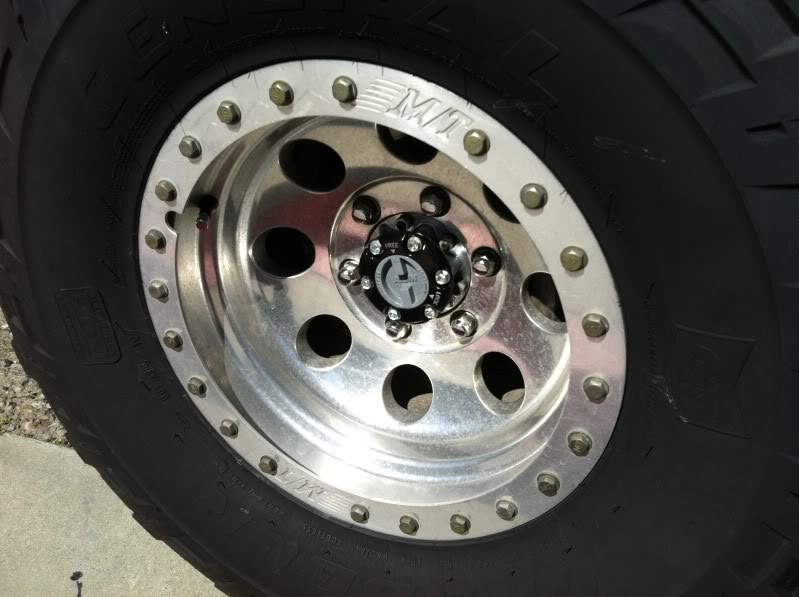
After
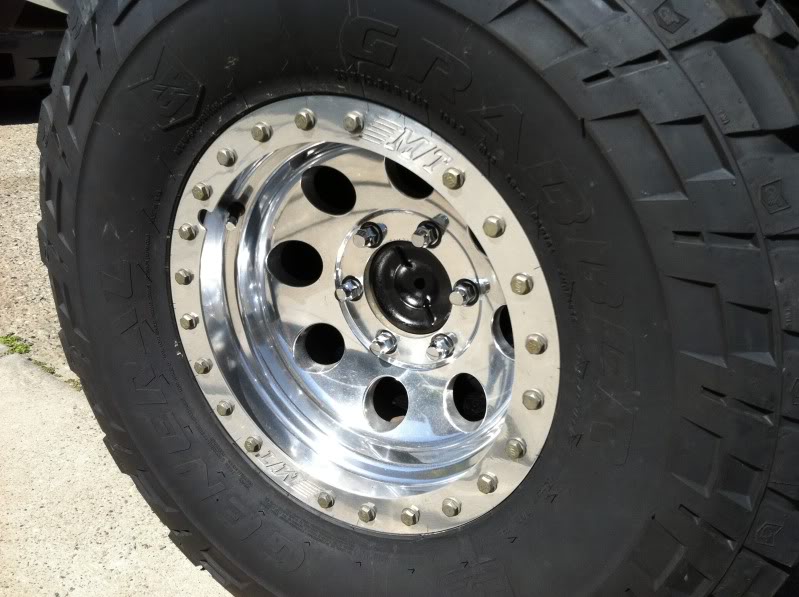
3M Marine Aluminum Polish FTW!!
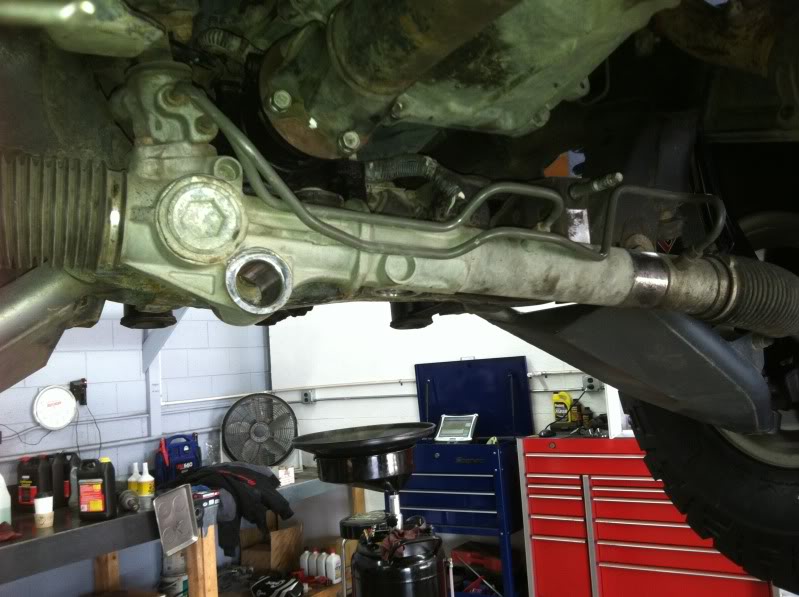
Also replaced my steering rack bushings. You can see the shiny part of the rack where it was flopping around.
All Done

Originally, I had my bumper set up for 2 lights, so the existing mounts will need to be removed and 3 new mounts will be fabricated on Monday by Mike at CCP. Can't wait to get these HID's on!
-OEM Painted Black Grille
-OEM Black Corner Marker Lights (Have them wired as blinkers currently)
-3 Baja Designs Soltek HID Lights (2 Driving, 1 Pencil)
-Baja Designs complete wiring kit
-Baja Designs 3rd light splitter kit
-Baja Designs Switch Kit
Cleaned up the rims and got new lug nuts. Supposedly these McGuards are lifetime warranty against rusting/chipping, good news for me since I'm on the beach all the time. 60 Degree Conical Seats w/ Bulge.
Before
After
3M Marine Aluminum Polish FTW!!
Also replaced my steering rack bushings. You can see the shiny part of the rack where it was flopping around.
All Done
Originally, I had my bumper set up for 2 lights, so the existing mounts will need to be removed and 3 new mounts will be fabricated on Monday by Mike at CCP. Can't wait to get these HID's on!


