JBurt's 97 4runner Build-Up Thread
 01-19-2013, 10:55 PM
#41
Registered User
Thread Starter
So I didn't make my deadline. I have gotten a little done.
While reading about all the stuff I want to do, and the suggestion from Habanero, I heard how much of a difference people had in replacing their steering rack bushings. I wanted to see if they solved any of the clunking and/or vibrations in the steering wheel. I got under the truck and had my 13 year old brother turn the wheel with the engine off. He could barely move the wheels. I then got to explain how power steering works and tease him about being a wimp because my first car didn't have it. Anyways there was way too much movement for me to be happy so I ordered the kit from wheelers.
I followed this write up over on Ih8mud: http://forum.ih8mud.com/95-gen-toyot...placement.html
The write up was great but I guess a few things changed between 97 and 01. Ok well really only two things. The nut on the center bushing on mine wasn't welded on (no big deal. I think it made it a little easier) and the bolt on the top of the right bushing had a nut on the back that was almost impossible to get to. When I took the bolt out the nut fell down inside bracing on the cross member and I didn't even know it was there until reassembly. Good thing I had just the right size of telescoping magnet and was able to get it back where it was supposed to go.
All in all it wasn't bad at all. The hardest part was that nut. I just barely got it all buttoned up (had to wait for my wife to get home and for the kid to go down for the night) but 11:30 isn't too bad right? All that's left is to go and get a torque wrench probably monday and make sure everything is good. Then drive on a bad washboard road and see if that made a difference.
Also while I was down there with the rack not held in place I noticed that both inner tie rod ends could be moved easily. Ugh. Also check out the bushings on the passenger side (the one the shop replaced before I got it 12,000 miles ago)
back:
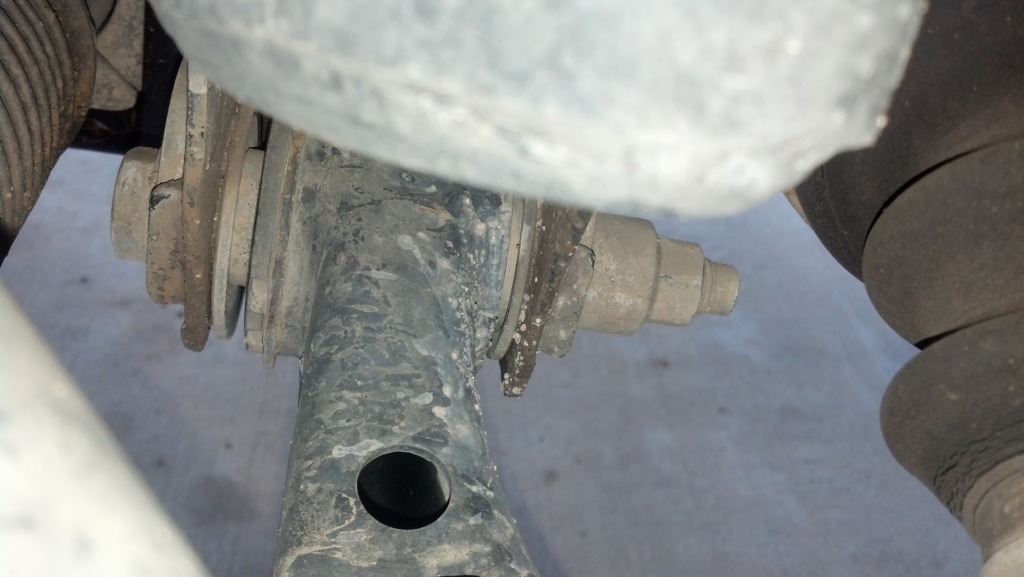
and front:
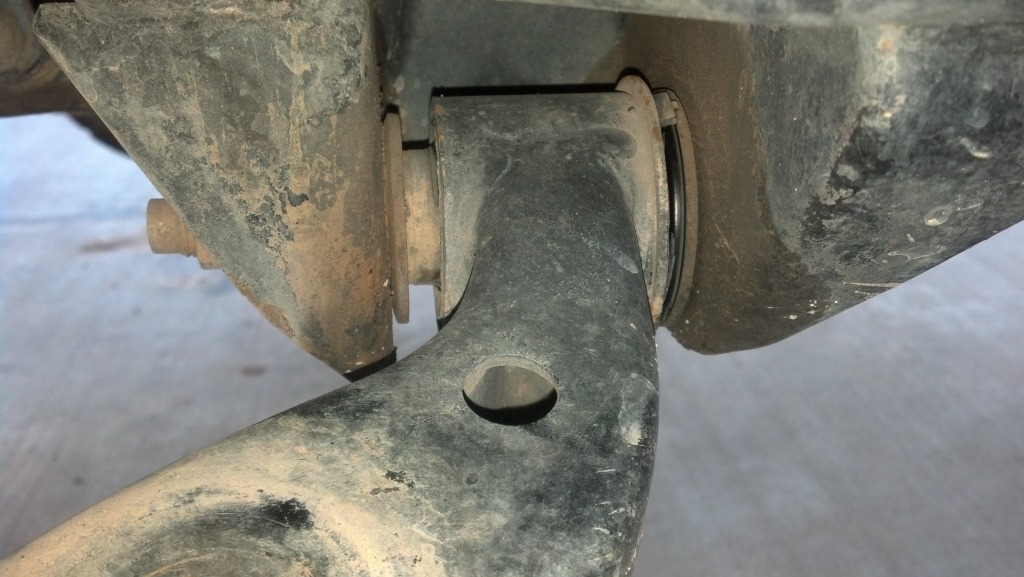
So looks like I should probably do everything for both sides and then not worry about it for a long time.
And here's one of the kid smiling. He just started smiling back at us this week. Exciting. He can also hold up his own head and last night he slept for 8 hours. Gotta enjoy the little things.

While reading about all the stuff I want to do, and the suggestion from Habanero, I heard how much of a difference people had in replacing their steering rack bushings. I wanted to see if they solved any of the clunking and/or vibrations in the steering wheel. I got under the truck and had my 13 year old brother turn the wheel with the engine off. He could barely move the wheels. I then got to explain how power steering works and tease him about being a wimp because my first car didn't have it. Anyways there was way too much movement for me to be happy so I ordered the kit from wheelers.
I followed this write up over on Ih8mud: http://forum.ih8mud.com/95-gen-toyot...placement.html
The write up was great but I guess a few things changed between 97 and 01. Ok well really only two things. The nut on the center bushing on mine wasn't welded on (no big deal. I think it made it a little easier) and the bolt on the top of the right bushing had a nut on the back that was almost impossible to get to. When I took the bolt out the nut fell down inside bracing on the cross member and I didn't even know it was there until reassembly. Good thing I had just the right size of telescoping magnet and was able to get it back where it was supposed to go.
All in all it wasn't bad at all. The hardest part was that nut. I just barely got it all buttoned up (had to wait for my wife to get home and for the kid to go down for the night) but 11:30 isn't too bad right? All that's left is to go and get a torque wrench probably monday and make sure everything is good. Then drive on a bad washboard road and see if that made a difference.
Also while I was down there with the rack not held in place I noticed that both inner tie rod ends could be moved easily. Ugh. Also check out the bushings on the passenger side (the one the shop replaced before I got it 12,000 miles ago)
back:
and front:
So looks like I should probably do everything for both sides and then not worry about it for a long time.
And here's one of the kid smiling. He just started smiling back at us this week. Exciting. He can also hold up his own head and last night he slept for 8 hours. Gotta enjoy the little things.
Last edited by JBurt; 02-15-2013 at 10:50 AM.
 01-20-2013, 06:24 AM
#42
Registered User
Hey man doing the rack bushings in my case was much easier without the front diff in, not that I would recommend pulling it just for that. I'm really looking forward to getting mine back together just to see how much better its going to drive. The kiddo is a cutie take lots of pics when they are little.
01-21-2013, 11:57 AM
#43
Registered User
Thread Starter
Well I went and got torque wrench this morning and tightened everything up. Took it for a test drive and it was like driving a different car. Can't stress enough how much of a difference it makes. Probably some of the best twenty bucks I've ever spent.
But I did the work by myself which means that I can't fix something without breaking something else. When I did the tundra brake upgrade I needed 1/4" spacers to get my wheels to clear the calipers. Some people just grind a little off the caliper to make it fit with the 6 spoke wheels, but I took the easy way. Anyways the spacers kind of made it difficult to get the lug nuts back on. While I was putting the wheels back on today I cross threaded two wheel studs (one on each side). Not a huge deal. I'll pick some up and change them later. 5 should be ok for a few days. I'll probably grind down the calipers while I'm at it then I won't have to worry about it anymore.
But I did the work by myself which means that I can't fix something without breaking something else. When I did the tundra brake upgrade I needed 1/4" spacers to get my wheels to clear the calipers. Some people just grind a little off the caliper to make it fit with the 6 spoke wheels, but I took the easy way. Anyways the spacers kind of made it difficult to get the lug nuts back on. While I was putting the wheels back on today I cross threaded two wheel studs (one on each side). Not a huge deal. I'll pick some up and change them later. 5 should be ok for a few days. I'll probably grind down the calipers while I'm at it then I won't have to worry about it anymore.
01-21-2013, 12:18 PM
#44
Contributing Member
I despised the 1/4" spacers, cross-threading the studs while trying to get the wheels on the few threads you've got left is totally understandable. Went to adapters instead. MUCH nicer for me at least. Made the 33's fit better too. 
02-02-2013, 09:45 AM
#45
Registered User
Thread Starter
Well I definitely didn't make my deadline of the 17th. Oh well. I've been collecting parts, but they don't do much good on my bench in the garage. Ha.
I was going to get started early this morning. I still needed the bushings for the control arm. I had run out of money so I wasn't going to go with oem bushings. I figured if some napa ones could get me through a year I'll be done with school, have a job, and do it right. In the meantime I still need an alignment that will stick, hence napa bushings. I wanted to find poly ones but couldn't. Anyways I was looking for a write up on the bushings when I found this thread and lo and behold, poly bushing! They are energy suspension ones for a tacoma but they fit. Plus it's about $40 for upper and lower bushings for BOTH sides. I wound up ordering them from autozone and they'll get here tuesday, so no suspension work today...
But I really wanted to do something today. Now I'm headed out to adjust the rear brakes.
02-03-2013, 05:35 PM
#46
Registered User
Thread Starter
And the brakes are adjusted and the bushings ordered. I haven't adjusted the rear brakes before. Big difference. Plus I cleaned out the back for the first time in a long time.
02-09-2013, 04:59 AM
#47
Registered User
Thanks man now with everything else I had tore apart on mine you have me wondering SHOULD I REPLACE MY A ARM BUSHINGS, this suspension stuff gets expensive fast, I got OEM upper and lower ball joints and outer tie rods got the inners from Napa. Good luck with getting it all put together.
The baby is really growing its amazing watching them learn things at least until the teen years when they're convinced they know it all.
The baby is really growing its amazing watching them learn things at least until the teen years when they're convinced they know it all.
02-09-2013, 09:24 AM
#48
Registered User
Thread Starter
Well Jason at least I'll let you know how the poly's work out, then you get a first hand review. I really didn't want to spend 100+ on oem. Good to hear you're getting new shocks and such. Hopefully it improves the ride. Something I've thought about. The OME shocks are pretty stiff.
Question for anyone: 1) I forget to get new clamps for the inner tie rod end boots. Could I just go get some big hose clamps or are they more specific than that. Thanks.
Question for anyone: 1) I forget to get new clamps for the inner tie rod end boots. Could I just go get some big hose clamps or are they more specific than that. Thanks.
Last edited by JBurt; 02-09-2013 at 10:14 PM.
02-09-2013, 10:41 AM
#49
Registered User
Thread Starter
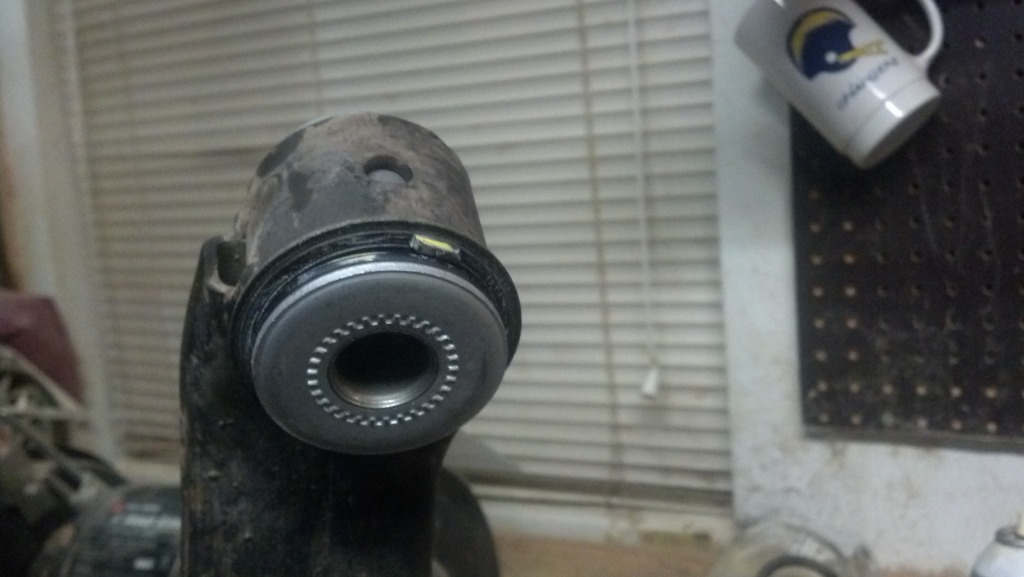
Well I started with the tie rod ends. All was going smoothly until I got the boot off the inner tie rod. Anyone see anything wrong with this picture?

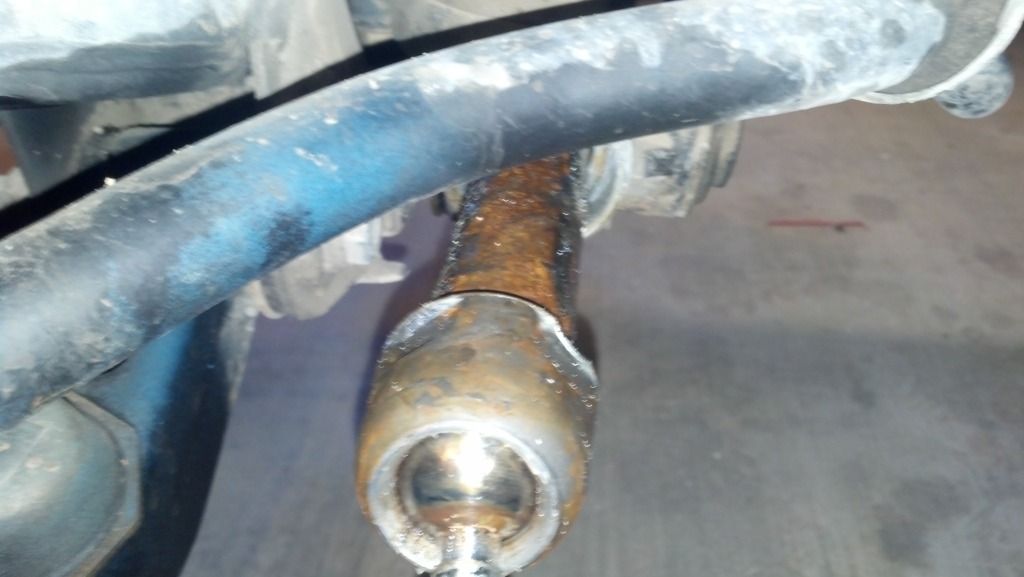
How do you guys feel about a rusty rack? It doesn't leak a drop of fluid and the teeth are clean from rust and in good condition. Oh well...
How do you guys feel about a rusty rack? It doesn't leak a drop of fluid and the teeth are clean from rust and in good condition. Oh well...
Last edited by JBurt; 02-09-2013 at 10:10 PM.
02-09-2013, 10:14 PM
#50
Registered User
Thread Starter
So I played with it a little more tonight. Had to wait to borrow my uncles big air compressor and an impact wrench for the lower ball joint nuts. They were stuck on there surprisingly well. With the right tools though no problems.
Got the drivers side completely torn apart. This thread helped for the control arm.
I'm calling it a night though. One of those bushing was very squeaky. Tomorrow it will be gone.
On a brighter note with respect to the p0301 code, I switched the ignition packs to see if the code came back on another cylinder and after a few hundred miles no codes at all. Guess it was just a bad connection.
02-15-2013, 10:48 AM
#52
Registered User
Thread Starter
Well after a super busy week with school and I got started working on the 4runner again today, but only while the kid is napping.
To take the old bushings out I used a propane torch to head up the metal around the bushings until the bushing started to melt then just pullet them out with pliers. It took a little bit to clean up the melted rubber but it beat paying someone to press them out. You're supposed to be able get the poly's in without a press. We'll see.
Anyways I think I found out while the old one squeaked so bad. It only seemed to be coming from the rear bushing on the drivers side. When I got the bushing out I found a nice little burr inside. Seems like someone replaced them before and took them out with a hammer and chisel or something. Other then one burr it doesn't seem so bad. At the next nap time I'll break out the dremel.
02-20-2013, 05:18 PM
#53
Registered User
Thread Starter
So I finally got the bushings figured out. The dremel cleaned it up nicely. Went to put in the new poly energy suspension bushing and guess what:
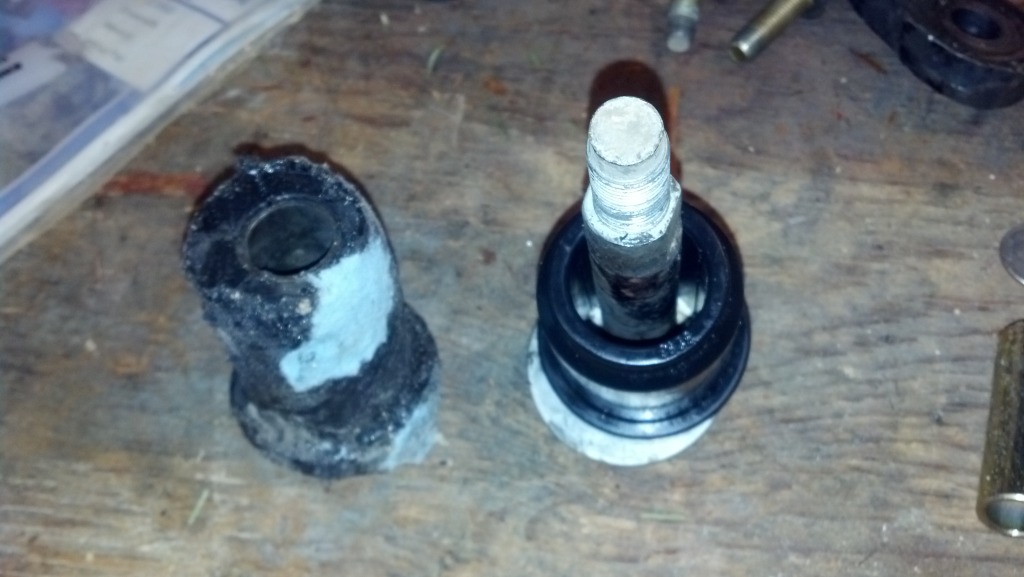
So I called customer service at Energy Suspension (where I ordered the polyurethane bushings from) and they took some time and looked at it and determined that the bushings I had weren't stock bushings. When you get their poly bushings you have to reuse all the metal parts, and since the bushings I had didn't have the right metal parts, so I went this route:

Found a really cool thread on how to remove old bushings without a press (thanks to Habanero):
https://www.yotatech.com/forums/f2/f...rd-gen-265072/
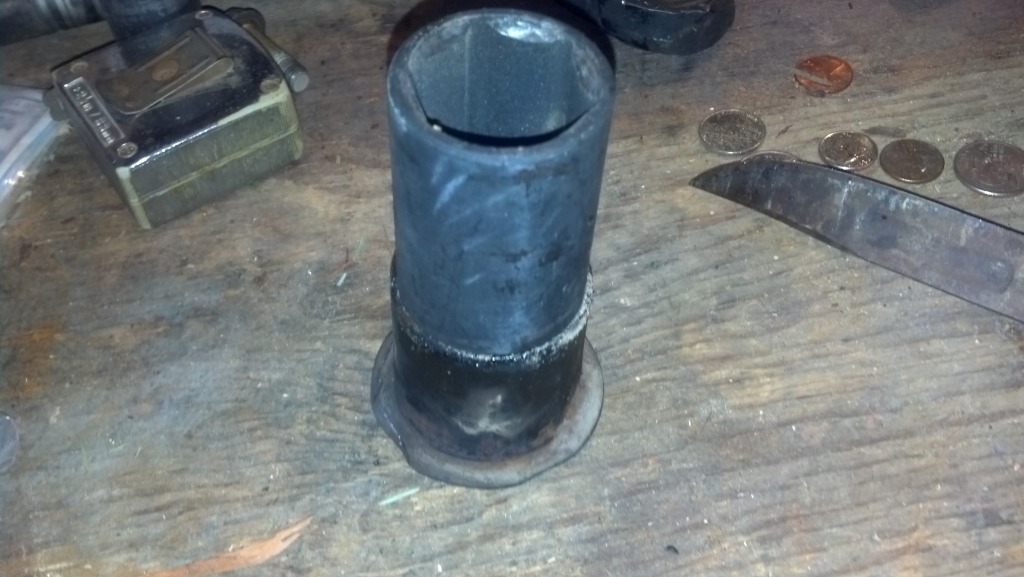
So my problem then was to get the old metal sleeves out. I went for my bottle jack but the jack was too narrow and just slipped through the metal sleeve. I was like "great now I have to find a washer or something that is bigger than the metal sleeve but smaller than the opening on the control arm!" I didn't know what to do. My first thought was to see about my impact sockets. Viola! 32mm impact socket from harbor freight has a lip on it that fits perfectly inside the sleeve and the outer diameter of the socket is just a small amount bigger than the sleeve:
(picture is after the sleeve is out)
Now I finally get to start putting the drivers side back together.
So I called customer service at Energy Suspension (where I ordered the polyurethane bushings from) and they took some time and looked at it and determined that the bushings I had weren't stock bushings. When you get their poly bushings you have to reuse all the metal parts, and since the bushings I had didn't have the right metal parts, so I went this route:
Found a really cool thread on how to remove old bushings without a press (thanks to Habanero):
https://www.yotatech.com/forums/f2/f...rd-gen-265072/
So my problem then was to get the old metal sleeves out. I went for my bottle jack but the jack was too narrow and just slipped through the metal sleeve. I was like "great now I have to find a washer or something that is bigger than the metal sleeve but smaller than the opening on the control arm!" I didn't know what to do. My first thought was to see about my impact sockets. Viola! 32mm impact socket from harbor freight has a lip on it that fits perfectly inside the sleeve and the outer diameter of the socket is just a small amount bigger than the sleeve:
(picture is after the sleeve is out)
Now I finally get to start putting the drivers side back together.
Last edited by JBurt; 02-23-2013 at 11:06 PM.
02-20-2013, 06:10 PM
#54
Contributing Member
WHOO HOO!!! (Thanks to 4rnographic and some JBurt ingenuity).
02-20-2013, 06:31 PM
#56
Registered User
Thread Starter
You and me both Jason. I guess it's a race to see who gets their front end back together first!
Forgot to mention. The first sleeve I took out I just used the jack. It took lots of force and I worried about it getting out of round. The second go around I used PB blaster, let it soak for a while, then heated it up with a torch (I love those things). Came out MUCH easier.
Forgot to mention. The first sleeve I took out I just used the jack. It took lots of force and I worried about it getting out of round. The second go around I used PB blaster, let it soak for a while, then heated it up with a torch (I love those things). Came out MUCH easier.
Last edited by JBurt; 02-20-2013 at 06:43 PM.
02-20-2013, 09:05 PM
#57
Registered User
Thread Starter
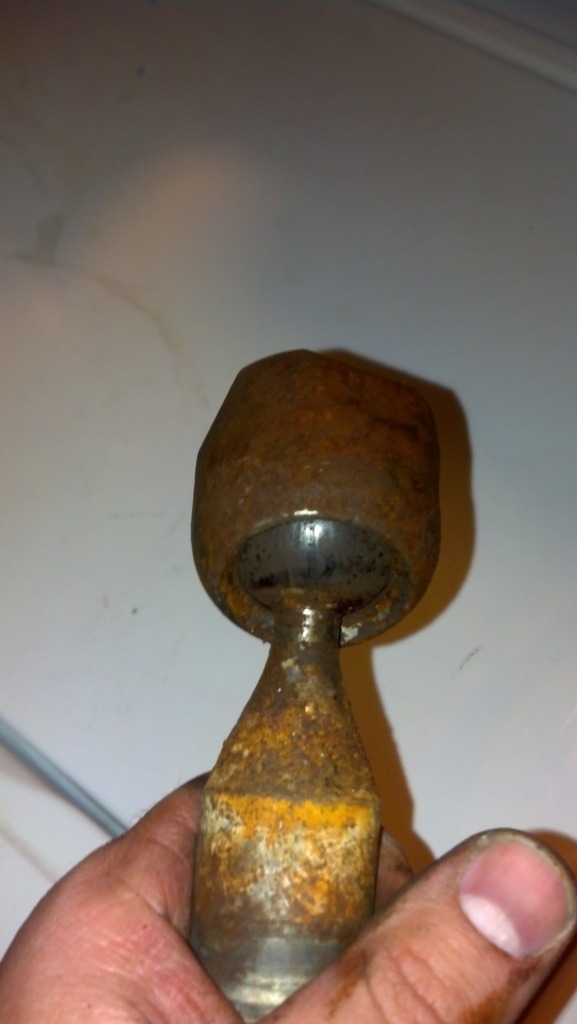
Well... I get the bonehead of the month award. I but the rear bushing in backwards.
Did I mess this one up? Can't figure out an easy to get this one out. Might have to take it to a shop with a press friday. Would having it pressed out ruin it? Would it be ok to mount it like this? I really have no clue.
Did I mess this one up? Can't figure out an easy to get this one out. Might have to take it to a shop with a press friday. Would having it pressed out ruin it? Would it be ok to mount it like this? I really have no clue.
02-21-2013, 04:06 AM
#58
Contributing Member
Now that's an interesting situation. Given the way the bushing and a-arm fit I don't think it could go as-in into the truck. Even if it did you'd be lacking the protection the metal flange provides for the forces between a-arm and mount.
Guess the biggest problem with pressing it out is finding something to push against and something to drop the bushing into? Gonna be a learning experience, would love to see what you end up with.
Guess the biggest problem with pressing it out is finding something to push against and something to drop the bushing into? Gonna be a learning experience, would love to see what you end up with.
02-21-2013, 06:56 AM
#59
Registered User
Thread Starter
02-23-2013, 11:04 PM
#60
Registered User
Thread Starter
Well I finally got to make some progress today. I almost got done. I got to finally use my new torque wrench and it was nice. Playing with new toys is always a good time.
Yesterday I had a buddy help me get the backwards bushing out. He's got a welding shop and I had an elaborate jig in mind that we could make to hold the control arm and the bottle jack. Then he looked at it and said "I've got a big vice, lets try that." Whatta you know, the vice worked. And all this time people tell me to get rid of my vices. Sheese.
It was definitely jerry rigged. I didn't have my phone but he took a picture. When he gets it to me I'll post it up.
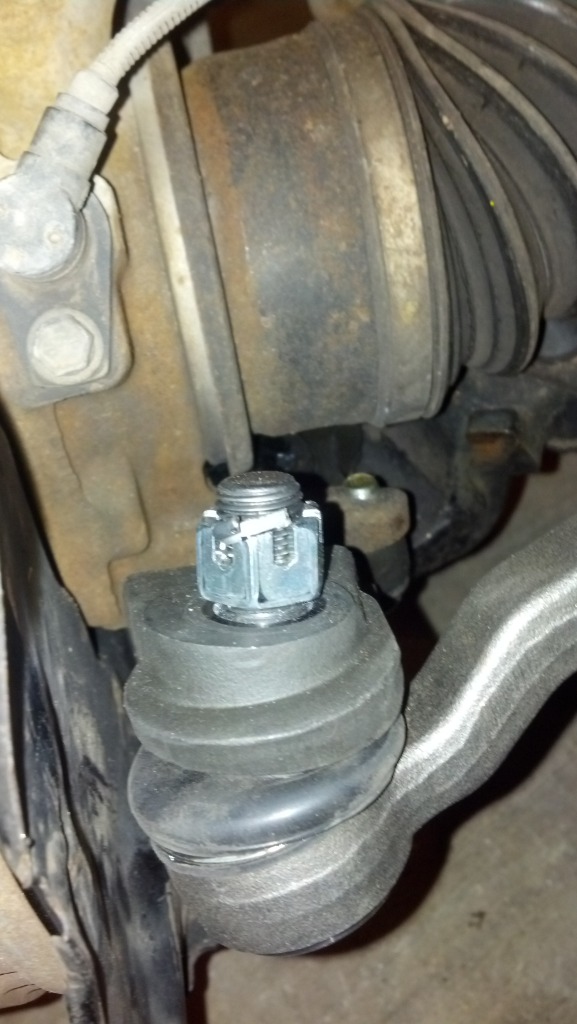
Anyways tore down the passenger side and guess what I found?!
Nasty (and wayyyy to much play)
I thought the boot on that side of the steering rack was ok but turns out it had a hole in it (explains the rust I guess).
Everything else was run of the mill. Followed the FSM and a couple write ups and it went easy as pie until I was torquing the last nut before I put the tires back on.
It was the drivers side outer tie rod end. Set the torque wrench and started turning. Then I kept turning, and turning, and turning. I never got very much resistance. I thought maybe the stud was turning in there and when I took the wrench off I saw the stud wasn't turning and that that the castle nut was entirely below the hole in the stud.
So I backed it off until I could put the pin in there but I got to thinking that steering might be a little bit important so I think I'll just take it back and get another otre on monday. It was the 555 brand with a lifetime warranty so that shouldn't be a problem I guess.
Being midnight I think I'm going to call it a night. I guess monday is another day. Hopefully I can get it all wrapped up. I'll be glad when it's over and I can drive my car again. The wife's prius just doesn't feel right.
Yesterday I had a buddy help me get the backwards bushing out. He's got a welding shop and I had an elaborate jig in mind that we could make to hold the control arm and the bottle jack. Then he looked at it and said "I've got a big vice, lets try that." Whatta you know, the vice worked. And all this time people tell me to get rid of my vices. Sheese.
It was definitely jerry rigged. I didn't have my phone but he took a picture. When he gets it to me I'll post it up.
Anyways tore down the passenger side and guess what I found?!
Nasty (and wayyyy to much play)
I thought the boot on that side of the steering rack was ok but turns out it had a hole in it (explains the rust I guess).
Everything else was run of the mill. Followed the FSM and a couple write ups and it went easy as pie until I was torquing the last nut before I put the tires back on.
It was the drivers side outer tie rod end. Set the torque wrench and started turning. Then I kept turning, and turning, and turning. I never got very much resistance. I thought maybe the stud was turning in there and when I took the wrench off I saw the stud wasn't turning and that that the castle nut was entirely below the hole in the stud.
So I backed it off until I could put the pin in there but I got to thinking that steering might be a little bit important so I think I'll just take it back and get another otre on monday. It was the 555 brand with a lifetime warranty so that shouldn't be a problem I guess.
Being midnight I think I'm going to call it a night. I guess monday is another day. Hopefully I can get it all wrapped up. I'll be glad when it's over and I can drive my car again. The wife's prius just doesn't feel right.
Last edited by JBurt; 02-25-2013 at 06:18 AM.


