Writeup - Installing Yaesu FT-7800R Ham Radio in '02 4Runner
 08-05-2008, 04:45 PM
#1
Registered User
Thread Starter
Join Date: Mar 2005
Location: New Brunswick, Canada
Posts: 1,756
Likes: 0
Received 7 Likes
on
6 Posts
Writeup - Installing Yaesu FT-7800R Ham Radio in '02 4Runner
Well, I've got my new Yaesu FT-7800R radio installed in my 2002 4Runner (my Larsen NMO 2/70B antenna only arrives this friday, so that will not be installed until the weekend).
The FT-7800R is dual band (2m and 70cm) ham radio with a detachable head that can be remote mounted. Here's a bit of a writeup showing how I installed the radio.
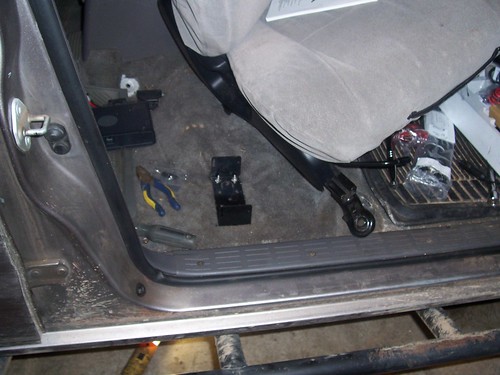
I started off by test fitting the base of the radio to see where I wanted to mount it. Under the passenger seat seemed like the most logical choice, since the space under the driver seat is already taken up by my 1000W inverter.
I then removed the passenger seat and drilled some holes in the floor to mount the radio bracket.
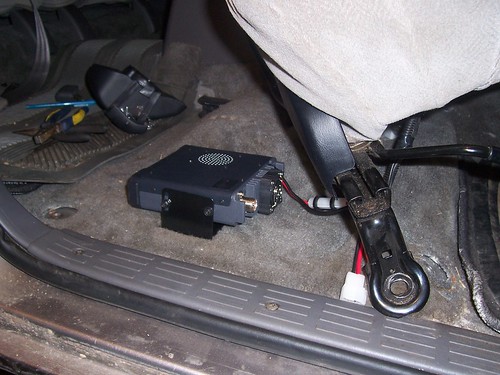
Next, I installed the radio onto the mounting bracket...
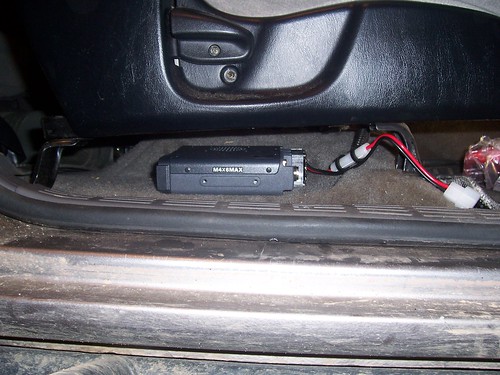
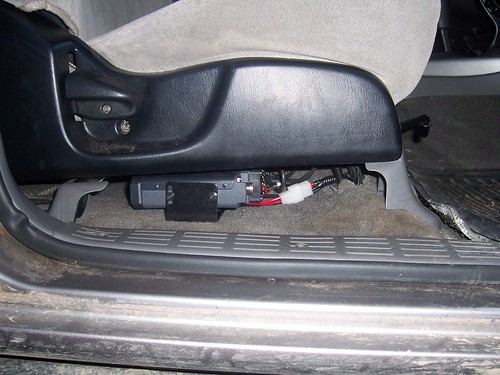
And re-installed the passenger seat. This is the final installation of the base of the radio.
Next was the wiring. I don't have any pictures of the power wire and antenna wire routing. I ran both of these into the engine compartment through the grommet in the firewall that is just behind the blower fan. I got power directly from my aux battery (mounted above the front passenger wheelwell), and I ran the antenna wire to my front TJM T15 bumper, where I will mount the antenna when I receive it.
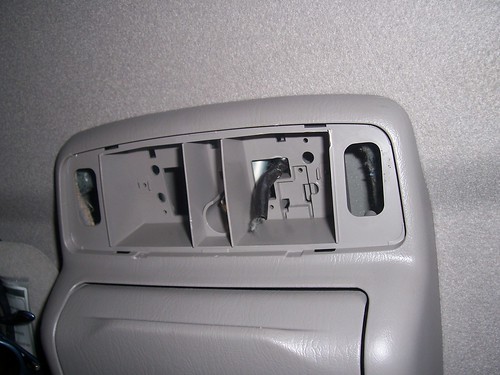
I removed a couple of headliner trim pieces on the passenger side. They are just held on with a few clips. I pushed a piece of coax cable above the headliner until I got it through this opening above the rearview mirror (see the short piece of black coax sticking out?) I used that to pull the flimsey extension wire (looks like telephone wire) for the radio's remote head unit through, which I will be mounting in this location.
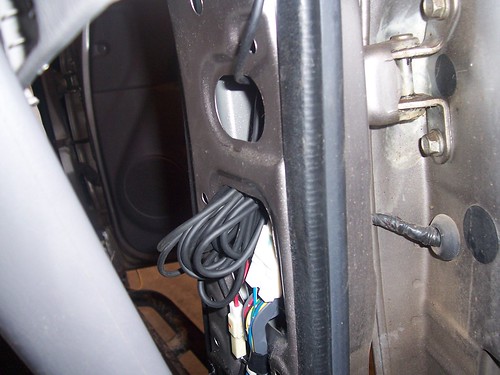
I ran the wire down behind the trim piece covering the passenger side B-pillar. In the passenger side B-pillar, I found this small cubby to be the perfect location to store the excess coiled up extension wire.
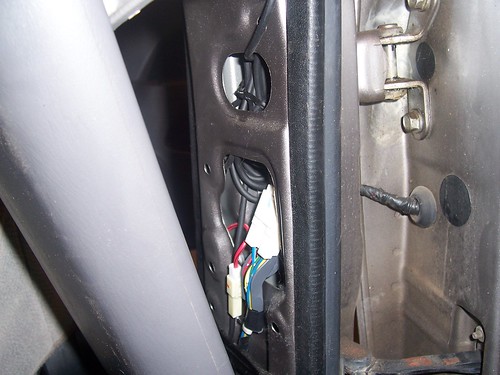
Here's how it looked right before I put the trim piece back on.
For the remote head unit, I made a bracket out of part of an L-bracket and some 22 gauge steel. I forgot to take a picture of the bracket prior to mounting everything on it, but this is a shot of the rear of the bracket after installation.
And this picture shows the detail of how the bracket is mounted. It is held on with one bolt only, but is really solid. There was a shorter bolt here before that held the grey headliner trim piece on, but I just replaced it with a longer bolt to hold my bracket on.

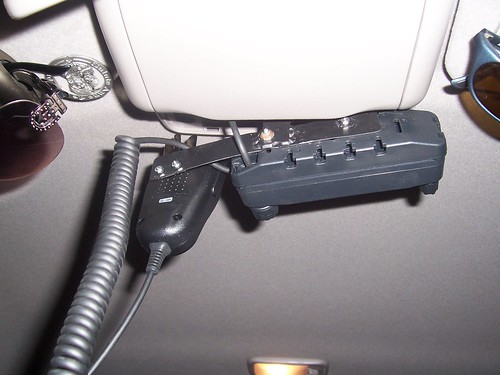
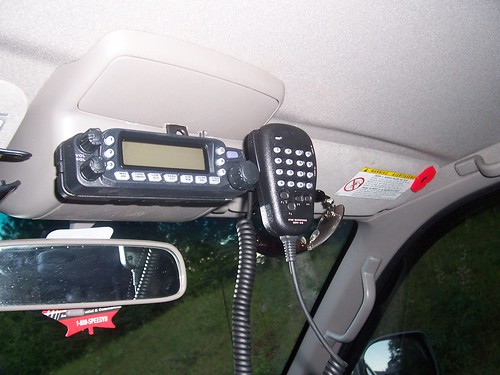
Finally, This is what the remote head unit and microphone look like after the installation. I used my dremel to notch out the plastic trim piece that covers the top part of the bracket so that I could re-insall it. The microphone can easily be removed if needed for normal driving when I don't need the radio.
I haven't been able to try the radio out yet, because my antenna is not due in until the end of the week.
The FT-7800R is dual band (2m and 70cm) ham radio with a detachable head that can be remote mounted. Here's a bit of a writeup showing how I installed the radio.
I started off by test fitting the base of the radio to see where I wanted to mount it. Under the passenger seat seemed like the most logical choice, since the space under the driver seat is already taken up by my 1000W inverter.
I then removed the passenger seat and drilled some holes in the floor to mount the radio bracket.
Next, I installed the radio onto the mounting bracket...
And re-installed the passenger seat. This is the final installation of the base of the radio.
Next was the wiring. I don't have any pictures of the power wire and antenna wire routing. I ran both of these into the engine compartment through the grommet in the firewall that is just behind the blower fan. I got power directly from my aux battery (mounted above the front passenger wheelwell), and I ran the antenna wire to my front TJM T15 bumper, where I will mount the antenna when I receive it.
I removed a couple of headliner trim pieces on the passenger side. They are just held on with a few clips. I pushed a piece of coax cable above the headliner until I got it through this opening above the rearview mirror (see the short piece of black coax sticking out?) I used that to pull the flimsey extension wire (looks like telephone wire) for the radio's remote head unit through, which I will be mounting in this location.
I ran the wire down behind the trim piece covering the passenger side B-pillar. In the passenger side B-pillar, I found this small cubby to be the perfect location to store the excess coiled up extension wire.
Here's how it looked right before I put the trim piece back on.
For the remote head unit, I made a bracket out of part of an L-bracket and some 22 gauge steel. I forgot to take a picture of the bracket prior to mounting everything on it, but this is a shot of the rear of the bracket after installation.
And this picture shows the detail of how the bracket is mounted. It is held on with one bolt only, but is really solid. There was a shorter bolt here before that held the grey headliner trim piece on, but I just replaced it with a longer bolt to hold my bracket on.
Finally, This is what the remote head unit and microphone look like after the installation. I used my dremel to notch out the plastic trim piece that covers the top part of the bracket so that I could re-insall it. The microphone can easily be removed if needed for normal driving when I don't need the radio.
I haven't been able to try the radio out yet, because my antenna is not due in until the end of the week.
Last edited by GSGALLANT; 08-05-2008 at 04:49 PM.
 08-06-2008, 07:59 AM
#5
Registered User

Join Date: Jul 2008
Location: San Diego, CA
Posts: 10
Likes: 0
Received 0 Likes
on
0 Posts
Great install, thanks for the write-up. Some people might not mount it high due to the easy visibility to would be thieves. I try to hide anything cool/expensive after losing my passenger window, scanner, and XM radio in my last 4runner.
08-06-2008, 09:44 AM
#6
Registered User
Thread Starter
Join Date: Mar 2005
Location: New Brunswick, Canada
Posts: 1,756
Likes: 0
Received 7 Likes
on
6 Posts
Makes sense. We don't have a whole lot of problems up here with vehicle break-ins, but it could certainly be something to consider depending on the crime rate in your area. If I'm going to park in any "sketchy" areas, the remote head unit and mic can be removed in seconds (there is a quick release button to release it from the backing plate that's bolted to the bracket).
08-06-2008, 10:27 AM
#7
Registered User
Join Date: Feb 2007
Location: Pleasant Grove, Utah
Posts: 441
Likes: 0
Received 0 Likes
on
0 Posts
Trending Topics
08-06-2008, 10:32 AM
#8
Registered User
08-06-2008, 10:37 AM
#10
Registered User
Thread Starter
Join Date: Mar 2005
Location: New Brunswick, Canada
Posts: 1,756
Likes: 0
Received 7 Likes
on
6 Posts
Yeah, I thought about that a bit before the install, but decided that if it bugged me, I'd just remove the mic for normal everyday driving, and re-install it when I needed the radio. So far, though, it hasn't bugged me in everyday driving conditions. I haven't been offroad since I installed the radio, so I can't comment on that yet.
08-06-2008, 10:41 AM
#12
Registered User
Join Date: Mar 2008
Location: COLORADO
Posts: 88
Likes: 0
Received 0 Likes
on
0 Posts
well not necessarily the theives problem, but the hassle of putting your hand up and flippin channels.. seems easier to put it next to your right knee.. but hey man it looks good and peeps got their own opinion.
08-06-2008, 03:56 PM
#14
Registered User
Timely. Just got my license last week and need to get a radio. I like this install, but I'll probably look around for alternative faceplate locations. I had my old Sirius receiver right where you installed yours and the G/F must have hit her head on it 100 times.
ANEEWAYY.. Couple of (sort of) related questions. Why did you choose this radio and this antenna? Where did you get them? And do you have a writeup or info somewhere about your aux batt install?
Thx
ANEEWAYY.. Couple of (sort of) related questions. Why did you choose this radio and this antenna? Where did you get them? And do you have a writeup or info somewhere about your aux batt install?
Thx
08-07-2008, 09:02 AM
#15
Registered User
Thread Starter
Join Date: Mar 2005
Location: New Brunswick, Canada
Posts: 1,756
Likes: 0
Received 7 Likes
on
6 Posts
That would take some interesting stretching for her to hit her head where the faceplate is located... you're a lucky man 
Seriously though, unless I was trying to move from the driver seat over to the passenger seat by crossing over the center console, I can't see any time that I could bump it where it's located.
I chose the radio because it's a dual band (2m and 70cm), it's has the remote radio head (which means more options for the install), it is compact and still high powered, and it has an impressive set of features and specifications for the price.
For the antenna, it was a bit more of a shot in the dark... because there are so many out there. I needed a dual band and I wanted an NMO mount and at least a 1/2 wave, so that narrowed it down a bit. I did a lot of reading and the Larsen's seemed well liked. The NMO 2/70B is one of three that Universal Radio.com sells (B stands for black). The other two were 1) a chrome version of the same antenna, which I didn't want, and 2) a shorter version of the same antenna (1/4 wave) which I didn't want. Through the process of elimination, I chose the Larsen NMO 2/70B.
I purchased everything through www.Universal-Radio.com and I highly recommend them.
I don't have a writeup for my aux battery, but you can see some pictures of how it's mounted here. I am using a "Sure Power Industries" battery isolator model 9523A, which is working well for me. I mounted the isolator just below where the stock battery is.

Thread
Thread Starter
Forum
Replies
Last Post
FS[PacSouthWest]: 2- 8"3rd members:4.88 ratchet lockers,new setup kit, rear axle rebuild kit,diff armor
jerusry
Axles - Suspensions - Tires - Wheels
1
10-19-2015 05:28 PM


