Steering Wheel Removal - '98 4Runner
 07-03-2006, 05:31 PM
#1
Contributing Member
Thread Starter
Join Date: Apr 2003
Location: Riverview, FL
Posts: 534
Likes: 0
Received 0 Likes
on
0 Posts
I just bought a replacement steering wheel for my 4Runner off eBay. The leather wrap on my current wheel is in really bad shape and I plan to swap it out. The one I bought is from a 2001 4Runner limited and looks identical to mine (minus the torn up leather).
http://cgi.ebay.com/ebaymotors/ws/eB...m=130001846773
I did a search for instructions on disabling the air bag and removing the existing steering wheel, but didn't find anything very specific. I know several people have pulled them for various reasons. Can someone give me directions on what tools I need and how I can do it safely?
 07-03-2006, 06:07 PM
#2
Registered User
Join Date: Apr 2006
Location: TX
Posts: 503
Likes: 0
Received 0 Likes
on
0 Posts
heres what you need to do:
1. torx screwdriver, forgot what size (25 i believe), and unscrwe the airbag from the wheel, held on by 2 screws.
2.unlock the airbag harness and unclip the harness. unclip other harness.
3a. mark the steering wheel
3b. use a steering wheel puller. rent or buy one if autozone exist in ur area.
4. reassemble
07-04-2006, 09:56 AM
#4
Registered User

Join Date: Mar 2006
Posts: 9
Likes: 0
Received 0 Likes
on
0 Posts
I just went through this with my T100, I think that the airbag assembly is the same...I used a T30 Torx (star) head screwdriver. Autozone has a nice set of these for 9.99 if you dont have one. PM me for details, i literally did this yesterday. But profuse has good instructions. make sure to disconnect the battery first!
07-04-2006, 02:14 PM
#5
Contributing Member

Join Date: Dec 2003
Location: boston, ma
Posts: 6,729
Likes: 0
Received 0 Likes
on
0 Posts
from the FSM..
Work must not begin until at least 90 seconds after the ignition switch is turned to the LOCK position and the negative battery cable is disconnected from the battery. The SRS is equipped with a back-up power source so that if the work is started within the 90 seconds of disconnecting the negative terminal, the SRS may be deployed.
1. Disarm the SRS system.
2. On models without tilt steering, proceed as follows:
A. Place the front wheels facing straight ahead.
B. Remove the 2 steering wheel lower covers. Using a Torx� driver, loosen the Torx� screws until the groove along the screw circumference catches on the screw case.
C. Pull out the wheel pad from the steering wheel, then detach the air bag connector.
3. Remove the steering wheel set nut. A special wheel puller may be needed. Place matchmarks on the steering wheel and mainshaft assembly. Remove the wheel.
4. Unplug the harness.
To install:
5. Align the matchmarks on the wheel and the mainshaft. Tighten the wheel set nut to 25 ft. lbs. (34 Nm).
6. Attach the harness.
7. Attach the air bag harness, then install the wheel pad after confirming that the circumference groove of the Torx� screw is caught on the screw case.
8. Using a Torx� driver, tighten the screws to 78 inch lbs. (9 Nm).
9. Install the steering wheel covers.
10. Check the steering wheel center point.
Last edited by lee; 07-04-2006 at 02:16 PM.
07-04-2006, 11:21 PM
#6
Contributing Member
Thread Starter
Join Date: Apr 2003
Location: Riverview, FL
Posts: 534
Likes: 0
Received 0 Likes
on
0 Posts
Thanks for all the information. Looks like this should be a fairly simple job. I was afraid there'd be a hidden screw somewhere or other complication to prevent an easy removal. It's good to hear Toyota made the job straightforward.
Thanks again. Can't wait 'til the new wheel arrives...
Thanks again. Can't wait 'til the new wheel arrives...
07-05-2006, 11:30 PM
#7
Registered User
Join Date: Jun 2006
Location: Spokane Valley Washington
Posts: 814
Likes: 0
Received 0 Likes
on
0 Posts
Originally Posted by jimrockford
Thanks for all the information. Looks like this should be a fairly simple job. I was afraid there'd be a hidden screw somewhere or other complication to prevent an easy removal. It's good to hear Toyota made the job straightforward.
Thanks again. Can't wait 'til the new wheel arrives...
Thanks again. Can't wait 'til the new wheel arrives...
I'm in the Valley, if you ever need help feel free to give me a shout.
Trending Topics
04-05-2009, 06:36 PM
#8
Registered User

Join Date: Sep 2004
Posts: 47
Likes: 0
Received 0 Likes
on
0 Posts
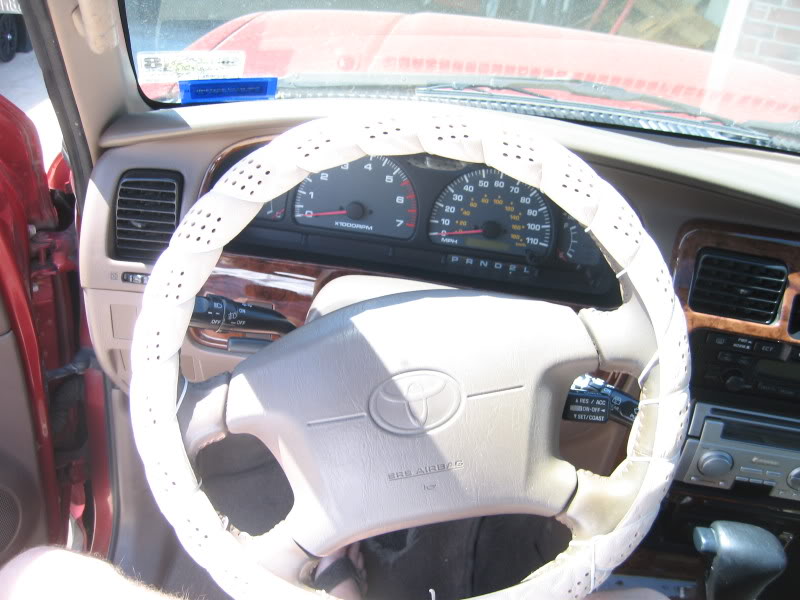
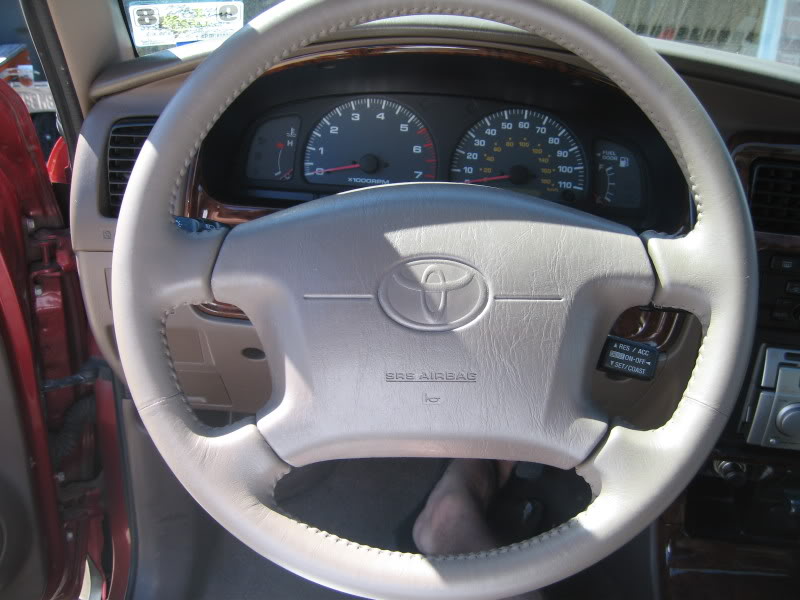
Since I used this thread as a guide for my steering wheel swap today, I figured I'd add pics to it for others to see.
'99 4runner limited.
My old steering wheel was fairly ratty looking. It got to a point where it started leaving gunk on my hands if it
was a humid enough day. So I wrapped it with a $2 gift from Autozone.
First, go ahead and disconnect the negative cable from the battery in your engine compartment. Then wait a
couple minutes before going any further, to allow for complete discharge of all remaining power in the system.
Someone above recommended 90 seconds. I waited at least five minutes each time.
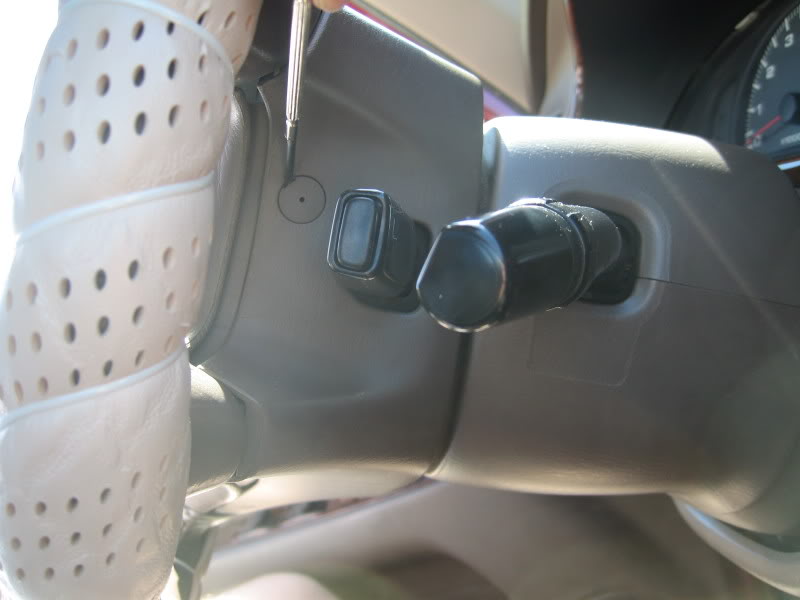
To remove the wheel, you first pry off the little button covers using a knife or small screwdriver.
Below is the button cap on the right side of the wheel.
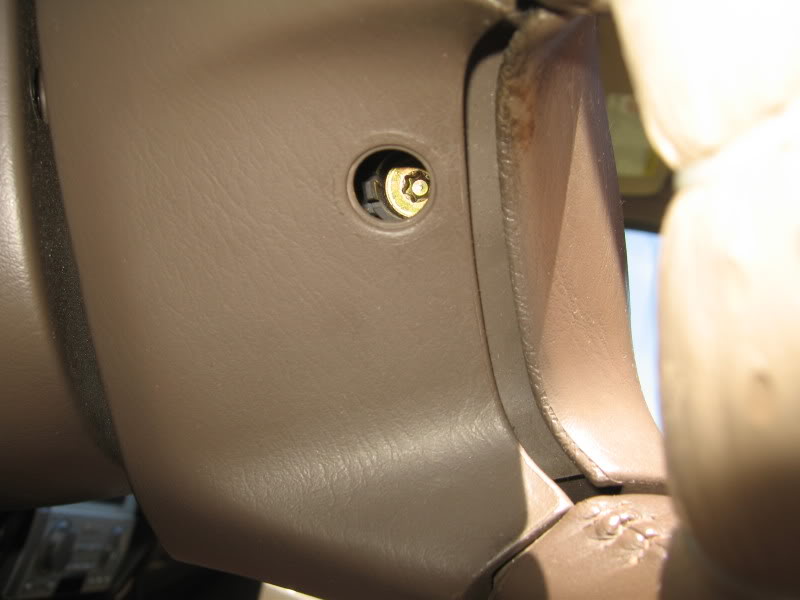
With the button cap removed, you can see the #27 torx nut. I started out removing it with 5/32 allen wrench
because I didn't think I had any torx bits. Later on, I did find a #27 torx bit. Btw, the screws don't actually
come out. They just loosen and stay in place.
Below is the torx screw on the left side of the wheel.
You remove the screw on either side of the wheel. Then you tuggle the horn/airbag assembly off the wheel.
You have to rock it back and forth to remove it.
After you dislodge the horn/airbag assembly, you will see there is one wiring harness (yellow) that needs to be
disconnected from the airbag assembly. While you're at it, go ahead and disconnect the other red wire with
white connector, since that needs to be done before removing the wheel.
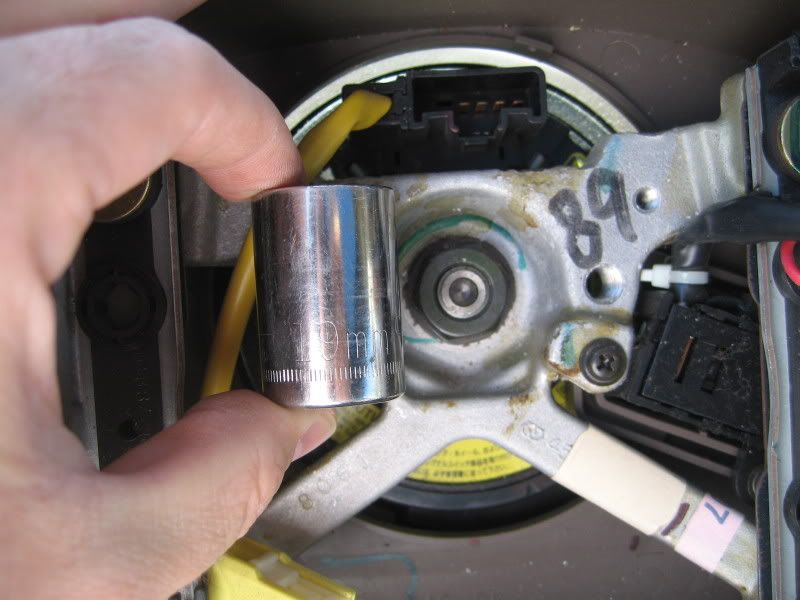
Remove the steering wheel nut using a 19mm socket.
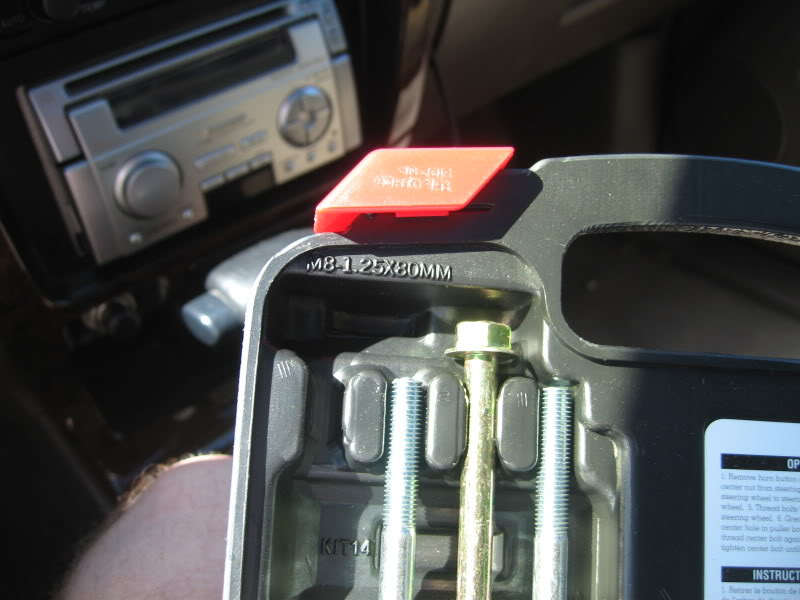
This is what the $5 rental steering wheel puller kit from my local Discount auto parts looks like. You give them
$30, they give you the kit. Then when you return it, they give you $25 back. You get something like 30 days
to borrow it.

You'll use the M8 1.25x80mm screws to remove the steering wheel.
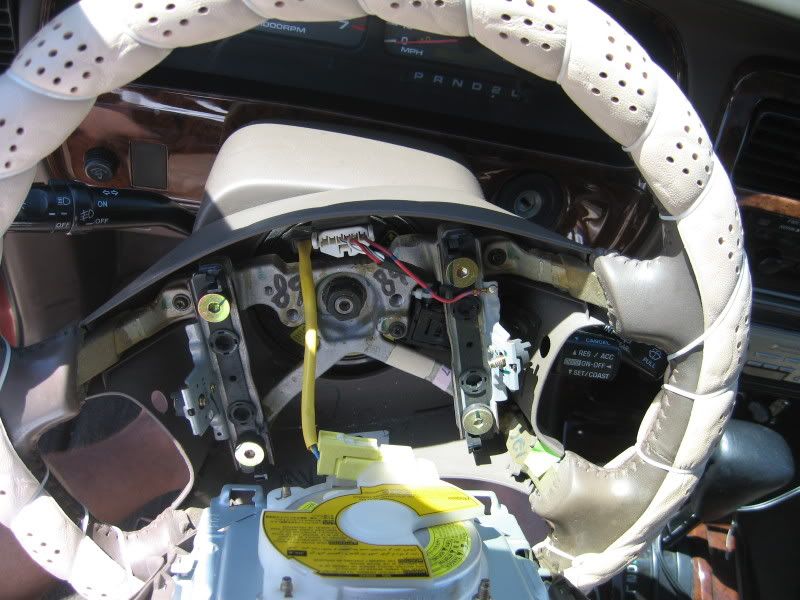
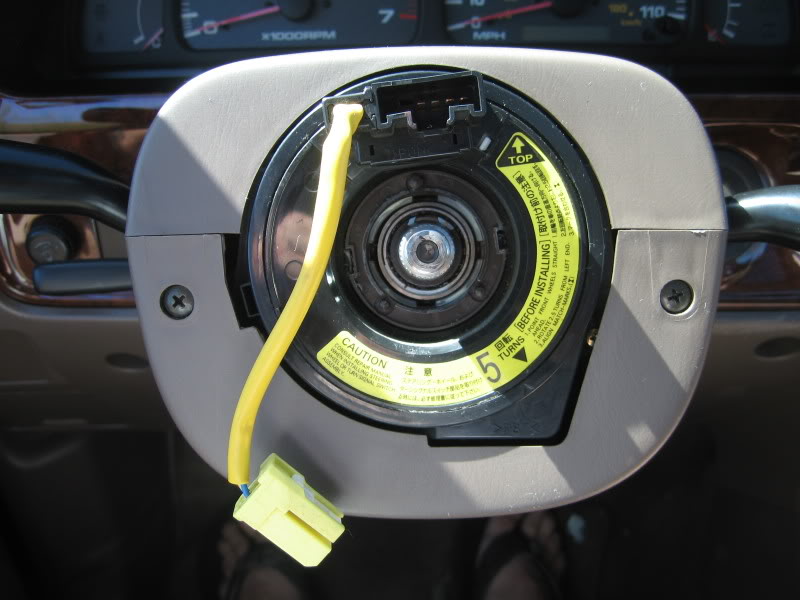
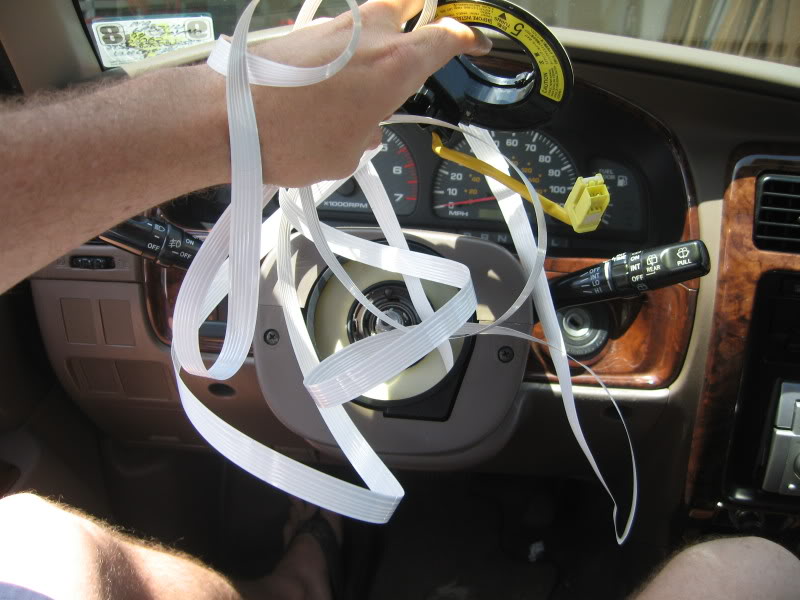
And this is what it looks like after you've removed the steering wheel! If you accidentally pull this black plastic
off also, then don't scream as you see 20' of white ribbon cable come flying out (I did ). Just wrap it
back up around the plastic bezel nice and tight, then rotate the plastic bezel five times to loosen the ribbon
cable (to allow for the wheel to turn completely) and you're good to go.
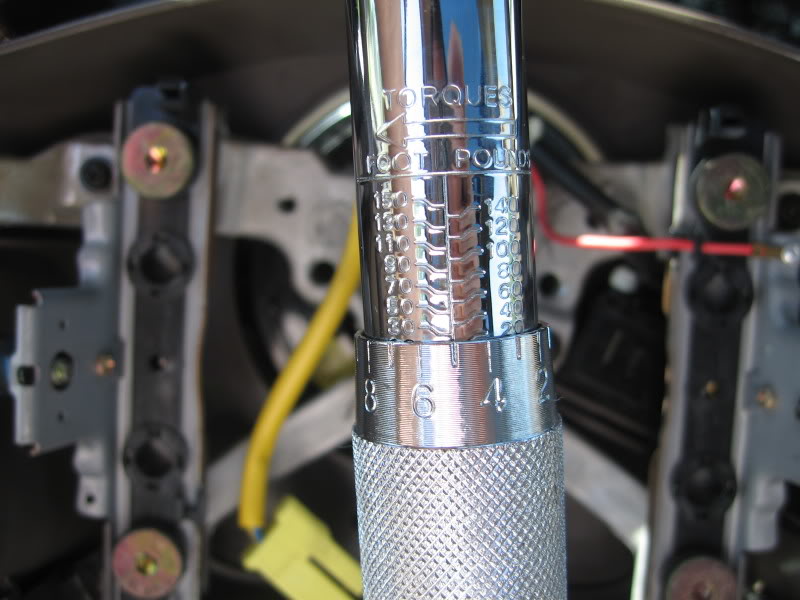
Now you're ready to put the new steering wheel in place. Put the steering wheel nut back on and torque it to 25ft lbs.
Put the two wiring harness connectors back on, put the horn/airbag assembly back on, then get the two torx
screws tight and the button caps back in place, reconnect the battery and it's time to test to make sure the
wheel is straight!
Mine wasn't the first time, so I had to redo it. It's very easy to get it straight once you figure out how it works.
I guess it took about an hour for me to do all this. But it's really only a fifteen minute job. Very easy.
'99 4runner limited.
My old steering wheel was fairly ratty looking. It got to a point where it started leaving gunk on my hands if it
was a humid enough day. So I wrapped it with a $2 gift from Autozone.
First, go ahead and disconnect the negative cable from the battery in your engine compartment. Then wait a
couple minutes before going any further, to allow for complete discharge of all remaining power in the system.
Someone above recommended 90 seconds. I waited at least five minutes each time.
To remove the wheel, you first pry off the little button covers using a knife or small screwdriver.
Below is the button cap on the right side of the wheel.
With the button cap removed, you can see the #27 torx nut. I started out removing it with 5/32 allen wrench
because I didn't think I had any torx bits. Later on, I did find a #27 torx bit. Btw, the screws don't actually
come out. They just loosen and stay in place.
Below is the torx screw on the left side of the wheel.
You remove the screw on either side of the wheel. Then you tuggle the horn/airbag assembly off the wheel.
You have to rock it back and forth to remove it.
After you dislodge the horn/airbag assembly, you will see there is one wiring harness (yellow) that needs to be
disconnected from the airbag assembly. While you're at it, go ahead and disconnect the other red wire with
white connector, since that needs to be done before removing the wheel.
Remove the steering wheel nut using a 19mm socket.
This is what the $5 rental steering wheel puller kit from my local Discount auto parts looks like. You give them
$30, they give you the kit. Then when you return it, they give you $25 back. You get something like 30 days
to borrow it.
You'll use the M8 1.25x80mm screws to remove the steering wheel.
And this is what it looks like after you've removed the steering wheel! If you accidentally pull this black plastic
off also, then don't scream as you see 20' of white ribbon cable come flying out (I did
). Just wrap it back up around the plastic bezel nice and tight, then rotate the plastic bezel five times to loosen the ribbon
cable (to allow for the wheel to turn completely) and you're good to go.
Now you're ready to put the new steering wheel in place. Put the steering wheel nut back on and torque it to 25ft lbs.
Put the two wiring harness connectors back on, put the horn/airbag assembly back on, then get the two torx
screws tight and the button caps back in place, reconnect the battery and it's time to test to make sure the
wheel is straight!
Mine wasn't the first time, so I had to redo it. It's very easy to get it straight once you figure out how it works.
I guess it took about an hour for me to do all this. But it's really only a fifteen minute job. Very easy.
Last edited by CZ Eddie; 04-05-2009 at 06:45 PM.
04-06-2009, 05:31 PM
#9
Registered User

Join Date: Jan 2009
Posts: 82
Likes: 0
Received 0 Likes
on
0 Posts
Very nice write-up! So if I have to hold my steering wheel slightly counter-clockwise to travel straight would this basically be how I would fix it? Guessing yes, which is hopefully the case as this has been bugging me for the last 25,000 miles or so.
04-06-2009, 06:03 PM
#11
Registered User
Join Date: Jan 2009
Posts: 82
Likes: 0
Received 0 Likes
on
0 Posts
No, it's not a joke and I don't believe I need an alignment. The 4runner travels dead-center straight down the road without holding the wheel. The wheel is just off-center.
Last edited by bootown; 04-07-2009 at 06:47 AM.
 04-09-2009, 06:10 PM
#13
Registered User
Join Date: Sep 2004
Posts: 47
Likes: 0
Received 0 Likes
on
0 Posts
It's normal to have the wheel slightly counter-clockwise when driving on the right side of the road. This is because roads are usually not flat, but concave, with the center being higher than the sides. So you are forced to turn the wheel slightly to the left, in order to travel straight.
Now if you're driving down the CENTER of the road and still have the wheel slightly to the left, then yeah there is a problem. An alignment fixes something like this in most instances.
I had to go back into the wheel again because the new wheel had a bad cruise control switch. Hopefully the seller will give me a partial refund to make up for it.
So I swapped my old switch in place. And figured you guys might like to see the spaghetti that can happen if you accidentally remove the black plastic that you should NOT remove.
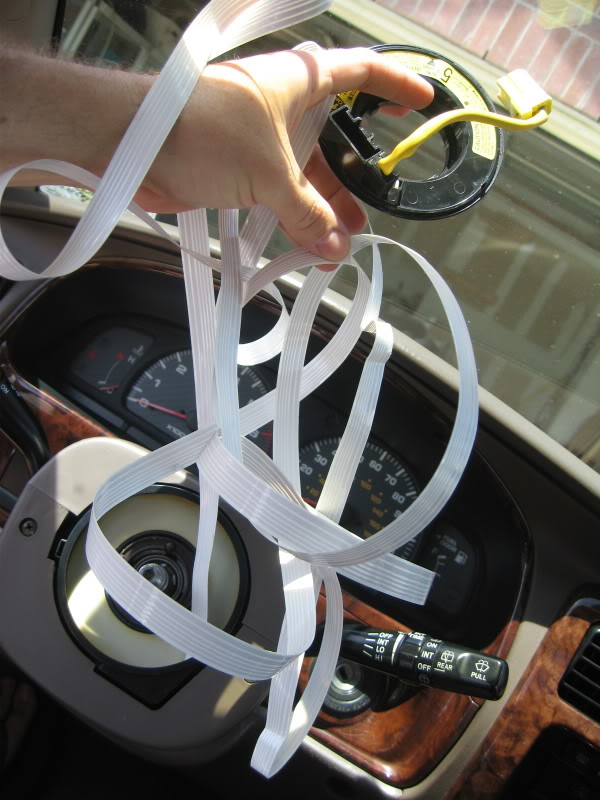
Yeah, it's not as bad as it looks.
 04-10-2009, 07:02 PM
#14
Registered User
Join Date: Apr 2009
Posts: 4
Likes: 0
Received 0 Likes
on
0 Posts
Thank you for this write with pics! I too am attempting to replace my steering wheel in a '98 4runner.
Question: when you rock the airbag assembly back and forth (with the battery disconnected), is there any way for the airbag to still go off?
I also ran into a big snag while trying to remove it. I have a stripped torx screw. I created another thread for this topic here:
https://www.yotatech.com/forums/f2/h.../#post51113488
08-03-2009, 10:54 AM
#15
Registered User

Join Date: Aug 2009
Posts: 5
Likes: 0
Received 0 Likes
on
0 Posts
I have a 98 Surf and the horn is not working. My Chinese mechanic says it is the part that is pictured above. He only speaks Chinese though so I don't know the name of it. Can someone tell me the name of the part with the white-tape like thing in it?

Thread
Thread Starter
Forum
Replies
Last Post
RedRunner_87
95.5-2004 Tacomas & 96-2002 4Runners (Build-Up Section)
84
06-01-2021 01:51 PM
Jnkml
95.5-2004 Tacomas & 96-2002 4Runners
3
07-06-2015 01:20 PM


