ordered OME suspension: any install tips?
 05-05-2009, 09:05 AM
#1
Registered User
Thread Starter
Join Date: Feb 2008
Location: Ohio
Posts: 80
Likes: 0
Received 0 Likes
on
0 Posts
ordered OME suspension: any install tips?
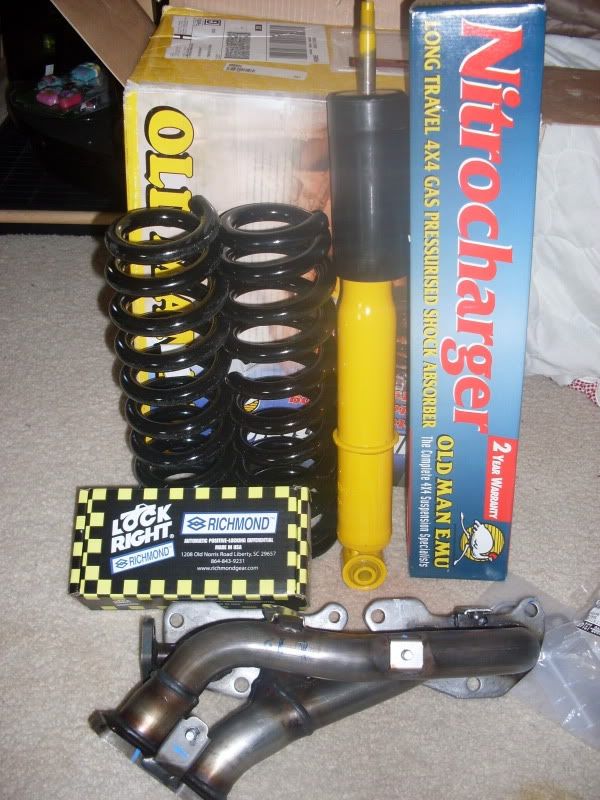
I just ordered my OME suspension from Man-A-Fre. I ordered the light/medium load. Does anyone have any tips that will make the installation smoother? Will I need an alignment after?
 05-05-2009, 09:41 AM
#3
Registered User

Join Date: May 2007
Location: Lexington, KY
Posts: 80
Likes: 0
Received 0 Likes
on
0 Posts
^^
x2 on soaking things in PB Plaster.. stuff makes taking off suspension parts so much easier.
Take your time on the install, and don't rush it. If it ends up taking you 2 days, then let it take 2 days, as long as you do everything right.
You should get an alignment when it is all done as well.
x2 on soaking things in PB Plaster.. stuff makes taking off suspension parts so much easier.
Take your time on the install, and don't rush it. If it ends up taking you 2 days, then let it take 2 days, as long as you do everything right.
You should get an alignment when it is all done as well.
05-05-2009, 04:13 PM
#4
Registered User
Join Date: Oct 2008
Location: Northwest, Ohio
Posts: 97
Likes: 0
Received 0 Likes
on
0 Posts
An OME 5mm front trim packer, 10mm front top out spacers and new set of extended front studs would make the job really nice and easy. I just listed them in the marketplace.
https://www.yotatech.com/forums/f11/...packer-181389/
https://www.yotatech.com/forums/f11/...packer-181389/
Last edited by DavidAlexander; 05-05-2009 at 04:16 PM.
05-05-2009, 05:19 PM
#5
Registered User
Thread Starter
Join Date: Feb 2008
Location: Ohio
Posts: 80
Likes: 0
Received 0 Likes
on
0 Posts
What will those do for me? Why would it make things easier? I honestly haven't even looked at the suspension yet.
05-06-2009, 12:02 AM
#6
Registered User
I just did OME on my rig. PB Blaster is your new jesus! You can't use too much.
Be ready to order bolts/nuts from toyota if you have 'persuade' the old stuff to come off. I know I had to haul out the cut-off wheel a few times in my install...
After that, ENOJY!!!!
I can't say how happy am with my stuff!
Be ready to order bolts/nuts from toyota if you have 'persuade' the old stuff to come off. I know I had to haul out the cut-off wheel a few times in my install...
After that, ENOJY!!!!
I can't say how happy am with my stuff!
05-06-2009, 04:42 AM
#7
Registered User

Trending Topics
05-06-2009, 08:28 AM
#8
Registered User
Join Date: May 2007
Location: Lexington, KY
Posts: 80
Likes: 0
Received 0 Likes
on
0 Posts
^^
Thanks for that link... just ordered a set of 13.
Usually end up pulling out the dremel, and cutting slits into the nut then removing it, but tight areas don't always allow that.
Thanks for that link... just ordered a set of 13.
Usually end up pulling out the dremel, and cutting slits into the nut then removing it, but tight areas don't always allow that.
05-06-2009, 09:48 AM
#9
Registered User
They are awesome, my only word of advice is make sure you are on as flush as possible. Once they start to "bite" into the bolt they do not come off easy so knuckle bust city if they are not on flush or you will snap the head off the bolt. And as someone said before new hardware may be needed (especially if you use the bolt extractors).
05-06-2009, 09:54 AM
#10
Registered User
Join Date: Jun 2008
Location: El Paso, TX
Posts: 104
Likes: 0
Received 0 Likes
on
0 Posts
You will probably need to use your stock jack upside down against the top of the wheel well to push the a-arm down in order to fit the longer shock in. Also, it will make it ALOT easier if you disconnect the swaybar from the lower suspension arm and also unbolt the 4 lower ball joint bolts (make sure you use that blue threadlock to retighten these bolts). You will need a jackstand and big floor jack for this.
 05-06-2009, 07:35 PM
#12
Registered User
Join Date: Oct 2008
Location: Northwest, Ohio
Posts: 97
Likes: 0
Received 0 Likes
on
0 Posts
Like the others have chimed in, having the new set of studs for the top plate can make your job go really smoothly. The hardware is usually pretty bad from exposure to the elements.

 05-07-2009, 12:07 AM
#14
Registered User
05-07-2009, 12:24 PM
#15
Registered User
Thread Starter
Join Date: Feb 2008
Location: Ohio
Posts: 80
Likes: 0
Received 0 Likes
on
0 Posts
What's the trick to the upper mount of the rear shock. I soaked everything in mouse milk and when it came to the rear shock I couldn't even feel the nut. I hope the shock just turns into a nut that is welded up there.
07-22-2009, 08:05 PM
#16
Registered User
Join Date: Aug 2008
Location: Nor, CAL
Posts: 1,816
Likes: 0
Received 0 Likes
on
0 Posts
Just my $.02
07-22-2009, 08:43 PM
#17
Registered User
Join Date: Mar 2009
Location: Palmetto
Posts: 33
Likes: 0
Received 0 Likes
on
0 Posts
front shocks you wanna take some were to get the springs installed, trust me i fought with the autozone spring compresser for 2 days. make sure you align the top studs the way they came out on ur new front shocks. i used the stock bottle jack to push the uca down far enough that the shocks could fit in, they take alil poundn to get them in there. rear shocks arnt that bad, i would just cut them out if ur not gunna use the stock stuff again. you wanna put jackstands under the frame rails as high as you can so the axle can droop, get a floor jack and jack up one side of the axle until the spring practicaly falls out. then repeat on the other side and install your new shocks and springs. search around and ul find plenty of write ups. im 17 and have pretty much no mechanical skills what so ever and i did the lift in 2 days, of course i had air tools to 


Thread
Thread Starter
Forum
Replies
Last Post
MTLroadierunner
86-95 Trucks & 4Runners
1
07-20-2015 03:07 PM
crashburnoveride
86-95 Trucks & 4Runners
1
07-10-2015 06:39 AM


