Operation: PATWGN Rear Bumper!
 11-09-2013, 07:28 PM
#1
Operation: PATWGN Rear Bumper!
Operation: PATYWGN Rear Bumper!
Here is my thread about my rear bumper build that I completed over the summer. Took a long time but I wanted it to be perfect so I opted to take my time and do it right. Hope you enjoy.
I first started mocking it up with some welding rod as a skeleton. This way I could easily tweak the design and visualize how it would look.

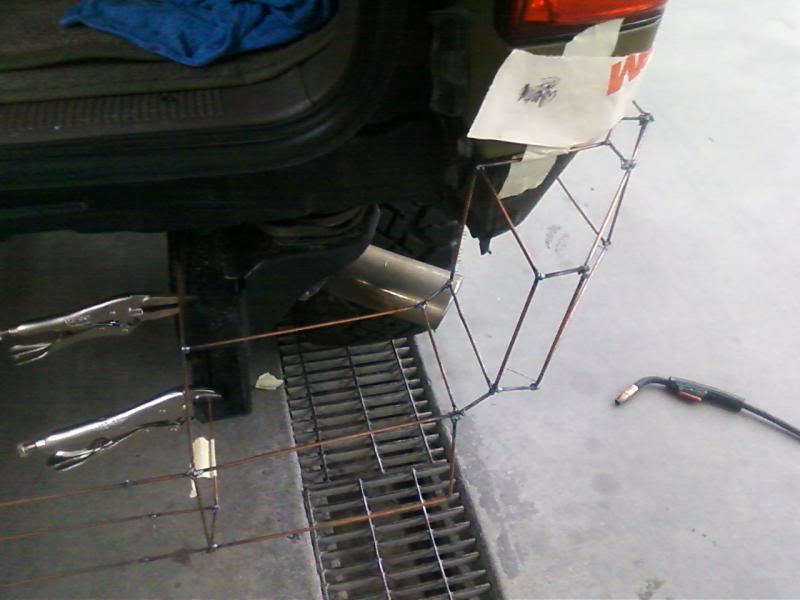

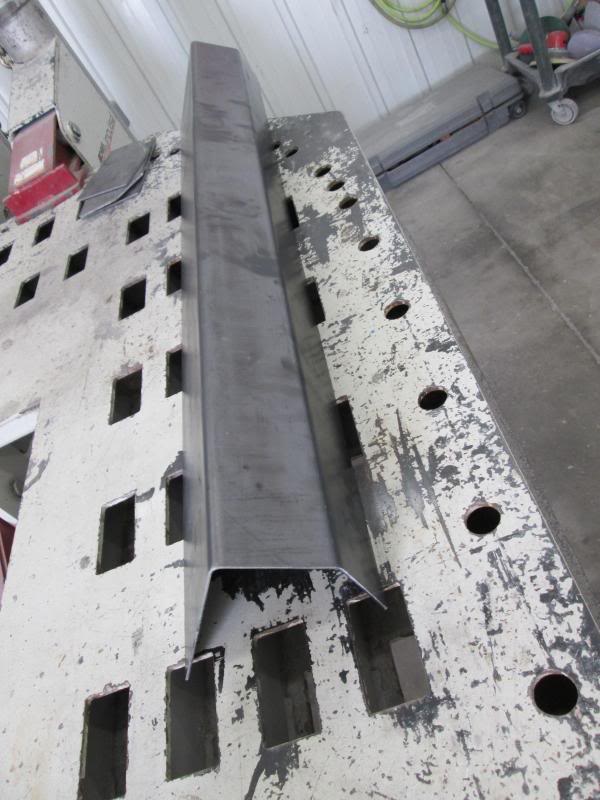
Then, I made some drawings and a couple poster board templates and took them in to a local steel company. The 4 mounts are 1/4" steel, and the center section was bent to follow the shape of the mounts. All other steel used on the project was 1/8".
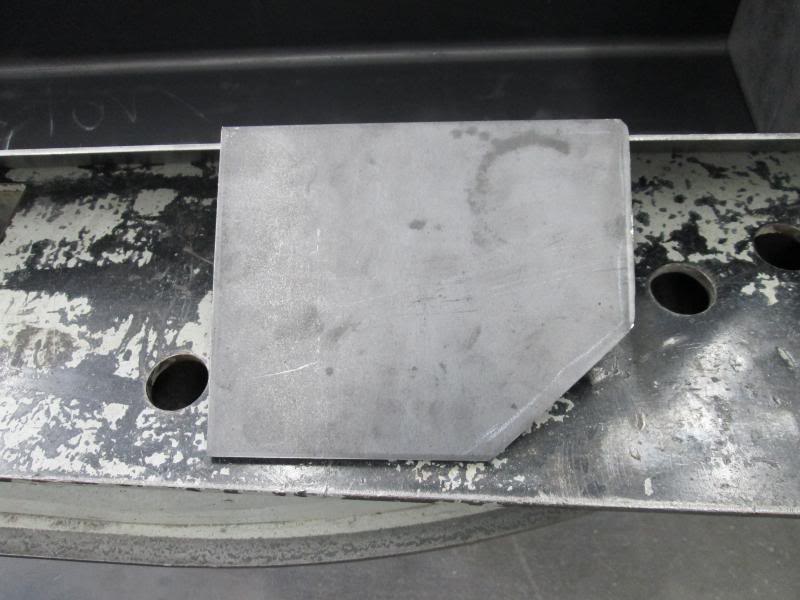
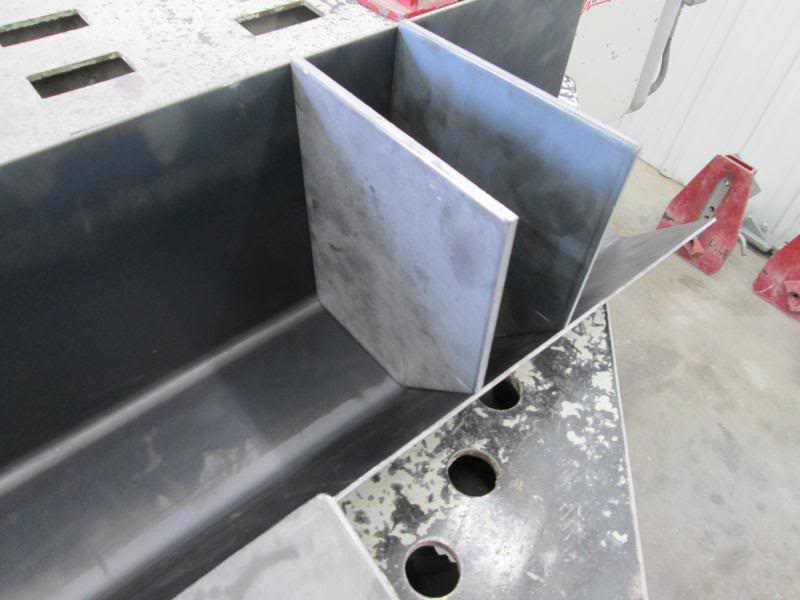
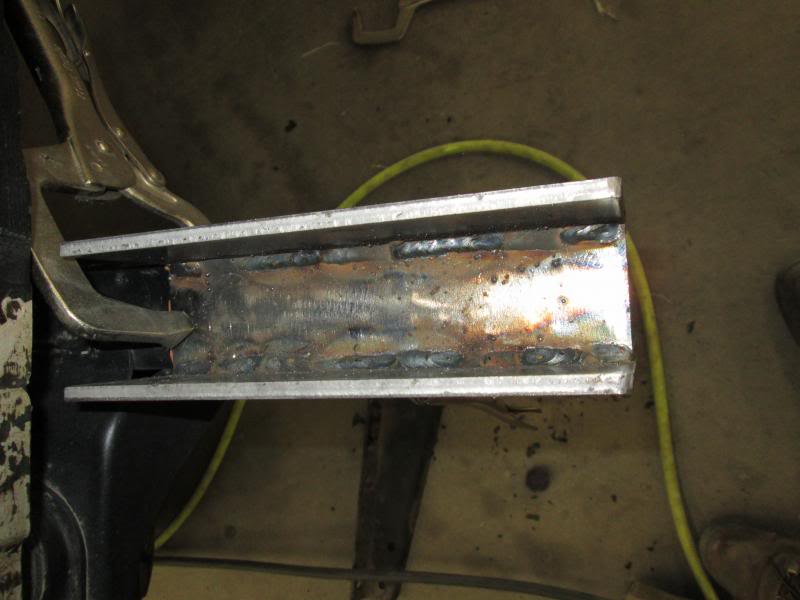
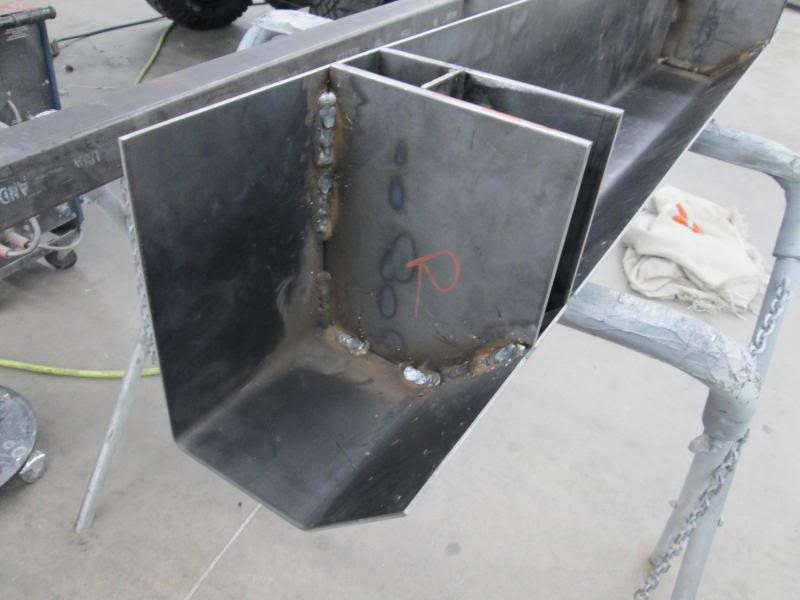
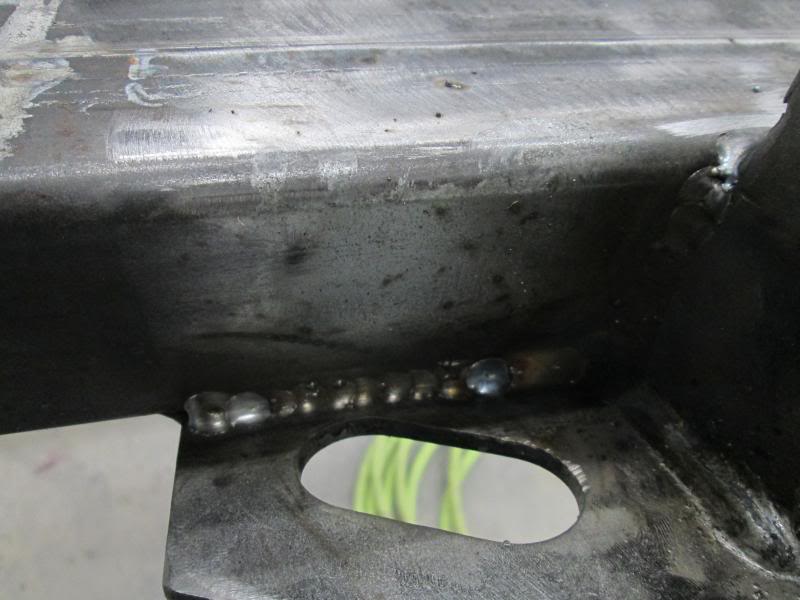
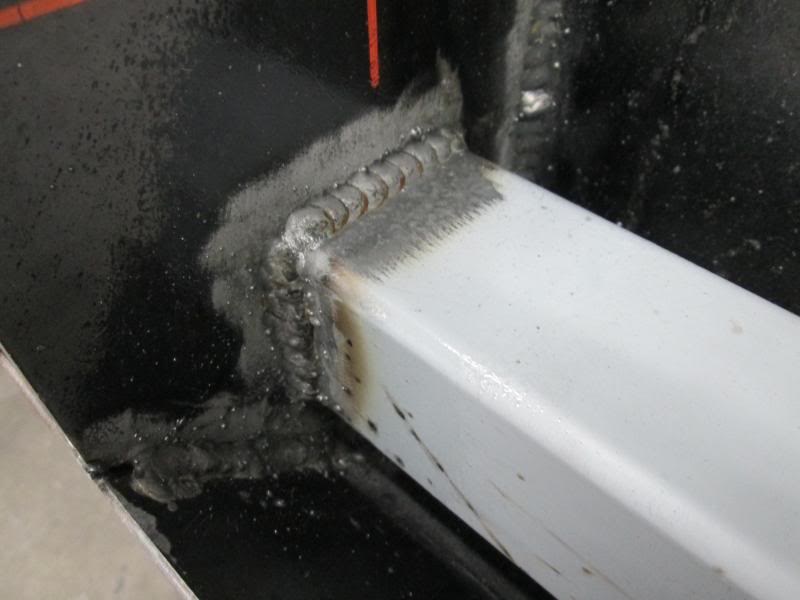
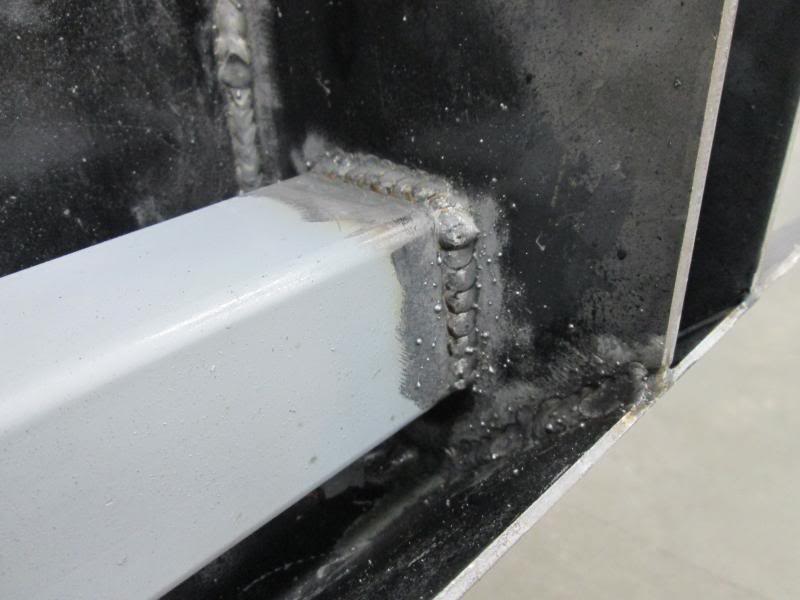
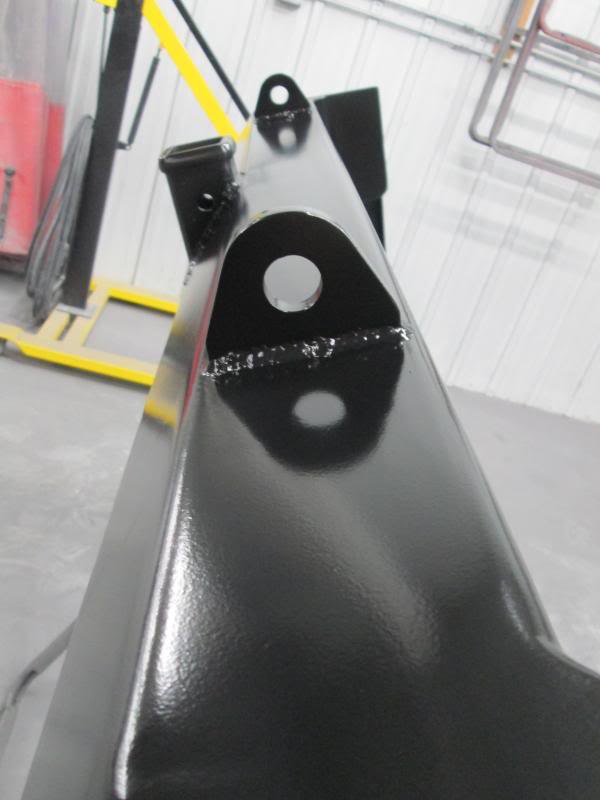
Here are some pics of welding the center mounts. I welded a flat piece between them so when I put the bumper on it rests on the frame and I�m not having to balance a heavy bumper while fumbling with the mounting hardware.
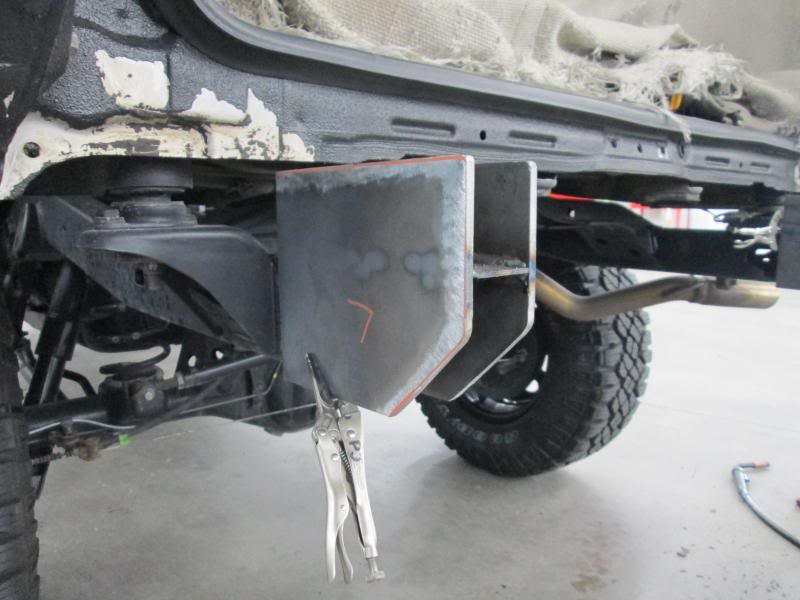
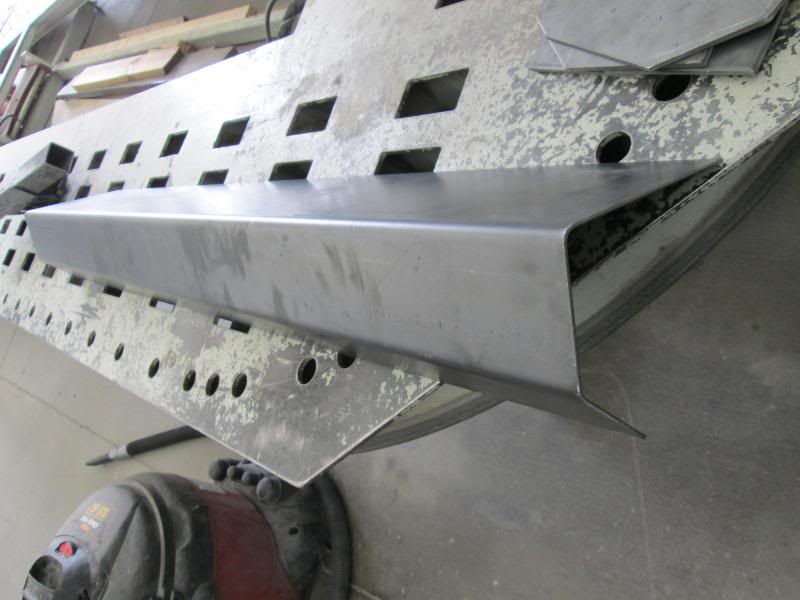
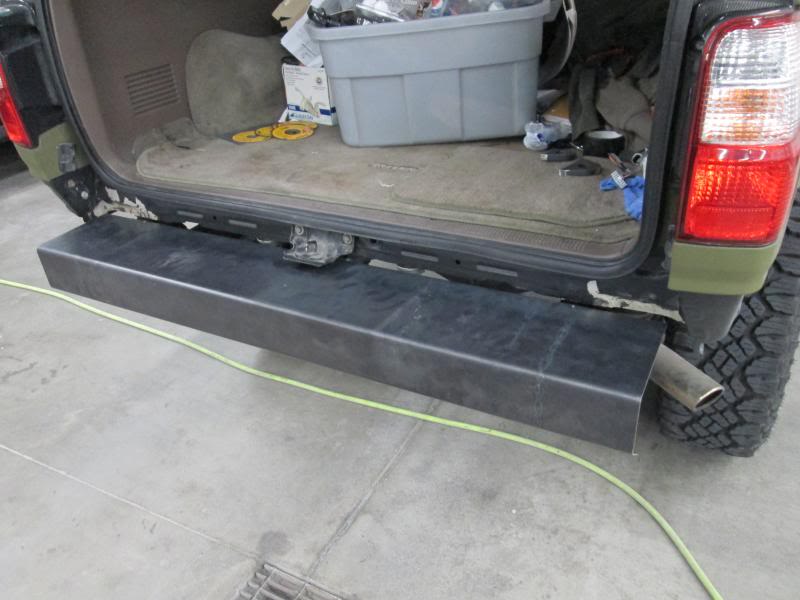
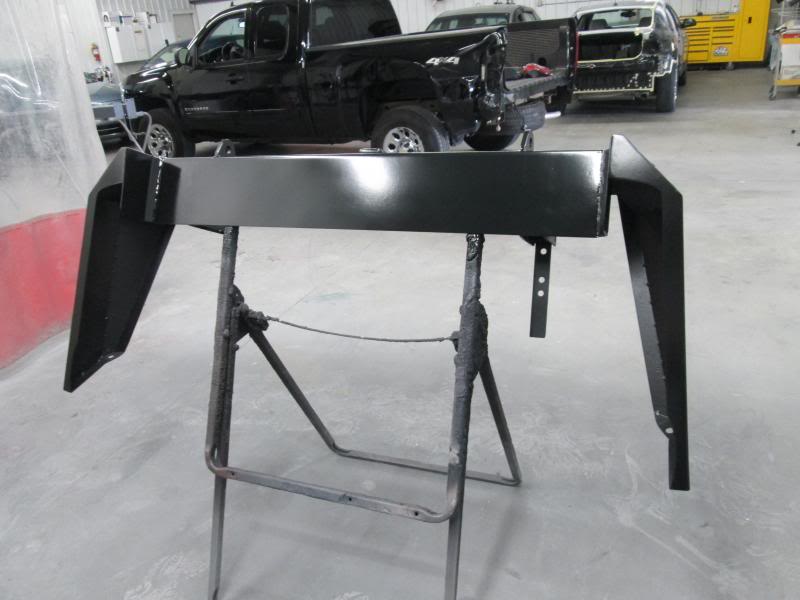
Then I set the main center piece on the center brackets, tacked in place, then removed and welded the brackets securely to the outer center bumper section.
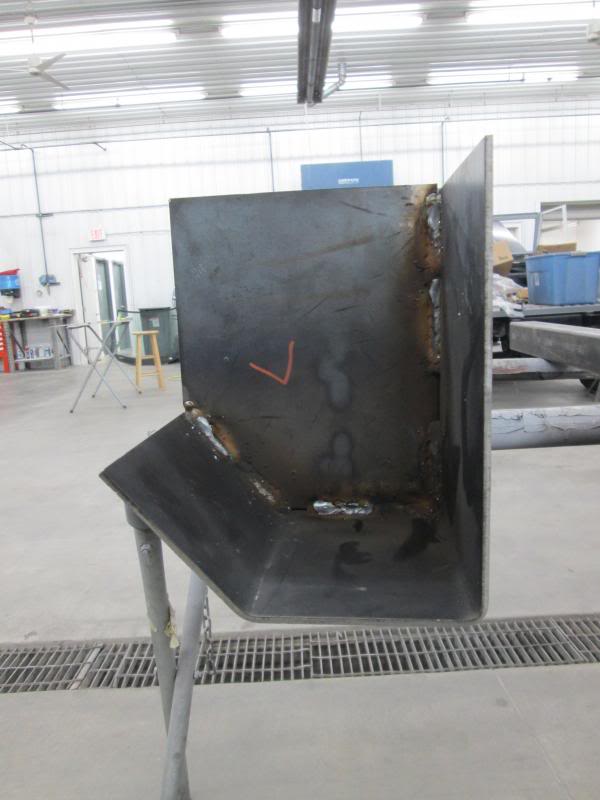
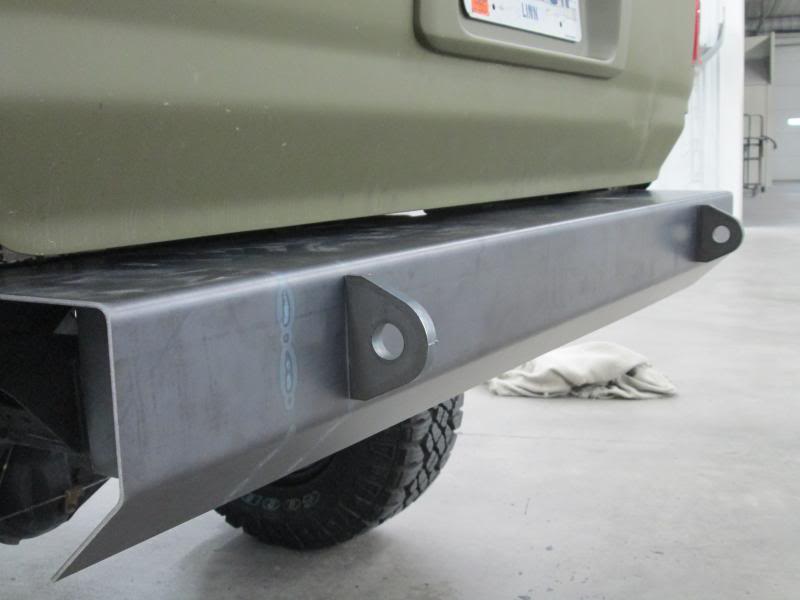
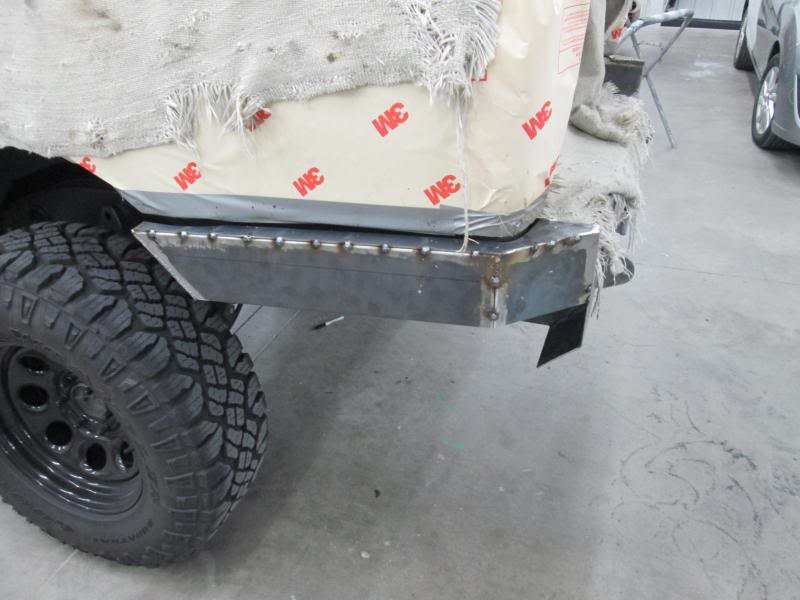
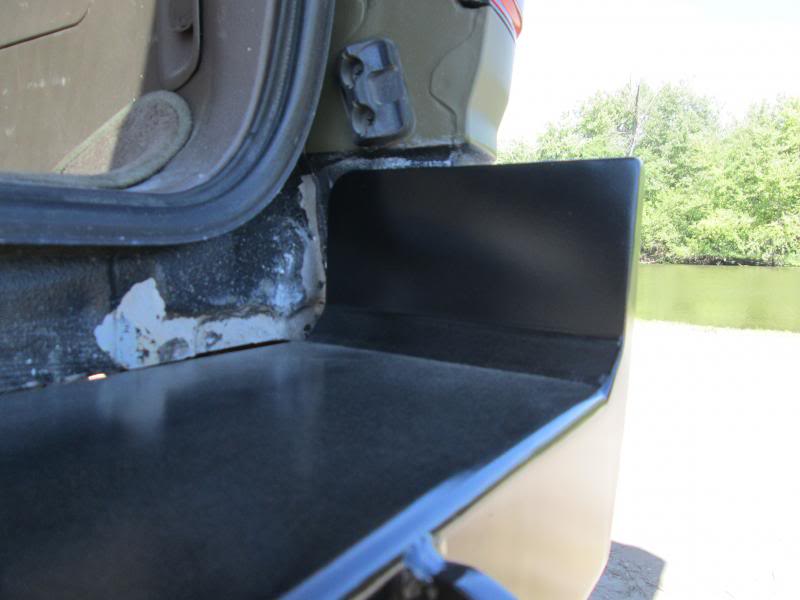
Here is how it sits.
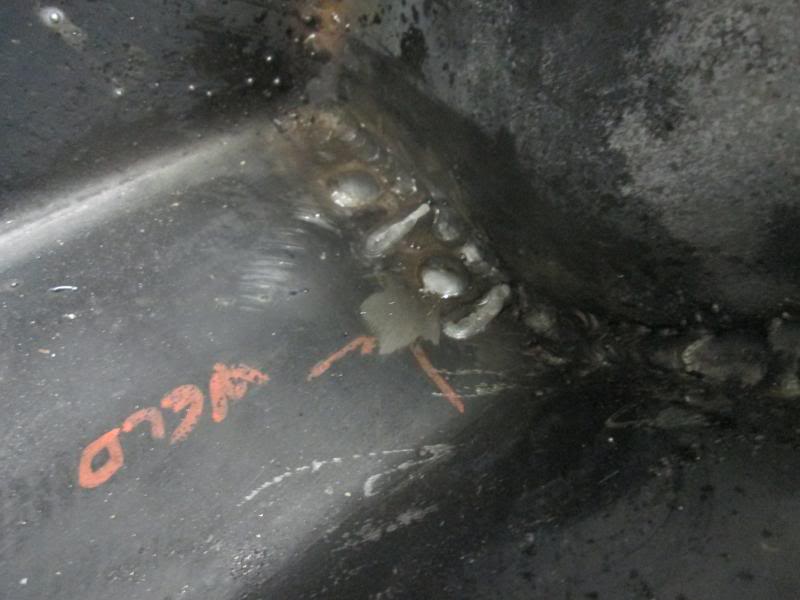
I used some double sided molding tape to see approx where I wanted the D ring mounts to be. Just a preview. BTW, look at that burn through from the brackets! PENETRATION!!
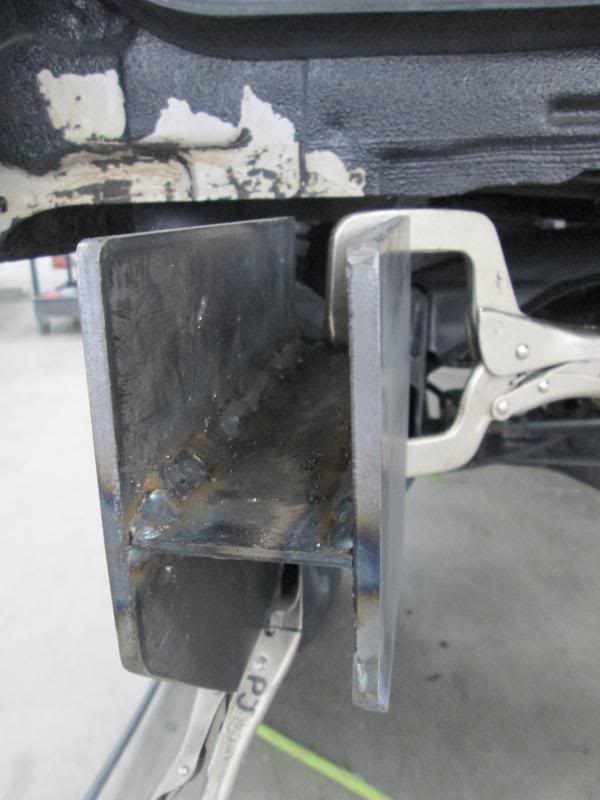
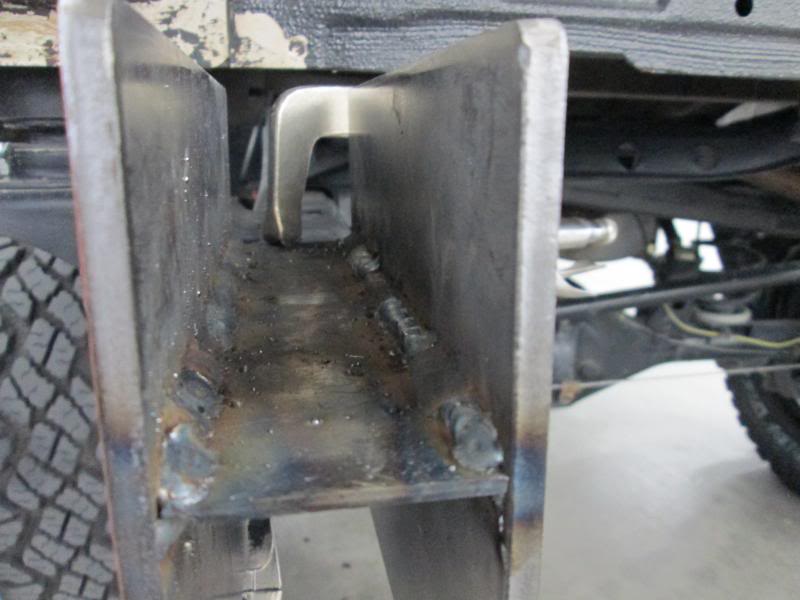
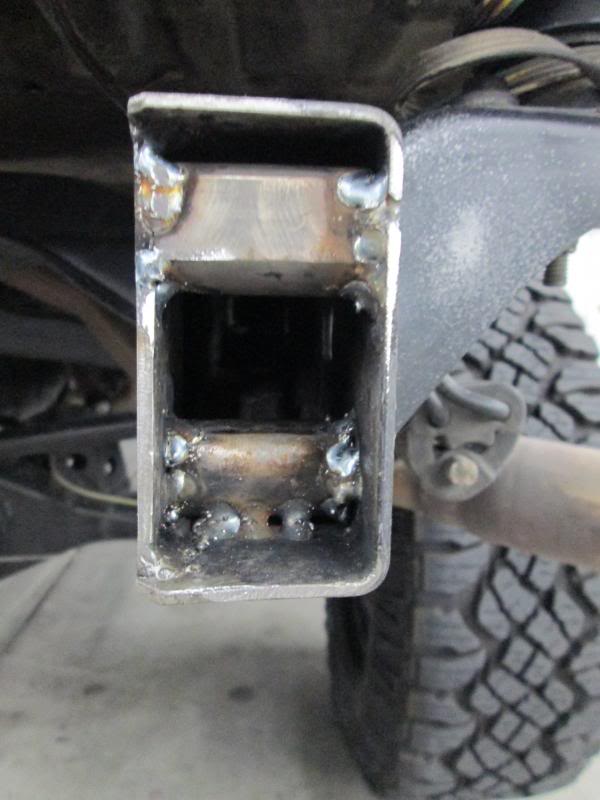
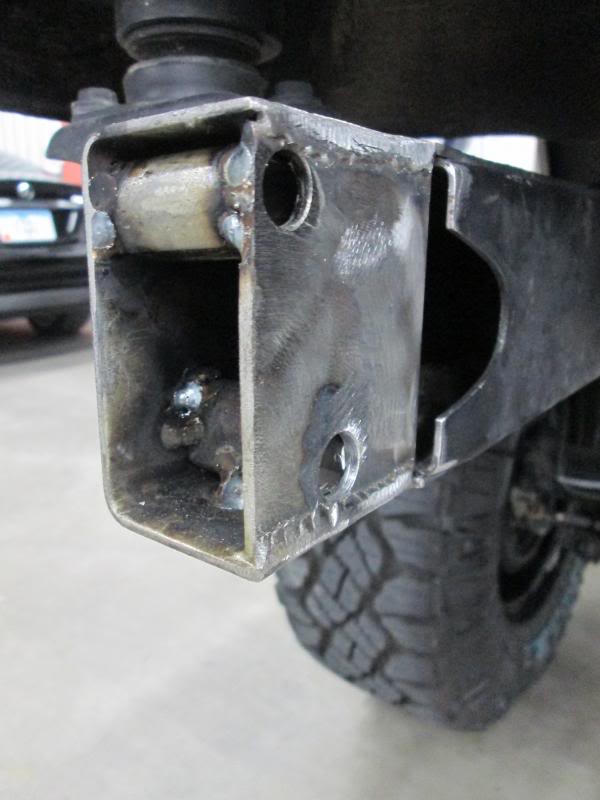
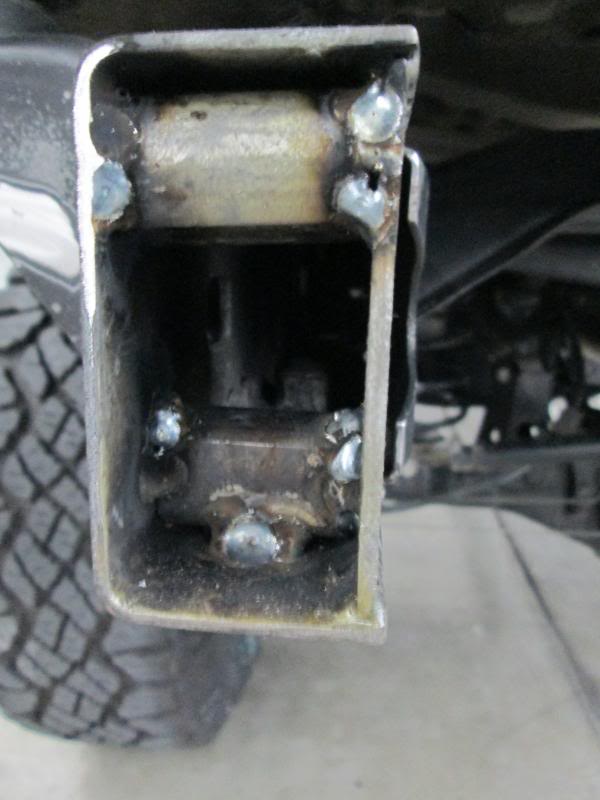
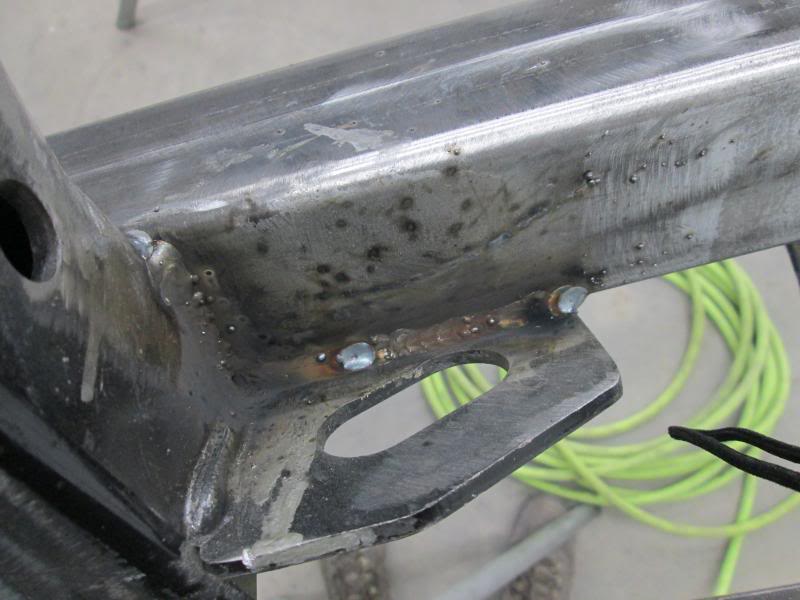
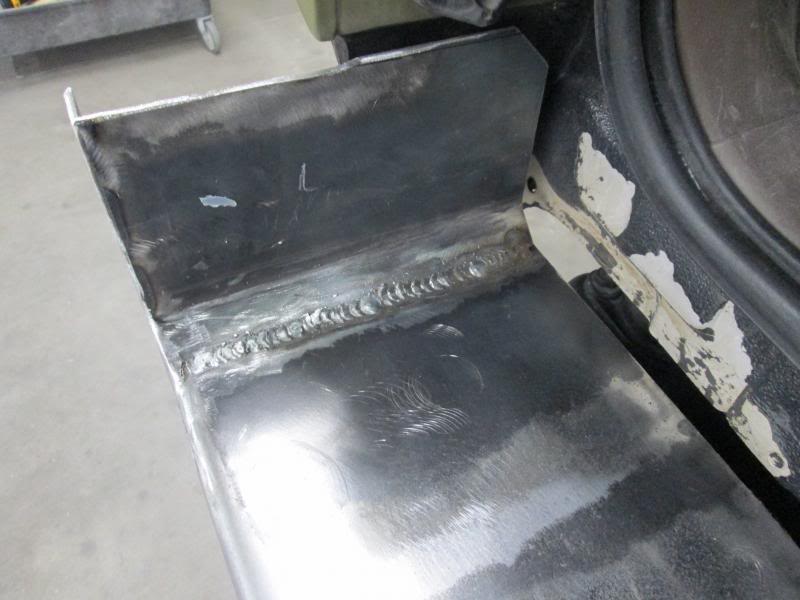
I modified my frame ends by boxing the insides with a piece of 1/8" steel, then welded in some round tube inside the frame ends where the bolts would go. In retrospect I could have done something better like sleeving and extending the frame rails a bit more to mount the brackets but hey, this was my first time doing this and I�m not a professional.

All boxed in.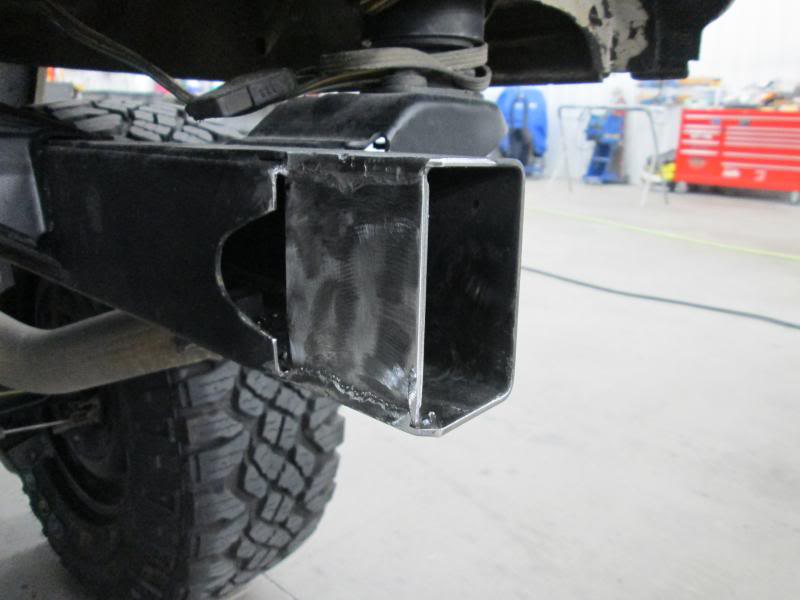
Round tube welded in for the frame mounting bracket hardware.
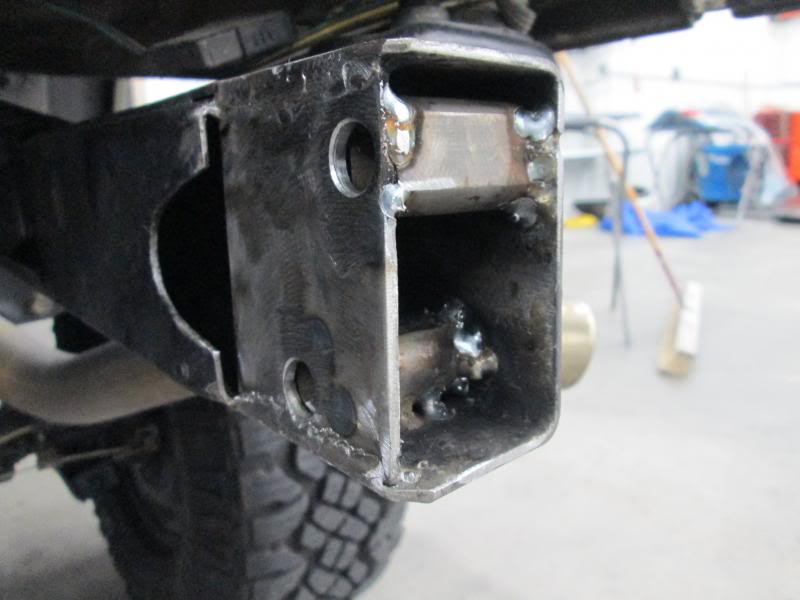
Not pretty but it works and will be covered up.
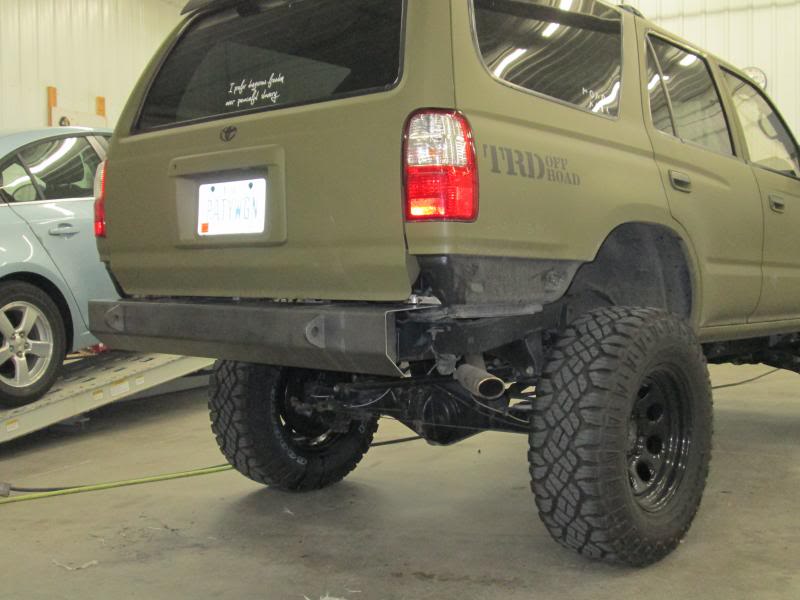
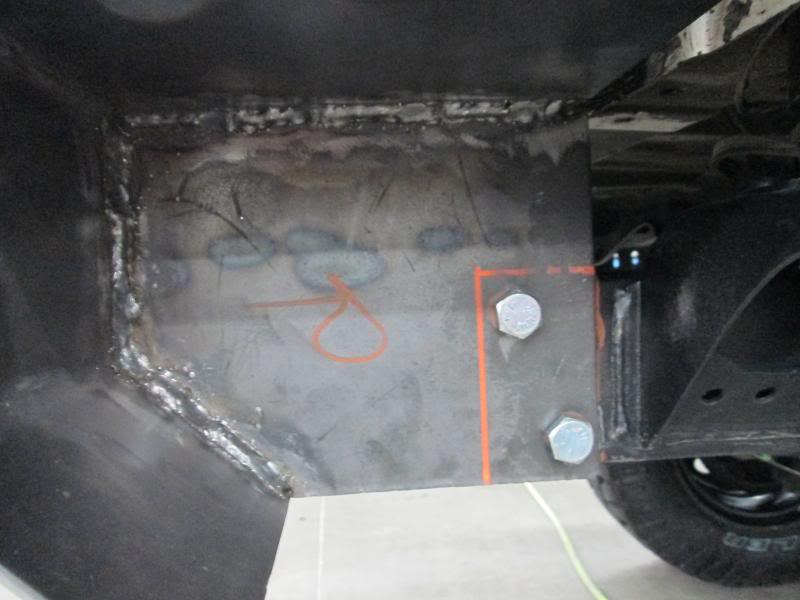
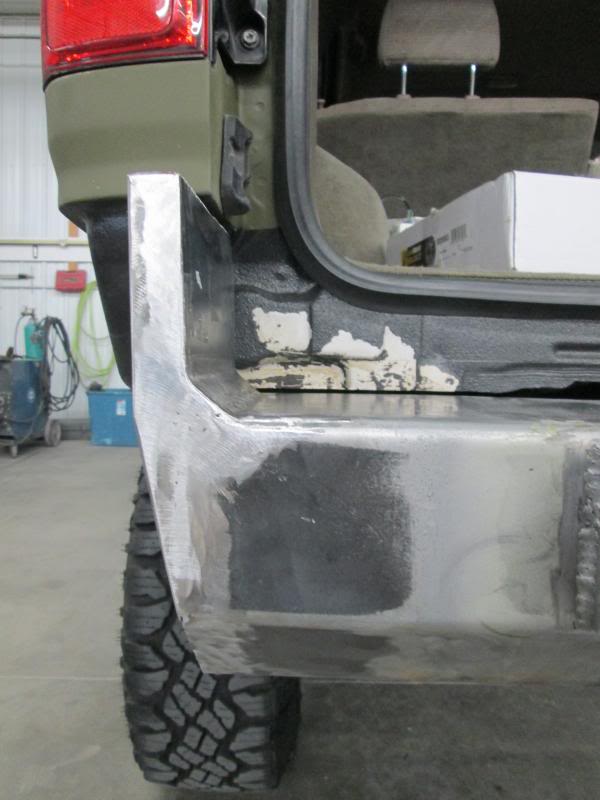
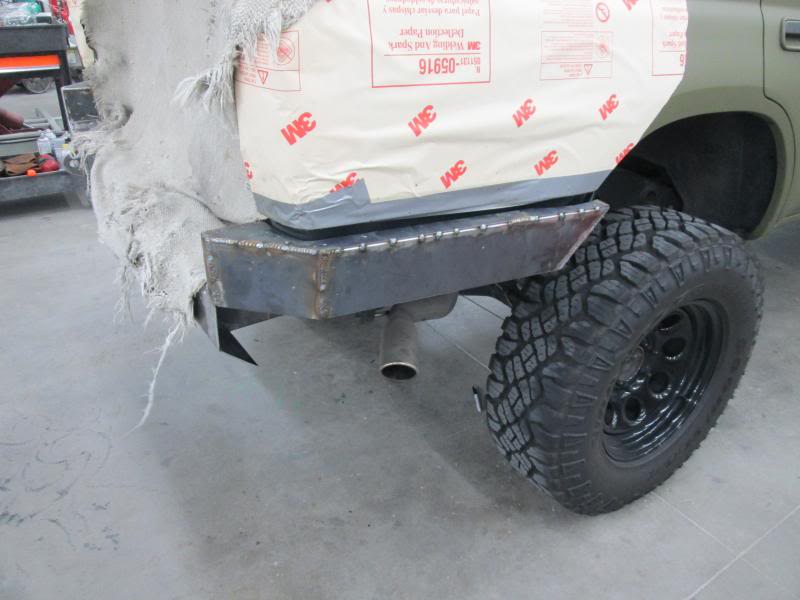
Test fit on the center, looks pretty good!
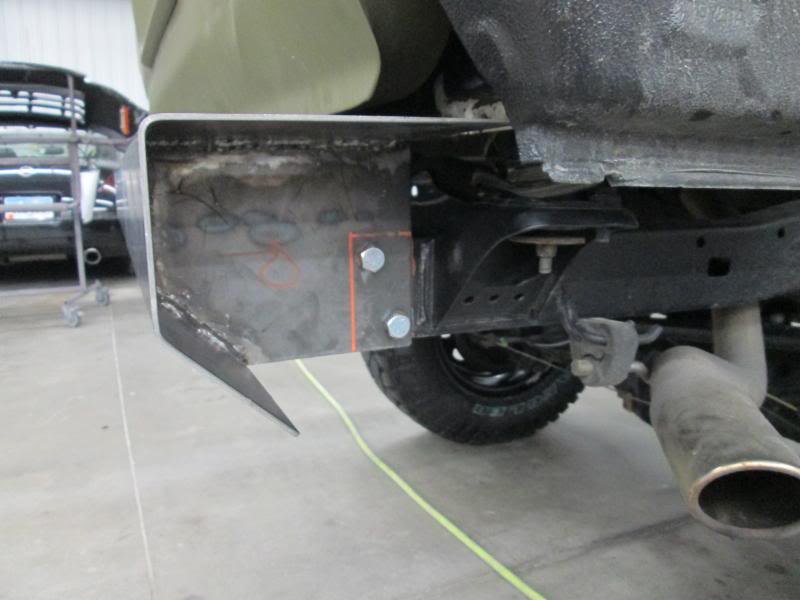
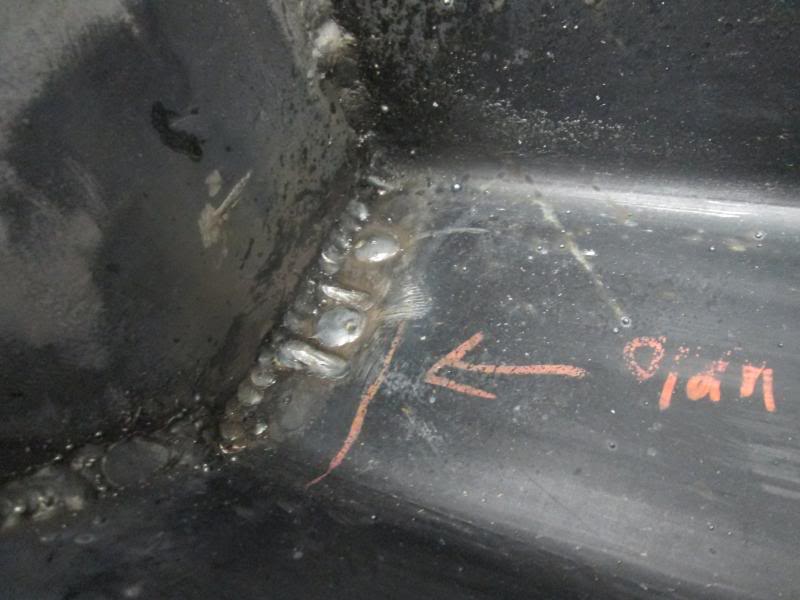
The orange marks show approx where the frame ends. This is a good shot of why I now think I should have extended the frame rails a little further but I think it will be OK. Hindsight is a real bitch.

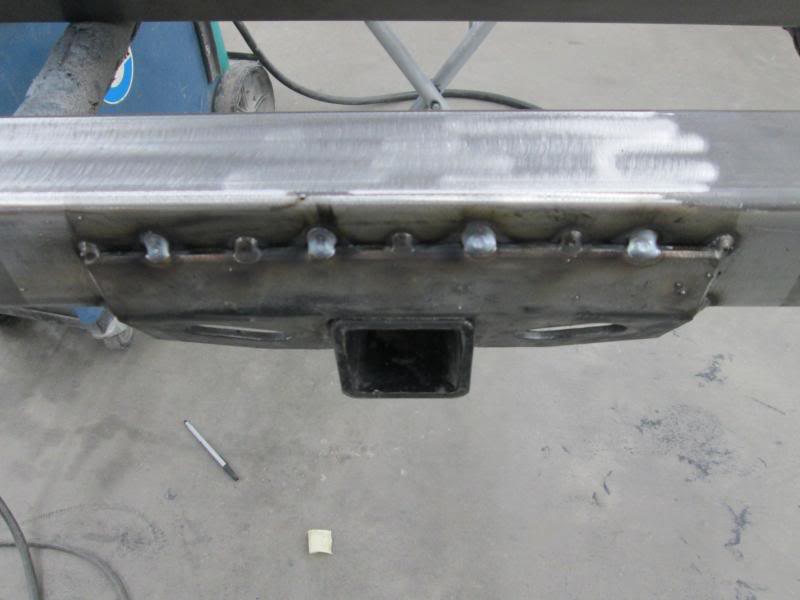
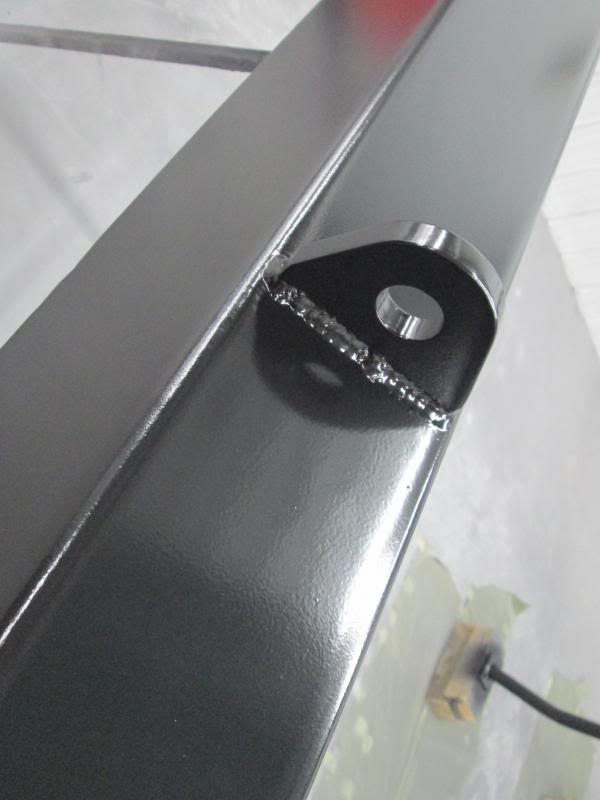
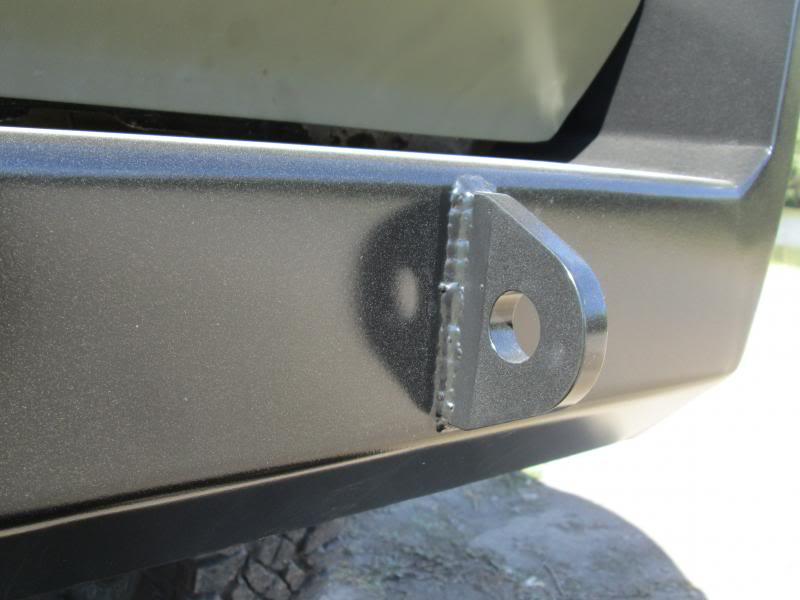
I drilled holes behind the D rings and plug welded them, and then welded them on the face of the bumper as well.
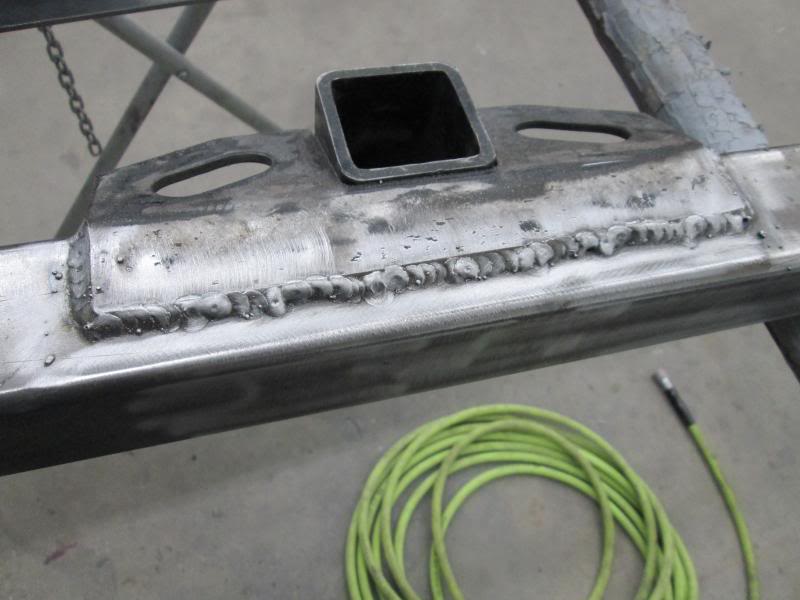
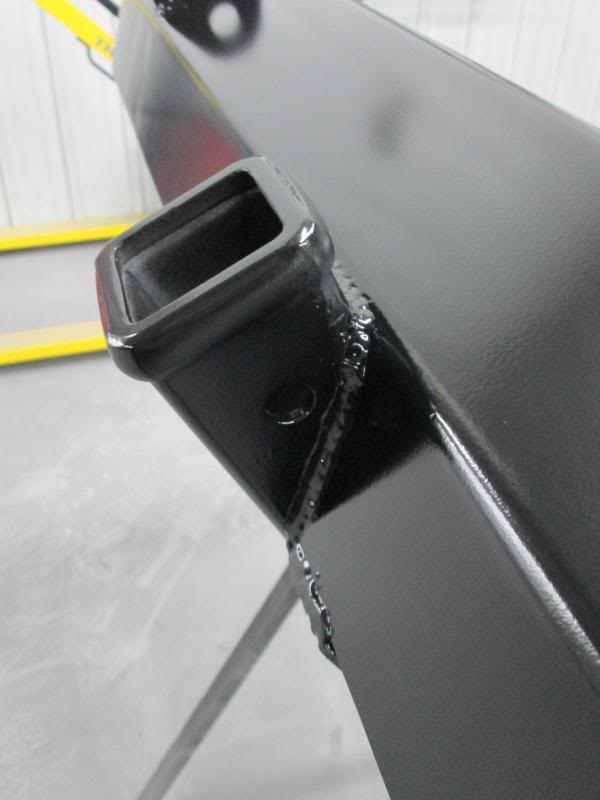
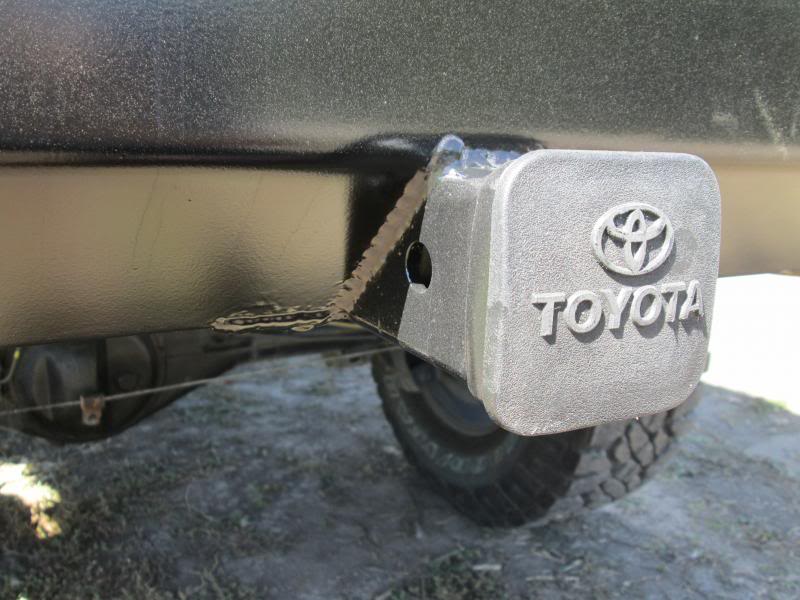
I work at a body shop and we had a bunch of newer Ford F150s come in with rear bumper damage. Most needed the hitch/bumper support sections replaced but the hitches themselves were salvageable. I saved a couple good ones knowing I wanted to use them on my bumper builds. Unfortunately the square tube they were attached to was not wide enough and I would not be able to use it. I cut the 2" receiver off the old square tube, bought a new section of square tube, welded the receiver to the new tube, notched the center of my bumper, and welded the receiver section to the frame mounts and to the exterior of my bumper.
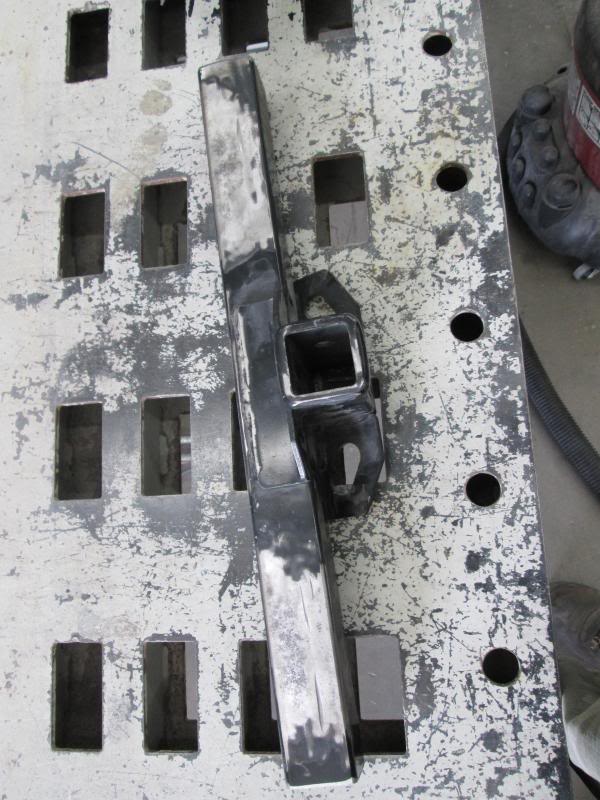
I cut the receiver off the square tube, looks a bit phallic in this pic.
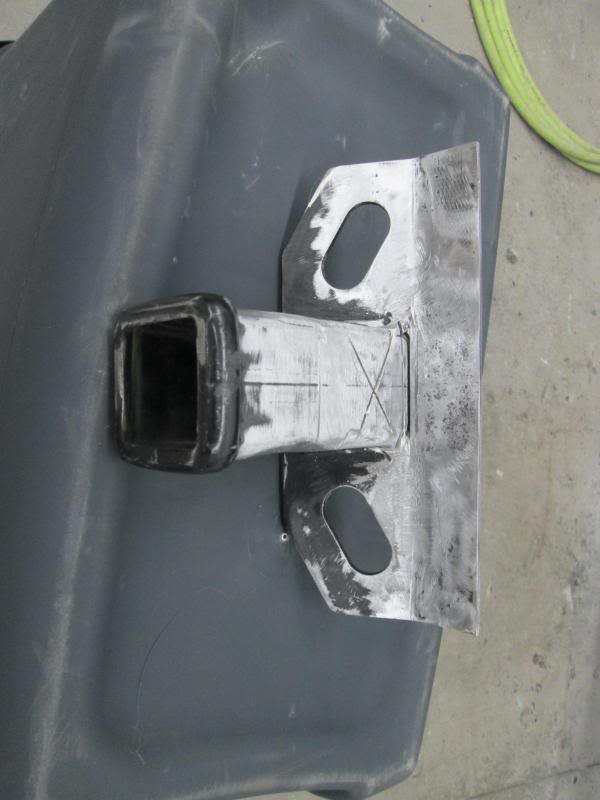
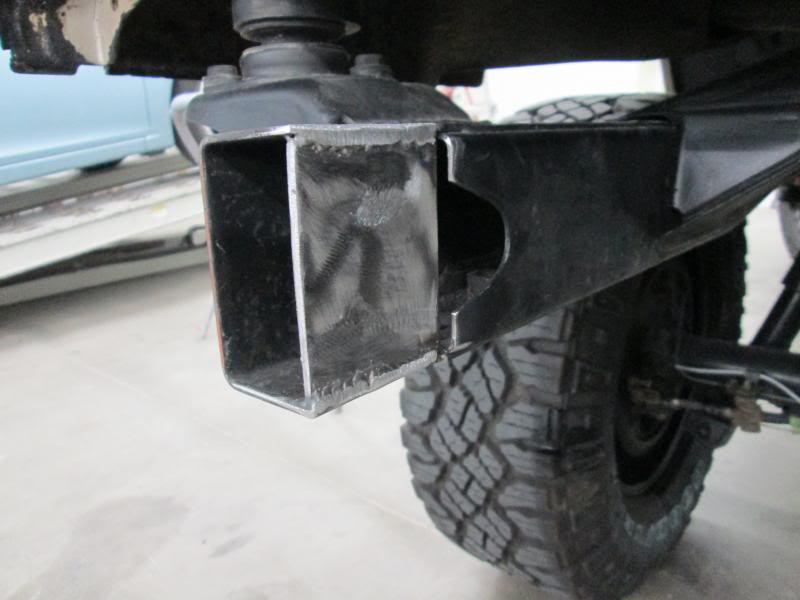
Here it is clamped onto the new square tube ready to be tacked in.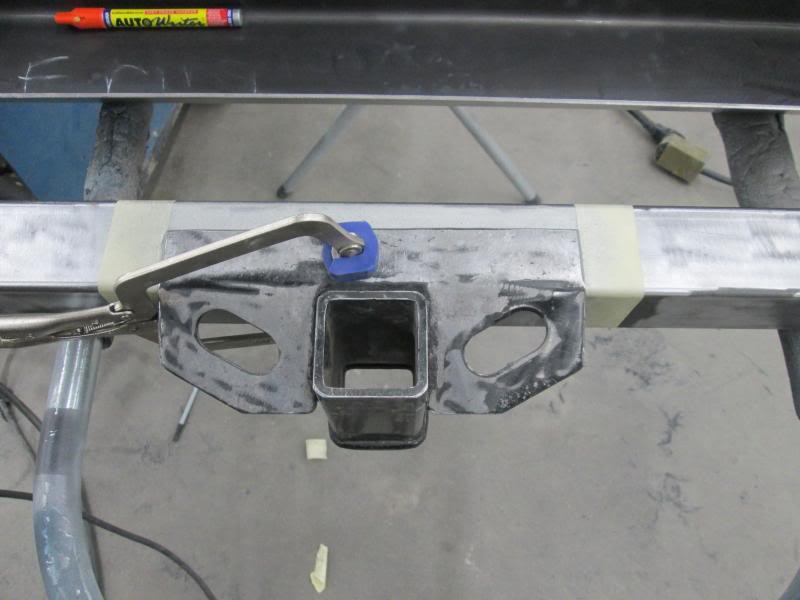
Tacked in and ready for full welds.
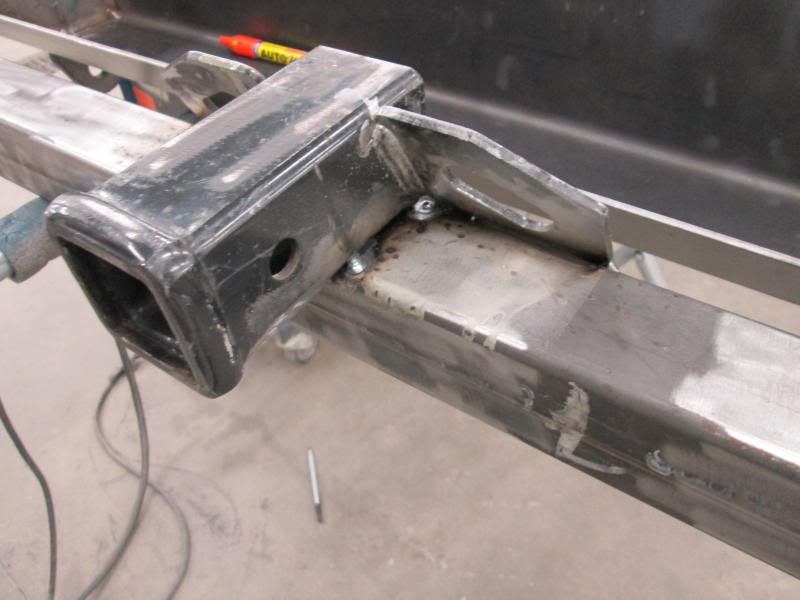
All welded up.
It was a long day. Don�t be too harsh about my wandering welds. It�s not pretty but it�s not going to show so cut me some slack.
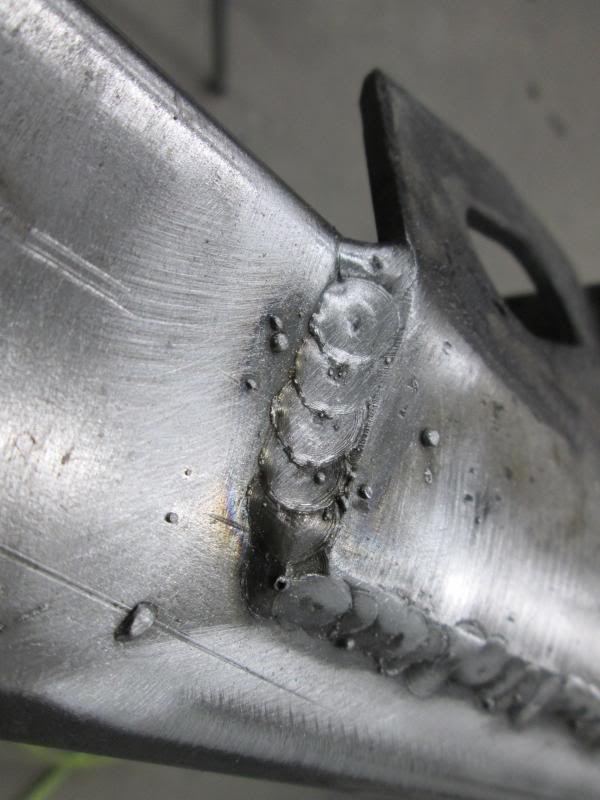
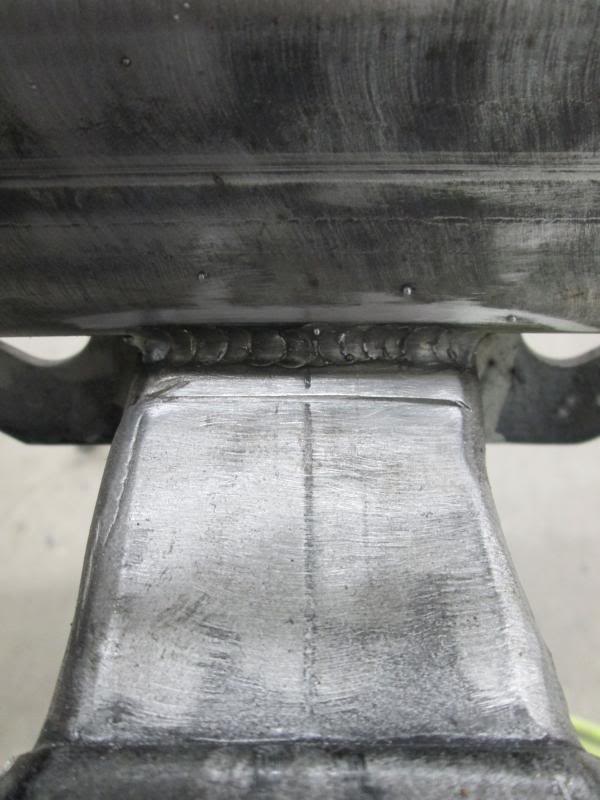
I cleaned up the hitch and put some etch primer on it before welding it to the center frame brackets. These welds look a little straighter.
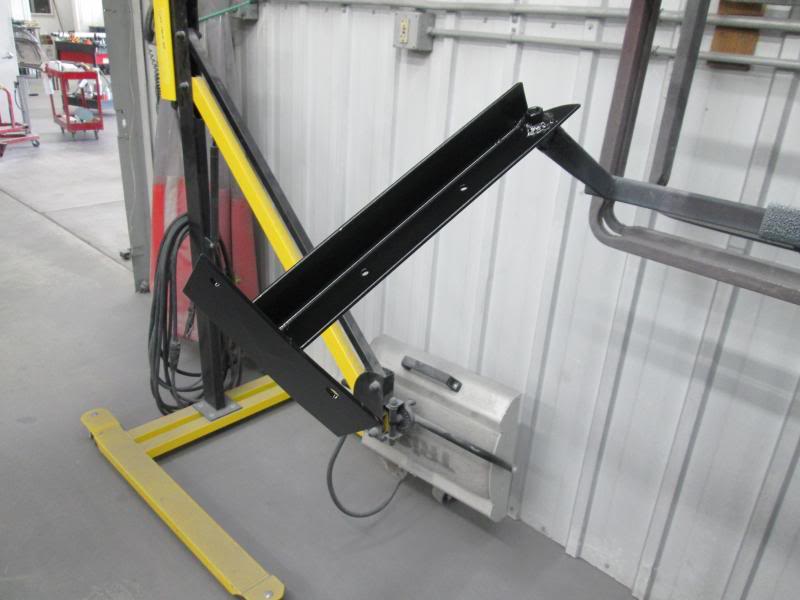
I had a couple pieces cut and bent to start building off the center section.
Then welded a couple more pieces and ground the welds smooth.
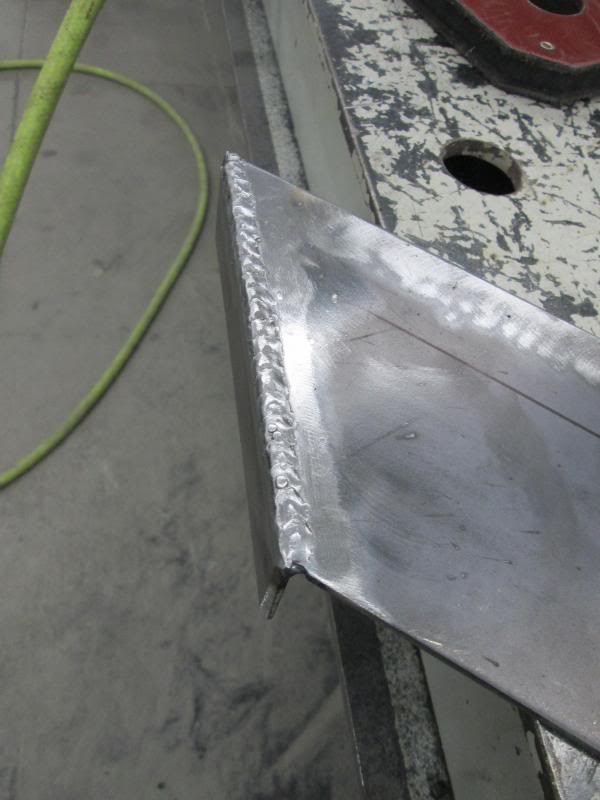
I made a cardboard template for the top of the "wings" that was about the same contour of the quarter panels, and then kept building off of those.


Welded more pieces to the �wings�. This one looked so nice I almost left it.
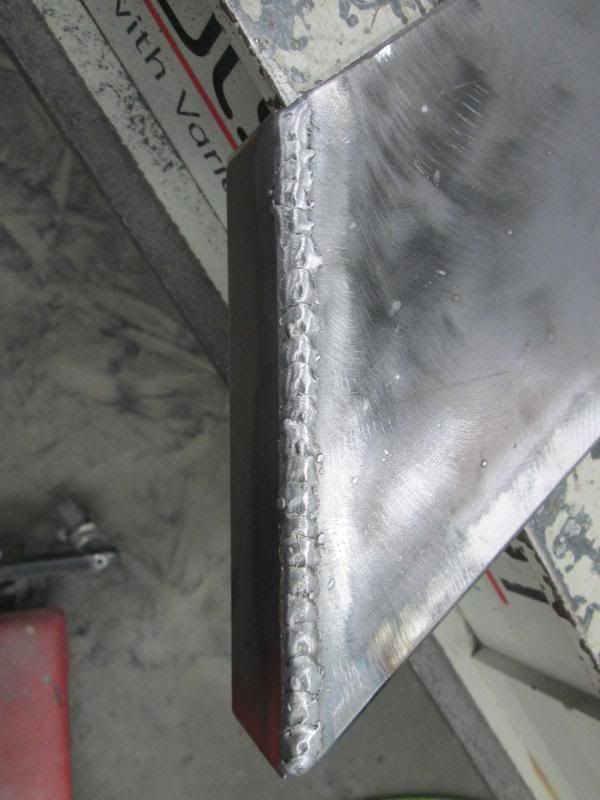
Top of the left �wing� tacked in place. Man that�s going to be A LOT of welding!
 Right �wing�.
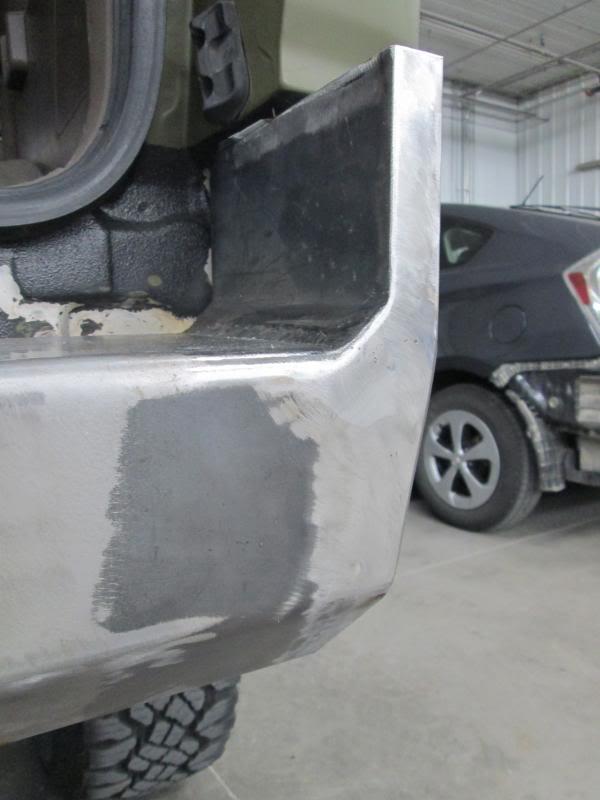
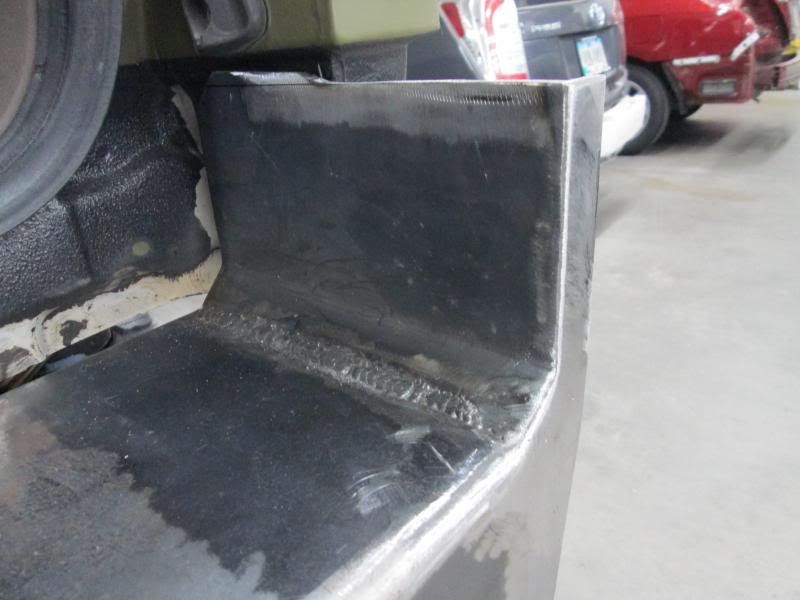
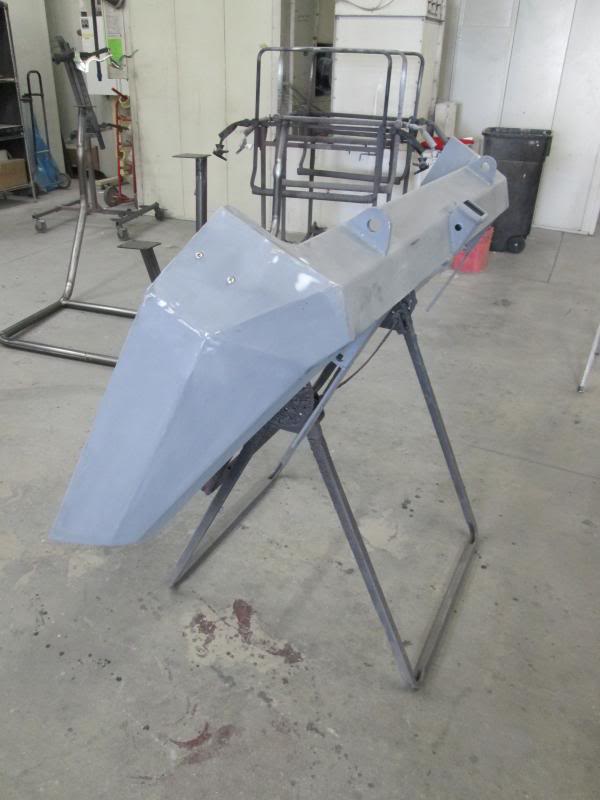
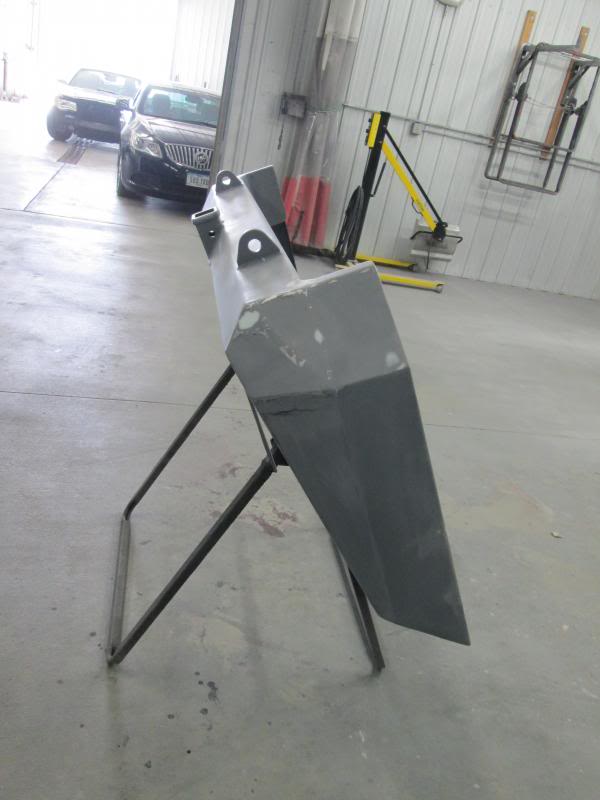
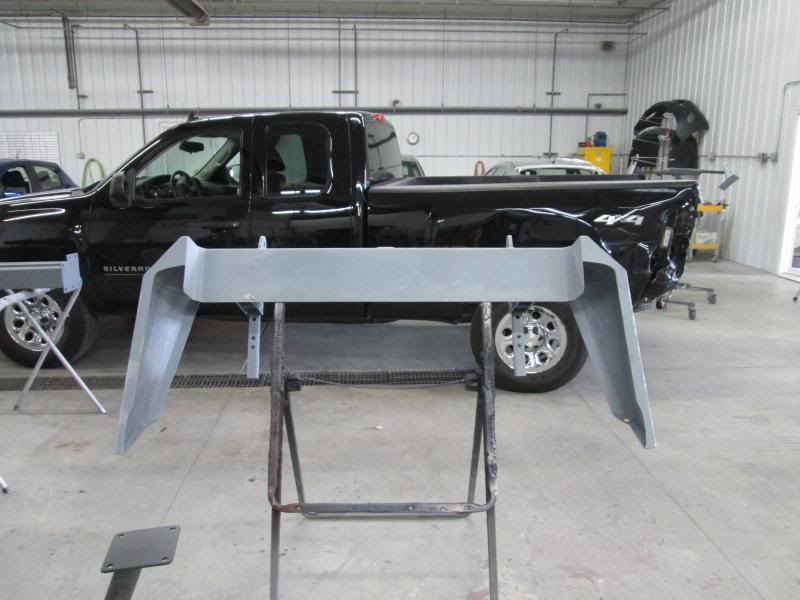
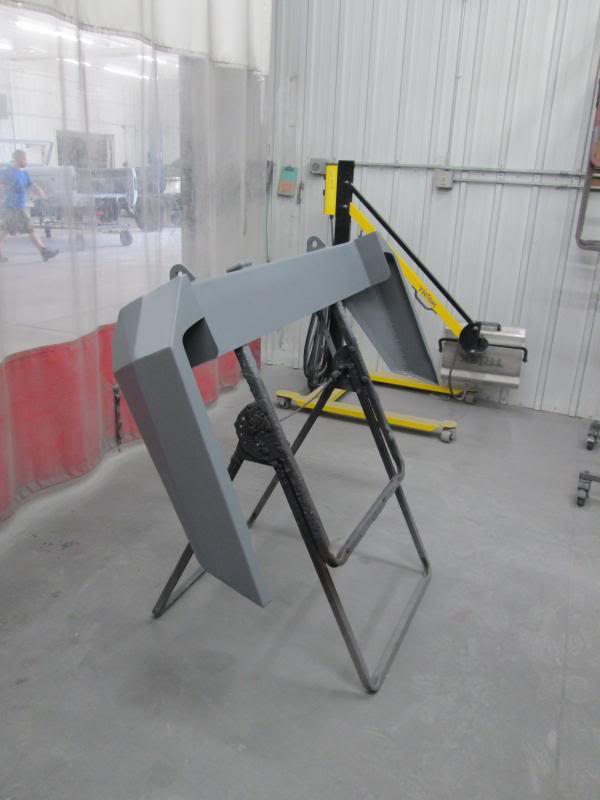
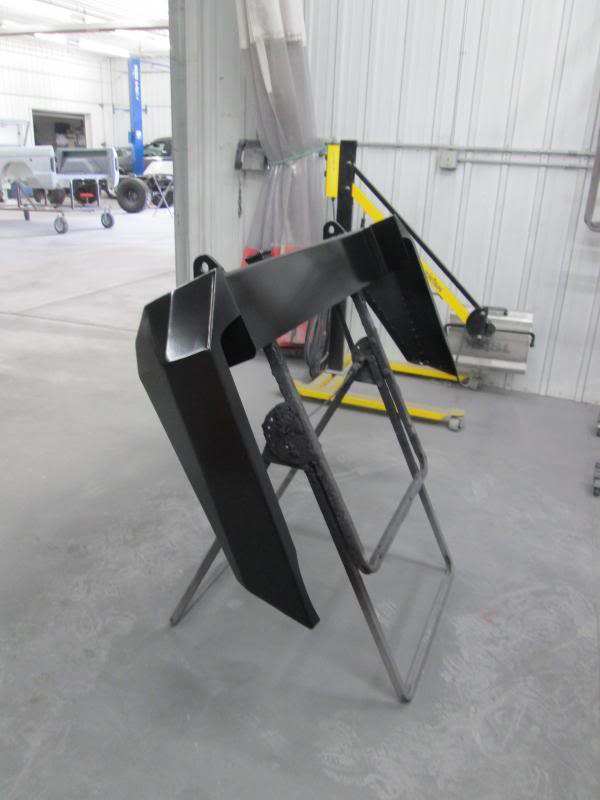
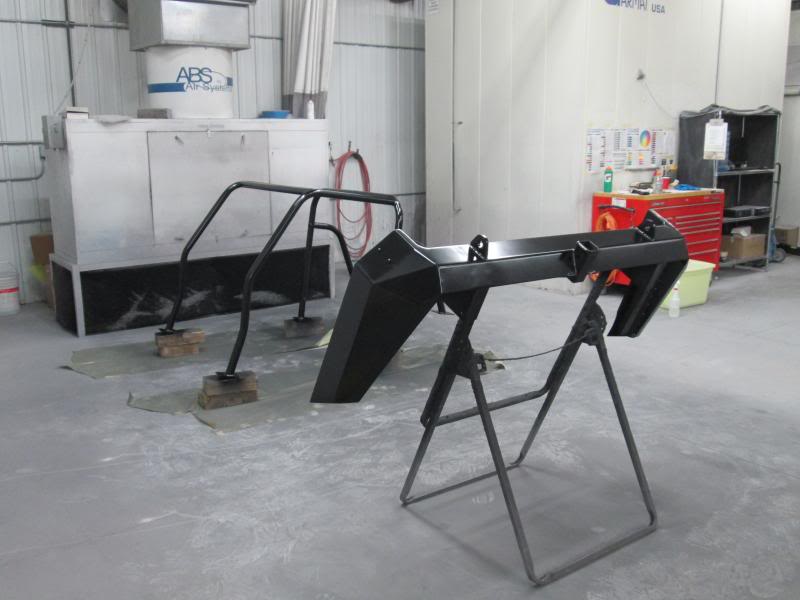
After hours of welding 1� sections and letting things cool I then ground down all my welds so there was a nice soft edge between pieces. Honestly, the corners of the bumper are not the prettiest design but they work. Again, I�m no professional so don�t be too hard on me. Here is the bumper all welded and cleaned up, ready for paint.
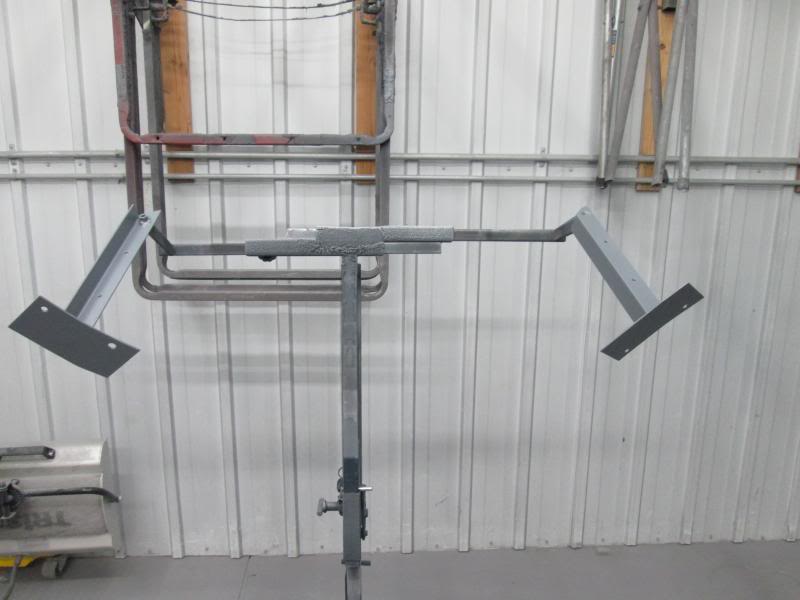
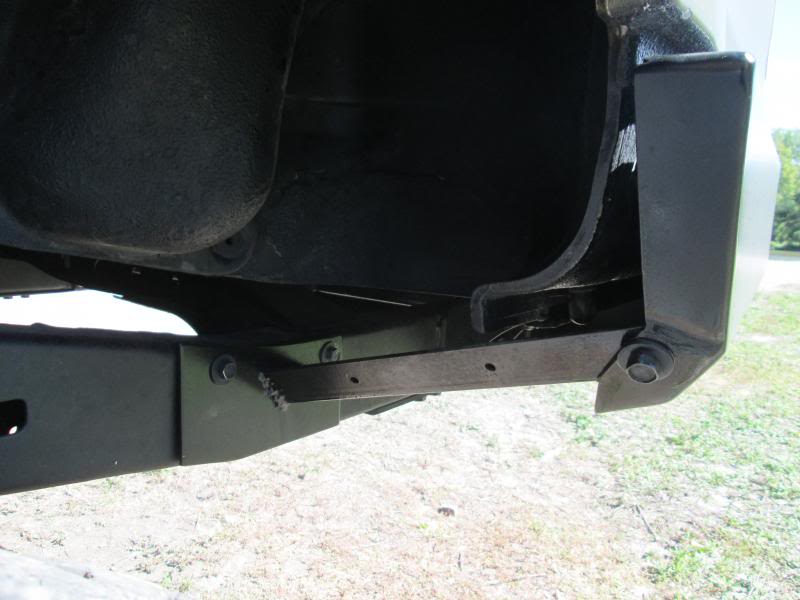
I mounted the bumper and it was nice and solid in the center, however the "wings" were not tied into anything and could easily be moved. I decided to make some brackets to tie the "wings" into the frame. I cut and shaped a 1/8" plate that was the same contour of the frame, drilled holes in the plate that corresponded to two holes already in the frame, installed 2 nutserts in each frame rail and bolted the plate to the frame. Using a measuring tape, string, wire, cardboard, and probably a lot of dumb luck; I cut and shaped some 1/8" angle for the brackets. I drilled holes in the end of the bumper "wings", drilled a hole in the same spot on the brackets and welded nuts on the bracket ends. I then welded the brackets to the plates on the frame rails. Now the "wings" are securely tied into the frame and they don't move at all. I also drilled a couple holes in the angle of the brackets so water could easily escape and I would have no buildup of moisture. This will also be a good place to attach some material to act as a mud guard or fender liner to keep dirt/mud/snow from packing the inside of the bumper. That's a next year project. Pics:
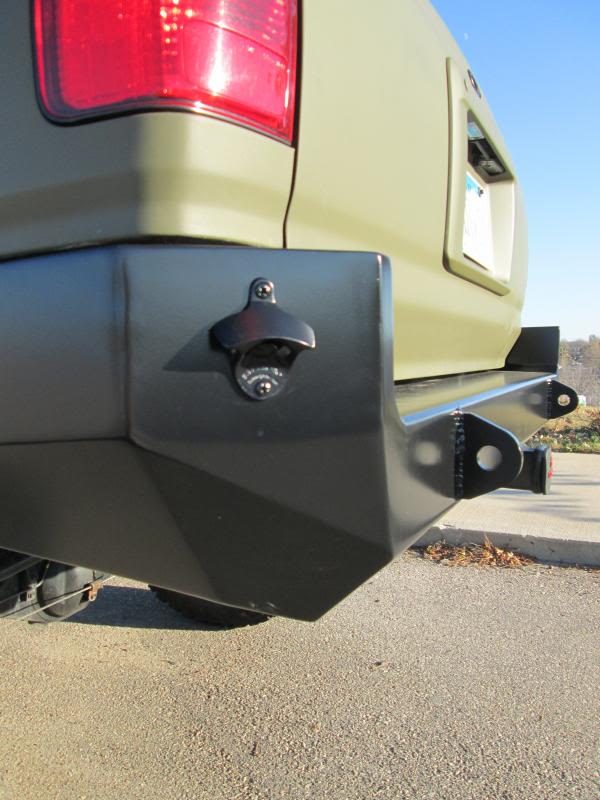
One other fun bit I wanted to ad was a bottle opener. You never know when you'll need one! I bought a steel commercial bottle opener and marked right where I wanted it on the left corner.

I drilled the two holes. Now that probably could have been enough but I wanted that baby SECURE. I had a scrap of 1/2" steel so I marked and drilled holes in that as well. I then tapped the holes for the stainless screws I was going to use. Then mounted it on the bumper and welded the 1/2" bar on the inside of the bumper. I figure if I get tired of the bottle opener I'll have a spot to mount something else securely down the road.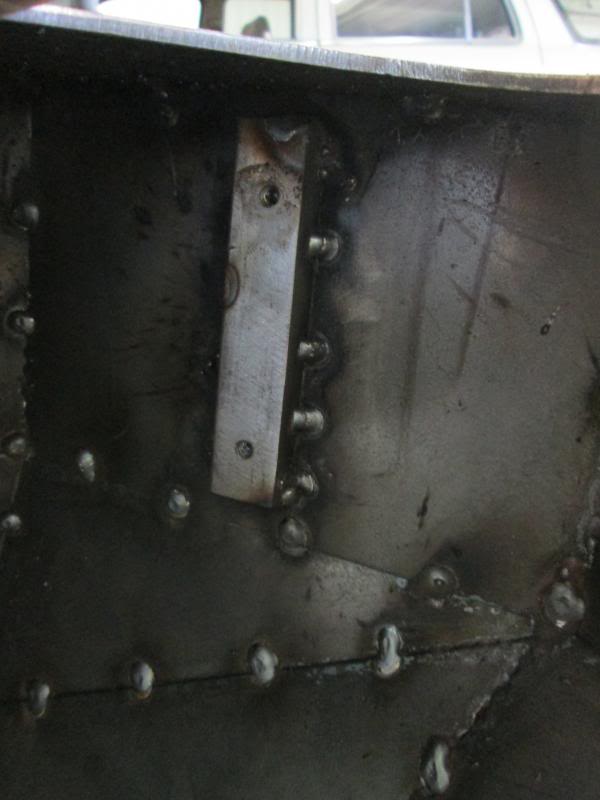
Now on to prepping for paint. After all that work there was a little rust here and there. I sprayed the entire bumper with some Ospho and scrubbed it with some 3M red scuff pads. That scuffed the steel, took all surface rust off, and treated any remaining rust that couldn't be seen. I cleaned again with some grease and wax remover and let air dry. Then I mixed up some Eastwood Epoxy Primer and put two good coats on. I let it cure for a week (says 3 days before topcoating), scuffed again and shot two more coats of epoxy primer.

The directions say you can topcoat after 1 hour but not after 5 hours so this time I mixed up some Eastwood Chassis Black Extreme ceramic paint and shot two coats on top of the primer. So total, everything has 4 coats of epoxy primer and 2 coats of ceramic paint. I used this same stuff on my frame before I swapped it last winter and it's held up great and is tough as nails.

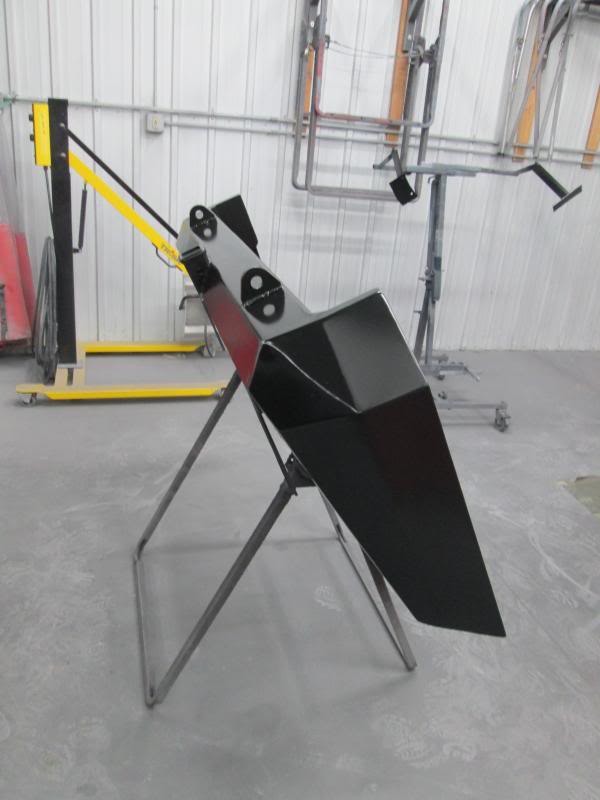
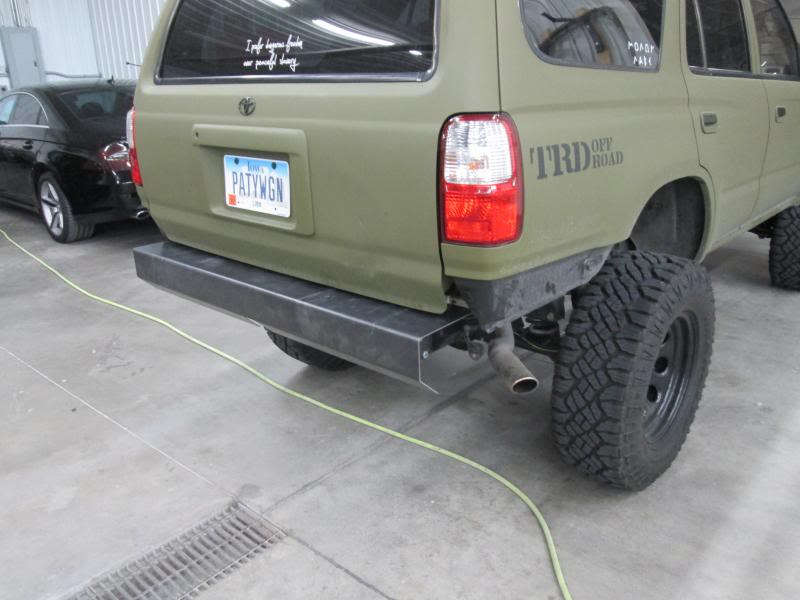
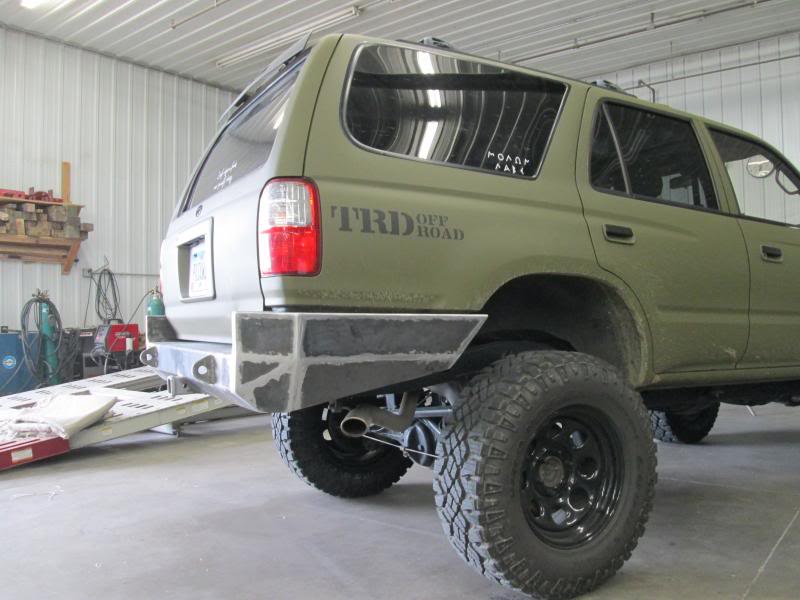
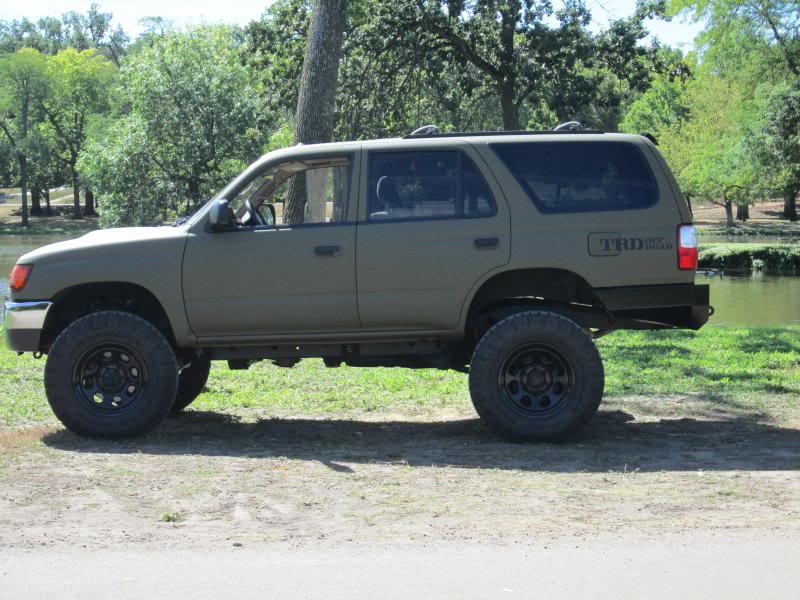
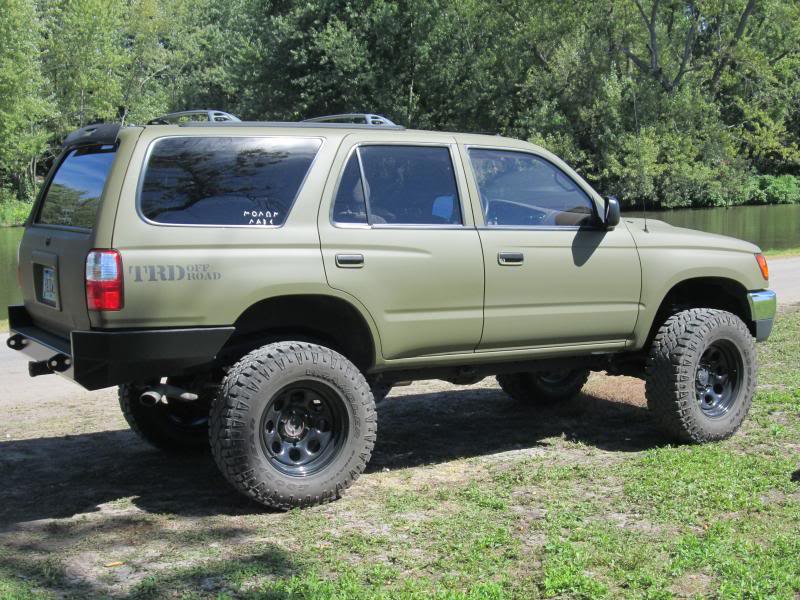
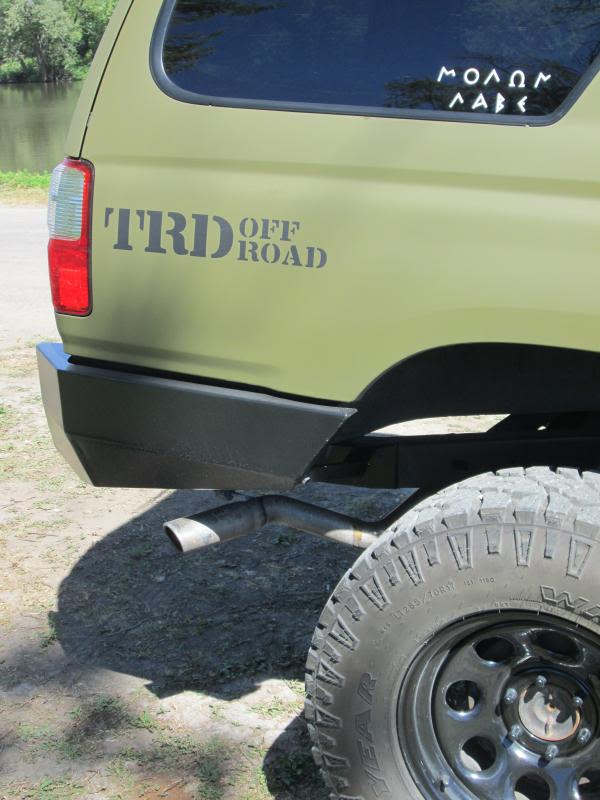
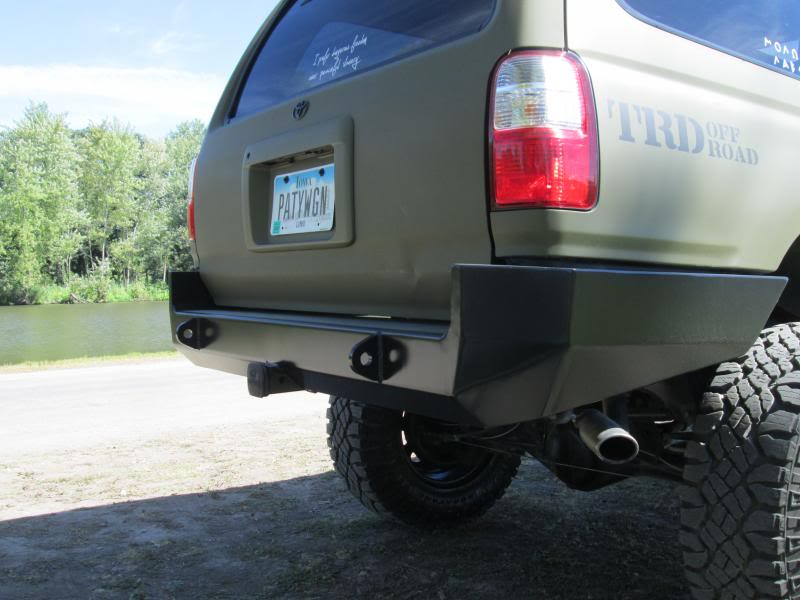
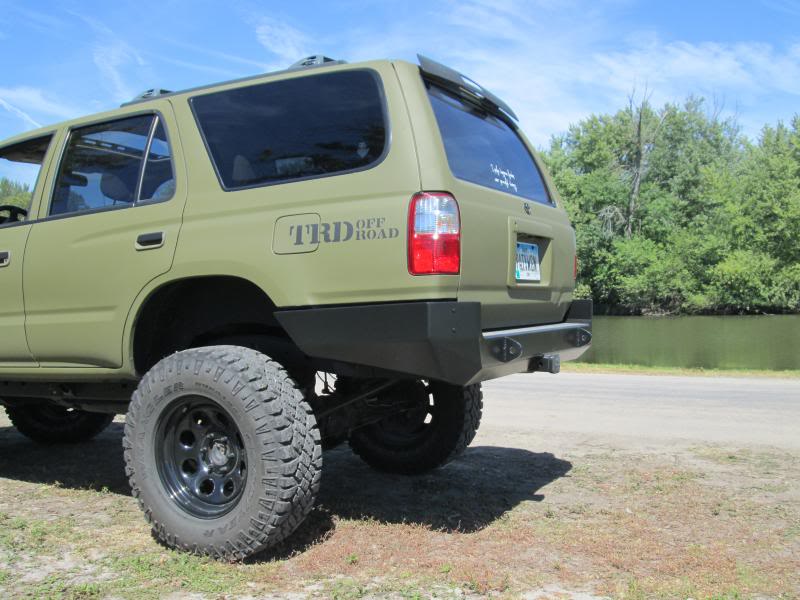
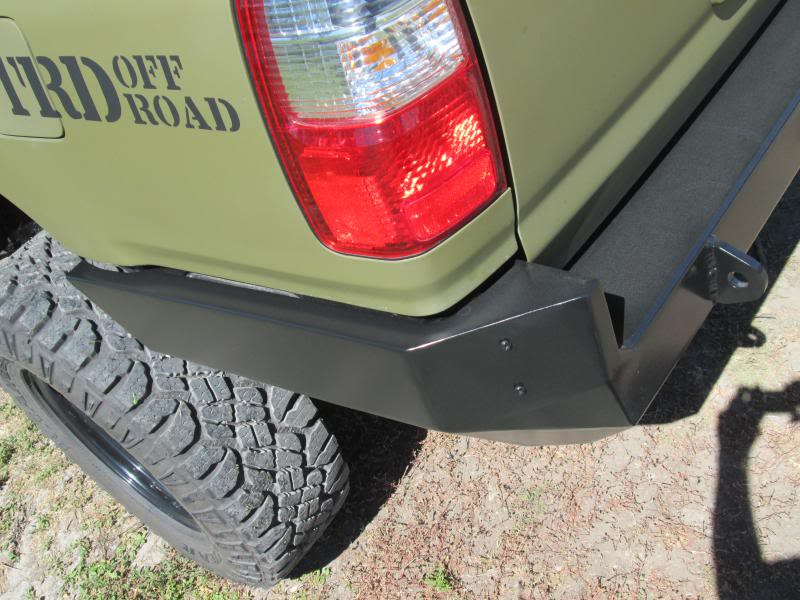
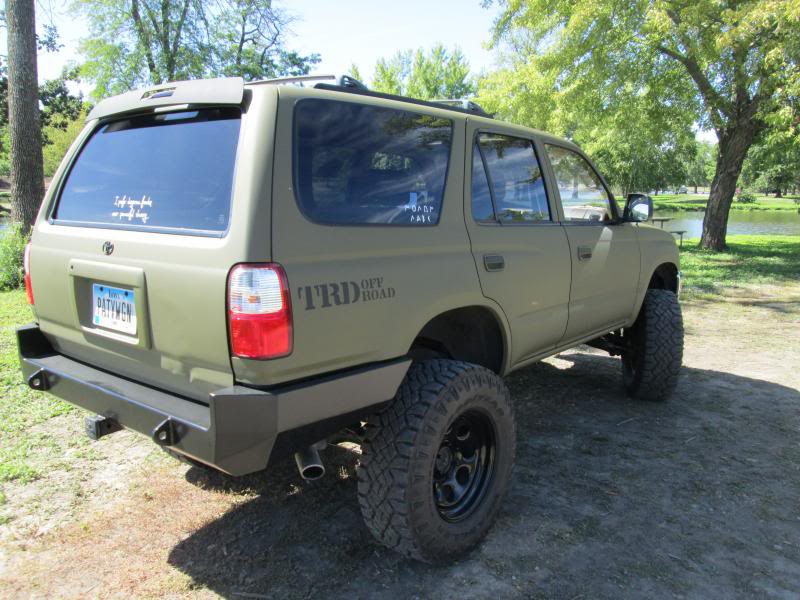
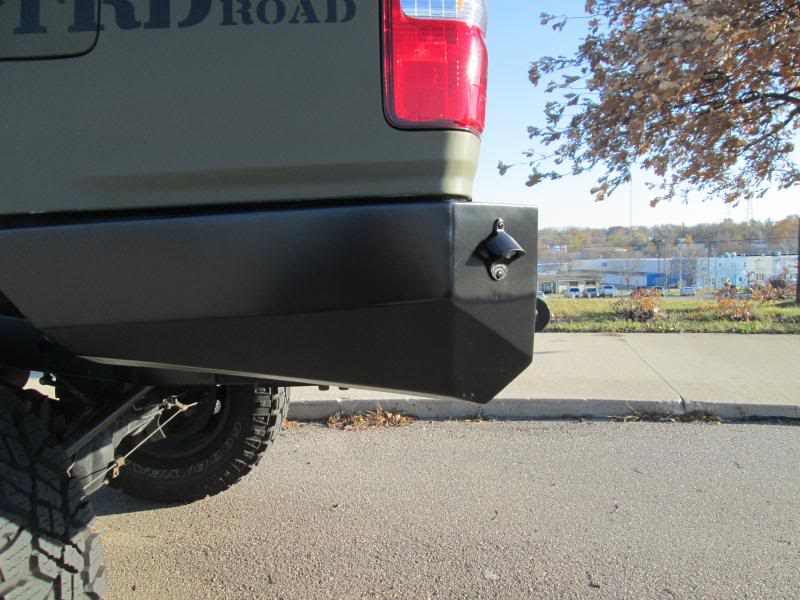
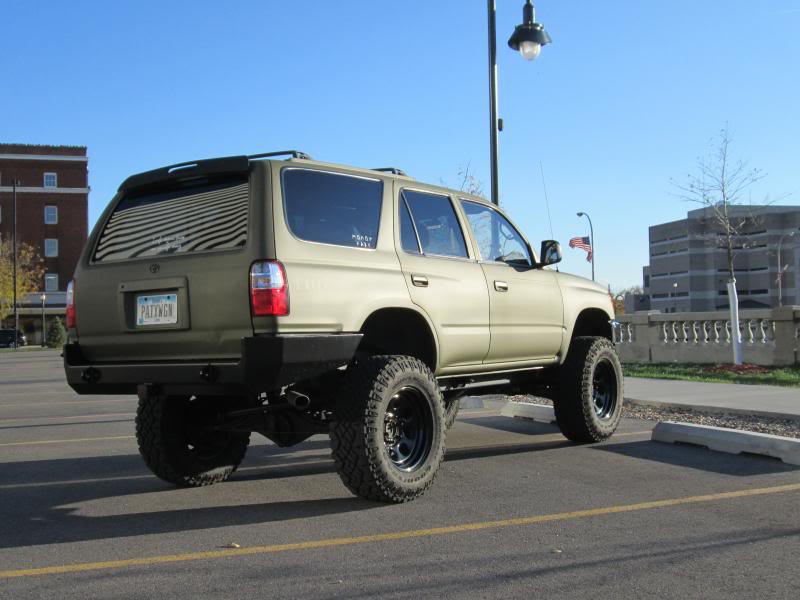
Once everything was cured, I mounted the bumper using grade 8 bolts, washers, and nuts. The inside of the bumper was coated with Sherwin Williams CPS rust inhibitor and some 3M Rust fighter to keep any creeping salt and moisture from creating havoc. On to some outdoor glam pics. The bottle opener wasn�t powder coated yet so it�s not on in the first pics.

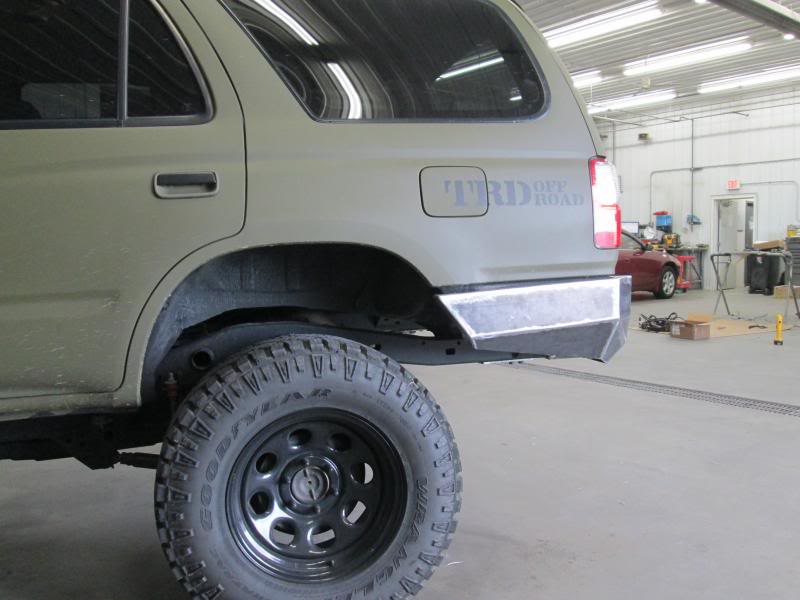
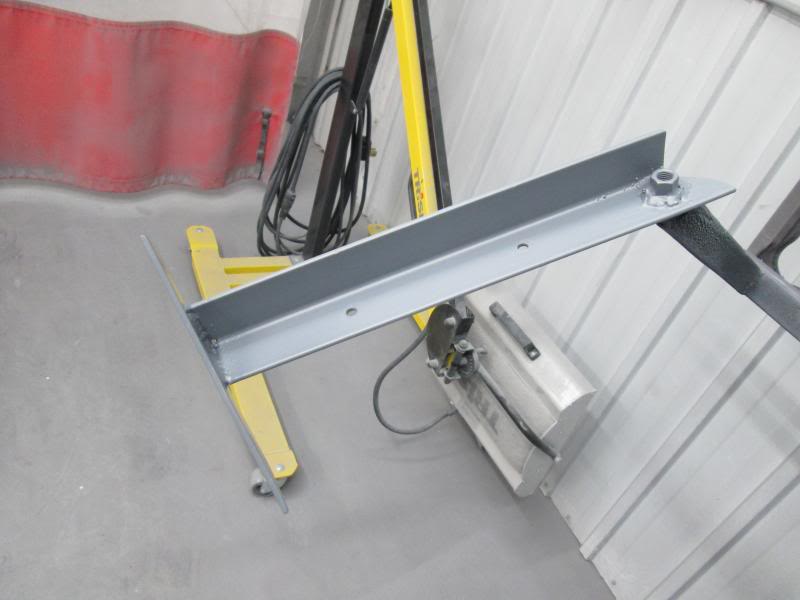
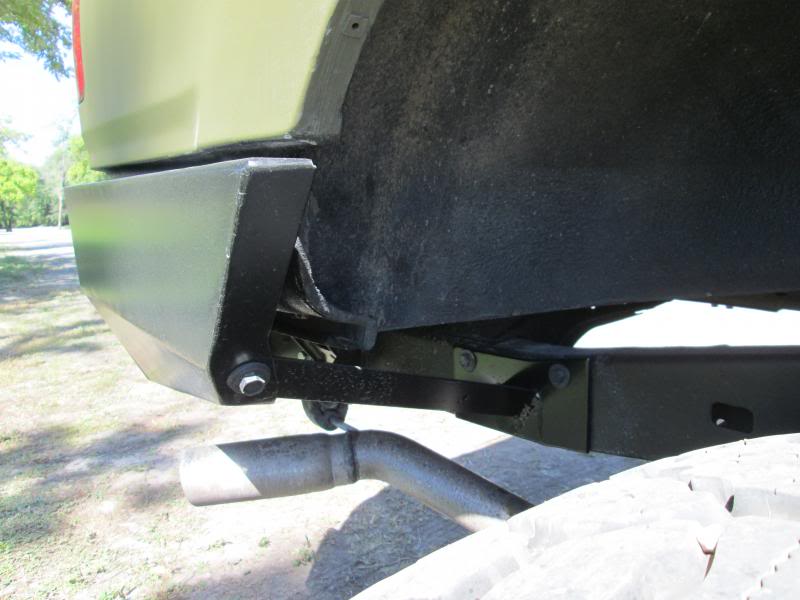
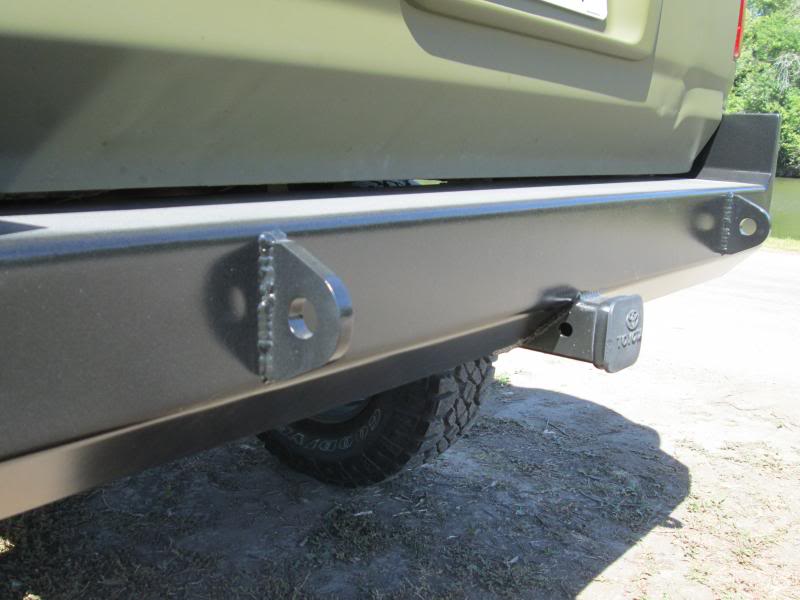
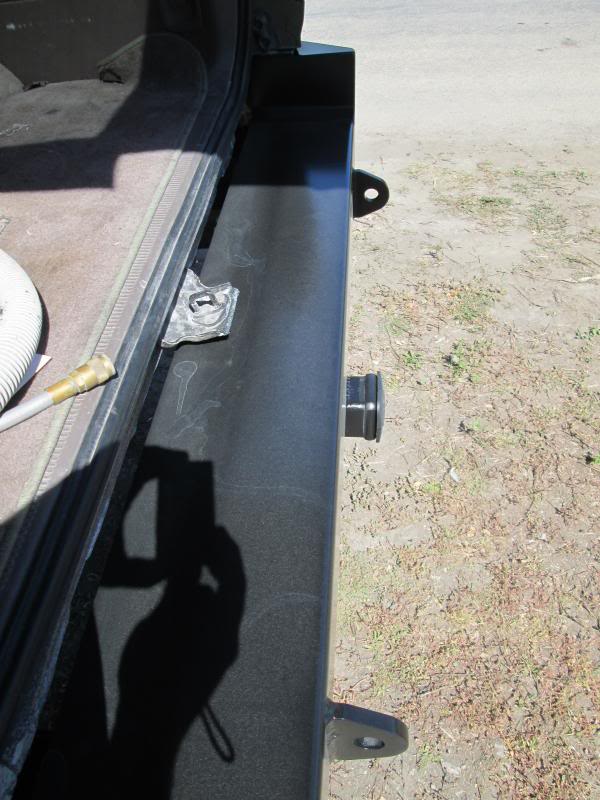
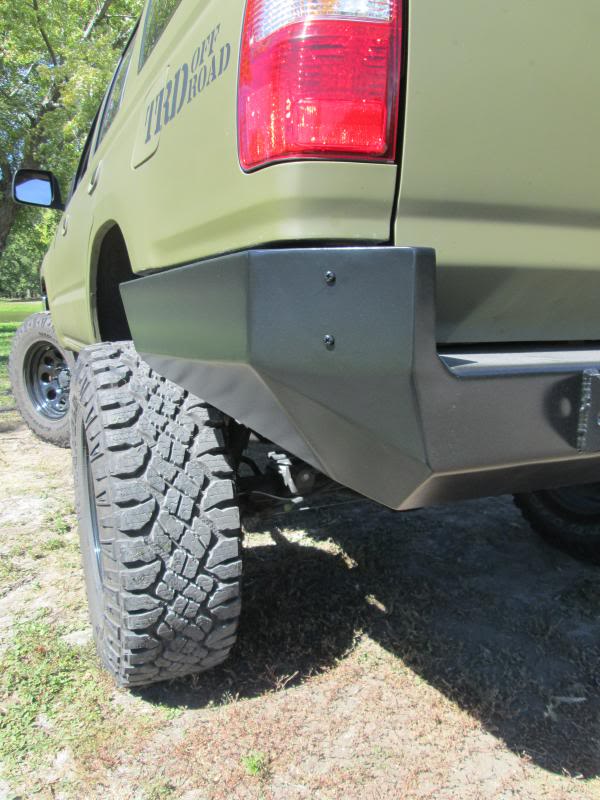
Here is a better shot of how the brackets for the sides mount to the bumper and then tie into the frame where the nutserts were installed.
This is where the bottle opener would be if it was done.
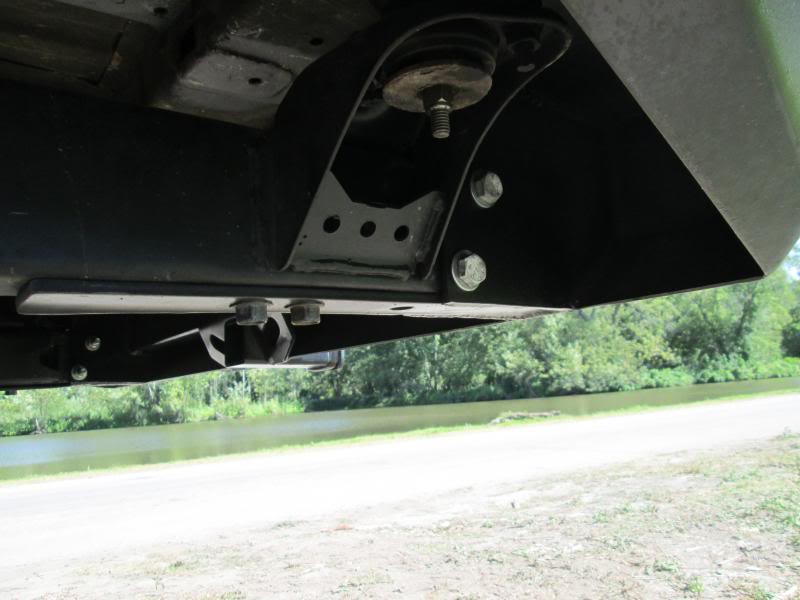
I still had the mounts from my old OEM hitch so I modified and welded them to the center brackets to further tie into the frame.
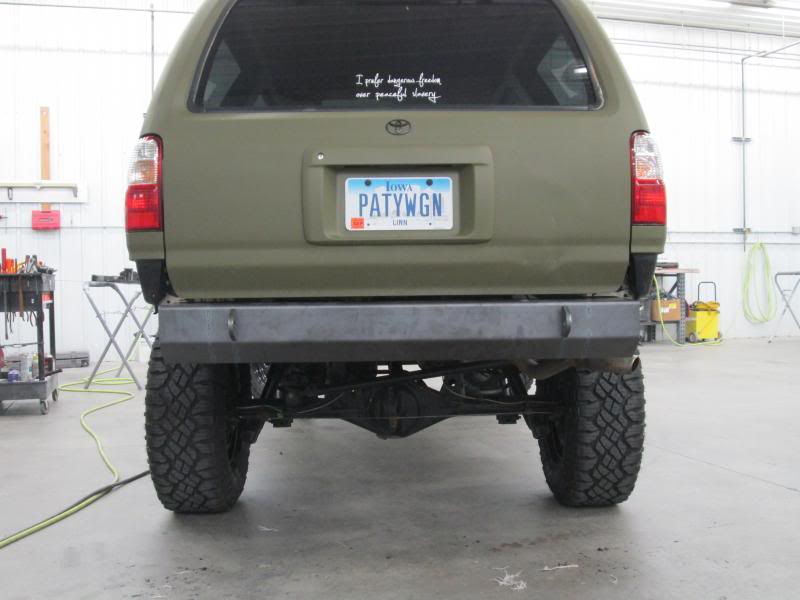
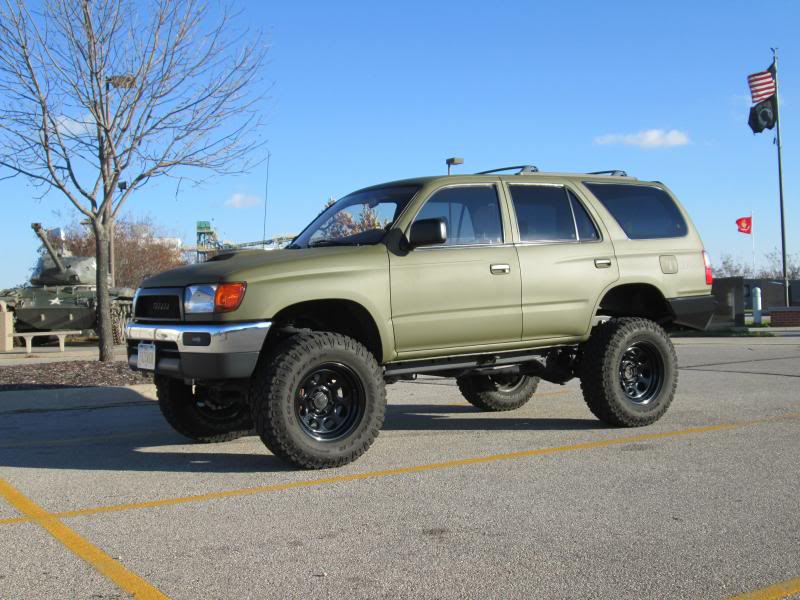
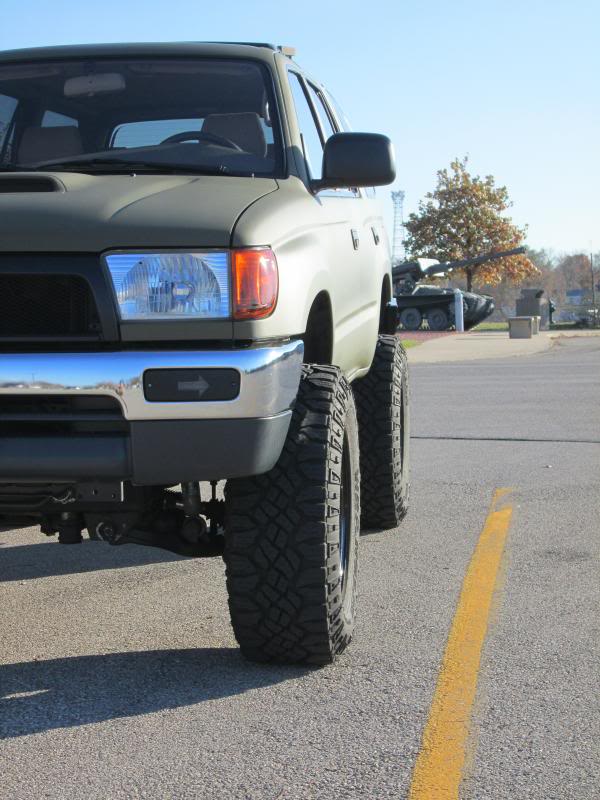
Fixed the 1 �� gap on the front bumper from when I put on my body lift. Now it�s not as ugly, but it�s still a stock chrome bumper that needs remedied.
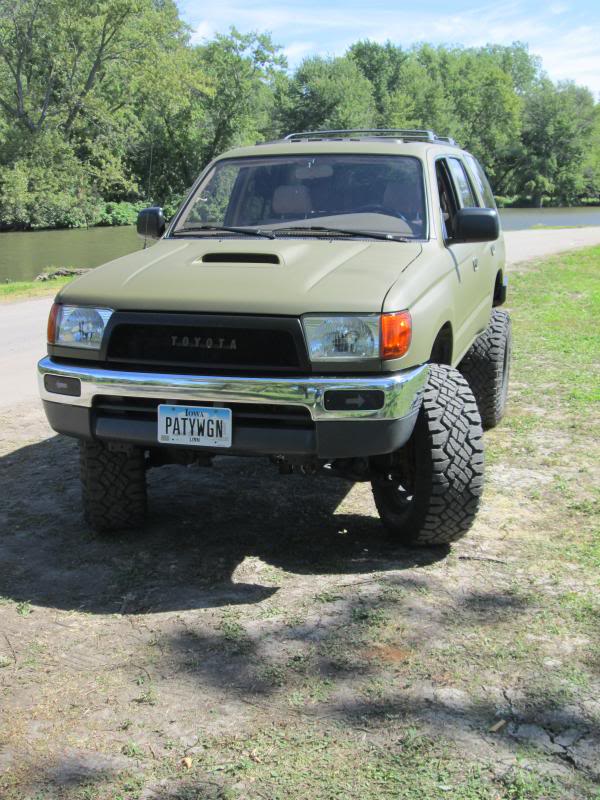

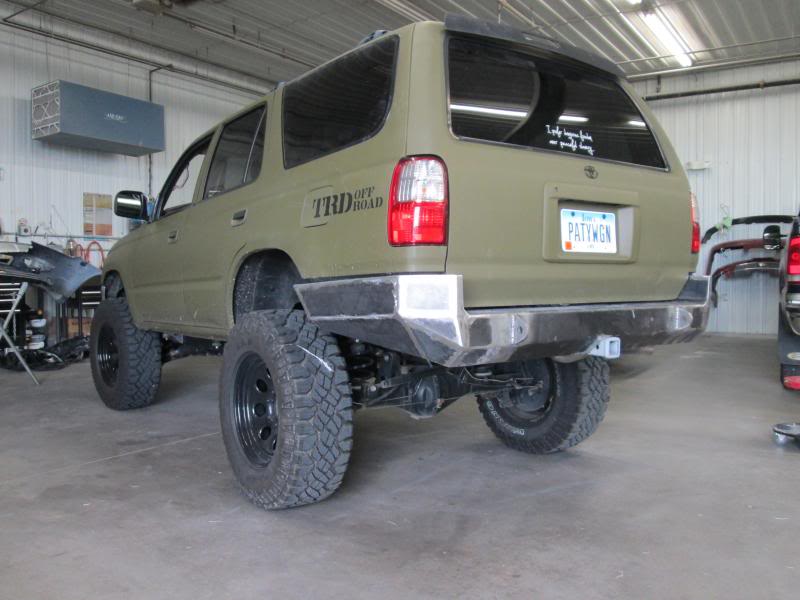
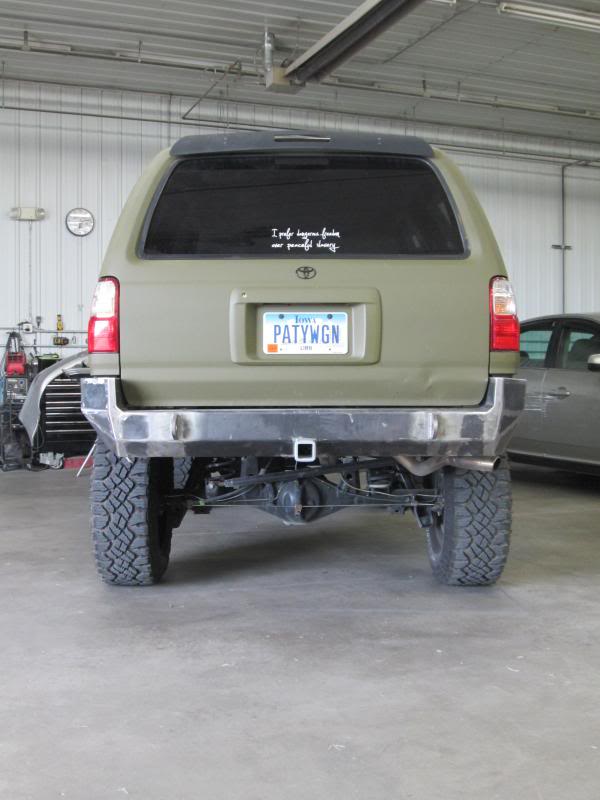
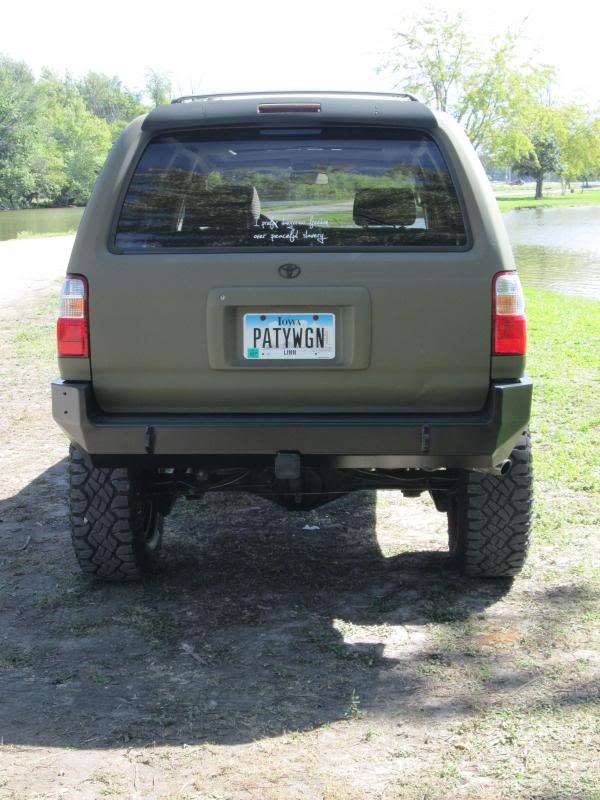
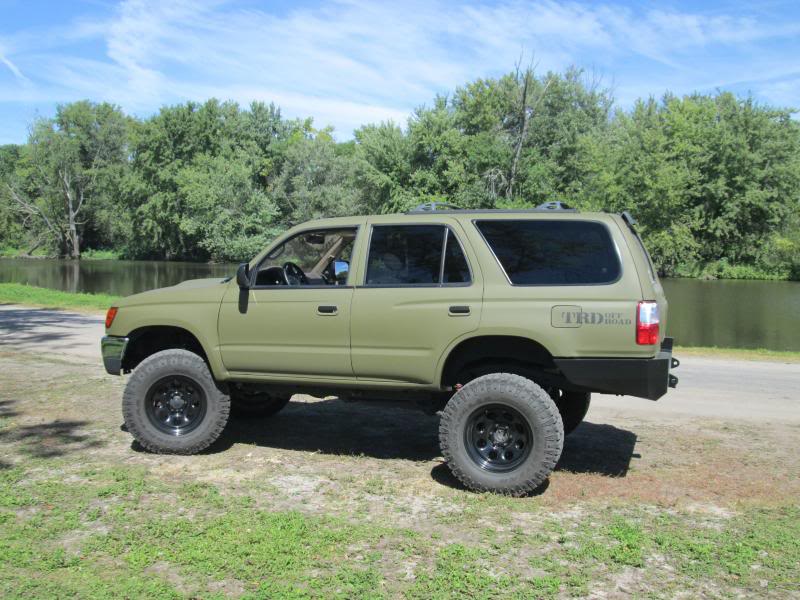
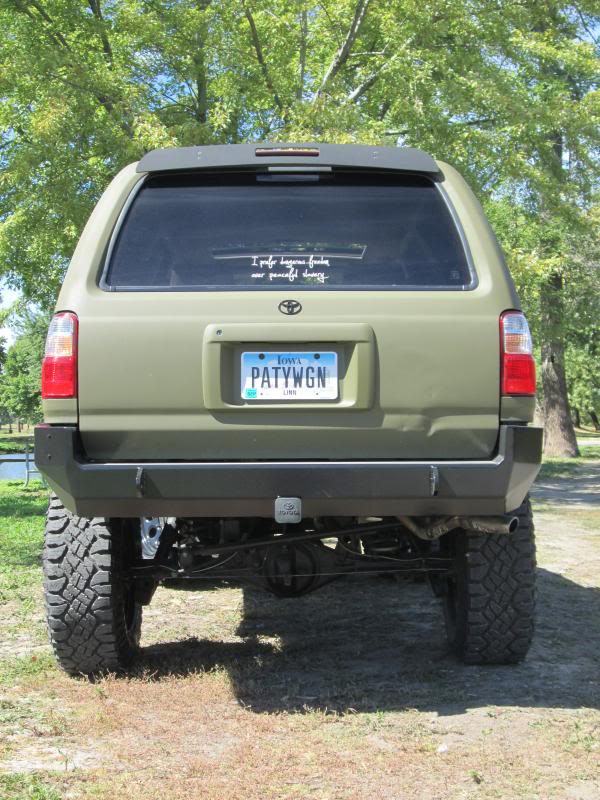
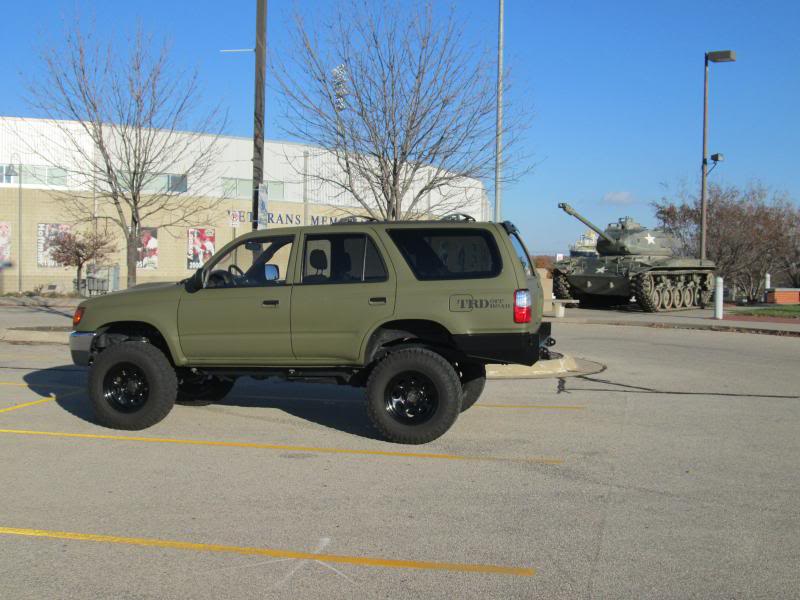
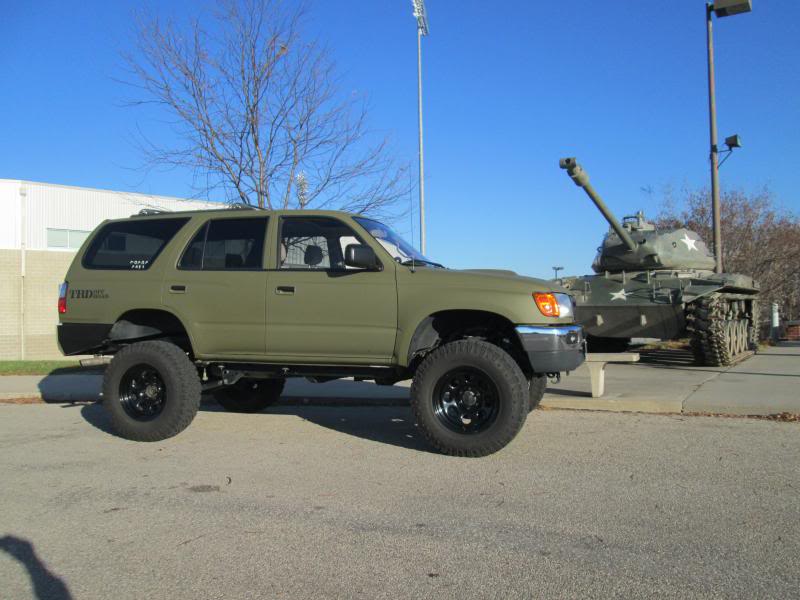
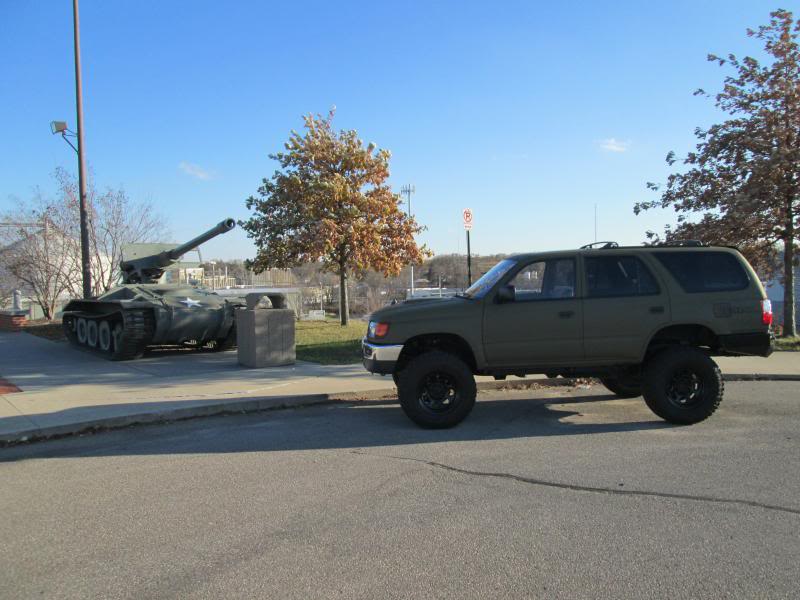
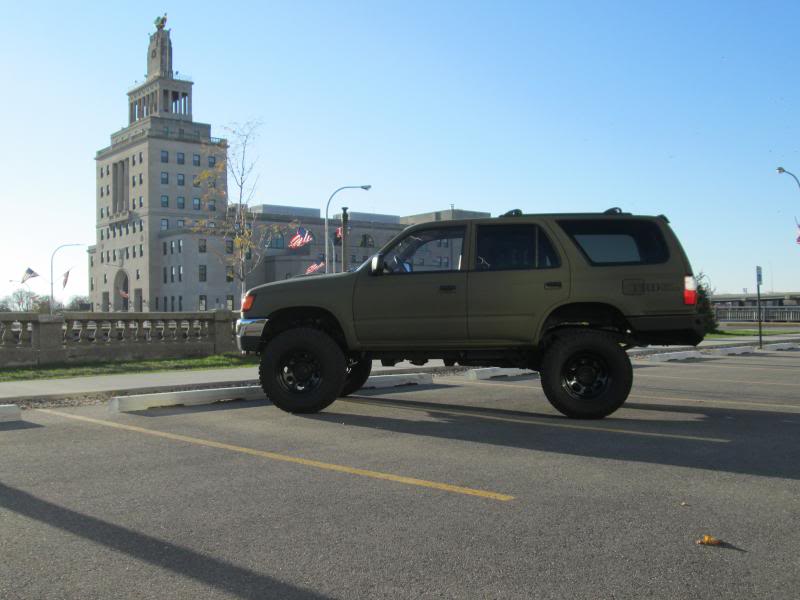
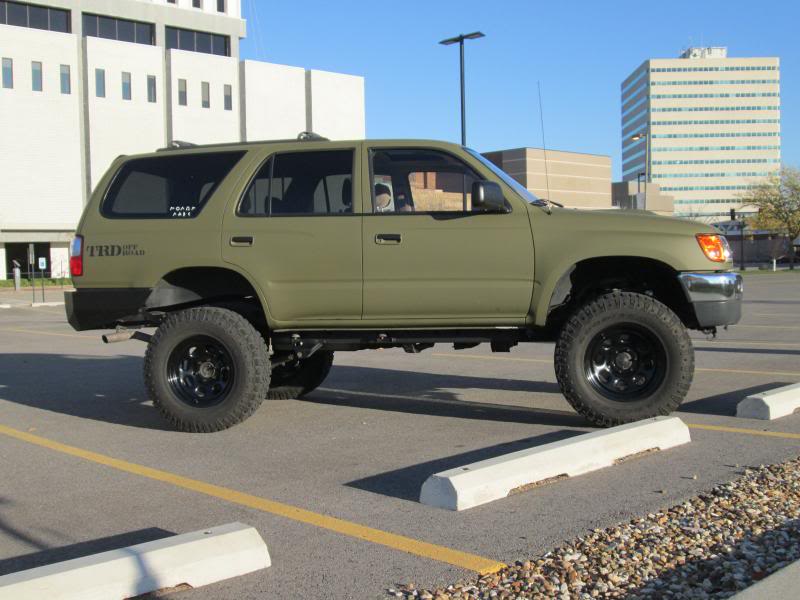
Veteran�s Day is Monday so I got the PATYWGN all cleaned up and took some pics with some old military vehicles and a couple shots with a local landmark named �Veteran�s Memorial� here in Cedar Rapids with Old Glory flying high in the background. I want to thank our military Veterans for everything you do and have done. Thank You.
Bottle Opener!!!! (Used about 12 times thus far)
All in all I spent a lot of time and money on this but in the end I get to stand back and say "I made that!". I'm contemplating (planning) a front bumper build next year, but for now I'm just going to relax and enjoy my 4runner.
Thanks for reading. Sorry about the bandwidth.
Here is my thread about my rear bumper build that I completed over the summer. Took a long time but I wanted it to be perfect so I opted to take my time and do it right. Hope you enjoy.
I first started mocking it up with some welding rod as a skeleton. This way I could easily tweak the design and visualize how it would look.


Then, I made some drawings and a couple poster board templates and took them in to a local steel company. The 4 mounts are 1/4" steel, and the center section was bent to follow the shape of the mounts. All other steel used on the project was 1/8".


Here are some pics of welding the center mounts. I welded a flat piece between them so when I put the bumper on it rests on the frame and I�m not having to balance a heavy bumper while fumbling with the mounting hardware.


Then I set the main center piece on the center brackets, tacked in place, then removed and welded the brackets securely to the outer center bumper section.


Here is how it sits.

I used some double sided molding tape to see approx where I wanted the D ring mounts to be. Just a preview. BTW, look at that burn through from the brackets! PENETRATION!!


I modified my frame ends by boxing the insides with a piece of 1/8" steel, then welded in some round tube inside the frame ends where the bolts would go. In retrospect I could have done something better like sleeving and extending the frame rails a bit more to mount the brackets but hey, this was my first time doing this and I�m not a professional.

All boxed in.


Round tube welded in for the frame mounting bracket hardware.

Not pretty but it works and will be covered up.


Test fit on the center, looks pretty good!


The orange marks show approx where the frame ends. This is a good shot of why I now think I should have extended the frame rails a little further but I think it will be OK. Hindsight is a real bitch.


I drilled holes behind the D rings and plug welded them, and then welded them on the face of the bumper as well.


I work at a body shop and we had a bunch of newer Ford F150s come in with rear bumper damage. Most needed the hitch/bumper support sections replaced but the hitches themselves were salvageable. I saved a couple good ones knowing I wanted to use them on my bumper builds. Unfortunately the square tube they were attached to was not wide enough and I would not be able to use it. I cut the 2" receiver off the old square tube, bought a new section of square tube, welded the receiver to the new tube, notched the center of my bumper, and welded the receiver section to the frame mounts and to the exterior of my bumper.

I cut the receiver off the square tube, looks a bit phallic in this pic.

Here it is clamped onto the new square tube ready to be tacked in.

Tacked in and ready for full welds.


All welded up.


It was a long day. Don�t be too harsh about my wandering welds. It�s not pretty but it�s not going to show so cut me some slack.


I cleaned up the hitch and put some etch primer on it before welding it to the center frame brackets. These welds look a little straighter.


I had a couple pieces cut and bent to start building off the center section.

Then welded a couple more pieces and ground the welds smooth.


I made a cardboard template for the top of the "wings" that was about the same contour of the quarter panels, and then kept building off of those.

Welded more pieces to the �wings�. This one looked so nice I almost left it.


Top of the left �wing� tacked in place. Man that�s going to be A LOT of welding!
 Right �wing�.
After hours of welding 1� sections and letting things cool I then ground down all my welds so there was a nice soft edge between pieces. Honestly, the corners of the bumper are not the prettiest design but they work. Again, I�m no professional so don�t be too hard on me.
Here is the bumper all welded and cleaned up, ready for paint.


I mounted the bumper and it was nice and solid in the center, however the "wings" were not tied into anything and could easily be moved. I decided to make some brackets to tie the "wings" into the frame. I cut and shaped a 1/8" plate that was the same contour of the frame, drilled holes in the plate that corresponded to two holes already in the frame, installed 2 nutserts in each frame rail and bolted the plate to the frame. Using a measuring tape, string, wire, cardboard, and probably a lot of dumb luck; I cut and shaped some 1/8" angle for the brackets. I drilled holes in the end of the bumper "wings", drilled a hole in the same spot on the brackets and welded nuts on the bracket ends. I then welded the brackets to the plates on the frame rails. Now the "wings" are securely tied into the frame and they don't move at all. I also drilled a couple holes in the angle of the brackets so water could easily escape and I would have no buildup of moisture. This will also be a good place to attach some material to act as a mud guard or fender liner to keep dirt/mud/snow from packing the inside of the bumper. That's a next year project. Pics:


One other fun bit I wanted to ad was a bottle opener. You never know when you'll need one! I bought a steel commercial bottle opener and marked right where I wanted it on the left corner.

I drilled the two holes. Now that probably could have been enough but I wanted that baby SECURE. I had a scrap of 1/2" steel so I marked and drilled holes in that as well. I then tapped the holes for the stainless screws I was going to use. Then mounted it on the bumper and welded the 1/2" bar on the inside of the bumper. I figure if I get tired of the bottle opener I'll have a spot to mount something else securely down the road.

Now on to prepping for paint. After all that work there was a little rust here and there. I sprayed the entire bumper with some Ospho and scrubbed it with some 3M red scuff pads. That scuffed the steel, took all surface rust off, and treated any remaining rust that couldn't be seen. I cleaned again with some grease and wax remover and let air dry. Then I mixed up some Eastwood Epoxy Primer and put two good coats on. I let it cure for a week (says 3 days before topcoating), scuffed again and shot two more coats of epoxy primer.


The directions say you can topcoat after 1 hour but not after 5 hours so this time I mixed up some Eastwood Chassis Black Extreme ceramic paint and shot two coats on top of the primer. So total, everything has 4 coats of epoxy primer and 2 coats of ceramic paint. I used this same stuff on my frame before I swapped it last winter and it's held up great and is tough as nails.


Once everything was cured, I mounted the bumper using grade 8 bolts, washers, and nuts. The inside of the bumper was coated with Sherwin Williams CPS rust inhibitor and some 3M Rust fighter to keep any creeping salt and moisture from creating havoc. On to some outdoor glam pics. The bottle opener wasn�t powder coated yet so it�s not on in the first pics.


Here is a better shot of how the brackets for the sides mount to the bumper and then tie into the frame where the nutserts were installed.


This is where the bottle opener would be if it was done.


I still had the mounts from my old OEM hitch so I modified and welded them to the center brackets to further tie into the frame.

Fixed the 1 �� gap on the front bumper from when I put on my body lift. Now it�s not as ugly, but it�s still a stock chrome bumper that needs remedied.


Veteran�s Day is Monday so I got the PATYWGN all cleaned up and took some pics with some old military vehicles and a couple shots with a local landmark named �Veteran�s Memorial� here in Cedar Rapids with Old Glory flying high in the background. I want to thank our military Veterans for everything you do and have done. Thank You.


Bottle Opener!!!! (Used about 12 times thus far)


All in all I spent a lot of time and money on this but in the end I get to stand back and say "I made that!". I'm contemplating (planning) a front bumper build next year, but for now I'm just going to relax and enjoy my 4runner.
Thanks for reading. Sorry about the bandwidth.
 11-09-2013, 07:58 PM
#2
Registered User
Holy patywgn porn, that was intense!!! How dare you drop so much awesomeness in 1 posting, that was preposterous. Really man, ease up a little next time way too much.....
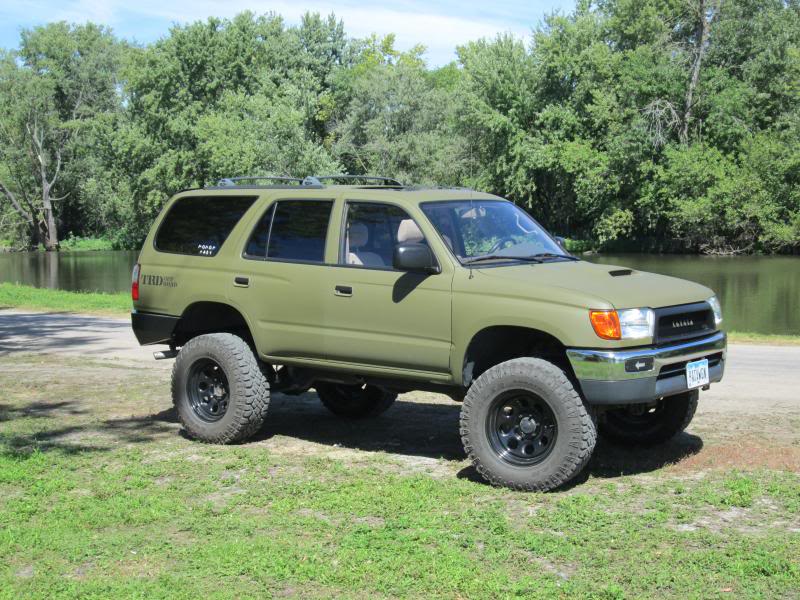
Oh yea love the front directionals, really cool
Oh yea love the front directionals, really cool
Last edited by Discombobulated; 11-09-2013 at 08:00 PM.

 11-09-2013, 09:39 PM
#6
Registered User
Join Date: Sep 2012
Location: iowa
Posts: 618
Likes: 0
Received 0 Likes
on
0 Posts
That bumper turned out phenomenal. And then I read u were in cedar rapids...Whaaat? That's only bout an hour and a half from me. I actually have family that live in cr. Nice to know there's other Yota junkies close to home.


 11-11-2013, 09:19 PM
#16
Registered User
Join Date: Apr 2007
Location: Yuba City, CA
Posts: 568
Likes: 0
Received 0 Likes
on
0 Posts
11-12-2013, 04:52 AM
#17
That's correct. I had them somewhat blacked out before and over the summer some guy yelled at me for not using my turn signal. I guess he couldn't see it during the day so I decided to change them and make them very visible. I just sanded the clear lens, made a template for the arrow, masked it off, and sprayed it black. Unmasked and then installed. My buddies joke that it looks like a school bus.
Thanks for the compliments guys, glad you all like the bumper. I really wanted to put some LED backup lights in there but ran out of time and money, but they can always be added later.
Thanks for the compliments guys, glad you all like the bumper. I really wanted to put some LED backup lights in there but ran out of time and money, but they can always be added later.

Thread
Thread Starter
Forum
Replies
Last Post
RedRunner_87
95.5-2004 Tacomas & 96-2002 4Runners (Build-Up Section)
84
06-01-2021 01:51 PM
WTB[WestCanada]: 1989 4runner stock front bumper and other items
lledwod
Items Wanted
1
08-30-2016 01:03 PM
FS[GreatLakes]: Toyota collection part out
88sasturbotoy
Axles - Suspensions - Tires - Wheels
2
08-11-2015 01:56 AM


