Off Road & Fog Light Indictor Install
 04-20-2008, 08:06 AM
#1
Off Road & Fog Light Indictor Install
 I have had a few questions about my LED indicators on my dash. Here is a brief write up on that portion of my Hella light install. Not all light switches have lighted indications as part of the switch so this makes a very nice clean and effective method of adding something a little more 'factory' in a way to remind you that you left your lights on.
 Disclaimer: This write up is for educational purposes only. Any use or application of this procedure is done so at the risk of the installer/owner. The author and YotaTech are not responsible for any modifications done to any vehicle using these or any other related procedures contained in this write up. Descriptions and photographs are the sole property and copyright of the author and may not be copied or distributed without written consent. Links to this article may be allowed but are protected by all US copyrights. Use of specific products along with any photographs of such items remains the copyrighted property of the copyright holder and is not an endorsement of any specific company or items.
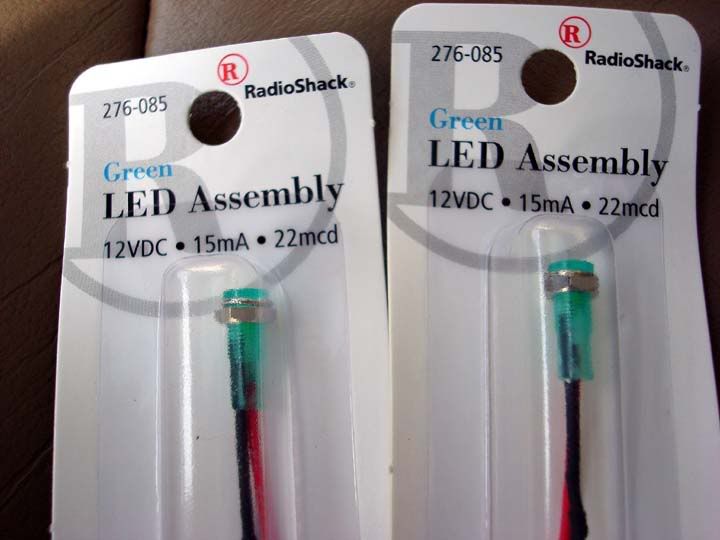
You will need to go to Radio Shack and check with the guys there and ask them for the contained LED's that already have the holder and resistor installed. I used 276-085, they were green but also the only ones they had that were preassembled. It worked for me as I did not do any fancy light upgrades and color changes to the OEM lighting in the gauge cluster. Other wise you have to purchase the LED color you want (which are domed), the holder AND the resistor that will drop the vehicle supplied voltage from 12vdc to around 5vdc. After about an hour of soldering, shrink wrapping the leads then installing in holders, you'll wish you had just purchased the pre-mades:
Removal of the dash gauge cluster:
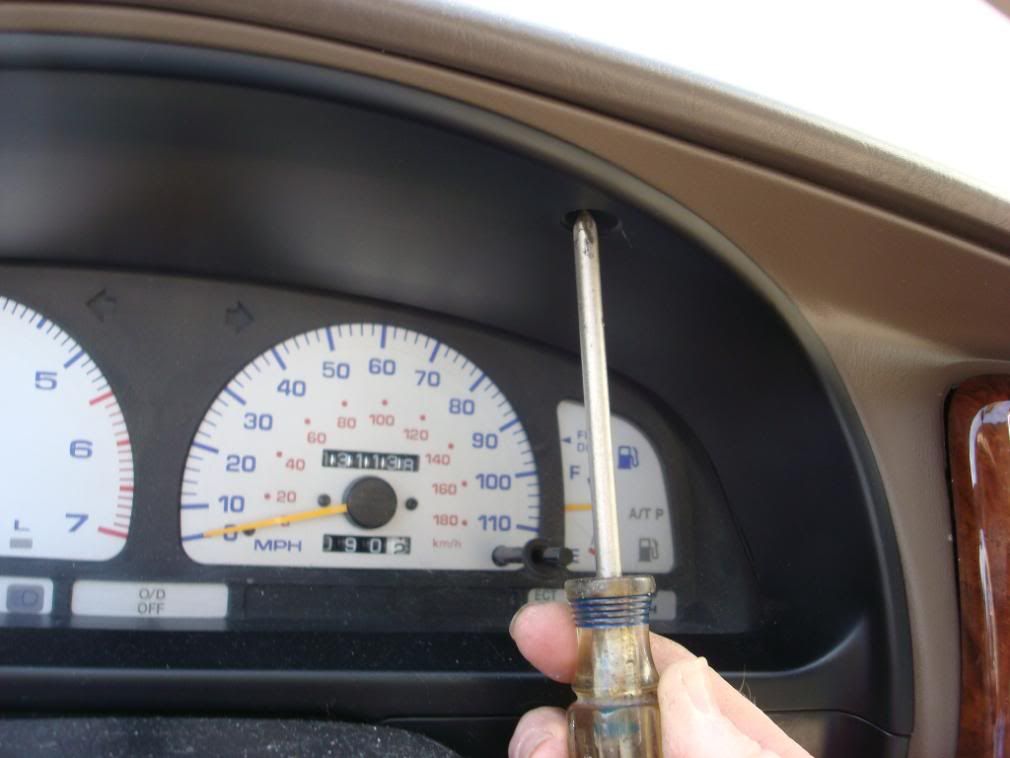
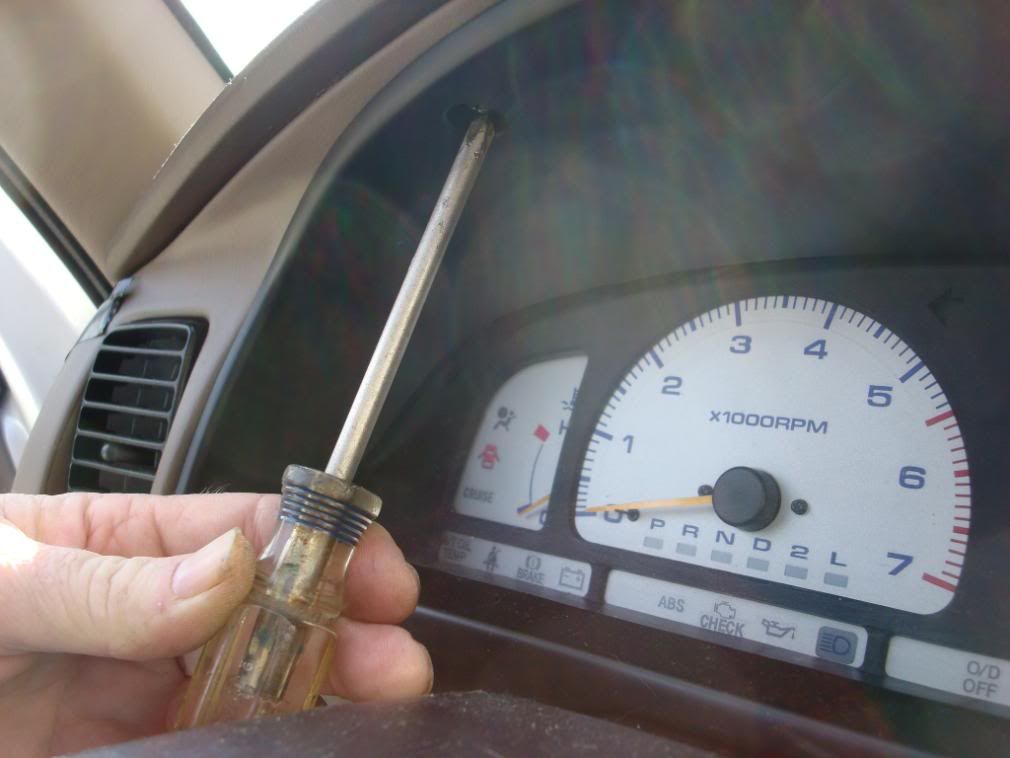
Remove the two screws in the top of the gauge cluster bezel, one on either side
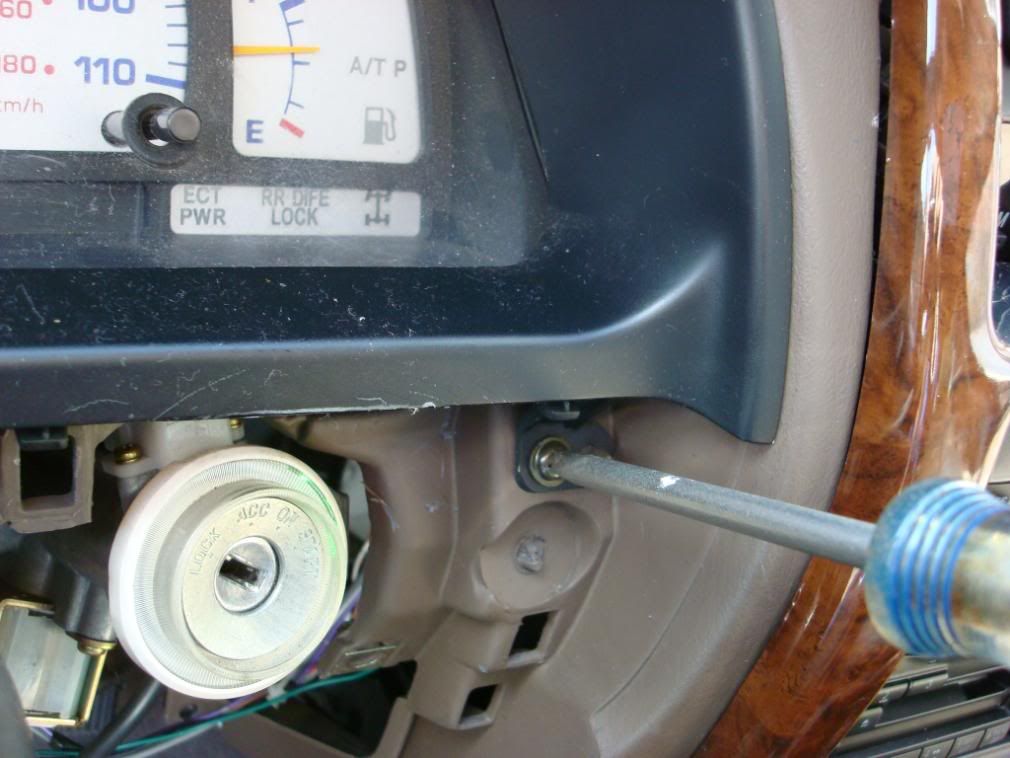
Remove the ignition cover, it will just pop off with a little persuasion and the lower dash panel on the left side of the steering column, there are 4 10 mm bolts in recessed holes. With those off you will see two screws that will need to be removed from the lower part of the bezel.
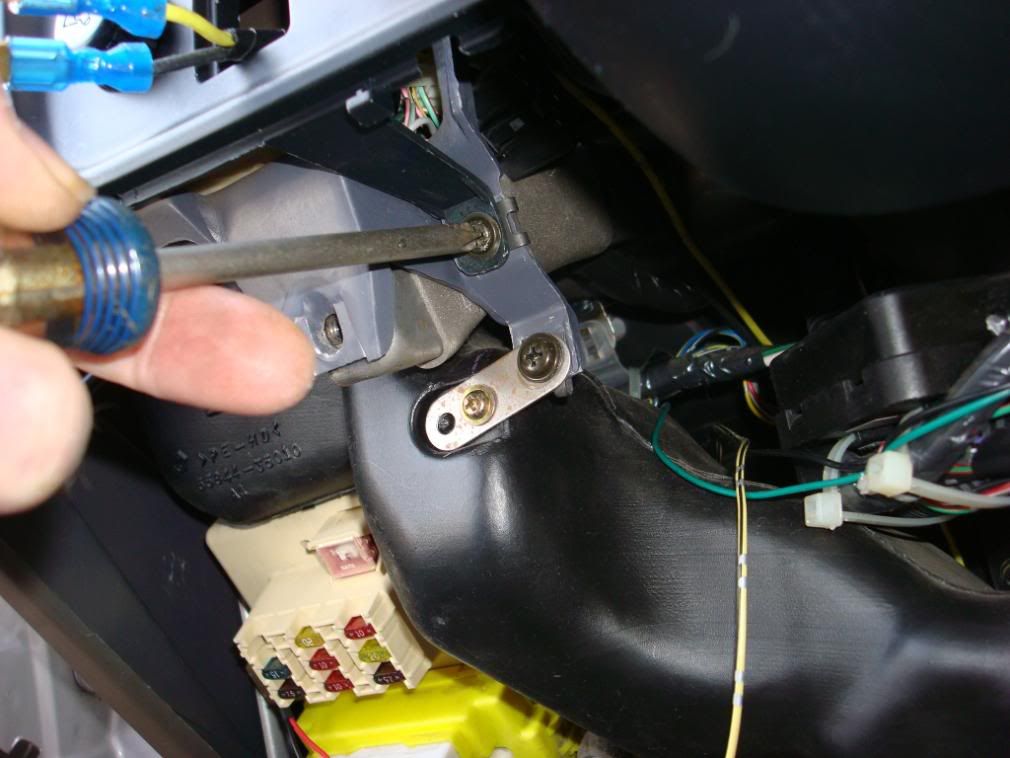
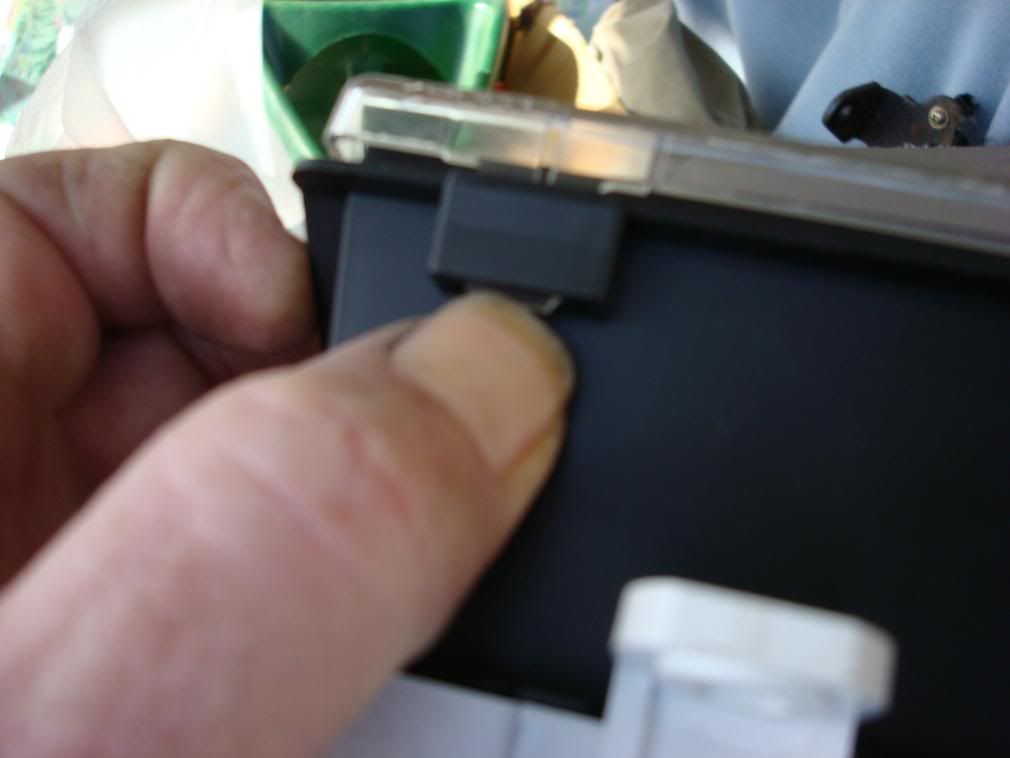
When you pull the bezel out, you will need to disconnect the dash dimmer connector. Just press down on the tab and pull. Be sure to remove any other leads for any switch that may be installed in the bezel as well.
After removal of the gauge cluster bezel you will pull the gauge cluster itself.
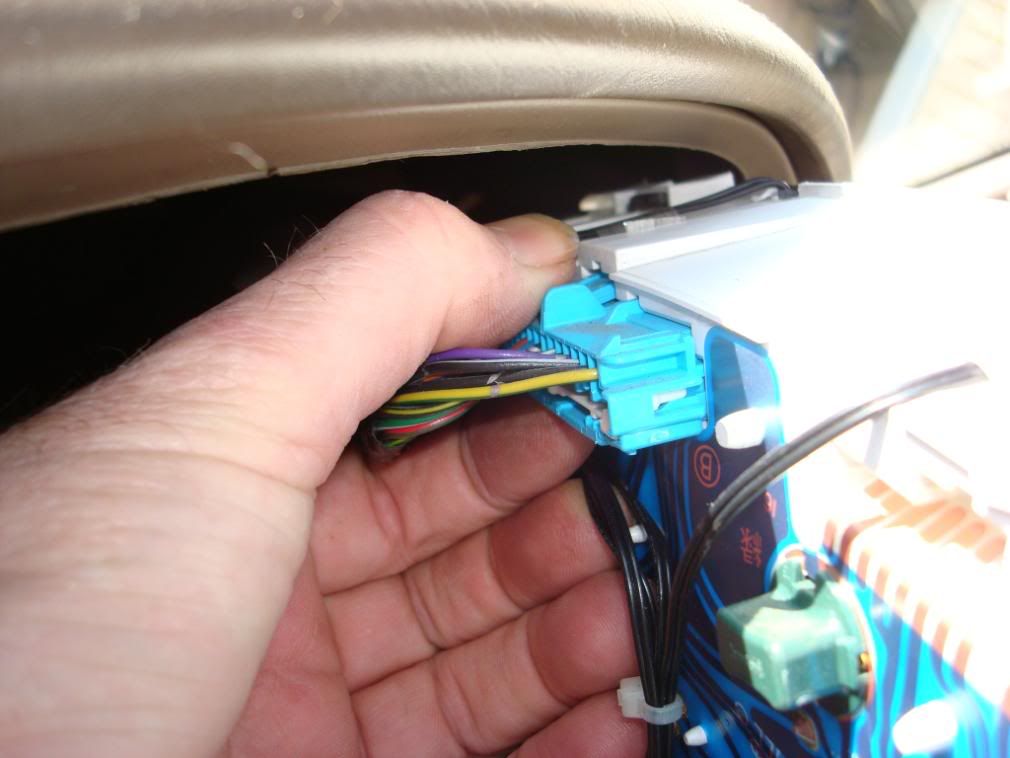
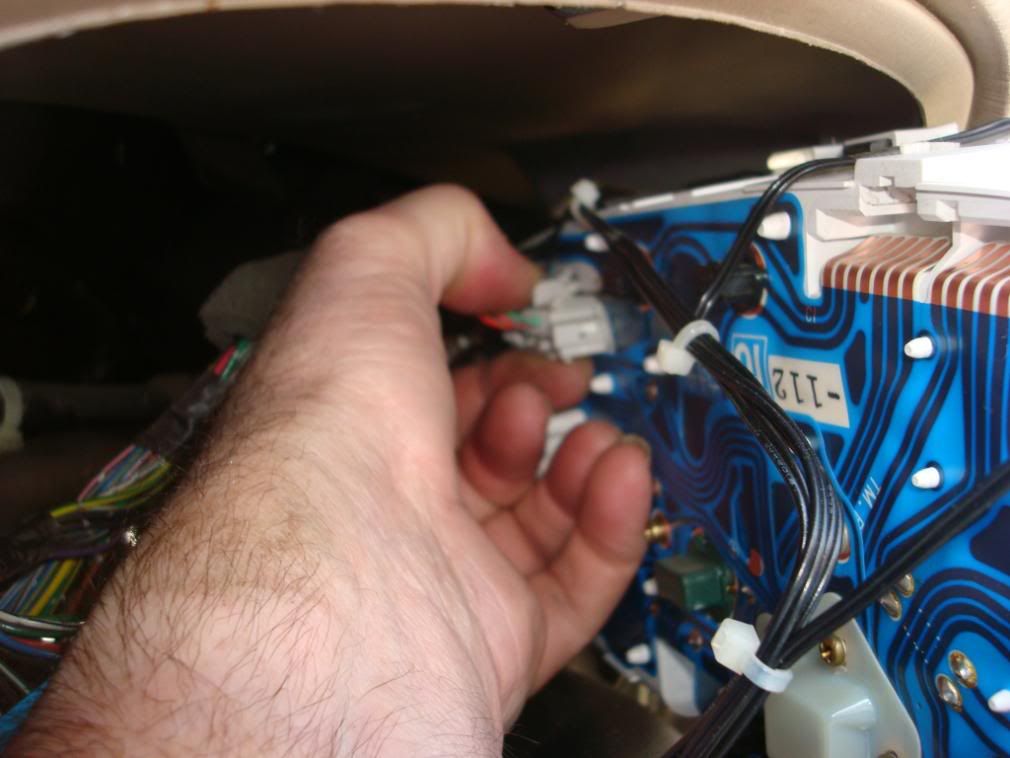
There are 4 screws holding the gauge cluster in place along with several connectors in the rear of the cluster.
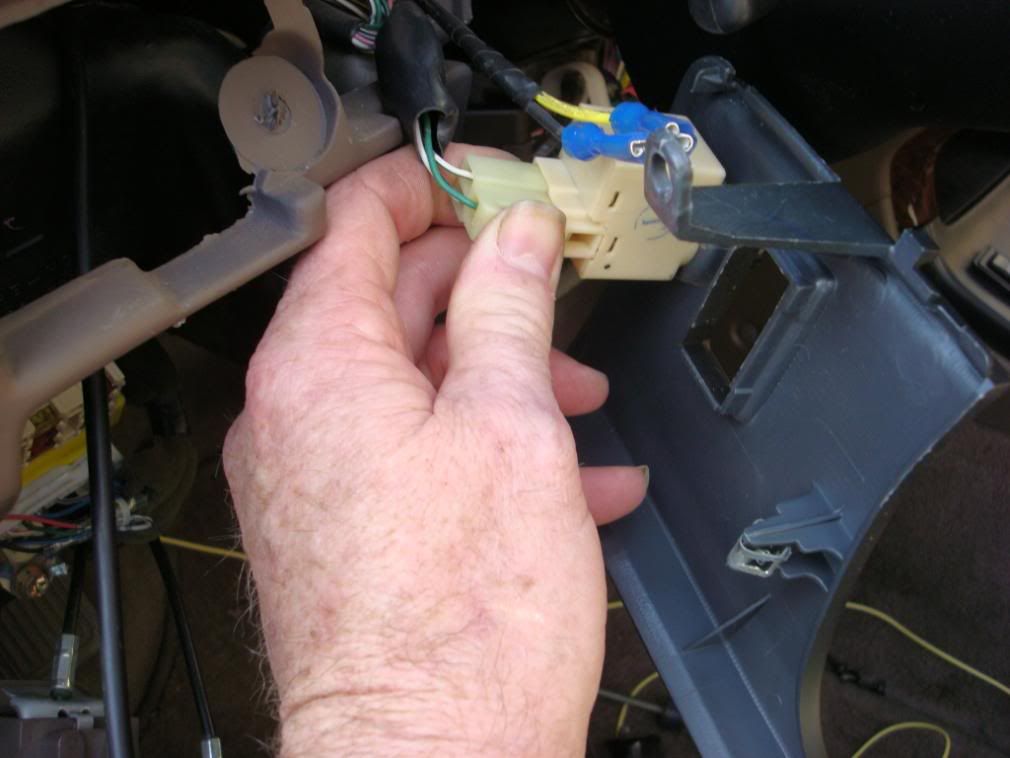
After you remove those 4 screws you will begin by gently pulling the gauge cluster out from the left side. You will feel tension, but pull it out enough to reveal the first connector. Press down on the tab at the top of the connector and gently pull it out of the cluster.
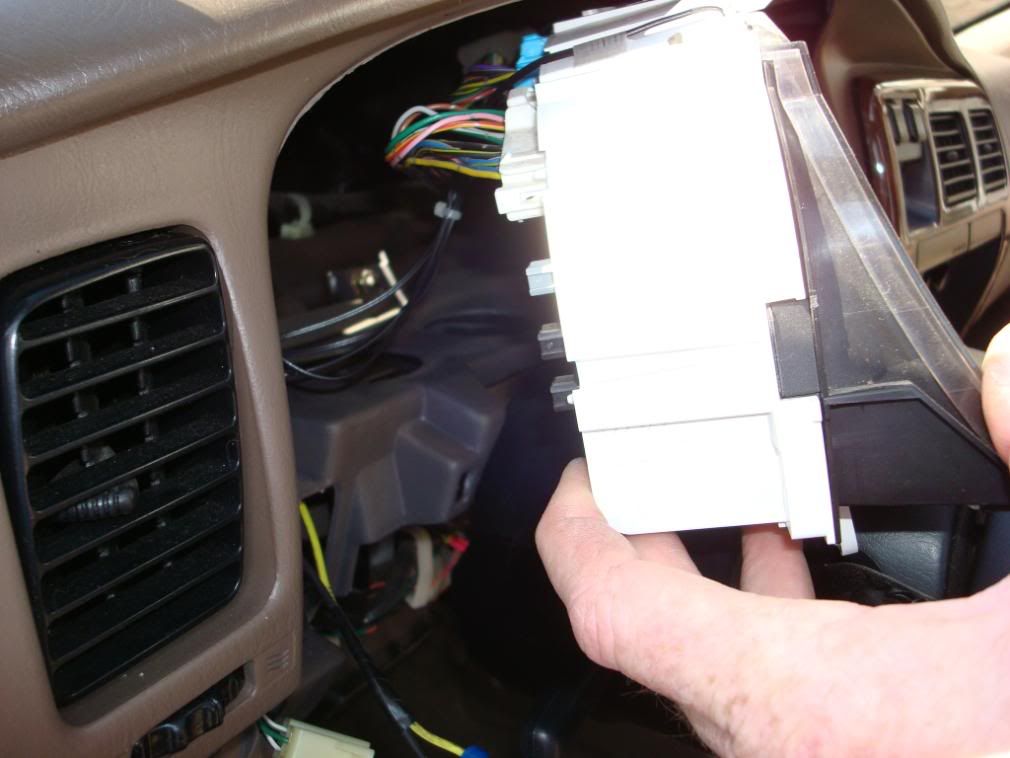
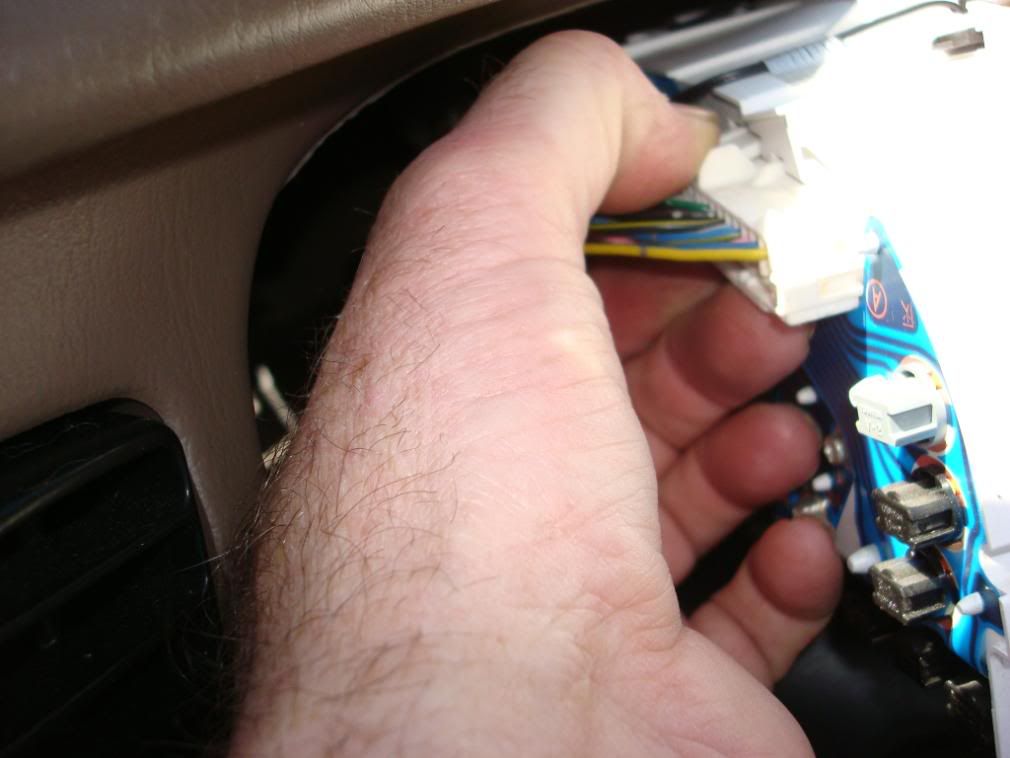
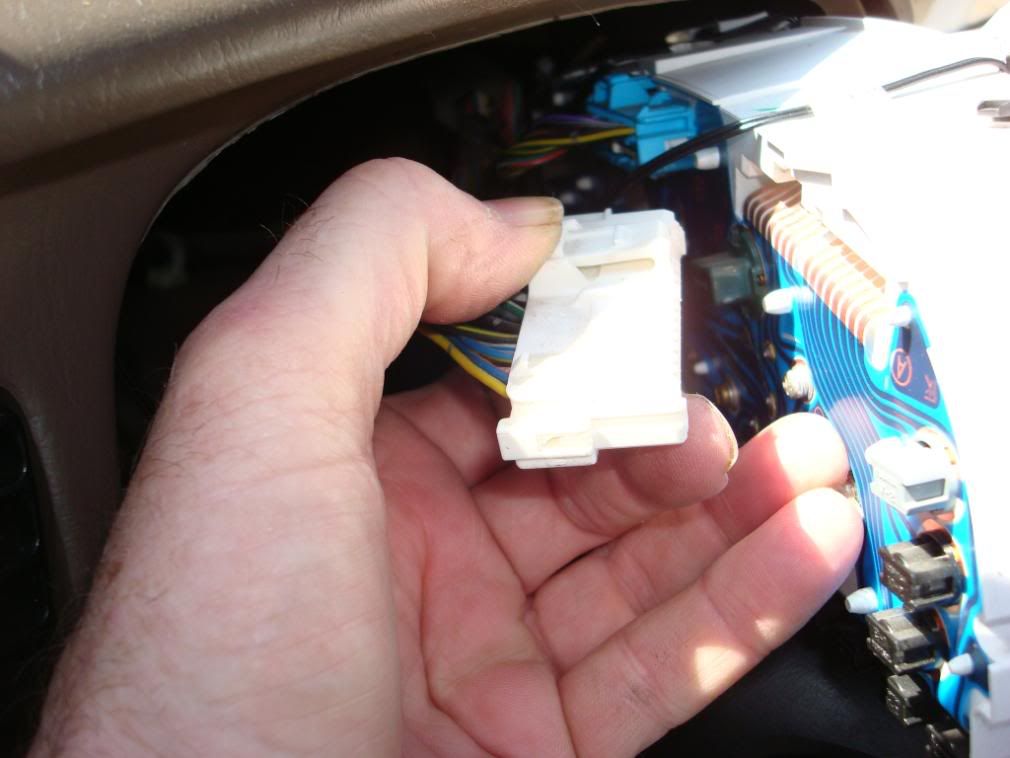
Work your way towards the right side of the cluster removing each of the remaining 3 connectors the same way
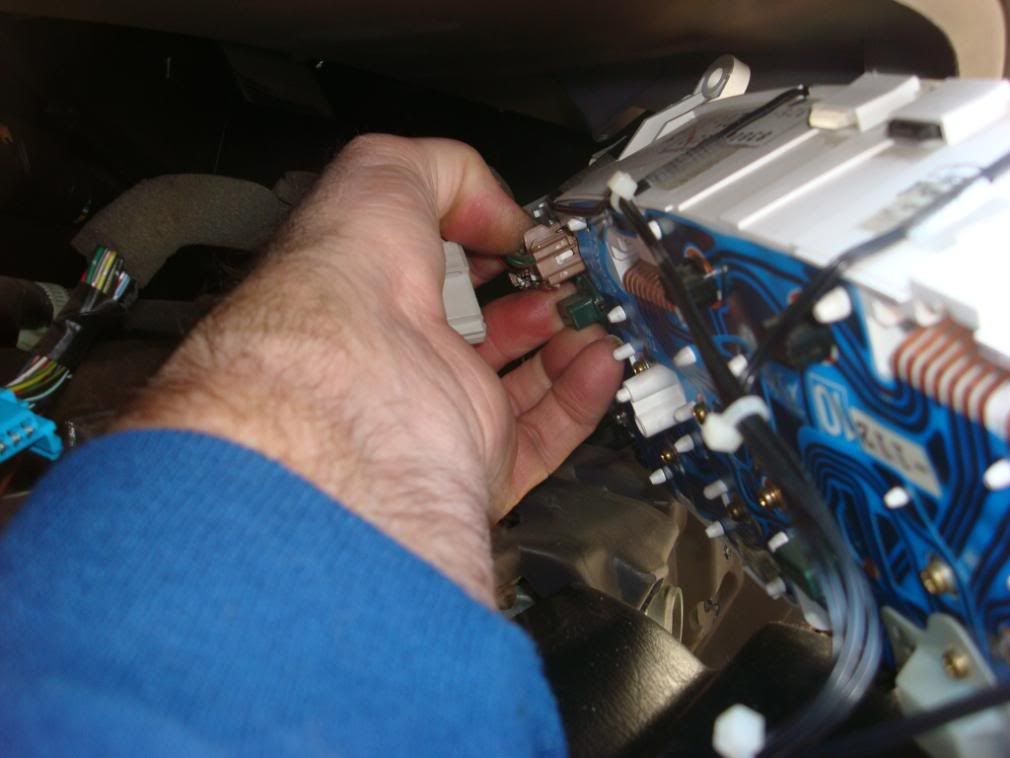
Set the cluster aside.
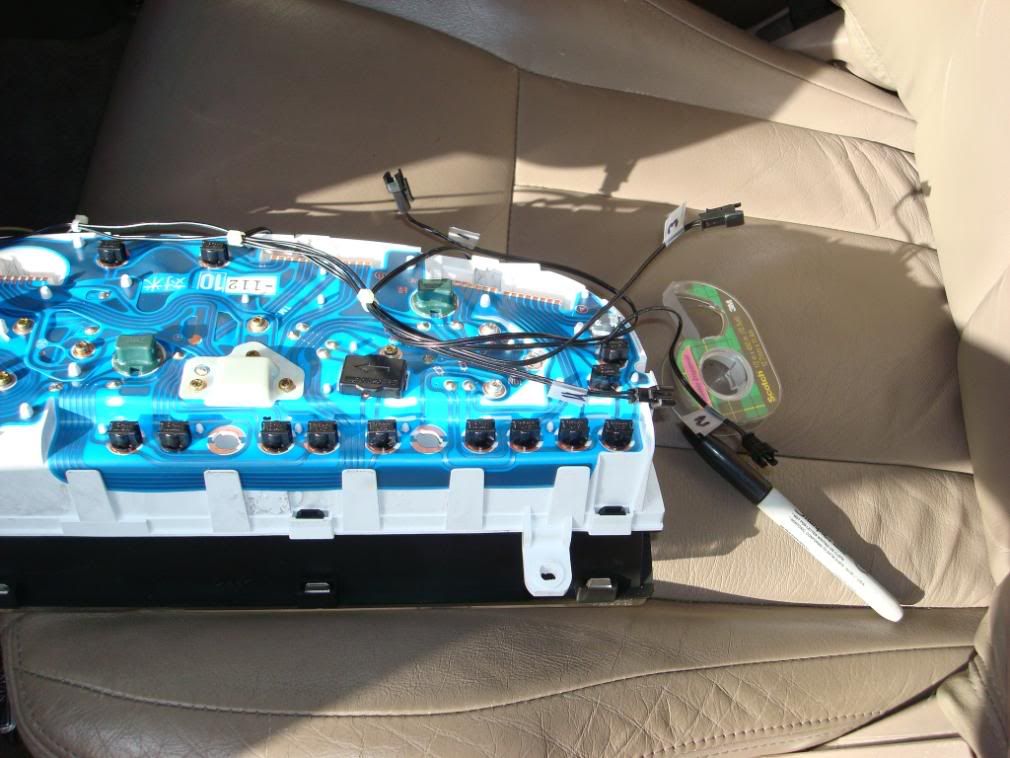
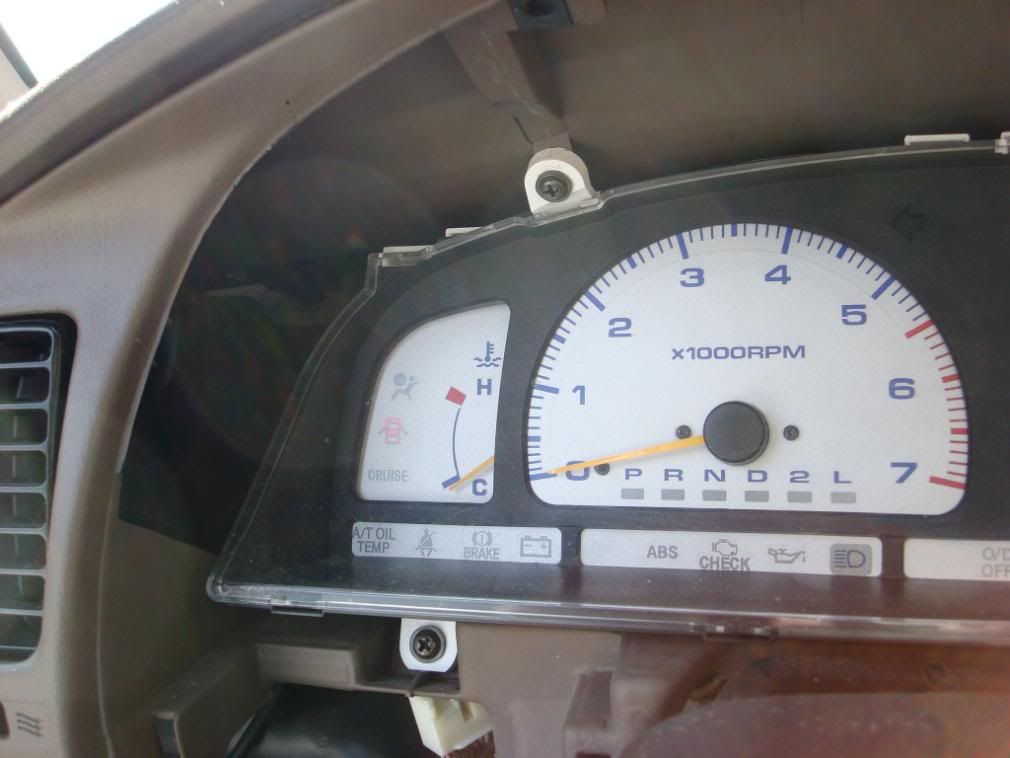
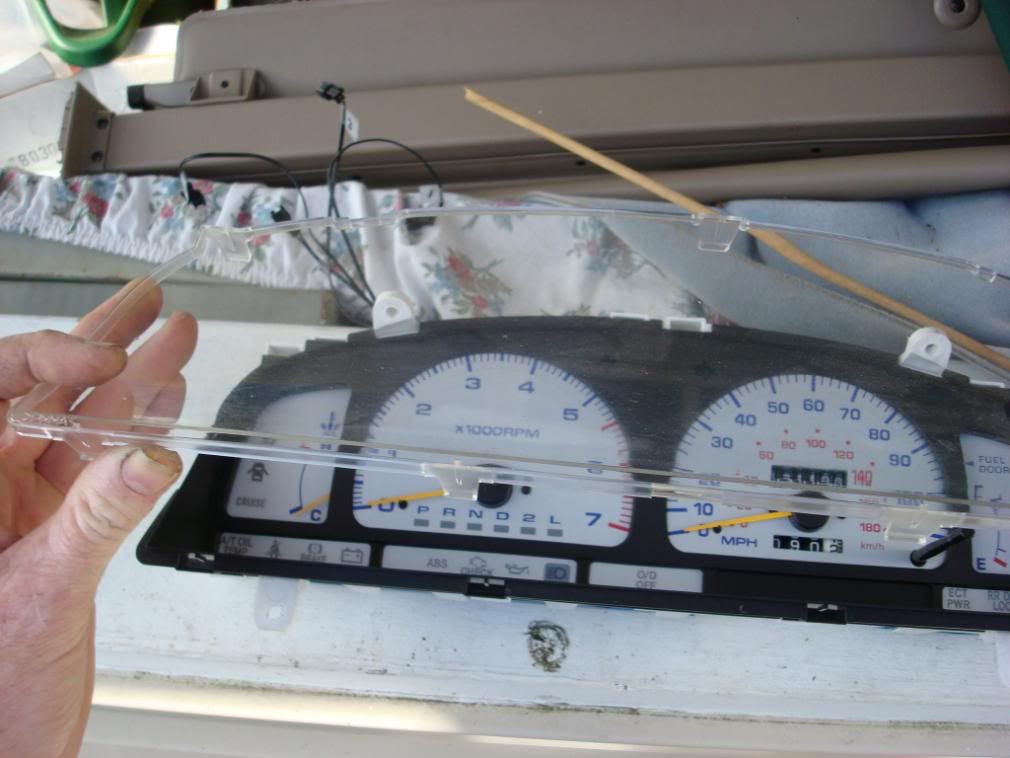
Removal of the gauge cluster protective plastic cover:
There are numerous tabs that will need to be pressed downward to free the protective cover from the cluster.
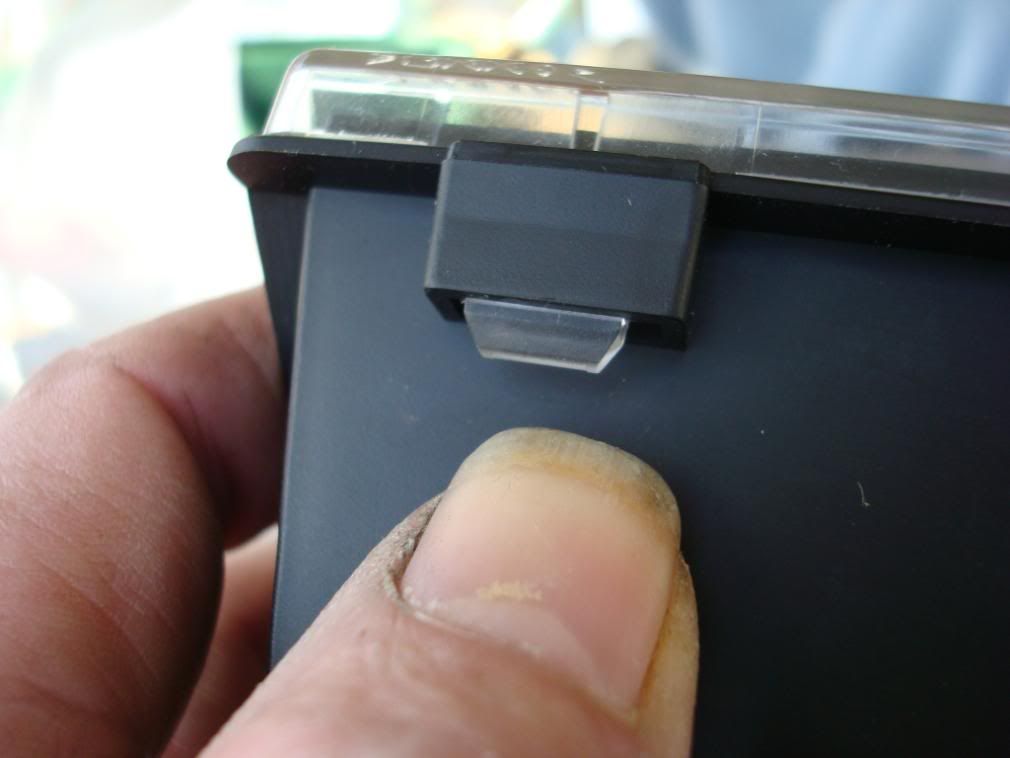
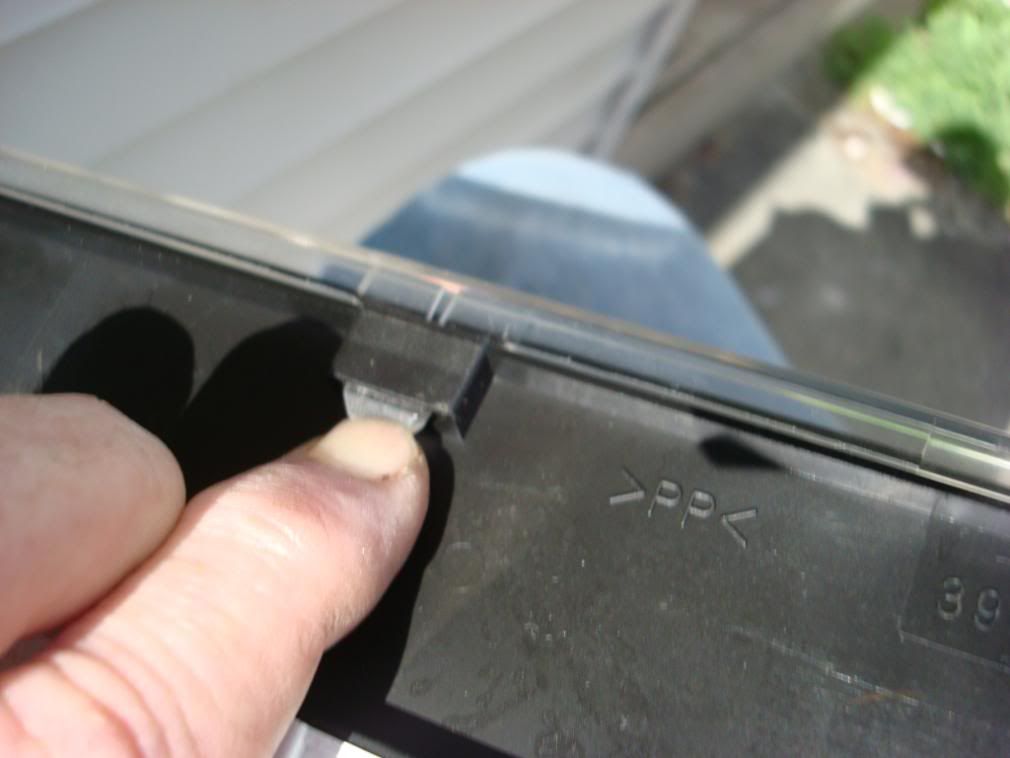
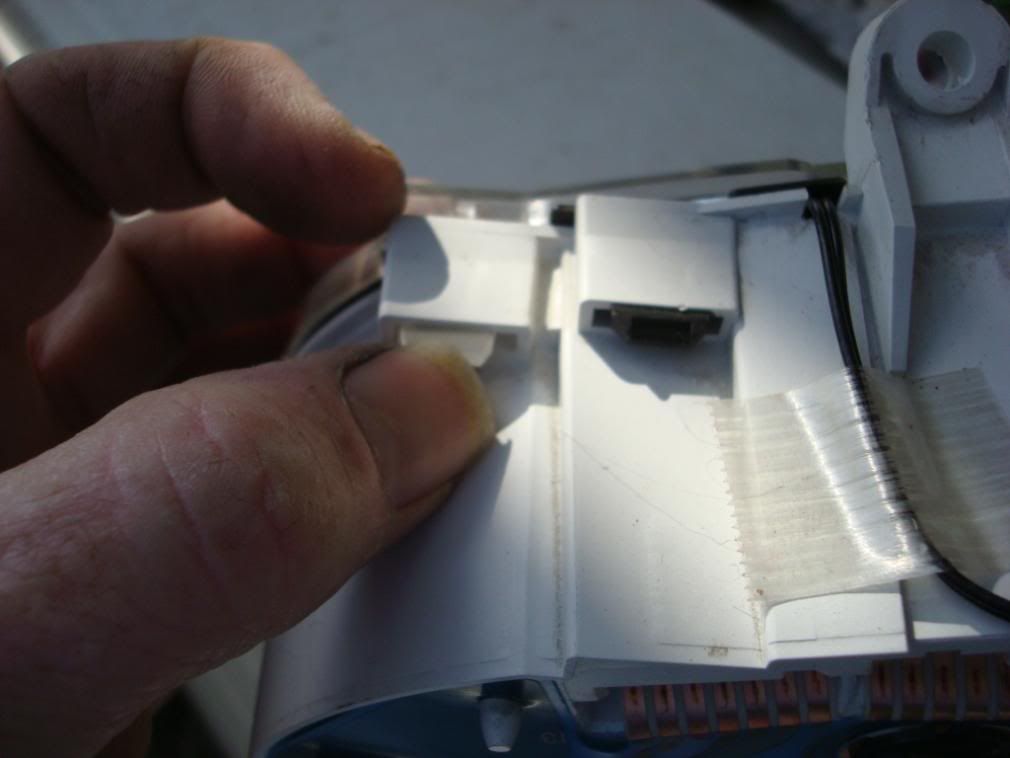
Work your way completely around the outer edge. After releasing all the tabs out, remove the plastic cover. This would be the same procedure if you desired to dress up the inner black gauge bezel, such as making it colored, carbon fiber or aluminum.
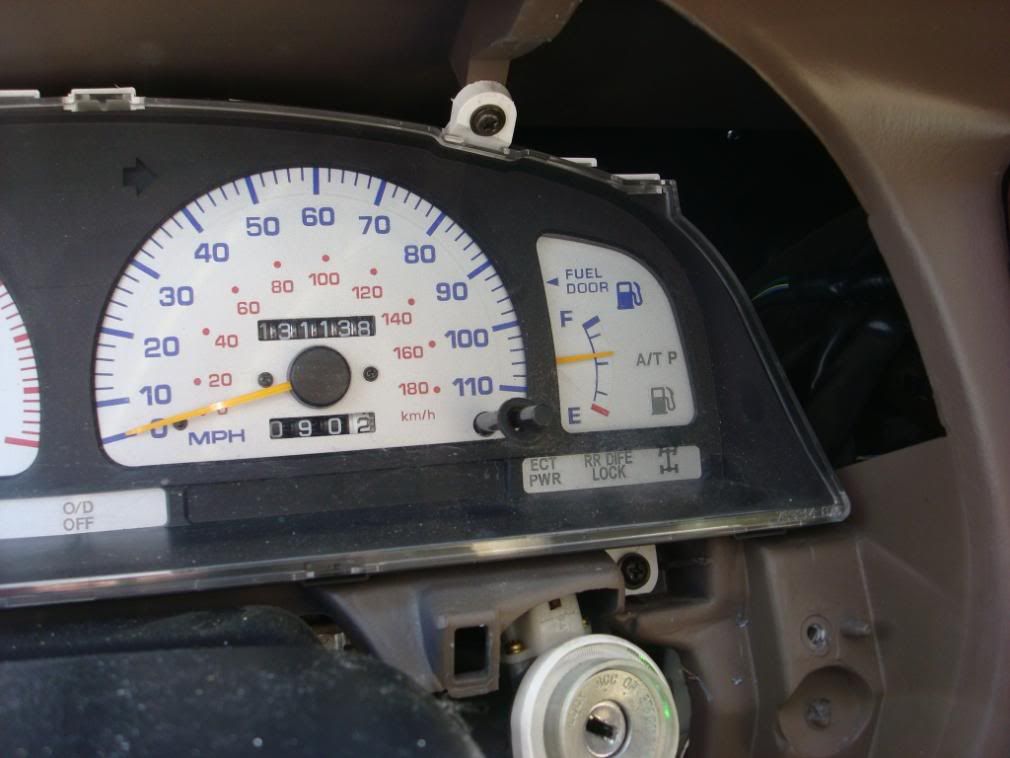
Depending on how many you are planning to install will determine where you want to locate the LED in the gauge cluster. I must caution you, I was very lucky when I put mine in. The gauge cluster when it goes back into the dash, if you put the LEDs in too close to the gauge face, or too far to one side or the other, they will interfere with your installing the gauge cluster back in the dash. Be sure to examine the length of the pre-made LEDs and then figure out the best location for your LEDs and their respective leads. Note where the gauge cluster fits back into the dash. Pre fit the cluster to help in determining the best location for your LEDs.
Installing and connecting the LEDs.
There should be some instruction on the packaging that tells you which leg of the LED is + and the other is -. Make sure you wire these correctly. LEDs only work when biased in one direction. These are diodes and only allow electron flow in ONE direction.
Nice thing about these pre-assembled LEDs besides having every thing there is they are flush and you use a lock nut to hold them in place vice the plastic push fit holders which tend to not stay put and require some sort of adhesive such as hot glue to help keep them permanently installed.
After finding the right location you need, drill the hole just the size needed to insert the LED.
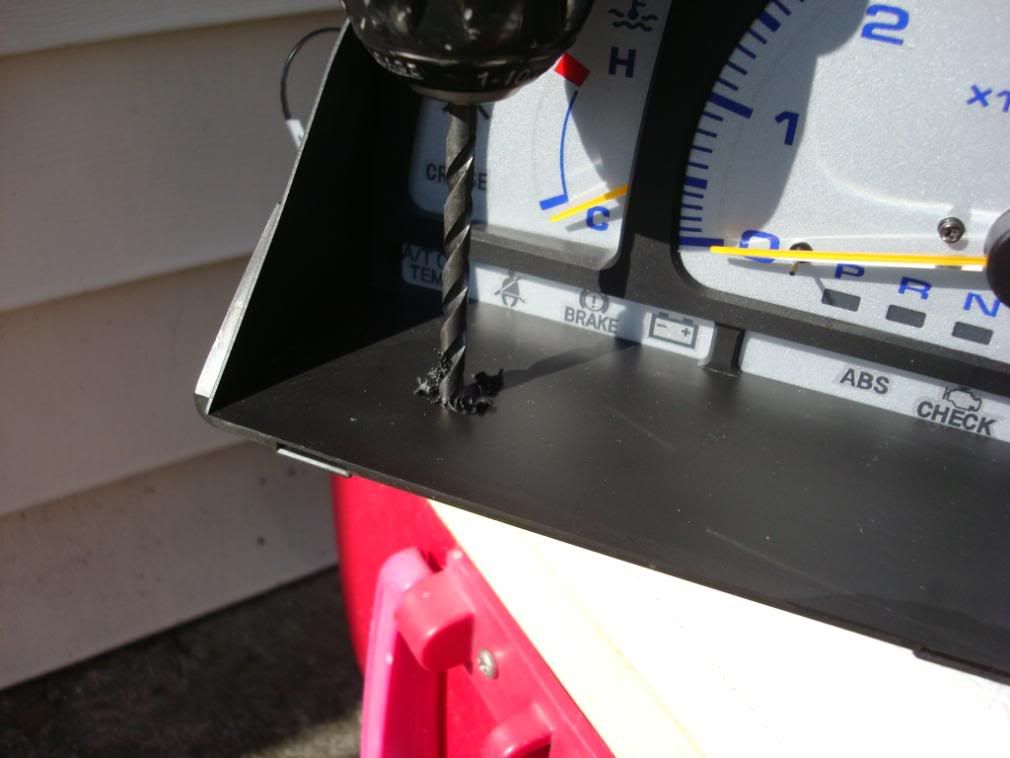
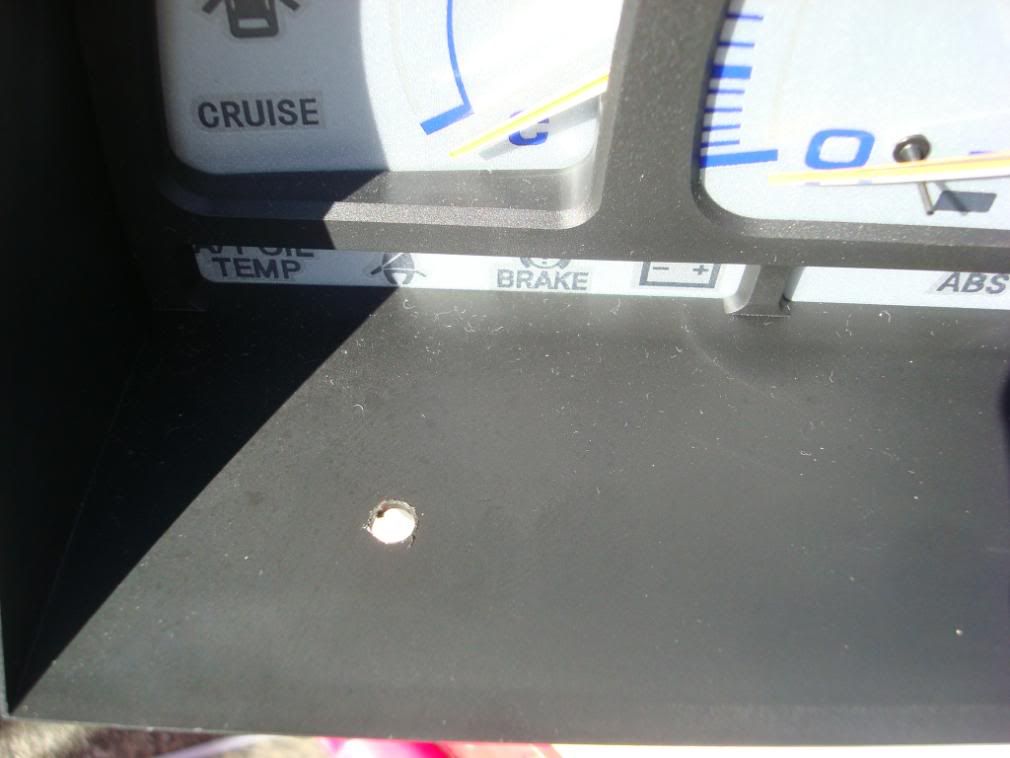
Install the LED in the hole so the base is flush in the hole.

Attach the locking nut.
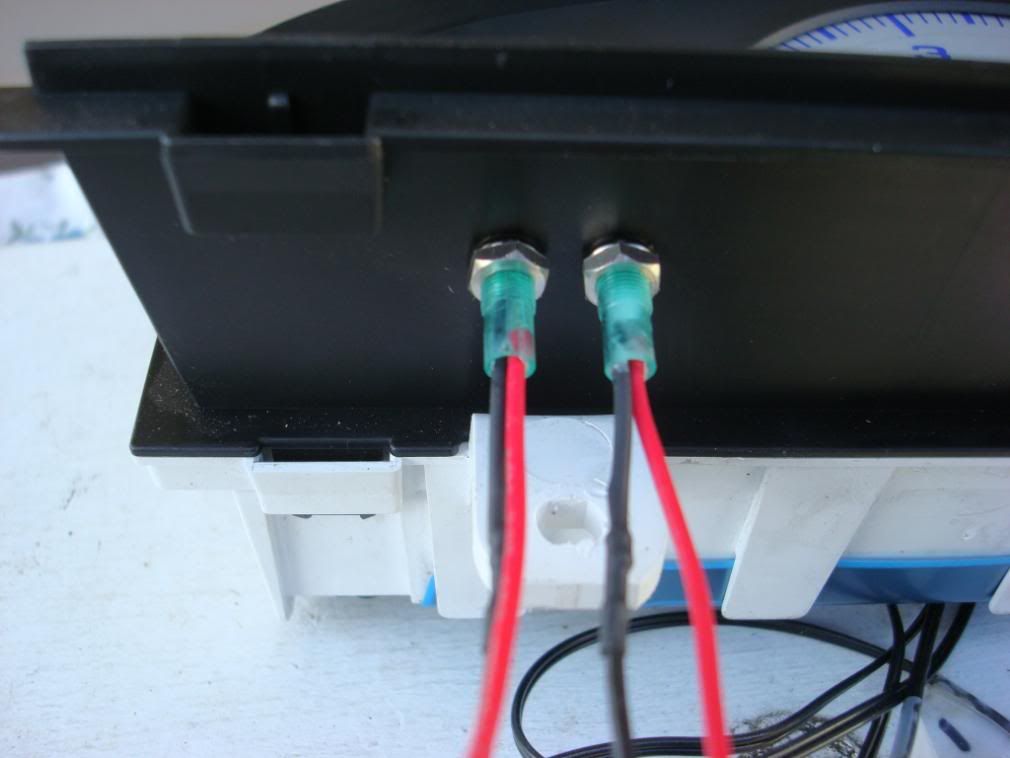
You will need to crimp on extension wires to the LED leads. I mention this as if you ever need to remove the LED or the switch if you have then directly crimped you loose wire length. I also put plug in connectors on the leads so that I could remove the switch and leave the LED installed.
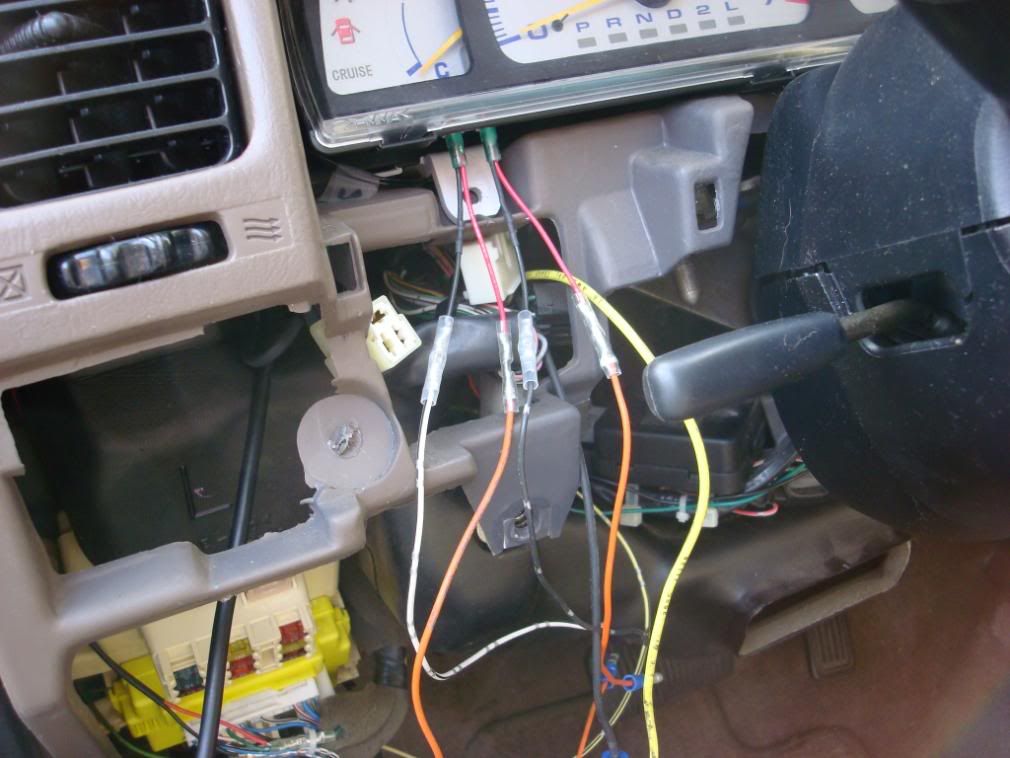
Hook up your switches with the appropriate lead then using the corresponding lead (remember + to +) from the switch. Cut that lead leaving enough space to strip about 3/8" insulation as you will take the LED '+' lead and splice one end of the switch wire and the LED lead together in the SAME END of the splice. Next you will connect the other end of your crimp to the switch lead. What you end up with is a 'Y' looking wire splice.
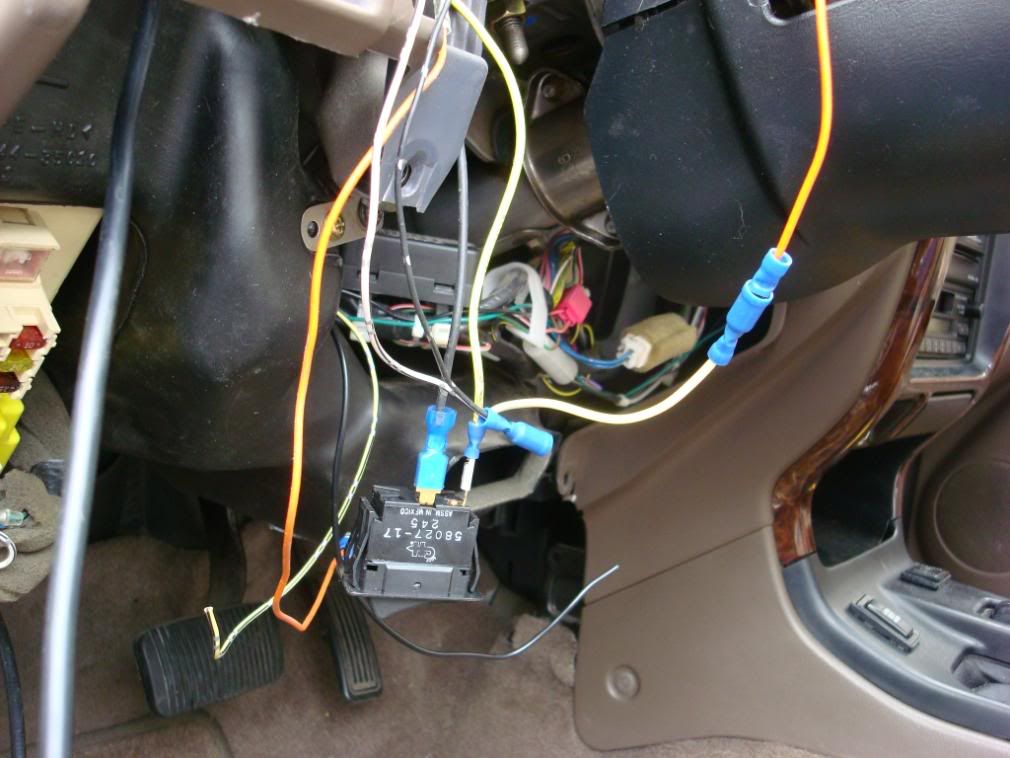
This picture is the Orange lead spliced into the white lead from the switch. You need to be sure to understand in what direction the current is flowing to and from the switch. You want the power for the LED to be on the "switched" side of current flow. If you don't have it on the after side of the switch, then the LED will be on all the time as you have 12vdc potential sitting on the incoming side of the switch.
The negative end of the LED will be wired to a common ground point. In other words, the LED is actually just a pick off for power to turn it on, while the other lead is connected to chassis GROUND.
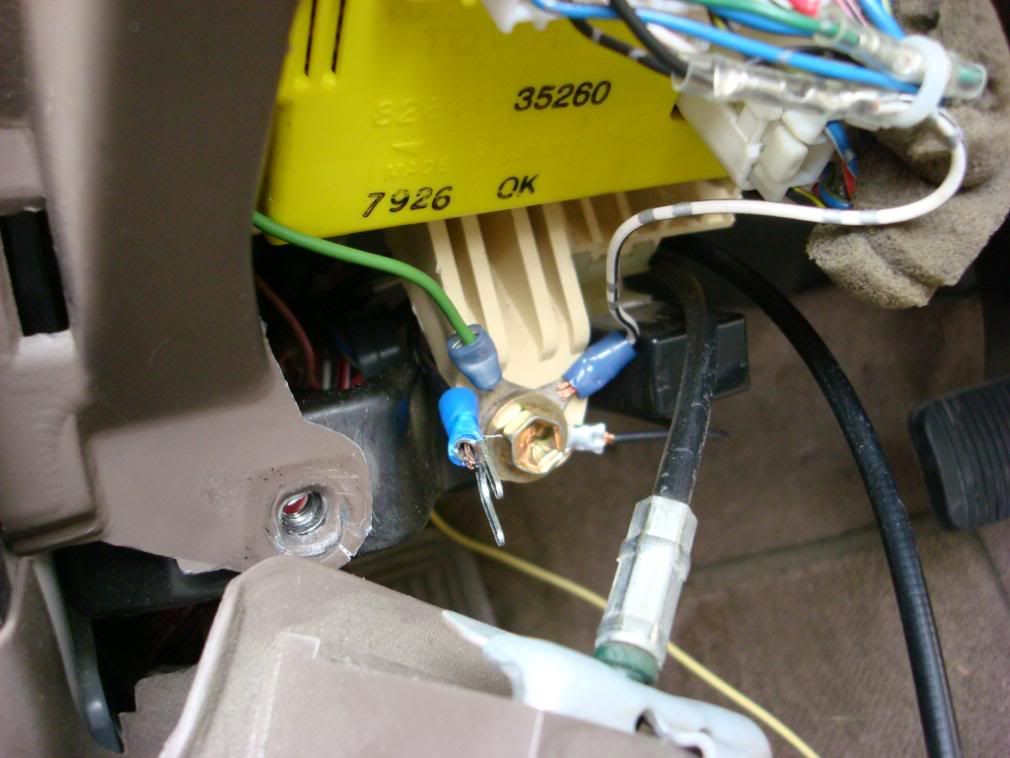
If you use more then one LED, crimp them all into one loop end terminal and attach to a common ground. I used the mount screw for the Integration relay which is just under the lower dash panel next to the left side of the lower dash panel.
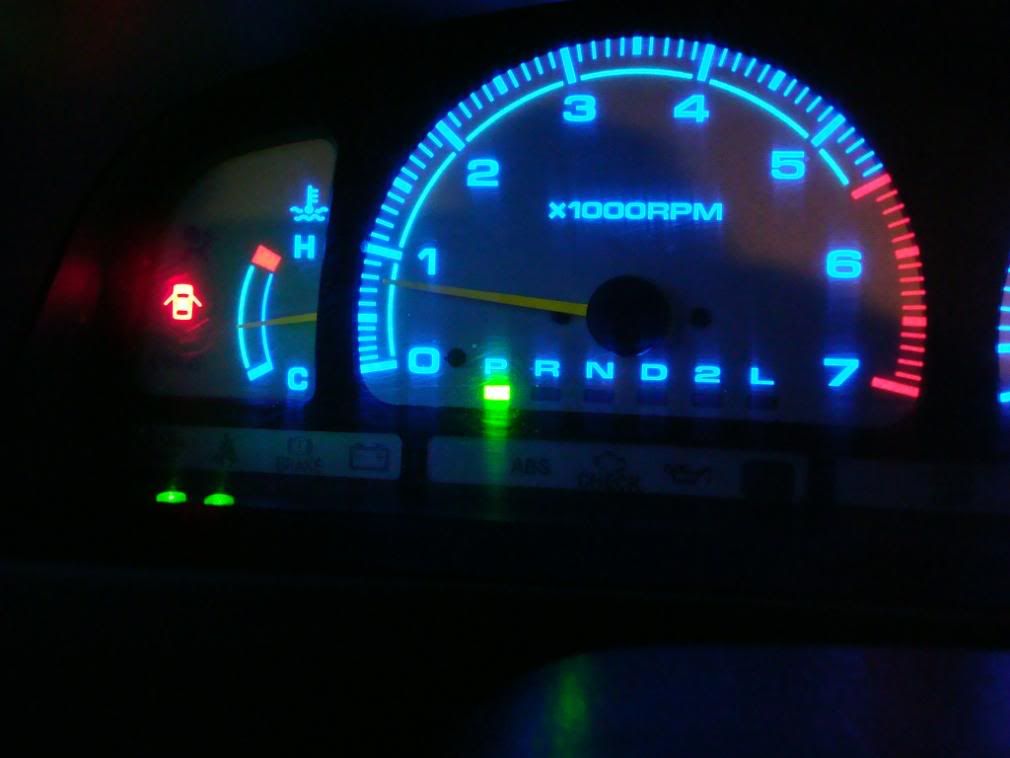
If you put these all in the correct order and location, when you press the rocker to 'ON' then the LED for that light will turn on.

 04-20-2008, 09:14 AM
#3
Registered User
Join Date: Oct 2006
Location: Woodway, TX
Posts: 1,341
Likes: 0
Received 0 Likes
on
0 Posts
Pretty cool idea and good job on the install. I know what your saying, I think I have the same light switch as your for my hellas and the indicator light is really dim. I'd do this mod, but I hate taking my dash apart.
04-20-2008, 09:14 AM
#4
Registered User
Join Date: Mar 2003
Location: Richland, WA
Posts: 15
Likes: 0
Received 0 Likes
on
0 Posts
The nice thing about the having the lights by the gauge cluster is that you can see them while you are driving. I put in the Toyota fog light switches to the left of the steering wheel and you can't see if it is on unless you duck your head. The main thing I worried about is driving around with my backup lights on - I put LEDs in the dash and it was well worth the time.
GT
GT
04-20-2008, 09:18 AM
#5
Registered User
Join Date: Mar 2003
Location: Richland, WA
Posts: 15
Likes: 0
Received 0 Likes
on
0 Posts
One more thing - when I did the mod, I didn't unplug the gauges, I just unscrewed it and took off the clear cover and drilled from the bottom. You just have to be careful to clean up all the plastic pieces when you drill. (I got a piece stuck behind my gas gauge and had to pull it all apart again).
04-20-2008, 09:18 AM
#6
Registered User
Join Date: Oct 2006
Location: Woodway, TX
Posts: 1,341
Likes: 0
Received 0 Likes
on
0 Posts
The nice thing about the having the lights by the gauge cluster is that you can see them while you are driving. I put in the Toyota fog light switches to the left of the steering wheel and you can't see if it is on unless you duck your head. The main thing I worried about is driving around with my backup lights on - I put LEDs in the dash and it was well worth the time.
GT
GT
Trending Topics
04-20-2008, 10:42 AM
#8

One thing about posting here is you always get some guy who tries to make it look like a compliment but he is really dishing you .... I wonder how many hours you spend in front of the TV, reading a newspaper, sitting around on your computer at night spending quite few hours of YOUR life that you can never get back in useless banter, glad YOU have that kind of time.
At least I am doing something that I enjoy doing that has a benefit that obviously you have no clue about, doing a job right and making my truck look better. Some how getting some self satisfaction in doing a job right and having others tell you they want to do it, seems like a lot better way to spend that time you can never get back .... oh and spending it with your teenage son who is learning about cars, I guess that is a waste of time too right? Geez and you live up here in the same part of the Northwest as I do.

Now here are come really classy YotaTechers:
The nice thing about the having the lights by the gauge cluster is that you can see them while you are driving. I put in the Toyota fog light switches to the left of the steering wheel and you can't see if it is on unless you duck your head. The main thing I worried about is driving around with my backup lights on - I put LEDs in the dash and it was well worth the time.
GT
GT
 you do have a very hot looking road warrior! Saw you post about "To grille guard or not to grille guard." Your ride looks very nice either way but if you do decide to '86' the grille guard, I would love to give it a proper home! One can never have enough lights!
 04-20-2008, 04:33 PM
#10
THANK YOU!!!!!
now i know why you didn't cover this in your PM back to me, and the wait was surely worth it i swear, Toyota needs to hire you to write their FSMs! always great information and so many pictures, anyone could repeat. no stone left unturned, and for the rest of us, no modding in the dark.
thanks again for sharing
now i know why you didn't cover this in your PM back to me, and the wait was surely worth it
i swear, Toyota needs to hire you to write their FSMs! always great information and so many pictures, anyone could repeat. no stone left unturned, and for the rest of us, no modding in the dark.thanks again for sharing
04-20-2008, 08:40 PM
#12
THANK YOU!!!!!
now i know why you didn't cover this in your PM back to me, and the wait was surely worth it i swear, Toyota needs to hire you to write their FSMs! always great information and so many pictures, anyone could repeat. no stone left unturned, and for the rest of us, no modding in the dark.
thanks again for sharing
now i know why you didn't cover this in your PM back to me, and the wait was surely worth it
i swear, Toyota needs to hire you to write their FSMs! always great information and so many pictures, anyone could repeat. no stone left unturned, and for the rest of us, no modding in the dark.thanks again for sharing
I submitted it right after I posted it here
Thanks for the comps.
 04-20-2008, 09:07 PM
#13
Took me about 5 months to find them but I got them on eBay. No real information as to the company that made them either but I needed the ones that show the automatic trans shift and when I finally found this set, I had to have it. They are silver vice white and look AWESOME! Here is the write up I did when I installed them. https://www.yotatech.com/forums/f2/r...en-3-a-120466/Enjoy!
04-20-2008, 10:29 PM
#14
Registered User
Fo_SheeZy, thanks dude, you always have something positive to say about even the rudest poster so when I do get a comp from you I know you are sincere. Even though I am not a huge fan of 'bling' you do have a very hot looking road warrior! Saw you post about "To grille guard or not to grille guard." Your ride looks very nice either way but if you do decide to '86' the grille guard, I would love to give it a proper home! One can never have enough lights!
you do have a very hot looking road warrior! Saw you post about "To grille guard or not to grille guard." Your ride looks very nice either way but if you do decide to '86' the grille guard, I would love to give it a proper home! One can never have enough lights! But yeah I ditched the brush guard and it's already found a home to another Street Runner owner! Soon I'll have some black headlights + corners, and a new skid plate!
04-21-2008, 10:41 AM
#15
Registered User
Join Date: May 2007
Location: Denver metro area-CO
Posts: 2,175
Likes: 0
Received 2 Likes
on
2 Posts
x3 what he said
Another well illustrated mod that could also be titled-"removing the gauge cluster" as that would have intimidated the heck out of me until seeing you Ritzy show us how easy it really is.
I don't have a use for this mod-right now today, but sure is nice to see how to do it when I do need it.
Thanks for the illustrative photos to help us along.
04-21-2008, 04:26 PM
#16
Registered User
Join Date: Oct 2007
Location: Fay-Town, AR
Posts: 68
Likes: 0
Received 0 Likes
on
0 Posts
Took me about 5 months to find them but I got them on eBay. No real information as to the company that made them either but I needed the ones that show the automatic trans shift and when I finally found this set, I had to have it. They are silver vice white and look AWESOME! Here is the write up I did when I installed them. https://www.yotatech.com/forums/f2/r...en-3-a-120466/Enjoy!
Last edited by 4runnit; 04-21-2008 at 04:29 PM.
04-22-2008, 07:32 AM
#18
Registered User
this mod sucks!
ha i'm just joking. hey this is a really great write up, and you put some serious work into the pics and descriptions, which is REALLY nice for the future readers who may be looking to do this very mod. Now that led's are so easy to obtain, you could wire up anything in there for lights within the pod that aren't shining directly in your eye.
I wish everyone who posted here was as thorough about their pics and descriptions. It would make yotatech into more of a knowledge database than a chatroom. The forum i go to for my motorcycle is full of people who post super detailed like this, and they compiled it all (props to D Slone) into a sweet outline format ( http://www.sloneservices.com/SilverB...ar1100-FAQ.htm ) so you can search it any time easily. Maybe more write ups like this one will encourage others to help organize the info here, which would eliminate people asking the same questions and people answering with links to a half dozen different locations.
good work man!
Last edited by tj884Rdlx; 04-22-2008 at 07:38 AM.

Thread
Thread Starter
Forum
Replies
Last Post
the1998sr5
95.5-2004 Tacomas & 96-2002 4Runners
15
07-14-2020 08:35 PM
GreatLakesGuy
The Classifieds GraveYard
8
09-04-2015 09:27 AM
rushw
General Electrical & Lighting Related Topics
4
07-18-2015 01:46 PM


