Lookie what I got today!
 01-11-2003, 08:09 AM
#1
Contributing Member
Thread Starter
Join Date: May 2002
Location: Solano Co, CA Originally a North Idaho Hick
Posts: 4,267
Likes: 0
Received 0 Likes
on
0 Posts
Lookie what I got today!

Guess I know what I will be doing tomorrow!! Even gave me the excuse to go and buy that cordless drill I been eyeing!! Hopefully will have pics posted by tomorrow night!
 01-11-2003, 08:21 AM
#2
Fantastic
Hey Joey, you are gonna love those.
It helps to put all the gasket stuff on the night before as it's a real tedious job doing that part.
Good time to watch a vid or the tube, and have at.
Also helps to take off all of your wheels, unless you have one of those drills with the tip that comes out angled.
And also to tape the flares into position, and have one person hold the flares in place real tight, while the other person drills.
You also will have lots of screws left over as they provide a lot of extras.
We did not use all of the "drill indents" they have on the flares.
We made a few of our own holes when we drilled.
Also out back, I have a few holes going right into my bumper.
I'll have to trim my Bush :eek: when it comes time to get a new rear bumper.
Kind of the way Mike H. did on that maroon 2nd gen you have seen pics here of.
Good luck, and looking forward to the pictures after you get them on.
This is still one of my favorite all time mods next to the Downey coils.
01-11-2003, 08:37 AM
#3
Registered User
Join Date: May 2002
Location: Boyertown, Pa
Posts: 1,853
Likes: 0
Received 0 Likes
on
0 Posts
I am sure that they will look awesome on your 4Runner Joey. Can't wait to see the pictures and how you made out doing them. Goodluck and remember the #1 rule in doing things like that...Measure twice, cut/drill once! Goodluck! :fireman:
01-11-2003, 09:45 AM
#5
Registered User
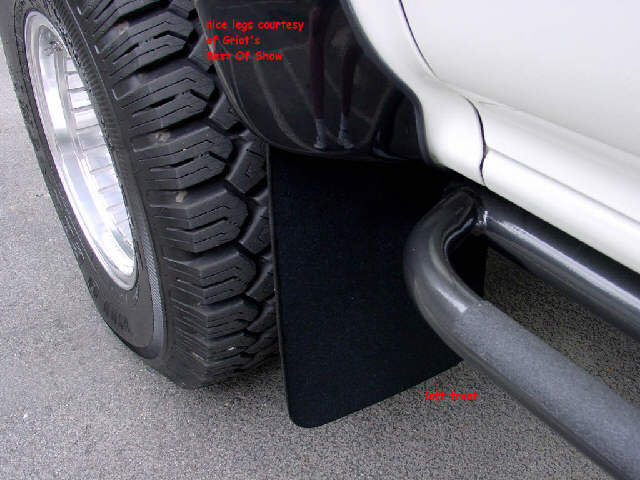
Gaskets
Apply the gasket to the flare. It goes on the top edge that will contact the fender. Here are a couple of close ups. I hope you can see it well enough, the Runner is a bit filthy at the moment...


BTW - Joey empty your PM box...
BTW - Joey empty your PM box...
01-12-2003, 04:51 AM
#6
Contributing Member
Thread Starter
Join Date: May 2002
Location: Solano Co, CA Originally a North Idaho Hick
Posts: 4,267
Likes: 0
Received 0 Likes
on
0 Posts
Cebby thanks for the pics. I was pretty positive that's how it went I just wanted to hear it from someone else. Once you stick on 3M it's there. The instructions that came with the front ones were different than the rears and they actually showed how to do this step.. Found that this morning.. Well anyways sorry no pics with them installed but I ran into some un forseen problems this morning.. My first plan was to wash it up real good but all the hoses around base were froze and the base car wash was closed. Then when I removed the rear flaps I found out how nasty it was behind them. I want to take a wire brush and clean all the nasty crap out of there before I get too deep in to it. Cebby and Corey did you have to remove the 10mm bolts in the front that hold the fender lining in and then drill holes in the flare to put them back in? I am swamped this week but hopefully next weekend it'll be warmer and I get them put on.
01-12-2003, 05:07 AM
#7
I did not have to remove any of the bolts for the liner.
Also, some of the nubs you are suppose to use on the flares to drill as pilots end up going into the plastic lner, and won't hold.
You need to do a little ad-libbing, and make new holes on the flares to get into solid metal.
Still, it only took two of us perhaps 2 hours at the most to do all 4.
Corey
Trending Topics
 01-12-2003, 07:22 PM
#11
Contributing Member
Join Date: Oct 2002
Location: Bradenton, Florida
Posts: 992
Likes: 0
Received 0 Likes
on
0 Posts
maybe one day..when my g/f stopes having to go to the shop..i will be able to buy some flares and shine them up and then you can see my sexy legs..
 01-12-2003, 07:42 PM
#13
Registered User
Join Date: Jun 2002
Location: Edmonton, AB, Canada
Posts: 1,878
Likes: 0
Received 0 Likes
on
0 Posts
Don't do it Joey! Leave 'em off! I would have gone body-damage-free on yesterday's excursion on the trails if I didn't have flares. :pat:

I'm just kidding, they're gonna look great on your rig.
I'm just kidding, they're gonna look great on your rig.

Thread
Thread Starter
Forum
Replies
Last Post
Dale Johnston
86-95 Trucks & 4Runners (Build-Up Section)
11
10-31-2015 10:22 PM
PNW94Runner
86-95 Trucks & 4Runners
3
09-29-2015 02:55 PM


