LED Guage Light Install How-To
 03-26-2009, 07:59 AM
#1
Registered User
Thread Starter
iTrader: (1)
Join Date: Jun 2007
Location: Anne Arundel County, MD
Posts: 416
Likes: 0
Received 0 Likes
on
0 Posts
Gauge Cluster LED Install Write-up
Yesterday i got rid of the green light behind the gauges and ignition and put in white LEDs. I also changed the blinkers to blue. Heres a quick write up with some pictures. This install was on my 2002 4Runner, it may be different on other vehicles.
What You will Need:
4 #74 LED bulbs, i chose white
2 #74 LED bulbs(for the blinkers) i chose blue.
Philips Screwdriver
10mm socket with ratchet.
There are many colors of bulbs and different designs out there.
vleds.com
autolumination.com
I bought all my leds from autolumination.com, they have the most to offer and decent prices.
1. Remove steering wheel cover, there is one screw on the bottom, and one screw behind the steering wheel on each side.
1A. To get to the screws on the side, start the truck, turn the wheel to the left until you see a screw on the right side of the cover. Then turn the wheel to the right until you see the screw on the left side of the cover. remove both of those. The cover then pulls apart into two top and bottom pieces.
The screw on the bottom.
2. Remove the bottom piece of the dash below the steering wheel, it is held on by 4-10mm bolts.
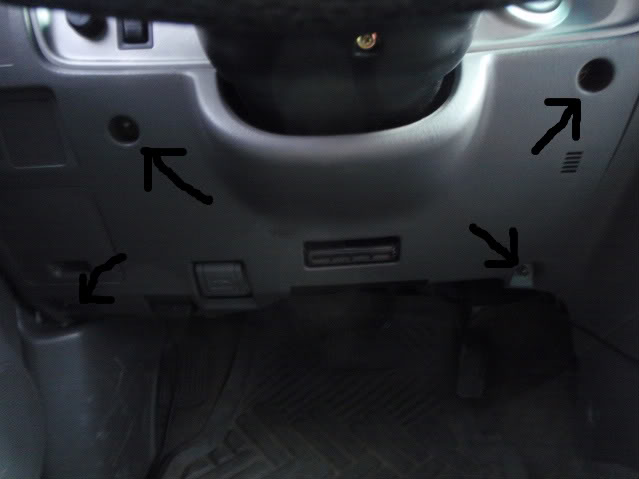
That piece then just pops off.
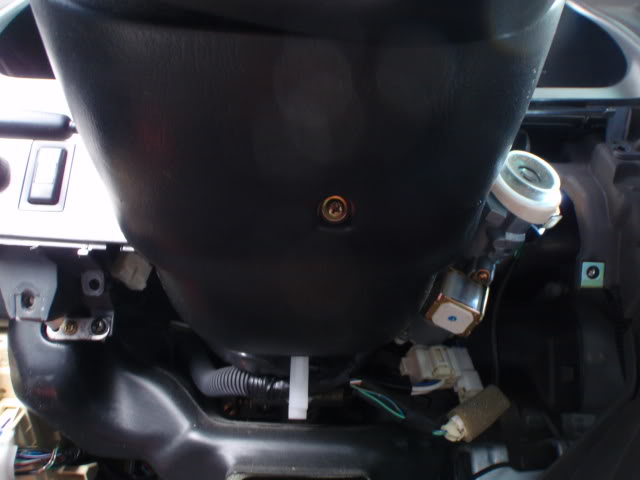
3. Pull the cover around the ignition off, it doesnt have any screws it just pops off.
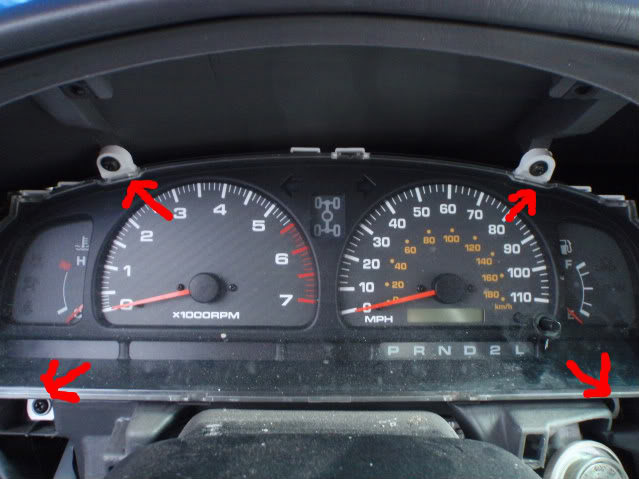
4. Remove the 4 screw that hold the piece around the gauge on.
Top two screws are here:
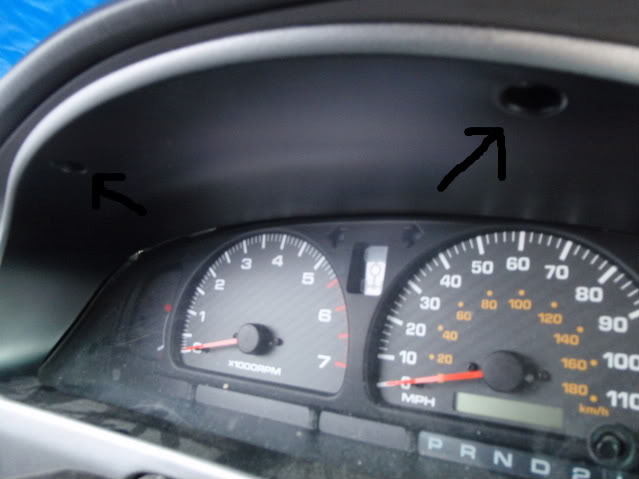
Bottom two screws are here:
The face piece around the gauge cluster then pops off.
5. Remove the 4 screw holding the guage cluster in.
6. Pull the gauge cluster out a little bit and disconnect the 5 plugs on the back of it. Then pull the cluster out the rest of the way. Here is what the back looks like.
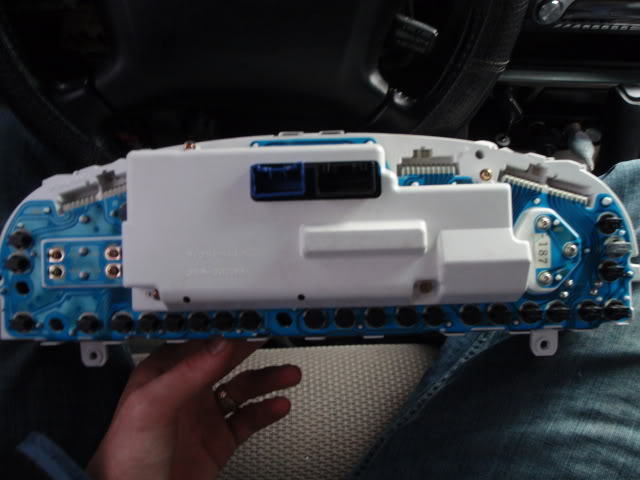
7. Take the white cover off the back of the cluster, by taking out 4 little gold screws.
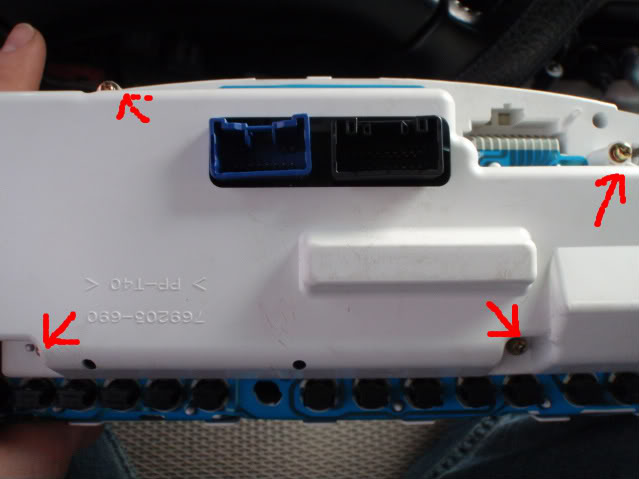
8. Taking caution in not breaking anything on the circuit board, remove the two screws at the top of it and the two flat wires at the top as well. The wires come off by gently lifting up on the front of the black holder, which doesnt come all the way off.

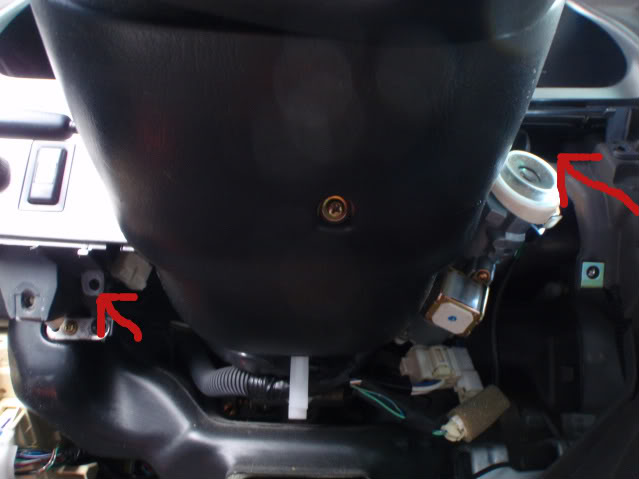
9. You can now see where the three cluster back lights and two blinkers go. The back lights are arrowed with red the blinkers are green.
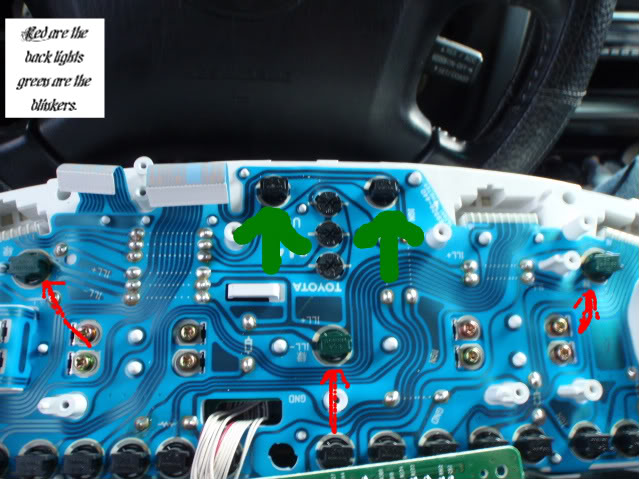
10. Remove each plug with a slight left turn, its about a 1/4 turn and they can be pulled out. Here is what one of the lights look like when they are out.
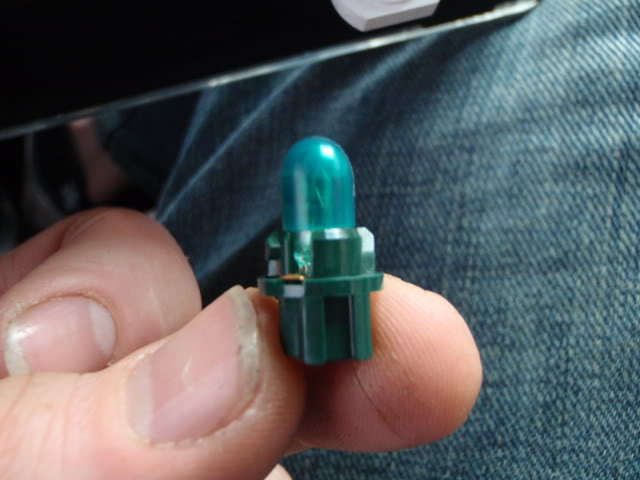
11. Pull the bulb out, and set it aside.
11A. Insert one of the new #74 bulbs.
12. Repeat step 11 for the remaining bulbs.
13. Now that all the bulbs are in, put the circuit board back on, (two screws and two flatwires) and insert the cluster into its opening and plug the 5 connections back in, AND plug the dimmer knob back in (leave it plugged in for the duration if possible).
14. Turn the truck on, then the lights and flashers, some of the lights are probably not lit. That is because the LEDs are not made the same way as the normal halogen lights.
15. Unplug the 5 connections, pull the cluster out, and each light that was not on needs to be rotated in the older 180 degrees, make note of which way the bulb holder was plugged in and plug it back in the same way, after rotating the bulb 180 degrees. Make sure the bulbs are fully seated in the holder.
16. Replace the cluster and plugs and recheck the lights.
17. Repeat steps 13-16 until all lights are lit. (That is what took me so long. I had to plug and unplug about 20 times before all the lights were on.)
18. After lights are all lit, insert gauge cluster and connect all plugs and re-attach to it mounting location with the 4 screws
19. Now a quick one bulb change for the ignition light and then back together.
20. Pull the white plastic piece out of the bottom of the ignition light holder.
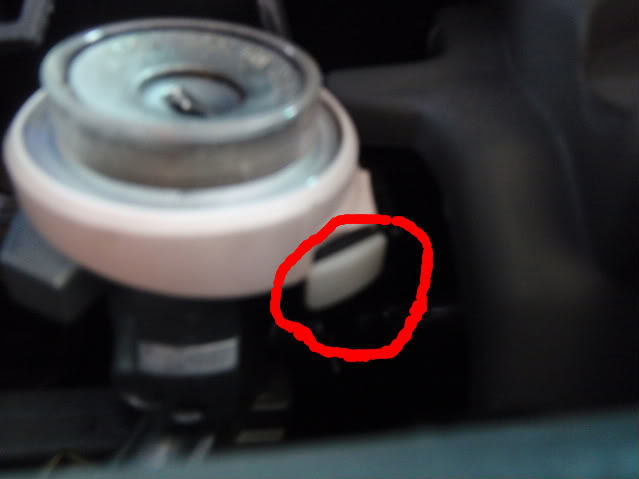
21. Pull the ignition light ring off the ignition.
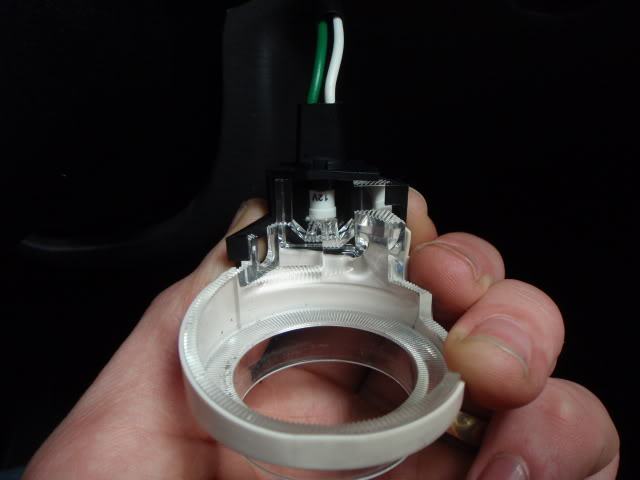
22. 1/4 twist and to remove the bulb holder.
23. Replace halogen with LED.
24. Open door, if the light comes on put it back together, if the light does not come on, rotate the bulb 180 degrees and make sure it is fully seated. Open the door again and you should have light.
25. Put the ignition light ring back on the ignition and insert the plastic holder piece.
26. Re-install the gauge cluster face plate with its 4 screws.
27. Snap the ignition face plate back into place.
28. Re-install steering wheel cover, with its three screws.
29. Re-install bottom plastic piece below the steering with with its 4 bolts.
Congratulations, You have now successfully replaced you halogen gauge cluster lights, blinkers, and ignition light with LEDS.
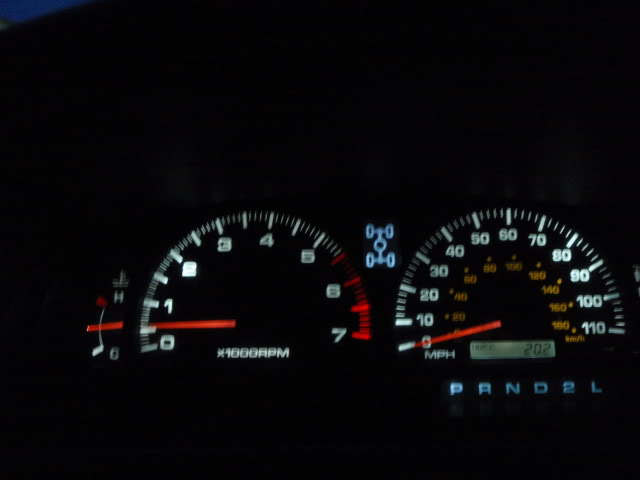
Here is what it looked like before:
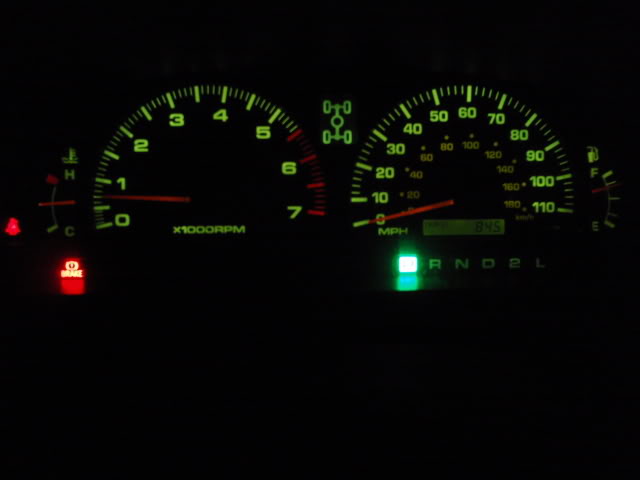
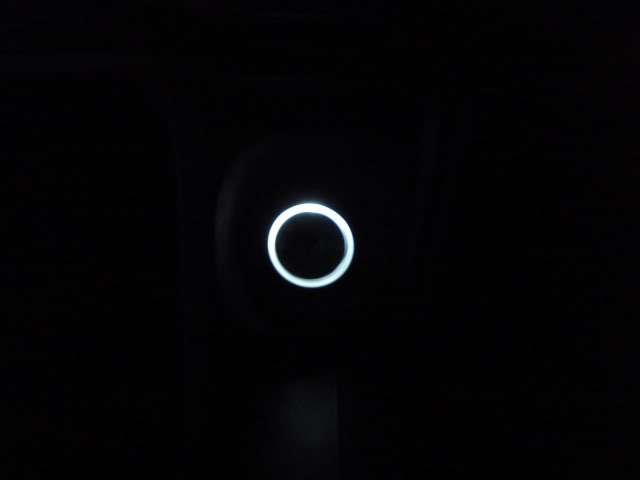
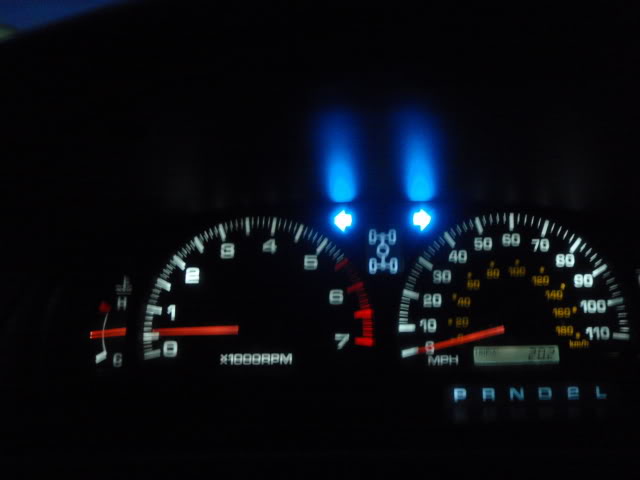
And now after the install:
I Also switched out the overhead lights with two LEDs and they make a huge difference. Next is the tempuerature controls, cigerette lighter, and shifter.
What You will Need:
4 #74 LED bulbs, i chose white
2 #74 LED bulbs(for the blinkers) i chose blue.
Philips Screwdriver
10mm socket with ratchet.
There are many colors of bulbs and different designs out there.
vleds.com
autolumination.com
I bought all my leds from autolumination.com, they have the most to offer and decent prices.
1. Remove steering wheel cover, there is one screw on the bottom, and one screw behind the steering wheel on each side.
1A. To get to the screws on the side, start the truck, turn the wheel to the left until you see a screw on the right side of the cover. Then turn the wheel to the right until you see the screw on the left side of the cover. remove both of those. The cover then pulls apart into two top and bottom pieces.
The screw on the bottom.
2. Remove the bottom piece of the dash below the steering wheel, it is held on by 4-10mm bolts.
That piece then just pops off.
3. Pull the cover around the ignition off, it doesnt have any screws it just pops off.
4. Remove the 4 screw that hold the piece around the gauge on.
Top two screws are here:
Bottom two screws are here:
The face piece around the gauge cluster then pops off.
5. Remove the 4 screw holding the guage cluster in.
6. Pull the gauge cluster out a little bit and disconnect the 5 plugs on the back of it. Then pull the cluster out the rest of the way. Here is what the back looks like.
7. Take the white cover off the back of the cluster, by taking out 4 little gold screws.
8. Taking caution in not breaking anything on the circuit board, remove the two screws at the top of it and the two flat wires at the top as well. The wires come off by gently lifting up on the front of the black holder, which doesnt come all the way off.
9. You can now see where the three cluster back lights and two blinkers go. The back lights are arrowed with red the blinkers are green.
10. Remove each plug with a slight left turn, its about a 1/4 turn and they can be pulled out. Here is what one of the lights look like when they are out.
11. Pull the bulb out, and set it aside.
11A. Insert one of the new #74 bulbs.
12. Repeat step 11 for the remaining bulbs.
13. Now that all the bulbs are in, put the circuit board back on, (two screws and two flatwires) and insert the cluster into its opening and plug the 5 connections back in, AND plug the dimmer knob back in (leave it plugged in for the duration if possible).
14. Turn the truck on, then the lights and flashers, some of the lights are probably not lit. That is because the LEDs are not made the same way as the normal halogen lights.
15. Unplug the 5 connections, pull the cluster out, and each light that was not on needs to be rotated in the older 180 degrees, make note of which way the bulb holder was plugged in and plug it back in the same way, after rotating the bulb 180 degrees. Make sure the bulbs are fully seated in the holder.
16. Replace the cluster and plugs and recheck the lights.
17. Repeat steps 13-16 until all lights are lit. (That is what took me so long. I had to plug and unplug about 20 times before all the lights were on.)
18. After lights are all lit, insert gauge cluster and connect all plugs and re-attach to it mounting location with the 4 screws
19. Now a quick one bulb change for the ignition light and then back together.
20. Pull the white plastic piece out of the bottom of the ignition light holder.
21. Pull the ignition light ring off the ignition.
22. 1/4 twist and to remove the bulb holder.
23. Replace halogen with LED.
24. Open door, if the light comes on put it back together, if the light does not come on, rotate the bulb 180 degrees and make sure it is fully seated. Open the door again and you should have light.
25. Put the ignition light ring back on the ignition and insert the plastic holder piece.
26. Re-install the gauge cluster face plate with its 4 screws.
27. Snap the ignition face plate back into place.
28. Re-install steering wheel cover, with its three screws.
29. Re-install bottom plastic piece below the steering with with its 4 bolts.
Congratulations, You have now successfully replaced you halogen gauge cluster lights, blinkers, and ignition light with LEDS.
Here is what it looked like before:
And now after the install:
I Also switched out the overhead lights with two LEDs and they make a huge difference. Next is the tempuerature controls, cigerette lighter, and shifter.
Last edited by wyorunner; 04-02-2009 at 05:44 PM.
 03-26-2009, 08:10 AM
#3
Registered User
Thread Starter
iTrader: (1)
Join Date: Jun 2007
Location: Anne Arundel County, MD
Posts: 416
Likes: 0
Received 0 Likes
on
0 Posts
thanks, im gonna do another on the temp control, cigerette lighter, and shifter lights in the next few days. and a transmission oil cooler as well. and maybe some others.

Trending Topics
03-26-2009, 09:35 AM
#8
Registered User
Join Date: Feb 2009
Posts: 24
Likes: 0
Received 0 Likes
on
0 Posts
03-26-2009, 05:32 PM
#9
Registered User
Thread Starter
iTrader: (1)
Join Date: Jun 2007
Location: Anne Arundel County, MD
Posts: 416
Likes: 0
Received 0 Likes
on
0 Posts
the bulbs i used are the first ones that page. they are pretty bright but dont evenly spread the light. there isnt a whole lot of space in the wholes for much bigger #74 bulbs. if you try a different buld, let me know.
03-26-2009, 07:49 PM
#11
Registered User

Join Date: Jan 2009
Posts: 82
Likes: 0
Received 0 Likes
on
0 Posts
autolumination?? Superbrightleds has better prices and a way better return policy. Also, I have read a lot of people saying their bulbs from autolumination burned out after a couple months...can't say anything first-hand about that though. Probably should mention too that I have only heard good things about v-leds but they seemed pretty expensive when I was looking around.
Nice write-up btw
Superbrightleds has better prices and a way better return policy. Also, I have read a lot of people saying their bulbs from autolumination burned out after a couple months...can't say anything first-hand about that though. Probably should mention too that I have only heard good things about v-leds but they seemed pretty expensive when I was looking around.Nice write-up btw
03-26-2009, 08:22 PM
#12
Registered User
Join Date: Dec 2008
Location: McLean, Virginia
Posts: 344
Likes: 0
Received 0 Likes
on
0 Posts
Awesome write up, now I feel like I can actually attempt this mod. White lighting in the had is the way I want to go no doubt. Also, where are you in Anne Arundel Co? Know of anywhere in the DMV area to off road? The closest place for me I know of is Cumberland
03-26-2009, 08:51 PM
#13
Contributing Member
Join Date: Nov 2006
Location: GSU/ATL/SD
Posts: 1,434
Likes: 0
Received 0 Likes
on
0 Posts
I wish someone would do this for the older 3rd gen. other than that great write up didn't skip a beat.
Earlier this week I was going to request a group project from those who have done it to help us construct two frontal pictures of the dash and cluster with the locations of the bulbs being highlighted different colors depending on the bulb type, pink for 74 etc. etc. and have a legend in the corner. this way any newcomer to this mod can easily determine the quantity and type of the bulbs depending on the scale of the swap. Since its apparent you are detailed in your work you should start one for your year's gagues and dash. Once both pictures are completed it would make for a great sticky at the top of this forum
Earlier this week I was going to request a group project from those who have done it to help us construct two frontal pictures of the dash and cluster with the locations of the bulbs being highlighted different colors depending on the bulb type, pink for 74 etc. etc. and have a legend in the corner. this way any newcomer to this mod can easily determine the quantity and type of the bulbs depending on the scale of the swap. Since its apparent you are detailed in your work you should start one for your year's gagues and dash. Once both pictures are completed it would make for a great sticky at the top of this forum
03-27-2009, 06:08 AM
#15
Registered User
Join Date: Jan 2009
Posts: 82
Likes: 0
Received 0 Likes
on
0 Posts
Earlier this week I was going to request a group project from those who have done it to help us construct two frontal pictures of the dash and cluster with the locations of the bulbs being highlighted different colors depending on the bulb type, pink for 74 etc. etc. and have a legend in the corner. this way any newcomer to this mod can easily determine the quantity and type of the bulbs depending on the scale of the swap.
Shifter: 74
Digital Climate Control: 2 - neowedge type A (3mm), 2 - type B (4mm)
Defrost/ECT: 1 - neowedge type A
Rear window: 1 - neowedge type A
Ash Tray: 74
Key Ring: 74
Map Lights: 2 - Ba9
Domes: 2 - Festoons
Glove box: 74
Vanity: 2 - 31mm fuse bulb
Gauge Illumination: 3 - 24's
4WD: 3 - neowedge Type B
All other gauge lights: 74's
Blinkers: 2 - 74
03-27-2009, 06:10 AM
#16
Registered User
Thread Starter
iTrader: (1)
Join Date: Jun 2007
Location: Anne Arundel County, MD
Posts: 416
Likes: 0
Received 0 Likes
on
0 Posts
boo, to each his own, but i did forget to mention superbrightleds.com. i havnt had any problems with autolumination thus far, and ive ordered from them twice. all the bulbs ive got are bright as hell so...
02_limited, i live on ft meade, well next wednesday im moving up there, right now im still in NC. what is the DMV area. and what are you doing on the 19th of april, there is a few guys going up to PA to do some wheeling.
miller, im not quite sure what you want me to do. i might just be mis reading it, but sorry for the stupidity i need a little more and ill be sure to do it. are you talking about the temp control panel as well...OR what. let me know, ill put something together. also ring you truck up to MD and ill do it on yours and then put the write up...UP.
94, you should give it a shot, and then put another write up up for it. That way there will be one for third gen and 2nd... HOWEVER, they vary from year to year.
 03-27-2009, 11:39 AM
#18
Registered User
Join Date: May 2007
Location: Denver metro area-CO
Posts: 2,175
Likes: 0
Received 2 Likes
on
2 Posts
thank you for this most illustrated writeup.
thanks for the extensive use of pictures and the scribbled in arrows
bootown the list is much appreciated-I have seen it elsewhere and it always comes in handy, your attention to detail is admirable sir.
thanks for the extensive use of pictures and the scribbled in arrows
bootown the list is much appreciated-I have seen it elsewhere and it always comes in handy, your attention to detail is admirable sir.
03-27-2009, 12:36 PM
#19
Registered User
Join Date: Dec 2008
Location: McLean, Virginia
Posts: 344
Likes: 0
Received 0 Likes
on
0 Posts
wyo the DMV is what a lot of people call the greater Washington D.C. area. DMV is just short for "D.C. Maryland Virginia"
And the 19th is two weekends from now I think? That would be awesome to get out there. Which place in PA are you headed to? Rausch Creek is the only one I'm familiar with really
And the 19th is two weekends from now I think? That would be awesome to get out there. Which place in PA are you headed to? Rausch Creek is the only one I'm familiar with really
03-27-2009, 03:38 PM
#20
Registered User
Join Date: Jan 2009
Posts: 82
Likes: 0
Received 0 Likes
on
0 Posts
Yeah, I posted my list on another thread here and a thread at T4R. I just figured might as well put it up anywhere because I certainly wish someone had done that before I started this project. I spent hours trying to figure out from threads what to get (was too cold to take the 4Runner apart multiple times) and still didn't get the order right the first time. At least anyone with the same 4runner as me has it easy from here on out. Always hoping other year 4runner owners post up lists since there is always someone trying to figure out what to get. PS...getting my deflector painted soon...curious what it will look like...


