How to: Replace steering rack guide- Pictures
 07-11-2010, 05:26 PM
#1
Registered User
Thread Starter
Join Date: Apr 2008
Location: Marquette, MI
Posts: 484
Likes: 0
Received 0 Likes
on
0 Posts
How to: Replace steering rack guide- Pictures
If you read THIS thread, you know whats going on here, but if you haven't its a good read, but here is a basic rundown
Inside your steering rack, there is a guide that keeps everything moving the right way, over time it can loosen, and lead to sloppy steering, or a mysterious front end clunk. The original part was a roller on bearings, this was replaced with a sold piece in later model years.
This video shows what happens when one gets really worn out, and this is the one that I am replacing.
Its pretty simple to do, all you need is:
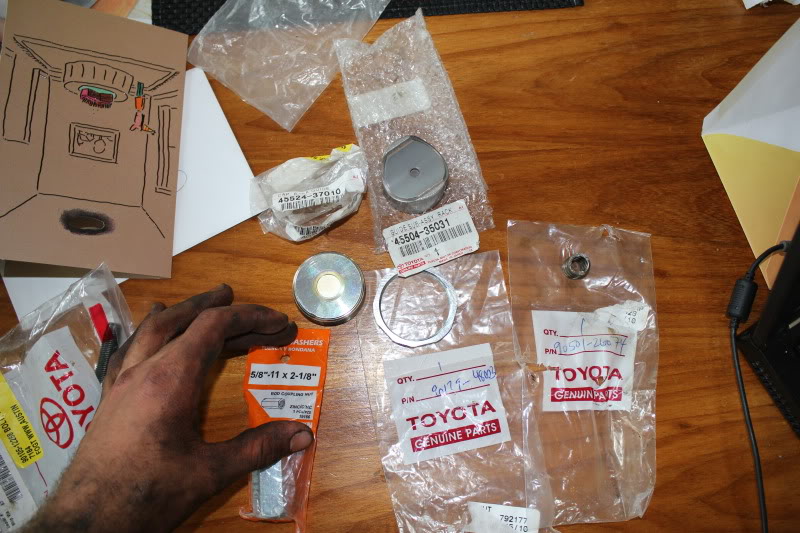
The parts from Toyota (read before ordering)
End sub-assembly, steering rack no. 2/ Guide sub/assembly
45504-35031-
Spring(for steering rack guide)/Spring, compression
90501-26074-
cap, Steering rack guide spring/ Cap, rack guide spring
45524-37010-
Nut(for steering rack guide spring cap/ nut
90179-48003-
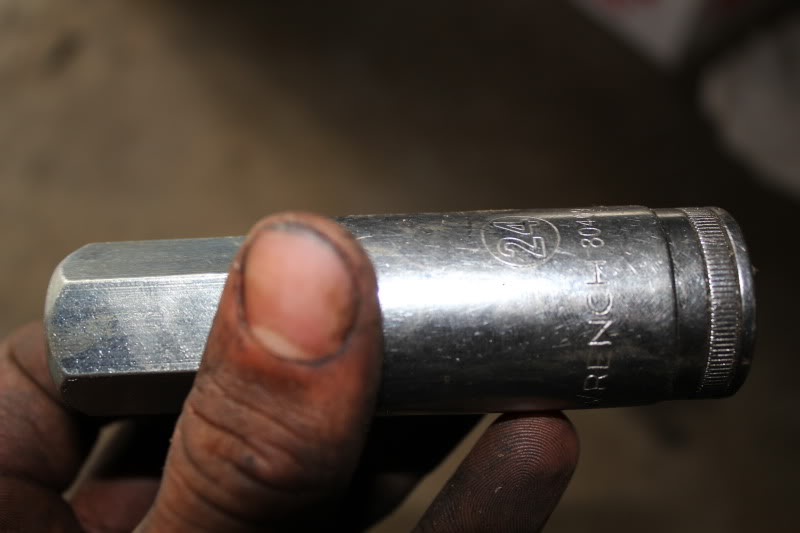
Then you'll need a 5/8th inch threaded rod connector (Mine was $1.24 at home depot)
And a 24mm socket and ratchet
Also, a magnet
A dollop of grease
And lastly a big wrench
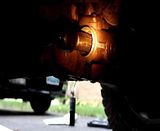
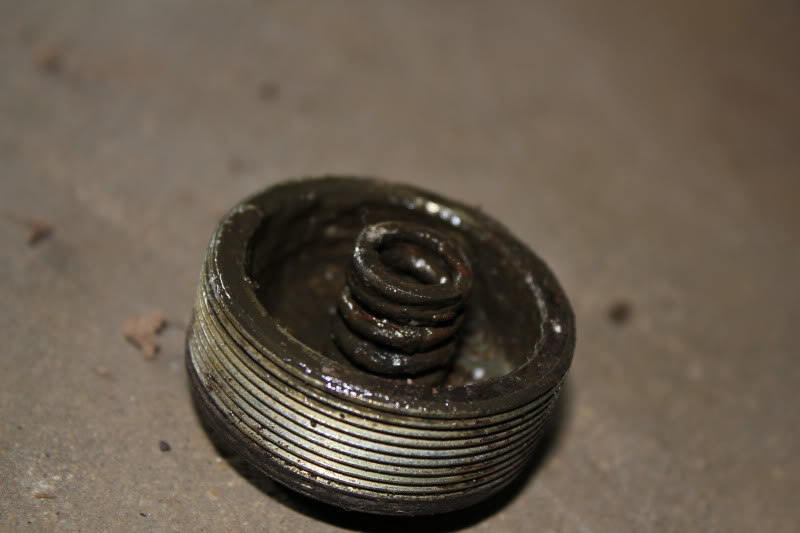
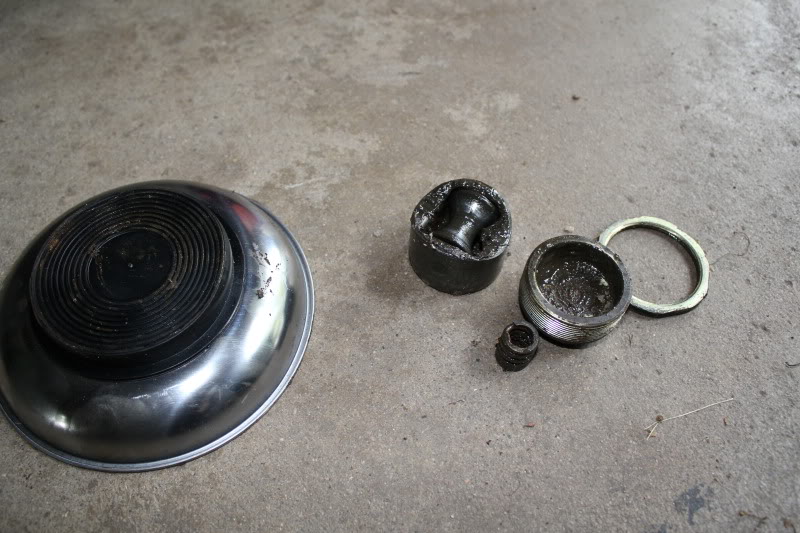
Here is the item we will be replacing, that large nut you can see on the rack.
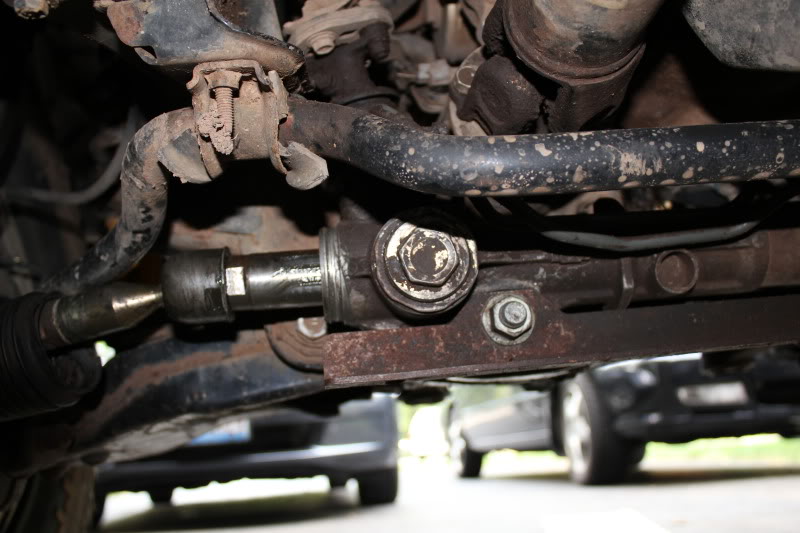
First remove the cap, Mine was pretty tight at first
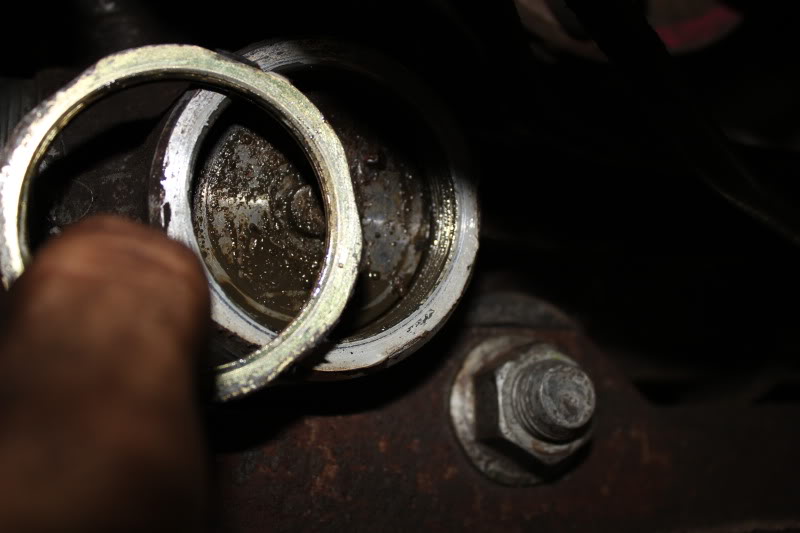
This is what will come out
Then I had to knock off the ring, you'll see it when you get there
Then your left with this, the guide itself
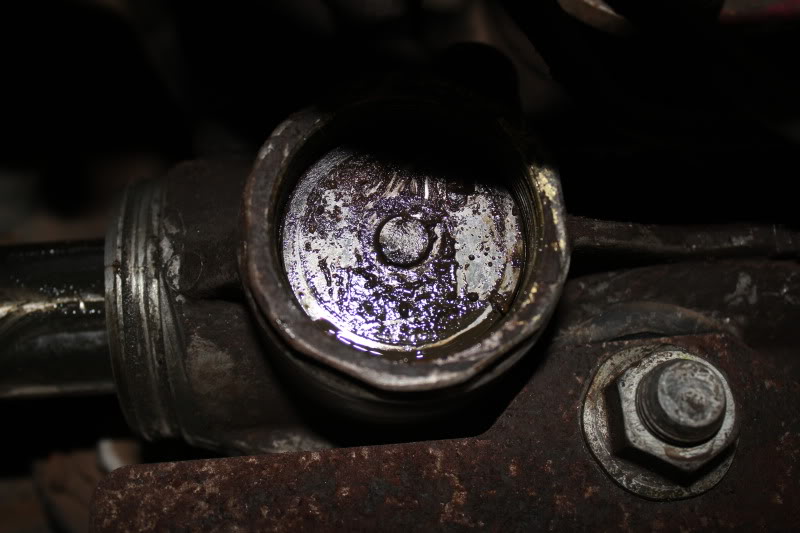
I used the magnet on my parts holder to pull this out, you may have a better way, but I couldn't get any pliers on it.
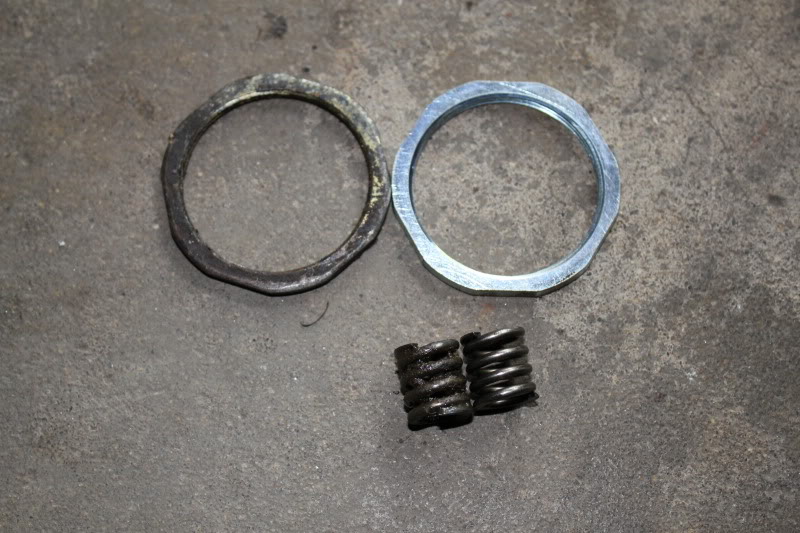
Then your left with a pile of old parts
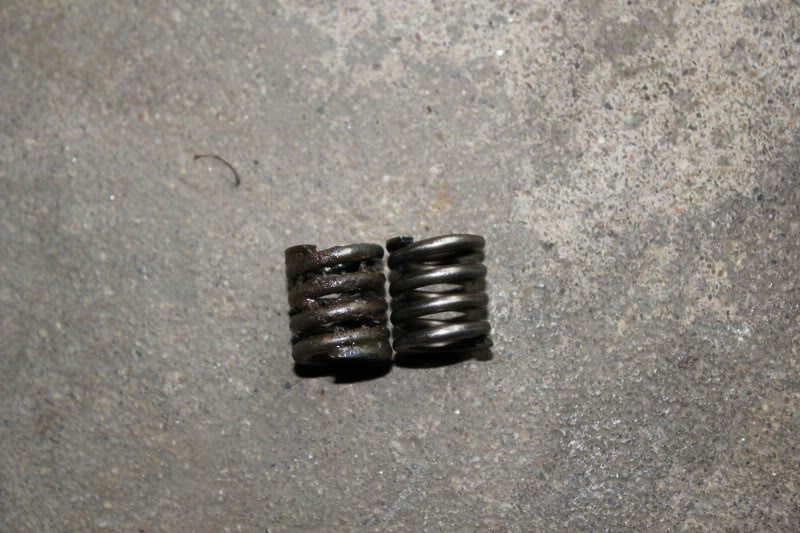
Money savers listen up here, I found the old spring, and new spring, and the old guide bolt were the same sizes as the new stuff. If you want to save a bit you could probably re-use them
Then its time to put the new stuff in
Slide in the new guide

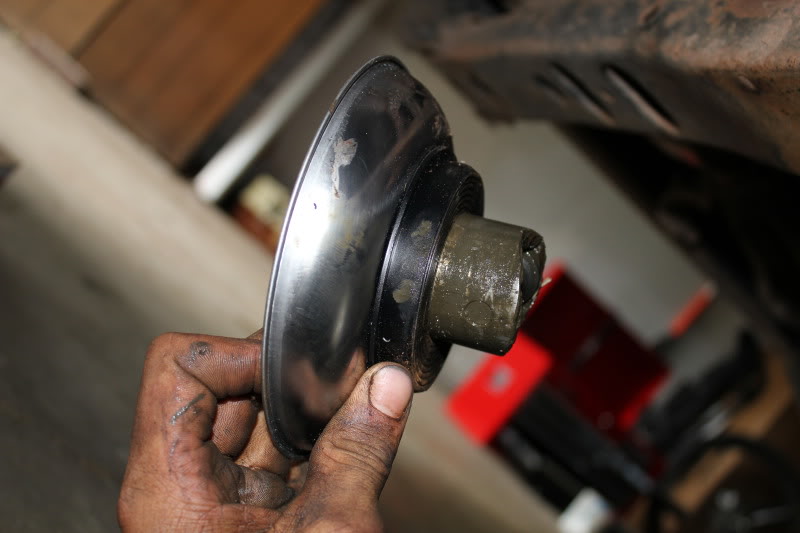
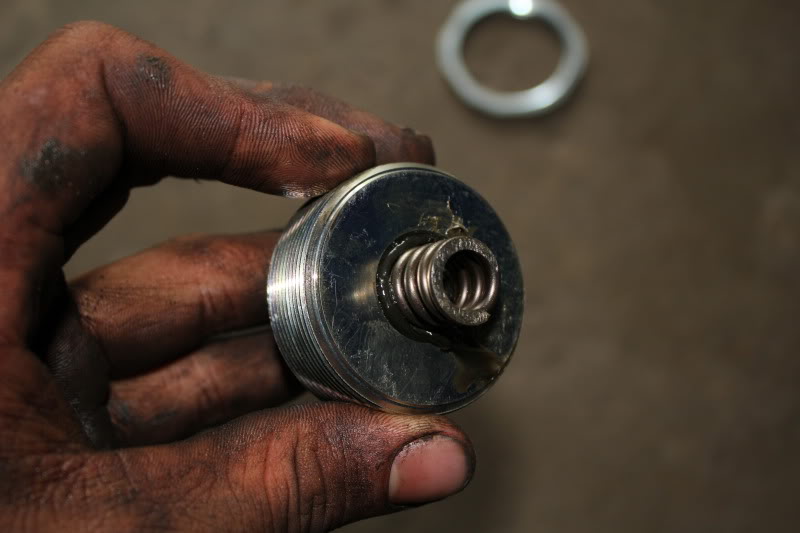
Then take the guide nut (the big ring thing) and spin it onto the new guide cap.
Then take the gude cap, and put a dollop of grease into the indent for the spring, this will help hold the spring on there while you put it in and tighten the cap
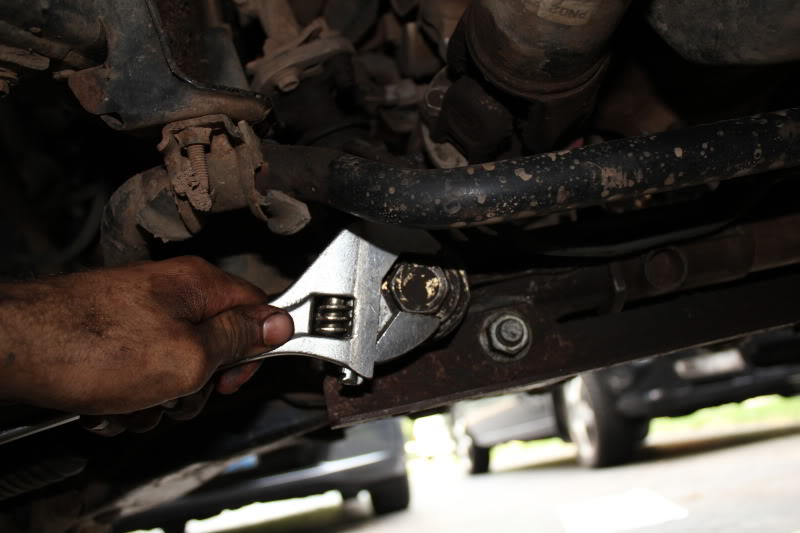
Thread the guide in by hand, it will tighten for a bit then you'll need to use your 24mm and the rod connector
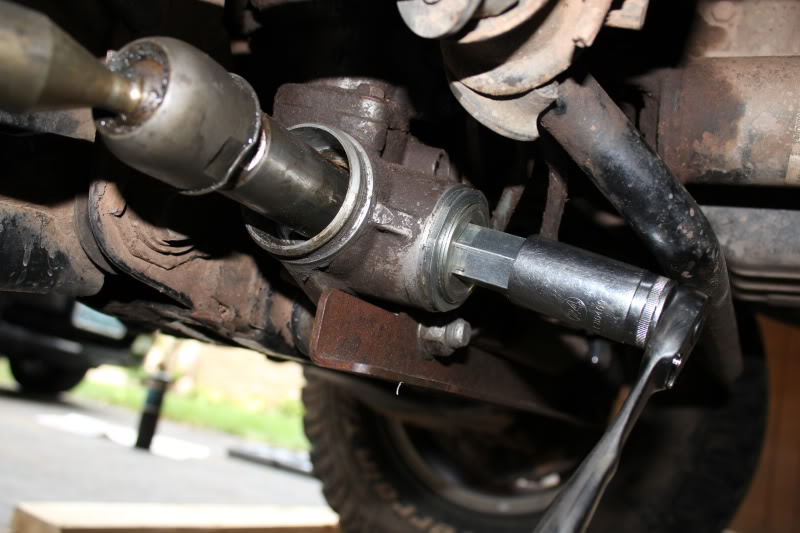
I tightened it up until it was 'tight' then backed it off a quarter turn. The torque spec is (18ft.lbs then back it off 19deg), but I don't have a wrench here that will measure that low, so basically if its too lose, you will notice that the slop is still there, and too tight, you will feel it in the steering wheel. I had 1 or 2 threads left showing when it was all done.
Hopefully this helps some people! If you have any questions or I left something out feel free to PM me!
Inside your steering rack, there is a guide that keeps everything moving the right way, over time it can loosen, and lead to sloppy steering, or a mysterious front end clunk. The original part was a roller on bearings, this was replaced with a sold piece in later model years.
This video shows what happens when one gets really worn out, and this is the one that I am replacing.
Its pretty simple to do, all you need is:
The parts from Toyota (read before ordering)
End sub-assembly, steering rack no. 2/ Guide sub/assembly
45504-35031-
Spring(for steering rack guide)/Spring, compression
90501-26074-
cap, Steering rack guide spring/ Cap, rack guide spring
45524-37010-
Nut(for steering rack guide spring cap/ nut
90179-48003-
Then you'll need a 5/8th inch threaded rod connector (Mine was $1.24 at home depot)
And a 24mm socket and ratchet
Also, a magnet
A dollop of grease
And lastly a big wrench
Here is the item we will be replacing, that large nut you can see on the rack.
First remove the cap, Mine was pretty tight at first
This is what will come out
Then I had to knock off the ring, you'll see it when you get there
Then your left with this, the guide itself
I used the magnet on my parts holder to pull this out, you may have a better way, but I couldn't get any pliers on it.
Then your left with a pile of old parts
Money savers listen up here, I found the old spring, and new spring, and the old guide bolt were the same sizes as the new stuff. If you want to save a bit you could probably re-use them
Then its time to put the new stuff in
Slide in the new guide
Then take the guide nut (the big ring thing) and spin it onto the new guide cap.
Then take the gude cap, and put a dollop of grease into the indent for the spring, this will help hold the spring on there while you put it in and tighten the cap
Thread the guide in by hand, it will tighten for a bit then you'll need to use your 24mm and the rod connector
I tightened it up until it was 'tight' then backed it off a quarter turn. The torque spec is (18ft.lbs then back it off 19deg), but I don't have a wrench here that will measure that low, so basically if its too lose, you will notice that the slop is still there, and too tight, you will feel it in the steering wheel. I had 1 or 2 threads left showing when it was all done.
Hopefully this helps some people! If you have any questions or I left something out feel free to PM me!
Last edited by Yukon; 07-11-2010 at 05:55 PM.
 07-11-2010, 06:10 PM
#2
Registered User
iTrader: (1)
Join Date: Feb 2007
Location: Shelburne, VT previous: Everett, WA; Bellingham, WA
Posts: 419
Likes: 0
Received 0 Likes
on
0 Posts
Nice write up. what is the ballpark for the replacement parts? it seems like this could even be done as a preventative measure coupled with the poly bushings to extend the life of the rack (it seems like everyone's rack is starting to go lately...)
it certainly is a quick job! (at least it appears that way)
it certainly is a quick job! (at least it appears that way)
07-11-2010, 06:35 PM
#3
Registered User
Thread Starter
Join Date: Apr 2008
Location: Marquette, MI
Posts: 484
Likes: 0
Received 0 Likes
on
0 Posts
$58 plus shipping from toyotapartsales.com
It is a quick job, I hardly would have gotten my hands dirty if I hadn't done a U-joint just before this.
It is a quick job, I hardly would have gotten my hands dirty if I hadn't done a U-joint just before this.
07-13-2010, 08:26 AM
#4
Registered User

Join Date: Feb 2009
Location: Maine
Posts: 134
Likes: 0
Received 0 Likes
on
0 Posts
Cool, thanks for the write up! I get an annoying slop in the steering wheel while backing up over small bumps and while driving straight over cobble stones. There are a lot of cobble stones in New England! Hopefully this and new bushings will make it all tight.
07-14-2010, 11:24 AM
#5
Registered User
Join Date: Mar 2005
Location: La Jolla (UTC), California
Posts: 140
Likes: 0
Received 0 Likes
on
0 Posts
hmm this is interesting. I just might have to try this. I've got bumpsteer, and have tried all new inner/outer tie rods and poly bushings to no avail... wonder if this could be the culprit?
07-14-2010, 02:02 PM
#6
Registered User
Join Date: Feb 2010
Location: Outer Banks, NC
Posts: 570
Likes: 0
Received 0 Likes
on
0 Posts
Excellant write-up Yukon. This is definitely a link to be added to my repair for the future folder.
I do have to say though that I have never seen a more tired and beat sway bar bushing. Put it out of its misery please.
I do have to say though that I have never seen a more tired and beat sway bar bushing. Put it out of its misery please.
07-15-2010, 05:40 PM
#7
Registered User
iTrader: (1)

Join Date: Jan 2005
Location: Spokane, WA
Posts: 199
Likes: 0
Received 0 Likes
on
0 Posts
Nice write up. Mine needs the guide. Unfortunately the rack seals are leaking atf as well  . Does anyone know a write up on how to replace the seals? Or do I need a whole new rack?
. Does anyone know a write up on how to replace the seals? Or do I need a whole new rack?
Trending Topics
08-29-2010, 09:00 AM
#10
Registered User
Join Date: Jul 2010
Posts: 27
Likes: 0
Received 0 Likes
on
0 Posts
I removed the bearing? today and everything looked good. I at first tightened it too tight and the steering wheel had to be pulled back hard when coming out of a turn. I think the adjustment is the hardest part of getting this done properly. It did take the clunk out of the front end when travelling on gravel roads. I haven't had it on the interstate to see if the slop/wander came out of the steering. Thanks again for the write up.
JR
JR
09-20-2010, 07:03 PM
#11
Contributing Member

I removed the bearing? today and everything looked good. I at first tightened it too tight and the steering wheel had to be pulled back hard when coming out of a turn. I think the adjustment is the hardest part of getting this done properly. It did take the clunk out of the front end when travelling on gravel roads. I haven't had it on the interstate to see if the slop/wander came out of the steering. Thanks again for the write up.
JR
JR
Andreas
09-20-2010, 07:20 PM
#12
Registered User
Join Date: Jul 2010
Posts: 27
Likes: 0
Received 0 Likes
on
0 Posts
I just re-used the old parts because my '01 had the new type of "bearing" in it. Remember, it is a fine line between too tight and too loose. It took quite a few attempts to get it right.
JR
JR
09-20-2010, 07:31 PM
#13
Contributing Member
Regardless, I'm now at 205,000+ miles and have a minor looseness/knock that I'd like to eliminate. I treated the truck to new lower control arms, new lower ball joints, new upper ball joints, and all new alignment bolts this winter. That helped a great deal. And cost a great deal.
Andreas
09-20-2010, 07:44 PM
#14
Registered User
Join Date: Jul 2010
Posts: 27
Likes: 0
Received 0 Likes
on
0 Posts
Interesting. I replaced the rack in my '01 a few years ago while trying to chase down a loose feeling that poly bushings and new TRs did not fix. I wonder if simply replacing this guide, or adjusting the old one would have taken care of it. The rack, new from Toyota, was every bit of $800 back then.......
Regardless, I'm now at 205,000+ miles and have a minor looseness/knock that I'd like to eliminate. I treated the truck to new lower control arms, new lower ball joints, new upper ball joints, and all new alignment bolts this winter. That helped a great deal. And cost a great deal.
Andreas
Regardless, I'm now at 205,000+ miles and have a minor looseness/knock that I'd like to eliminate. I treated the truck to new lower control arms, new lower ball joints, new upper ball joints, and all new alignment bolts this winter. That helped a great deal. And cost a great deal.
Andreas
http://ttora.com/forum/showthread.php?t=161689
Also, do NOT turn the wheel after you remove the column. There is a spiral cable that you can ruin by turning the wheel. Just a word of warning.
This will solve 90% of loose steering.
Try it.. at your own risk. Fairly easy.
Last edited by jreask; 09-20-2010 at 07:46 PM.
09-21-2010, 09:43 AM
#15
Contributing Member
I will tell you what helped more than anything was putting the tack weld on the steering column.
http://ttora.com/forum/showthread.php?t=161689
This will solve 90% of loose steering.
Try it.. at your own risk. Fairly easy.
http://ttora.com/forum/showthread.php?t=161689
This will solve 90% of loose steering.
Try it.. at your own risk. Fairly easy.
I read that thread late last night and was thoroughly convinced that the modification to the steering column slip-joint made perfect sense.
So today, instead of doing the things I originally set out to do around the house, I dove into this project. From start to finish, it took all of 1.5 hours and was a complete & utter success! I am very pleased. The slight click/knock that I would hear backing out of my driveway as I turned is gone. A short test drive revealed that the steering simply feels more planted & solid.
I did the entire procedure on the fly, as reading the TTORA write-up made so much sense to me. The only deviation I made was to give each 'flat' of the slip joint a pretty little tack weld. If two are good, six must be better.

I think I've convinced my buddy with a '98 that this is required for his as well.
Andreas
 10-10-2010, 05:23 AM
#18
Registered User
Join Date: Feb 2009
Location: Maine
Posts: 134
Likes: 0
Received 0 Likes
on
0 Posts
The local Home Depot claims that they don't have any hex rod??? I wasn't about to wander around and my gf was with me so I just left the store. Did I just ask an old bunk employee?
10-10-2010, 12:26 PM
#19
Registered User
Join Date: Dec 2007
Location: Rochester, Washington
Posts: 500
Likes: 0
Received 0 Likes
on
0 Posts
It's technically called a coupler/threaded rod connector/tube nut, it's threaded in the middle. The 5/8" is the thread diameter and the 11 is threads per inch or something like that.
The outside diameter of the coupler happens to be around 24mm or whatever the hex size is.
So, no dude at Home Depot answered your question correctly.

The outside diameter of the coupler happens to be around 24mm or whatever the hex size is.
So, no dude at Home Depot answered your question correctly.
10-10-2010, 01:18 PM
#20
Registered User
Regardless, I'm now at 205,000+ miles and have a minor looseness/knock that I'd like to eliminate. I treated the truck to new lower control arms, new lower ball joints, new upper ball joints, and all new alignment bolts this winter. That helped a great deal. And cost a great deal
FOG


