Deck Plate Mod Completed!!!
 05-22-2003, 09:43 AM
#1
Registered User
Thread Starter
Join Date: Apr 2003
Location: Central MA
Posts: 61
Likes: 0
Received 0 Likes
on
0 Posts
Deck Plate Mod Completed!!!
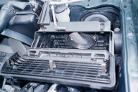
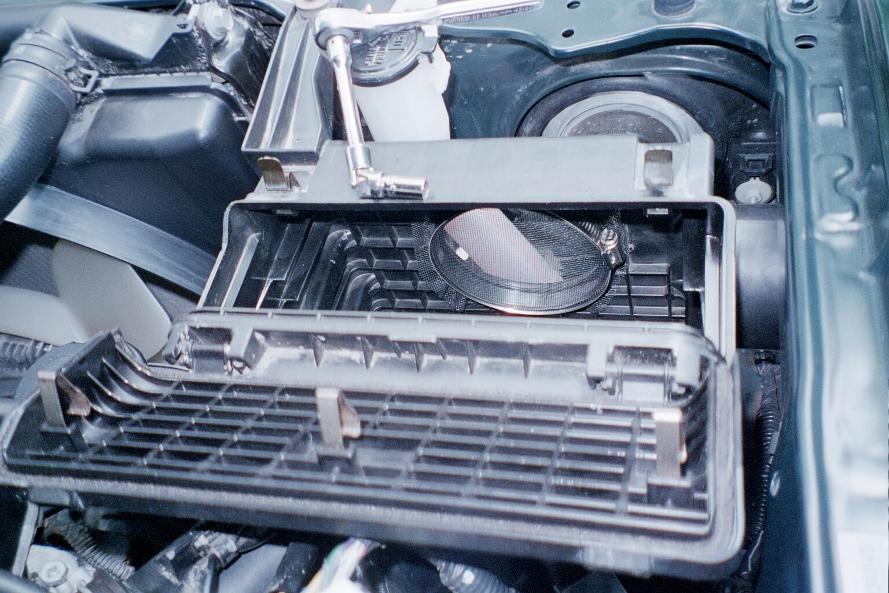
I just completed the deck plate mod. The toughest part, as everyone has pointed out, is cutting the hole with a Dremel. It made a hell of a mess, and a very non-uniform circle. I used a shop vac afterwards to get everything out. I pulled the 20 amp fuse before I started.
I got the deck plate for $7.00 from a local marine, the sensor safe sealant for $1.99 for a small tube (more than enough), $.84 for the six screws. $9.83 for this mod was not a bad deal, if you have all the tools already, and some average skills.
I was not able to put the screen on the back side with the clamp. The waffle material made it so I could not get the screen and clamp on. Is the screen a necessity, or more of a "nice to have it"? It doesn't look like it would get much in there by way of large debris or bugs or anything due to the placement of the hole ( it faces the headlight and washer filler tube).
I took a quick spin down the street, and noticed the "roar" doesn't kick in until you get the RPMs goin (which is what I have read). I will post more once I have a chance to get her up to cruisin speed!
 05-22-2003, 09:53 AM
#2
Registered User
Join Date: Feb 2003
Location: James Island/ChuckTown, SC
Posts: 698
Likes: 0
Received 0 Likes
on
0 Posts
I didnt haven dremel handy so i used a jig saw. If you take your time cutting the hole (about 5 mins) then a jigsaw works perfectly. I didnt put the screen on mine either and i probably wont. If i see any large bugs in there i will just clean them out. The air filter will catch them.
05-22-2003, 10:05 AM
#3
Contributing Member
Join Date: Jan 2003
Posts: 10,916
Likes: 0
Received 0 Likes
on
0 Posts
I never put a screen on either of my deckplates. I personally dont think its necessary. Its just a preference thing.
If you have an air filter, the screen is pointless. My opinion of course.
If you have an air filter, the screen is pointless. My opinion of course.
05-22-2003, 10:14 AM
#4
Registered User

Join Date: Jun 2002
Location: TX
Posts: 1,409
Likes: 0
Received 0 Likes
on
0 Posts
the screen is just for bugs and leafs..i have found bugs and leaves in my engine but not near the intake..i haven't seen anything stuck on mine or anything...so it doesn't really matter..
05-22-2003, 10:14 AM
#5
Contributing Member
Join Date: Jul 2002
Location: SLC, UT
Posts: 5,862
Likes: 0
Received 0 Likes
on
0 Posts
Originally posted by <96 Runner>
I never put a screen on either of my deckplates. I personally dont think its necessary. Its just a preference thing.
If you have an air filter, the screen is pointless. My opinion of course.
I never put a screen on either of my deckplates. I personally dont think its necessary. Its just a preference thing.
If you have an air filter, the screen is pointless. My opinion of course.
05-22-2003, 10:45 AM
#6
Registered User
Join Date: Feb 2003
Location: Madison, WI
Posts: 60
Likes: 0
Received 0 Likes
on
0 Posts
I did my Deckplate last night too, and I also found that the Dremel was a bit of a pain. I was able to put the screen on and secured it with a large Zip Tie. To me it is just the little bit of added insurance.
I did my mod in conjunction with the silencer removal mod. There is definitely an added roar, and a noticible increase in acceleration. I seem to have gained back all that I lost by going to the bigger 285/75/16 Revos. Now I gotta learn not to step on it to hear the roar!
Yee Ha!:bounce2:
I did my mod in conjunction with the silencer removal mod. There is definitely an added roar, and a noticible increase in acceleration. I seem to have gained back all that I lost by going to the bigger 285/75/16 Revos. Now I gotta learn not to step on it to hear the roar!
Yee Ha!:bounce2:

Trending Topics
05-22-2003, 11:04 AM
#8
Registered User
Thread Starter
Join Date: Apr 2003
Location: Central MA
Posts: 61
Likes: 0
Received 0 Likes
on
0 Posts
[QUOTE]Originally posted by <96 Runner>
[B]I hope everyone is using the circle-cut attachment for the dremel, it makes it a whole lot easier!
Yes, I bought that today..it made it easier, but not easy. It wanted to skip around a bit on me. You also need really good light to see the circle you drew to cut out the hole.
[B]I hope everyone is using the circle-cut attachment for the dremel, it makes it a whole lot easier!
Yes, I bought that today..it made it easier, but not easy. It wanted to skip around a bit on me. You also need really good light to see the circle you drew to cut out the hole.
05-22-2003, 11:12 AM
#10
Registered User

96,
I helped my buddy perform the deckplate this weekend and we used the tools you used too. It helps but for future reference, you really need to do two things:
1) stabilize the air box either in a workbench (like a B&D workbench) or have someone else hold it.
2) grip the dremel really hard. The bit will jump/skip when it hits the internal waffle ribs inside.
Better yet, suck it up and buy the appropriate sized hole saw for your drill.
Bob
05-22-2003, 11:26 AM
#11
Contributing Member
Join Date: Sep 2002
Location: Urbandale, IA
Posts: 7,112
Likes: 0
Received 0 Likes
on
0 Posts
Originally posted by Bob_98SR5
Better yet, suck it up and buy the appropriate sized hole saw for your drill.
Bob
Better yet, suck it up and buy the appropriate sized hole saw for your drill.
Bob
05-22-2003, 11:27 AM
#12
Contributing Member
Join Date: Jan 2003
Posts: 10,916
Likes: 0
Received 0 Likes
on
0 Posts
Bob-
Yeah, those are good pointers to future deckplaters out there. I always cut the hole a little smaller, then used coarse sanding bits get the extra size I needed. Of course, I am a big man with my 6" deckplate compared to all you 4 inchers.
Yeah, those are good pointers to future deckplaters out there. I always cut the hole a little smaller, then used coarse sanding bits get the extra size I needed. Of course, I am a big man with my 6" deckplate compared to all you 4 inchers.
05-22-2003, 06:11 PM
#14
Registered User
Join Date: Mar 2003
Location: Ann Arbor, MI
Posts: 2,785
Likes: 0
Received 0 Likes
on
0 Posts
Actually the hardest part for me was getting the lower bolts out, probably because we didn't have an extension for the sockets haha. Oh also sanding the edge of the hole just so the deckplate fits perfectly. Cuz I cuz the hole small on purpose to make sure I had the tightest fit.
05-23-2003, 05:05 AM
#16
Contributing Member
Join Date: May 2002
Location: NY
Posts: 861
Likes: 0
Received 0 Likes
on
0 Posts
Sensor-Safe Silicon Sealant, Permatex #598B UltraBlack Hi-Temp

The screen in definetly not necessary as the filter will pick up the junk, but it is nice to have it.
The screen in definetly not necessary as the filter will pick up the junk, but it is nice to have it.


Thread
Thread Starter
Forum
Replies
Last Post
theking11863
Vehicle Audio & Home Entertainment
2
03-19-2016 09:36 PM
FS[GreatLakes]: Toyota collection part out
88sasturbotoy
Axles - Suspensions - Tires - Wheels
2
08-11-2015 01:56 AM


